
Table of Contents Show
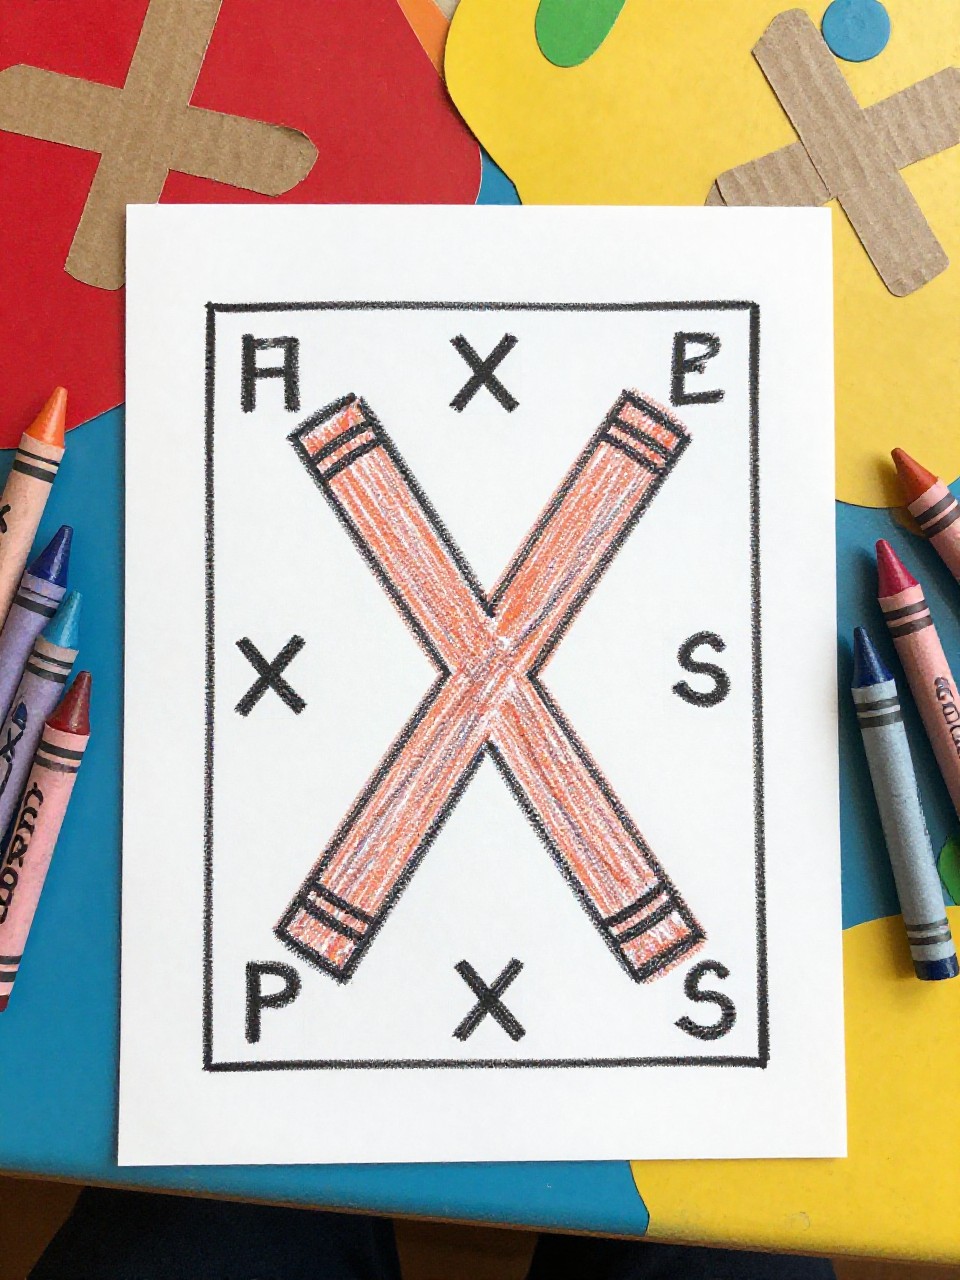
Keeping kids busy can be tough, especially on rainy days or when you need a quick classroom activity. If you’re teaching the alphabet or just want something new, the letter X can feel tricky. This list gives you fun, simple ideas that turn “X is hard” into “X is exciting.”
You’ll find easy, colorful projects that help kids learn, create, and play.
Let’s jump into 15 letter X crafts for a creative afternoon.
1. X-Ray Handprint Art
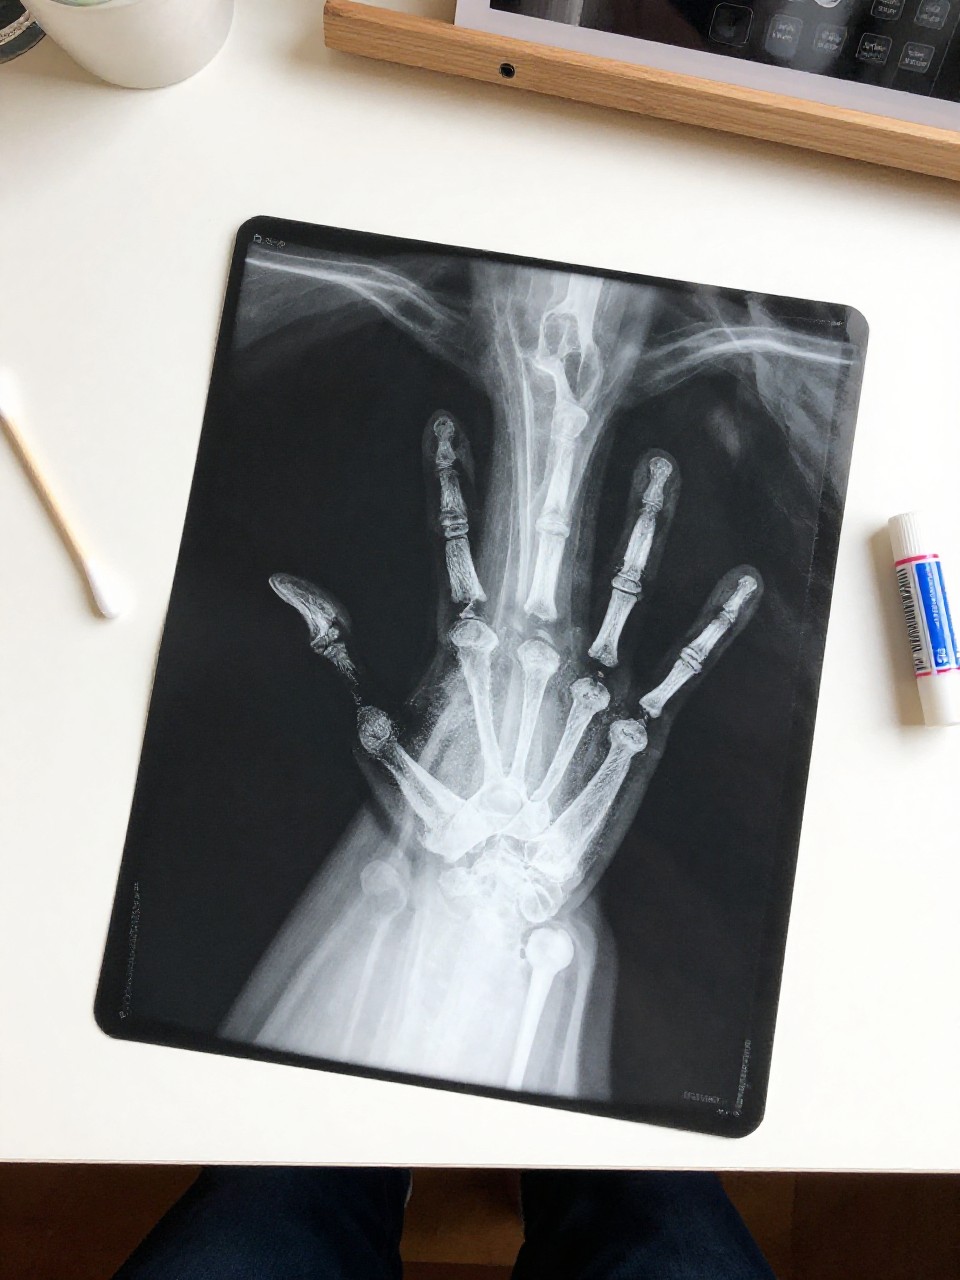
This craft looks like a playful X-ray of a hand on a black paper “screen,” with white paint bones crossing like X shapes. Kids love seeing their handprints turn into pretend bones, and the contrast is bold and satisfying.
Materials Needed:
For People Who Love to Make Things ✂️
- Black construction paper
- White tempera paint
- Paintbrush or cotton swabs
- Chalk or white crayon
- Paper towel for cleanup
How to make it:
- 1. Place the black paper on the table and draw a simple “X” in the center as a guide.
- 2. Paint your hand with white paint and press it onto the paper so the palm sits over the X.
- 3. Use cotton swabs to add simple bone lines inside the hand and along the X.
- 4. Let dry and hang it up as a “science lab” display.
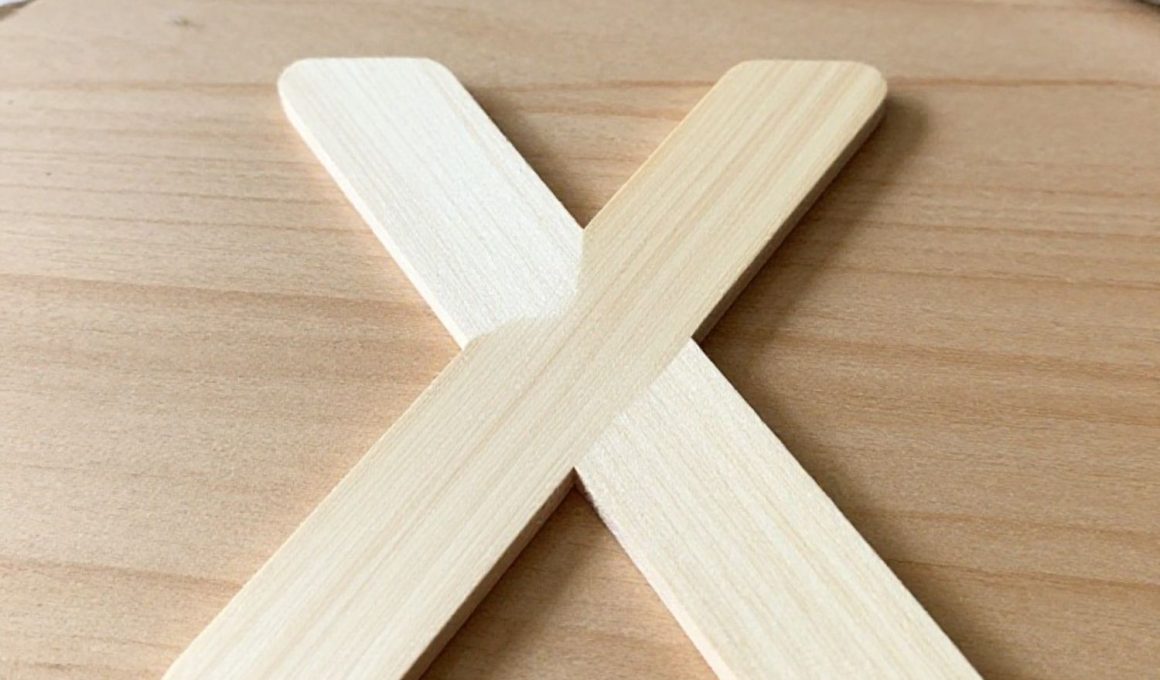
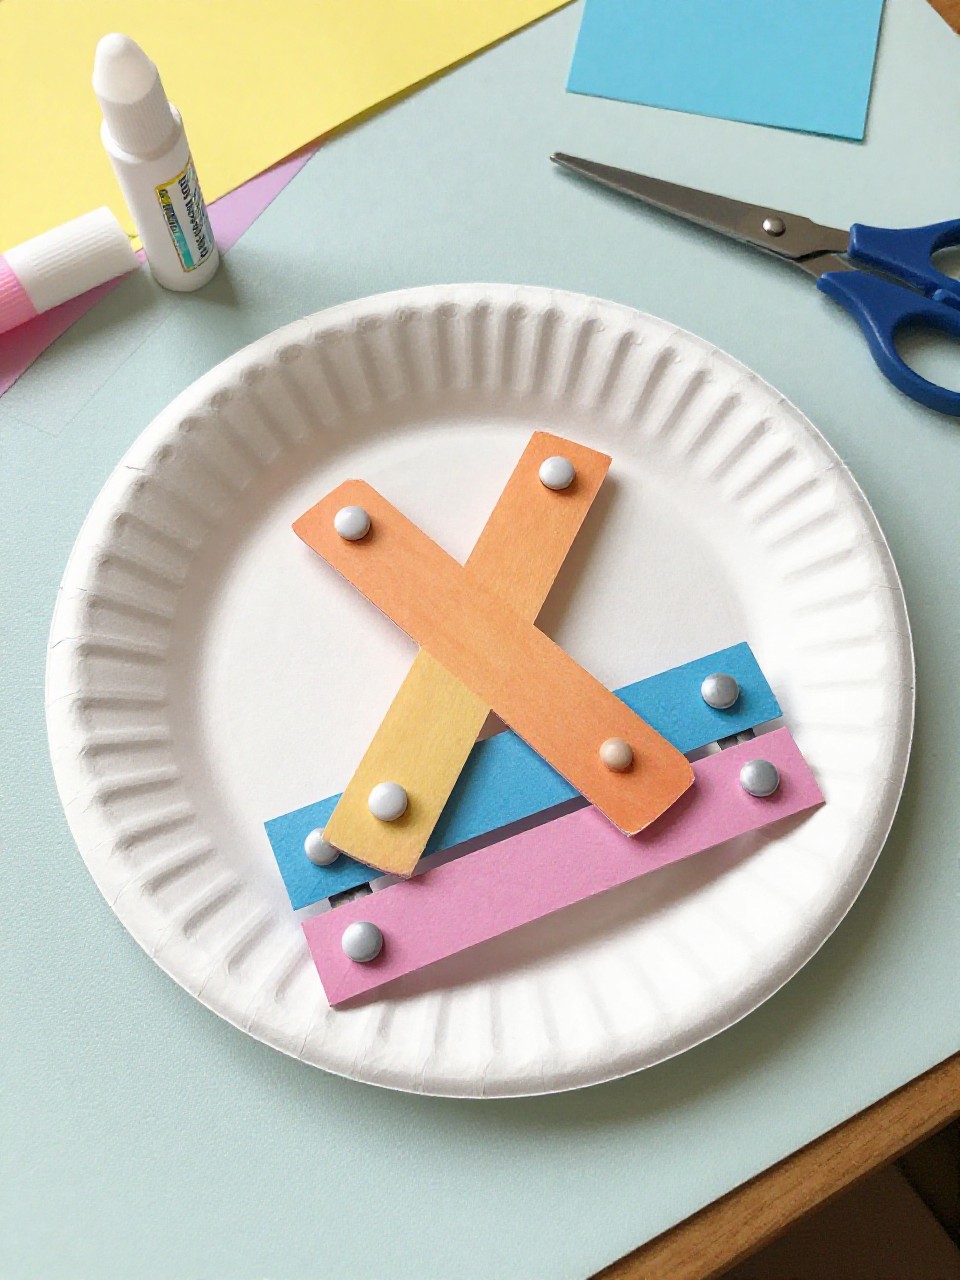
2. Popsicle Stick Letter X
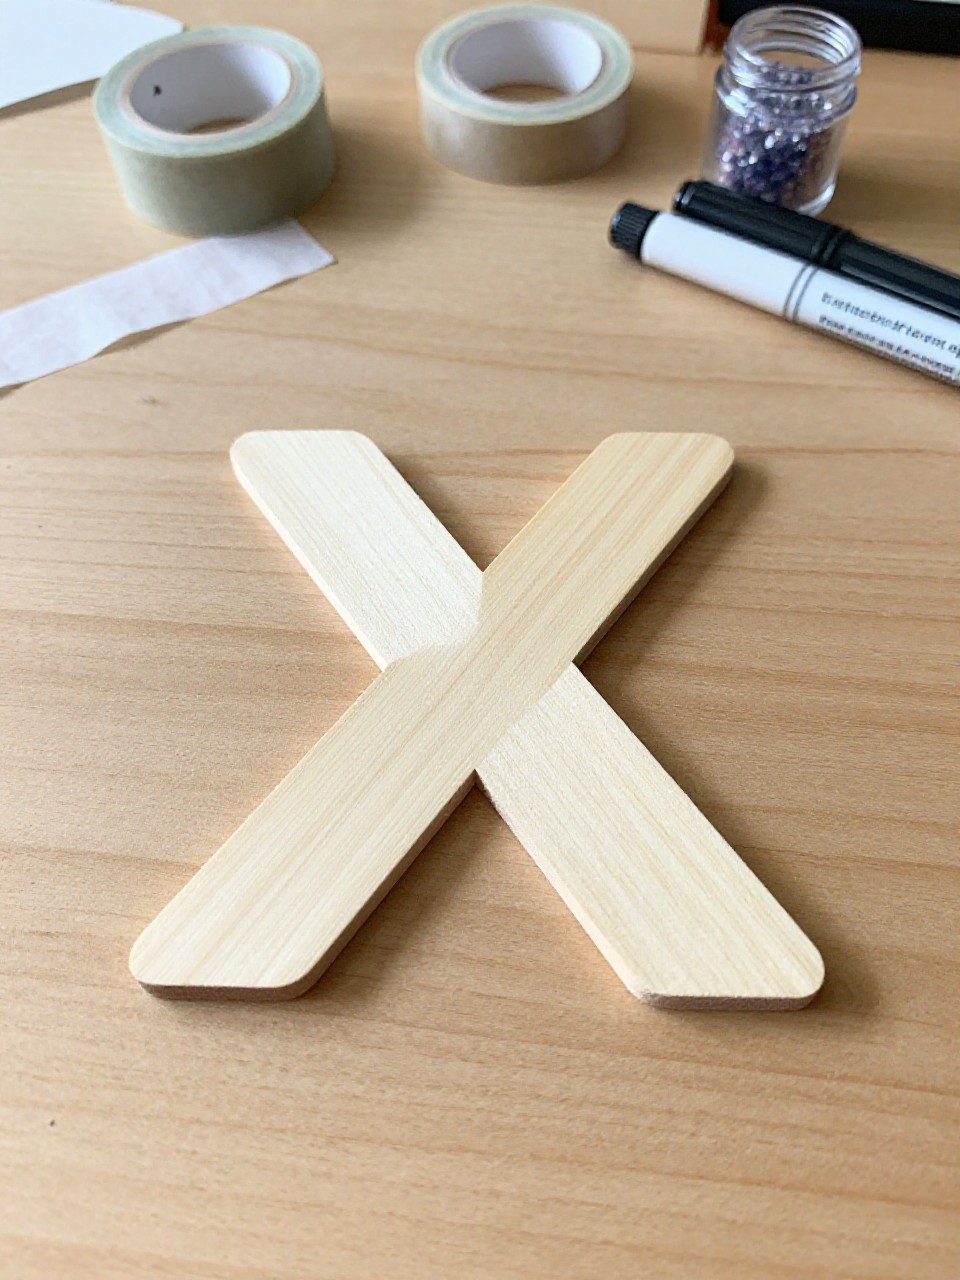
This craft makes a sturdy, colorful letter X from two popsicle sticks, decorated with washi tape or paint. Kids enjoy choosing color patterns and seeing a simple shape come together fast.
Materials Needed:
- 2 jumbo popsicle sticks
- School glue
- Washi tape or acrylic paint
- Markers
- Stick-on gems (optional)
How to make it:
- 1. Cross the two sticks into an X and glue the center; let it set a minute.
- 2. Wrap each arm with washi tape or paint and let dry.
- 3. Add patterns, stripes, or dots with markers and gems for sparkle.
- 4. Display on a bulletin board or use as a name tag initial.
3. X Marks the Spot Treasure Map
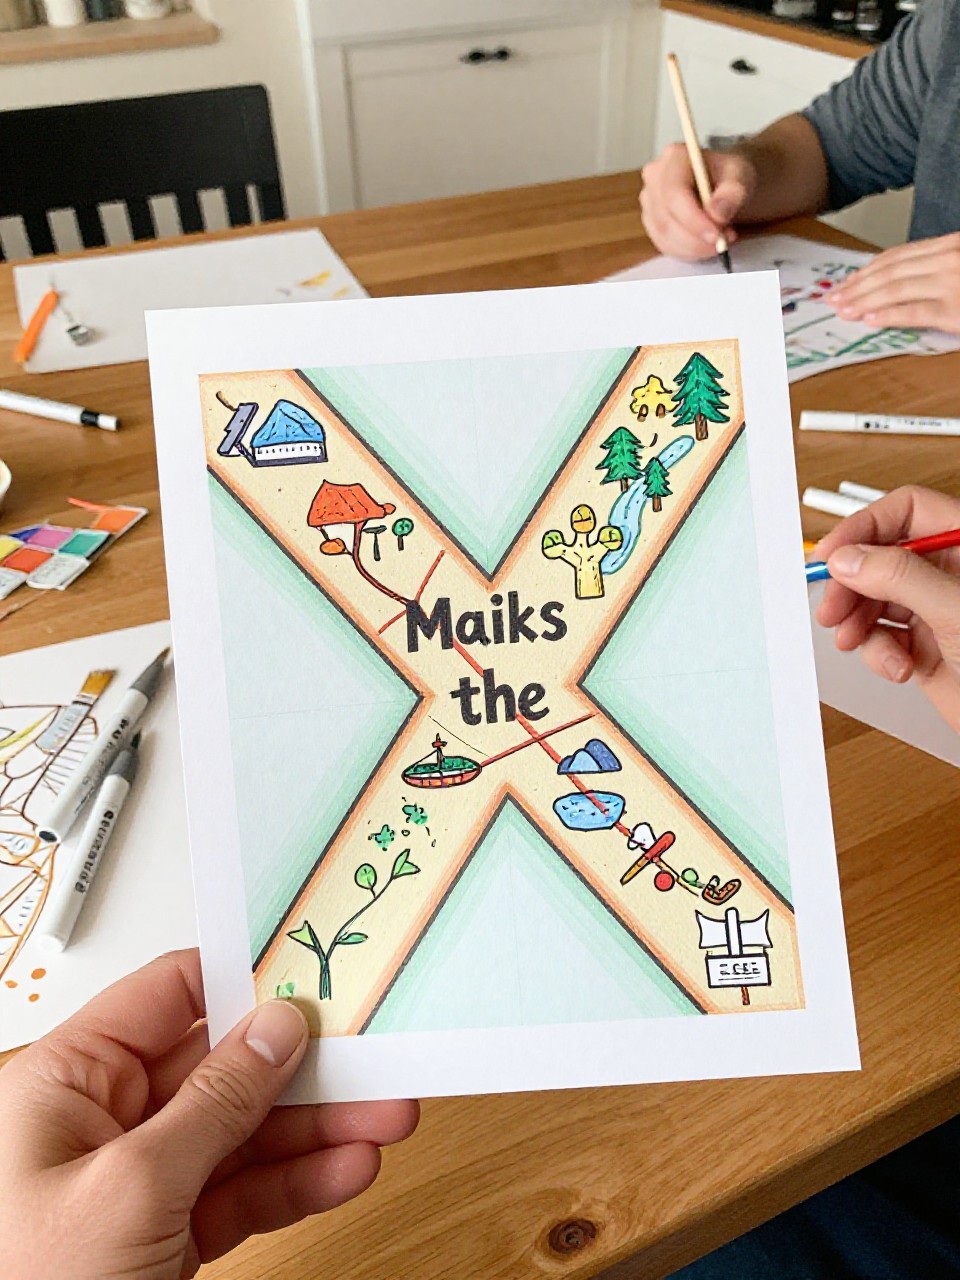
This looks like a worn map with a big red X marking treasure, complete with dotted paths and simple island drawings. Kids love storytelling with it and pretending to be explorers.
Materials Needed:
- Brown paper grocery bag or kraft paper
- Markers and crayons
- Red paint or marker
- Tea bag for aging effect (optional)
- String (optional)
How to make it:
- 1. Tear the paper edges and crumple, then flatten for a weathered look; dab with tea if using and let dry.
- 2. Draw land shapes, trees, waves, and a dotted path.
- 3. Paint or color a bold red X at the treasure spot.
- 4. Roll it up and tie with string for play.
4. Xylophone Paper Collage
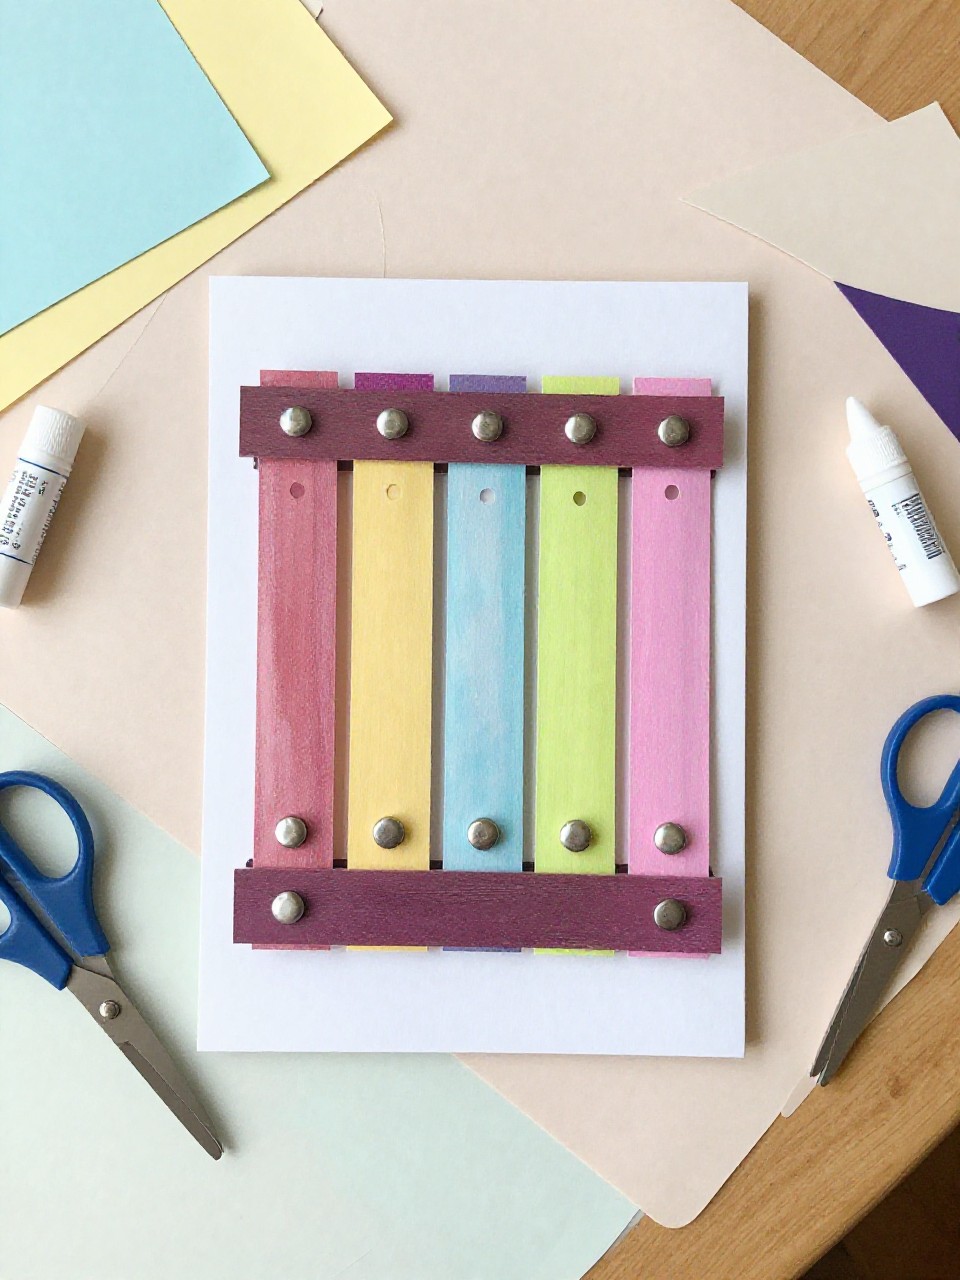
This craft creates a bright paper xylophone with rainbow bars lined up in an X-inspired crisscross frame. Kids enjoy arranging colors and pretending to play music.
Materials Needed:
- Black or white cardstock base
- Colored paper strips (rainbow)
- Glue stick
- Silver or gray paper for mallets
- Scissors
How to make it:
- 1. Cut colored paper into short bars and two long thin strips for the frame.
- 2. Glue the two thin strips in a slight X-like crisscross as the base.
- 3. Line up the rainbow bars across the frame and add two small circle “mallets.”
- 4. Let dry and hang as musical wall art.
5. Masking Tape X Resist Painting
This looks like a bold abstract painting with clean X shapes where tape blocked the paint. Kids enjoy peeling the tape to reveal crisp lines—very satisfying and beginner-friendly.
Materials Needed:
- Watercolor paper or thick paper
- Masking tape or painter’s tape
- Tempera or watercolor paint
- Paintbrushes or sponge
- Apron (optional)
How to make it:
- 1. Place tape strips in multiple X shapes across the paper.
- 2. Paint over the whole page with bright colors.
- 3. When dry to the touch, carefully peel off the tape to reveal white Xs.
- 4. Flatten under a book if paper curls, then display.
6. Egg Carton X-Creature
This craft forms a quirky creature shaped like an X using two egg carton cups crossed and glued. Kids love designing silly faces and textures for a friendly monster.
Materials Needed:
- Cardboard egg carton cups (2)
- School glue or hot glue with adult help
- Acrylic paint and brushes
- Googly eyes
- Pipe cleaners and pom-poms (optional)
How to make it:
- 1. Cut out two egg cups and trim edges so they can cross into an X.
- 2. Glue them together at the center and let dry.
- 3. Paint fun colors, add eyes, and twist pipe cleaners as arms or antennae.
- 4. Dry fully and use as a desk buddy.
7. Cardboard Cutout Giant X
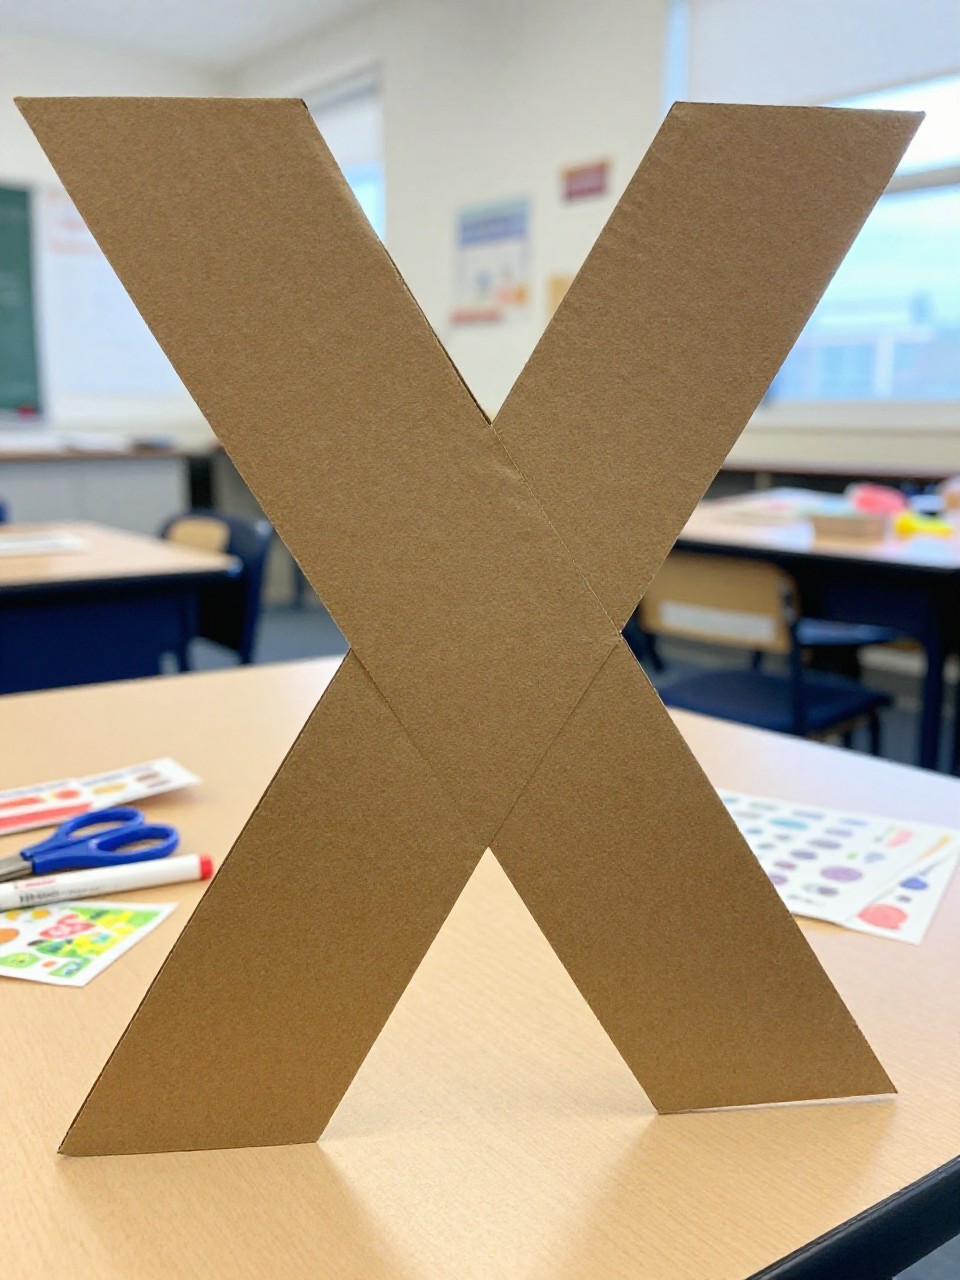
This looks like a big freestanding letter X decorated with patterns or stickers. Kids enjoy painting a large surface and seeing their letter stand up.
Materials Needed:
- Corrugated cardboard
- Pencil and ruler
- Scissors or craft knife (adult use)
- Paint or markers
- Stickers or washi tape (optional)
How to make it:
- 1. Draw a large X on cardboard and carefully cut it out.
- 2. Paint or color both sides with bright patterns.
- 3. Add washi tape borders or stickers for texture.
- 4. Lean it on a shelf or tape to the wall as room decor.
8. Cross-Stitch Paper X Card
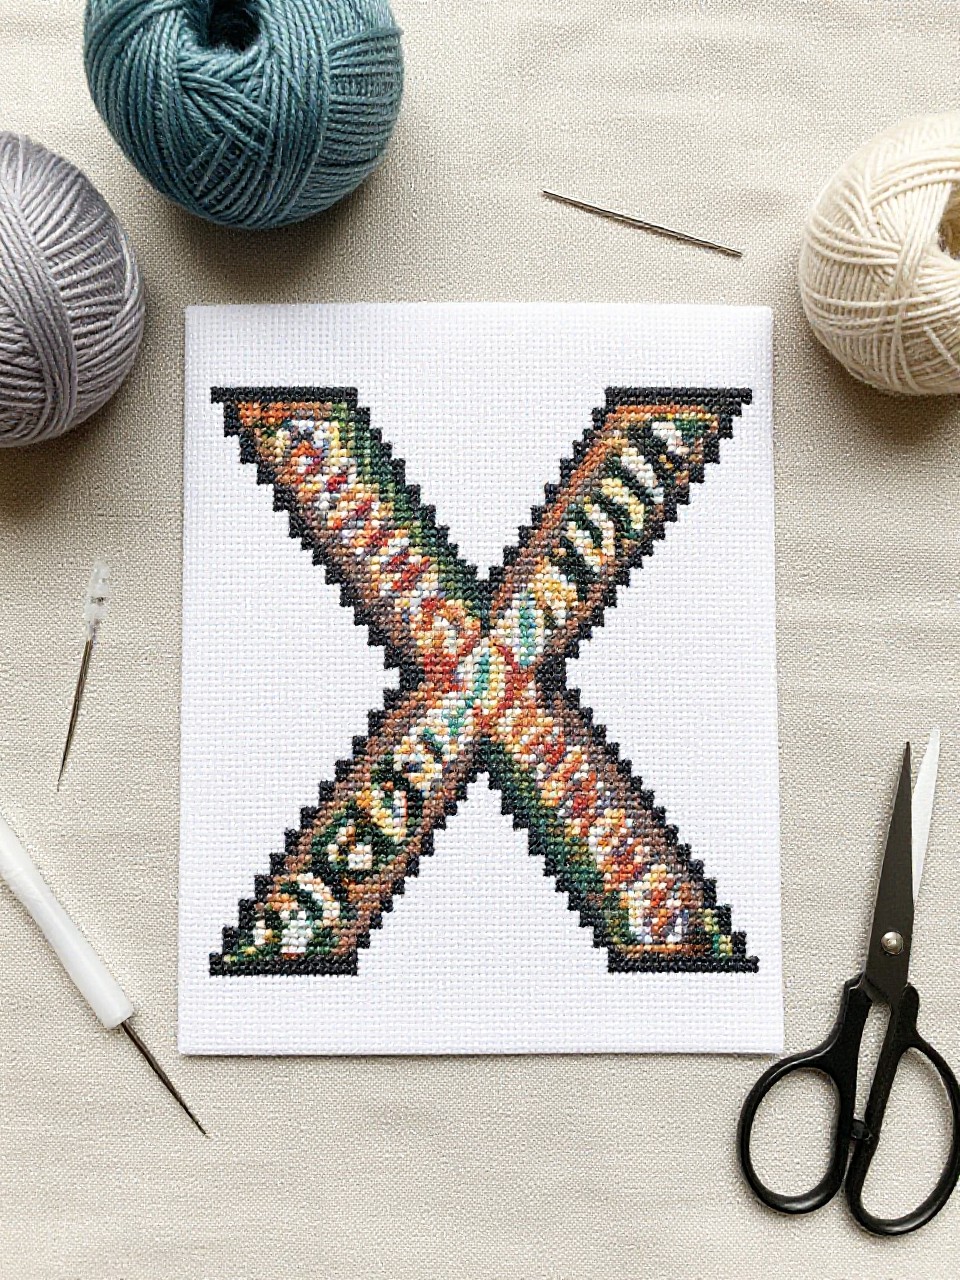
This craft looks like a simple stitched X design on cardstock using yarn through punched holes. Kids enjoy the gentle weaving motion and end up with a cute card.
Materials Needed:
- Blank cardstock card
- Hole punch or push pin (adult help)
- Yarn or embroidery thread
- Plastic needle
- Pencil
How to make it:
- 1. Lightly draw a big X on the front of the card and punch holes along the lines.
- 2. Thread the needle and sew back and forth to fill the X.
- 3. Tie knots on the inside and trim extra yarn.
- 4. Write a message and gift it to someone special.
9. Nature Stick X Weaving
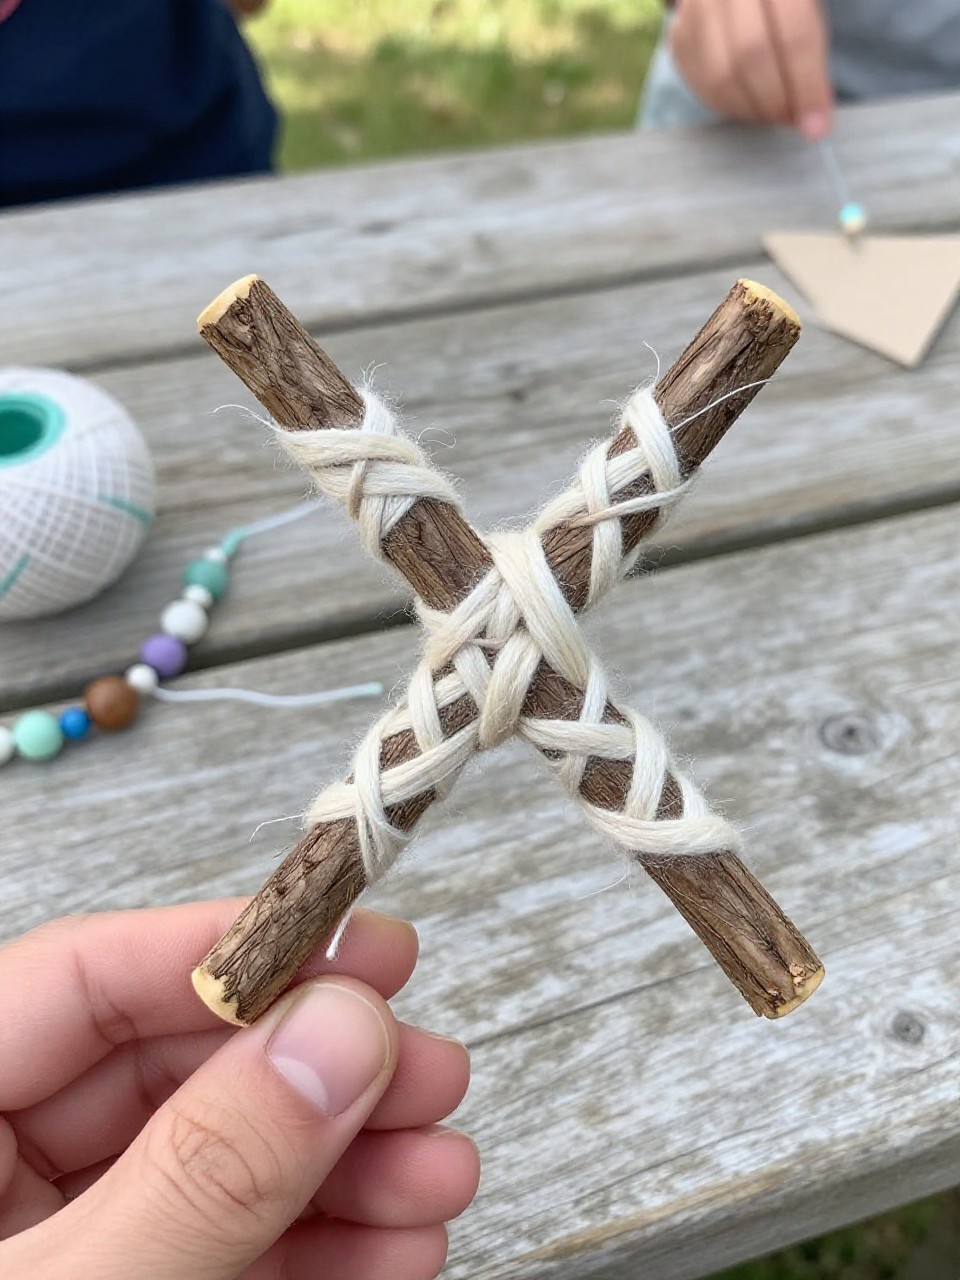
This looks like two twigs tied into an X, with colorful yarn woven in the center like a tiny dreamcatcher. Kids enjoy collecting sticks and mixing natural and bright textures.
Materials Needed:
- Two small sturdy sticks
- Yarn or string
- Scissors
- Beads or feathers (optional)
- Glue (optional)
How to make it:
- 1. Cross the sticks into an X and tie tightly at the center.
- 2. Wrap yarn around the middle to secure, then weave crisscross patterns between arms.
- 3. Add beads or a feather tied to one end if you like.
- 4. Hang it in a window or on a wall.
10. Foil Tape X-Ray Fish

This craft makes a shiny fish skeleton in an X-ray style using foil tape lines on black paper. Kids love the metallic glow and learning simple bone patterns.
Materials Needed:
- Black cardstock
- Aluminum foil tape or thin strips of foil glued down
- White gel pen or chalk
- Scissors
- Ruler (optional)
How to make it:
- 1. Draw a simple fish outline on black paper.
- 2. Add a long spine and short diagonal ribs using foil tape strips forming small X angles.
- 3. Outline details with a white pen and add an eye.
- 4. Display under a light to catch the shine.
11. Crayon Rubbing Hidden X Hunt
This looks like a colorful page where secret cardboard X shapes appear through crayon rubbings. Kids enjoy the surprise of revealing each hidden X.
Materials Needed:
- Thin white paper
- Cardboard cutout X shapes
- Crayons with wrappers peeled
- Tape
- Clipboard or book (optional)
How to make it:
- 1. Tape several cardboard Xs onto the table or a clipboard.
- 2. Place white paper on top and hold steady.
- 3. Rub sideways with crayons to reveal the hidden X shapes in bright colors.
- 4. Add a title and hang as a letter hunt poster.
12. Paper Plate Xylophone
This craft turns half a paper plate into a smiling xylophone with rainbow paper bars and drawn strings. Kids like its cheerful face and musical theme.
Materials Needed:
- Paper plate
- Colored paper strips
- Glue stick
- Black marker
- Craft sticks for mallets (optional)
How to make it:
- 1. Cut the plate in half to make the base.
- 2. Glue colored strips across the plate in size order like xylophone keys.
- 3. Draw simple lines, a face, and add two small craft stick “mallets.”
- 4. Let dry and tape to a wall display.
13. Tape-and-Paint Letter X Canvas
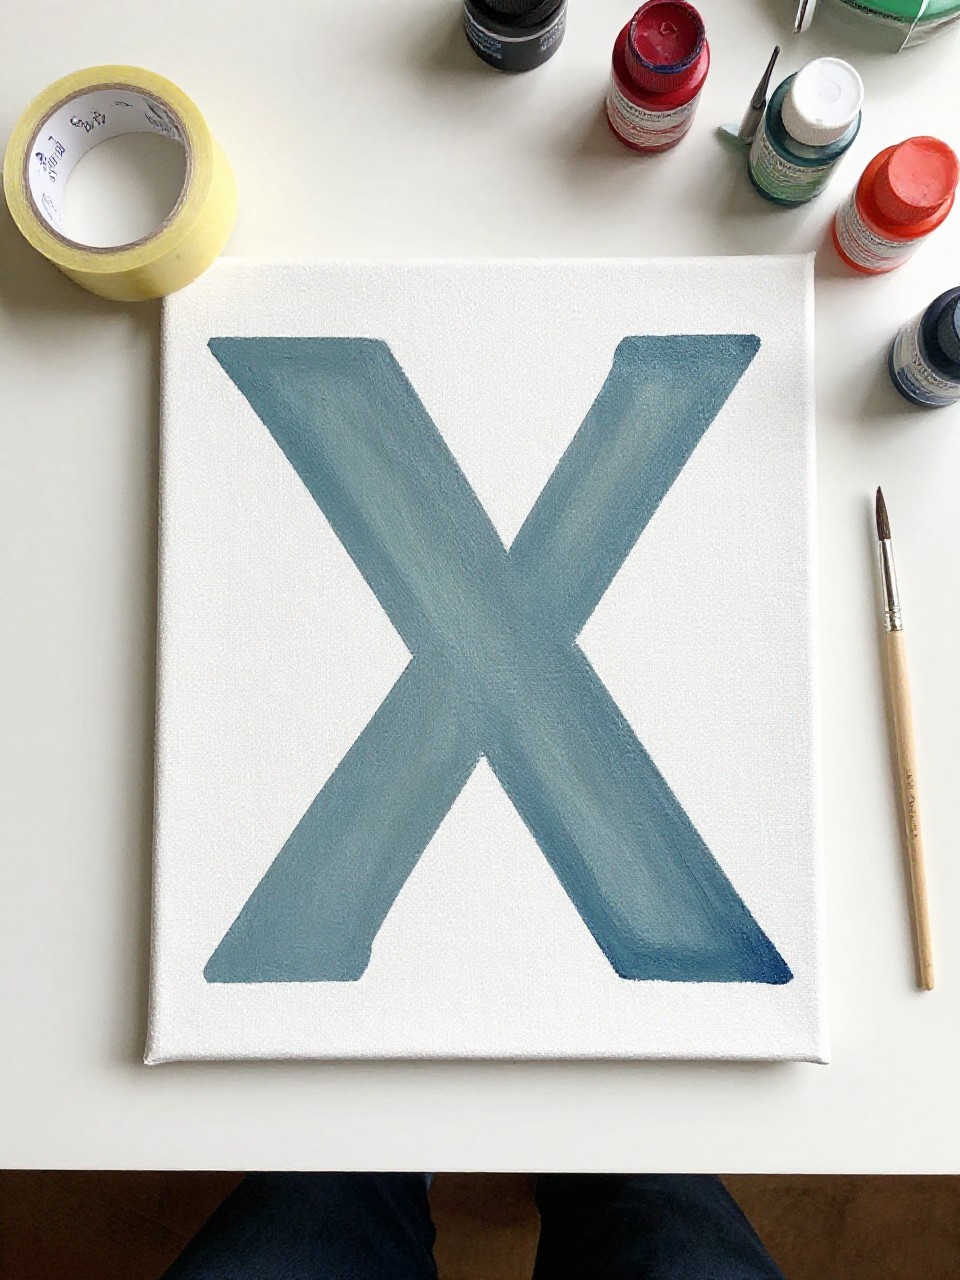
This is a mini canvas with a crisp white X left by painter’s tape and colorful paint around it. Kids enjoy choosing colors and seeing clean results that look like real art.
Materials Needed:
- Small canvas or thick cardstock
- Painter’s tape
- Acrylic paint
- Brush or sponge
- Table cover
How to make it:
- 1. Place two tape strips to make a centered X.
- 2. Dab or brush paint all over the canvas.
- 3. Peel tape carefully once paint is semi-dry to reveal the white X.
- 4. Prop on a windowsill to display.
14. LEGO Brick X Mosaic
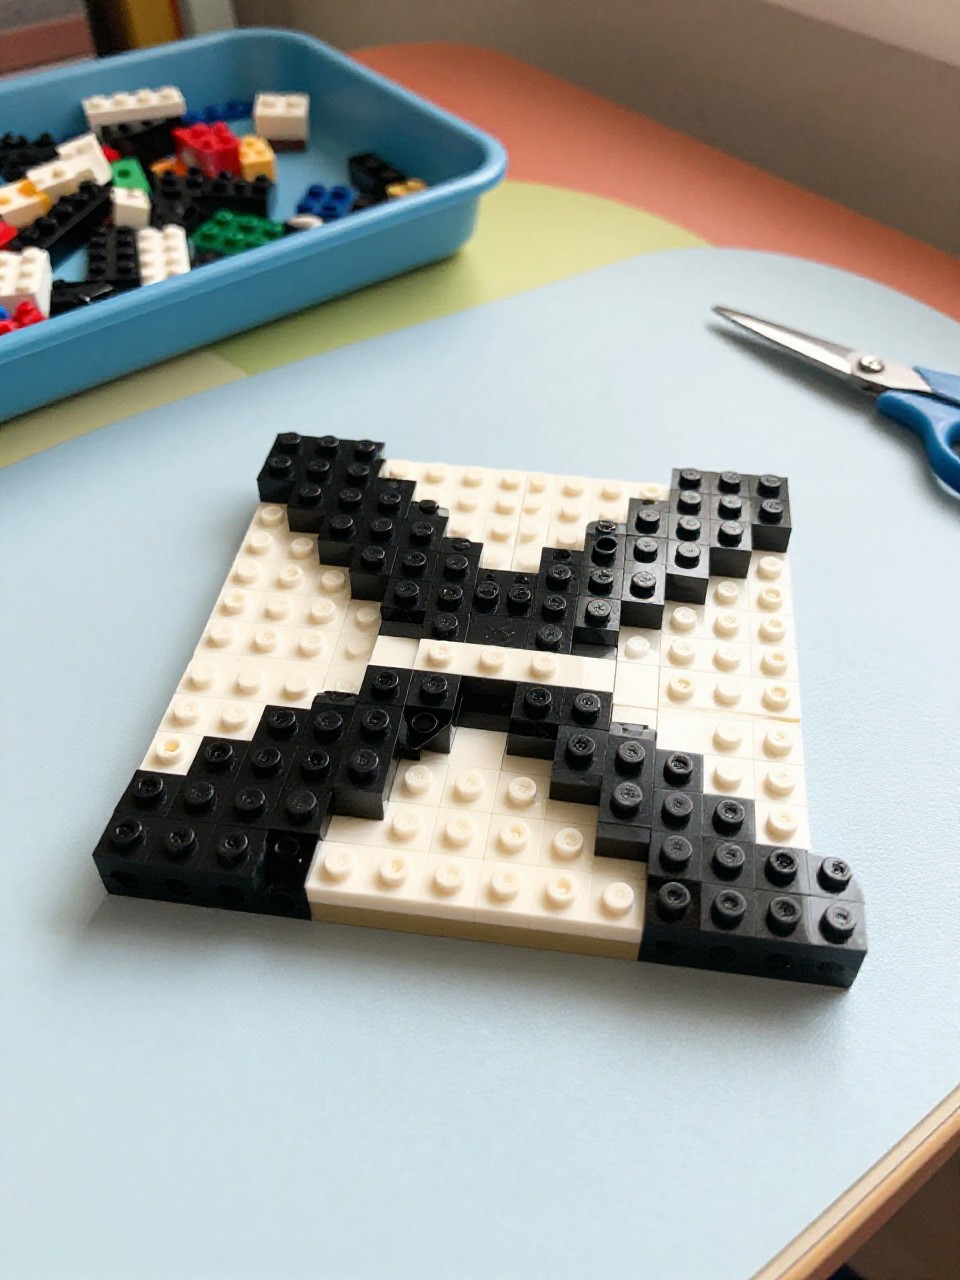
This craft builds a bold X using small LEGO bricks on a baseplate, mixing colors or making a gradient. Kids love the tactile snap and quick success.
Materials Needed:
- Small LEGO baseplate
- Assorted LEGO bricks
- Optional color guide sketch
- Tray to hold pieces
- Camera to snap a photo (optional)
How to make it:
- 1. Sketch a simple X or visualize the design.
- 2. Place bricks to outline the X, then fill it in with solid or rainbow colors.
- 3. Add a border or background pattern around the X.
- 4. Take a picture and keep it on display.
15. Stamped X Pattern Wrapping Paper
This looks like handmade gift wrap covered in repeating X stamps in different colors. Kids enjoy stamping rhythms and seeing their pattern grow.
Materials Needed:
- Plain kraft paper or butcher paper
- Foam X stamp or carved potato X
- Washable paint
- Paint tray
- Paper towel
How to make it:
- 1. Roll out kraft paper and tape corners to the table.
- 2. Dip the X stamp into paint and press repeating rows across the sheet.
- 3. Switch colors to add a playful pattern and let extra white space show.
- 4. Dry fully and wrap a small gift.