



Table of Contents Show
Painting pumpkin pottery is a relaxed date idea that gives you plenty of time to talk, experiment with color, and create something useful together. Instead of carving real pumpkins that only last for a short time, you can decorate ceramic pumpkin pieces that return to your shelves, dining table, or entryway every fall. You also do not need to be an experienced painter, since pottery glazes, simple patterns, and small handmade differences often make the finished pieces more interesting.
The ideas below include matching designs, connected scenes, playful patterns, and personalized keepsakes that couples can complete at a pottery studio or during an at-home ceramic painting night. Choose bisque pumpkin pieces in similar or contrasting shapes, follow the firing instructions for your chosen paints or glazes, and use a limited palette to keep the final designs coordinated.
Whether this is your first creative date or part of a fall tradition, these projects provide everything you need for a fun and display-worthy result.
1. Matching Speckled Stoneware Pumpkins

Choose two ceramic pumpkins in different shapes and paint them in coordinating stoneware shades such as warm cream, taupe, sage, or clay brown. Once the base is dry enough to handle, flick a small amount of darker paint across each surface using a stiff brush.
Keep the speckles irregular and add slightly darker shading inside the grooves. Your pumpkins will match through their texture and palette while the different shapes prevent them from looking like identical store-bought pieces.

For People Who Love to Make Things ✂️
2. Sun and Moon Pottery Pair

Paint one ceramic pumpkin in ochre, mustard, or muted orange and give it a simple sun with uneven rays. Paint the second pumpkin navy or deep plum, then add a crescent moon, small stars, and a few fine constellation lines.
This pair works well for couples with different styles because the designs contrast while still belonging together. Repeat one small color, such as cream or gold, across both pumpkins to connect the finished pieces.
3. Two-Part Autumn Landscape
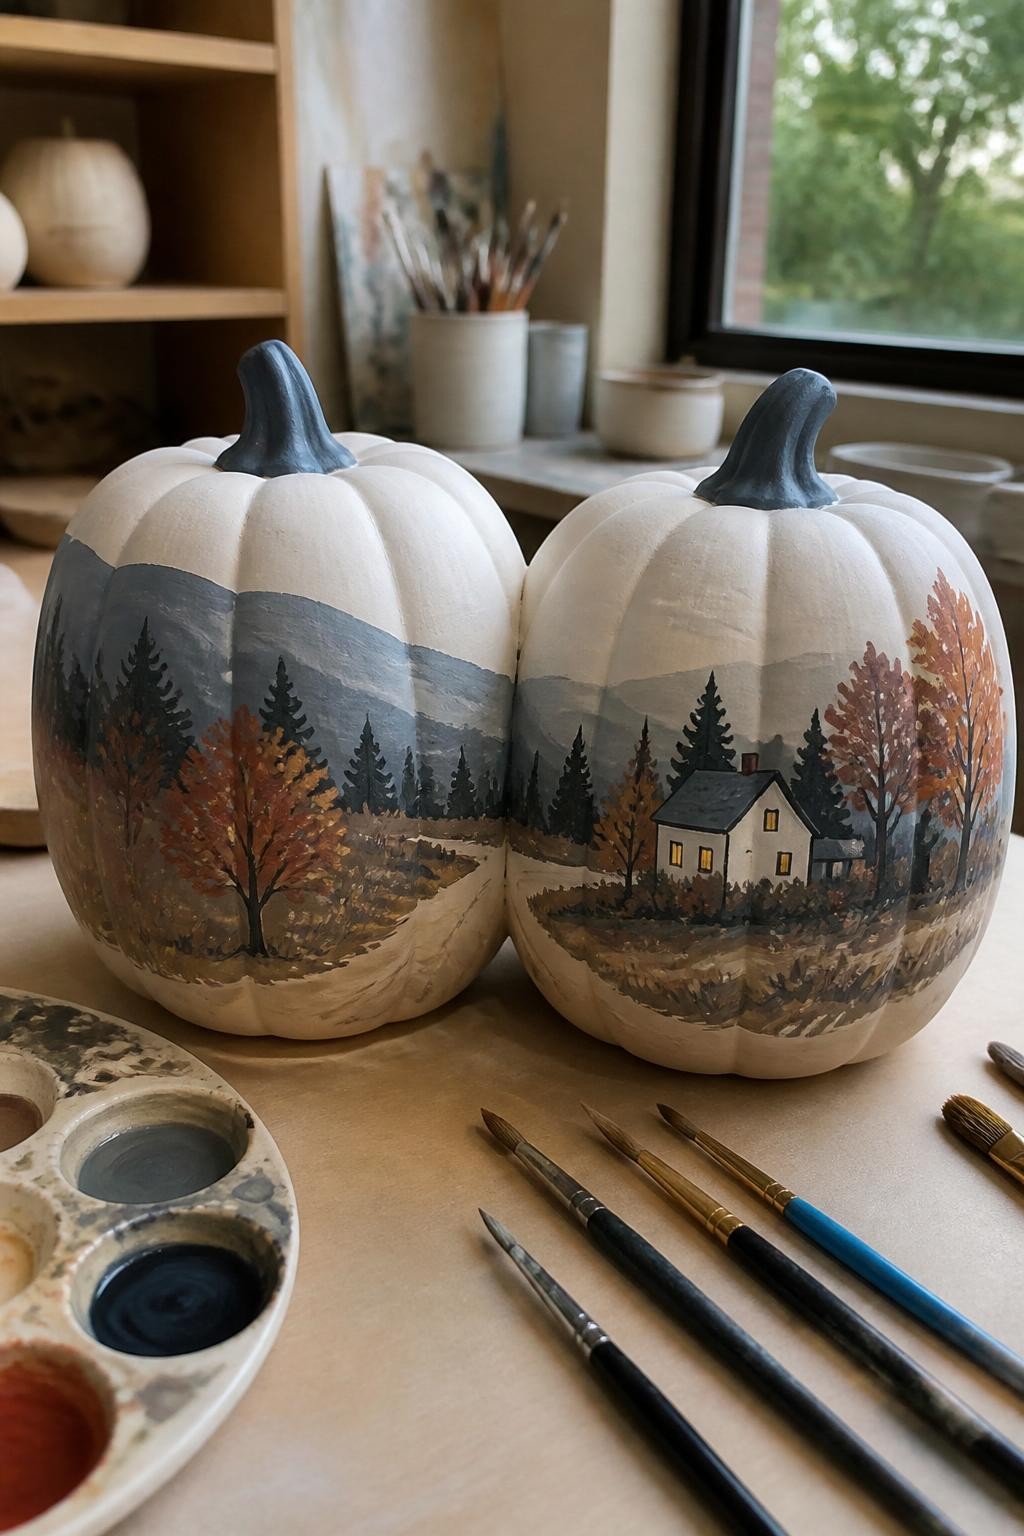
Place two ceramic pumpkins beside each other and sketch one landscape that moves from the first piece onto the second. Include distant hills, autumn trees, a winding path, and a small cottage or cabin near the center.
Keep the shapes loose so they remain easy to paint on the curved pottery. When the pumpkins are separated, each should still contain enough scenery to look complete, but displaying them together reveals the full artwork.
4. Coordinated Abstract Brushstroke Pumpkins

Choose one shared color palette, then allow each person to create a different abstract composition. Use broad strokes, curved lines, dots, arches, and blocks of color without planning every detail.
The designs can reflect your individual personalities while the repeated colors keep the pair coordinated. This is a forgiving option for beginners because irregular shapes and visible brush marks improve the handmade appearance.
5. Blue-and-White Floral Pottery Pumpkins
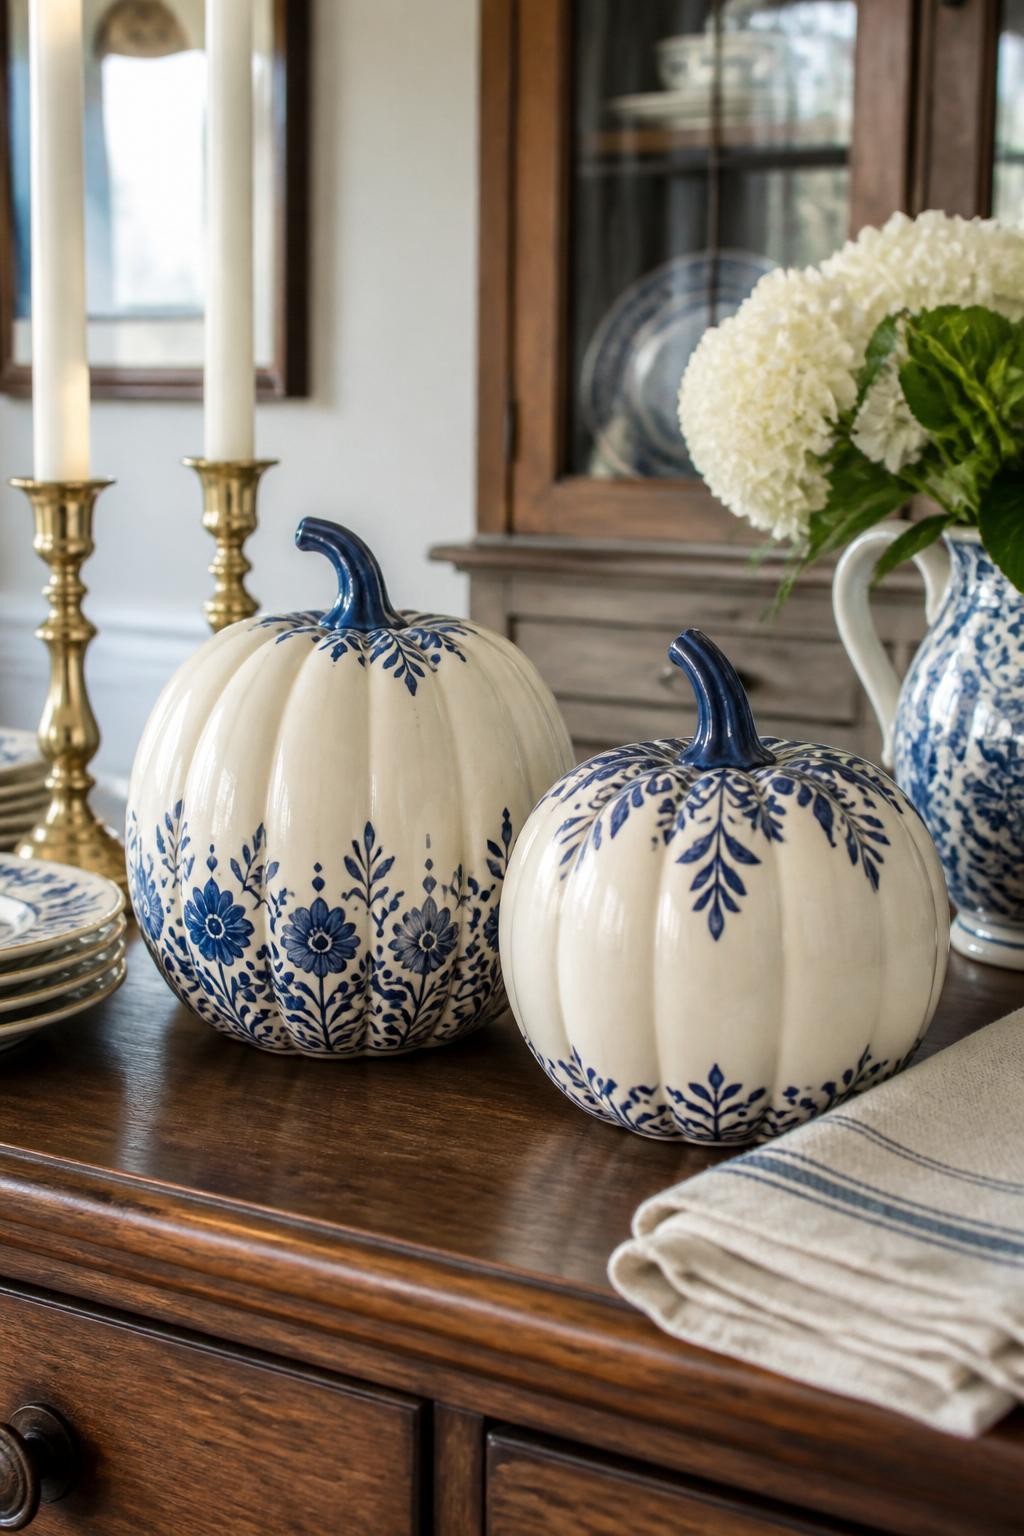
Paint both pumpkins warm white, then decorate them with cobalt-blue flowers, leaves, and curling vines. One person can create a fuller botanical pattern while the other paints a smaller border or single floral branch.
Using the same blue and white palette will connect the pieces even when the layouts differ. Leave open white space between the details so the designs remain crisp after glazing and firing.
6. His-and-Hers Plaid Pottery Pumpkins

Select two related plaid palettes rather than painting identical patterns. One pumpkin can have a deeper green or burgundy base, while the other uses cream or beige with matching accent lines.
Use the raised ceramic ridges to guide the vertical stripes, then add horizontal lines around the body. Slight changes in spacing will make each pumpkin feel personal while the repeated colors keep the pair balanced.
7. Personalized Initial Pumpkin Set
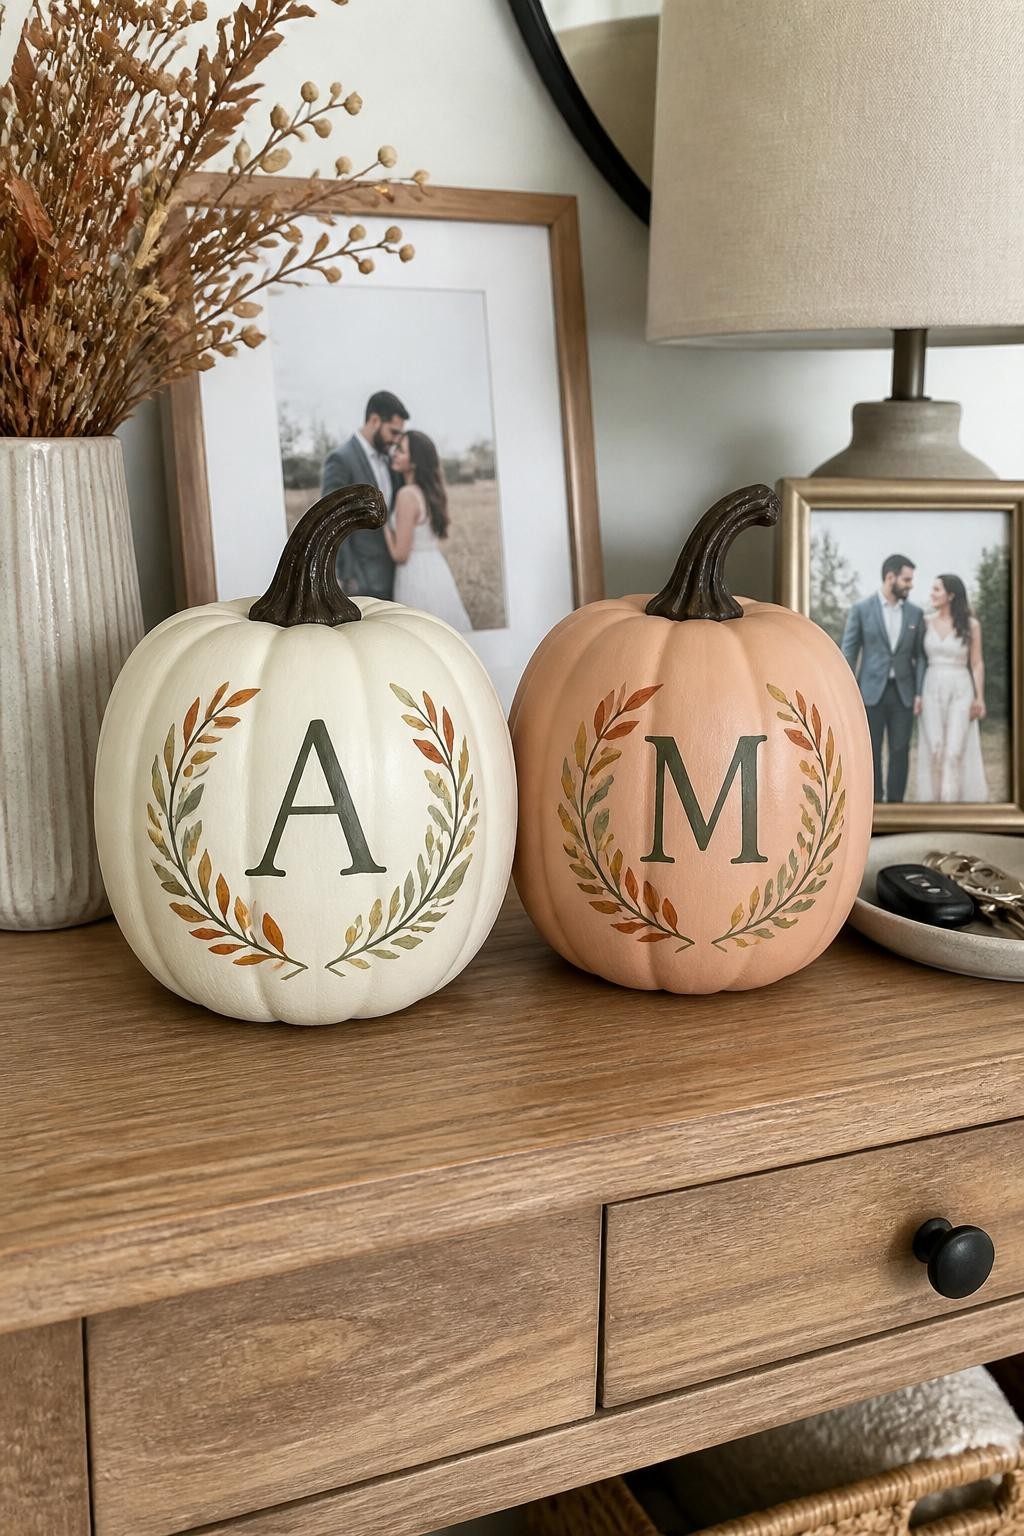
Paint one ceramic pumpkin with your initial and the second with your partner’s. Choose contrasting base colors but repeat the same lettering shade and botanical details across both pieces.
Sketch each letter lightly before filling it with paint, then add a small wreath or leafy sprig around it. The fired pottery pair becomes a lasting keepsake that can return to your fall display each year.
8. Marbled Ceramic Pumpkin Pair
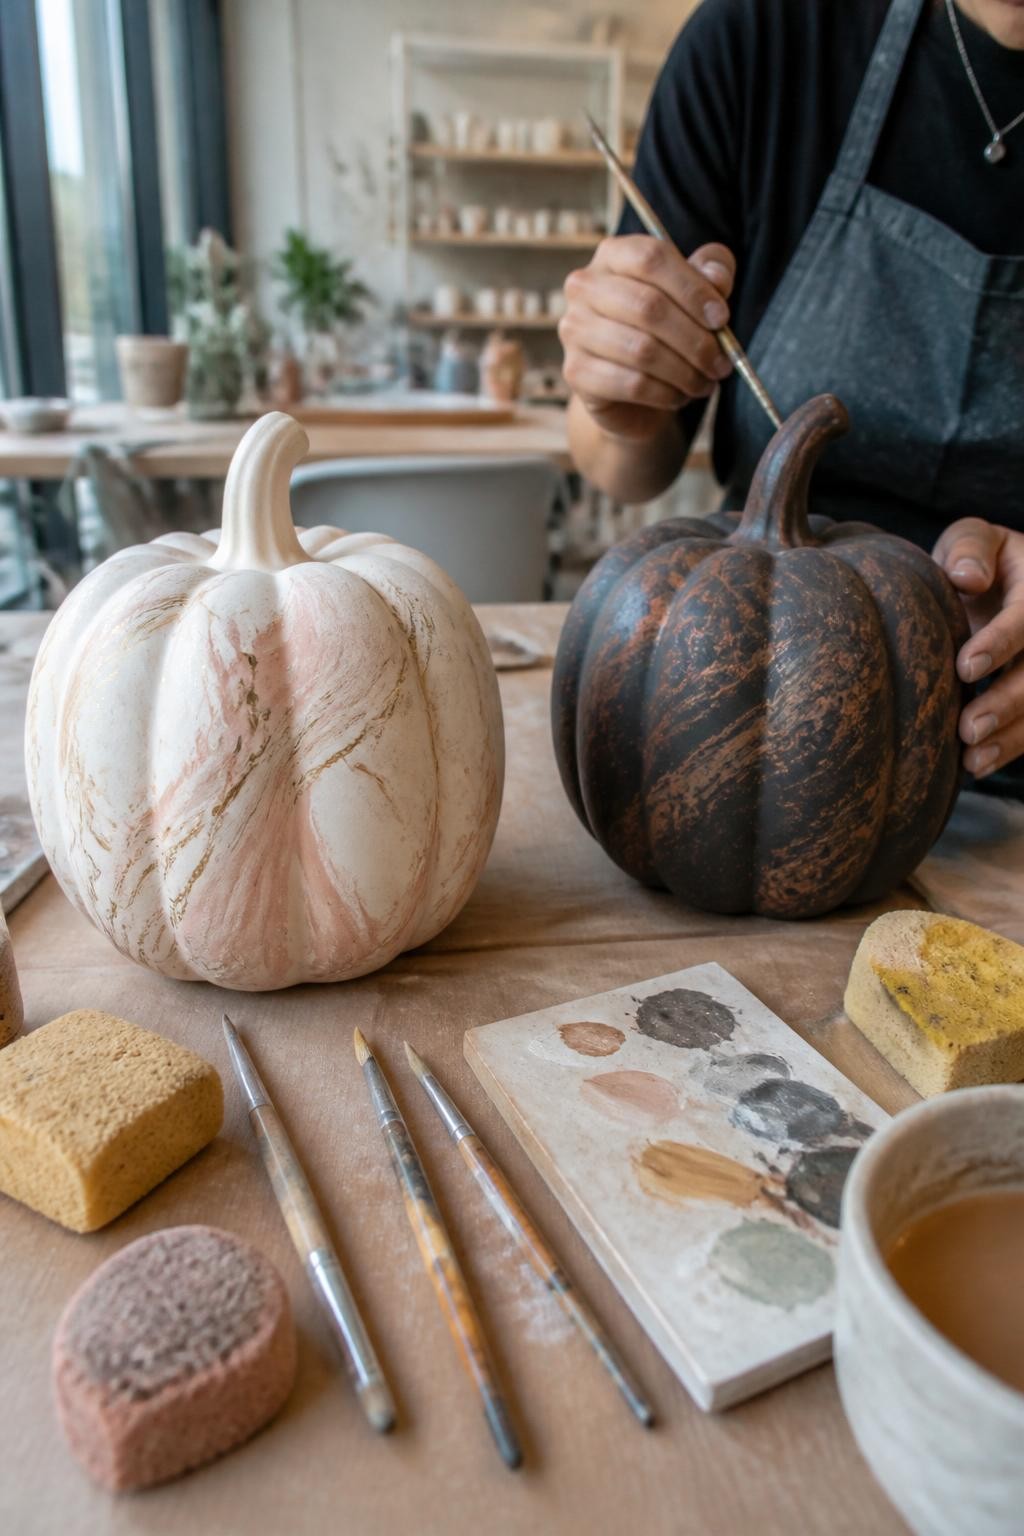
Choose two contrasting marble combinations, such as white with blush veins and charcoal with copper veins. Paint thin irregular lines that branch across the ceramic surface, then soften selected edges with a damp sponge.
Repeat one color across both pumpkins to make the pair feel connected. Leaving some veins sharp and others blurred creates depth and prevents the pattern from looking flat or overly planned.
9. Tiny Cottage Pottery Pumpkins

Paint one tiny cottage on the front of each ceramic pumpkin. Give the houses different colors and rooflines while repeating the same trees, paths, flowers, and warm window shades.
The cottages do not need architectural precision. Slightly uneven windows, curved roofs, and loose shrubs create a storybook quality that makes the finished pair feel warm and personal.
10. Folk-Art Floral Pumpkin Pair
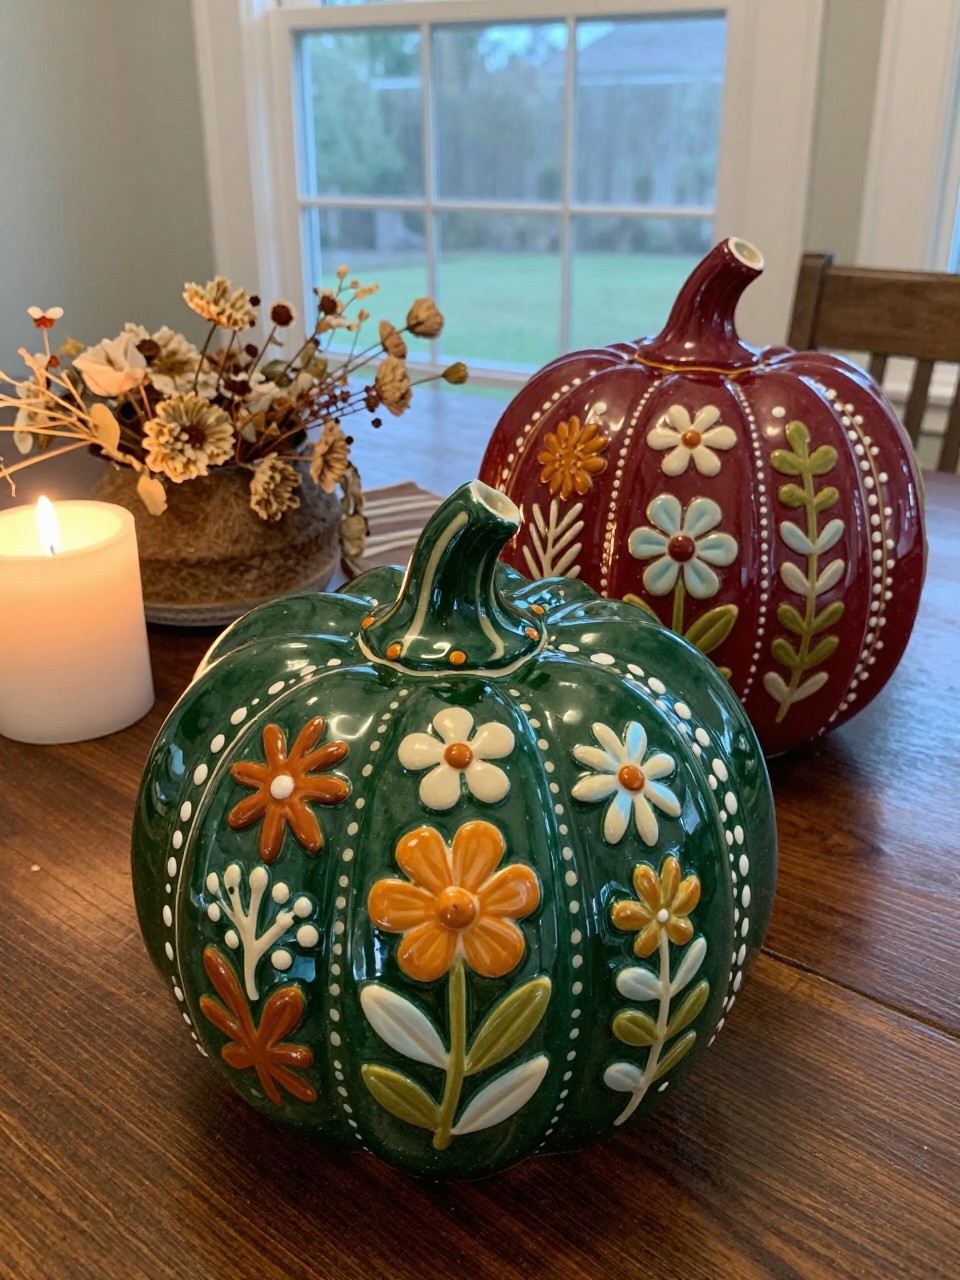
Paint both ceramic pumpkins in rich base colors such as forest green, navy, burgundy, or charcoal. Add simple folk-art flowers, leaves, dots, and curved decorative shapes using a shared lighter palette.
You can divide the motifs so each person creates a different arrangement while repeating the same basic shapes. Small differences in symmetry give the pottery a handcrafted character and make the pair feel collected rather than manufactured.
11. Cozy Knit-Pattern Ceramic Pumpkins

Paint the pumpkins in warm sweater-inspired shades, then add cable lines, small V-shaped stitches, dots, and braided patterns across the surfaces. Use slightly lighter and darker versions of each base color to create depth.
Choose different knit patterns while repeating one accent shade across both pumpkins. Once fired, the glossy or satin finish creates an interesting contrast with the soft textile-inspired artwork.
12. Date Memory Pottery Pumpkins
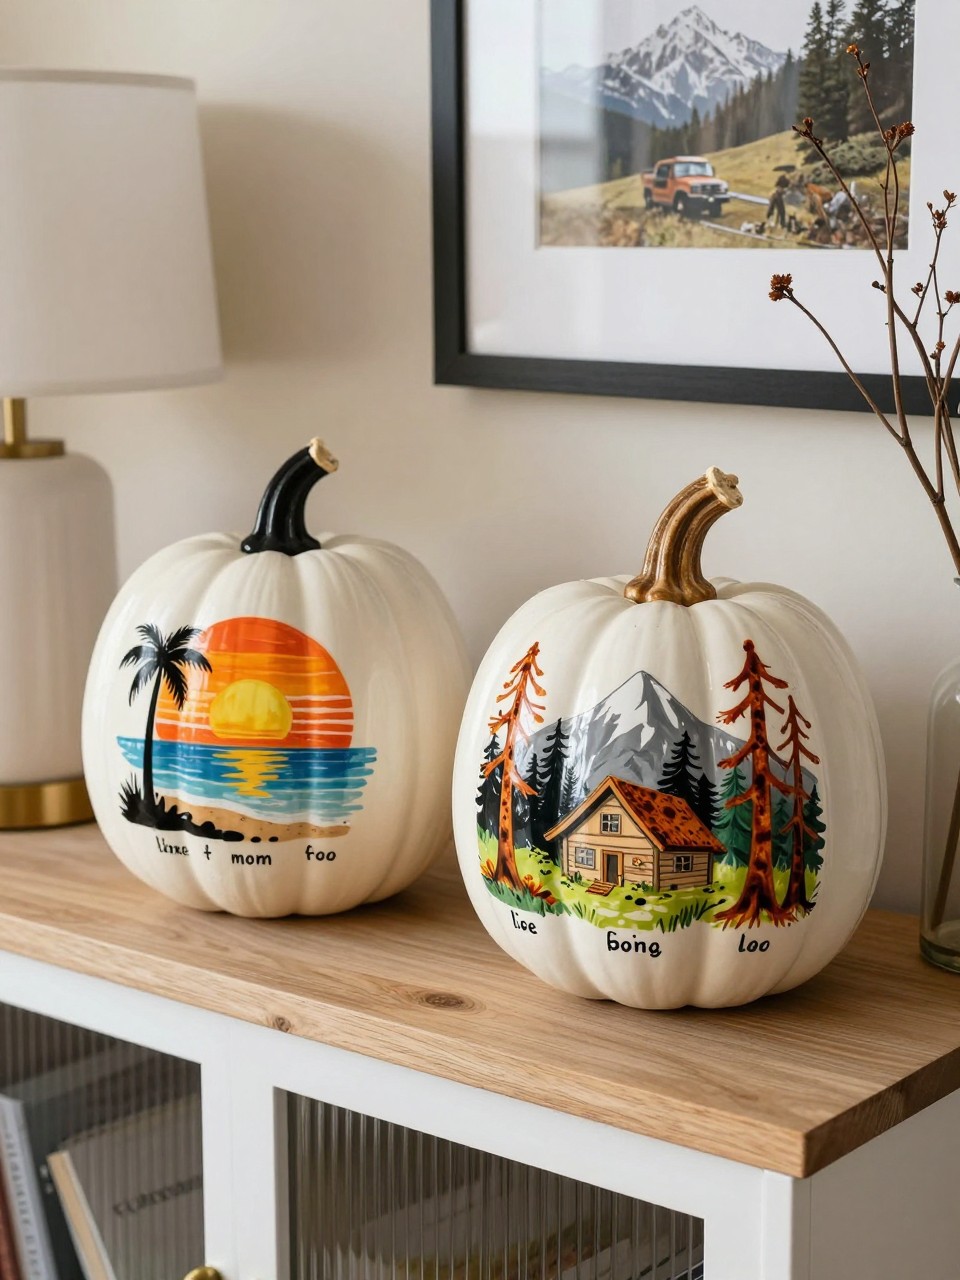
Choose two important memories from your relationship and paint one simplified scene on each pumpkin. These might represent your first trip, first date location, engagement, favorite holiday, or a place you hope to revisit.
Focus on a few recognizable elements instead of trying to recreate an entire photograph. Add a small date or short location name beneath the scene to turn each pumpkin into a lasting reminder of the experience.
13. Split Heart Ceramic Pumpkins
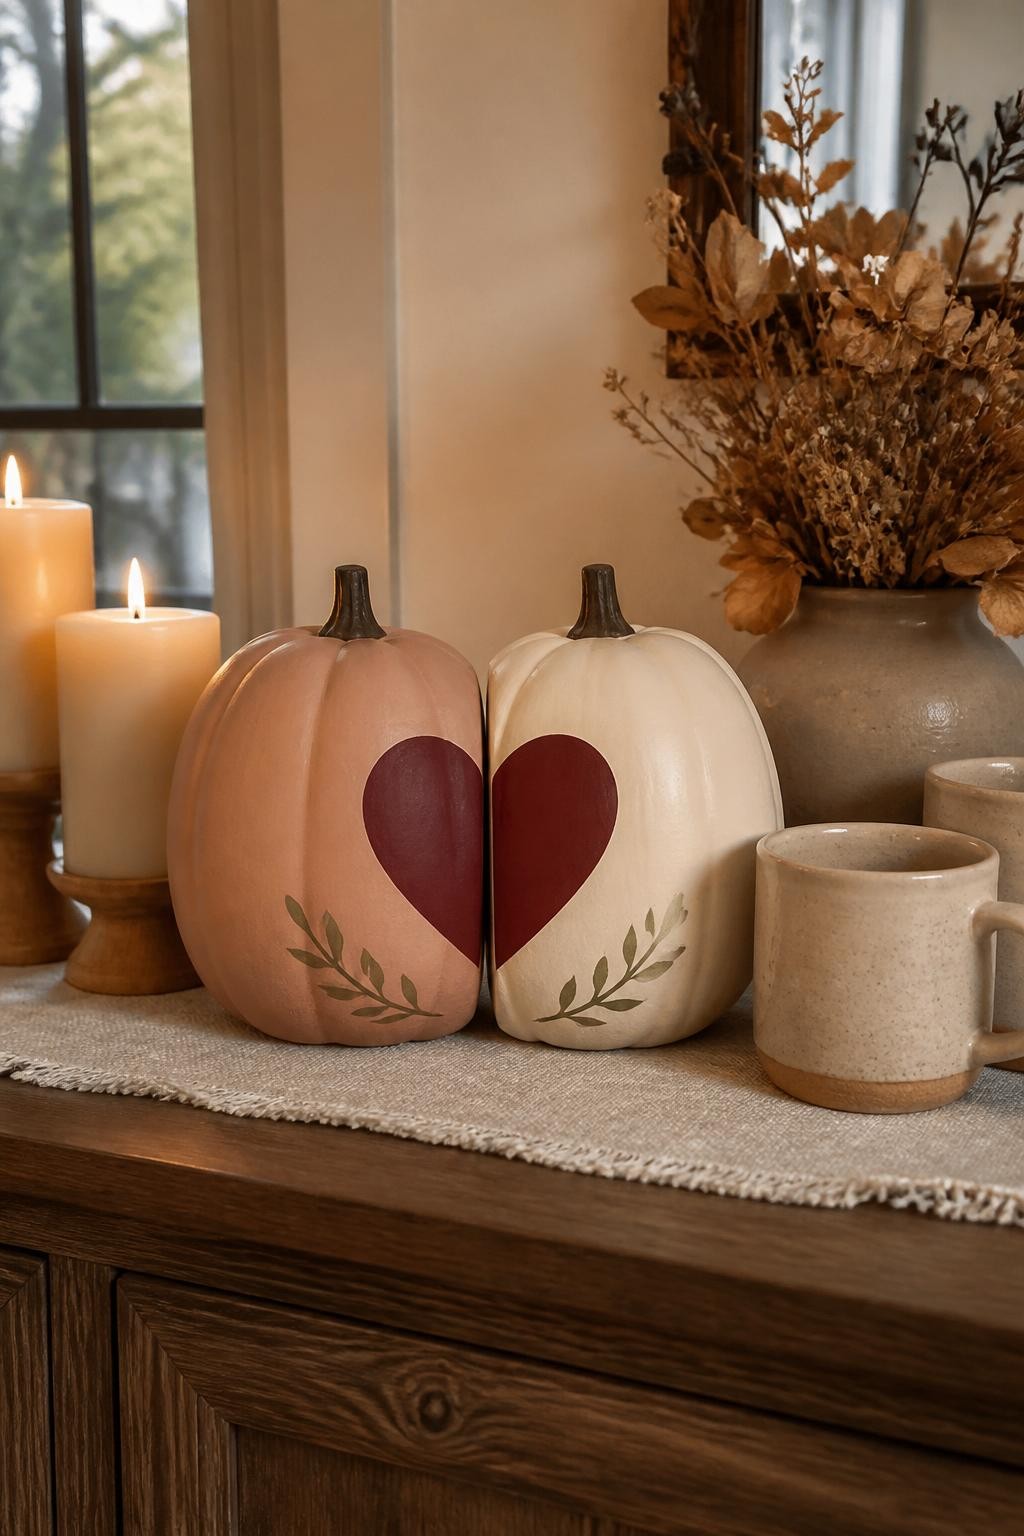
Position the ceramic pumpkins together and sketch one large heart across their inner sides. Paint half of the shape on each piece so it becomes complete only when the pumpkins are displayed together.
Keep the remaining surfaces plain or add one small botanical detail near the base. The simple design is romantic without being difficult, and the pottery pair can become part of your yearly fall decorations.
14. Opposite Color-Block Pumpkins
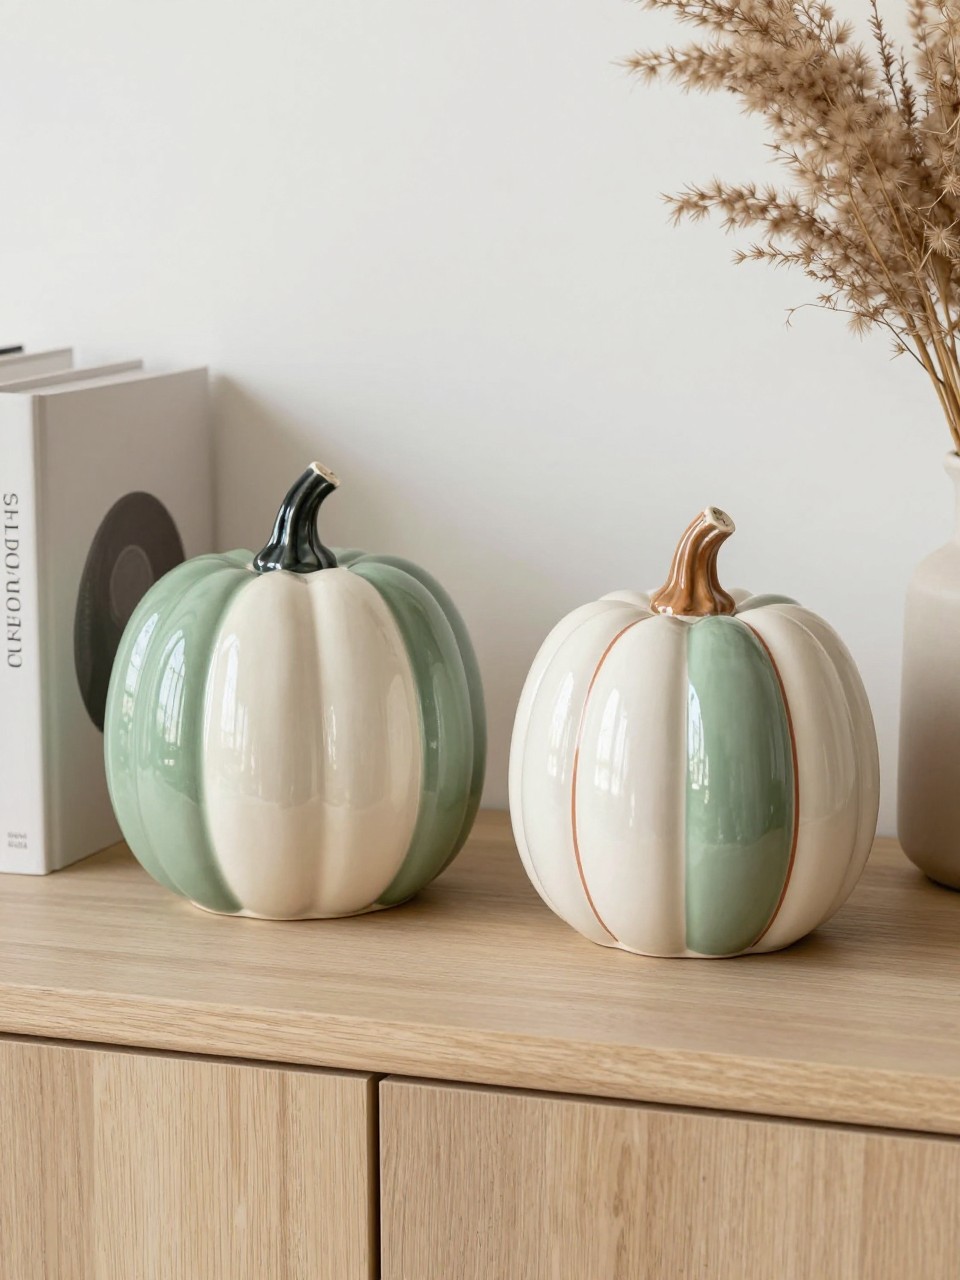
Choose two or three colors, then reverse their placement on each pumpkin. For example, one piece can be mostly sage with a cream section, while the other is mostly cream with a sage section.
Add a thin shared accent line in terracotta, burgundy, or gold. The opposite layouts create visual balance and give the pair a modern look without requiring detailed brushwork.
15. Pottery Date Pumpkin Display
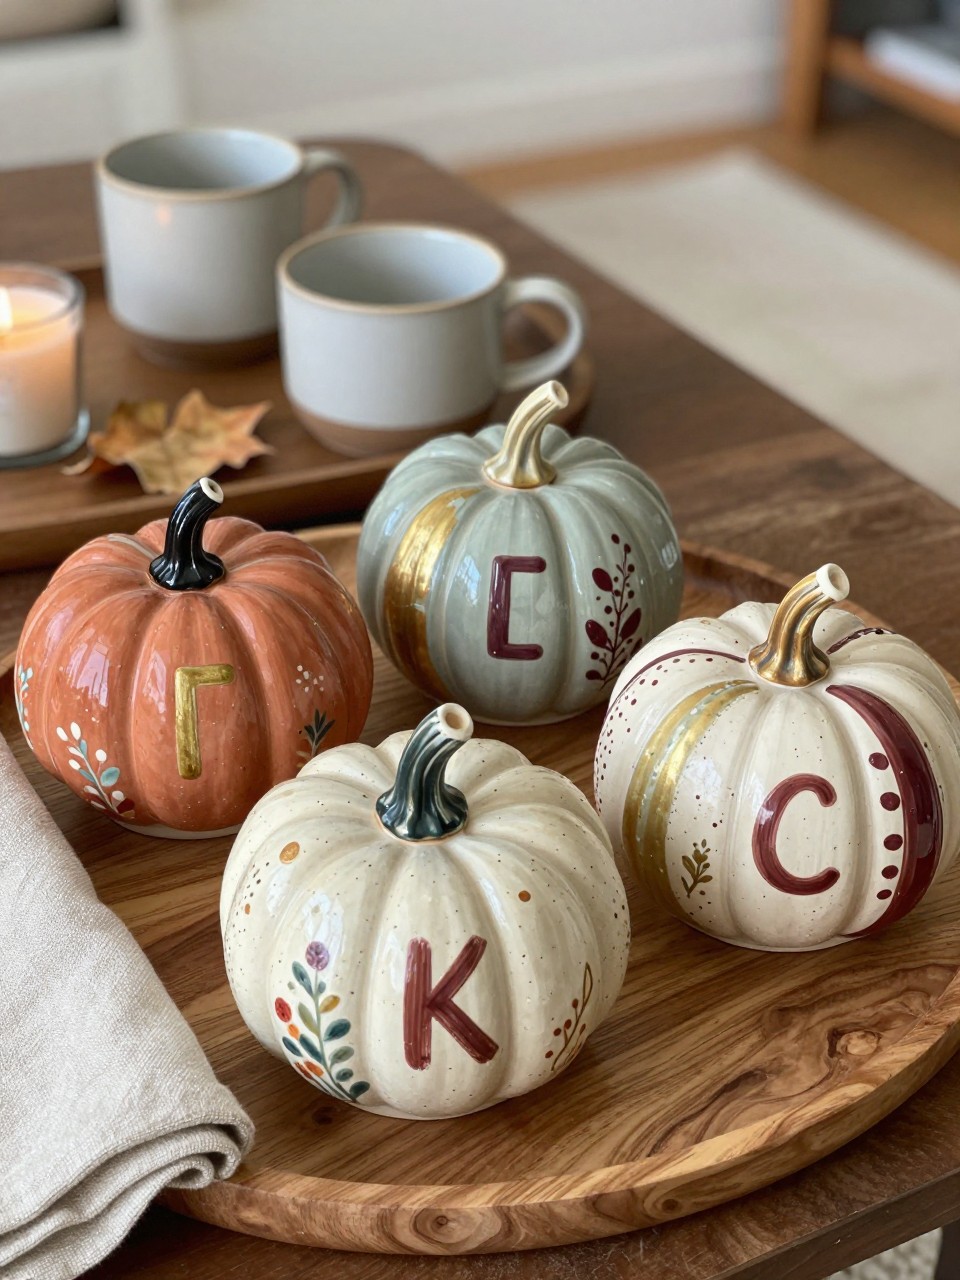
Paint several smaller ceramic pumpkins rather than committing to one large piece each. Give every pumpkin a different design, such as initials, abstract marks, speckles, florals, or simple color blocks, while using one shared palette.
Once the pieces have been fired, arrange them together on a wooden tray with a candle, mugs, or a few dried leaves. The complete display becomes both fall decor and a meaningful reminder of your creative date.