Table of Contents Show
Keeping preschoolers busy can be hard, especially on rainy days or when you need a calm, fun activity at home or in class. This list brings you simple, creative transportation crafts that use easy supplies and come together fast.
Each project helps kids explore cars, trains, planes, and more while practicing fine motor skills.
Let’s jump into playful ideas that are quick to set up and satisfying to make.
1. Paper Plate School Bus
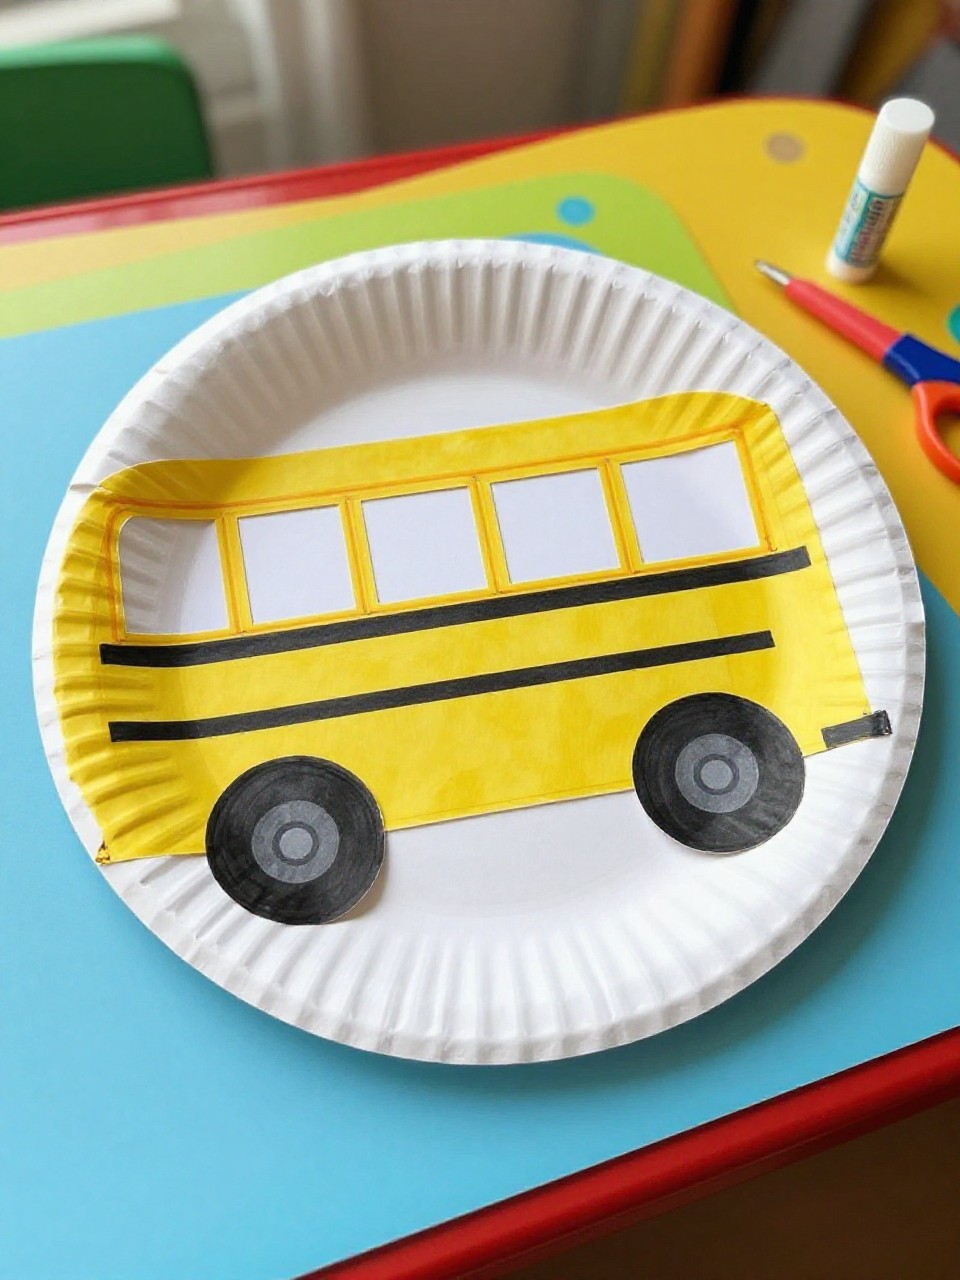
This craft turns a half paper plate into a bright yellow school bus with windows and wheels. Kids love recognizing a familiar vehicle and adding their own “passengers” with drawn faces, making it personal and fun.
Materials Needed:
For People Who Love to Make Things ✂️
- Paper plate (cut in half)
- Yellow paint or marker
- Black construction paper (wheels and stripe)
- White paper (windows)
- Glue stick
How to make it:
- 1. Cut the plate in half and paint it yellow; let it dry.
- 2. Cut out two black circles for wheels and a long black stripe.
- 3. Add white rectangle windows and draw faces of friends or family inside.
- 4. Glue on wheels and stripe; display on a wall or bulletin board.
2. Cardboard Tube Rocket Ship
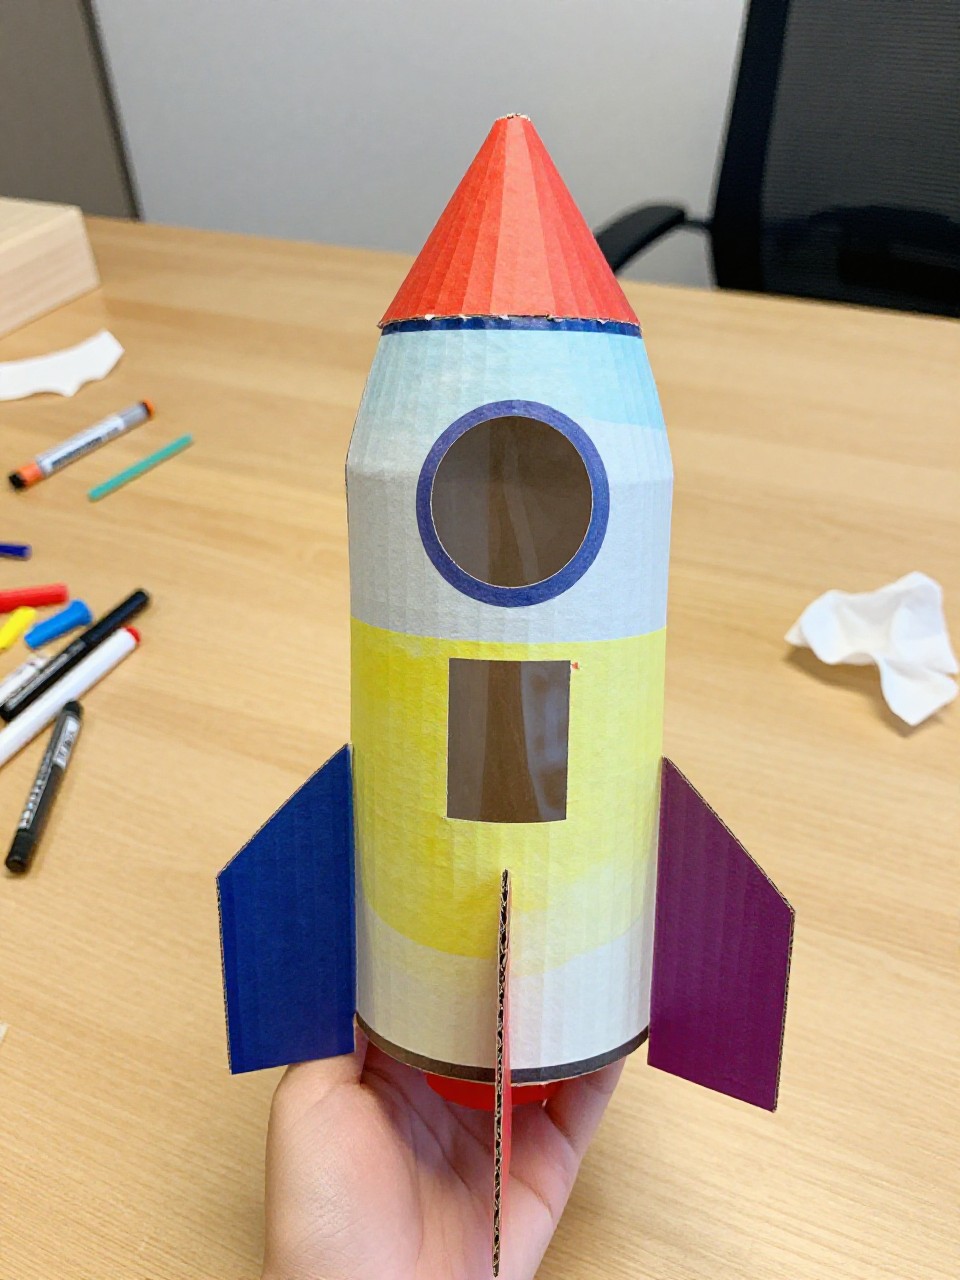
A toilet paper roll becomes a colorful rocket with a cone top and fiery tissue flames. Kids enjoy choosing colors and pretending to blast off, which boosts imagination and storytelling.
Materials Needed:
- Cardboard tube
- Colored paper (for cone top)
- Tissue paper (red/orange/yellow flames)
- Markers or stickers
- Glue or tape
How to make it:
- 1. Wrap the tube in colored paper or color it with markers.
- 2. Cut a circle, slit it, and roll into a cone; tape it to the top.
- 3. Glue tissue strips inside the bottom for flames and add windows with stickers or paper circles.
- 4. Let dry, then “launch” the rocket in pretend play.
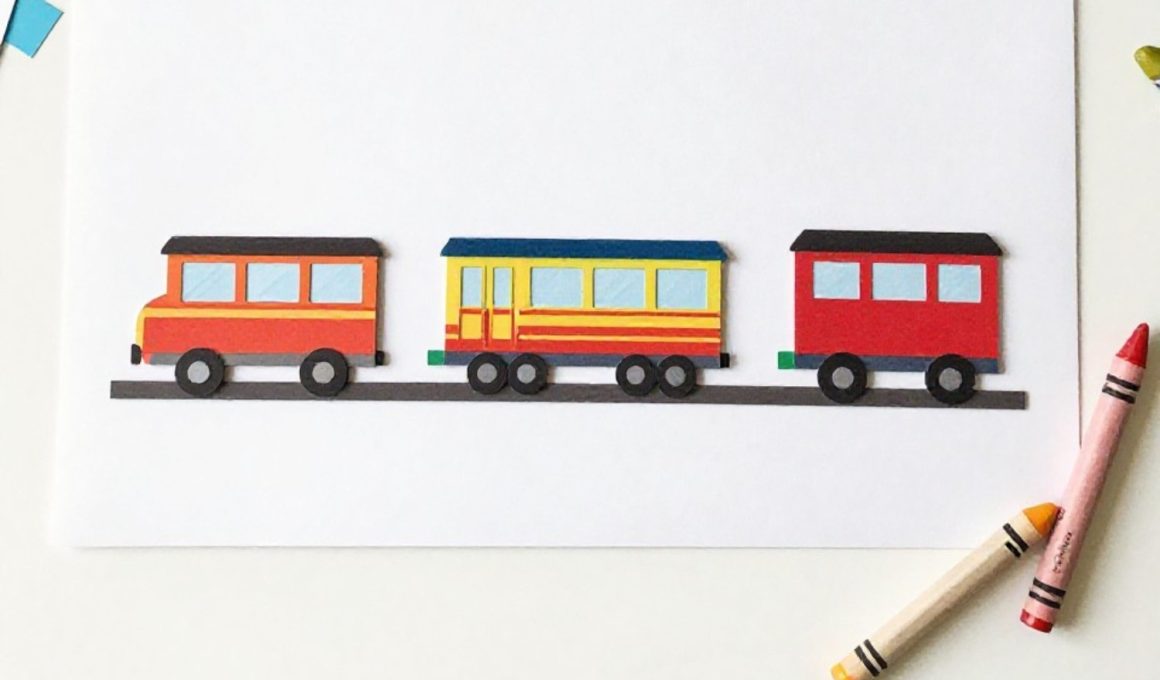
3. Shape Train Collage
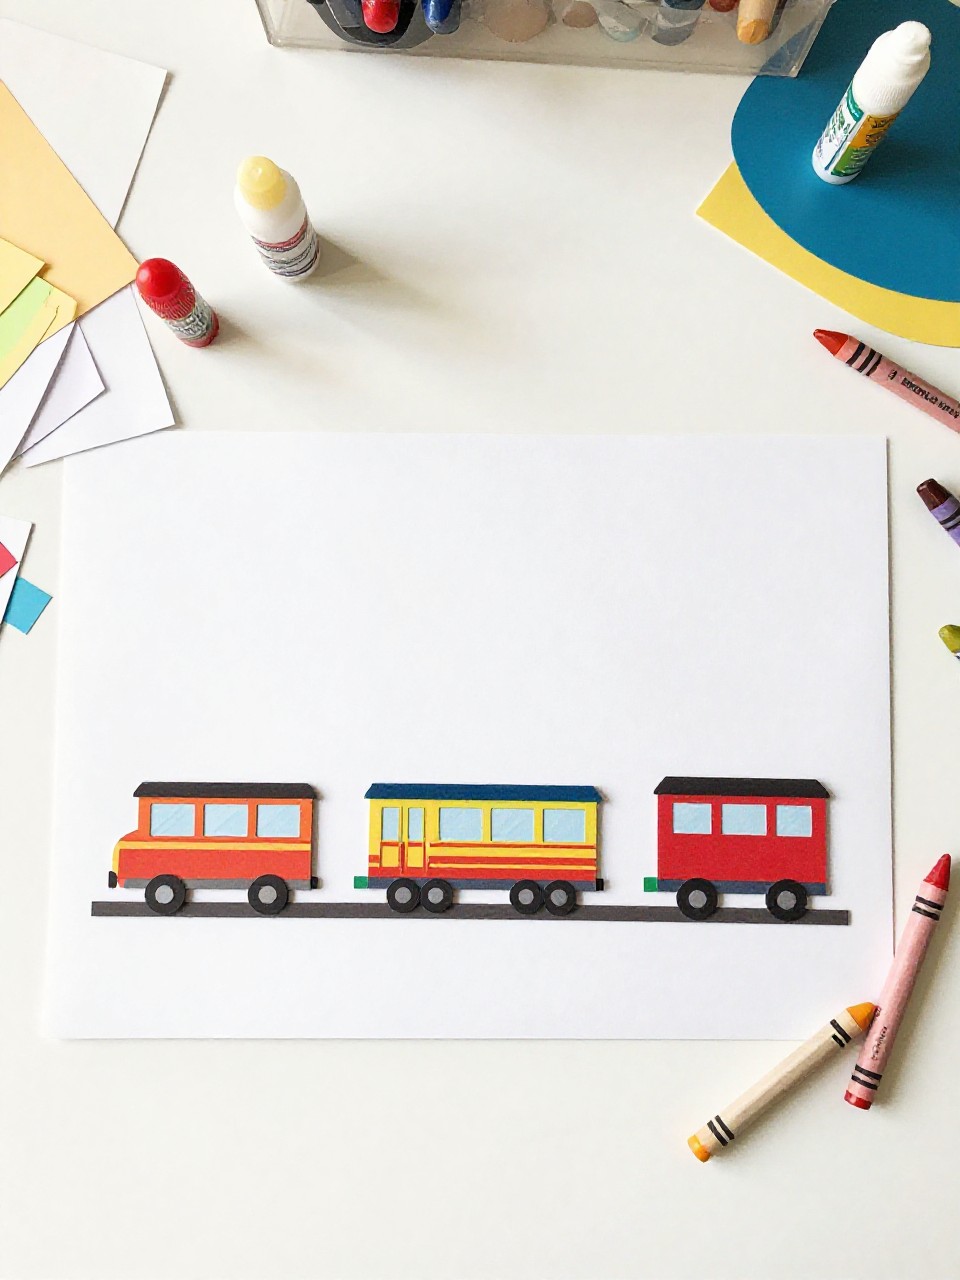
Kids build a train from simple paper shapes—rectangles for cars, squares for windows, and circles for wheels—on a long sheet. It feels like a puzzle and helps little hands practice gluing and matching shapes.
Materials Needed:
- Construction paper (assorted colors)
- Pre-cut shapes (rectangles, squares, circles)
- Long cardstock or sentence strip
- Glue stick
- Crayon for tracks
How to make it:
- 1. Draw two straight crayon lines on the base for tracks.
- 2. Arrange rectangles for the engine and cars along the track.
- 3. Add squares for windows and circles for wheels, then glue in place.
- 4. Label the cars with letters or names and display as a class train.
4. Sponge-Stamp City Bus Art
A rectangle sponge becomes a bus stamp, and kids print a row of buses across a paper “street.” Stamping is satisfying and quick, and children love adding tiny details like headlights and stop signs.
Materials Needed:
- Small rectangular sponge
- Washable paint (yellow, red, or green)
- White or blue paper
- Black marker
- Paper plate (paint tray)
How to make it:
- 1. Pour paint onto a plate and dip the flat sponge side.
- 2. Stamp bus shapes in a row on the paper.
- 3. After it dries a bit, draw wheels, windows, doors, and a route number.
- 4. Add a simple road line at the bottom and let the page dry fully.
5. Paper Plate Steering Wheel
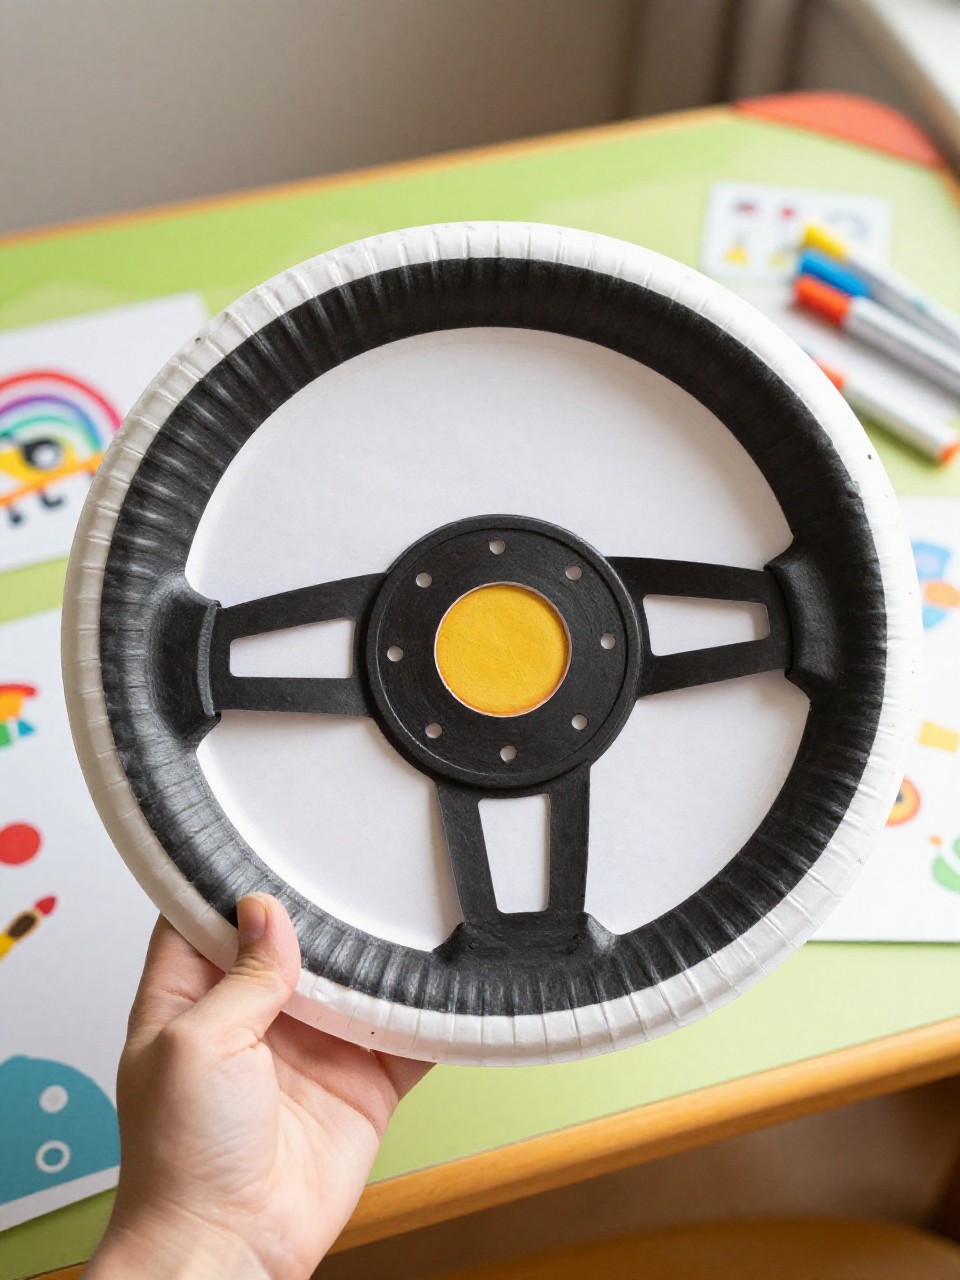
A cut-out paper plate becomes a pretend steering wheel kids can hold to “drive.” It’s easy, quick, and makes dramatic play exciting.
Materials Needed:
- Sturdy paper plate
- Black paint or marker
- Small circle of cardboard (center hub)
- Brass fastener (paper brad) [optional]
- Stickers
How to make it:
- 1. Cut out a small center circle and two side openings to form a wheel shape.
- 2. Color the wheel black and glue the small cardboard circle in the center.
- 3. Add stickers or draw a horn symbol and speedometer marks.
- 4. Optional: Use a brad to attach a spinning center; then use it for pretend driving.
6. Clothespin Airplane
A clothespin body with two craft stick wings turns into a cute little airplane. Kids enjoy clipping and flying it around the room, practicing fine motor skills as they assemble.
Materials Needed:
- Wooden clothespin
- 2–3 mini craft sticks
- Washable paint or markers
- Glue
- Small sticker dot (window) [optional]
How to make it:
- 1. Color the clothespin and craft sticks; let dry.
- 2. Glue one stick on top and one underneath for wings; add a small tail stick at the back.
- 3. Add a sticker dot or drawn window near the front.
- 4. Dry completely, then zoom it through the air.
7. Footprint Sailboat Picture
A painted footprint becomes the boat hull, with paper triangles for sails floating on a blue background. Kids love using their own foot as a stamp and seeing it turn into a real boat.
Materials Needed:
- Blue construction paper
- Washable paint (brown for hull)
- White and colored paper (sails)
- Glue stick
- Marker for waves
How to make it:
- 1. Paint the bottom of a clean foot with brown paint and stamp near the bottom of the page; wash foot.
- 2. Glue a paper mast and two triangle sails above the footprint hull.
- 3. Draw waves, a sun, and birds.
- 4. Let dry and hang the ocean scene.
8. Paper Strip Hot Air Balloon
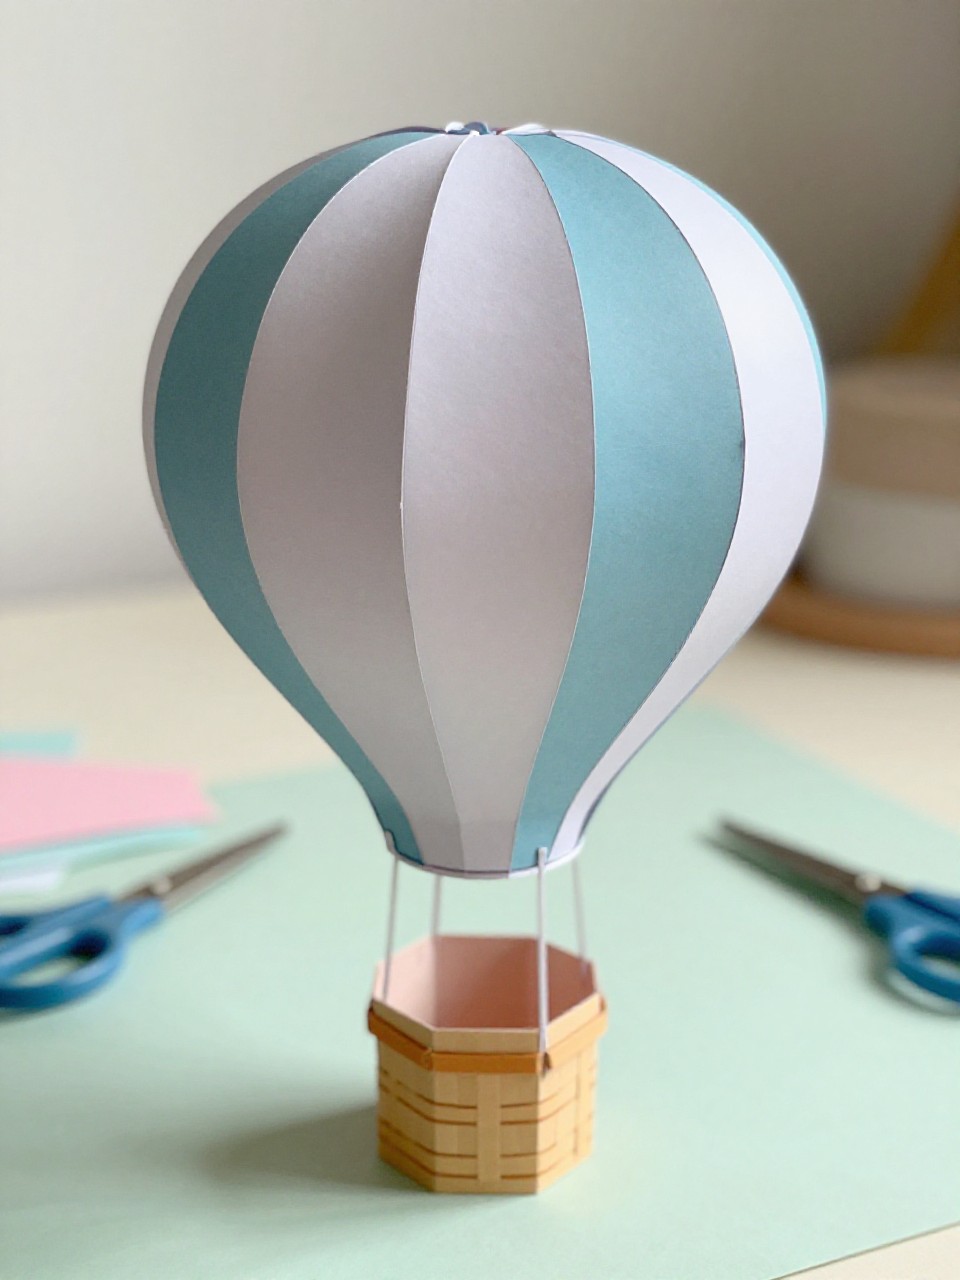
Paper loops form a round balloon with a small paper basket and string “ropes.” It looks 3D and kids enjoy choosing colors and seeing the balloon puff out.
Materials Needed:
- Construction paper (assorted colors)
- Scissors
- Glue stick or tape
- Short string or yarn
- Cardstock background
How to make it:
- 1. Cut 4–6 paper strips; glue the ends together to make loops.
- 2. Glue one end of each loop to the background in a circle and the other ends closer together to form a dome.
- 3. Add a small paper basket and two yarn ropes.
- 4. Draw clouds and display the raised balloon.
9. Egg Carton Fire Truck
A cut egg carton cup becomes the cab, and a carton strip becomes the body of a bright red fire truck. Children enjoy adding ladders and lights, then pretending to race to the rescue.
Materials Needed:
- Cardboard egg carton
- Red paint
- Black and white paper (wheels, windows)
- Craft stick (ladder)
- Glue
How to make it:
- 1. Cut one cup for the cab and a long strip for the truck body; paint both red.
- 2. Glue the cup to the strip for a tall front cab.
- 3. Add paper wheels, windows, and a small blue light; glue a craft stick ladder on the side.
- 4. Let dry and roll it across a table during play.
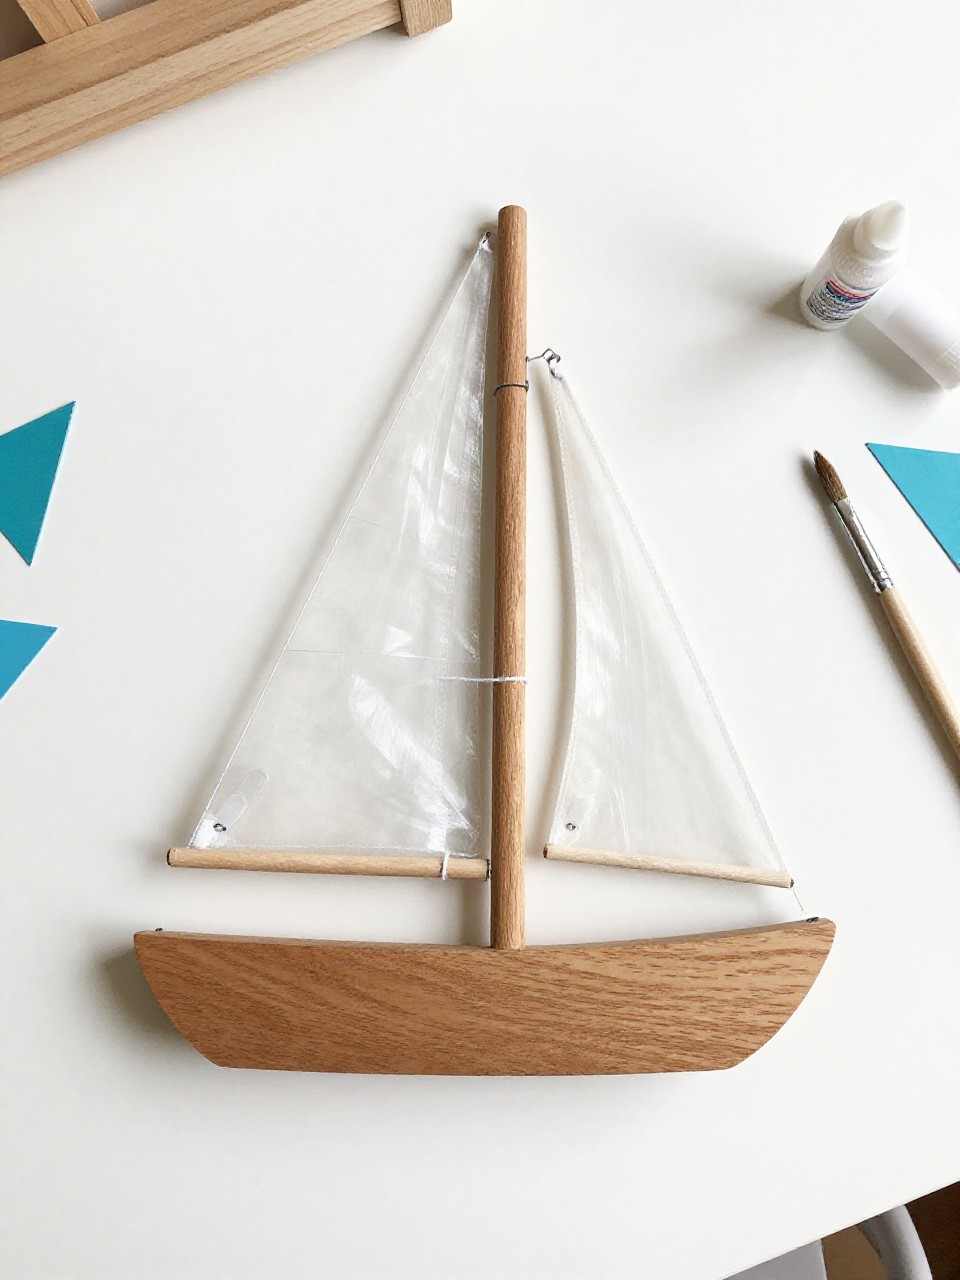
10. Popsicle Stick Sailboat
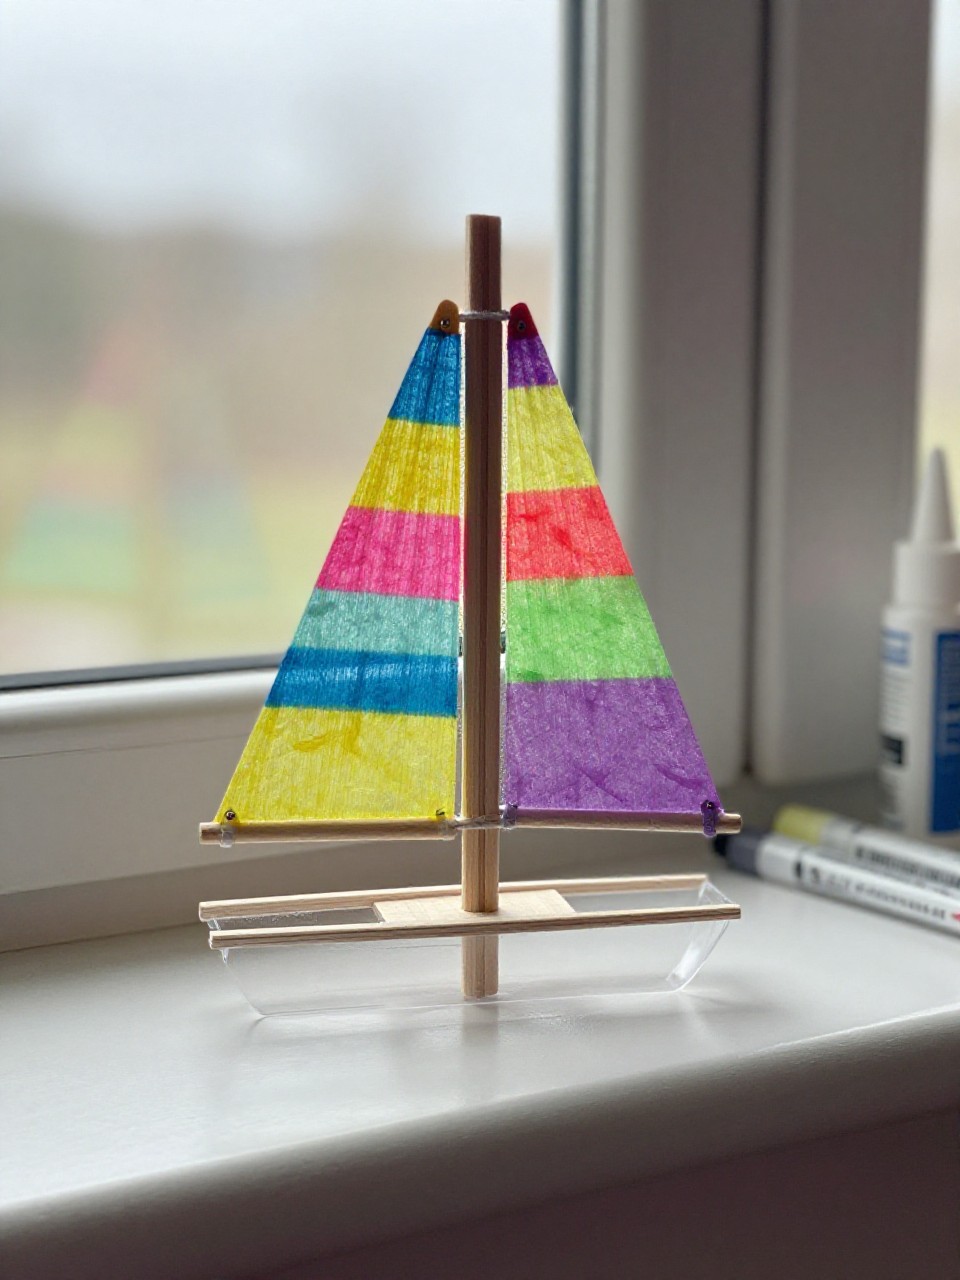
Two craft sticks make the base, and a triangle paper sail stands tall on a straw mast. Kids like choosing sail patterns and floating the boat in pretend water trays (dry play recommended).
Materials Needed:
- Wide popsicle sticks
- Paper or foam sail
- Drinking straw (mast)
- Glue
- Markers
How to make it:
- 1. Glue two sticks side by side for the boat base.
- 2. Glue a straw upright at the center as the mast.
- 3. Cut and glue a triangle sail to one side of the straw; decorate.
- 4. Let dry and set the boat on a windowsill “harbor.”
11. Handprint Helicopter Art
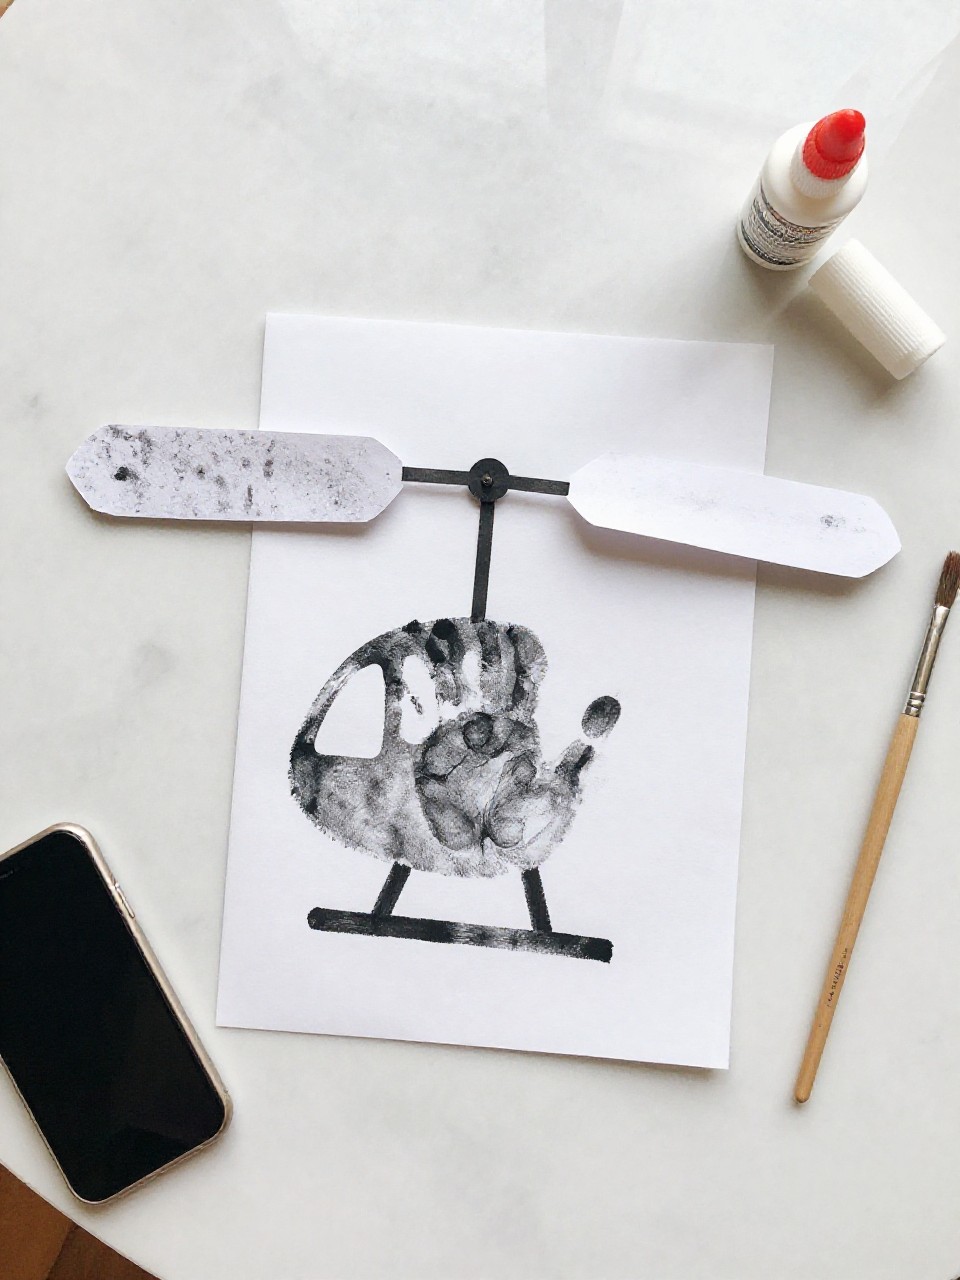
A painted handprint becomes the helicopter body, with paper rotors and skids added on top. Kids enjoy the tickly paint and watching their hand turn into a flying machine.
Materials Needed:
- White or blue paper
- Washable paint for handprint
- Black and gray paper (rotor, skids)
- Glue stick
- Marker for windows
How to make it:
- 1. Make a handprint near the center of the paper; let it dry.
- 2. Cut and glue a long thin rotor on top and two skids beneath.
- 3. Draw a round window and tiny pilot face.
- 4. Add clouds and let dry before hanging.
12. Road Tape Play Mat
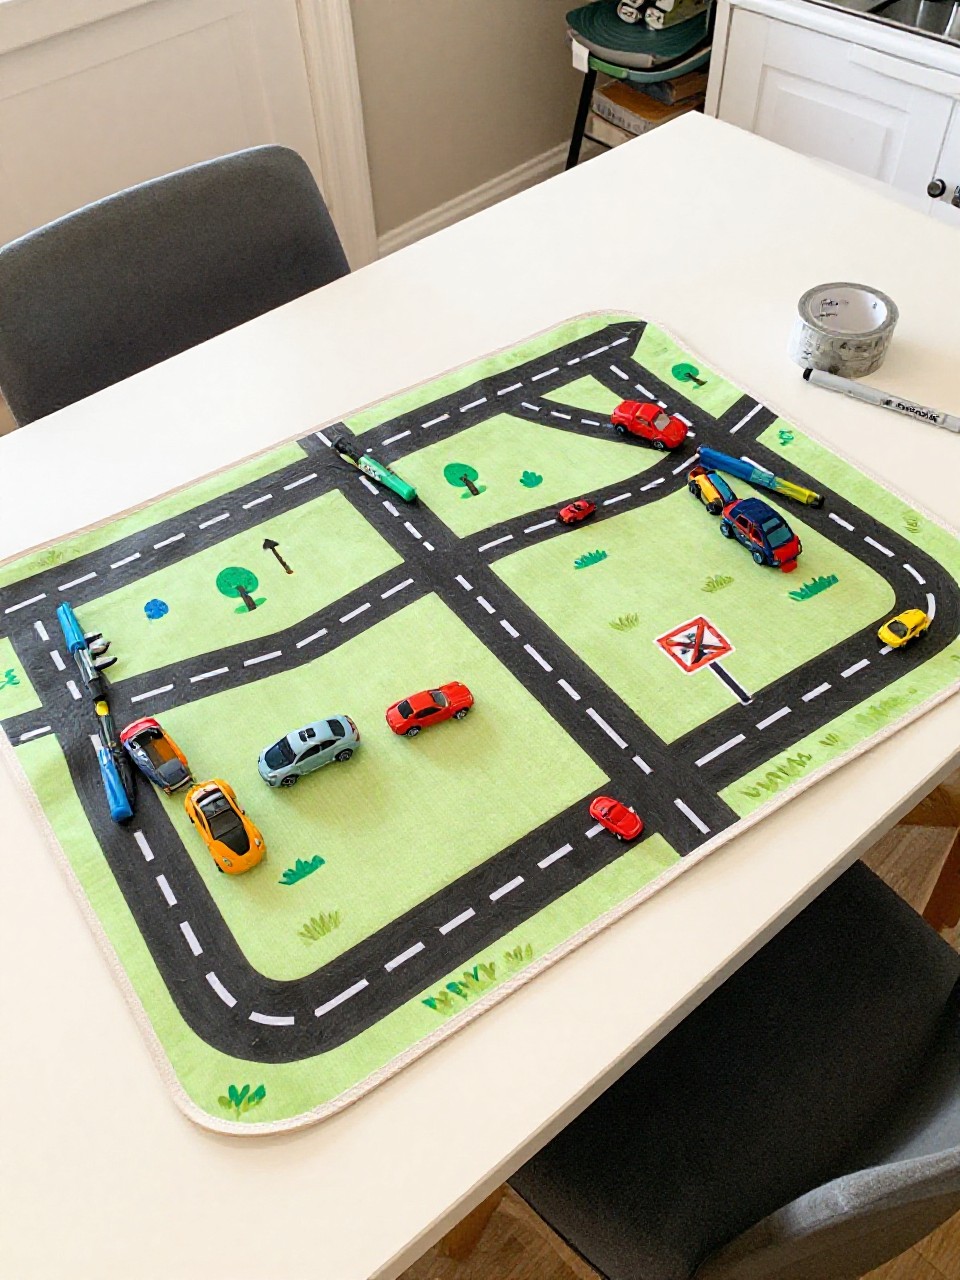
Create a quick roadway using removable road tape on a big sheet or cardboard, with simple signs and parking spots. Kids love driving toy cars on something they helped build.
Materials Needed:
- Large poster board or cardboard
- Road washi tape or black tape
- Markers
- Small paper for signs
- Glue or tape for signs
How to make it:
- 1. Lay tape roads in loops and intersections on the board.
- 2. Draw crosswalks, parking boxes, and a gas station.
- 3. Make tiny stop and yield signs and tape them beside the road.
- 4. Park toy cars and drive on the finished mat.
13. Paper Cup Sail Car
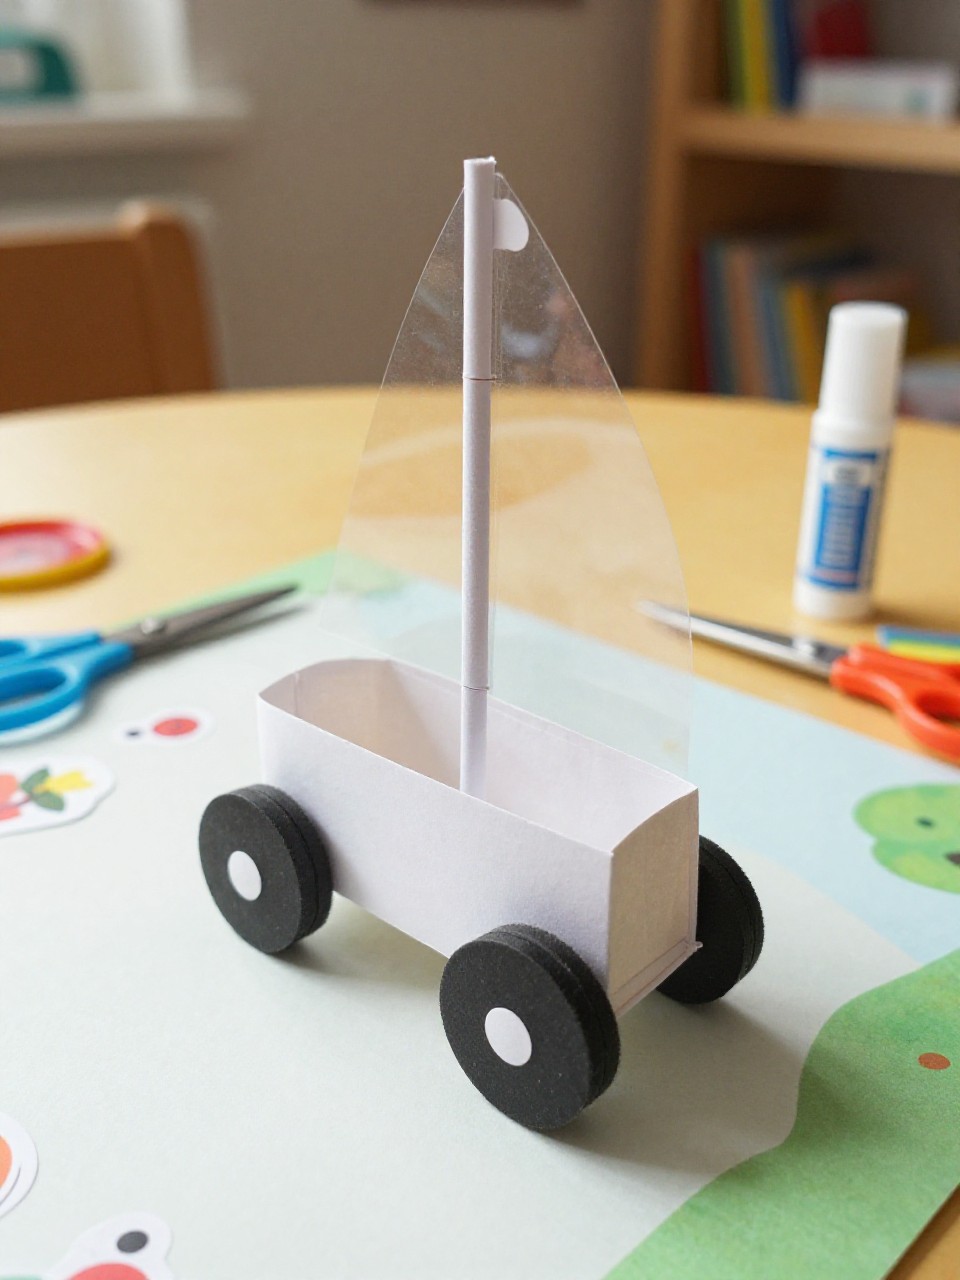
A paper cup on its side becomes a rolling car with a straw sail and paper wheels. Kids enjoy pushing it and watching the sail flutter while it moves.
Materials Needed:
- Paper cup
- 2 large paper circles (wheels)
- Straw (mast)
- Small paper triangle (sail)
- Glue or tape
How to make it:
- 1. Place the cup on its side; glue paper wheels to each side.
- 2. Poke a small hole on top and insert a straw.
- 3. Tape a triangle sail to the straw; decorate the cup with stickers.
- 4. Let set, then race the sail cars across a smooth table.
14. Bubble Wrap Road Roller Print

Wrap a block with bubble wrap, roll it in paint, and print bumpy “asphalt” roads on paper. The texture is exciting, and kids love seeing the road appear as they roll.
Materials Needed:
- Small wooden block or box
- Bubble wrap
- Rubber band or tape
- Washable paint (gray/black)
- Large paper
How to make it:
- 1. Wrap the block with bubble wrap and secure it.
- 2. Roll the wrap in paint and then across the paper to make roads.
- 3. Add lane lines with white paint or marker; draw tiny cars if desired.
- 4. Let dry and hang as a textured city map.
15. Shape Subway Car Window
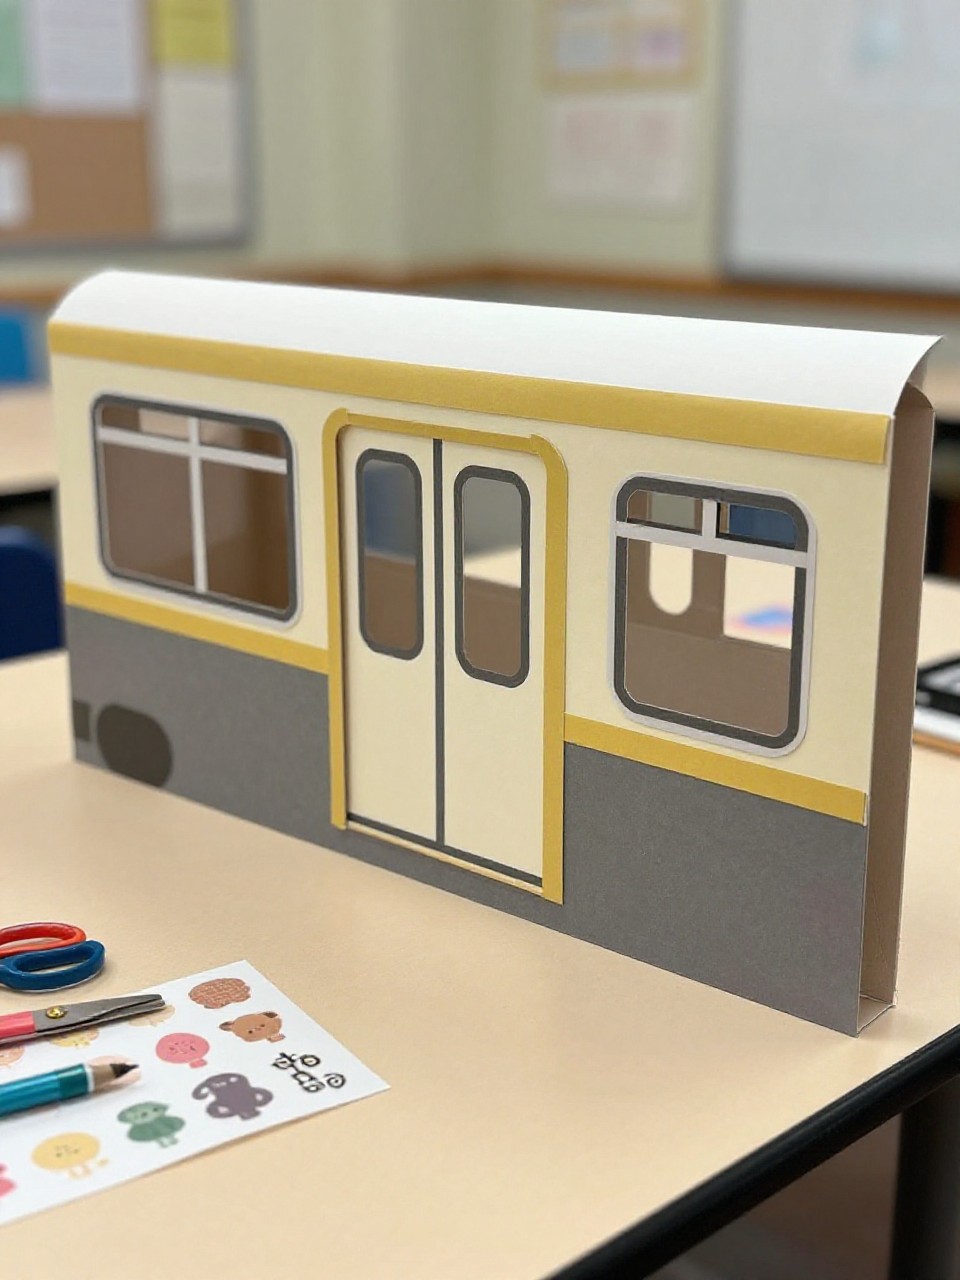
Kids make a rectangle subway car with cut-out windows and slide faces or drawings behind them. Peeking passengers make this interactive, and little artists enjoy moving the faces around.
Materials Needed:
- Gray or silver paper (car body)
- White paper (background)
- Scissors
- Glue or tape
- Markers and stickers
How to make it:
- 1. Cut a large rectangle for the subway car; cut two or three window holes.
- 2. Glue the car onto a white page, leaving room to slide small face drawings underneath.
- 3. Draw doors, wheels, and route letters; decorate with stickers.
- 4. Slide faces up and down to change who’s riding.
16. Paper Plate Airplane Window

Turn a paper plate into a round airplane window view with clouds, sky, and a wing tip. Kids enjoy “looking out” at their own sky scene and adding weather, birds, or a rainbow.
Materials Needed:
- Paper plate
- Blue paint or paper (sky)
- White paper (clouds)
- Gray paper (wing)
- Glue stick and markers
How to make it:
- 1. Paint or cover the plate center with blue for the sky.
- 2. Cut and glue fluffy white clouds and a small gray wing along one edge.
- 3. Add tiny bolts around the rim with a marker to look like a real window.
- 4. Dry and hang as an airplane window picture.