


Table of Contents Show
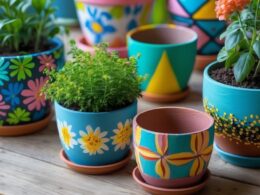
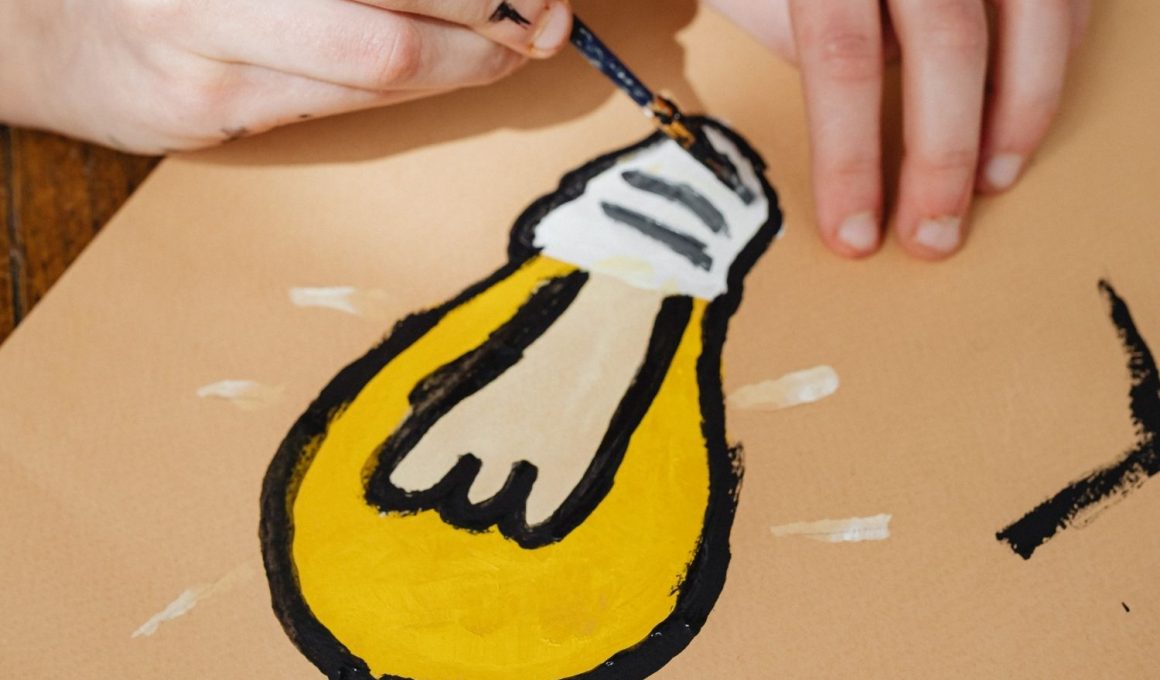
If you’ve ever wanted a relaxing hobby but didn’t know what to paint, bulb painting is a sweet place to start. Light bulbs are small, cheap, and easy to finish in one sitting, which makes them great for beginners. You can turn them into cute decorations, gifts, or seasonal ornaments with just a few colors.
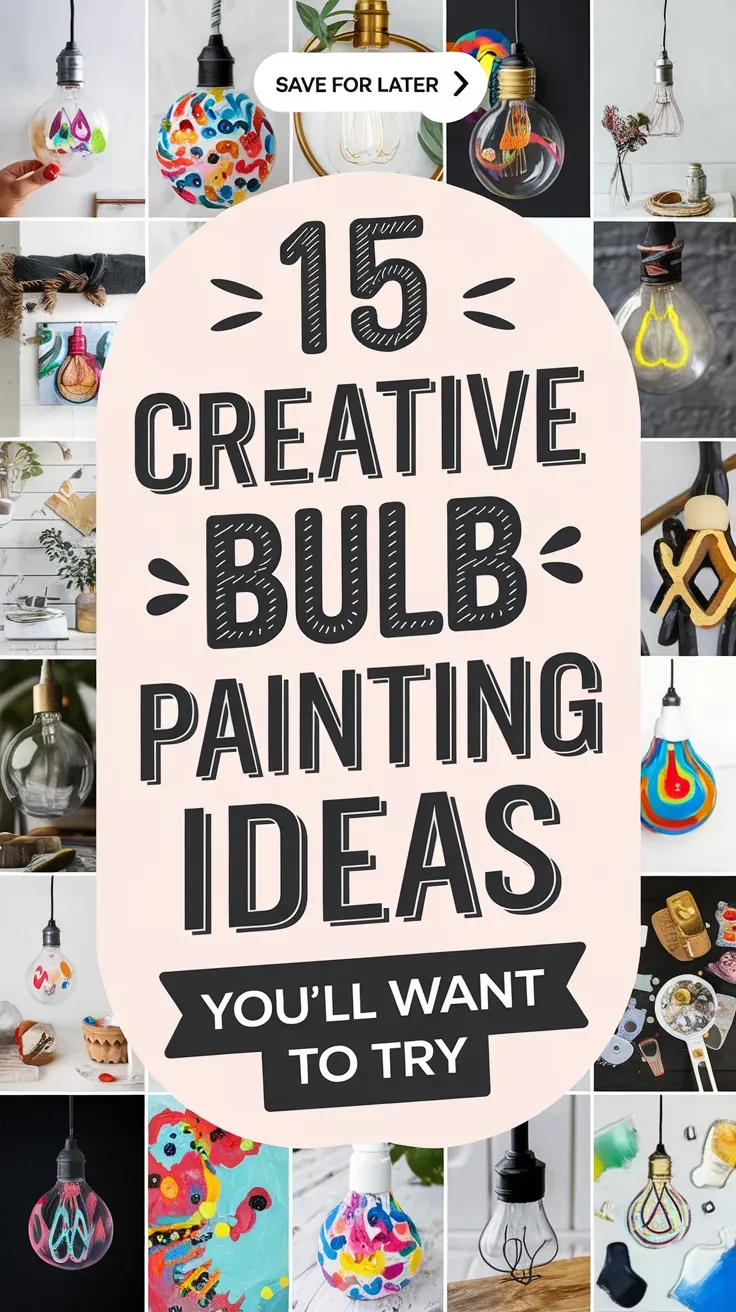
Here are 15 creative bulb painting ideas to help you feel inspired and actually want to grab a brush.
1. Wildflower Meadow Bulb
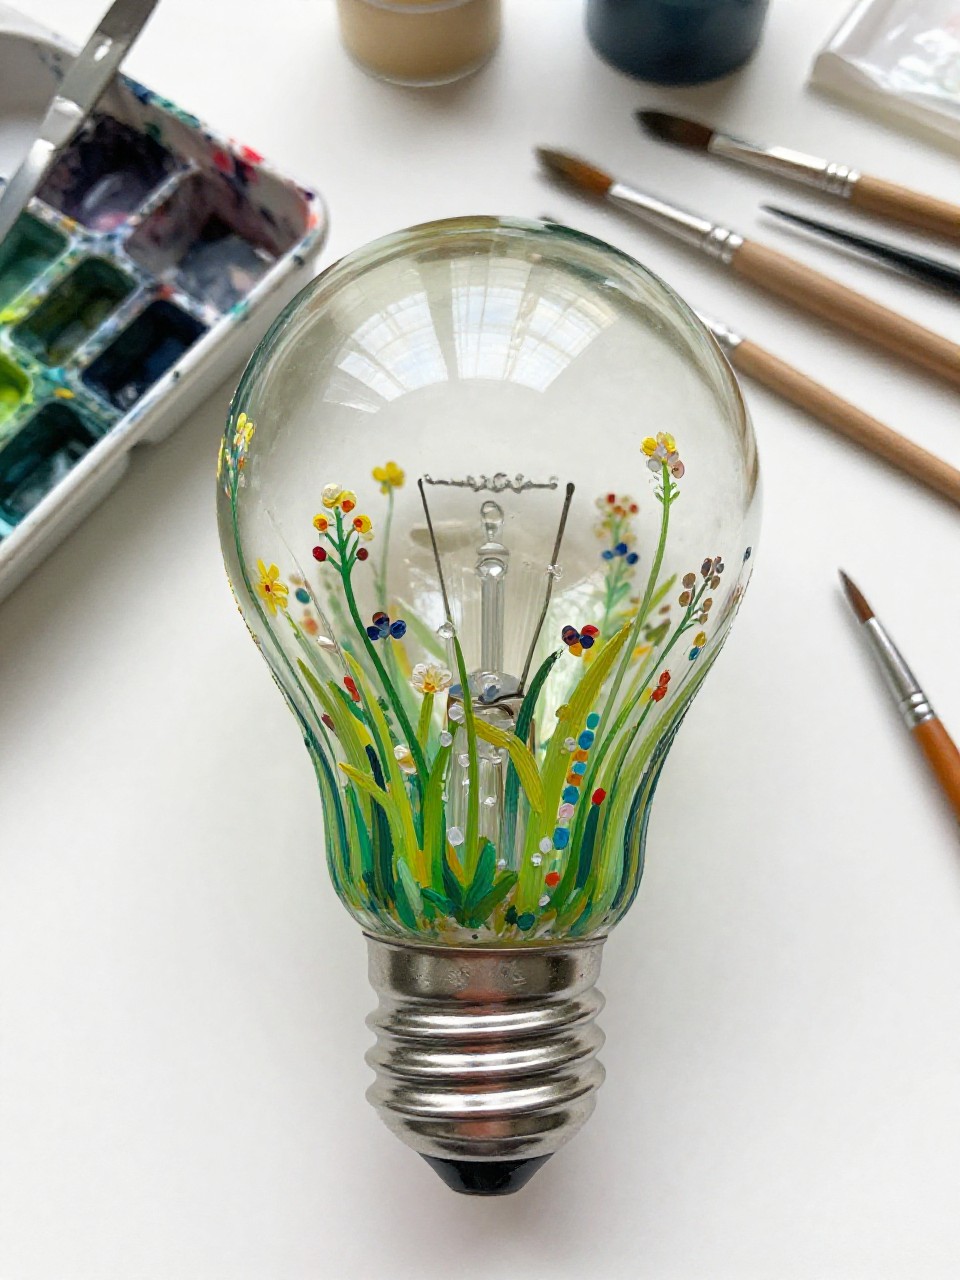
This painted bulb looks like a tiny spring meadow, with thin green stems and colorful wildflowers wrapping around the glass. It’s satisfying because the flowers don’t need to be perfect—little dots and loose petals still look charming. It’s great for beginners who want something calm and pretty.
Materials Needed:
- Clear incandescent-style light bulb (burned-out)
- Acrylic paint
- Paintbrushes in multiple sizes
- Palette or paint tray
- Cup of water + paper towel
- Optional clear acrylic sealer
Steps to Make:
For People Who Love to Make Things ✂️
- Clean the bulb with rubbing alcohol and let it dry fully.
- Paint a light sky or creamy base coat, leaving the metal cap unpainted.
- Add thin green stems that curve naturally around the bulb’s round shape.
- Dot on simple flower heads (daisies, lavender sprigs, tiny poppies) with a small brush.
- Let it dry, seal if you want, and display in a small bowl or hang with twine.
2. Galaxy Night-Sky Bulb
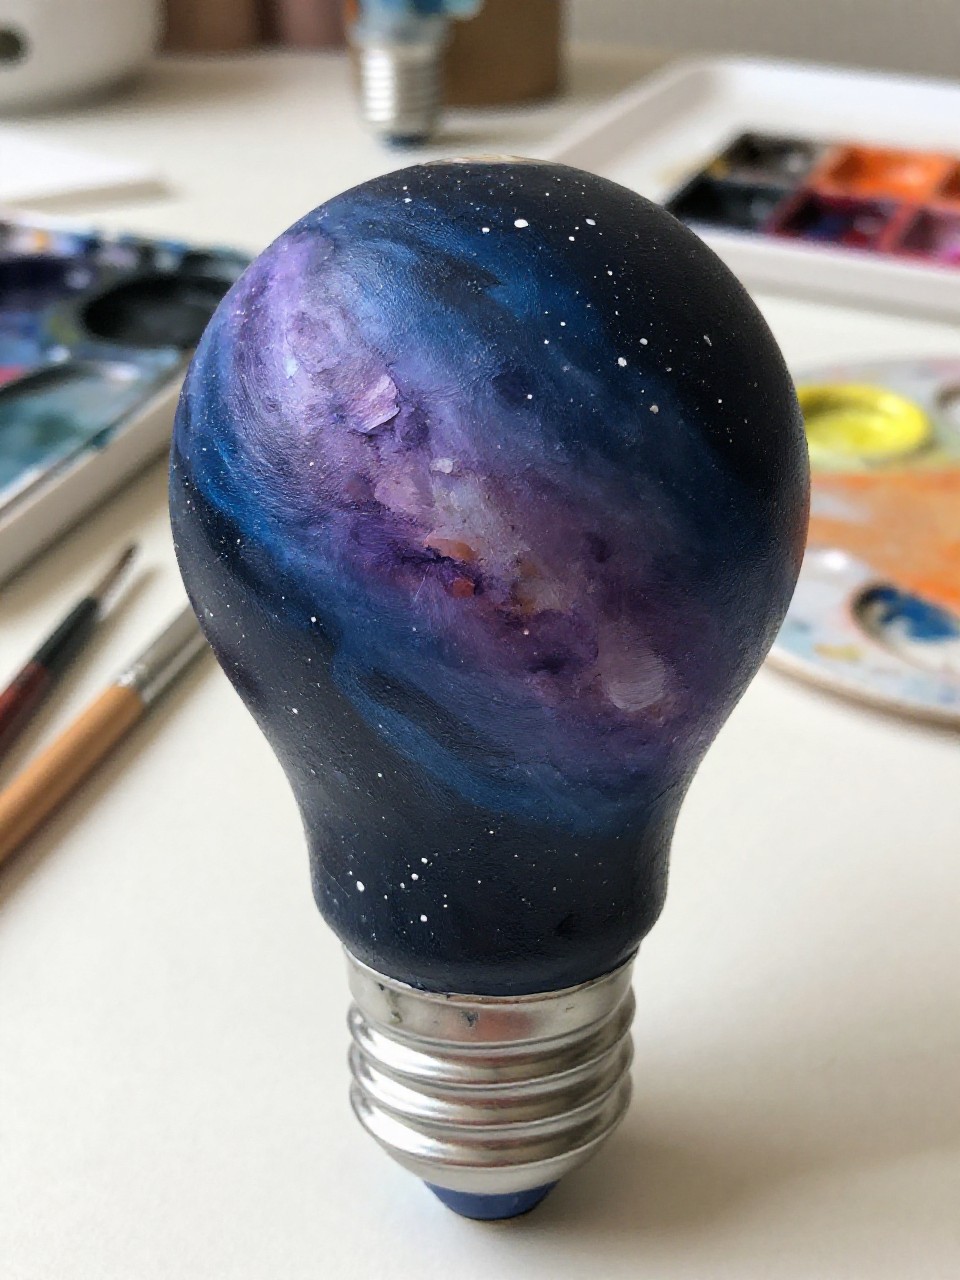
This bulb looks like a mini universe, with deep blue and purple clouds, soft black shadows, and white star splatter across the curve. It’s relaxing because you can blend colors slowly and let them flow. Beginners love it since “messy” blending actually makes it look more real.
Materials Needed:
- Clear light bulb
- Acrylic paint (black, navy, purple, white)
- Paintbrushes in multiple sizes
- Palette or paint tray
- Old toothbrush (for star splatter)
- Optional glossy varnish
Steps to Make:
- Wipe the bulb clean and set it in a cup so it won’t roll.
- Paint loose patches of navy and purple, blending while still wet.
- Add black around the edges to create depth and a night-sky feel.
- Flick white paint with a toothbrush to make stars that wrap around the bulb.
- Dry completely and add a thin glossy coat for a shiny “space” finish.
3. Smiling Snowman Bulb Ornament
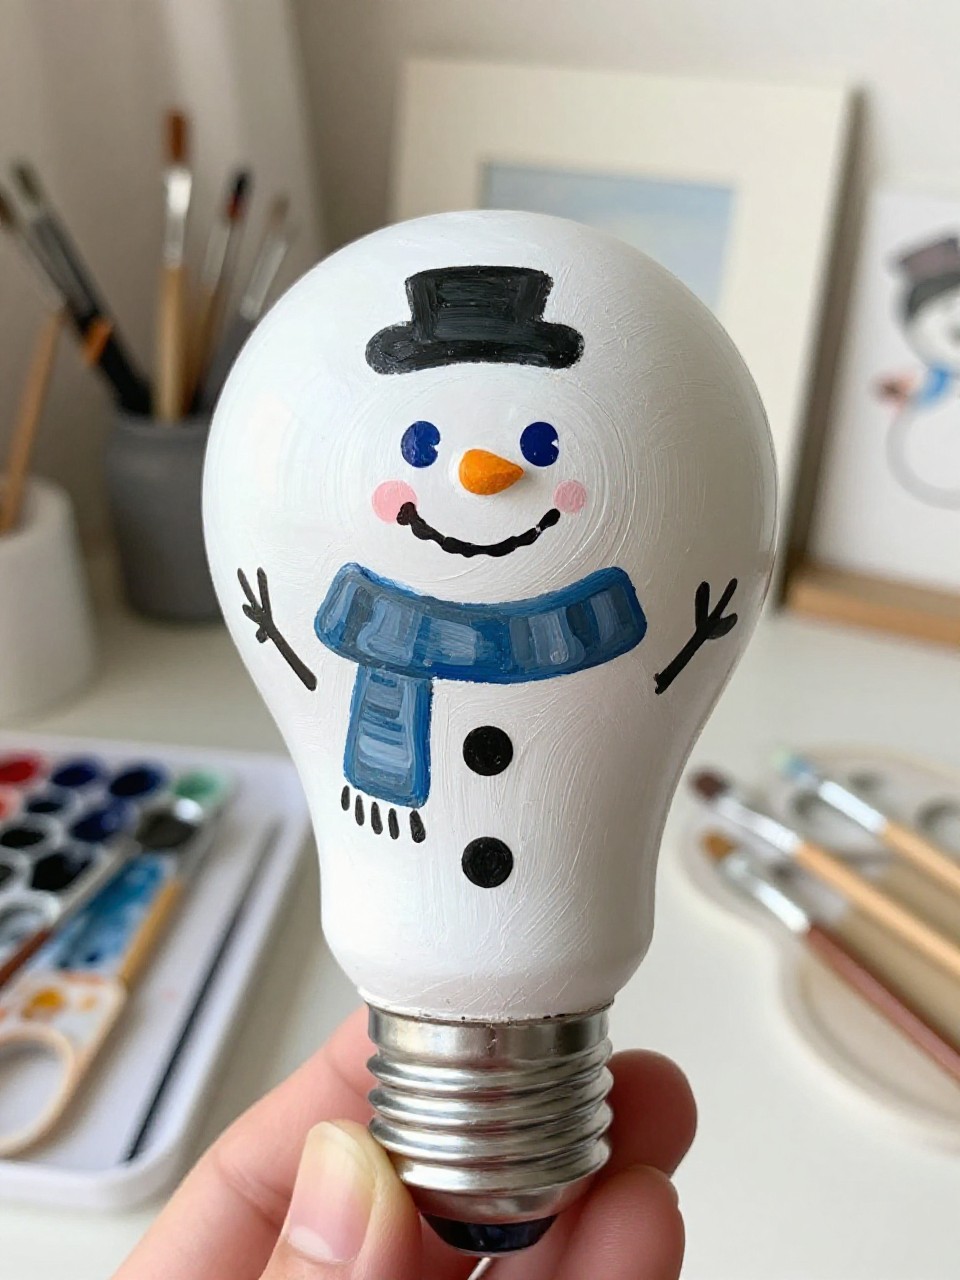
This bulb becomes an adorable snowman with a white “snow” body, a carrot nose, coal dots, and a scarf painted around the widest part. It’s perfect for winter decorating and makes a sweet handmade gift. The simple shapes are beginner-friendly and quick to paint.
Materials Needed:
- Clear light bulb
- Acrylic paint
- Paintbrushes in multiple sizes
- Palette or paint tray
- Black paint pen (optional)
- Optional matte sealer
Steps to Make:
- Clean the bulb and paint the glass white in two thin coats.
- Sketch a simple face placement near the top curve with light pencil marks.
- Paint the eyes, smile, and carrot nose, then add coal buttons down the front.
- Paint a scarf band that wraps around the bulb’s curve, adding stripes or dots.
- Let it dry, seal, and tie a ribbon around the metal cap for hanging.
4. Bumblebee and Daisy Bulb
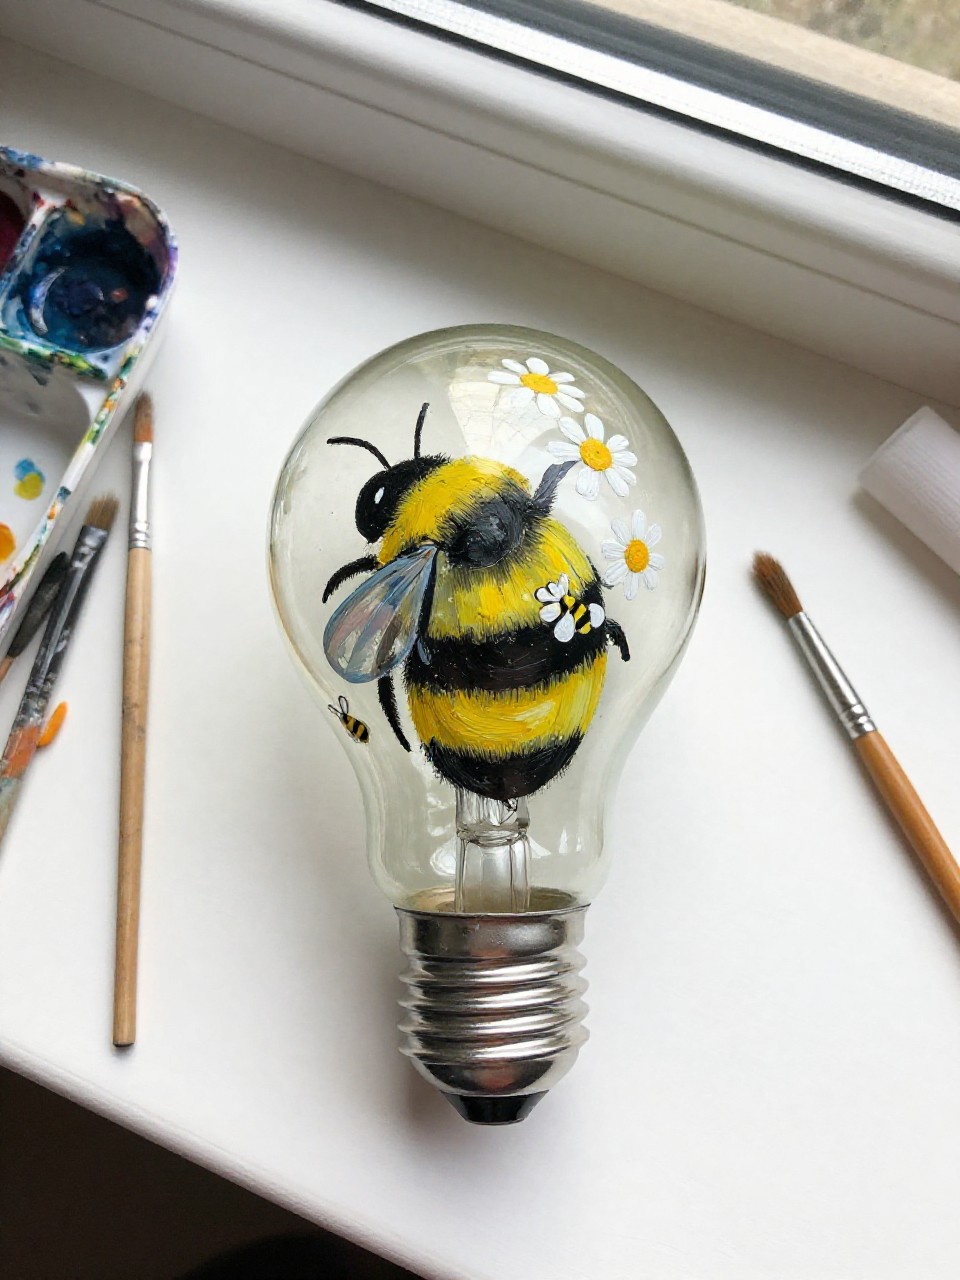
This bulb features bold yellow-and-black bee stripes with a tiny bumblebee and small white daisies wrapping around the sides. It’s satisfying because the pattern is simple, but the finished look is bright and playful. Great for spring décor or a cute desk decoration.
Materials Needed:
- Clear light bulb
- Acrylic paint (yellow, black, white, green)
- Paintbrushes in multiple sizes
- Palette or paint tray
- Pencil (for light sketching)
- Optional clear sealer
Steps to Make:
- Clean the bulb and paint a pale blue or white background if you want it brighter.
- Mark gentle stripe lines that curve around the bulb, then paint yellow sections first.
- Fill in the black stripes, letting the bands follow the round shape naturally.
- Add small daisies and a simple bee with tiny wings using a fine brush.
- Dry fully and seal for extra protection, then place in a mini stand or bowl.
5. Watercolor-Style Sunset Bulb
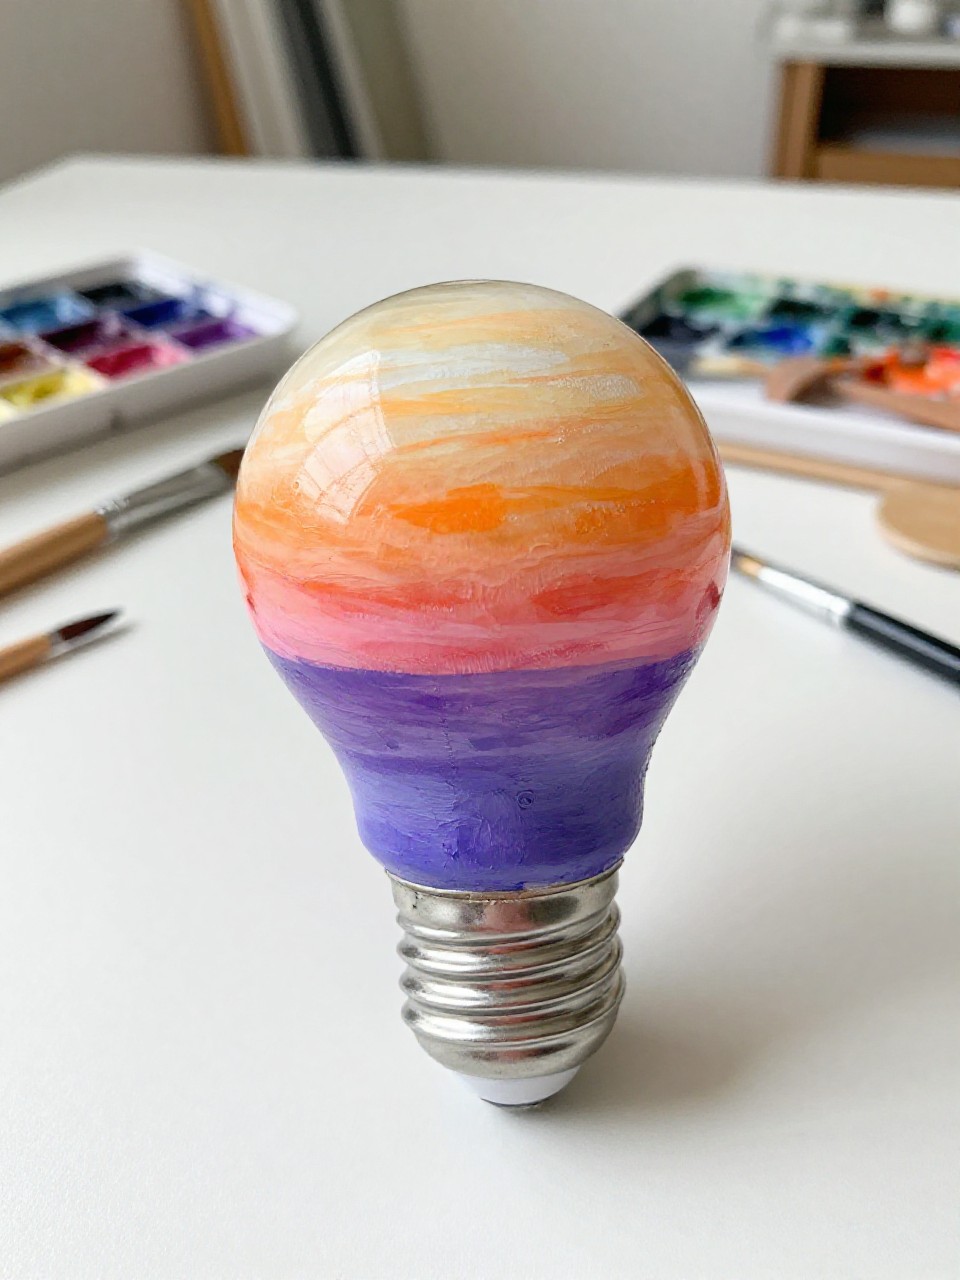
This bulb looks like a soft sunset with warm orange, pink, and purple bands blended gently around the glass. It’s a calming project because you can work slowly and keep the shapes simple. Beginners like it since the goal is smooth color transitions, not perfect details.
Materials Needed:
- Clear light bulb
- Acrylic paint (pink, orange, purple, white)
- Paintbrushes in multiple sizes
- Palette or paint tray
- Small sponge (optional for blending)
- Optional gloss varnish
Steps to Make:
- Clean the bulb and set it upright in a jar or cup.
- Paint wide color bands around the bulb, starting with yellow/orange near the bottom.
- Blend pink and purple into the top area while the paint is still a bit wet.
- Add a thin white highlight streak or tiny bird “V” shapes if you want detail.
- Let dry and add a glossy coat to make the colors look richer.
6. Blue Porcelain-Inspired Floral Bulb
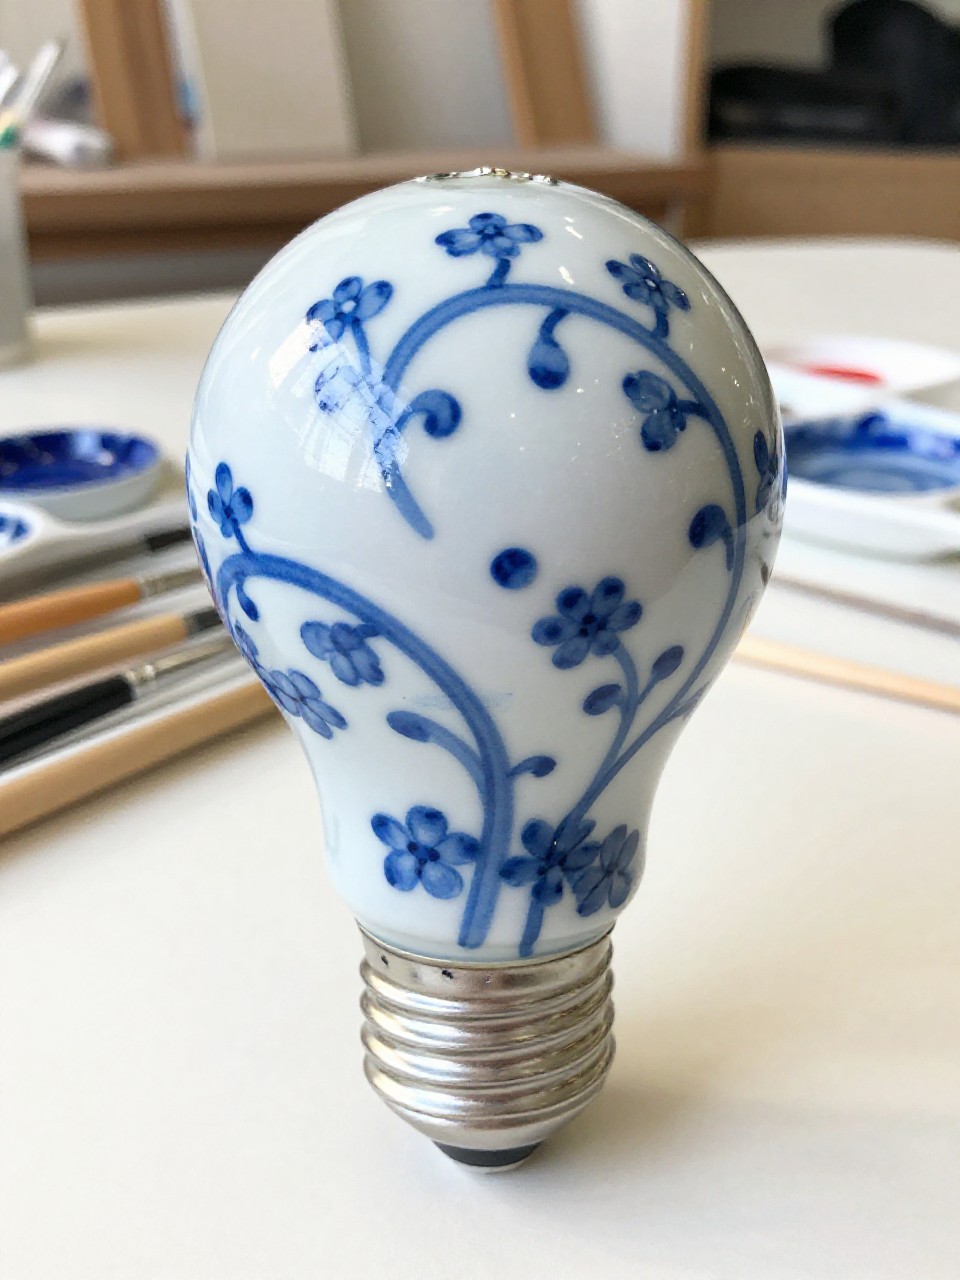
This bulb looks like classic blue-and-white porcelain, with delicate painted vines and small flowers that curl around the glass. It’s a peaceful, slow project that feels fancy even with simple brushwork. Great for anyone who likes neat patterns without needing advanced skills.
Materials Needed:
- Clear light bulb
- Acrylic paint (white and cobalt blue)
- Paintbrushes in multiple sizes
- Palette or paint tray
- Fine liner brush
- Optional matte sealer
Steps to Make:
- Clean the bulb and paint the glass white as a base coat.
- Lightly sketch a flowing vine that wraps around the bulb in an “S” curve.
- Paint the vine and leaves with blue, keeping brush strokes thin and layered.
- Add tiny flowers and dot details, varying the blue shades for depth.
- Dry completely and seal with matte finish for a ceramic-like look.
7. Cute Penguin Bulb Character
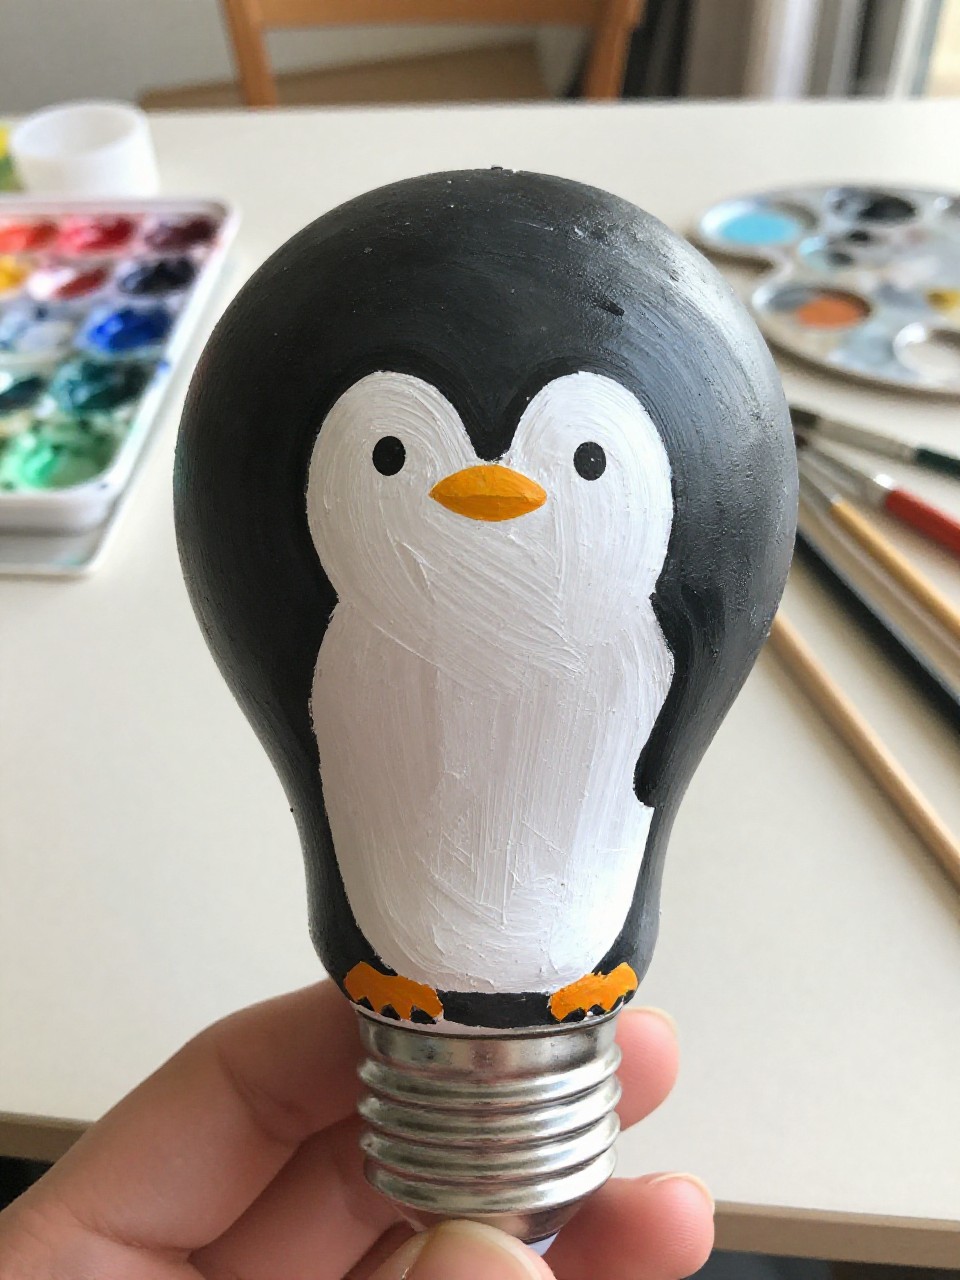
This bulb becomes a round little penguin with a black “coat,” white belly, and tiny orange beak and feet painted near the bottom curve. It’s fun because it’s basically painting simple ovals and triangles. Beginners can make a whole set of penguins for winter décor.
Materials Needed:
- Clear light bulb
- Acrylic paint
- Paintbrushes in multiple sizes
- Palette or paint tray
- Pencil (optional)
- Optional sealer
Steps to Make:
- Clean the bulb and decide where the penguin face will sit near the top.
- Paint the back and sides black, leaving a white belly area on the front.
- Add the beak and small feet shapes so they sit naturally on the lower curve.
- Paint eyes and tiny blush dots, then add a scarf or earmuffs if you want.
- Let dry, seal, and display with other painted bulbs like a mini “penguin family.”
8. Mini Mandala Pattern Bulb
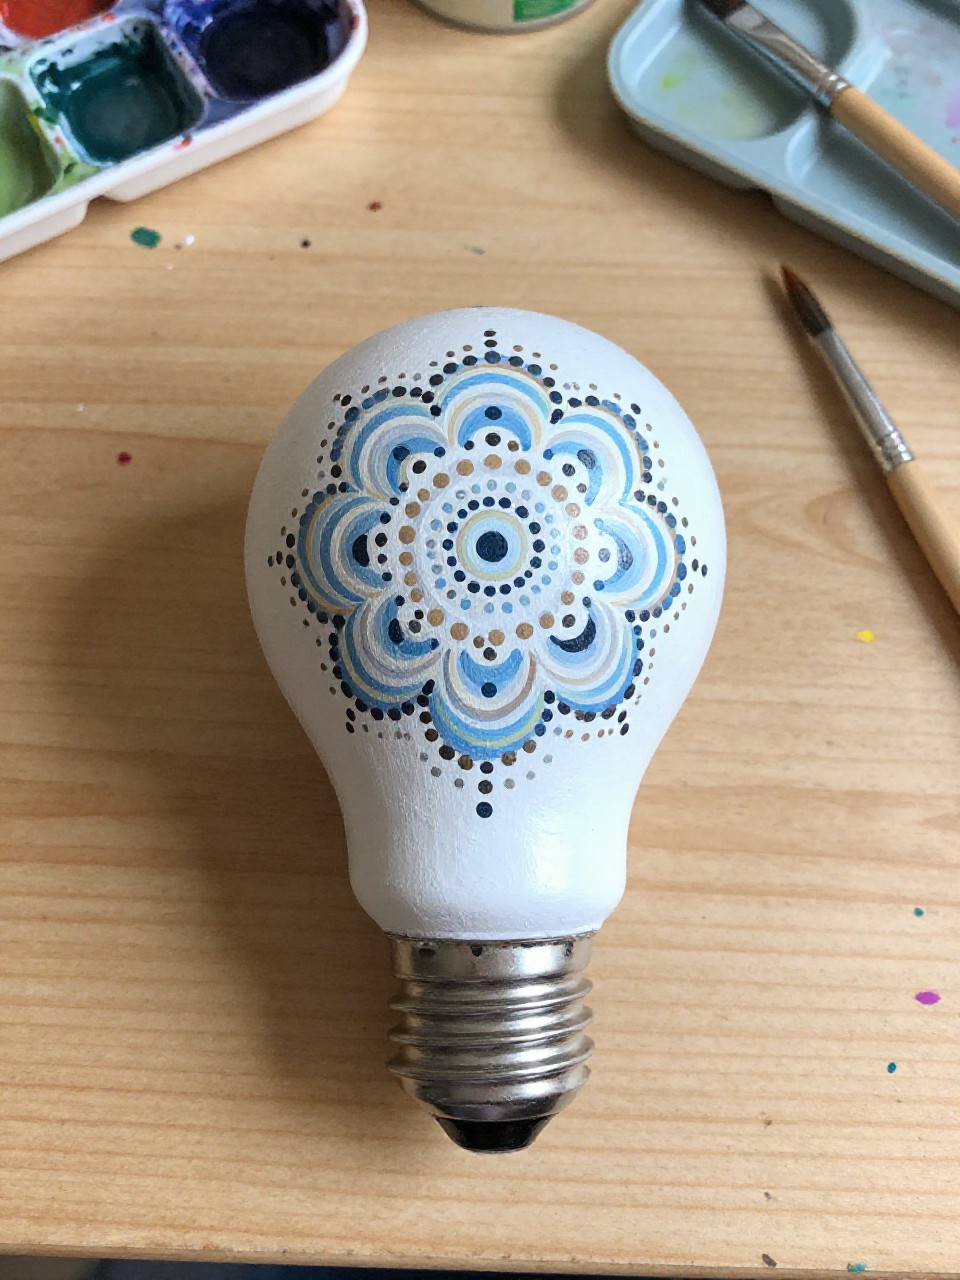
This bulb is covered in a calm mandala design made from dots and petal shapes that spread around the center. It’s soothing because you can repeat the same small motions and watch the pattern grow. It’s ideal for beginners who like slow, mindful painting.
Materials Needed:
- Clear light bulb
- Acrylic paint
- Paintbrushes in multiple sizes
- Palette or paint tray
- Dotting tools or the end of a brush (optional)
- Optional clear varnish
Steps to Make:
- Clean the bulb and paint a solid base color like teal, black, or warm white.
- Mark a small center point on one side where your mandala will start.
- Dot rings of color outward, rotating the bulb so the pattern stays balanced.
- Add tiny petal shapes and extra dots to fill gaps, following the curve of the glass.
- Dry fully and seal so the raised dots and layers stay protected.
9. Strawberry Patch Bulb
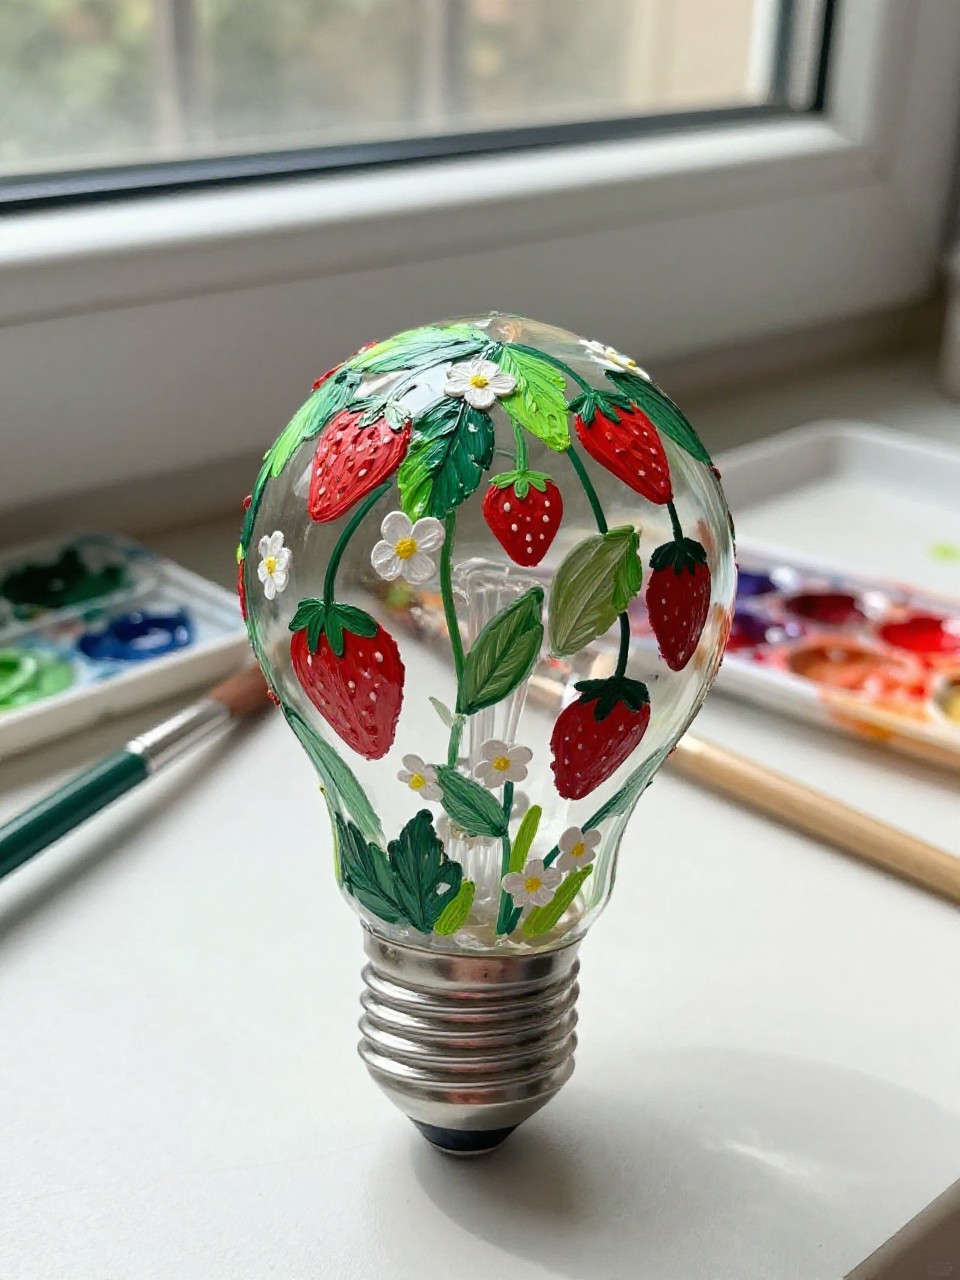
This bulb looks like a tiny strawberry field, with red strawberries, green leaves, and small white blossoms wrapping around the glass. It’s cheerful and doesn’t take long, so it’s perfect for a quick creative break. Beginners can keep strawberries simple with heart-like shapes.
Materials Needed:
- Clear light bulb
- Acrylic paint (red, green, white, yellow)
- Paintbrushes in multiple sizes
- Palette or paint tray
- Fine brush or toothpick (for seeds)
- Optional sealer
Steps to Make:
- Clean the bulb and paint a light background, like pale pink or cream.
- Paint several red strawberry shapes around the bulb, spacing them evenly.
- Add green leafy tops that follow the strawberry curve and the bulb’s roundness.
- Dot tiny yellow seeds and add a few white flowers in the empty spaces.
- Dry and seal, then style it in a small fruit bowl or hang as kitchen décor.
10. Black Cat Silhouette Moon Bulb

This bulb has a soft moon glow background with a simple black cat silhouette sitting along the lower edge, like it’s watching the night. It’s great if you want something striking without tons of details. Beginners can focus on clean shapes and gentle blending.
Materials Needed:
- Clear light bulb
- Acrylic paint (black, white, pale yellow, blue)
- Paintbrushes in multiple sizes
- Palette or paint tray
- Small sponge (optional)
- Optional matte varnish
Steps to Make:
- Clean the bulb and paint a pale moon-like glow area (white mixed with a little yellow).
- Blend a soft blue-gray night shade around the edges to create contrast.
- Paint a black cat silhouette near the bottom curve, keeping the outline simple.
- Add small stars or a thin crescent detail with a fine brush.
- Let it dry, seal with matte finish, and display on a shelf for a cozy vibe.
11. Tropical Palm Leaves Bulb
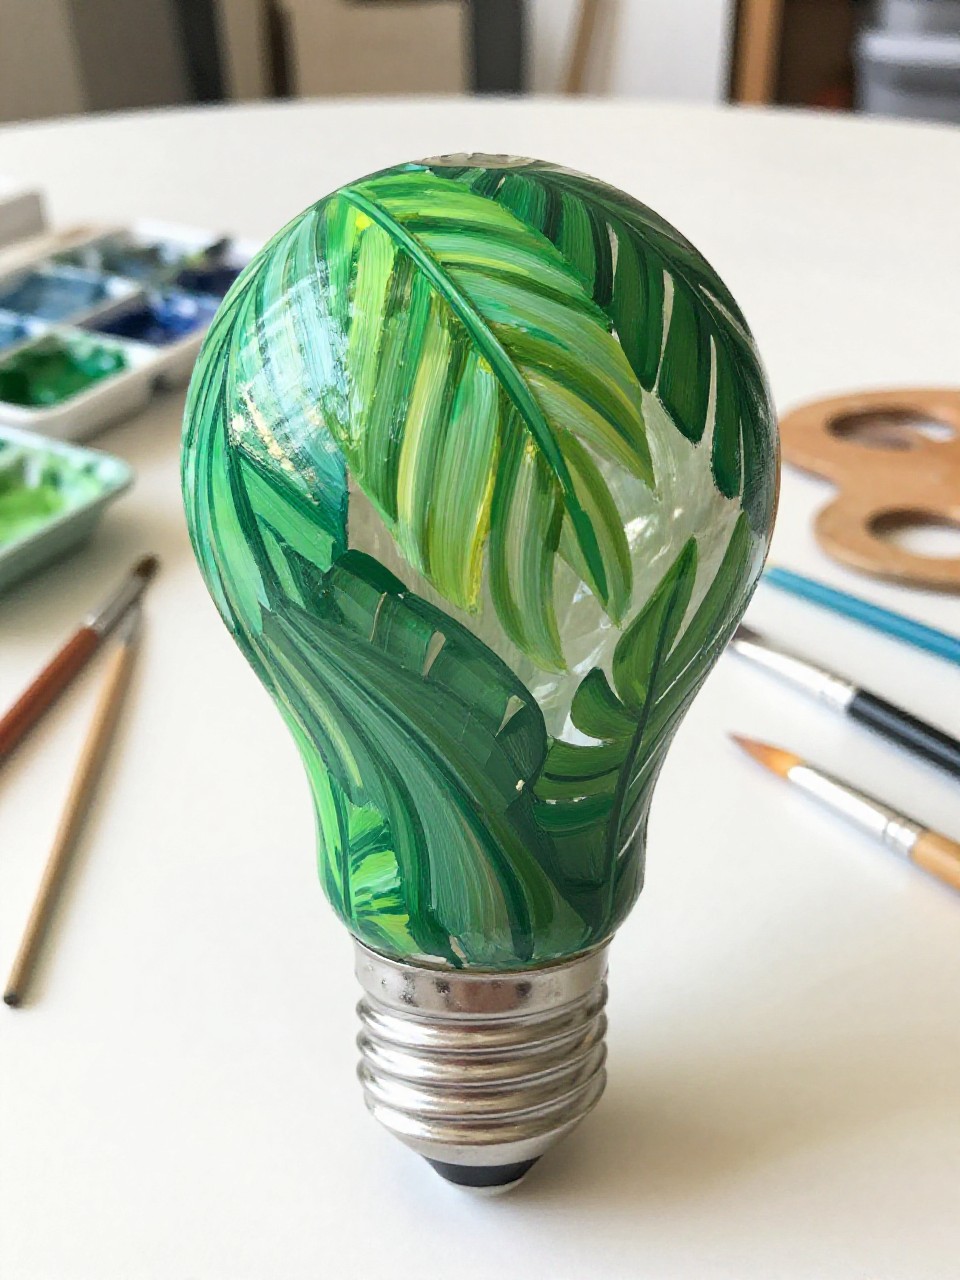
This bulb looks fresh and modern with layered green palm leaves that overlap and wrap around the glass. It’s satisfying because you can build leaves in simple strokes and add lighter highlights on top. Great for brightening up a desk, bathroom shelf, or summer party décor.
Materials Needed:
- Clear light bulb
- Acrylic paint (greens, white)
- Paintbrushes in multiple sizes
- Palette or paint tray
- Water jar + paper towel
- Optional clear sealer
Steps to Make:
- Clean the bulb and paint a light base color like white or pale aqua.
- Brush in large palm leaf shapes that curve with the bulb, starting in darker green.
- Layer lighter green leaf strokes on top to show overlapping fronds.
- Add thin white highlights and a few shadow lines for depth.
- Dry completely, seal, and group several bulbs together for a tropical look.
12. Color-Blocked Modern Stripes Bulb
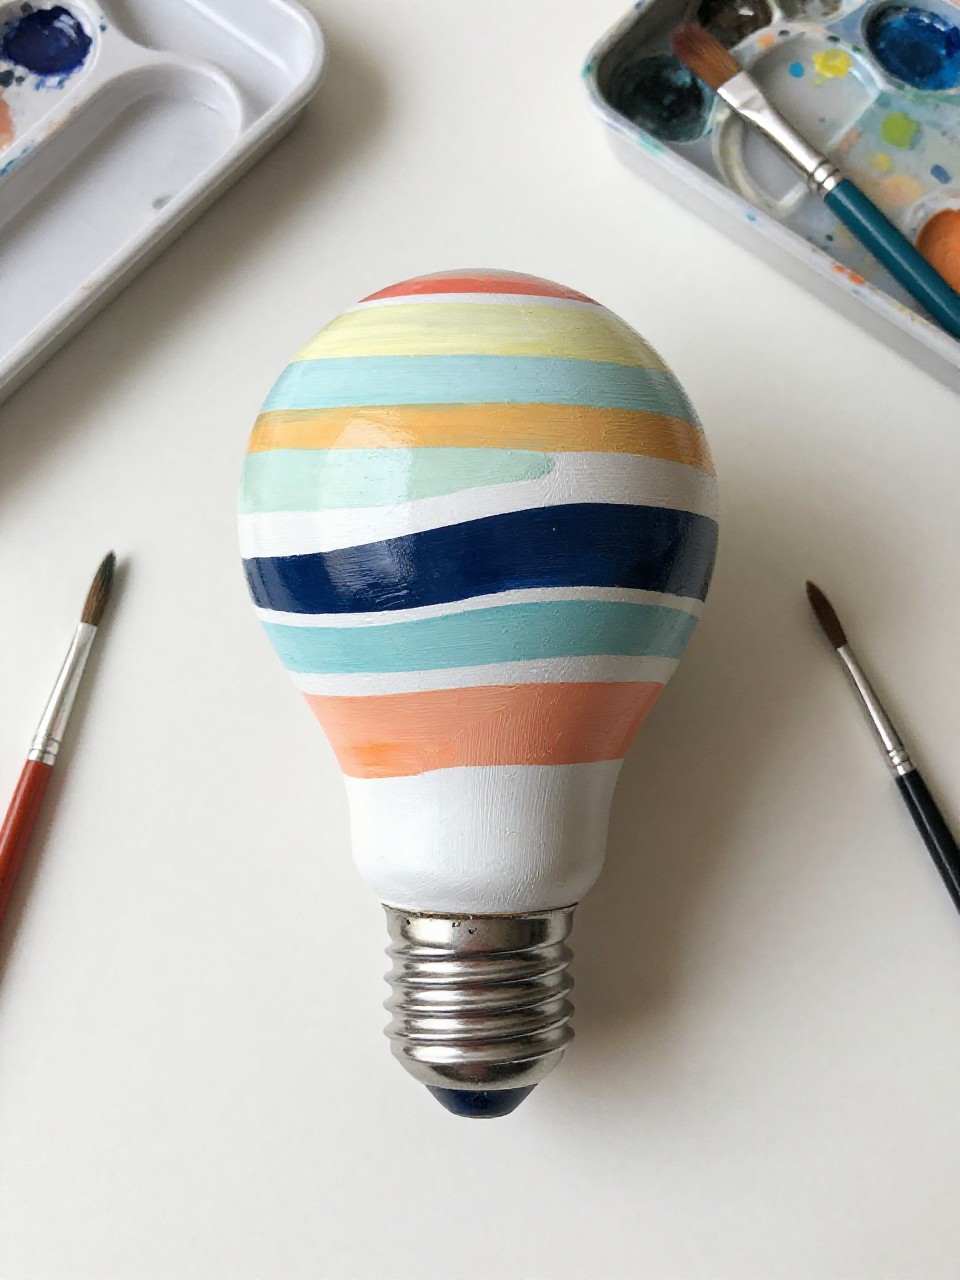
This bulb has clean, modern color blocks—soft stripes and angled sections that wrap neatly around the glass. It’s a low-stress project because you don’t need to draw anything complicated, and it still looks stylish. Perfect for matching your room colors or making a set.
Materials Needed:
- Clear light bulb
- Acrylic paint
- Paintbrushes in multiple sizes
- Palette or paint tray
- Painter’s tape (thin strips)
- Optional glossy varnish
Steps to Make:
- Clean the bulb and plan 3–4 colors that look good together.
- Use painter’s tape to mark stripe edges that follow the bulb’s curve.
- Paint each section in thin coats, letting layers dry before removing tape.
- Touch up edges with a small brush and add a tiny gold line if you like.
- Dry fully and seal for a smooth, durable finish.
13. Ladybug Garden Bulb
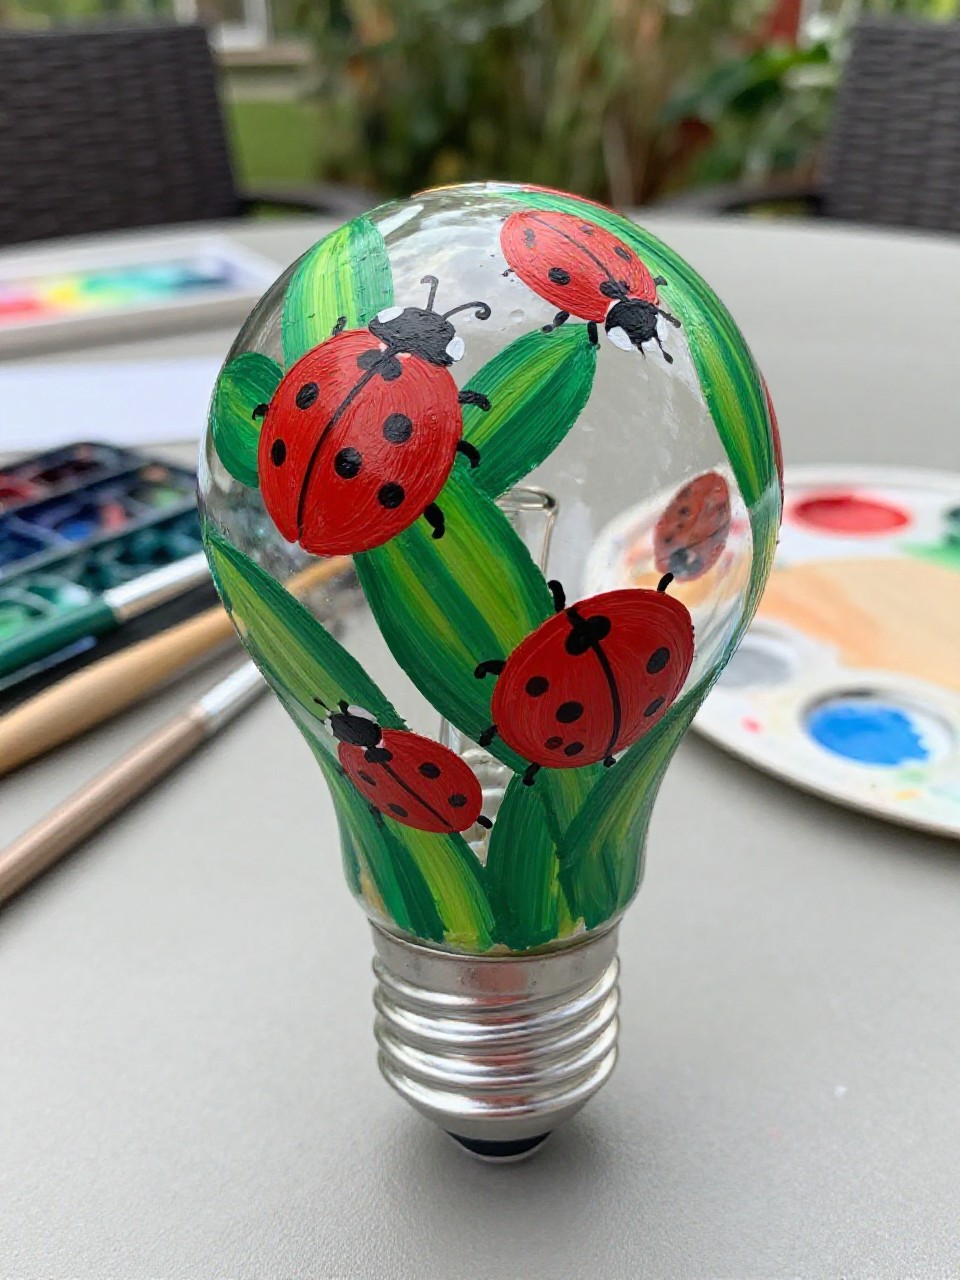
This bulb looks like a tiny garden scene with red ladybugs crawling over green leaves and little dotted trails. It’s fun because you can paint ladybugs with just a few simple shapes, then add extra leaves to fill space. Beginners usually find it easy and cute right away.
Materials Needed:
- Clear light bulb
- Acrylic paint (red, black, green, white)
- Paintbrushes in multiple sizes
- Palette or paint tray
- Dotting tool or toothpick
- Optional sealer
Steps to Make:
- Clean the bulb and paint a pale green or sky-blue background.
- Add a few leafy shapes that wrap around the bulb to create a “garden base.”
- Paint red ladybug ovals, then add black heads and a center wing line.
- Dot on black spots and tiny white highlights to make them pop.
- Let dry, seal, and display with small plants for a garden-themed corner.
14. Gingerbread House Bulb
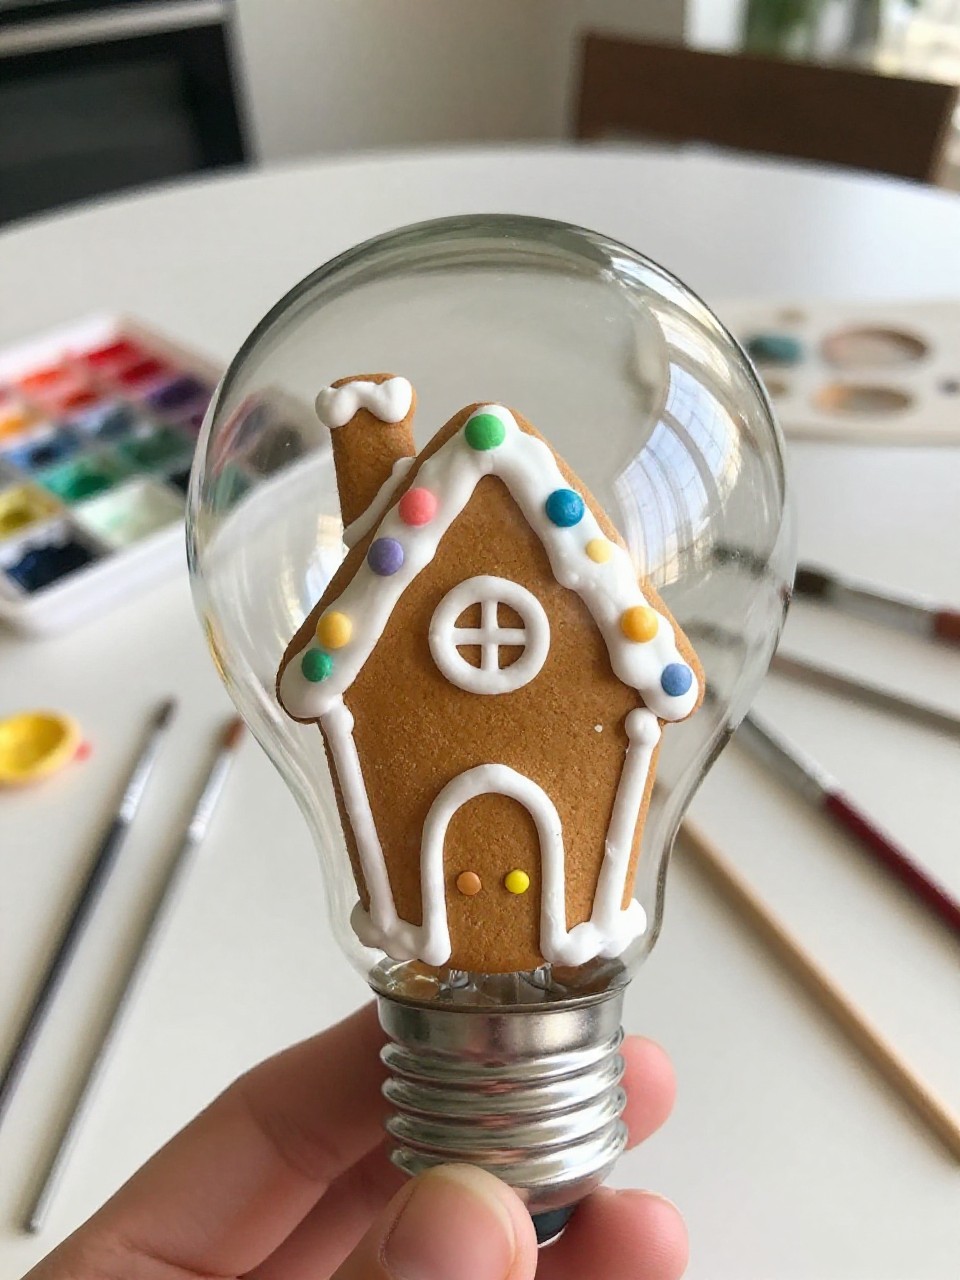
This bulb turns into a gingerbread house look, with “cookie” brown paint, white icing lines, and candy dots that curve around the glass. It’s cozy and playful, and it’s a great holiday craft night project. Beginners can keep the icing lines loose—imperfections make it look homemade.
Materials Needed:
- Clear light bulb
- Acrylic paint (brown, white, red, green)
- Paintbrushes in multiple sizes
- Palette or paint tray
- White paint pen (optional for icing)
- Optional matte sealer
Steps to Make:
- Clean the bulb and paint the glass a warm gingerbread brown in two coats.
- Paint simple “roof” and window shapes that follow the bulb’s round form.
- Add white icing lines around edges and across the bulb like piped frosting.
- Dot on candy colors and add little sprinkle marks for extra charm.
- Dry fully, seal, and hang with twine for a sweet ornament look.
15. Ocean Waves and Seafoam Bulb

This bulb looks like rolling ocean waves, with layered blues and white seafoam curling around the glass. It’s calming to paint because you can build the wave shapes slowly and let brush strokes show. It’s also a beautiful piece to display in a bathroom or near a sunny window.
Materials Needed:
- Clear light bulb
- Acrylic paint (light blue, dark blue, white)
- Paintbrushes in multiple sizes
- Palette or paint tray
- Small sponge (optional for seafoam)
- Optional glossy varnish
Steps to Make:
- Clean the bulb and paint a light blue base so the ocean colors stay bright.
- Brush in darker blue wave bands that curve around the bulb like rolling water.
- Layer mid-blue and white along the wave edges to create movement.
- Dab seafoam with a sponge or stiff brush, leaving textured paint ridges.
- Dry completely and add a glossy coat to give the waves a wet, shiny look.