


Table of Contents Show
Girls’ night crafts should feel cute, relaxed, and worth making. The best ideas are easy to set up, fun to personalize, and pretty enough to keep, wear, gift, or use as decor. You want projects that feel social without being too complicated, so everyone can chat, snack, laugh, and still leave with something lovely.
These DIY girls’ night craft ideas are simple but not boring. They are perfect for cozy sleepovers, birthday nights, bridal party hangouts, dorm nights, weekend get-togethers, or a cute craft table with friends.
From charm bracelets and painted candles to custom tote bags and mini mirror frames, each idea feels stylish, creative, and easy to make together.
1. Charm Bracelet Bar
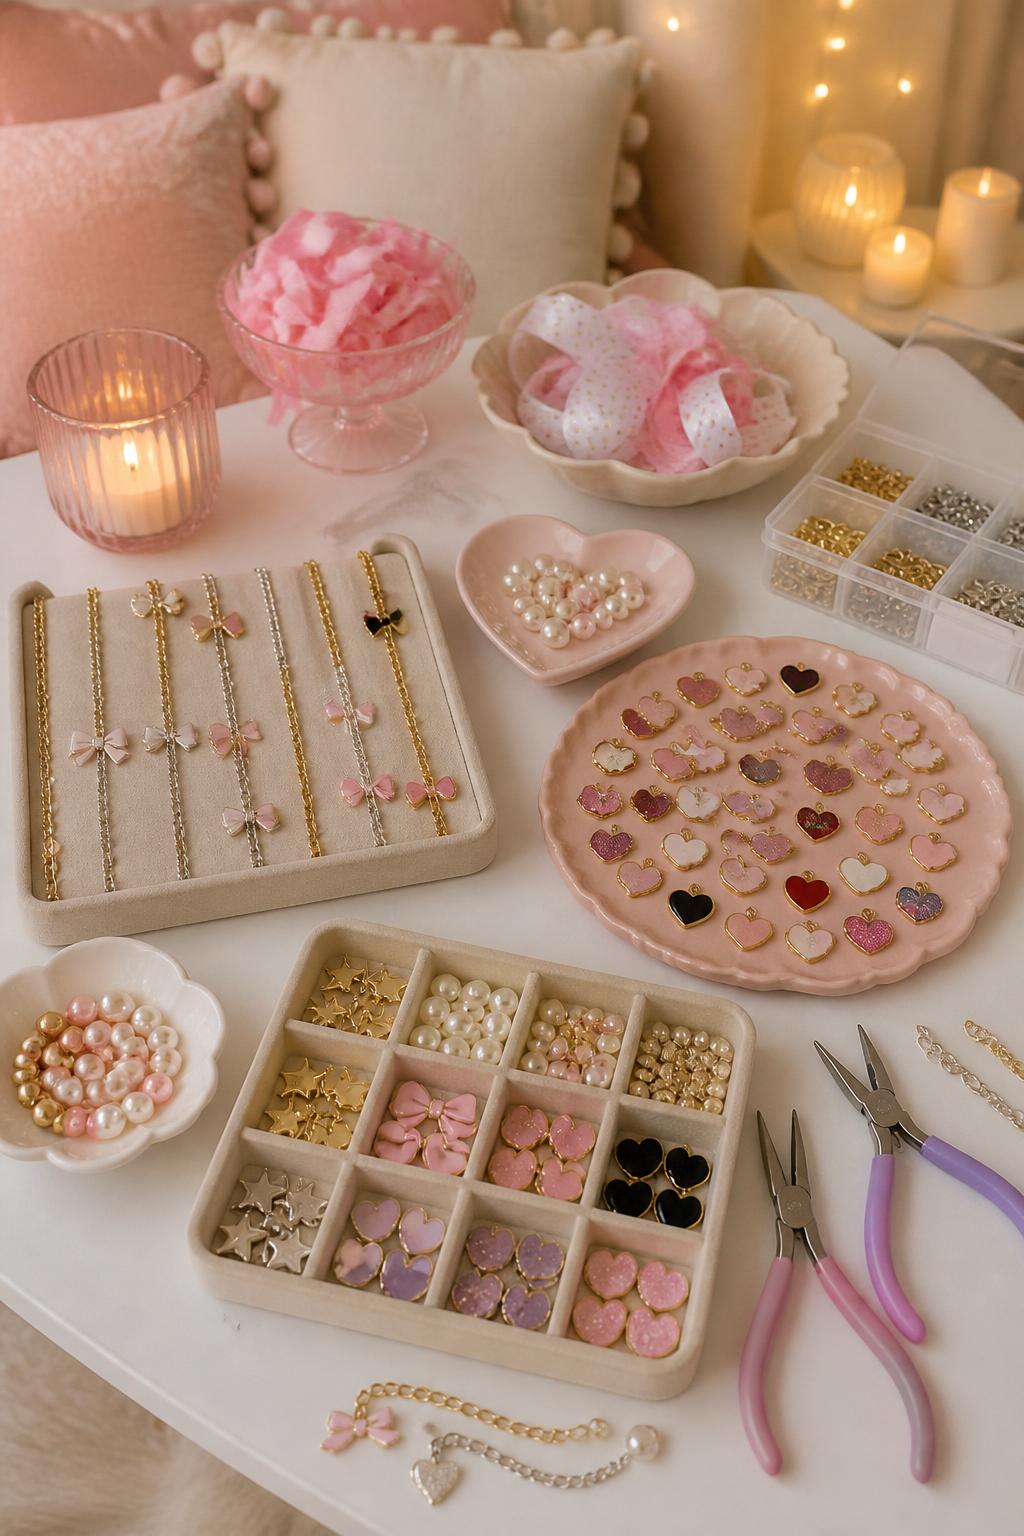
A charm bracelet bar is perfect for girls’ night because everyone can create something that matches their own style. You can keep it sweet with hearts and pearls, bold with colorful charms, or soft and dainty with stars, bows, and tiny initials.
Materials Needed:
For People Who Love to Make Things ✂️
- Bracelet chains or stretch cord
- Assorted charms
- Jump rings
- Beads
- Jewelry pliers
- Small bowls or trays
- Clasps, if needed
Steps To Make:
- Set out charms, beads, chains, and tools in small bowls.
- Choose a bracelet base.
- Pick charms that match your style or theme.
- Attach charms with jump rings using jewelry pliers.
- Add beads if using stretch cord.
- Check the fit before closing the bracelet.
- Wear it or place it in a small gift bag to take home.
2. Painted Taper Candles

Painted taper candles feel fancy but are surprisingly easy to make. They are great for room decor, dinner tables, birthday setups, or cute shelf styling after the night is over.
Materials Needed:
- Plain taper candles
- Acrylic paint or candle-safe paint
- Fine paintbrushes
- Paper towels
- Small cups of water
- Painter’s tape, optional
- Tray for drying
Steps To Make:
- Wipe the candles clean before painting.
- Choose small designs like flowers, bows, cherries, dots, or stars.
- Paint in thin layers so the design stays neat.
- Let one color dry before adding another.
- Add tiny details with a fine brush.
- Place candles on a tray to dry.
- Use them as decor or wrap them as a handmade gift.
3. Custom Canvas Tote Bags
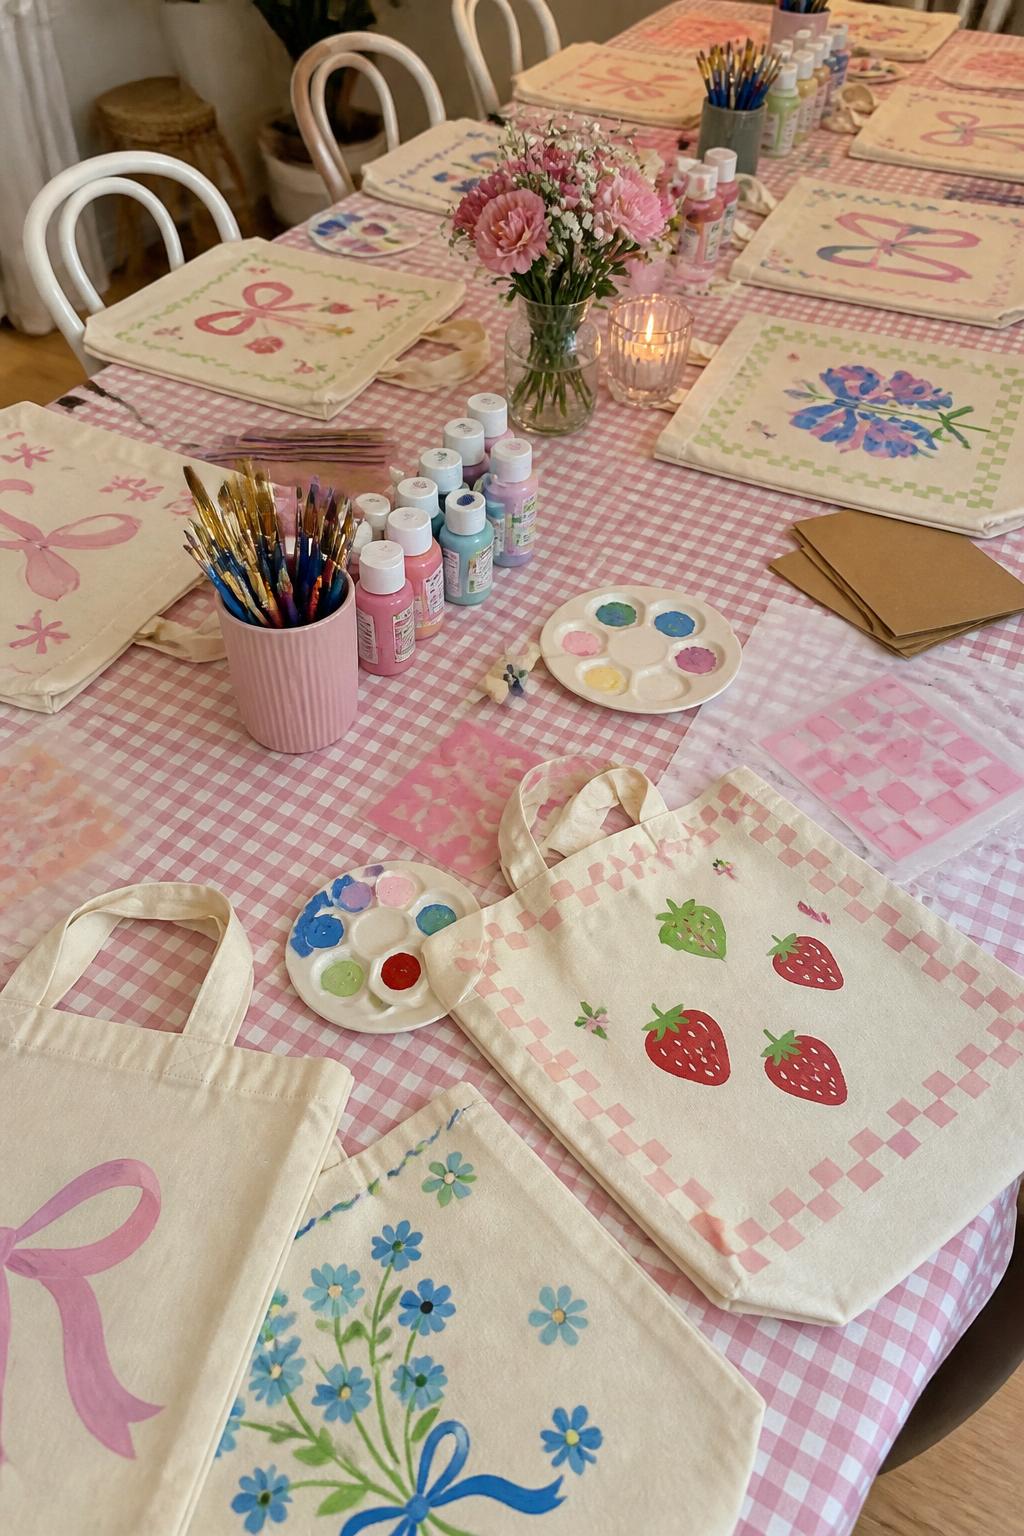
Custom tote bags are a fun group craft because everyone can make something useful. They work well for shopping, books, sleepover items, beach days, or everyday errands.
Materials Needed:
- Plain canvas tote bags
- Fabric paint
- Paintbrushes
- Stencils, optional
- Painter’s tape
- Cardboard inserts
- Pencil
- Paper plates for paint
Steps To Make:
- Place cardboard inside each tote to stop paint from bleeding through.
- Sketch a simple design lightly with pencil.
- Use painter’s tape for stripes or borders.
- Paint flowers, bows, fruit, names, or simple patterns.
- Let each color dry before adding small details.
- Leave the tote flat until fully dry.
- Remove the cardboard insert before using.
4. Mini Clay Trinket Dishes
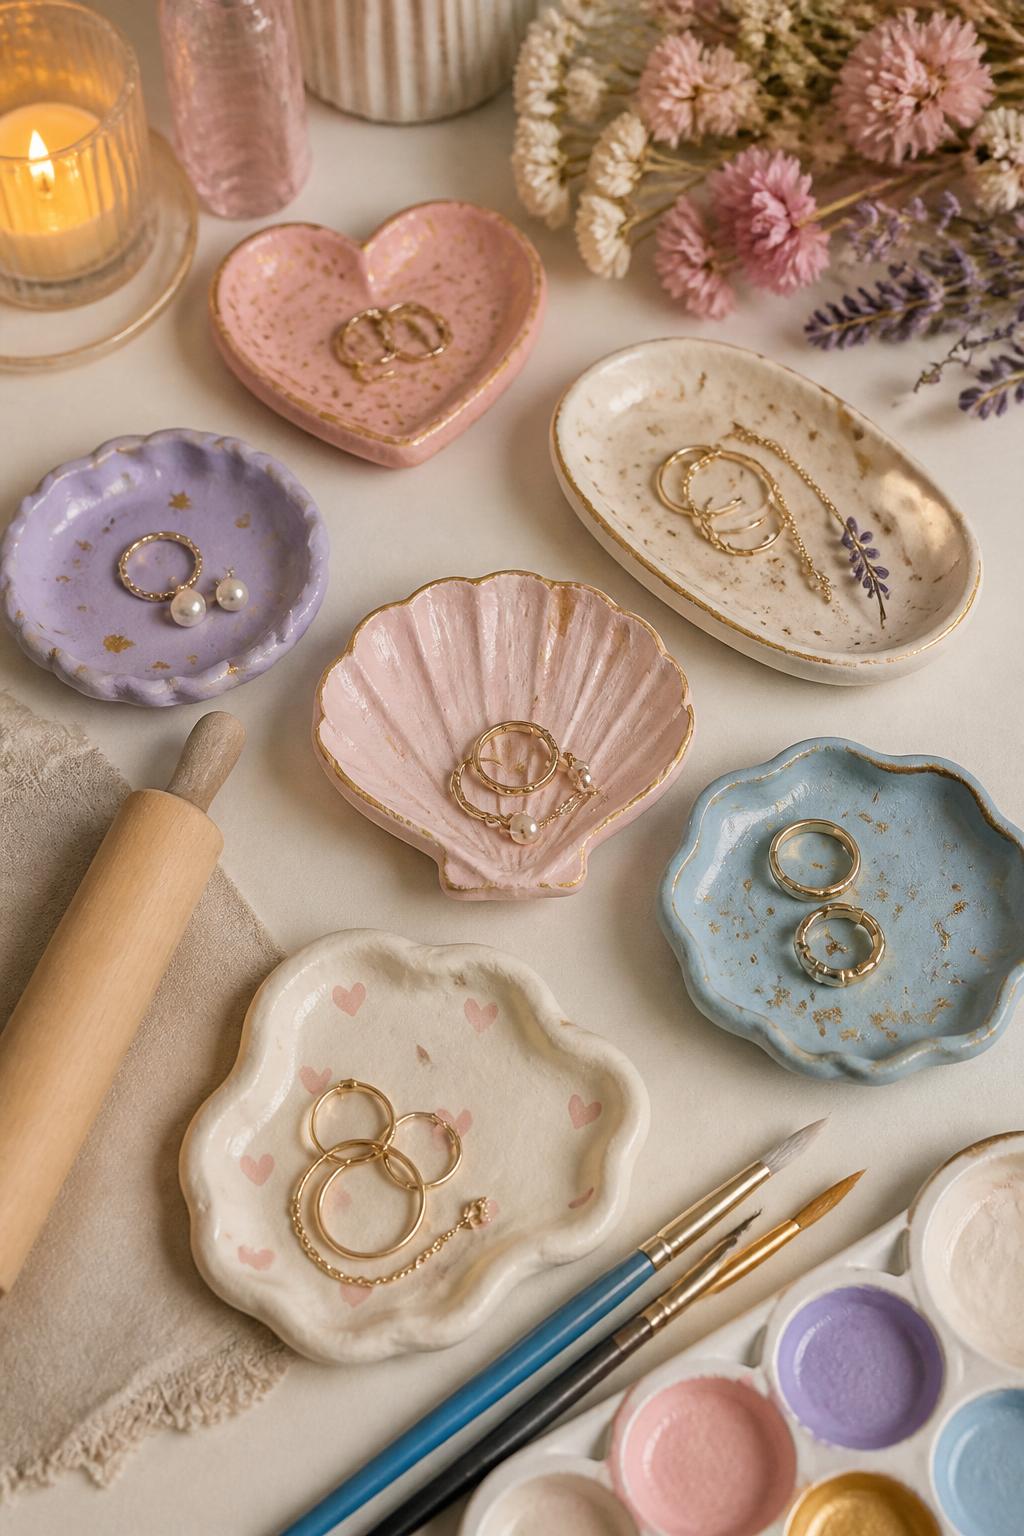
Clay trinket dishes are cute, practical, and easy to personalize. They can hold rings, earrings, lip balm, hair clips, or small desk items, making them perfect take-home crafts.
Materials Needed:
- Air-dry clay
- Rolling pin or smooth bottle
- Small bowl for shaping
- Plastic knife
- Acrylic paint
- Paintbrushes
- Clear sealer, optional
Steps To Make:
- Roll out a small piece of air-dry clay.
- Cut it into a heart, oval, shell, or wavy circle.
- Place it gently inside a small bowl to curve the edges.
- Smooth the edges with damp fingers.
- Let the clay dry according to package directions.
- Paint the dish with colors and tiny designs.
- Seal it once dry if desired.
5. DIY Lip Balm Decorating Station
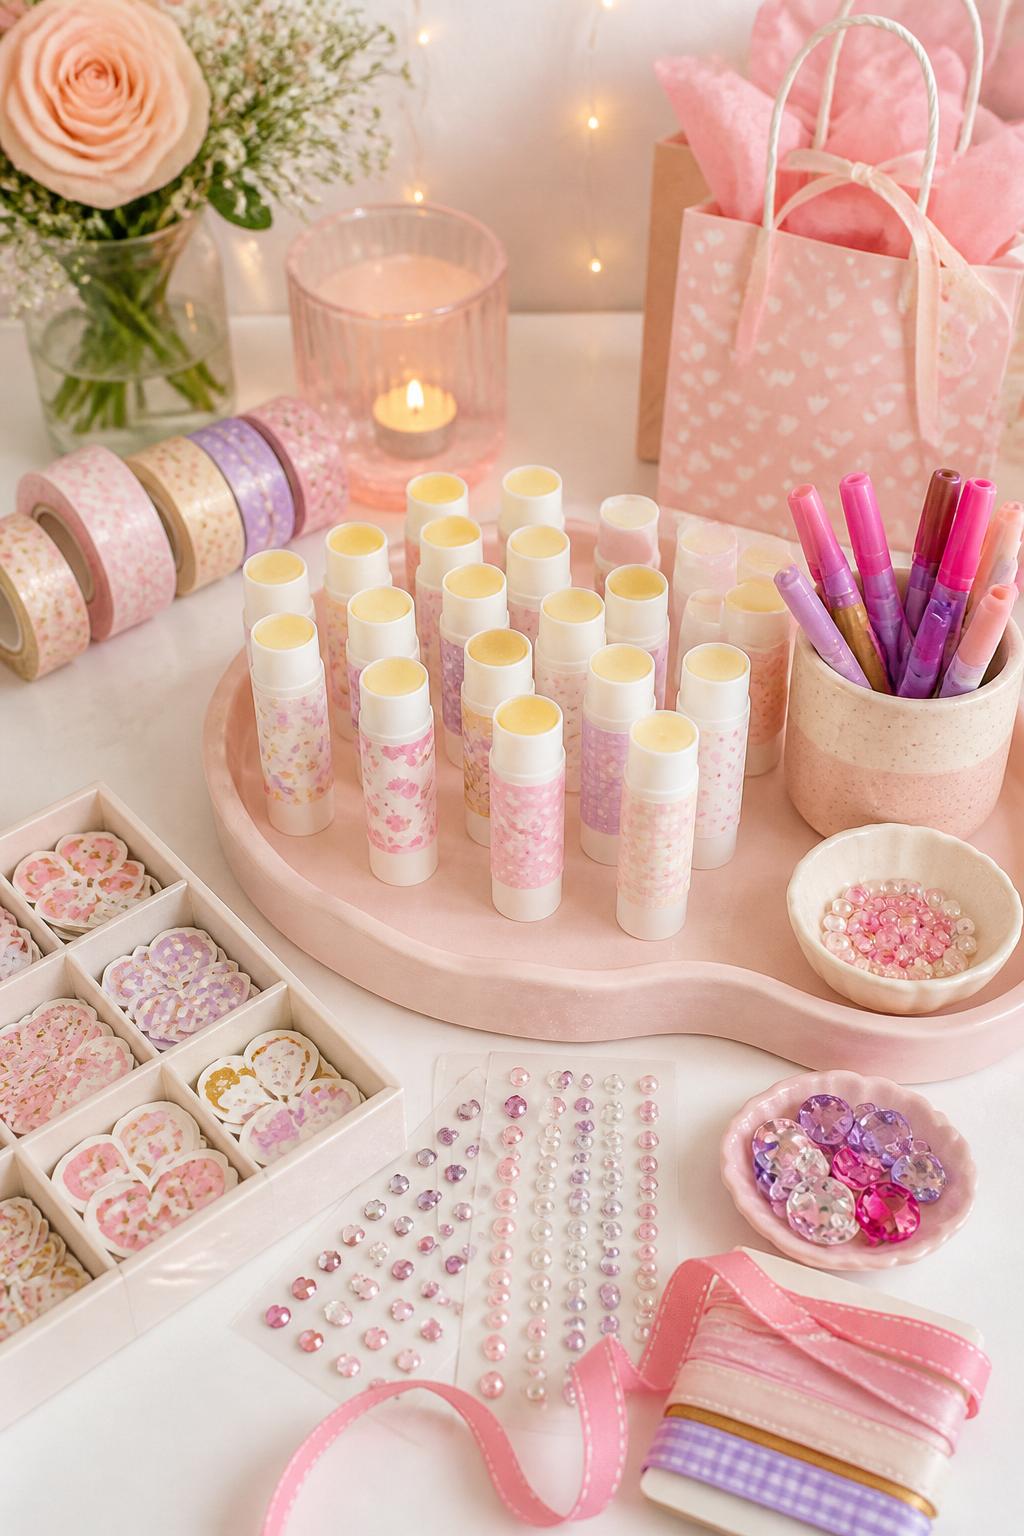
This is a simple craft that still feels fun and useful. Instead of making lip balm from scratch, decorate plain tubes with stickers, labels, washi tape, and ribbon for a cute custom beauty favor.
Materials Needed:
- Plain lip balm tubes
- Blank sticker labels
- Washi tape
- Small stickers
- Markers
- Ribbon
- Small gift bags
- Clear tape, optional
Steps To Make:
- Remove any unwanted outer packaging from the lip balm.
- Wrap a blank label or washi tape around the tube.
- Add stickers, hearts, stars, or tiny doodles.
- Tie a small ribbon around the cap if desired.
- Place finished lip balms in small gift bags.
- Add a matching sticker to each bag.
- Let everyone take one home.
6. Beaded Phone Charms
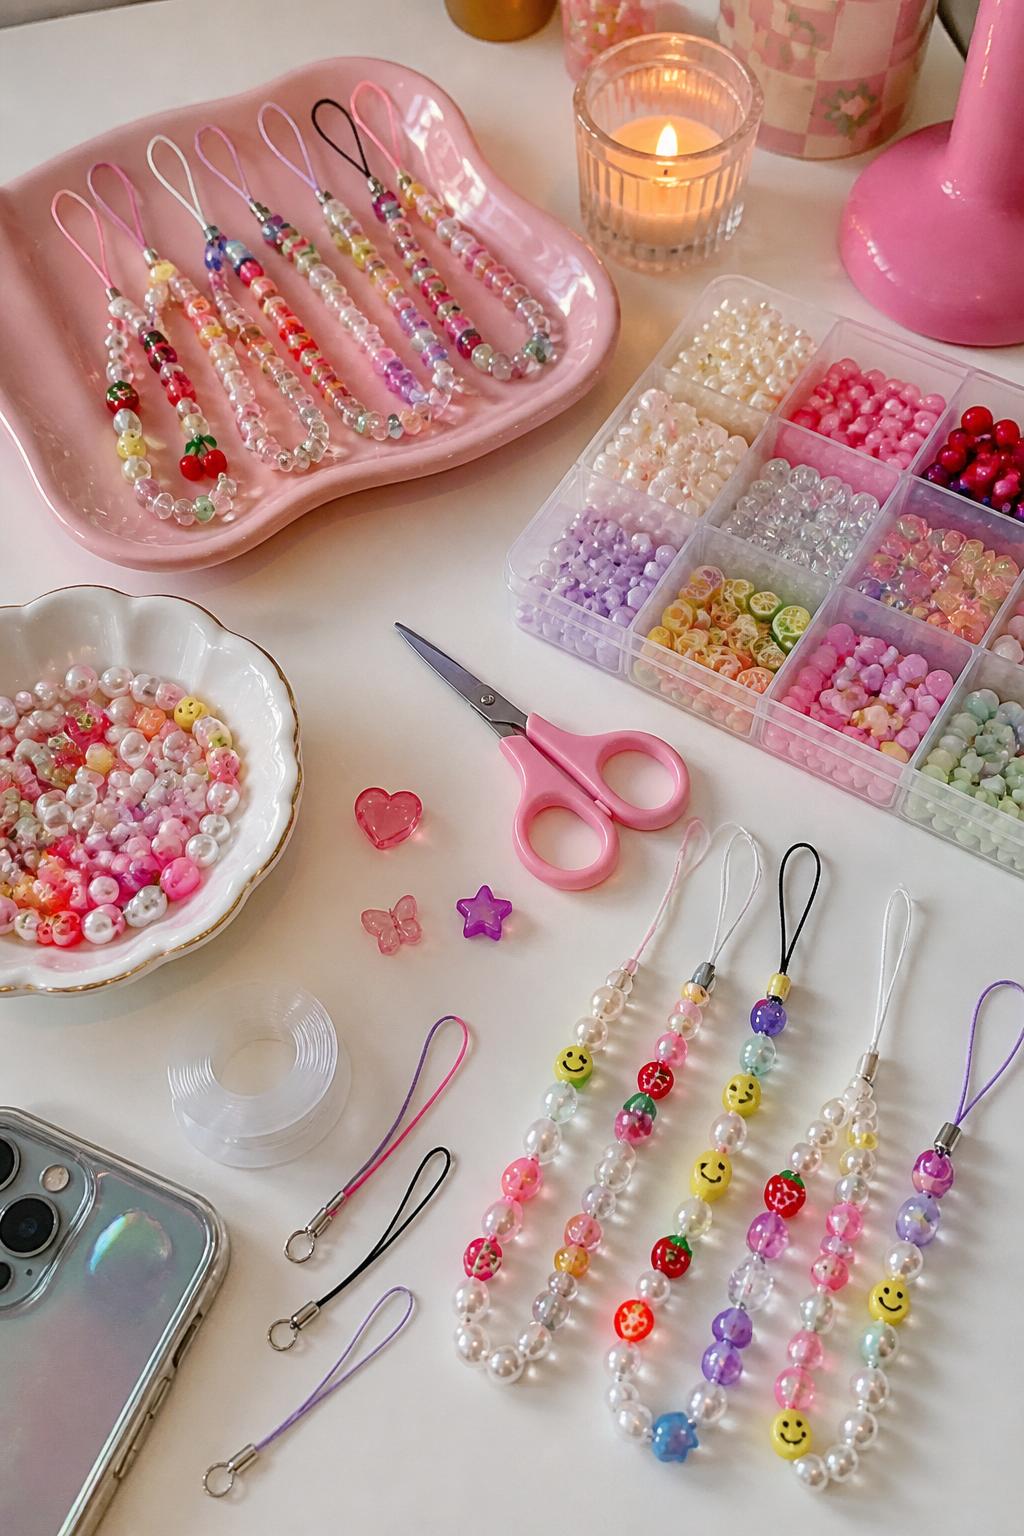
Beaded phone charms are cute, fast, and very easy to personalize. They are perfect for friends who want matching accessories without making them exactly the same.
Materials Needed:
- Beads in different styles
- Letter beads
- Phone charm loops
- Nylon cord or stretch cord
- Scissors
- Jewelry glue or clear nail polish
- Small charms, optional
Steps To Make:
- Cut a piece of cord for each charm.
- Tie one end to the phone charm loop.
- Add beads in your chosen pattern.
- Mix pearls, letters, hearts, stars, or fruit beads.
- Leave enough cord to tie a secure knot.
- Seal the knot with jewelry glue or clear nail polish.
- Let it dry before attaching it to a phone case.
7. Pressed Flower Bookmark Set
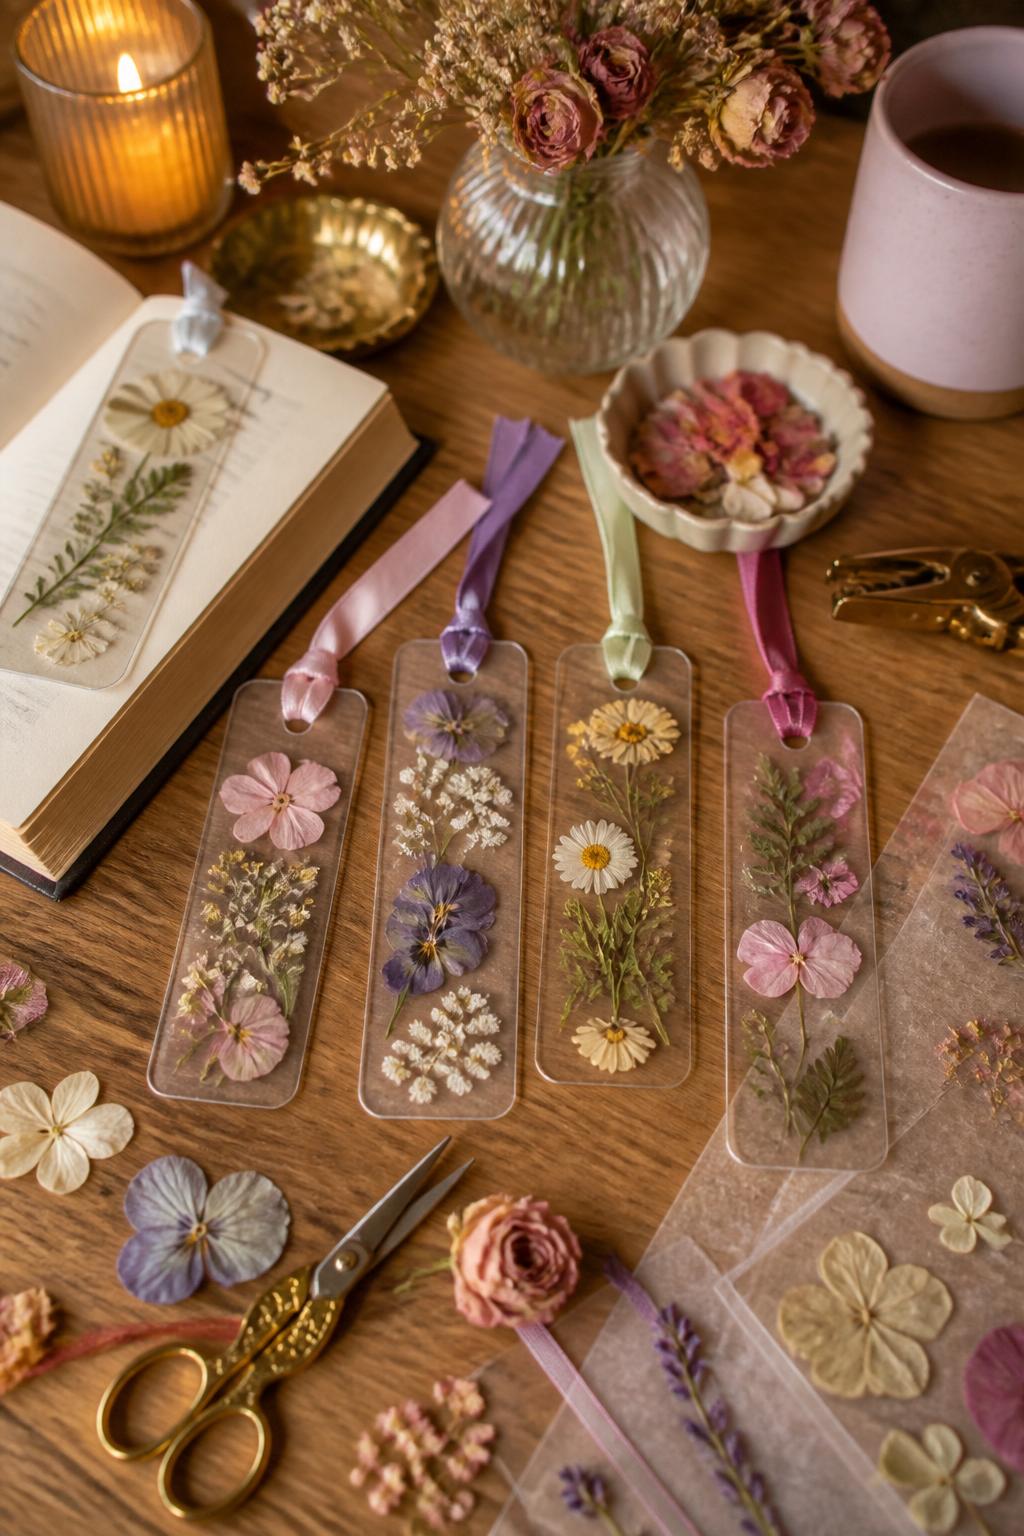
Pressed flower bookmarks are sweet, calm, and perfect for a cozy girls’ night. They also make lovely small gifts, especially for friends who love books, journaling, or pretty stationery.
Materials Needed:
- Pressed flowers and leaves
- Clear contact paper
- Cardstock, optional
- Hole punch
- Ribbon
- Scissors
- Small stickers, optional
Steps To Make:
- Cut bookmark shapes from contact paper.
- Peel one piece and place it sticky-side up.
- Arrange pressed flowers and leaves on top.
- Seal with another piece of contact paper.
- Trim the edges neatly.
- Punch a hole at the top.
- Tie ribbon through the hole as a tassel.
8. Decorated Compact Mirrors

Decorated compact mirrors feel very cute for a beauty-themed girls’ night. They are easy to make and look lovely in a purse, makeup bag, or vanity drawer.
Materials Needed:
- Plain compact mirrors
- Pearl stickers
- Rhinestones
- Tiny bows or charms
- Strong craft glue
- Tweezers
- Wax paper
- Small tray
Steps To Make:
- Place the compact mirror on wax paper.
- Plan your design before gluing.
- Add pearl stickers, rhinestones, or tiny charms around the top.
- Use tweezers for small pieces.
- Keep the mirror opening clear.
- Let the glue dry fully.
- Place the finished mirror in a small pouch or bag.
9. Friendship Candle Jars
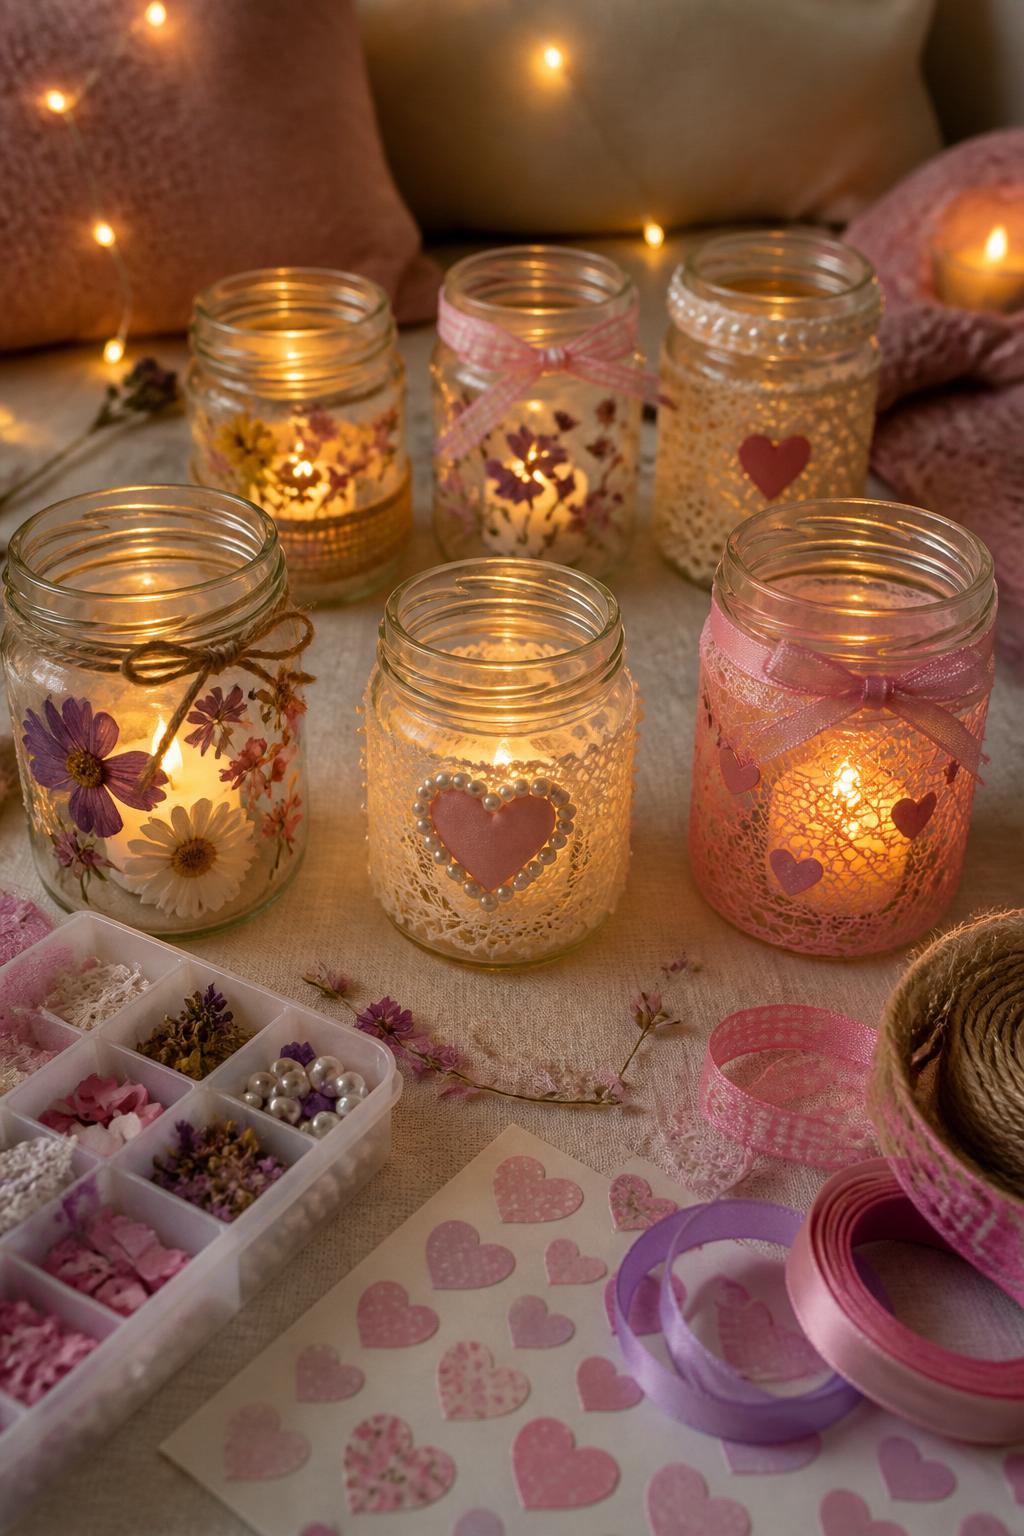
These candle jars are simple, pretty, and safe when made with battery tea lights. They work well as room decor, party favors, or matching keepsakes for friends.
Materials Needed:
- Small glass or plastic jars
- Battery tea lights
- Ribbon or lace
- Pressed flowers
- Heart stickers
- Twine
- Craft glue
- Scissors
Steps To Make:
- Clean and dry each jar.
- Wrap ribbon, lace, or twine around the jar.
- Glue the ends neatly in place.
- Add pressed flowers or heart stickers to the outside.
- Tie a small bow around the rim.
- Place a battery tea light inside.
- Display on a shelf, desk, or nightstand.
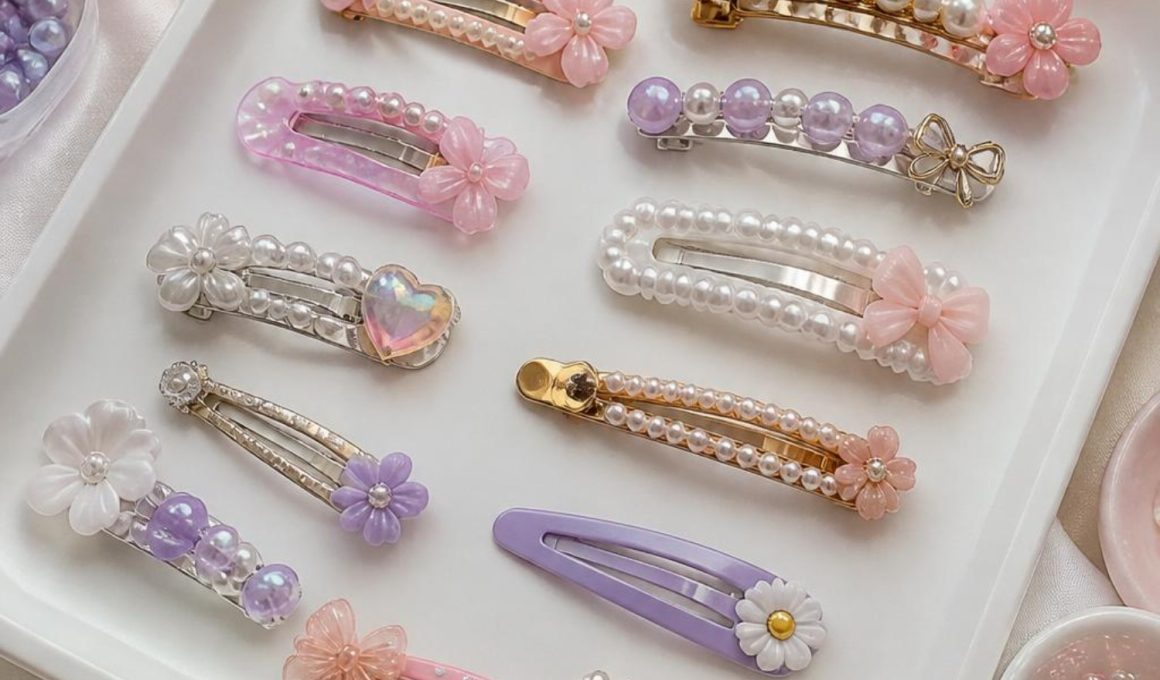
10. Custom Hair Clip Set
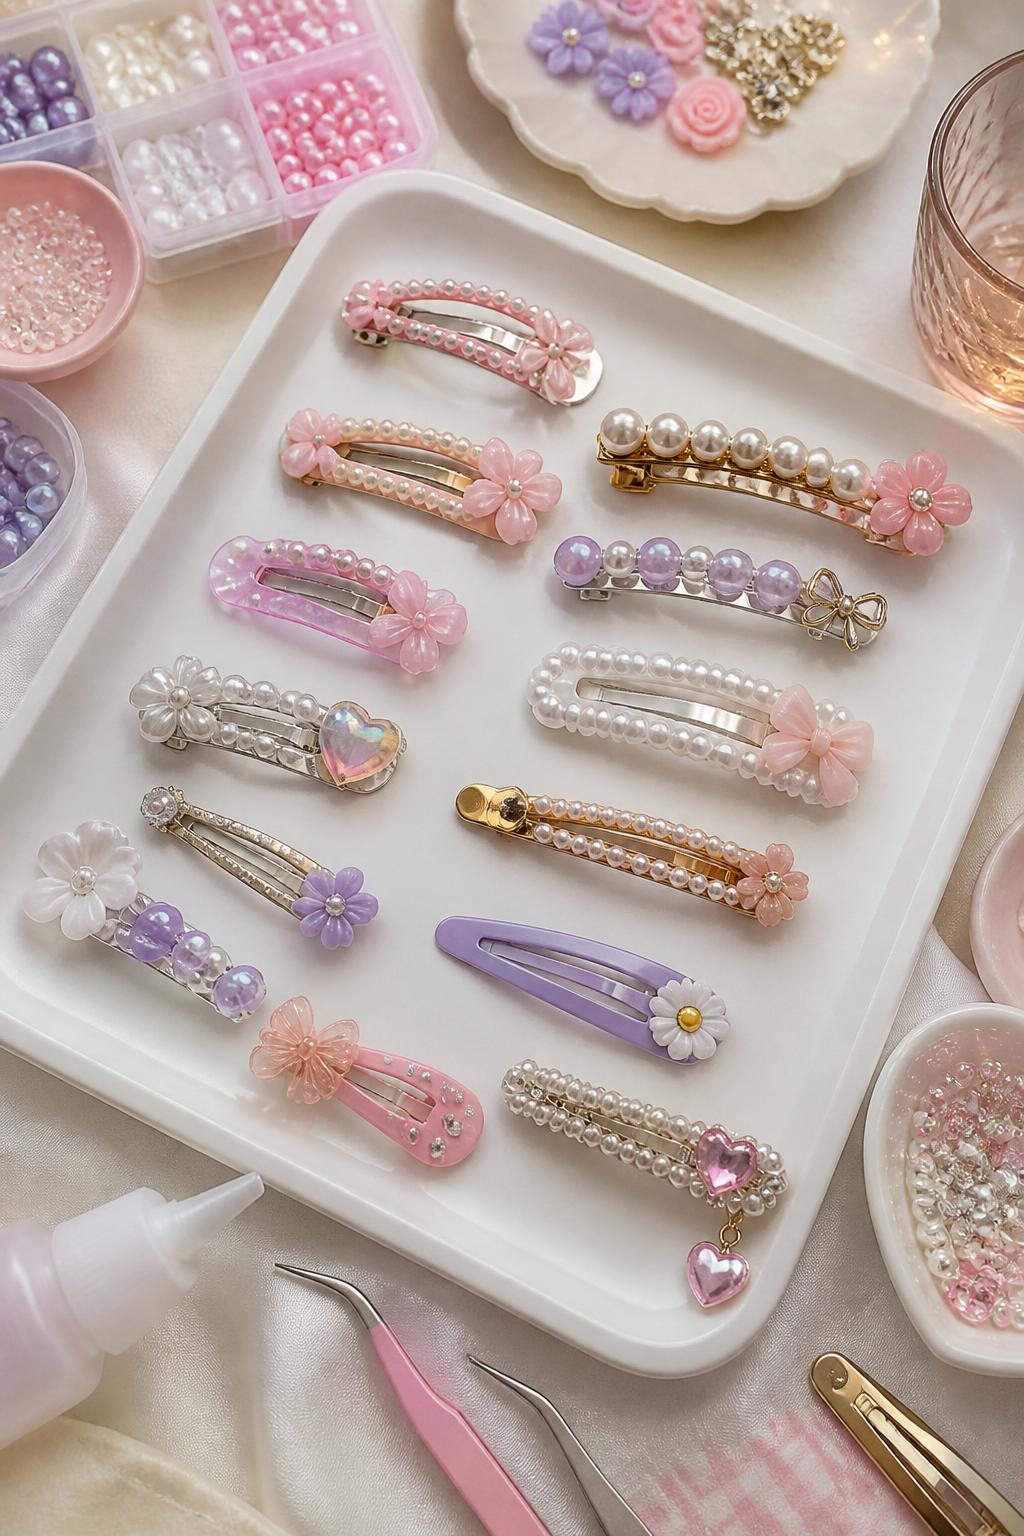
Custom hair clips are quick to make and easy to wear after craft night. Everyone can choose a different style, from soft and dainty to colorful and playful.
Materials Needed:
- Plain hair clips or barrettes
- Pearl beads
- Rhinestones
- Tiny bows
- Strong craft glue
- Tweezers
- Wax paper
- Small charms, optional
Steps To Make:
- Lay the clips on wax paper.
- Arrange beads, bows, and charms on each clip before gluing.
- Add small dots of glue to the clip.
- Press decorations into place with tweezers.
- Keep the underside clear so the clip still works.
- Let the glue dry fully.
- Wear or package the clips as a cute set.
11. Mini Mood Board Canvas
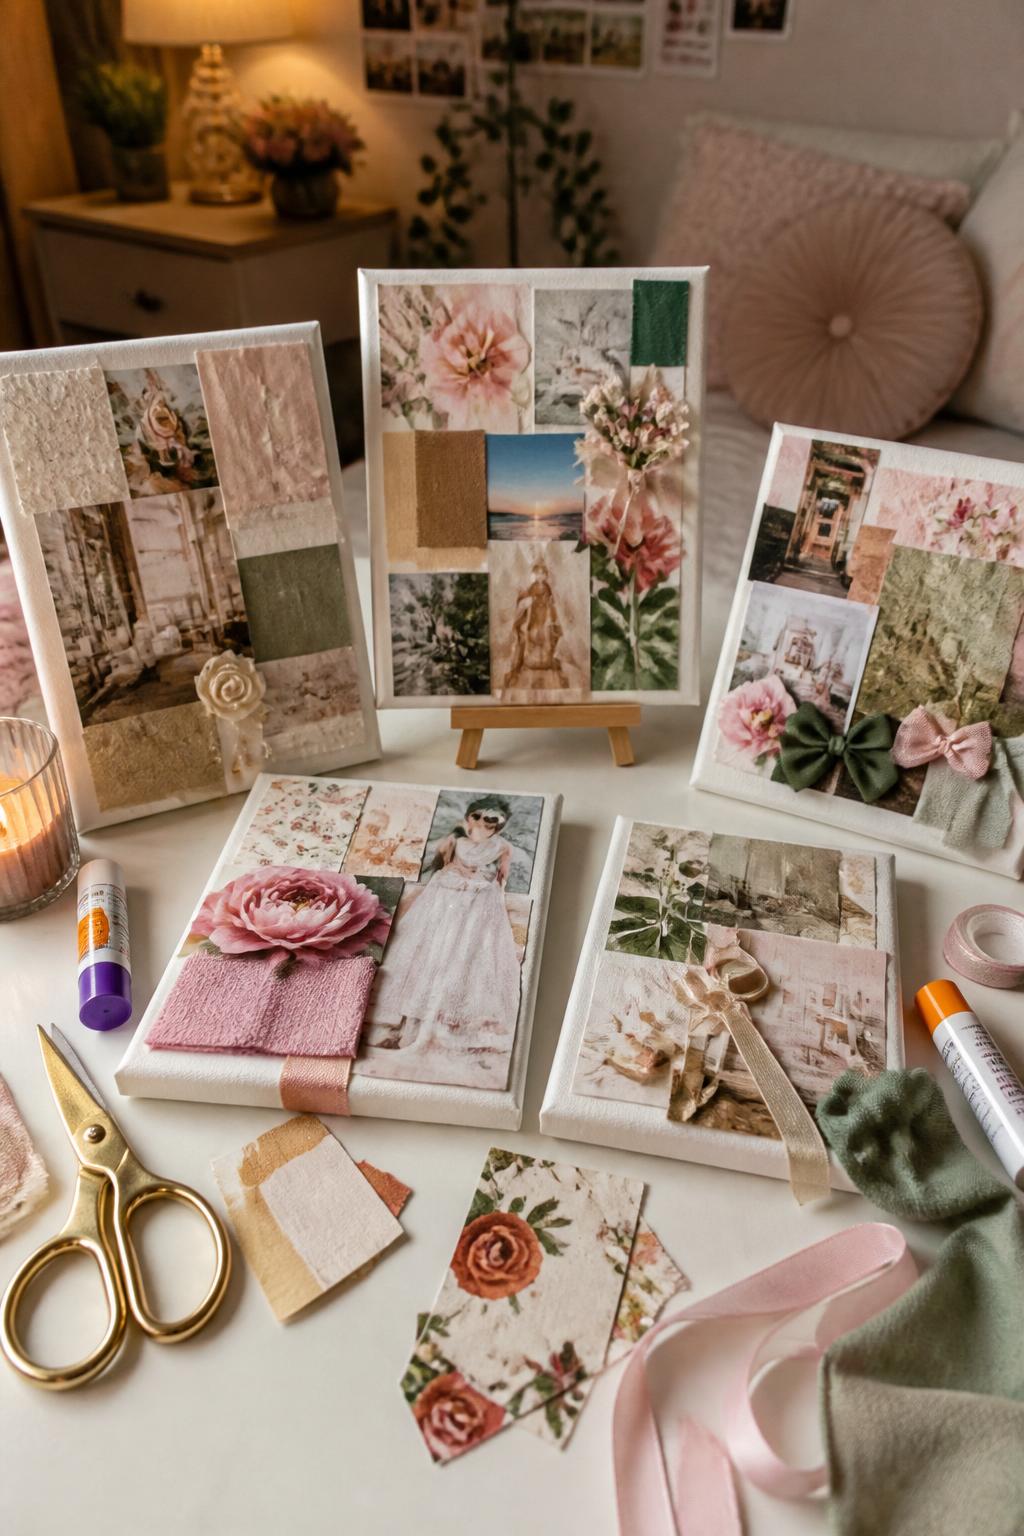
Mini mood board canvases are perfect for friends who like decor, fashion, travel, beauty, or personal style. Each canvas can show a favorite color palette, dream trip, season, or goal.
Materials Needed:
- Mini canvases or thick cardstock
- Magazine cutouts or printed images
- Stickers
- Washi tape
- Fabric scraps
- Glue stick
- Scissors
- Ribbon, optional
Steps To Make:
- Pick a theme or color palette for the canvas.
- Cut out images, paper pieces, and textures.
- Arrange everything before gluing.
- Layer larger pieces first.
- Add stickers, tape, ribbon, and small accents.
- Let the glue dry.
- Display the canvas on a shelf, desk, or wall.
12. Painted Wine Glass Style Cups
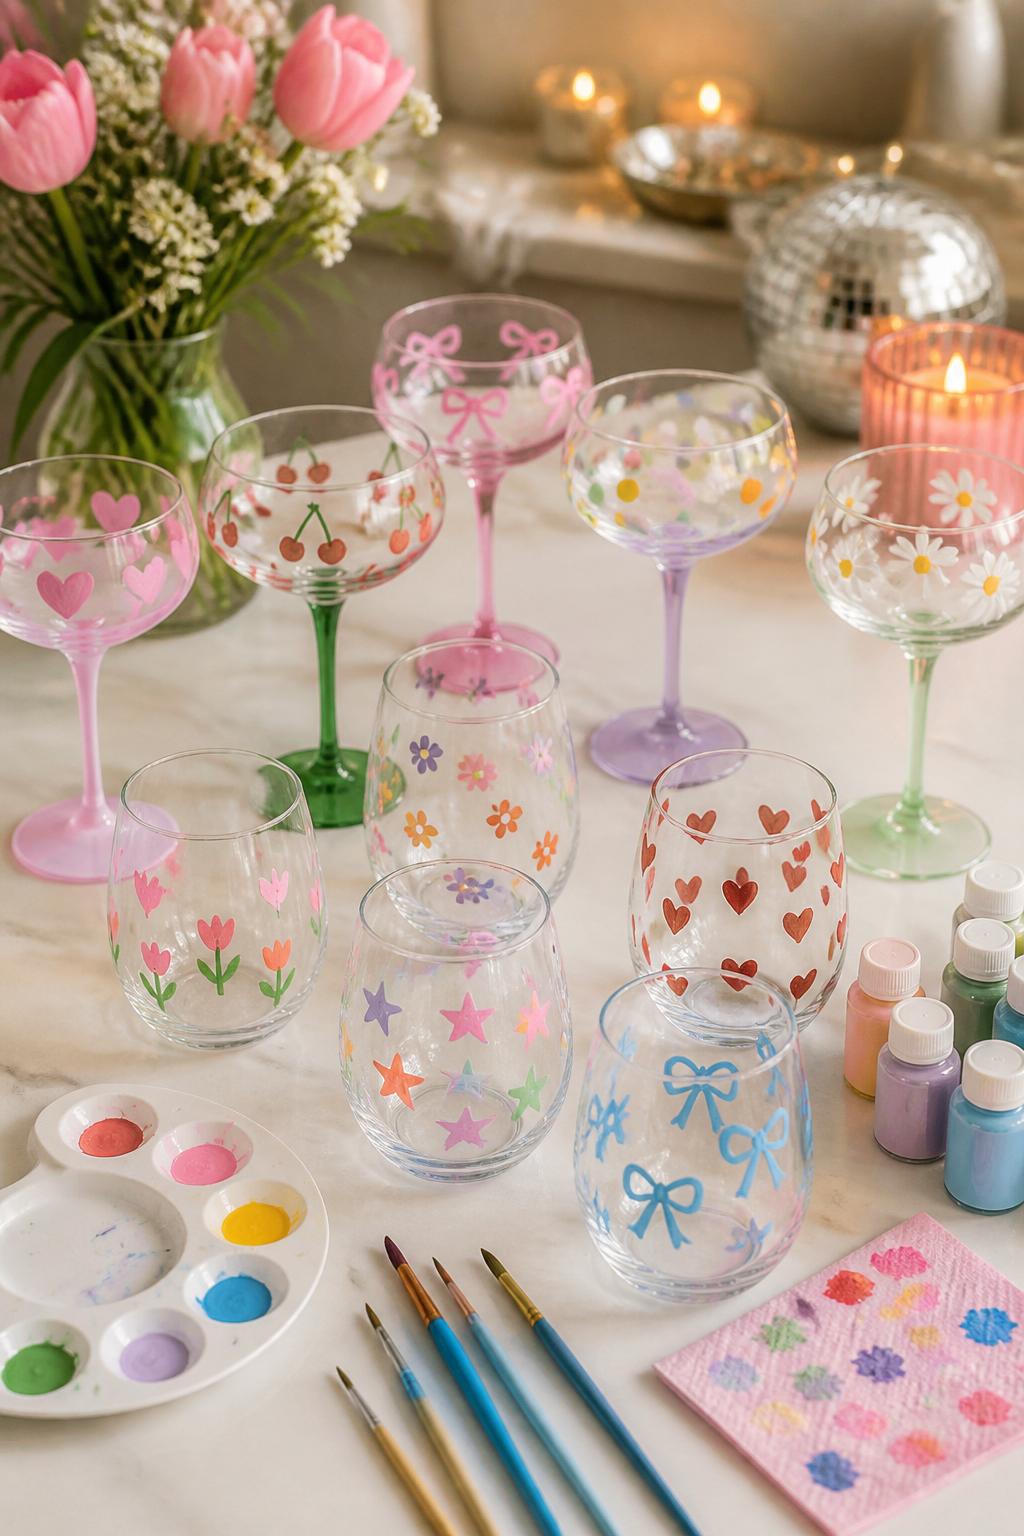
Painted stemmed cups feel festive and fun, but you can use regular juice glasses, plastic stemmed cups, or mocktail cups. Each person can decorate one for future movie nights, picnics, or sleepovers.
Materials Needed:
- Clear glass or plastic cups
- Glass paint or acrylic paint for decor use
- Fine paintbrushes
- Painter’s tape, optional
- Paper towels
- Paint pens, optional
- Drying tray
Steps To Make:
- Wash and dry the cups.
- Plan a simple design like flowers, cherries, dots, bows, or stars.
- Paint the design on the outside only.
- Let each color dry before adding small details.
- Place cups upside down to dry.
- Follow paint directions for curing if using glass paint.
- Use as decorative cups or party keepsakes.
13. Pearl and Ribbon Keychains
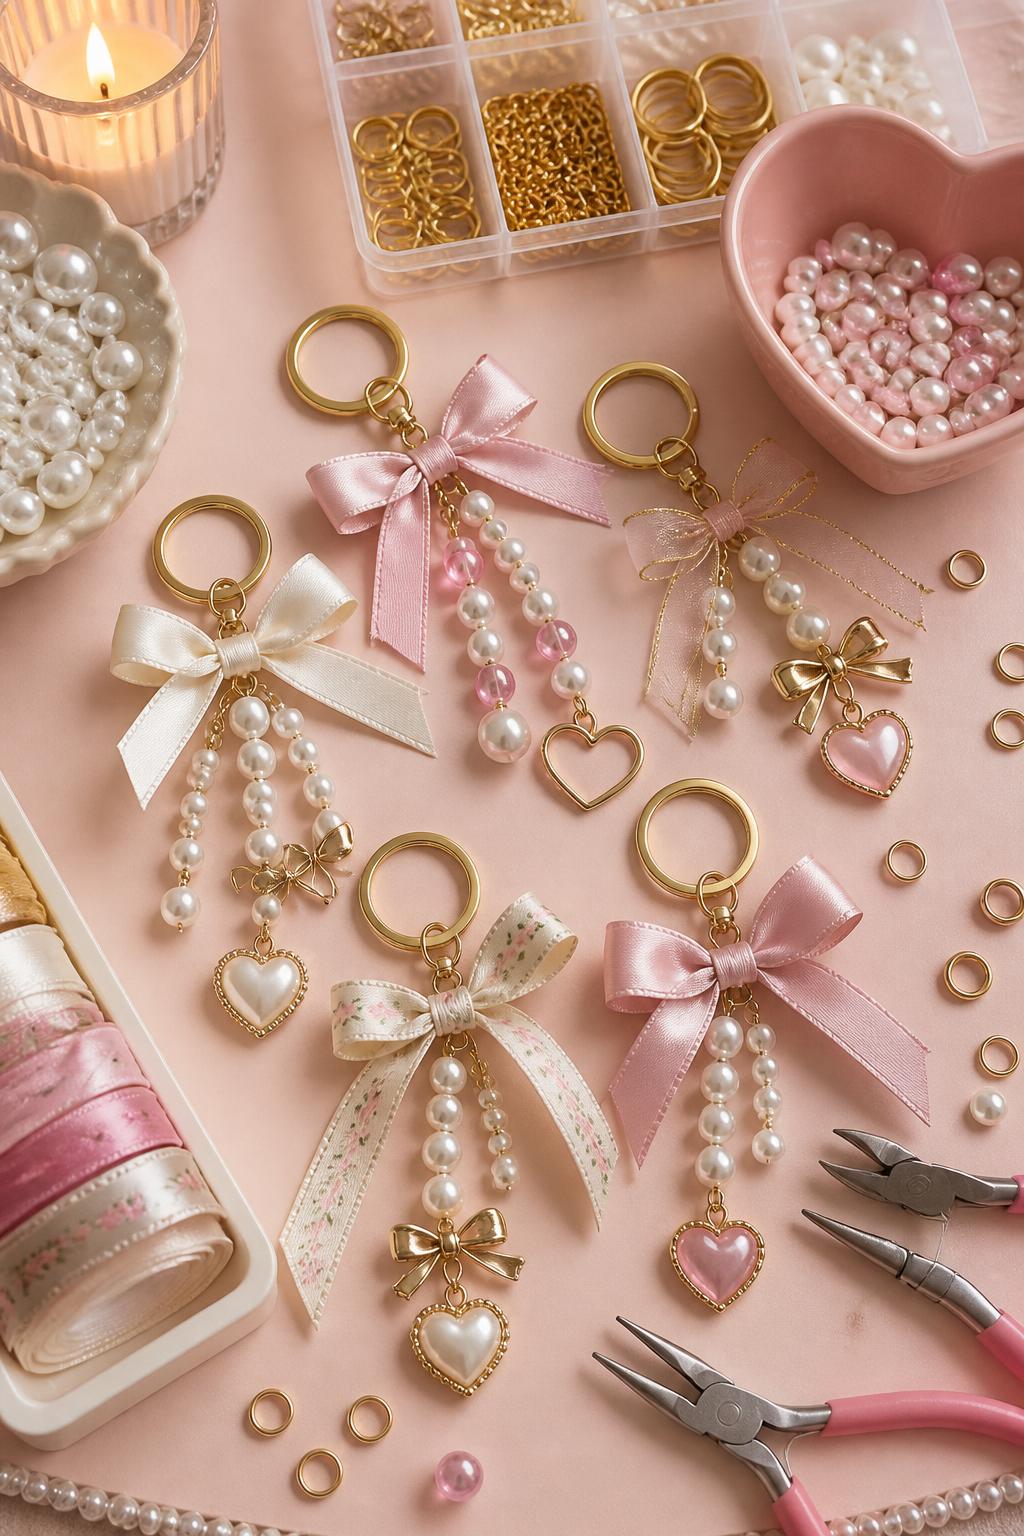
Pearl and ribbon keychains feel cute, simple, and useful. They can be clipped to keys, tote bags, backpacks, makeup pouches, or gift bags.
Materials Needed:
- Keyrings
- Faux pearl beads
- Satin ribbon
- Charms
- Jump rings
- Jewelry pliers
- Cord or wire
- Scissors
Steps To Make:
- Attach a charm to the keyring using a jump ring.
- Thread pearl beads onto cord or wire.
- Tie or secure the beaded section to the keyring.
- Add a small ribbon bow.
- Trim extra ribbon neatly.
- Check that all knots and rings are secure.
- Clip the keychain to a bag or pouch.
14. DIY Scrunchie Station
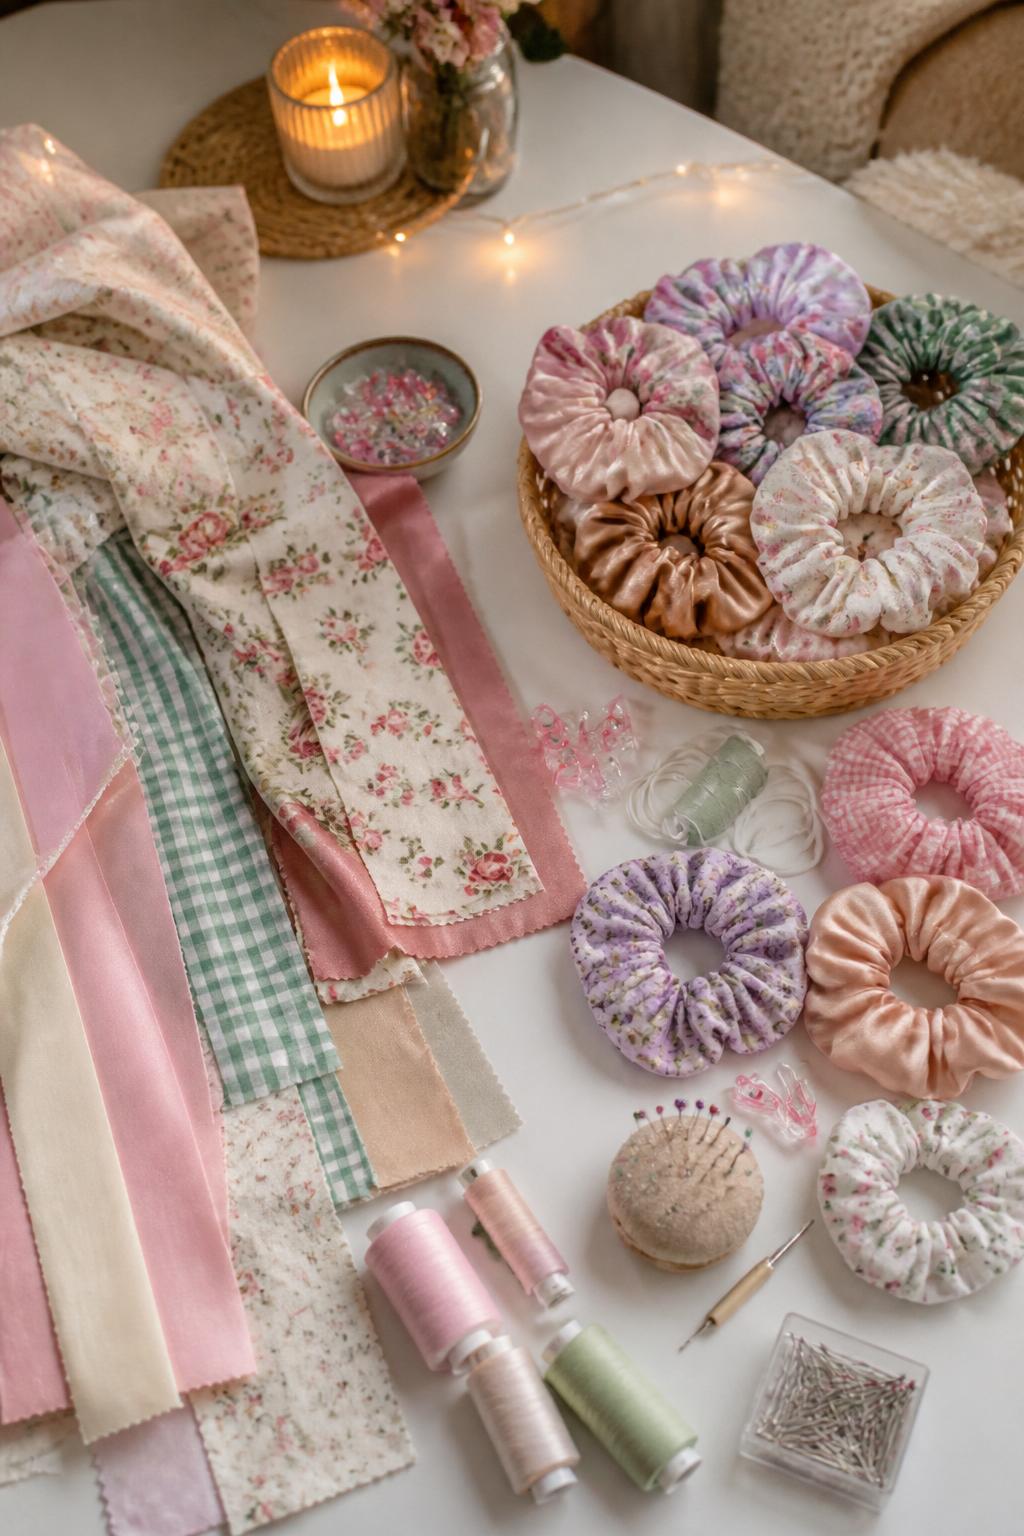
Scrunchies are a fun girls’ night craft because they are wearable and easy to customize with fabric choice. This can be a simple hand-sewing project or a no-sew version with fabric glue.
Materials Needed:
- Fabric strips
- Elastic
- Needle and thread or fabric glue
- Safety pin
- Scissors
- Sewing clips or pins
- Measuring tape
Steps To Make:
- Cut fabric into a long rectangle.
- Fold it lengthwise with the right sides together.
- Sew or glue along the long edge to make a tube.
- Turn the fabric tube right-side out.
- Thread elastic through the tube with a safety pin.
- Tie or sew the elastic ends together.
- Close the fabric opening with stitches or fabric glue.
15. Mini Painted Picture Frames
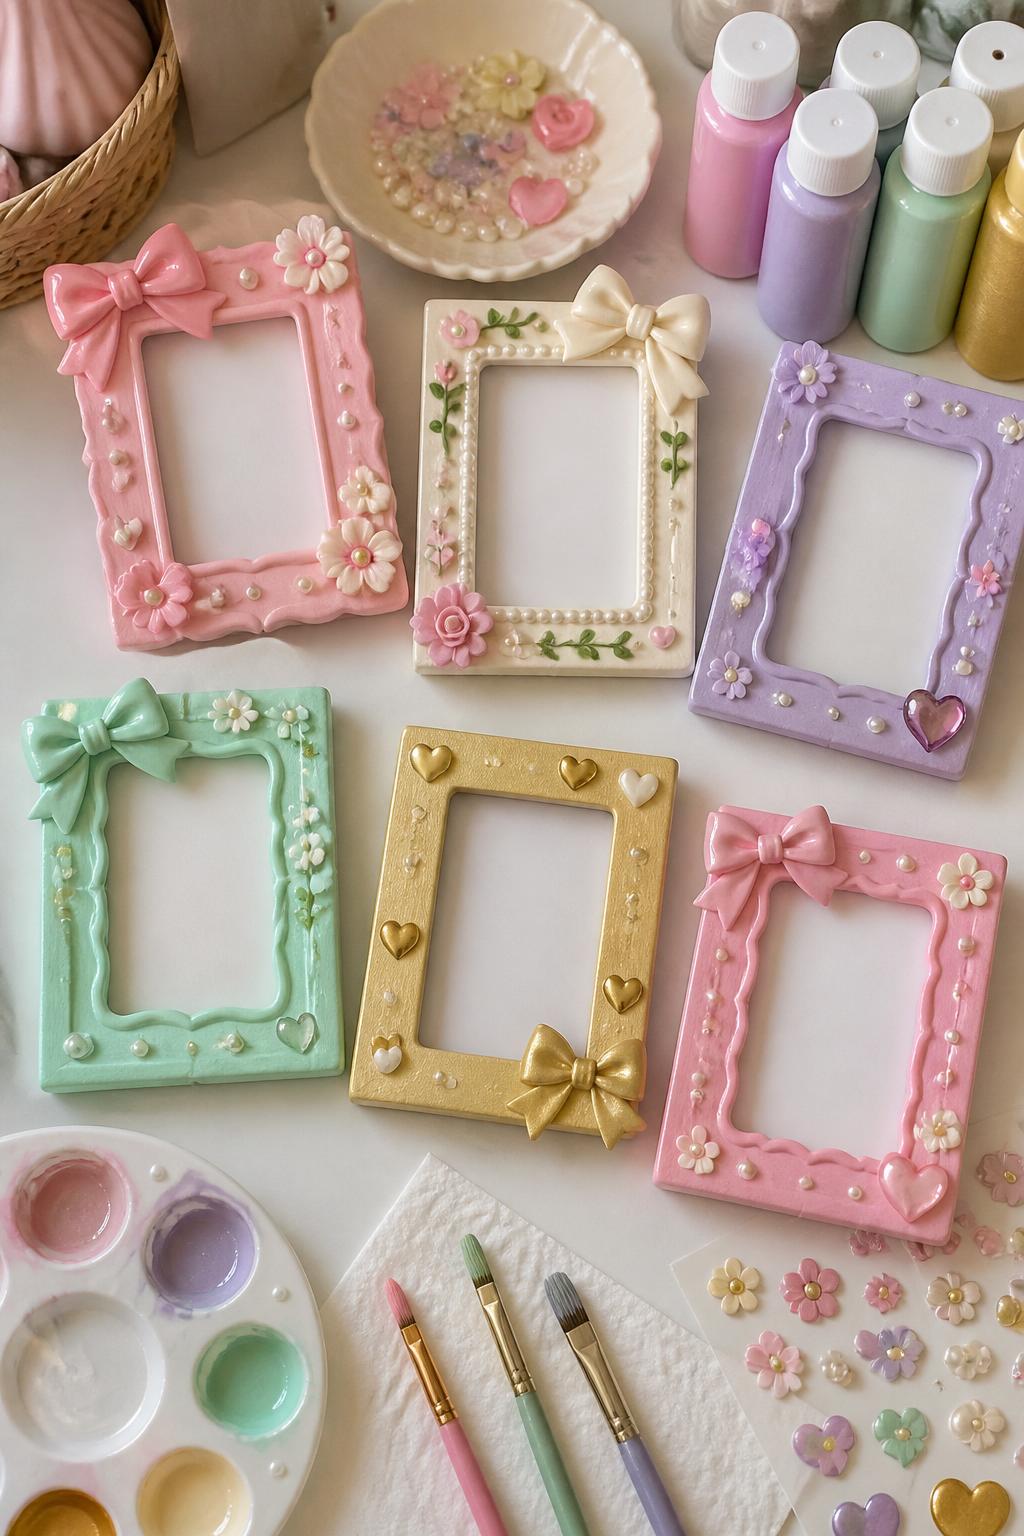
Mini picture frames are perfect for friend photos, photo booth prints, or small art pieces. They are easy to paint, and each person can design one that fits their room.
Materials Needed:
- Mini wooden frames
- Acrylic paint
- Paintbrushes
- Pearl stickers
- Tiny bows or charms
- Craft glue
- Small printed photos
- Clear sealer, optional
Steps To Make:
- Remove the frame insert if possible.
- Paint the frame with a base color.
- Let it dry fully.
- Add dots, flowers, stripes, or small patterns.
- Glue on pearls, bows, or charms.
- Add a photo or tiny art print inside.
- Display the frame on a desk or shelf.
16. Cute Journal Decorating
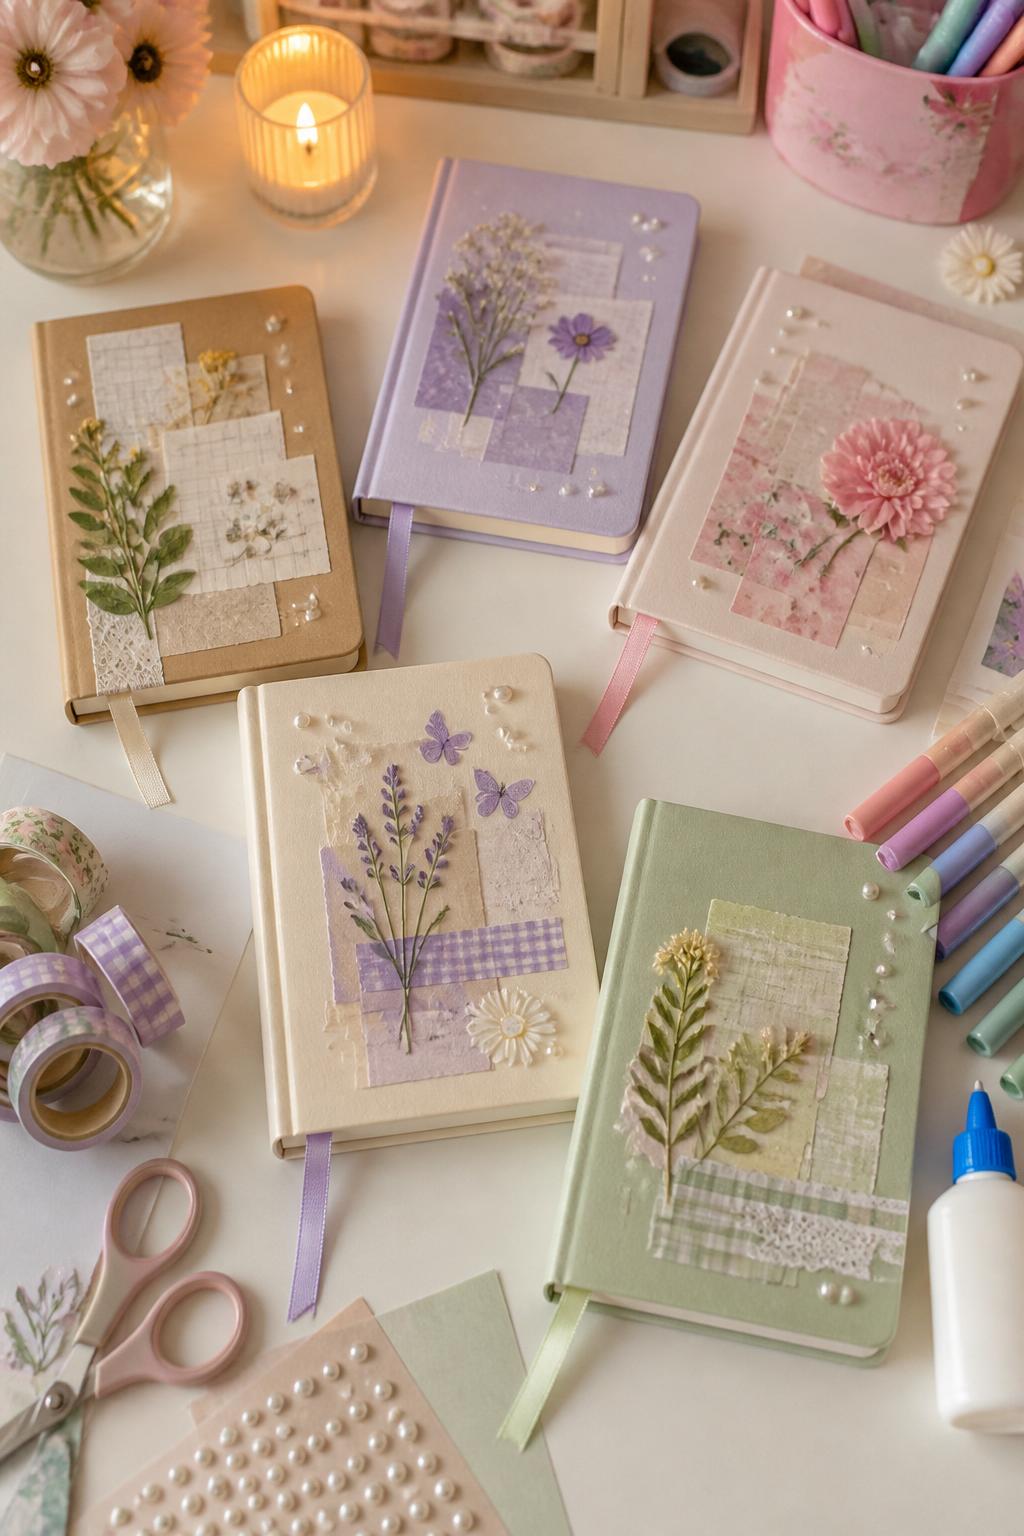
Journal decorating is easy, relaxing, and great for a mixed group. Some friends can make soft floral covers, while others can go bold with stickers, paper layers, and colorful borders.
Materials Needed:
- Plain notebooks or journals
- Scrapbook paper
- Stickers
- Washi tape
- Glue stick
- Ribbon
- Markers
- Clear contact paper, optional
Steps To Make:
- Choose a theme or color palette for the journal.
- Cut scrapbook paper to fit the cover.
- Glue the paper onto the front.
- Add washi tape borders, stickers, and small doodles.
- Tie ribbon to the spiral or spine if possible.
- Cover with clear contact paper for protection if desired.
- Let it dry before using.
17. DIY Satin Bow Garland
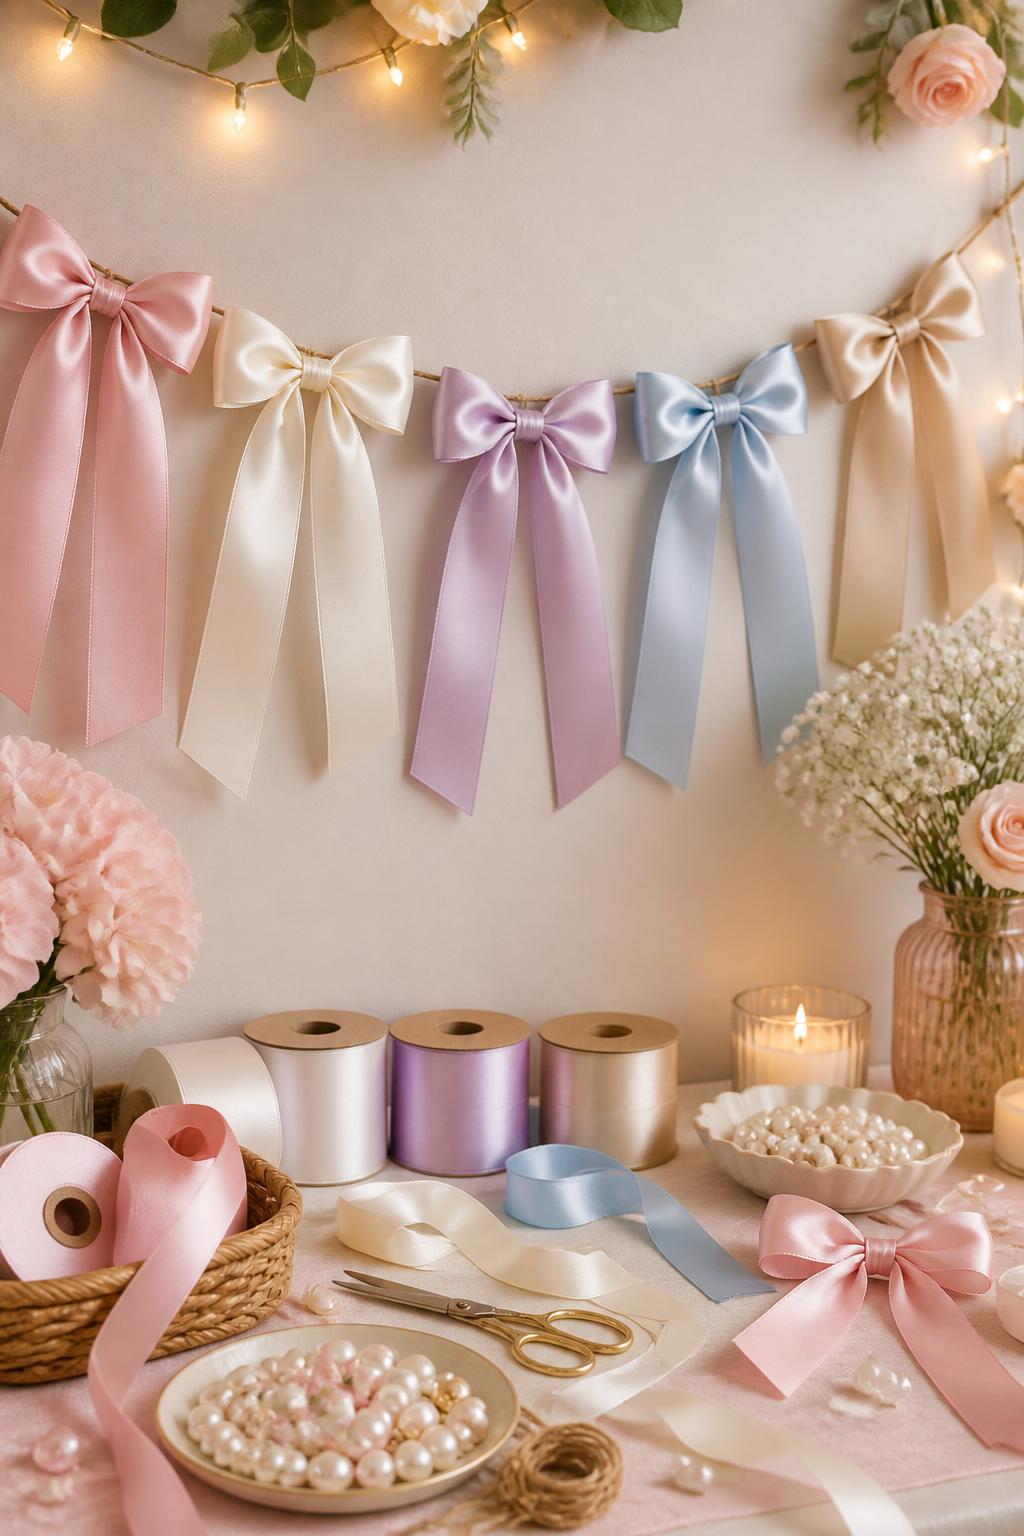
A satin bow garland is simple, cute, and perfect for decorating the room during girls’ night. Afterward, it can be used for bedroom decor, birthday setups, bridal showers, or photo corners.
Materials Needed:
- Satin ribbon
- Twine or string
- Scissors
- Pearl beads, optional
- Clear tape or hooks for hanging
- Measuring tape
Steps To Make:
- Cut ribbon pieces into equal lengths.
- Tie each piece into a bow.
- Trim the ribbon tails neatly.
- Tie or glue each bow onto the twine.
- Space the bows evenly.
- Add pearl beads between bows if desired.
- Hang the garland on a wall, mirror, shelf, or party table.


