


Table of Contents Show
Planning a bachelorette party can be a fun way to celebrate with friends while adding personal touches to the event. I wanted to share craft ideas that are simple to do and add extra meaning to the day.
These projects let you create memories and keepsakes without needing special skills or lots of materials.
If you’re looking for ways to make the party both creative and enjoyable, these 16 easy craft ideas offer fun activities that anyone can try. They turn the celebration into a chance to bond and make something unique for the bride-to-be.
This article will help you find simple ways to add charm and creativity to the party.
1. Personalized wine glass painting
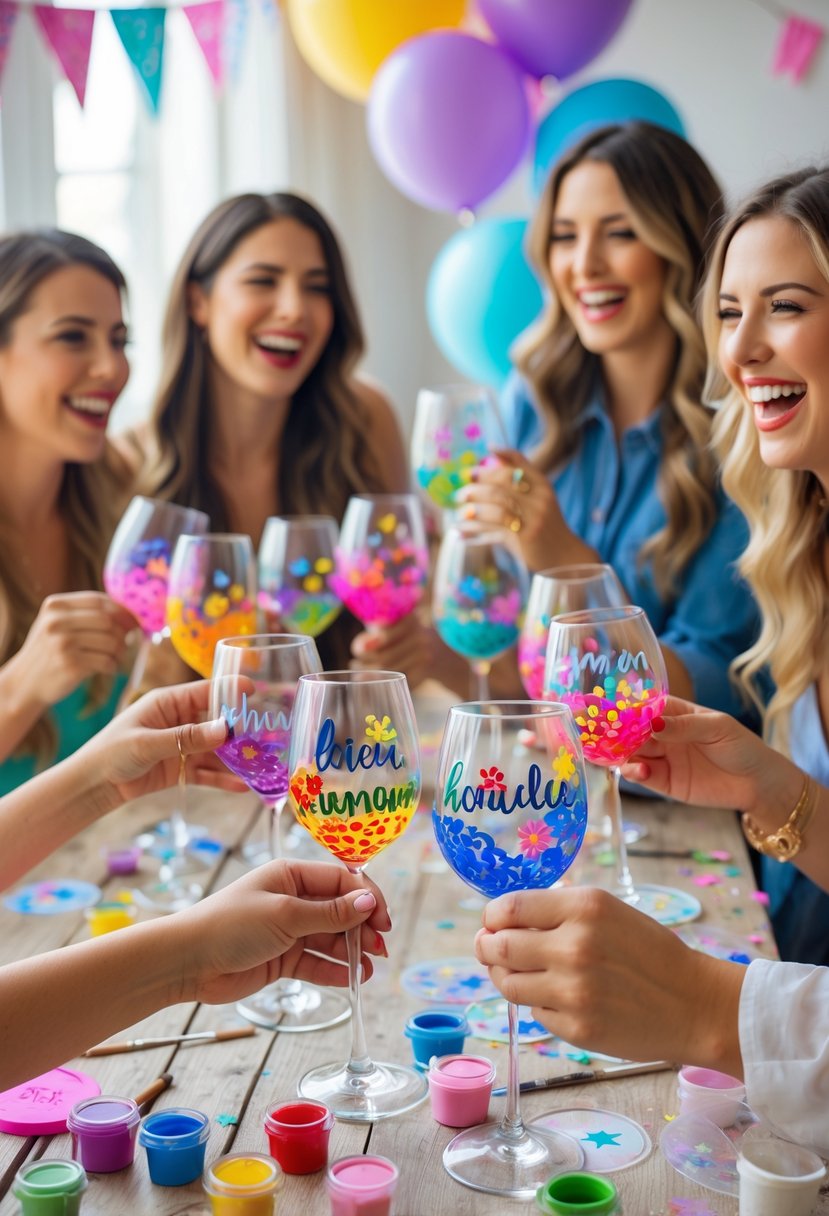
I like using wine glass painting for bachelorette parties because it is simple and creative. Each guest can design their own glass, making it a fun activity and a lasting keepsake. It also adds a personal touch to the celebration.
For People Who Love to Make Things ✂️
How to Make Personalized Painted Wine Glasses
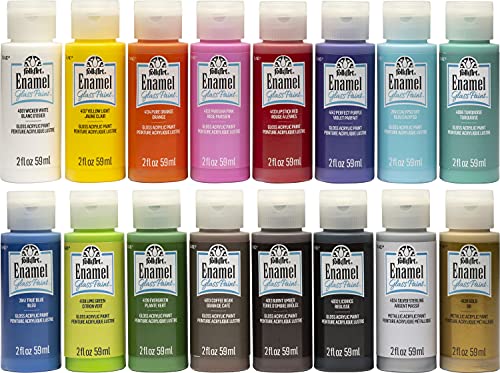
Materials Needed:
- Plain wine glasses (clear glass works best)
- Acrylic enamel or glass paint
- Fine-tipped paintbrushes or paint pens
- Rubbing alcohol and cotton pads
- Painter’s tape (optional, for straight lines or sections)
- Oven (for curing the paint, if required by your paint brand)
Shop the materials


The steps
- Step 1: Clean and Prep Your Glasses
Start by cleaning each glass with warm, soapy water, then wipe it down with rubbing alcohol. This removes any oils or fingerprints so the paint sticks properly. - Step 2: Plan Your Design
Decide what you want to paint — names, quotes, or fun patterns. You can lightly sketch your design on paper and tape it inside the glass as a guide, or go freehand for a more organic look. - Step 3: Paint Your Design
Use your paintbrush or paint pen to carefully apply your design. Bright colors, polka dots, flowers, and calligraphy-style names are all popular choices. Don’t overload the brush — a little paint goes a long way. - Step 4: Let It Dry
Allow your painted glasses to dry for at least 24 hours (or follow your paint’s label instructions). This step helps prevent smudging and ensures durability. - Step 5: Bake to Set (Optional but Recommended)
If your paint is oven-safe, place the glasses in a cool oven, then heat to 350°F (175°C). Bake for 30 minutes and let them cool inside the oven. This step makes the design dishwasher-safe and long-lasting. - Step 6: Add Finishing Touches
Once cooled, check for any touch-ups and add details like metallic accents or dots for a festive look. You can even tie a small ribbon around the stem for gift-giving. - Step 7: Enjoy or Gift
Your personalized wine glasses are now ready! Perfect for girls’ nights, weddings, bridal showers, or as thoughtful handmade gifts.
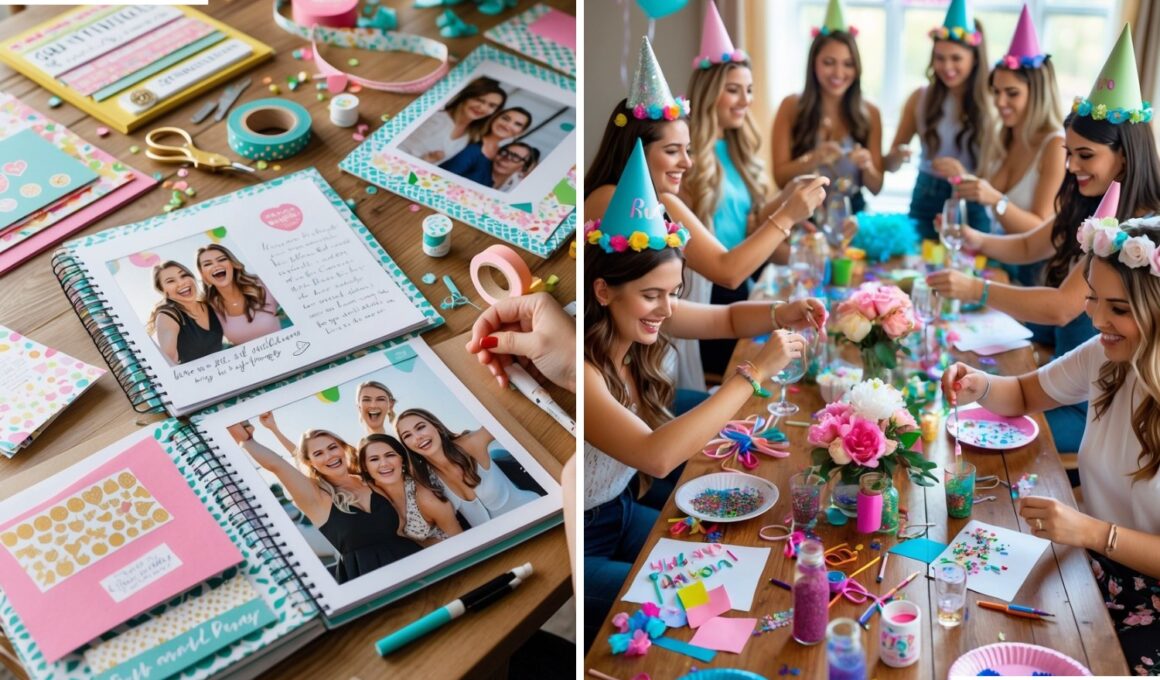
2. Memory book scrapbooking
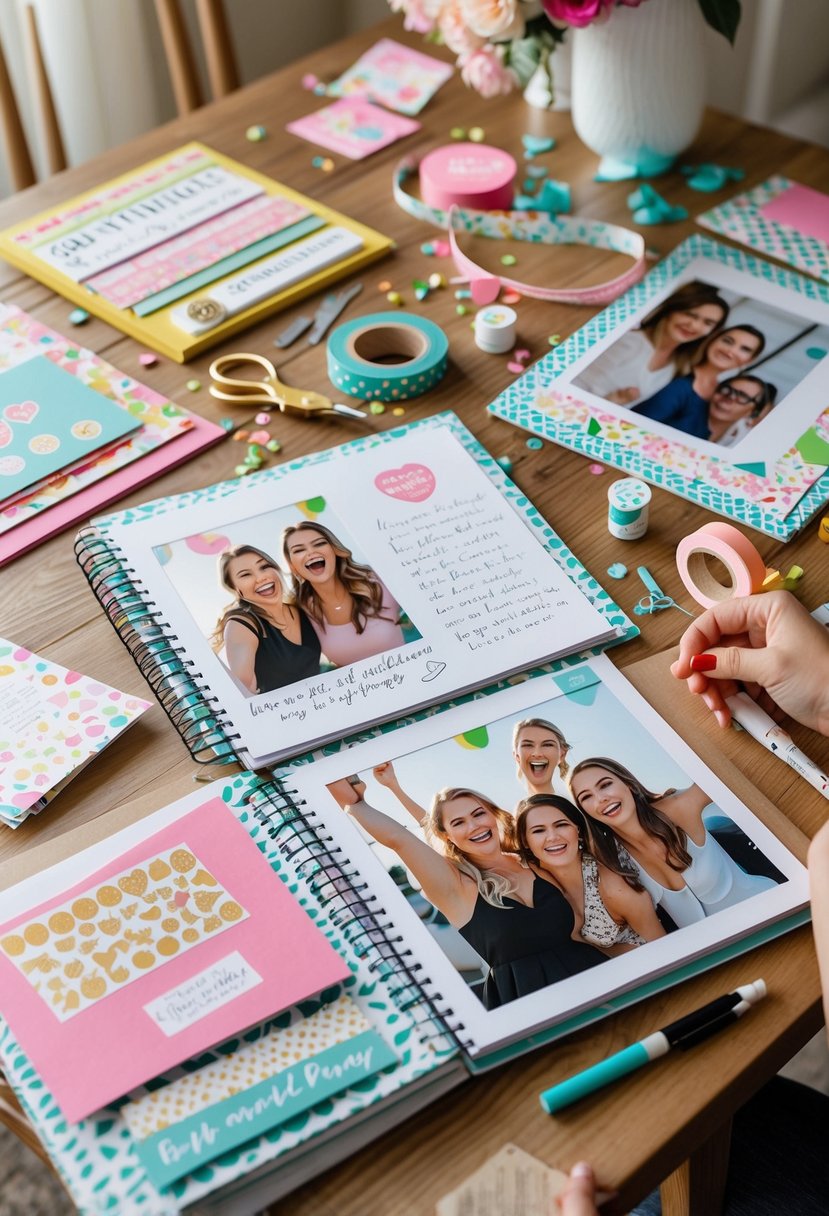
I like using memory books to capture moments from the bachelorette party. Adding photos, notes, and small decorations makes the book personal and special. It’s a simple way to keep these memories in one place for years.
How to Create a Memory Book Scrapbook
Materials Needed:
- Scrapbook or blank journal
- Printed photos
- Washi tape and decorative paper
- Scissors and glue
- Stickers, embellishments, and stamps
- Pens or markers for captions
- Optional: ribbons, tags, and envelopes for keepsakes
Shop the materials


The steps
- Step 1: Gather Your Memories
Start by collecting your favorite photos, ticket stubs, letters, or small mementos. Think about the story you want to tell — whether it’s a friendship journey, a family yearbook, or a wedding memory book. - Step 2: Choose a Theme
Pick a theme or mood for your scrapbook. For example: “Best Friends Adventures,” “Our Wedding Journey,” or “Summer Memories.” This helps guide your color choices, layouts, and embellishments. - Step 3: Arrange Your Photos
Lay out your photos before gluing anything down. Try grouping them by moments or emotions. Mix horizontal and vertical shots for variety and balance each page visually. - Step 4: Add Backgrounds and Borders
Use patterned paper, washi tape, or colored cardstock to frame your photos. Layering papers of different textures or tones adds depth and makes each memory stand out beautifully. - Step 5: Write Captions and Notes
Add handwritten notes or small captions to capture feelings, quotes, or inside jokes. This personal touch makes your scrapbook one-of-a-kind. - Step 6: Decorate Creatively
Enhance your pages with stickers, drawings, or pressed flowers. Don’t overfill — leave some space so the pages feel clean and balanced. - Step 7: Finish with Details
Include a title page, a date, or a quote that sums up the spirit of your scrapbook. You can also add pockets or envelopes to hold letters or keepsakes like dried petals or postcards.
3. Custom photo booth props
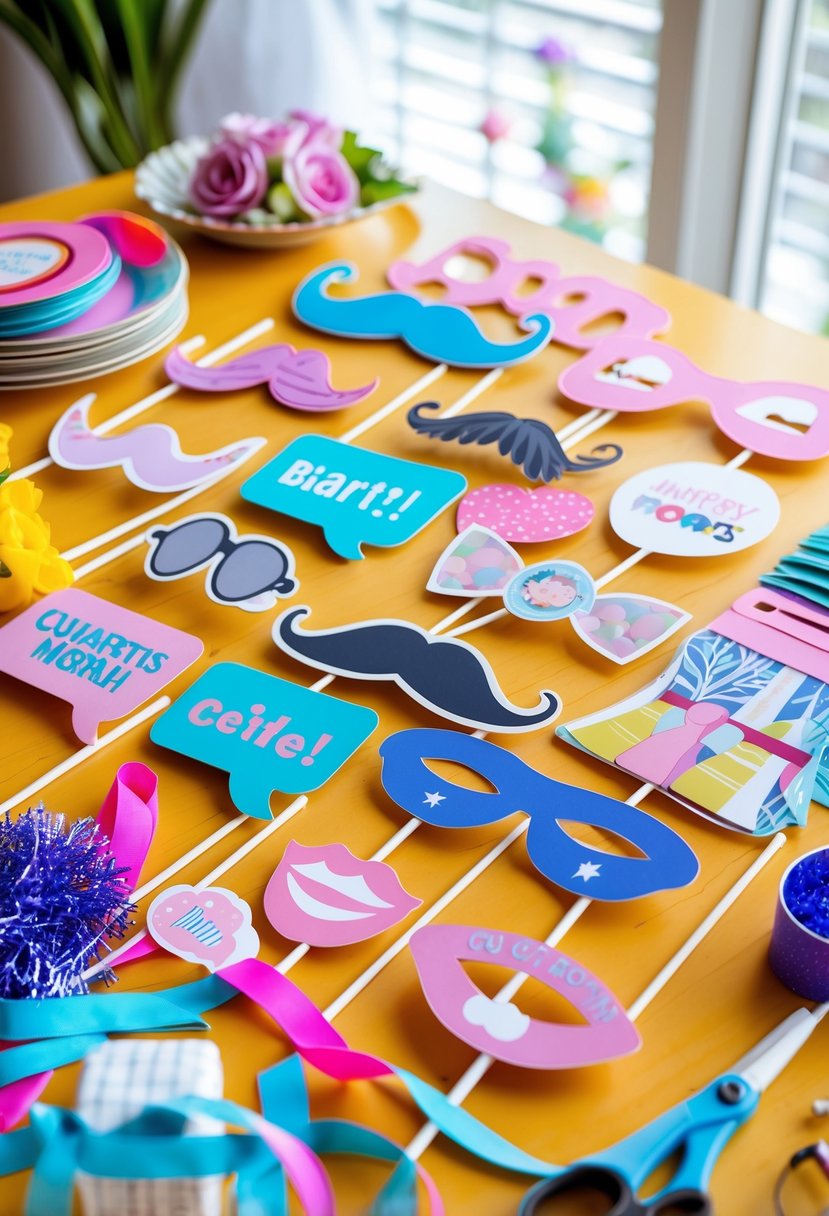
I like making custom photo booth props because they add fun to any party. Simple materials like paper, sticks, and glue are all you need.
I often create funny signs and themed props to match the party vibe. These props help guests capture fun memories in photos.
How to Make Custom Photo Booth Props
Materials Needed:
- Cardstock or thick craft paper
- Wooden dowels or paper straws
- Scissors and craft knife
- Glue or hot glue gun
- Markers, stickers, and embellishments
- Printable prop templates (optional)
- Glitter, ribbons, and washi tape for decoration
Shop the materials


The steps
- Step 1: Pick a Theme
Decide what your photo booth theme will be — birthday party, wedding, baby shower, or holiday event. This helps you choose colors, shapes, and fun sayings that match the mood. - Step 2: Create or Print Templates
Sketch out shapes like mustaches, hats, glasses, lips, or speech bubbles on cardstock. If you want to save time, print ready-made templates from online resources and trace them onto your paper. - Step 3: Cut Out Your Props
Carefully cut along the outlines using scissors or a craft knife for detailed shapes. You can mix and match sizes for variety — oversized glasses and tiny mustaches always make people laugh! - Step 4: Decorate Each Piece
Add personality to your props with paint, markers, glitter, or washi tape. Write fun phrases like “Say Cheese!”, “Best Day Ever!”, or personalized names for each guest. - Step 5: Attach Sticks
Use hot glue or strong tape to attach a wooden dowel or straw to the back of each prop. Make sure the sticks are secure and placed on the side for easy holding during photos. - Step 6: Add Finishing Touches
For extra flair, add mini ribbons, sequins, or foam stickers. Let the props dry completely before using them. - Step 7: Set Up Your Booth
Display your props in a cute basket or stand near your photo backdrop. Encourage guests to mix and match — the sillier, the better!
4. DIY floral crown crafting

I love how simple and fun making floral crowns can be for a bachelorette party. Using fresh or silk flowers, you can create beautiful crowns that suit everyone’s style. It’s a hands-on way to add a personal and pretty touch to the celebration.
How to Make a DIY Floral Crown
Materials Needed:
- Fresh or faux flowers
- Green floral wire
- Green floral tape
- Scissors or wire cutters
- Greenery or filler leaves (e.g., eucalyptus, fern)
- Ribbon (optional for finishing touches)
Shop the materials


The steps
- Step 1: Measure and Shape the Base
Start by measuring the wire around your head where you’d like the crown to sit. Leave a little extra for overlap, then twist the ends together to form a circular base. This will be your crown’s foundation. - Step 2: Wrap with Floral Tape
Cover the wire base completely with floral tape. This not only gives it a natural look but also provides a better grip for attaching flowers and leaves. - Step 3: Prepare the Flowers
Trim your flowers and greenery, leaving 2–3 inches of stem. Choose a mix of big and small blooms for a balanced look — roses, daisies, and ranunculus work beautifully together. - Step 4: Start Attaching the Greenery
Begin by attaching small pieces of greenery to the wire base with floral tape, overlapping slightly as you go. This forms a lush, even background for your flowers. - Step 5: Add the Flowers
Attach your flowers one at a time, starting with larger blooms and filling in with smaller ones. Secure each stem to the base with floral tape, making sure to angle them in the same direction for a natural flow. - Step 6: Fill in the Gaps
Once your main flowers are attached, use small buds, baby’s breath, or extra leaves to fill any gaps. Step back to check the symmetry and adjust as needed. - Step 7: Add Ribbon (Optional)
Tie ribbons to the back ends of the crown for an adjustable fit or to add a soft, romantic touch.
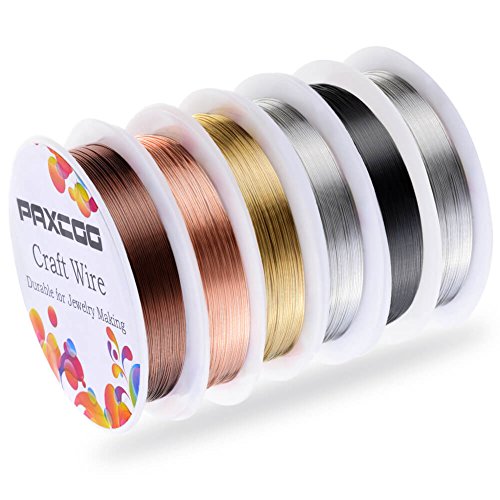
5. Handmade bridesmaid bracelets
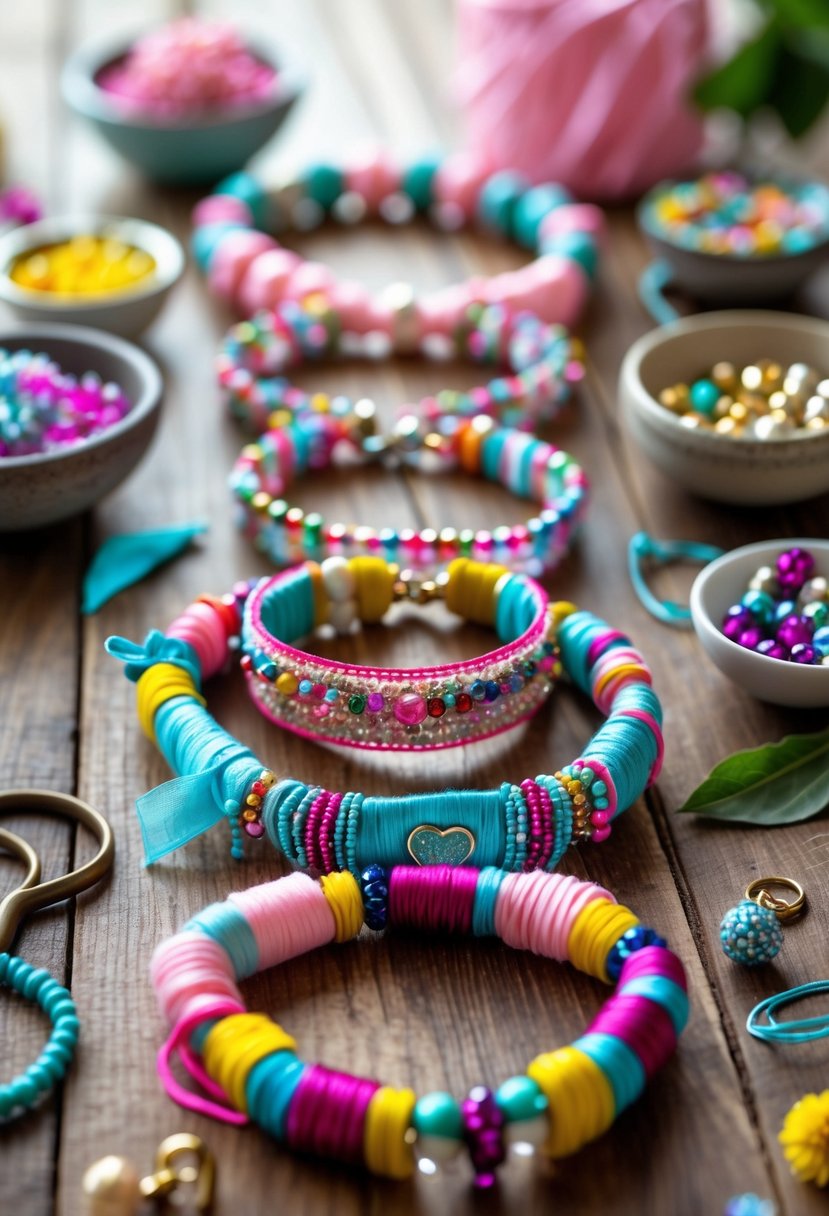
I like making handmade bracelets for my bridesmaids. They are simple to create and add a personal touch. Using beads, charms, or thread lets me customize each bracelet to fit their style. It’s a small gift that shows appreciation and makes the day special.
How to Make Handmade Bridesmaid Bracelets
Materials Needed:
- Elastic cord or jewelry wire
- Assorted beads (pearls, crystals, glass, or wooden beads)
- Charms or pendants (optional, like hearts or initials)
- Crimp beads or clasps (for wire bracelets)
- Scissors or wire cutters
- Small jewelry pliers
Shop the materials


The steps
- Step 1: Choose Your Color Theme
Decide on colors that match your wedding palette or each bridesmaid’s personality. Soft blush and gold for elegance, turquoise and coral for tropical vibes — the color choice sets the tone for the gift. - Step 2: Measure the Bracelet Length
Wrap the elastic or wire around your wrist to measure the desired length, leaving an extra inch for tying or securing. Most bracelets fit well at around 7 inches. - Step 3: Plan Your Bead Pattern
Lay out your beads on a flat surface before threading. Mix textures like pearls, crystals, and metallic spacers for a polished, layered look. Adding a special charm or initial bead gives it a personalized touch. - Step 4: String the Beads
Carefully thread the beads onto your cord or wire. If using elastic, stretch it slightly as you add beads to ensure it won’t be too tight later. - Step 5: Secure the Ends
For elastic bracelets, tie a double or triple knot and add a drop of jewelry glue for extra hold. For wire bracelets, secure both ends with crimp beads and attach clasps using jewelry pliers. - Step 6: Add a Finishing Touch
Tie on a small ribbon or attach a bridesmaid tag for presentation. You can also package each bracelet in a mini jewelry box or organza bag for a thoughtful gift reveal.
6. Decorative bachelorette party banners

I like making banners to add color and fun to the party space. They are simple to create with paper, fabric, or vinyl.
Personalized banners with the bride’s name or photos make the event feel special. They help set the party mood quickly and look great in pictures.
How to Make Decorative Bachelorette Party Banners
Materials Needed:
- Colored cardstock or glitter paper
- Letter stencils or pre-cut letters
- Scissors or craft knife
- Hole punch
- String, twine, or ribbon
- Glue or double-sided tape
- Optional: stickers, glitter, mini tassels, or confetti
Shop the materials


The steps
- Step 1: Pick a Theme and Color Palette
Decide on your party colors — think blush pink, gold, rose gold, or bold tropical shades. Choose a phrase like “Bride Tribe”, “She Said Yes”, or “Team Bride” that fits your celebration’s tone. - Step 2: Cut Out the Banner Shapes
Cut cardstock into banner shapes — triangles, rectangles, or fishtail flags work best. Each piece should be about 5–6 inches wide and tall. Use glitter or patterned paper for extra sparkle. - Step 3: Add the Letters
Use letter stencils, stickers, or pre-cut adhesive letters to spell out your chosen phrase. Center each letter on a banner piece. Mix metallic and solid colors for an eye-catching look. - Step 4: Decorate Each Piece
Add details like hearts, engagement rings, stars, or mini champagne glasses. You can use die-cuts, stickers, or small paper shapes to tie the design together. - Step 5: Punch Holes and Thread the String
Punch two holes at the top of each banner piece, then thread through ribbon or twine. Make sure to space the letters evenly so the banner hangs neatly. - Step 6: Add Finishing Touches
Tie small bows or tassels between the banner sections for flair. You can even attach fairy lights to make the banner glow for evening parties. - Step 7: Hang and Celebrate
Hang your banner across a wall, doorway, or dessert table. Pair it with balloons, streamers, or a photo backdrop to complete the festive look.
7. Personalized tote bag painting
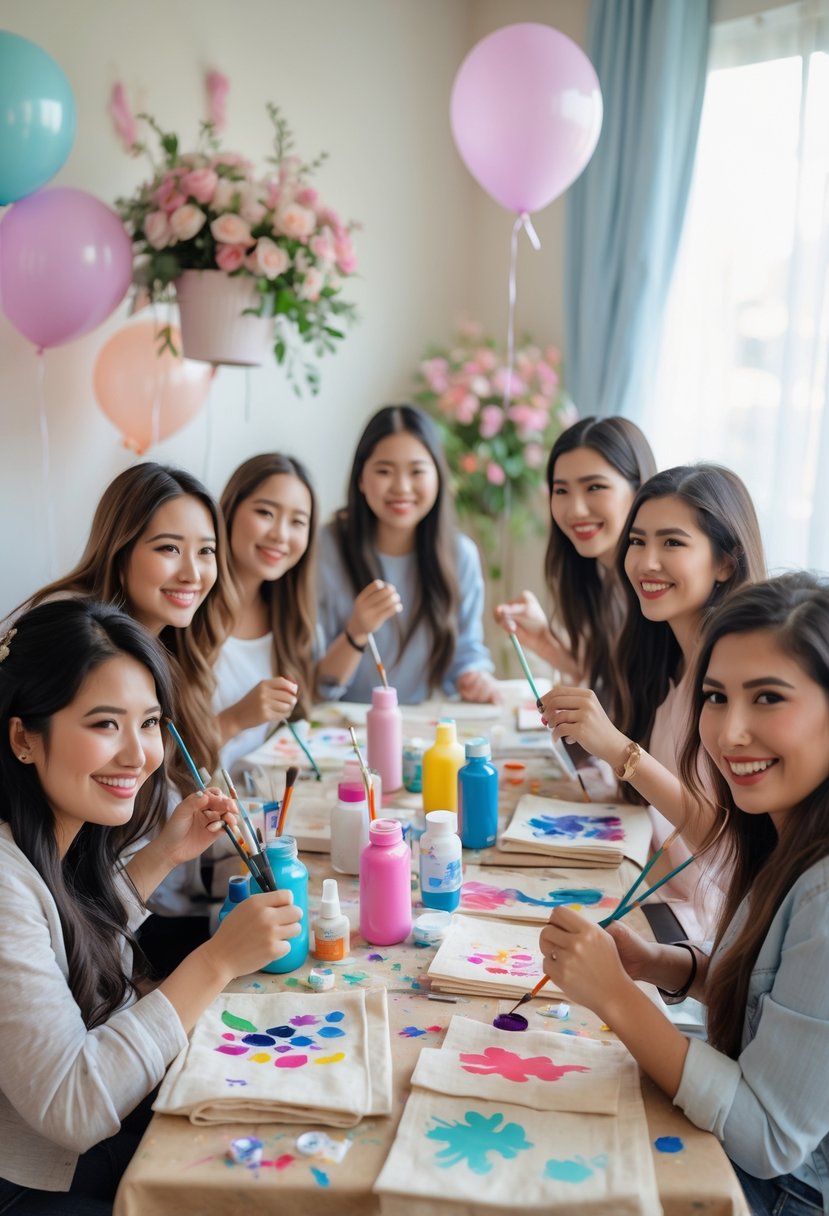
I love how personalized tote bag painting adds a creative touch to bachelorette parties. It’s simple and lets everyone make something useful. You can choose colors and designs that fit the bride’s style.
Painting tote bags creates a fun and lasting keepsake. It also works well for all skill levels.
How to Make Personalized Tote Bags
Materials Needed:
- Plain canvas tote bags
- Fabric paints (various colors)
- Paintbrushes or foam brushes
- Stencils or letter templates (optional)
- Painter’s tape (to outline designs)
- Cardboard (to place inside the tote)
- Iron (for heat-setting the paint)
Shop the materials


The steps
- Step 1: Prep the Work Area
Lay out a protective table covering and place a piece of cardboard inside each tote bag. This prevents paint from bleeding through to the other side. - Step 2: Plan Your Design
Decide on a design or message for each bag. You can use stencils for names, initials, or fun quotes like “Bride Tribe,” “Maid of Honor,” or “Girls’ Getaway.” Lightly sketch the outline with a pencil if needed. - Step 3: Start Painting
Use fabric paint to fill in your design. Mix colors or blend shades for a watercolor effect. For neat lines, apply painter’s tape around the edges or use fine brushes for detailed work. - Step 4: Add Personal Touches
Once the base paint is dry, add little extras like hearts, flowers, polka dots, or gold accents. Metallic or glitter fabric paint gives a chic finishing touch. - Step 5: Let It Dry Completely
Allow the painted bags to dry for several hours (or overnight). Don’t stack them until they’re fully dry to avoid smudges. - Step 6: Heat-Set the Paint
Place a thin cloth over the painted area and gently iron it on low heat for a few minutes. This step seals the paint and makes it washable. - Step 7: Gift or Use!
Your personalized tote bags are ready! Fill them with small goodies like a mini candle
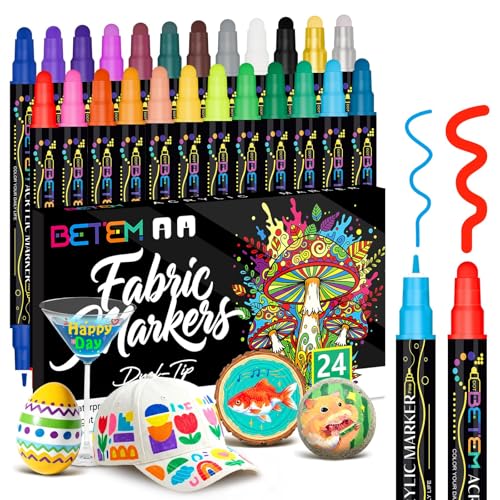
8. Custom temporary tattoo design
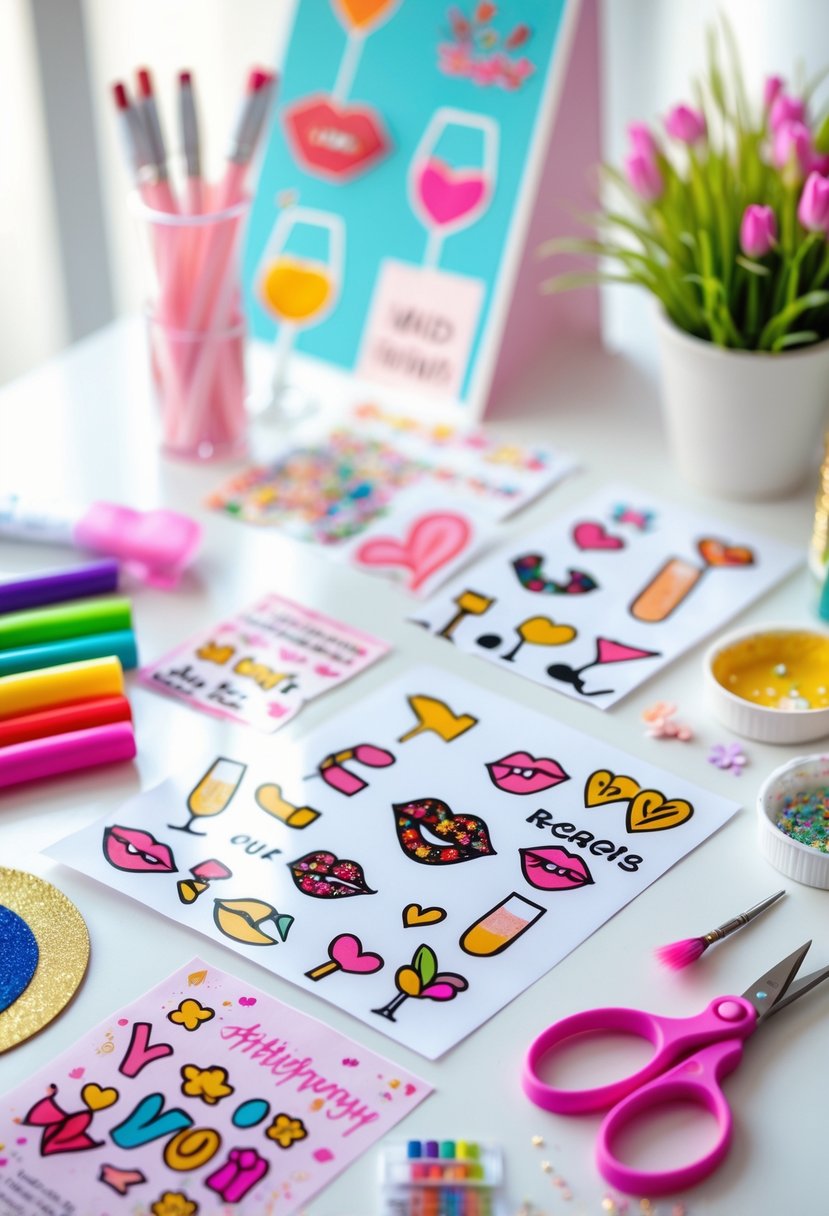
I like using custom temporary tattoos for bachelorette parties because they are simple and fun. Designing your own tattoo adds a personal touch and gives everyone a cool keepsake. You can make the tattoos match the party theme or include names and dates for a special memory.
How to Make Custom Temporary Tattoos
Materials Needed:
- Temporary tattoo paper (compatible with your printer)
- Inkjet printer
- Scissors
- Clear adhesive sheet (comes with tattoo paper)
- Computer or tablet for design creation
- Ruler (optional for alignment)
Shop the materials


The steps
- Step 1: Create or Choose Your Designs
Use a design program like Canva, Photoshop, or even Google Slides to create your tattoos. Fun options include:
“Bride Tribe” or “Team Bride” text
Lips, champagne glasses, hearts, or engagement rings
Inside jokes or names of the bridal party
Keep each design small — about 1.5 inches wide is perfect for wrists or shoulders. - Step 2: Mirror the Images
Before printing, flip the designs horizontally (mirror them) so that they appear correctly when applied. This is especially important for text designs. - Step 3: Print the Tattoos
Load the tattoo paper into your inkjet printer according to the manufacturer’s instructions. Print the mirrored designs onto the glossy side. Let the ink dry completely before moving on. - Step 4: Apply the Adhesive Sheet
Peel the clear adhesive sheet and carefully place it sticky-side down over the printed tattoo paper. Smooth it out with a ruler or card to avoid bubbles. - Step 5: Cut Out the Tattoos
Use scissors to cut out each design, leaving a small border around them. Keep them organized in envelopes or small containers for easy distribution. - Step 6: Apply the Tattoos
To apply, peel off the clear backing, place the tattoo face-down on clean skin, and press a damp cloth over it for about 30 seconds. Gently peel back the paper to reveal your design! - Step 7: Party-Ready Tattoos
They’ll last 1–3 days depending on placement and skin type. Perfect for bachelorette parties, bridal showers, or themed photoshoots.
9. Fabric flower bouquet making
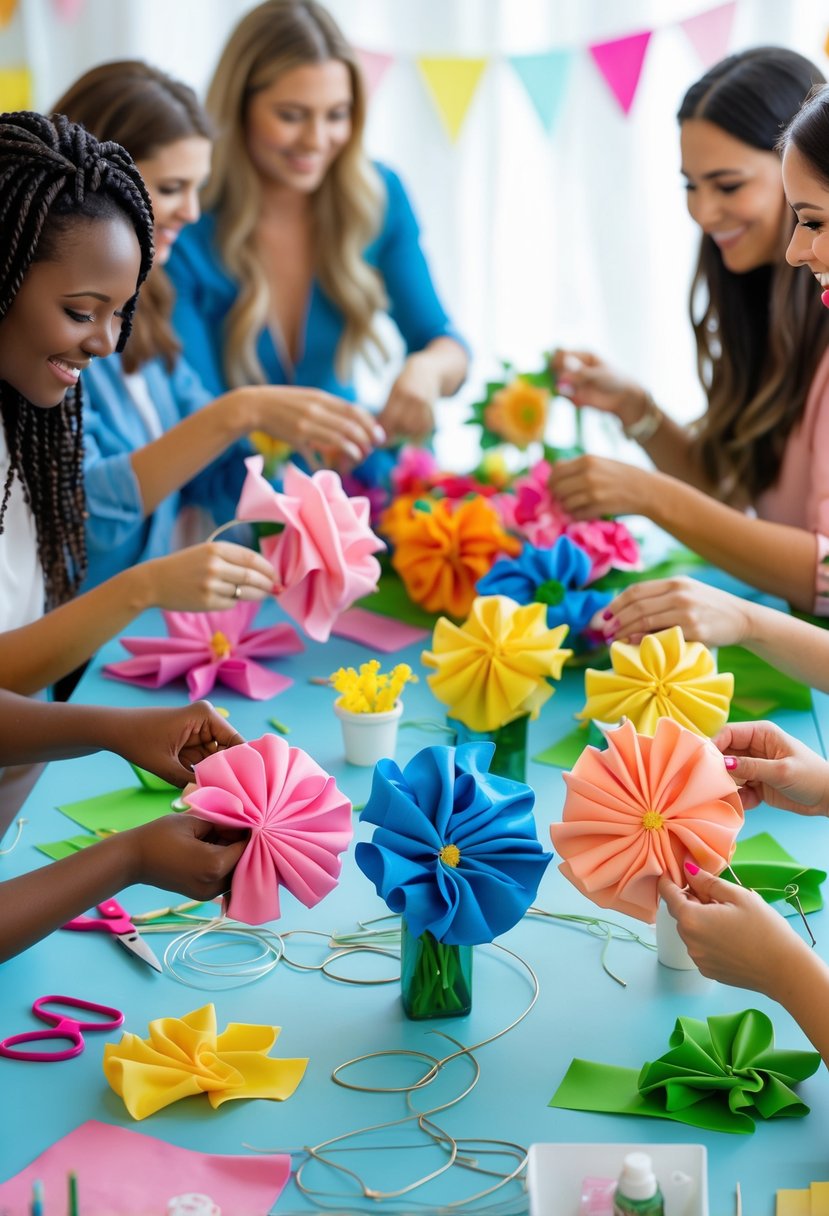
I enjoy making fabric flower bouquets because they are simple and creative. You only need fabric scraps, floral wire, and tape. It’s a calm activity that everyone can join during the party.
How to Make Fabric Flower Bouquets
Materials Needed:
- Fabric squares (cotton, felt, or satin work best)
- Floral wire
- Green floral tape
- Scissors
- Hot glue gun or fabric glue
- Buttons or beads (for flower centers)
- Ribbon (for wrapping the bouquet)
Shop the materials


The steps
- Step 1: Choose and Cut Your Fabric
- Pick bright, coordinating fabrics to match your theme — soft pastels for a bridal shower or bold colors for a fun girls’ night. Cut each fabric into 5–6-inch squares or circles, depending on your desired flower size.
- Step 2: Shape the Petals
- Fold the fabric in half, then into quarters, creating a cone shape. Trim the rounded edge to form petal shapes. Unfold it, and you’ll see a flower base with multiple petals. You can layer 2–3 cutouts for a fuller bloom.
- Step 3: Create the Flower Center
Glue a small button, bead, or rolled piece of fabric to the middle of each flower. This adds texture and dimension — and gives it a finished, professional look. - Step 4: Attach the Stem
Take a piece of floral wire (about 10 inches long) and poke it through the back of the flower. Secure it with hot glue, then wrap the wire with green floral tape to make it look like a stem. - Step 5: Add Leaves
Cut small leaf shapes from green fabric or felt and glue them along the stem. You can add one or two per flower for a realistic touch. - Step 6: Arrange Your Bouquet
Gather 6–8 flowers and twist the stems together. Secure them with floral tape, then wrap a ribbon around the base for a polished finish. Tie it in a bow or knot for that charming handmade touch. - Step 7: Display or Gift It!
Your bouquet is now ready! These make perfect bridal shower centerpieces, bridesmaid gifts, or everlasting wedding keepsakes.
10. Personalized candle decorating
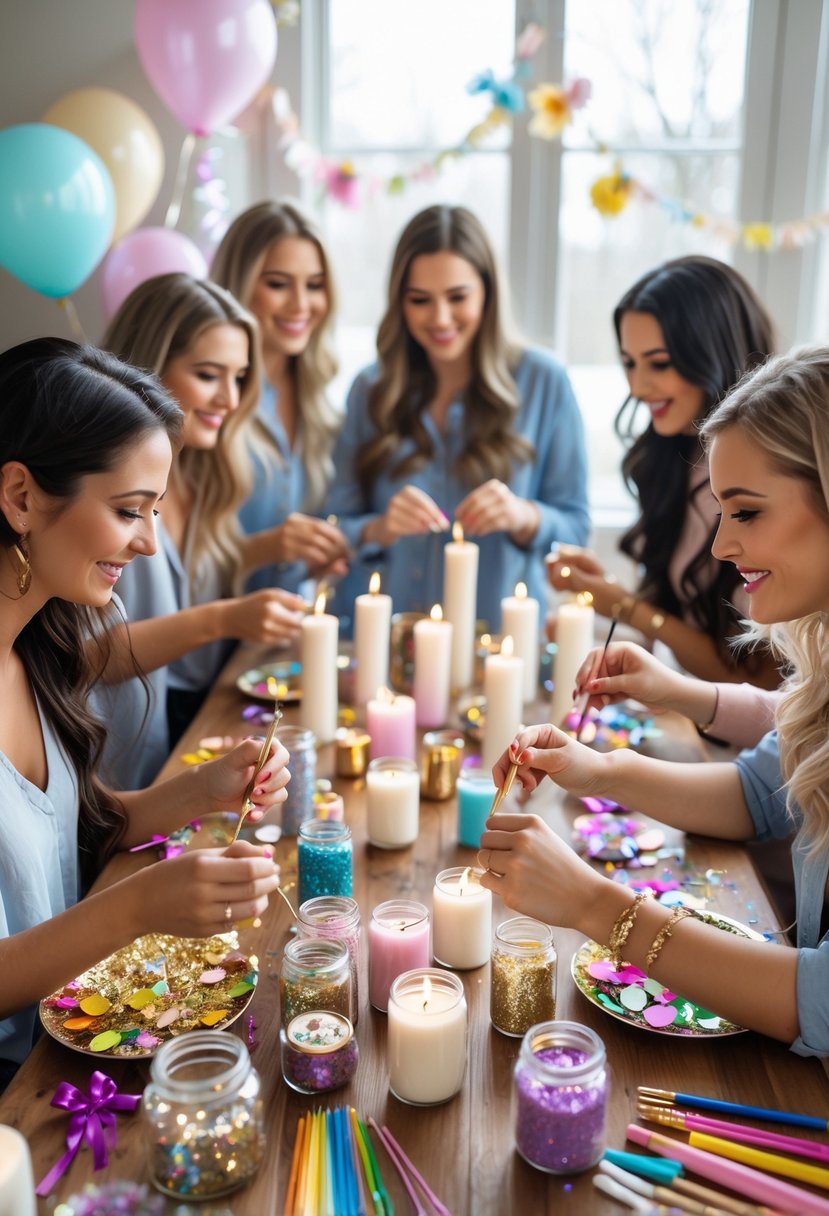
I enjoy personalized candle decorating because it is simple and creative. You can use basic supplies like plain candles, paint, and wax to make unique designs. This craft adds a warm, personal touch to the party and makes a nice keepsake for the bride.
How to Make Personalized Candles
Materials Needed:
- Plain pillar or jar candles (white or pastel colors work best)
- Paint pens or acrylic paint
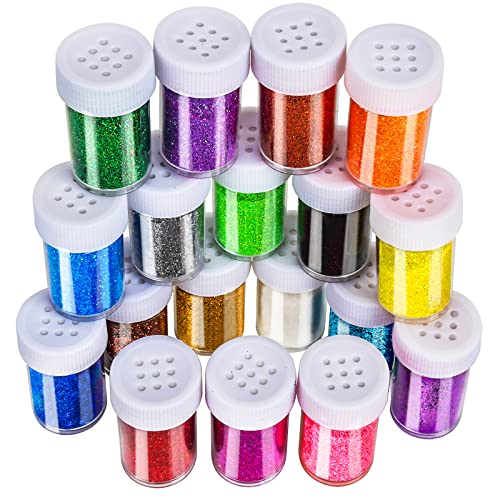
- Glitter (fine and chunky mix)
- Mod Podge or clear-drying craft glue
- Brushes or sponges
- Ribbons, charms, or dried flowers (optional)
- Heat gun or hair dryer (for sealing designs)
Shop the materials

The steps
- Step 1: Set Up Your Space
Lay down parchment paper or a disposable table cover — candle decorating can get sparkly fast! Make sure each person has their own candle, brush, and paint or glitter tray. - Step 2: Plan Your Design
Before you begin, decide what style fits your theme:
For a bridal shower: “Bride,” “Love,” or initials.
For a cozy night in: floral patterns or abstract swirls.
For gifting: add the recipient’s name and a small charm tied with ribbon.
You can lightly sketch the design with a pencil before painting. - Step 3: Paint or Draw Your Design
Use paint pens for crisp lines or a small brush and acrylic paint for more expressive designs. Let each color dry before layering to avoid smudging. Metallic gold or rose gold accents always look elegant. - Step 4: Add Glitter and Details
Apply Mod Podge in areas where you’d like sparkle — like around the base, top rim, or lettering — and sprinkle glitter over it. Gently shake off the excess. For extra glam, you can add a dusting of fine glitter across the candle for a shimmer effect. - Step 5: Seal the Design
Once everything is dry, use a hair dryer on a low heat setting to slightly warm the candle’s surface, sealing the glitter and paint. This step keeps the decorations in place longer. - Step 6: Add Final Touches
Wrap ribbons, lace, or twine around the base and tie small charms or dried flowers to personalize it further. - Step 7: Display or Gift It!
Your candles are ready! They make perfect personalized favors or decorative pieces for bridal showers, bachelorette parties, or holiday gatherings.
11. Paint your own cocktail shaker
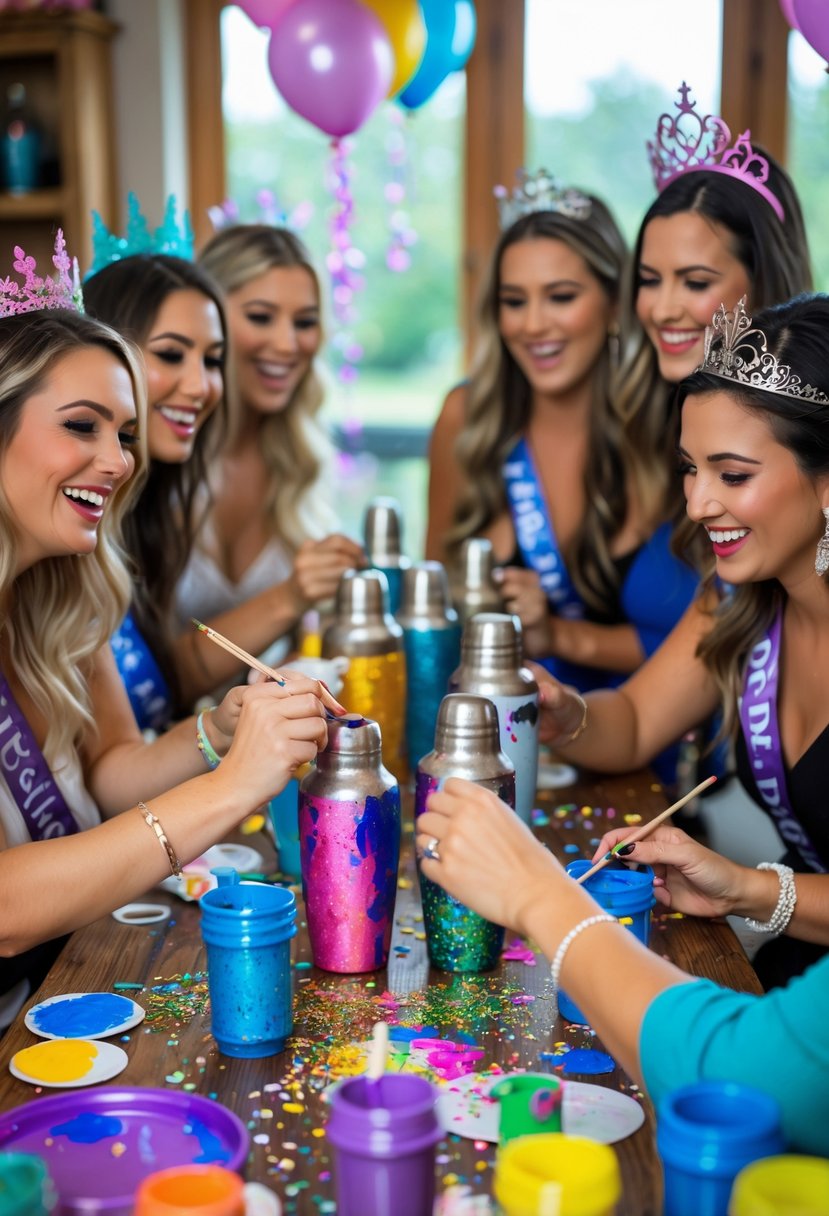
I like the idea of painting my own cocktail shaker. It adds a personal touch to the party. Using glass paint and simple designs, anyone can create a unique shaker. It also makes a useful keepsake.
How to Host a “Paint Your Own Cocktail Shaker” Party
Materials Needed:
- Stainless steel cocktail shakers
- Acrylic paint (metal-safe)
- Paintbrushes and sponges
- Painter’s tape (optional for clean lines)
- Glitter or metallic markers
- Clear sealant spray (food-safe exterior only)
- Disposable plates or palettes for paint
- Aprons or table covers
Shop the materials


The steps
- Step 1: Prep Your Shakers
Before painting, wipe each shaker with rubbing alcohol to remove oils or fingerprints. This ensures the paint adheres properly. - Step 2: Plan Your Design
Encourage everyone to come up with their own style! Some ideas:
Ombre metallic finishes
Glitter-dipped bottoms
Fun patterns like polka dots, stripes, or splatters
Names or initials of each bridesmaid or guest
If you want clean edges, use painter’s tape to section off areas before painting. - Step 3: Paint and Decorate
- Apply acrylic paint in thin layers, letting each coat dry before adding details. For sparkle, dust fine glitter over wet paint or use metallic markers to accent edges and patterns.
- Step 4: Seal the Design
Once dry, spray the painted areas with a clear sealant to protect your artwork from chipping. Make sure it’s applied only on the outside — avoid any area that comes in contact with drinks. - Step 5: Let It Dry and Set
Allow the sealant to dry for at least 24 hours. Once cured, your shakers are ready to use or gift! - Step 6: Mix and Toast
After everyone finishes, mix up a celebratory cocktail in your new custom shaker! It’s a perfect way to end the craft session with laughter and a bit of sparkle.
12. Customizable party favor jars

I like using jars as party favors because they are simple to decorate. You can add labels, ribbons, or small charms to fit the party theme. Filling jars with treats or small gifts makes them both pretty and useful. They are easy to make and personalize for each guest.
How to Make Customizable Party Favor Jars
Materials Needed:
- Small mason jars or clear plastic jars with lids
- Ribbon or lace trim
- Colorful candies, chocolates, or confetti fillers
- Round gift tags or stickers
- Hole punch and string/twine
- Scissors
- Optional: glitter paper, washi tape, and mini labels
Shop the materials

The steps
- Step 1: Choose Your Fillers
Pick fun and colorful fillers that match your party’s theme!
For weddings or bridal showers: pastel candies, chocolate pearls, or wrapped truffles.
For bachelorette parties: bright M&Ms, heart-shaped gummies, or mini confetti.
For birthdays or girls’ nights: rainbow candy mix or mini bath salts. - Step 2: Fill the Jars
Scoop your treats or goodies into each jar, leaving about an inch of space at the top. If using different candies or layers, alternate colors for a striped look that pops visually. - Step 3: Decorate the Lids
Add a touch of sparkle by cutting glitter paper or patterned cardstock into circles and gluing them onto the lids. You can also use washi tape to line the jar edges for extra flair. - Step 4: Add Ribbons and Tags
Tie a ribbon, lace, or twine around the neck of each jar. Use a hole punch to create a small hole in your tag, then tie it on. Write sweet notes like:
“Love is Sweet”
“Thanks for Celebrating with Us!”
“Sweet Moments Together” - Step 5: Personalize the Labels
Customize your jars with guests’ names or short messages using a metallic marker or printed labels. This makes each favor feel more personal and thoughtful. - Step 6: Display or Gift
Arrange the finished jars on a dessert table, favor station, or as place settings at each seat. They double as décor and gifts — everyone will love them!
13. Hand-painted champagne flutes
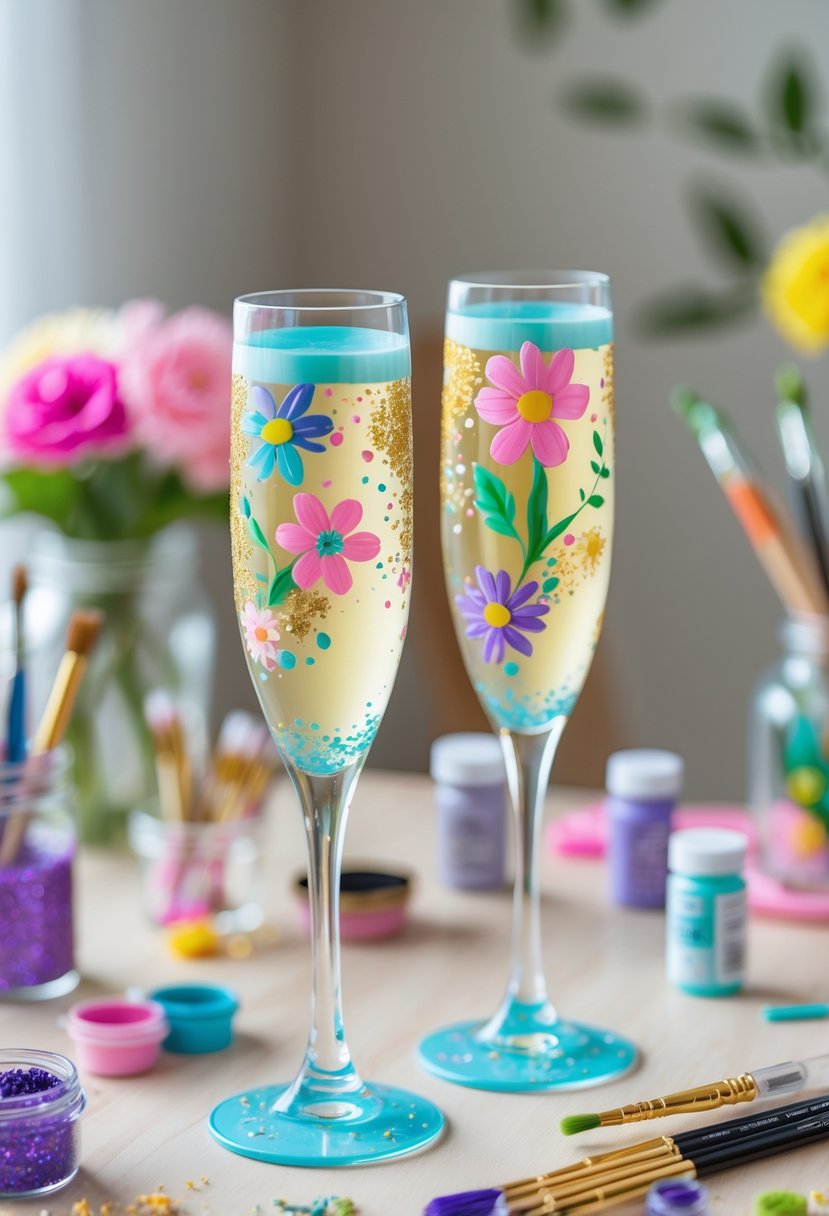
I enjoy hand-painting champagne flutes because it adds a personal touch to the party. You only need a few supplies, like paint and brushes to create simple designs. It’s a fun way to make each glass unique and special for the bride and guests.
How to Make Hand-Painted Champagne Flutes
Materials Needed:
- Clear champagne flutes (glass or acrylic)
- Glass paints or enamel paints (non-toxic and dishwasher-safe)
- Small detail brushes and sponge brushes
- Painter’s tape (optional for clean edges)
- Rubbing alcohol and cotton pads
- Glitter or metallic accents (optional)
- Clear glass sealant or varnish
Shop the materials
The steps
- Step 1: Clean and Prep the Glasses
Start by wiping each champagne flute with rubbing alcohol to remove dust and fingerprints. This ensures your paint sticks well and doesn’t peel later. - Step 2: Plan Your Design
Sketch your floral or abstract ideas on paper first, or use stencils if you prefer clean shapes. Common themes include:
Dainty flowers or vines
Glittery rims or base accents
Initials, names, or dates for a personal touch - You can tape off areas like the top rim to keep them paint-free (for lip-safe zones).
- Step 3: Start Painting
Use small detail brushes for floral patterns or lettering. Sponge brushes work best for soft gradient effects. - Apply paint in thin layers for smooth coverage.
If using multiple colors, let each layer dry before adding the next to avoid smudging. - Step 4: Add Sparkle (Optional)
Before the paint dries, sprinkle a bit of fine glitter onto wet areas for a glam touch. You can also use metallic paint for elegant gold or silver outlines. - Step 5: Cure and Seal the Design
Let the painted glasses air-dry for 24 hours. For enamel paints, follow manufacturer instructions — some may require baking in the oven to cure. Once dry, apply a thin layer of clear sealant to protect the design and give it a glossy finish. - Step 6: Display or Gift
Your custom champagne flutes are now ready! Use them for toasts at weddings, bridal showers, or engagement parties. You can even box them as personalized gifts with ribbons and name tags.
14. DIY sequin party hats
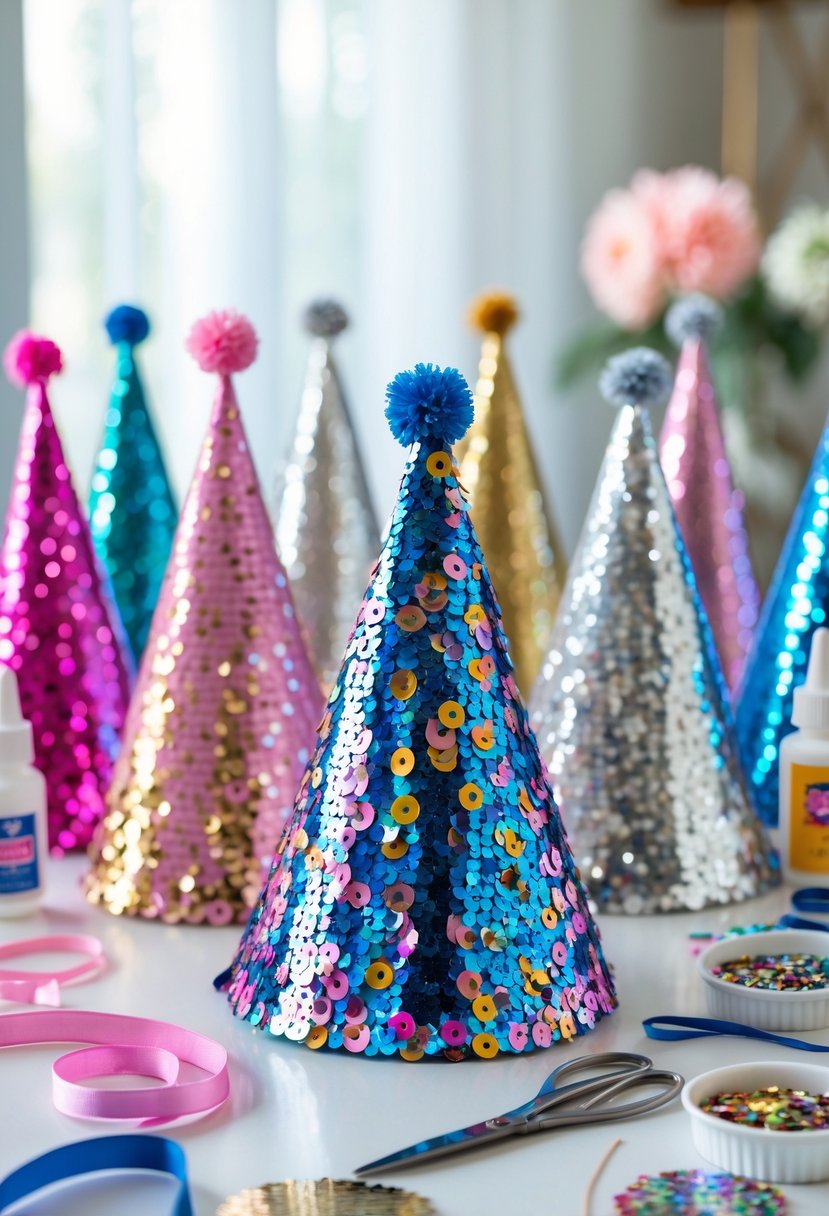
I like making sequin party hats because they add sparkle to any celebration. Using cardstock, glue, and sequins, I create hats that fit the party theme. These hats are simple to make and bring a fun, shiny touch to the bachelorette.
How to Make DIY Sequin Party Hats
Materials Needed:
- Colored cardstock or thick craft paper (for the hat base)
- Sequin fabric or loose sequins
- Hot glue gun or craft glue
- Scissors
- Pencil and ruler
- Pom-poms for the tops
- Ribbon or elastic cord for chin straps
- Tape or stapler
Shop the materials


The steps
- Step 1: Create the Hat Base
Use a large piece of cardstock to draw a semicircle (you can trace around a bowl for an even curve). Cut out the shape, then roll it into a cone and secure the edge with tape or glue. Adjust the size to fit your head comfortably. - Step 2: Cover with Sequins
If you’re using sequin fabric, wrap it around the cone, trim the excess, and glue it in place. For loose sequins, apply craft glue to small sections of the hat and sprinkle or press the sequins on until it’s completely covered. Let dry fully before handling. - Step 3: Add the Pom-Pom
Once your sequins are set, glue a small pom-pom to the top of the hat for a fun and festive finish. Choose bright or metallic pom-poms to complement your sequin color. - Step 4: Attach the Strap
Cut a piece of elastic cord or ribbon to fit under your chin. Tape, staple, or glue each end to the inside of the hat for a secure hold. - Step 5: Personalize It (Optional)
You can customize each hat by adding initials, glitter stickers, or mini paper cutouts that match your theme. - Step 6: Let It Sparkle!
Once everything is dry, your sequin party hats are ready to shine! Set them out as party favors or wear them for a photo booth moment — they catch light beautifully and add instant glam to any celebration.
15. Decorated photo frame keepsakes
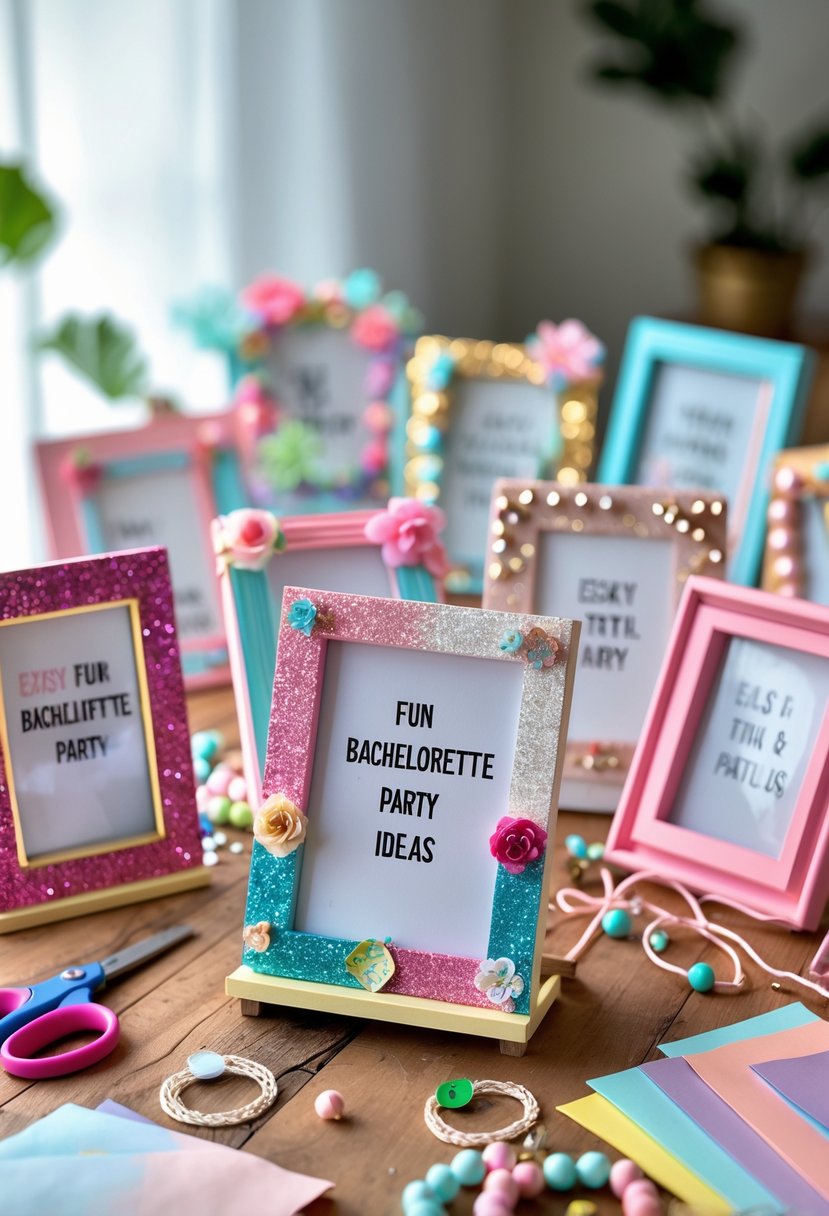
I like creating decorated photo frames as bachelorette party crafts. They are simple to make and can hold a special photo from the day. Adding paint, stickers, or glitter makes each frame unique and personal.
How to Make Decorated Photo Frame Keepsakes
Materials Needed:
- Plain photo frames (wood, acrylic, or cardboard)
- Acrylic paint or spray paint
- Glitter paper or loose glitter
- Mini artificial flowers or paper blooms
- Pearls, rhinestones, or buttons
- Hot glue gun or craft glue
- Scissors
- Optional: name tags or small printed messages
Shop the materials


The steps
- Step 1: Choose and Prep Your Frames
Start with simple, flat-surfaced frames — wood or plastic works best. Wipe them clean, then decide whether to paint or leave them natural. If painting, use pastel or metallic colors that match your party theme, and let them dry fully. - Step 2: Add a Touch of Sparkle
To give your frames a fun and festive look, add glitter or glitter paper! Brush on a thin layer of glue around the frame edges, sprinkle glitter evenly, and tap off the excess. For a cleaner look, you can cut strips of glitter cardstock and glue them along the borders. - Step 3: Decorate with Embellishments
Now the fun part — decorate! Use mini flowers, pearls, rhinestones, or sequins. Arrange them in clusters at the corners or sides of the frame for a balanced look. Mix textures (like flowers and beads) to make each frame unique. - Step 4: Add a Personal Touch
Slip in a printed note, fun quote, or photo of the bride and her friends. You can also personalize each one with guests’ names to use as seat markers or keepsakes. - Step 5: Seal and Dry
Once your decorations are glued in place, let everything dry completely. If you used paint or glitter, consider sealing it with a clear varnish spray to protect the finish. - Step 6: Display or Gift
Arrange your frames on the table as part of your décor — they look great grouped together! At the end of the event, guests can take them home as a sweet memory of the day.
16. Personalized compact mirror decorating
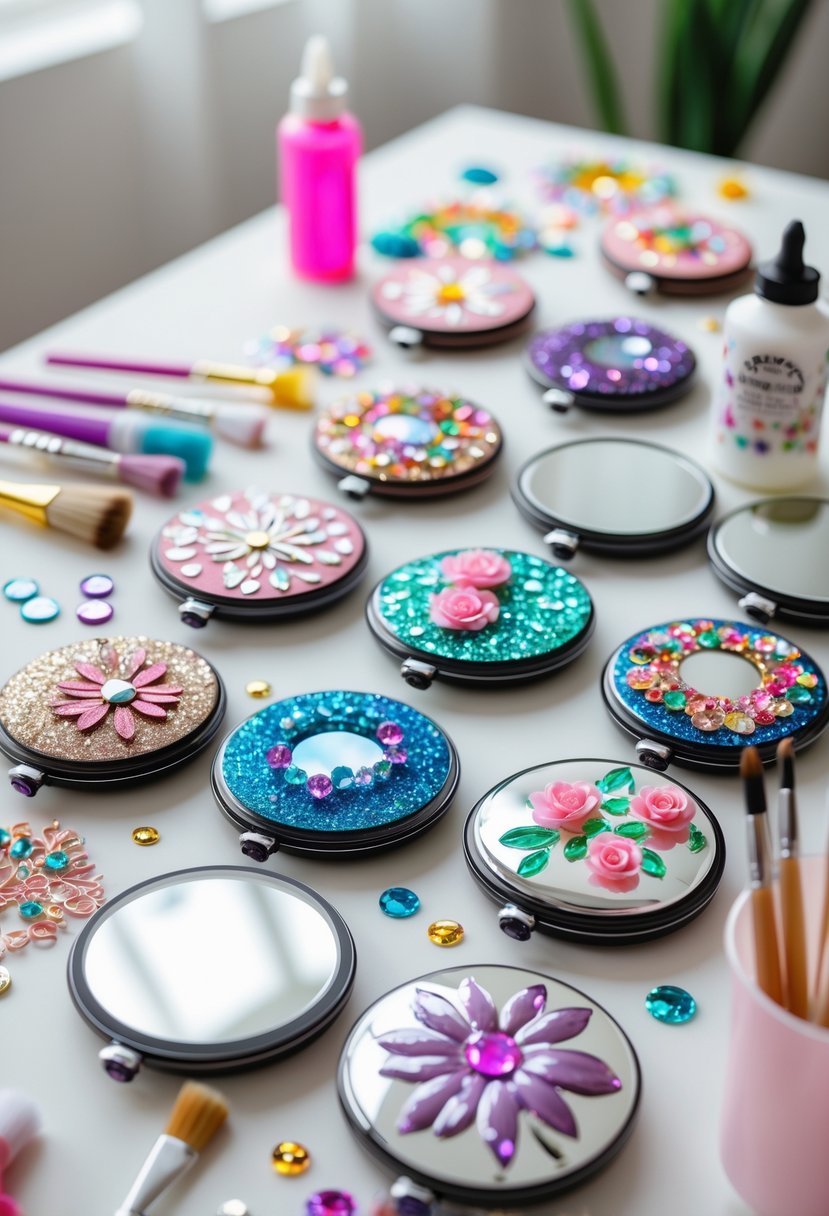
I like personalized compact mirror decorating because it’s simple and meaningful. You can use paint, stickers, or small gems to make each mirror unique. It’s a great craft that guests can keep and use after the party.
How to Make Personalized Compact Mirrors
Materials Needed:
- Plain compact mirrors (available online in bulk)
- Craft glue or strong adhesive (like E6000)
- Assorted rhinestones, gems, sequins, or pearls
- Glitter or glitter paper
- Acrylic paint (optional for base color)
- Small paintbrushes
- Mini flowers or embellishments
- Clear topcoat or sealer
Shop the materials


The steps
- Step 1: Clean and Prep Your Mirrors
Wipe each compact mirror clean with a soft cloth to remove fingerprints or dust. If you plan to paint a base color, apply a thin layer of acrylic paint and let it dry completely before decorating. - Step 2: Plan Your Design
Decide how you want each mirror to look. Popular designs include:
Floral patterns using mini roses or petals
Sparkling gemstone borders
Monogram initials with rhinestones
Glitter backgrounds with pearl accents
Sketch your design idea on paper or visualize it before gluing. - Step 3: Add Glitter or a Base Design
If you’re using glitter, brush a thin layer of glue over the surface of the compact lid, sprinkle glitter evenly, and tap off excess. Let it dry for about 10–15 minutes before adding more details. - Step 4: Decorate with Embellishments
Use tweezers or your fingers to place rhinestones, beads, or flowers. Arrange them in circles, heart shapes, or floral clusters for a luxe look. Press each piece gently into place to ensure it sticks firmly. - Step 5: Seal Your Design
Once your decorations are secure and the glue has dried, apply a thin coat of clear sealer to protect the design from wear and tear. Let dry fully before handling. - Step 6: Gift and Display
These mirrors make perfect party favors! Wrap each in organza bags or small gift boxes. Add a custom tag with the guest’s name or the event date for a personalized finishing touch.


Thank you for this amazing article and all the fun and detailed ideas!!! Love it!!L