


Table of Contents Show
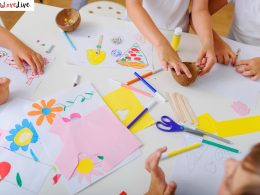
Glass crafts offer a relaxing and creative way to express yourself while making something beautiful. I enjoy working with glass because it blends art and skill, and it lets me create unique decorations or gifts.
Whether you have experience or are just starting out, glass crafting can be rewarding and fun.
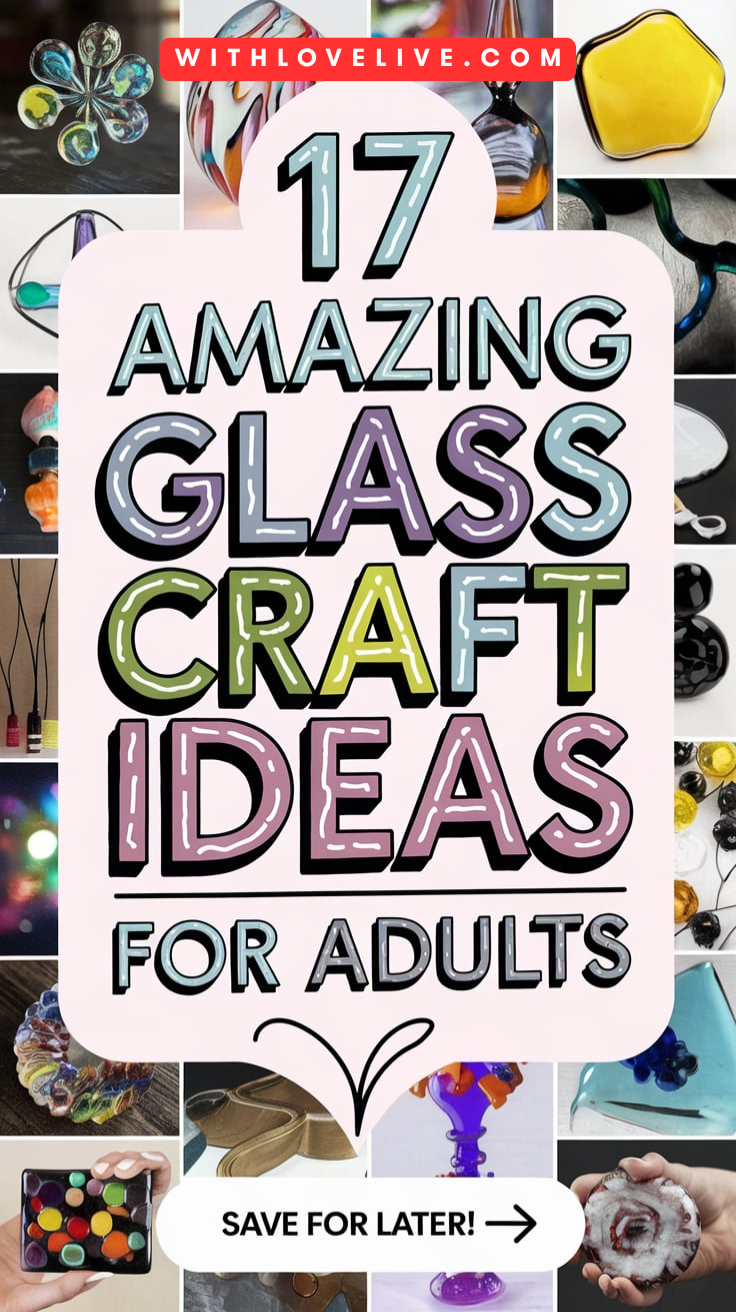
I want to share 17 amazing glass craft ideas for adults that are both enjoyable and doable. These projects allow you to explore different techniques, from painting to decorating glassware, all without needing expensive tools.
You can take these ideas and make them your own while enhancing your creativity.
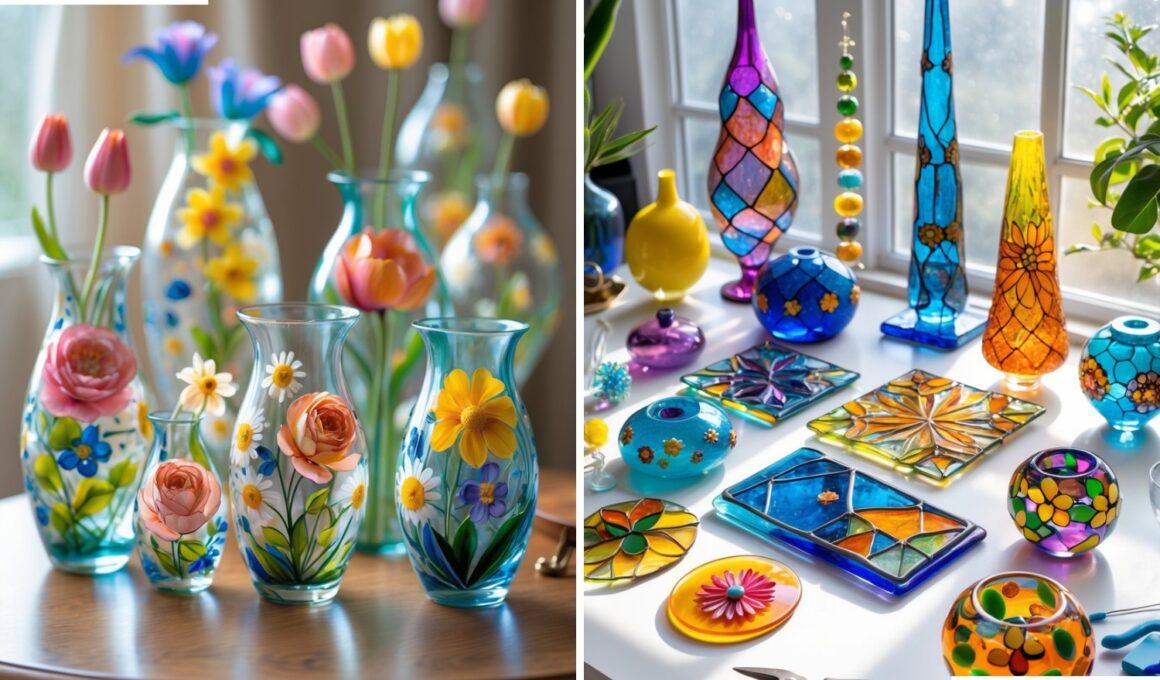
1. Painted Glass Vases with Floral Designs

I enjoy painting floral designs on glass vases because they add a natural touch to any room. Using fine brushes and bright colors helps bring simple flowers, leaves, or dots to life. This project is easy but still creates a thoughtful, personal decoration.
For People Who Love to Make Things ✂️
How to Make Painted Glass Vases with Floral Designs
Materials Needed:
- Clear glass vases (any shape or size)
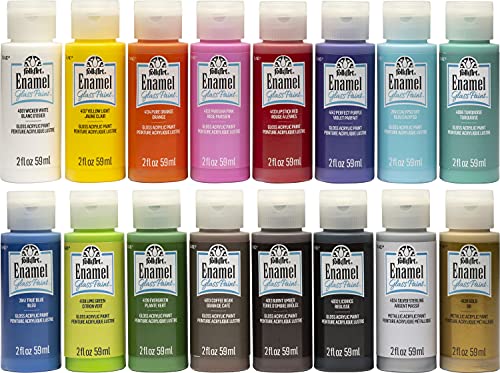
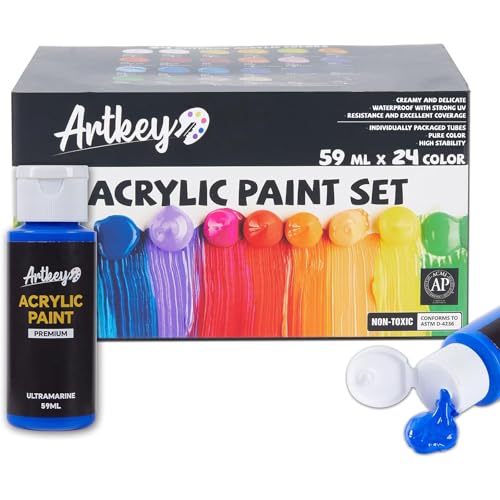
- Acrylic enamel paints (suitable for glass)
- Fine and medium paintbrushes
- Painter’s tape (optional for clean edges)
- Palette or paper plate
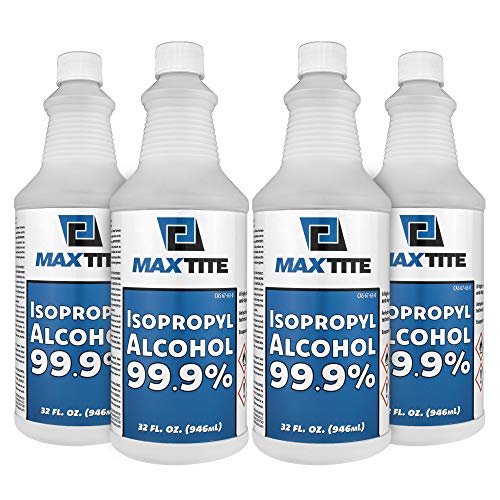
- Rubbing alcohol and a lint-free cloth
- Oven (optional for curing paint)
Shop the materials


The Steps
- Step 1: Prepare Your Vases
Wash and dry the glass vases thoroughly. Wipe the surface with rubbing alcohol to remove any oils or residue — this helps the paint stick better and ensures a smooth finish. - Step 2: Plan Your Floral Design
Sketch your idea or use floral references for inspiration. Think daisies, tulips, or wildflowers — simple shapes often look the most charming. You can paint one large flower on the front or scatter smaller blossoms around the vase. - Step 3: Start Painting
Using fine brushes, begin with the stems and leaves using green paint. Let them dry slightly before layering flower petals in bright shades like pink, yellow, or blue. Add dimension by using lighter tones for highlights and darker shades for shadows.
If you prefer a crisp border, use painter’s tape to mark areas where you don’t want paint. - Step 4: Add Details and Texture
Once your main flowers are dry, go back in with a thin brush to outline petals, add veins to leaves, or paint small buds. For an extra touch, you can lightly dab white or gold dots around the flowers to mimic pollen or sunlight reflections. - Step 5: Cure or Seal the Paint
Follow your paint’s instructions — some acrylic enamels air-dry for 24–48 hours, while others can be heat-cured in an oven at low temperature (typically 325°F for 30 minutes). This makes your design more durable and washable. - Step 6: Display or Gift Your Vases
Once dry, fill your vases with fresh or faux flowers. They make lovely centerpieces or thoughtful handmade gifts for friends, bridesmaids, or moms.
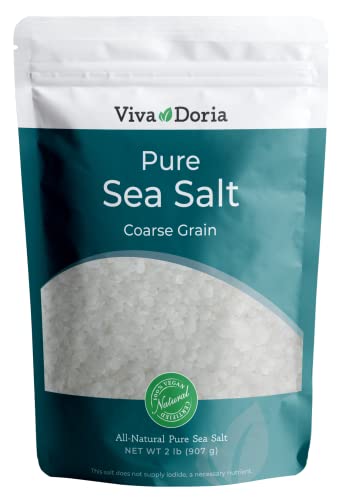
2. Etched Wine Glasses Using Citrus and Salt

I use citrus juice and salt to etch wine glasses gently. The acid in citrus helps wear down the glass surface when combined with the salt’s texture. This method is simple and needs no special tools. It adds a subtle, frosted design to the glass.
How to Make Etched Wine Glasses Using Citrus and Salt
Materials Needed:
- Clear wine glasses
- 1 lemon or orange (cut in half)
- Coarse sea salt
- Stencil or masking tape (optional for patterns)
- Soft cloth or sponge
- Warm water and dish soap
- Paper towels
Shop the materials


The steps
- Step 1: Clean Your Glasses
Wash each glass with warm soapy water and dry completely. Any oil or residue can prevent the citrus and salt mixture from etching evenly. - Step 2: Prepare the Etching “Paste”
Cut a lemon or orange in half. Dip the cut side generously into coarse sea salt — this will act as your natural abrasive for etching. - Step 3: Apply the Stencil (Optional)
If you want a specific pattern or monogram, apply a stencil or create shapes with masking tape on the glass. This helps you achieve clean lines while you etch. - Step 4: Rub the Citrus and Salt on the Glass
Gently scrub the salted citrus over the glass surface where you want the etched design to appear. Use circular motions and re-dip in salt as needed. The acid in the fruit combined with the rough texture of the salt will subtly frost the glass over time. Continue rubbing for 2–3 minutes. - Step 5: Rinse and Reveal
Rinse the glass under warm water and gently pat it dry with a clean cloth. You’ll notice a delicate frosted effect where the citrus and salt were applied. - Step 6: Add Final Touches
If you used stencils, peel them off carefully to reveal the clear areas beneath. For a fun finish, you can add a thin painted rim or gold accent to the base for a touch of elegance.
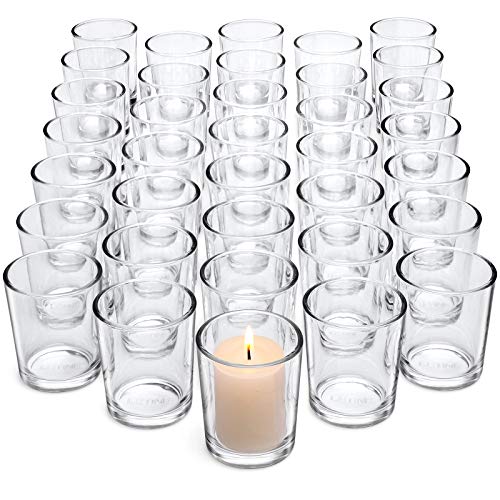
3. Dotted Glass Candle Holders with Acrylic Paint

I use acrylic paint to create small dots on glass candle holders. This simple method adds texture and color without much effort. It works well for both clear and frosted glass.
I like to arrange dots in patterns like circles or random clusters. The paint dries quickly and lasts well on glass when sealed.
How to Make Dotted Glass Candle Holders with Acrylic Paint
Materials Needed:
- Clear glass candle holders (any shape)
- Multi-surface or acrylic enamel paints
- Cotton swabs or dotting tools
- Rubbing alcohol and paper towels
- Small candles or tealights
- Baking sheet and oven (optional for curing paint)
Shop the materials


The steps
- Step 1: Clean the Glass Surface
Wipe the candle holders thoroughly with rubbing alcohol to remove any dust or fingerprints. A clean surface ensures the paint adheres well. - Step 2: Choose Your Colors and Pattern
Pick three to five colors that pop together — think bright orange, sky blue, yellow, and purple for a fun look. You can create neat rows of dots, random scatterings, or even gradient patterns from base to rim. - Step 3: Apply the Dots
Dip a cotton swab or the flat end of a paintbrush handle into the paint and gently dab it onto the glass to form dots. For crisp circles, avoid overloading your tool with paint. Space the dots evenly and let each color dry slightly before adding another to avoid smudging. - Step 4: Layer and Dry
Continue adding dots in different colors to build your pattern. Allow the holders to air dry for at least 1–2 hours (or follow your paint’s drying instructions). - Step 5: Optional – Cure the Paint for Durability
If you’re using glass or enamel paint, cure the holders in the oven to make them washable:
Place them on a baking sheet.
Bake at 325°F (165°C) for 30 minutes.
Let them cool completely inside the oven.
This step sets the paint permanently for long-lasting color. - Step 6: Add Candles and Display
Place tealight or pillar candles inside the holders and light them up. The glow through the colorful dots creates a beautiful, festive ambiance.
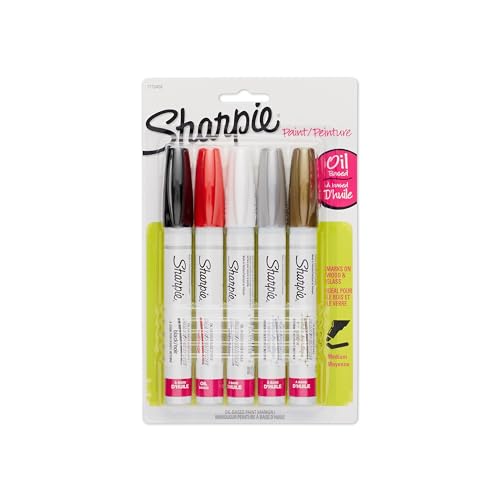
4. Personalized Glass Drinkware with Sharpie Markers

I enjoy using Sharpie markers to design on glass drinkware. It’s easy to create custom mugs or glasses with simple patterns or messages. After drawing, baking the glass helps the design last longer. This craft is a fun way to make unique gifts or personalize your kitchen items.
How to Make Personalized Glass Drinkware with Sharpie Markers
Materials Needed:
- Clear glass cups, jars, or tumblers
- Oil-based Sharpie paint markers (multi-color set)
- Rubbing alcohol and cotton pads
- Oven (for setting the design)
- Optional: masking tape, stencils, or letter stickers
Shop the materials


The steps:
- Step 1: Clean and Prep Your Glasses
Wash each glass and dry it completely. Wipe the outside with rubbing alcohol to remove any oils or fingerprints — this ensures your design sticks properly. - Step 2: Plan Your Design
Decide what you’d like to draw — flowers, names, hearts, doodles, or abstract lines. You can lightly sketch on paper first or place a printed design inside the cup as a guide. - Step 3: Start Drawing
Use oil-based Sharpie markers to draw directly onto the glass. Take your time, and if you make a mistake, wipe it off with a little rubbing alcohol before it dries. For smooth lines, apply gentle, steady pressure rather than pressing too hard.
You can mix colors, add shading, or create patterns — think floral motifs, zigzags, or cute messages like “Cheers” or “Bride Squad.” - Step 4: Let It Dry
Once your artwork is complete, let the glasses air dry for at least 12–24 hours before baking. This prevents the colors from smearing during curing. - Step 5: Bake to Set the Design
To make your design permanent:
Place the glasses on a baking sheet inside a cold oven.
Turn the oven to 325°F (165°C) and bake for 30 minutes.
Turn off the oven and let the glasses cool inside gradually before removing them.
This heat-sets the paint so it won’t wash off easily. - Step 6: Display or Gift Them!
Your personalized drinkware is now ready! Use them to serve mocktails, iced tea, or as decorative storage jars.
5. Mosaic Glass Picture Frames

I enjoy turning plain picture frames into pieces of art using mosaic glass. This craft lets me use colorful tiles or broken glass to make unique designs. It adds a personal touch to my home and memories.
How to Make Mosaic Glass Picture Frames
Materials Needed:
- Plain wooden or plastic photo frames
- Mosaic glass tiles or broken glass pieces
- Strong craft glue or mosaic adhesive
- Tweezers
- Grout (white, clear, or colored)
- Sponge and cloth
- Optional: gloves and safety glasses
Shop the materials


The steps:
- Step 1: Prepare Your Frame
Start by removing the glass and backing from your frame. Make sure the frame surface is clean and dry before gluing. You can lightly sand glossy finishes so the glue sticks better. - Step 2: Plan Your Mosaic Layout
Before gluing, arrange your glass pieces on the frame to visualize your design. You can create patterns (like stripes or geometric shapes) or go freestyle with a mix of colors. Leave a small gap (about 1/8 inch) between pieces for the grout. - Step 3: Glue the Pieces Down
Using tweezers for precision, apply a small amount of glue to each glass piece and press it gently onto the frame. Continue until the entire border is covered. Let it dry for several hours or overnight. - Step 4: Apply the Grout
Once the glue is dry, spread grout over the glass pieces using a rubber spatula or gloved hand. Make sure it fills all the spaces between tiles. Wait 10–15 minutes, then use a damp sponge to wipe away excess grout from the glass surfaces while keeping the gaps filled. - Step 5: Clean and Polish
After the grout has set (about 24 hours), buff the surface with a soft cloth to make your glass pieces shine. - Step 6: Reassemble the Frame
Put the glass and backing back into the frame. You now have a beautiful mosaic frame ready to display your favorite memories!
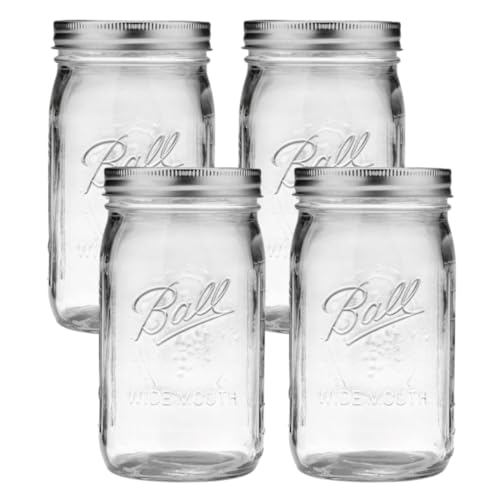
6. Glitter Polka Dot Mason Jars

I like making glitter polka dot mason jars because they add a simple sparkle. Using glass paint for the dots keeps the look neat and stylish. These jars work well as decorations or fun drinking glasses.
How to Make Glitter Polka Dot Mason Jars
Materials Needed:
- Mason jars (any size)
- Glitter (fine or chunky, your choice)
- Mod Podge or craft glue
- Foam brush or paintbrush
- Circle stickers or a round sponge dabber
- Spray sealant (optional)
- Newspaper or craft mat (to protect your surface)
Shop the materials


The steps:
- Step 1: Prep Your Workspace and Jars
Lay down a newspaper or a mat to catch excess glitter. Wash and dry the jars thoroughly — clean surfaces help the glue and glitter stick evenly. - Step 2: Apply Your Polka Dots
You can use small circular stickers as stencils or a sponge dabber for a hand-painted look. Dip the sponge or brush tip into Mod Podge and dab polka dots around the jar, spacing them evenly. For a playful mix, alternate dot sizes or use multiple colors later. - Step 3: Add the Glitter
While the glue is still wet, sprinkle glitter generously over the dots. Tap off the excess gently. Continue until the entire jar is covered in sparkling polka dots. - Step 4: Let It Dry
Allow the jars to dry for about 1–2 hours. If you used multiple colors of glitter, wait until one color dries before adding the next to avoid blending. - Step 5: Seal the Design
Once the glitter has set, brush a thin layer of Mod Podge over the surface to lock the glitter in place. Alternatively, use a clear spray sealant for a smoother finish that’s more durable. - Step 6: Style Your Jars!
Fill them with flowers, fairy lights, or tea candles for a cozy, glowing look. You can also use them as utensil holders or treat jars for parties.
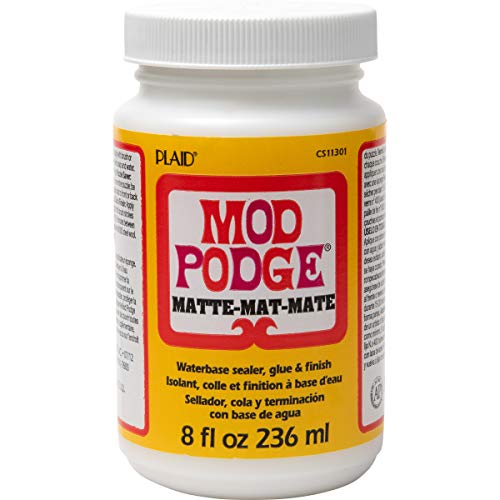
7. Decoupage Glass Ornaments

I enjoy making decoupage glass ornaments because they are simple and creative. Using paper scraps and glue, I can give plain glass balls a fresh look. It’s a fun way to add personal style to holiday decorations.
How to Make Decoupage Glass Ornaments
Materials Needed:
- Clear or colored glass ornaments
- Decorative napkins or patterned tissue paper
- Mod Podge (matte or glossy)
- Soft paintbrush or foam brush
- Scissors
- Tweezers
- Ribbon or twine for hanging
Shop the materials


The steps:
- Step 1: Prepare Your Ornaments
If using clear glass ornaments, remove the top metal caps and clean the surface with rubbing alcohol to remove dust or oils. Let them dry completely. - Step 2: Cut Your Designs
Cut out floral or pattern sections from your napkins or tissue paper. If you’re using napkins, peel away the top printed layer only—it’s thinner and easier to apply smoothly. - Step 3: Apply Mod Podge
Brush a thin layer of Mod Podge onto the area where you’ll place your design. Be sure to cover small sections at a time so the glue doesn’t dry before you attach the paper. - Step 4: Attach the Design
Using tweezers or your fingers, gently press the paper piece onto the ornament. Smooth it out carefully to avoid wrinkles or bubbles. If needed, use a soft brush to press down the edges. Continue adding more pieces until your ornament is fully covered or designed to your liking. - Step 5: Seal the Design
Once the paper has dried (about 20–30 minutes), brush another light coat of Mod Podge over the entire ornament to seal it. Allow it to dry for several hours or overnight for best results. - Step 6: Add Finishing Touches
Reattach the ornament cap and tie on a ribbon or twine loop for hanging. You can also add glitter, small gems, or metallic paint highlights for extra sparkle.
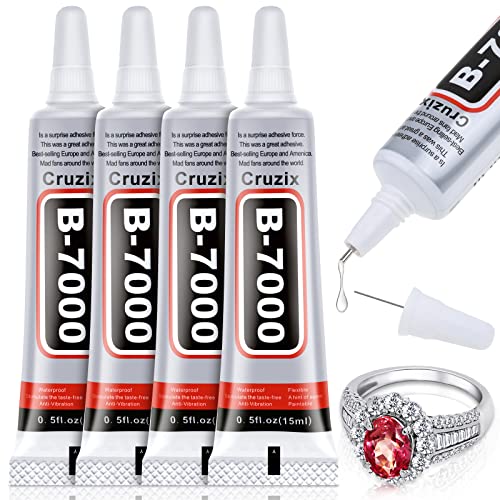
8. Fused Glass Pendants and Jewelry

I enjoy making fused glass jewelry because it lets me create unique pendants and earrings. The process melts glass pieces together in a kiln, forming a solid, colorful design. It’s a simple way to make personalized accessories that stand out.
How to Make Fused Glass Pendants and Jewelry
Materials Needed:
- Assorted colored glass sheets (COE 90 or 96)
- Glass cutter and running pliers
- Kiln with glass-fusing capability
- Kiln shelf paper or fiber shelf
- Glass adhesive or tack fuser glue
- Jewelry findings (bails, chains, or cords)
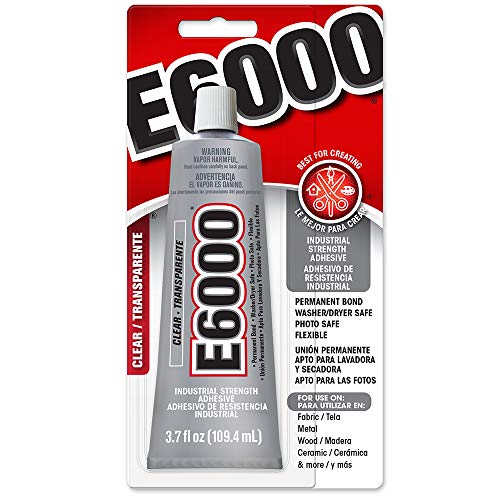
- E6000 adhesive or epoxy glue
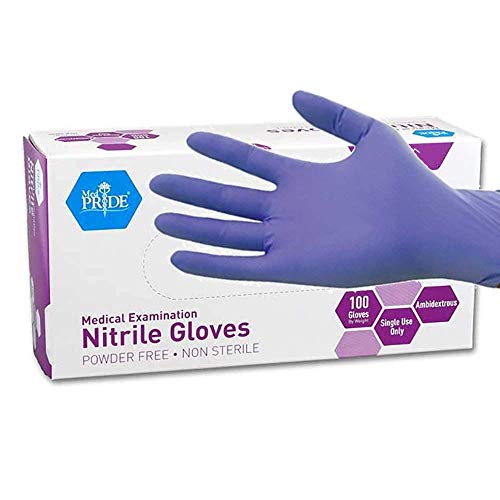
- Safety goggles and gloves
Shop the materials


The steps:
- Step 1: Choose and Cut Your Glass
Select 2–3 complementary glass colors. Cut small shapes using a glass cutter—squares, ovals, or freeform pieces all work well. You can mix opaque and transparent glass for more depth. - Step 2: Layer Your Design
On a kiln shelf lined with shelf paper, layer your glass pieces. Start with a base piece, then stack smaller shapes on top to create your design. If you want to add metallic flakes or stringer details, place them now. - Step 3: Fuse in the Kiln
Carefully place your layered glass in the kiln. Fire according to the glass manufacturer’s instructions—typically to around 1450°F (788°C) for a full fuse, or lower (1350°F / 732°C) for a tack fuse that retains texture. Let it cool slowly to prevent cracking. - Step 4: Clean and Attach Jewelry Hardware
Once cooled, clean your glass piece to remove any kiln residue. Use E6000 glue to attach a metal bail to the back. Let it dry for at least 24 hours. - Step 5: Assemble Your Jewelry
Thread your pendant onto a chain, leather cord, or silk ribbon. You can also use your fused glass pieces to make earrings, rings, or bracelets by gluing them onto suitable findings.
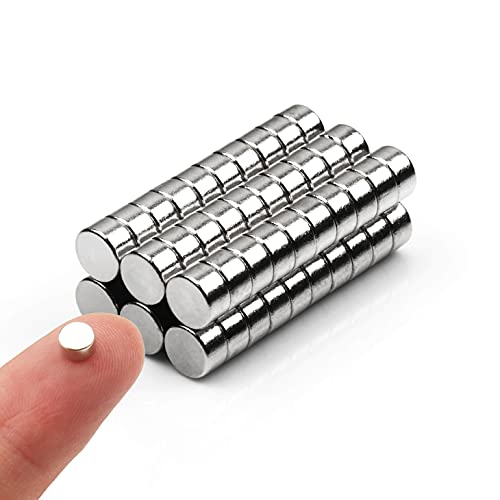
9. Glass Gem Magnets

I enjoy making glass gem magnets because they are simple and fun. You just glue a picture or design to the flat side of the gem. Then, you attach a magnet to the back to create a colorful fridge decoration.
How to Make Glass Gem Magnets
Materials Needed:
- Flat glass gems (available at craft or dollar stores)
- Small round magnets
- Patterned scrapbook paper, photos, or printed designs
- Mod Podge or clear-drying craft glue
- Scissors or hole punch
- Paintbrush
- Hot glue gun or strong craft adhesive
Shop the materials


The steps:
- Step 1: Choose Your Designs
Pick out the designs you want to use under your glass gems. You can use patterned paper, photos, or even small printed words. Make sure your design fits the size of the glass gem. - Step 2: Cut the Paper to Size
Place a gem on top of your paper and trace around it lightly with a pencil. Cut out each shape carefully to match the gem’s round or oval base. - Step 3: Attach the Design to the Gem
Brush a thin layer of Mod Podge or clear glue onto the flat side of the glass gem. Place your paper design face-down onto the glue so that the image shows through the glass. Smooth out any air bubbles and let it dry for about 15–20 minutes. - Step 4: Seal and Add the Magnet
Once the glue has dried, brush another thin layer of Mod Podge on the back of the paper for extra protection. When completely dry, use a hot glue gun or strong adhesive to attach a magnet to the back of each gem. - Step 5: Let Everything Set
Allow the magnets to dry completely before using — at least a few hours for best adhesion. Once done, you’ll have a set of beautiful, glossy glass magnets ready to brighten your fridge, whiteboard, or locker!
10. Hand-Painted Glass Platters

I enjoy hand-painting glass platters because they add a personal touch to any table. Simple designs or bold patterns both work well on smooth glass surfaces. These platters are perfect for serving food or just decoration.
How to Make Hand-Painted Glass Platters
Materials Needed:
- Clear or lightly tinted glass platters (flat or wavy-edged)
- Glass paints (transparent or opaque)
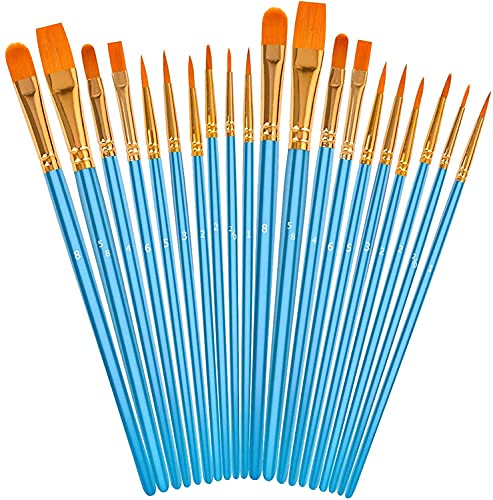
- Paintbrushes (fine tip and round)
- Painter’s tape or stencils (optional)
- Rubbing alcohol and paper towels
- Oven (for curing, if required by your paint brand)
Shop the materials
The steps
- Step 1: Clean and Prepare Your Glass
Wash your glass platters with warm soapy water and dry thoroughly. Wipe them down with rubbing alcohol to remove any oils or dust — this helps the paint stick evenly. - Step 2: Plan Your Design
Sketch your design idea on paper before you start. Floral, abstract, or geometric patterns work beautifully on glass platters. If you prefer symmetry or cleaner lines, use painter’s tape or stencils to outline your sections. - Step 3: Start Painting
Using your chosen glass paints, apply your first layer of color. For a stained-glass effect, use transparent paints in bold shades. Opaque paints work great for more vibrant or detailed looks. Let each color dry before adding another to prevent smudging. - Step 4: Add Fine Details
Once your base colors are dry, add outlines, dots, or small brush accents to make your design pop. You can mix metallic paints or use a toothpick for intricate designs like flower petals or mandala patterns. - Step 5: Cure and Set the Paint
Check the paint bottle for curing instructions. Most glass paints need to either air dry for 24–48 hours or be baked in the oven to make the design permanent. If baking, place the platter in a cool oven, heat to around 325°F (165°C), bake for 30 minutes, then let it cool completely inside the oven. - Step 6: Display or Gift Your Art
Your platter is now ready! Use it as a serving tray for dry foods, a candle base, or a decorative wall or table accent.
11. Stained Glass Suncatchers

I enjoy making stained glass suncatchers because they are simple and rewarding. Using paint or colored glue, I create designs that shine when sunlight passes through. These crafts add color and charm to any window in my home.
How to Make Stained Glass Suncatchers
Materials Needed:
- Clear glass sheets or pre-cut glass shapes (like circles or ovals)
- Glass paint or stained glass paint kit
- Lead strip or liquid leading (for outlines)
- Paintbrushes or droppers
- Chain or a strong string for hanging
- Rubbing alcohol and a lint-free cloth
Shop the materials
The steps:
- Step 1: Clean the Glass
Start by wiping your glass pieces with rubbing alcohol to remove any dirt, fingerprints, or oils. A clean surface helps your paint stick evenly. - Step 2: Sketch or Trace Your Design
Choose your design — floral patterns, geometric shapes, or mandalas look stunning. Tape your design underneath the glass as a guide or lightly sketch it on with a washable marker. - Step 3: Outline the Pattern
Use liquid leading or adhesive lead strips to trace the outlines of your design directly on the glass. This creates the traditional look of stained glass and prevents colors from bleeding together. Allow the leading to dry completely (usually 6–8 hours). - Step 4: Fill in with Color
Once your outlines are dry, use glass paints to fill in the sections. You can mix colors for a gradient effect or layer them for richer tones. Transparent paints work best since they let sunlight shine through beautifully. - Step 5: Let It Dry and Set
Allow your suncatcher to dry for at least 24 hours. Some paints may need baking to cure — check the label for specific instructions. - Step 6: Add Hanging Hardware
Attach a small chain or cord to the top of your suncatcher. You can use adhesive hooks or small rings if your piece doesn’t have a pre-made hanging hole. - Step 7: Display and Enjoy
Hang your finished suncatcher in a sunny window or garden area. Watch how it glows and transforms natural light into colorful reflections!
12. Frosted Glass Tumblers with Spray Paint

I like using frosted spray paint to create a smooth, matte finish on glass tumblers. It’s quick and gives a clean, modern look. This method works well for gifts or adding style to your own glassware.
How to Make Frosted Glass Tumblers with Spray Paint
Materials Needed:
- Plain glass tumblers
- Frosted glass spray paint (available in matte, translucent, or colored finishes)
- Painter’s tape or vinyl stickers
- Newspaper or drop cloth
- Rubbing alcohol and a soft cloth
- Optional: Acrylic paints or glass paint markers for added details
Shop the materials


The steps:
- Step 1: Clean the Glass
Wash and dry your tumblers thoroughly, then wipe them down with rubbing alcohol to remove any oils or residue. This step ensures that the spray paint adheres smoothly and evenly. - Step 2: Tape Off Your Design
Use painter’s tape or vinyl stickers to block off any areas you don’t want painted. You can create stripes, geometric patterns, or polka dots. Get creative — overlapping circles and blended colors make for striking results. - Step 3: Prepare Your Painting Area
Lay out a newspaper or a drop cloth in a well-ventilated area. Place your glasses upside down so you can easily spray from the bottom up for even coverage. - Step 4: Apply the Frosted Spray Paint
Shake the can well, then spray in light, even coats about 8–10 inches away from the glass. Start with a thin layer and let it dry for a few minutes between coats. Add more layers for a denser frosted look or mix colors for a gradient effect. - Step 5: Add Optional Color Details
Once the frosted base has dried, you can use acrylic paints or glass paint markers to add colorful accents — like dots, abstract swirls, or floral patterns. This gives your tumblers a personalized touch. - Step 6: Dry and Cure
Let your glasses dry completely for 24 hours. Some spray paints may suggest oven curing for added durability — follow the instructions on your paint label. - Step 7: Reveal and Use
Remove the tape or stickers carefully to reveal crisp, clean lines. Wash your new tumblers gently by hand, and avoid dishwashers to preserve the design.
13. Glass Etching with Stencils

I use stencils to create clear, sharp designs on glass. The stencil protects parts of the glass while the etching cream changes the exposed areas. This method is simple and gives consistent results. It is a great way to personalize glass items like cups or mirrors.
How to Make Etched Glass with Stencils
Materials Needed:
- Glass surface (bottle, plate, frame, or panel)
- Adhesive stencils or vinyl cutouts
- Etching cream (available at most craft stores)
- Painter’s tape
- Rubber gloves and protective eyewear
- Foam brush or plastic spatula
- Rubbing alcohol and paper towels
Shop the materials
The steps:
- Step 1: Clean the Glass
Wipe your glass thoroughly with rubbing alcohol to remove any dust or oil. This ensures that your stencil sticks well and that the etching cream works evenly. - Step 2: Apply the Stencil
Place your stencil on the glass where you want the design to appear. Press down firmly, especially around the edges, to prevent the cream from seeping underneath. Use painter’s tape to secure it if needed. - Step 3: Protect Surrounding Areas
Cover any parts of the glass that you don’t want etched with tape or additional vinyl. Etching cream is strong and will leave a frosted finish anywhere it touches. - Step 4: Apply Etching Cream
Wearing gloves, use a foam brush or plastic spatula to spread a thick, even layer of etching cream over the exposed design. Follow the instructions on your specific brand — most require about 5 to 10 minutes of setting time. - Step 5: Rinse and Reveal
Once the time is up, rinse the cream off under running water while still wearing gloves. Carefully peel off the stencil and tape to reveal your etched design. - Step 6: Dry and Admire
Pat dry with a soft cloth. You’ll see a permanent frosted pattern that’s dishwasher-safe and scratch-resistant — perfect for glassware, windows, or mirrors.
14. Glitter-Dipped Glassware

I like to dip the base of glasses in glue and then cover them with glitter. This adds sparkle while keeping the rim clear for safe drinking. Sealing with Mod Podge helps keep the glitter in place and makes cleaning easier.
How to Make Glitter-Dipped Glassware
Materials Needed:
- Plain wine glasses or champagne flutes
- Painter’s tape
- Mod Podge or clear-drying craft glue
- Fine glitter (any color you like)
- Small paintbrush or foam brush
- Paper plate or tray (to catch extra glitter)
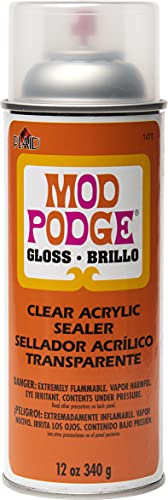
- Clear acrylic sealer spray (optional, for longer durability)
Shop the materials


The steps:
- Step 1: Clean Your Glasses
Start by wiping each glass thoroughly with rubbing alcohol to remove fingerprints and oils. This ensures the glue and glitter adhere evenly and cleanly. - Step 2: Tape Off the Design
- Use painter’s tape to mark where you want your glitter to stop — you can glitter just the base, the stem, or even add a rim accent at the top like in the photo. Make sure the tape is firmly pressed down to create clean edges.
- Step 3: Apply Glue
Using a small brush, apply a thin, even layer of Mod Podge or craft glue to the exposed area below (or above) the tape. Avoid making it too thick, as that can cause clumps later. - Step 4: Add the Glitter
Hold the glass over your paper plate and sprinkle glitter generously onto the glued section. Rotate the glass as you go so that every part is evenly covered. Shake off the excess and let it dry for at least 1 hour. - Step 5: Seal the Glitter
Once it’s dry, gently tap off any loose glitter. For a smoother finish, apply a second thin coat of Mod Podge over the glitter or use a clear acrylic sealer spray to lock it in place. Let it dry completely overnight. - Step 6: Remove the Tape
Carefully peel off the painter’s tape to reveal crisp, clean lines. If needed, touch up the edges with a bit of glue and glitter. - Step 7: Cure and Use
Let your glasses cure for at least 24 hours before using. These are best hand-washed only — avoid the dishwasher to keep that gorgeous sparkle intact.
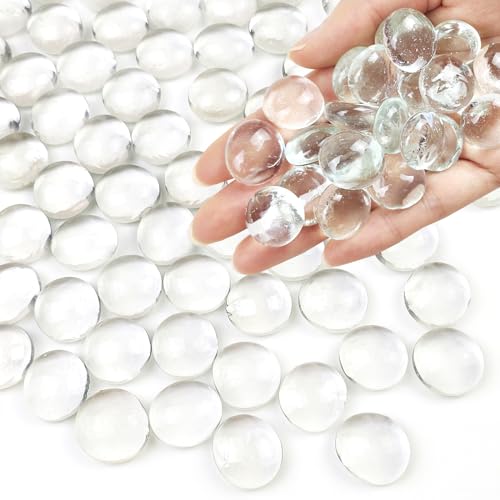
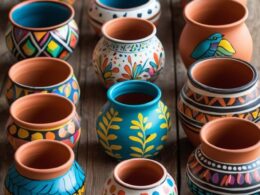
15. Colorful Glass Pebble Coasters

I like making coasters using painted glass pebbles. They are easy to customize with any colors I want.
I glue the pebbles together and let them dry completely before using them. These coasters add a simple, colorful touch to my table.
How to Make Colorful Glass Pebble Coasters
Materials Needed:
- Clear glass pebbles (flat-bottomed, assorted colors)
- Corkboard or felt coaster bases
- Clear-drying strong adhesive (like E6000 or Gorilla Glue)
- Pencil and scissors
- Ruler (optional)
- Mod Podge or clear sealer spray (optional for glossy finish)
Shop the materials


The steps:
- Step 1: Prepare the Base
Trace a circle or square onto the corkboard using a mug or small bowl as your guide. Cut out your coaster shape — about 4 inches wide works best for most glasses. - Step 2: Arrange the Pebbles
Before gluing, lay out your glass pebbles on top of the base to plan your design. Mix colors to create a mosaic effect or go for a simple pattern like alternating blue and green for a calmer look. - Step 3: Glue the Pebbles in Place
Once you’re happy with the layout, lift each pebble and add a small dab of glue underneath. Press it down gently onto the cork and continue until the surface is covered. Avoid leaving large gaps between the pebbles. - Step 4: Fill the Gaps (Optional)
For a smoother surface, you can fill the small spaces between pebbles with clear epoxy resin or a bit of transparent glue. This step gives your coasters a solid, glassy feel. - Step 5: Let It Dry
Allow the glue to cure completely — usually 12 to 24 hours, depending on your adhesive. Make sure the coasters are laid flat while drying. - Step 6: Seal the Surface (Optional)
For extra shine and durability, brush on a thin layer of Mod Podge or spray with a clear sealer. This helps prevent water rings and keeps the colors looking fresh. - Step 7: Enjoy and Display
Once dry, your coasters are ready to use! They make wonderful handmade gifts and are perfect for adding a colorful accent to any table or patio setting.
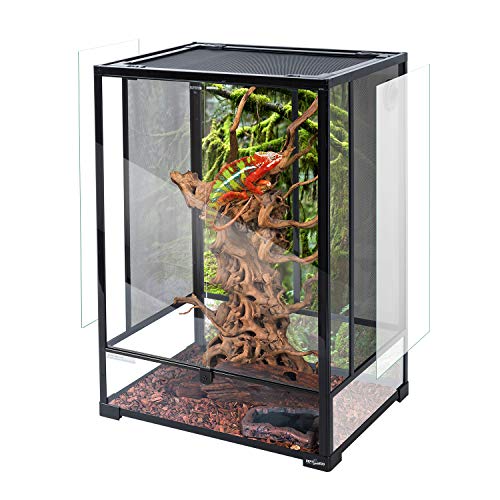
16. Glass Terrariums with Decorative Stones

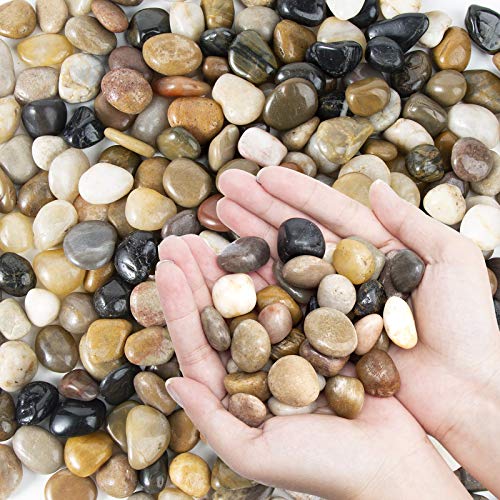
I like using decorative stones in glass terrariums to add color and texture. They create a nice contrast with the plants and help with drainage. These stones come in many shapes and colors, making each terrarium unique.
How to Make Glass Terrariums with Decorative Stones
Materials Needed:
- Glass terrariums (any shape: geometric, globe, or cube)
- Small decorative stones or pebbles (mixed colors work best)
- Sand or gravel (optional for layering)
- Air plants, faux succulents, or moss
- Tweezers or tongs (for placement)
- Small paintbrush (for cleanup)
Shop the materials


The steps:
- Step 1: Choose Your Glass Terrarium
Pick a clear glass terrarium that matches your style. Geometric shapes add a modern vibe, while round glass bowls feel softer and more organic. Make sure it’s clean and free of dust or fingerprints. - Step 2: Create a Base Layer
Start by pouring a thin layer of sand or fine gravel into the bottom of your terrarium. This adds a natural base and gives your stones some depth when layered on top. - Step 3: Add the Decorative Stones
Gently add your decorative stones, layering different sizes and colors to create contrast. Larger stones work well at the bottom, while smaller pebbles can fill in the gaps. If you want a beachy look, try neutral tones; for something bolder, go with colorful polished stones. - Step 4: Add Plants or Moss
Nestle your air plants or moss between the stones. Use tweezers for more precise placement. You can also mix in faux succulents for a maintenance-free design that still looks fresh year-round. - Step 5: Adjust and Clean Up
Use a small paintbrush to sweep away any dust or misplaced stones from the glass. This gives your terrarium a clean, professional finish. - Step 6: Display It
Place your terrarium on a windowsill, coffee table, or desk where it can catch some natural light. If you’re using air plants, mist them lightly once or twice a week.
17. Sharpie Tie-Dye Glass Bottles

I use Sharpie markers to create colorful tie-dye patterns on glass bottles. The process is simple and lets me customize each bottle with bright, unique designs. These bottles make great decorations or gifts.
How to Make Sharpie Tie-Dye Glass Bottles
Materials Needed:
- Clean glass bottles (wine, soda, or milk bottles work great)
- Assorted Sharpie markers (choose bright colors)
- Rubbing alcohol (at least 70%)
- Dropper or spray bottle
- Plastic cup or small bowl (for alcohol)
- Gloves (optional, to avoid stains)
- Paper towels or plastic sheet (to protect your workspace)
Shop the materials


The steps:
- Step 1: Clean and Prep Your Bottles
Remove any labels and residue using warm soapy water. Wipe the bottles with rubbing alcohol to ensure the glass is completely clean and oil-free. This helps the color stick better. - Step 2: Add Your Sharpie Designs
Use your Sharpies to draw colorful dots, lines, or random patterns on the glass. You can focus on one section at a time or cover the entire bottle. Don’t worry about perfection — the alcohol will blend it beautifully later! - Step 3: Add the Alcohol
Using a dropper or spray bottle, carefully apply rubbing alcohol over the inked areas. Watch as the colors spread and blend together, creating a swirling tie-dye effect. Tilt or gently rotate the bottle to help the colors flow in different directions. - Step 4: Let It Dry
Once you’re happy with the design, place the bottle upright and let it dry completely for several hours. The alcohol will evaporate, leaving behind a soft, watercolor-like pattern. - Step 5: Optional Seal
To make your design last longer, you can seal the bottle with a coat of clear acrylic spray. This helps prevent smudging and adds a glossy finish. - Step 6: Decorate and Display
Once dry, your Sharpie tie-dye bottles are ready to display! Use them as vases, centerpieces, or decorative accent bottles with fairy lights inside.


Where are the instructions for each of these?
Hey Sarah, please bear with us as we update them!
Thanks for stopping by x
Hello Jasmine
Please can you send me the instructions for the tie-dye glass bottles. They are beautiful and I’d love to try making them.
Hey Madeleine,
We already have the detailed instructions up, any confusing part we can clarify on?
Jasmine xx.