


Table of Contents Show
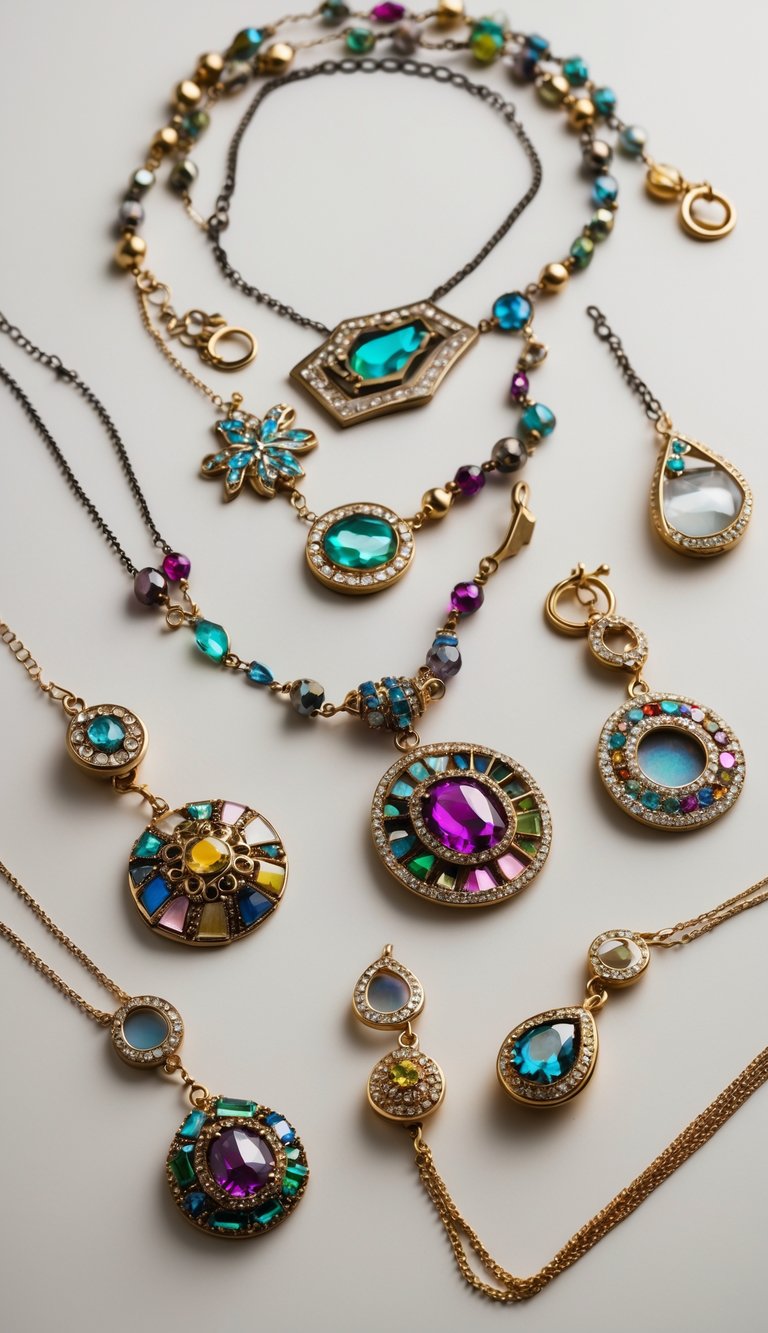
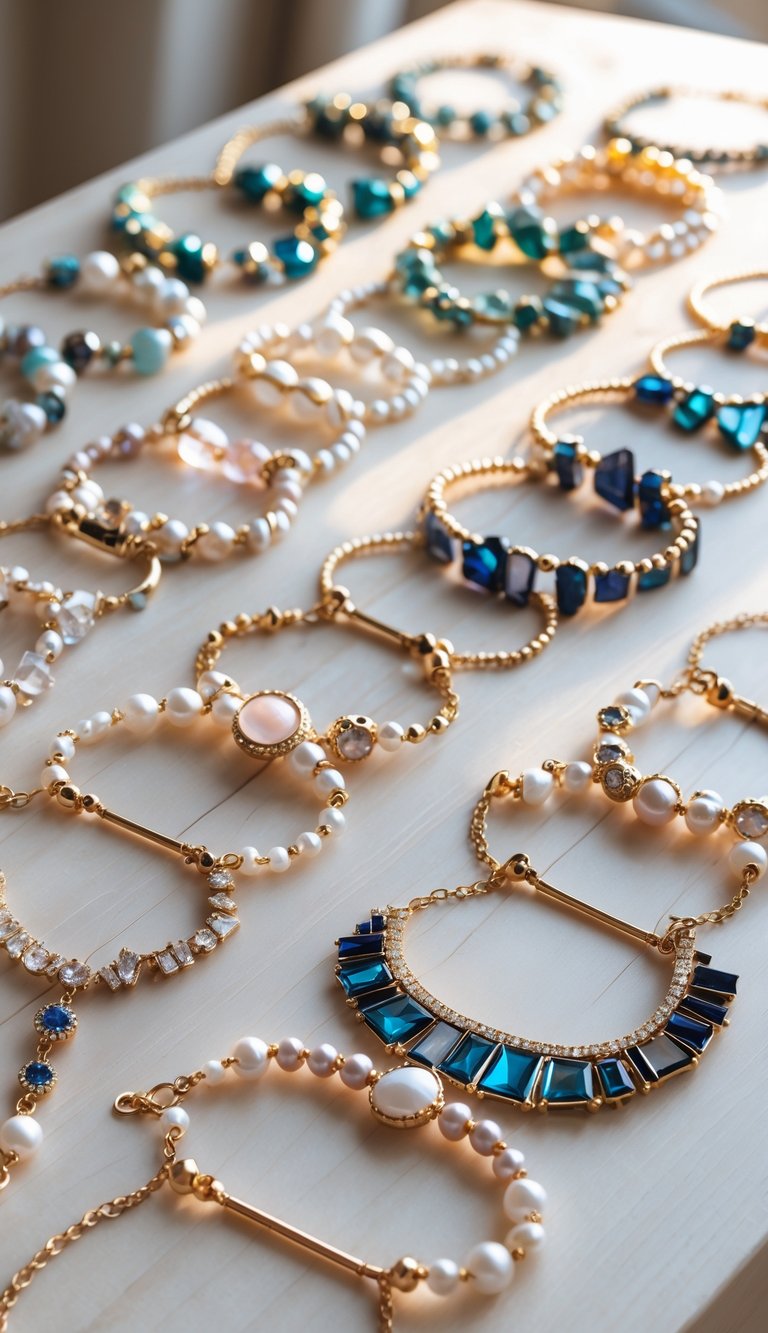
Honestly, I’m always torn about what to do with broken or outdated jewelry. Maybe it’s missing a stone, maybe the clasp is busted, or maybe my taste has just changed. Instead of letting those old pieces gather dust, I see them as a fun excuse to experiment and make something new.
There’s something satisfying about turning broken jewelry into creative crafts—giving forgotten items a second life as home décor or personalized gifts.
It feels practical, a little quirky, and honestly, just more fun than tossing them out.
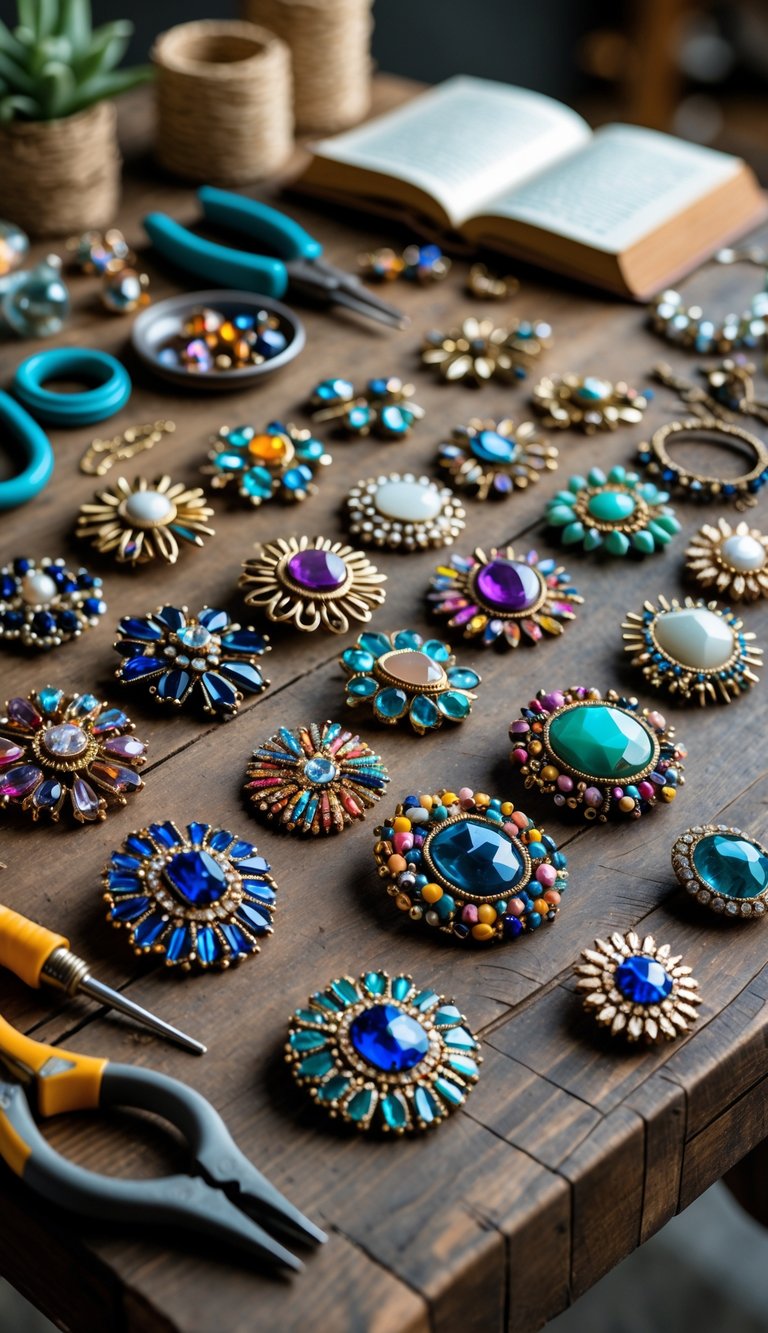
1. Jewelry Picture Frame Embellishments
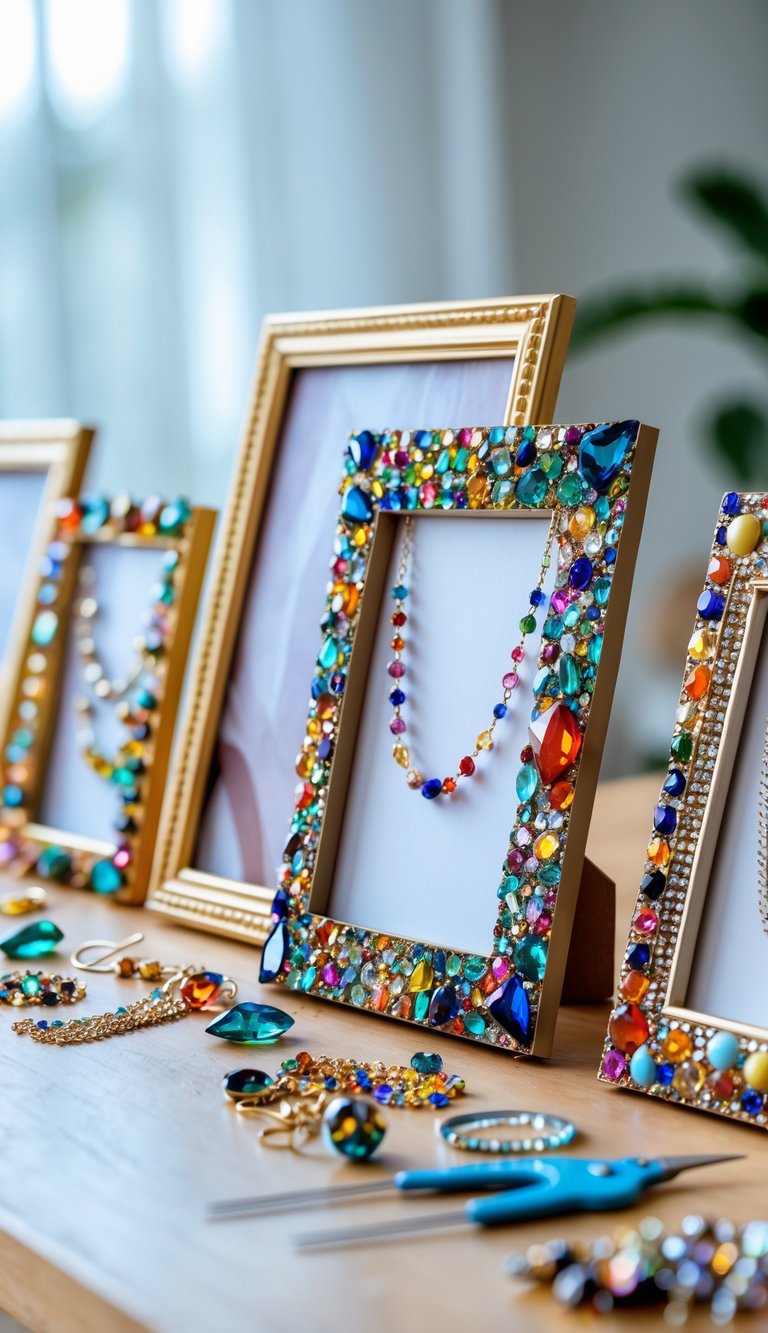
I grab a plain picture frame and pile up my broken jewelry. Mixing brooches, earrings, and pendants, I play around with the arrangement until something clicks. A dab of strong glue holds each piece in place. I let it dry, then pop in my favorite photo—done.
Browse The Items
For People Who Love to Make Things ✂️


How to Make Jewelry Picture Frame Embellishments
Materials Needed:
- Old or broken jewelry pieces (beads, rhinestones, pendants, earrings, etc.)
- A plain picture frame (wood, plastic, or metal)
- Strong craft glue or hot glue gun
- Tweezers (optional, for small pieces)
- Scissors or wire cutters (for trimming jewelry parts)
The Steps:
- Step 1: Gather and Sort Jewelry
Collect old jewelry you no longer use. Sort by size, color, and shape so you can plan your design more easily. - Step 2: Plan Your Layout
Lay out the jewelry pieces on the frame before gluing. Decide if you want a full coverage look, just accents on corners, or a pattern around the frame. - Step 3: Attach the Jewelry
Apply a small amount of glue to the back of each piece and press it firmly onto the frame. Start with larger pieces first, then fill in the gaps with smaller beads or gems. - Step 4: Layer for Texture
For a more luxurious look, layer smaller gems over larger ones, or overlap earrings and brooches to add depth and sparkle. - Step 5: Let It Dry
Allow the glue to dry completely before placing a photo inside. Once dry, your embellished frame is ready to display or gift!
⏰ Don’t want to keep scrolling?
Download the full Broken Jewelry Crafts ebook for only $2.99 — view offline, print your favorites, and enjoy all the projects ad-free.
2. Vintage Floral Jewelry Wall Art
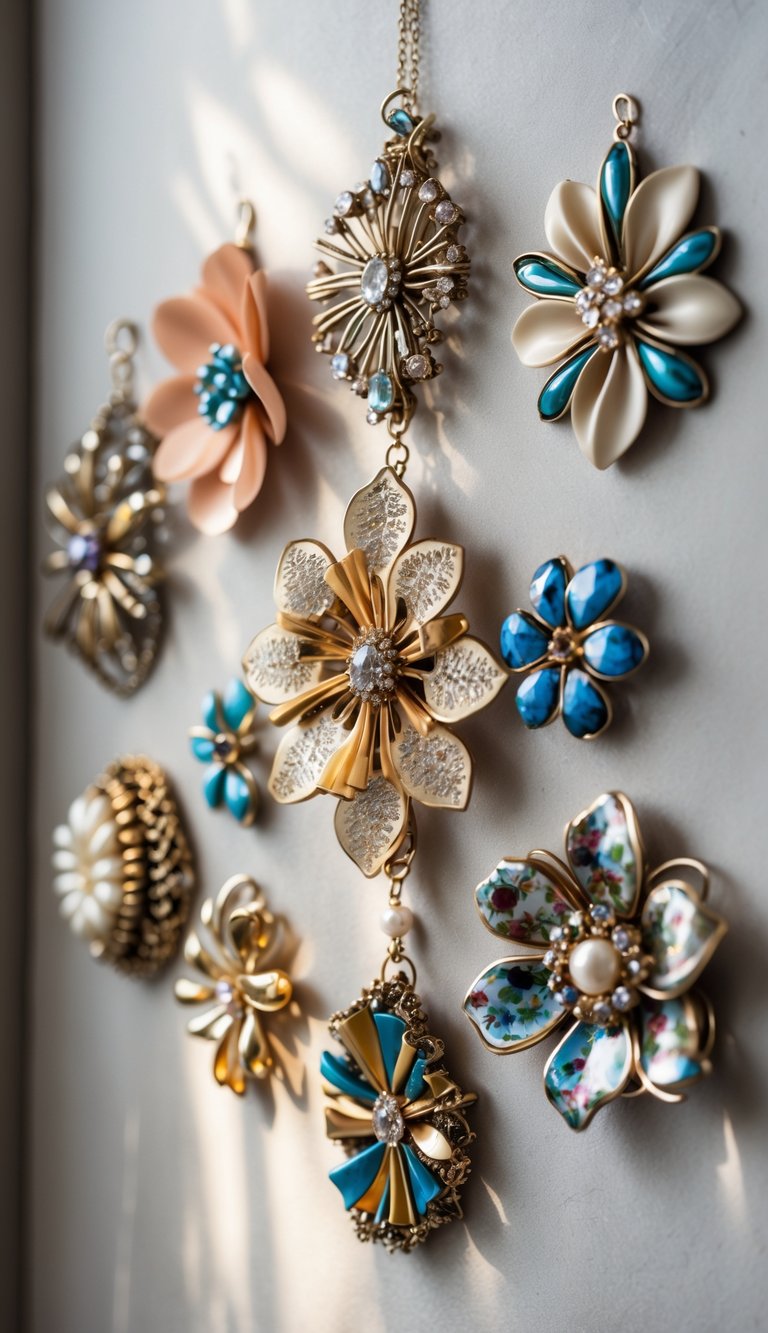
I start with a blank canvas or a wooden board, then gather up broken brooches, earrings, and necklaces. I arrange them into simple flower shapes or whatever pattern feels right, gluing each piece down as I go.
Browse The Items


How to Make Vintage Floral Jewelry Wall Art
Materials Needed:
- Vintage or broken floral jewelry (brooches, earrings, pendants)
- Canvas or wooden frame (any size)
- Hot glue gun or strong craft glue
- Tweezers or pliers
- Fabric or decorative paper (optional background)
The Steps:
- Step 1: Prepare Your Background
Choose a clean canvas or cover it with fabric or patterned paper for a decorative base. Neutral colors work best to make the jewelry stand out. - Step 2: Sort and Arrange the Jewelry
Lay out your floral jewelry pieces before gluing. Start with larger statement pieces in the center and surround them with smaller ones to create a balanced design. - Step 3: Remove Backs or Clasps
Use pliers to remove pins, earring backs, or hooks so the jewelry pieces sit flat on the surface. - Step 4: Glue the Jewelry in Place
Apply glue to the back of each piece and press it gently onto the canvas. Hold for a few seconds to ensure it sticks firmly. Continue until your layout is complete. - Step 5: Add Finishing Touches
Fill small gaps with beads, pearls, or rhinestones for extra sparkle. Once the glue is dry, you can hang your wall art or display it on a shelf.
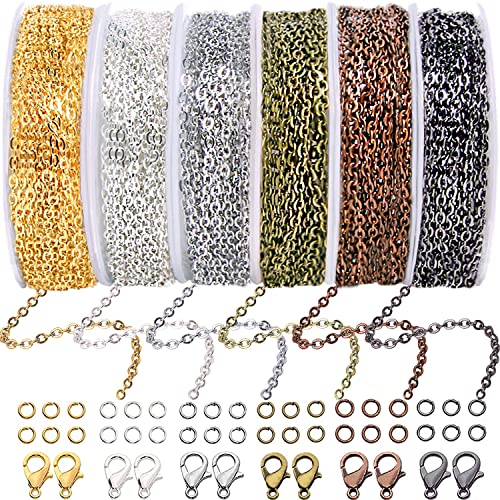
3. Broken Jewelry Pendant Necklaces
I pick a charm, bead, or stone from my stash and attach it to a necklace chain using a jump ring or a bit of wire. With pliers, I close the jump ring tight, and just like that, I’ve got a one-of-a-kind pendant that’s all mine.
Browse The Items


How to Make Broken Jewelry Pendant Necklaces
Materials Needed:
- Broken or old jewelry (earrings, brooches, charms, etc.)
- Necklace chains or cords
- Jump rings and clasps
- Jewelry pliers
- Super glue or jewelry adhesive (if needed for repairs)
The Steps:
- Step 1: Sort Through Broken Jewelry
Gather your old or damaged pieces. Look for items with interesting pendants, beads, or charms that can stand alone as statement pieces. - Step 2: Clean and Repair
Wipe each piece with a soft cloth to remove dirt or tarnish. Use a bit of jewelry adhesive to fix any loose gems or parts that need small repairs. - Step 3: Add Jump Rings
Attach a jump ring to the top of each pendant using jewelry pliers. If the pendant already has a loop, make sure it’s strong enough to hold the chain. - Step 4: Attach the Chain
Slide the pendant onto a necklace chain or leather cord. You can mix materials—like gold with ribbon or beads—for a creative touch. - Step 5: Secure the Clasp
Use pliers to attach the clasp to the ends of the chain. Make sure it’s tight and closes properly.
🖨️ Want to print your favorite jewelry crafts?
Skip the ads and save the full guide to your computer.
Get the Broken Jewelry Crafts Ebook for just $2.99 — easy to download, easy to follow, easy to love!
4. Earring Cluster Statement Rings
I dig out mismatched or broken earrings that have cool shapes or colors. Using an adjustable ring base, I mess around with different layouts until I find one I like. Then I glue the earring pieces onto the base, pressing down and letting it dry. Suddenly, I’ve got a ring that nobody else has.
Browse The Items


How to Make Earring Cluster Statement Rings
Materials Needed:
- Old earrings or broken jewelry pieces
- Small pieces of colorful waste fabric
- Ring bases (recycled or new)
- Strong craft glue or epoxy
- Scissors
- Tweezers
- Pliers (optional)
The Steps:
- Step 1: Gather Your Materials
Collect all your materials and prepare your workspace. Separate the earring tops or beads from their hooks using pliers. - Step 2: Cut and Prepare the Fabric
Cut your waste fabric into small decorative shapes — circles, diamonds, or any design that fits your ring’s style. - Step 3: Arrange Your Design
Lay out your fabric pieces and jewelry bits on the ring base to test out your cluster pattern before gluing. - Step 4: Glue Everything in Place
Apply a bit of strong glue on the ring base and carefully stick the pieces in your chosen design. Allow it to dry completely. - Step 5: Finish and Wear
Once dry, clean any extra glue and polish your new ring. You’ve now created a unique statement accessory from recycled materials!
5. Charm Bracelet Upcycling
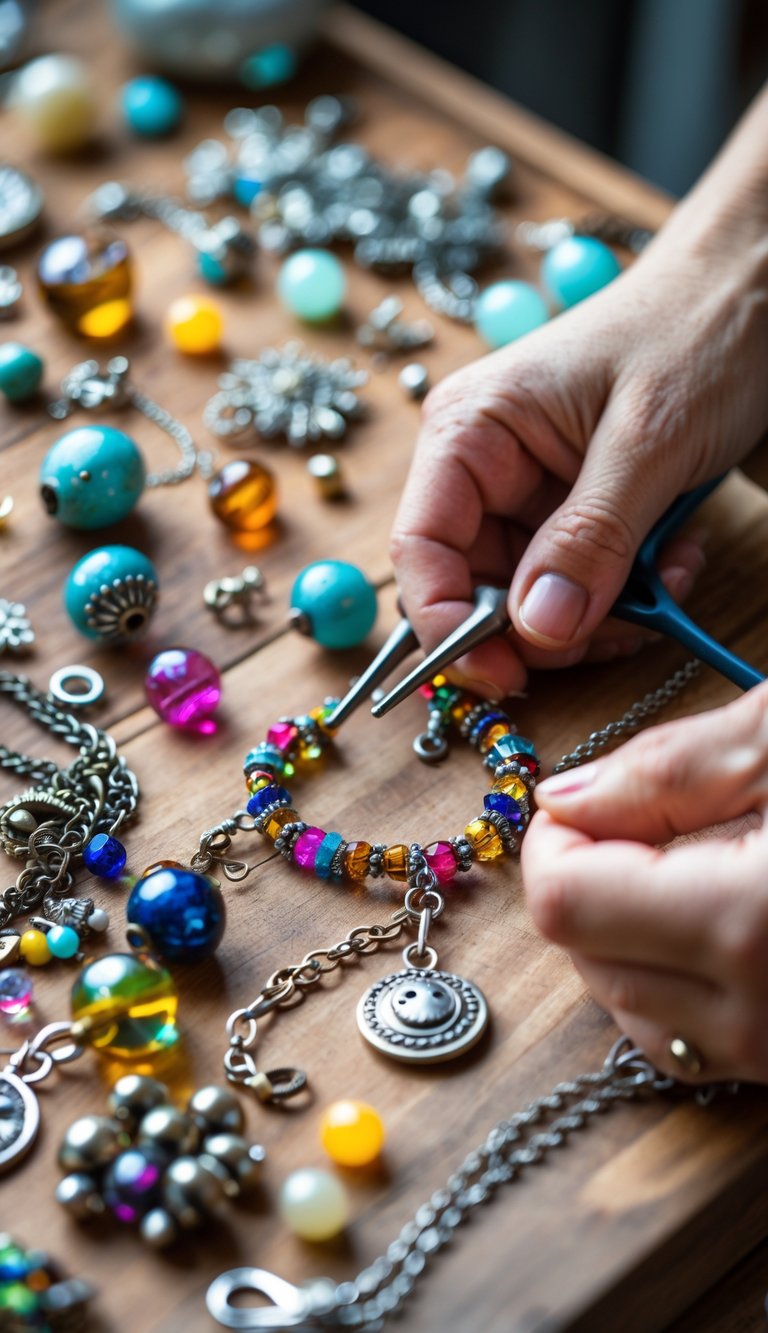
I gather up broken charms, pendants, and links, sorting by size and style. With jump rings and a chain, I attach each piece one by one, tightening things up with pliers. The result? A bracelet that’s a total mashup of old favorites.
Browse The Items


How to Make a Charm Bracelet Upcycling
Materials Needed:
- Old necklaces, earrings, or bracelets
- Mixed beads and small charms
- Jewelry pliers
- Jump rings
- Bracelet chain base or old bracelet
- Small hooks or clasps
The Steps:
- Step 1: Gather and Sort Your Jewelry
Collect all your old jewelry pieces and separate beads, charms, and pendants that are still in good shape. - Step 2: Prepare the Chain Base
Use an old bracelet or chain as your base. Make sure the clasp works properly or replace it if needed. - Step 3: Attach Jump Rings
Open jump rings using pliers and attach them evenly along the bracelet chain. These will hold your charms and beads. - Step 4: Add Your Charms and Beads
Connect each bead, pendant, or trinket to a jump ring, mixing colors and shapes to create an eye-catching design. - Step 5: Secure and Finish
Once you’ve added all your charms, check that each ring is tightly closed. Try on your new upcycled charm bracelet and enjoy your handmade creation!
6. Brooch Bookmark Creations
I pick a broken brooch that still looks good, then cut a ribbon or leather strip about six inches long. I attach the brooch to one end with hot glue or a few stitches. Now I’ve got a bookmark that makes my reading feel a bit more special.
Browse The Items


How to Brooch Bookmark Creations
Materials Needed:
- Old brooches or decorative pins
- Fabric scraps or ribbons
- Strong craft glue or a hot glue gun
- Scissors
- Needle and thread (optional)
- Felt or small backing fabric pieces
The Steps:
- Step 1: Gather Your Materials
Collect your old brooches, fabric pieces, and any decorative materials you’d like to add. Make sure your brooch pins are still in good condition. - Step 2: Cut and Prepare the Fabric
Cut your chosen fabric or ribbon into a long strip — about 8 to 10 inches — to serve as the bookmark base. Trim the edges neatly. - Step 3: Attach the Brooch
Secure the brooch to one end of the fabric strip. You can either pin it directly or glue it firmly in place if it’s a decorative piece without a clasp. - Step 4: Add a Backing
Cut a small felt piece and glue or sew it to the back of the brooch area to give it extra support and a clean finish. - Step 5: Finish and Use
Allow everything to dry completely, then slide your new brooch bookmark into your favorite book. It’s a beautiful and practical way to repurpose old jewelry!
📘 Tired of scrolling through ads?
Grab the 21 Creative Broken Jewelry Craft Ideas ebook — ad-free, printable, and perfect for crafting anytime, anywhere. Only $2.99.
7. Beaded Jewelry Keychains
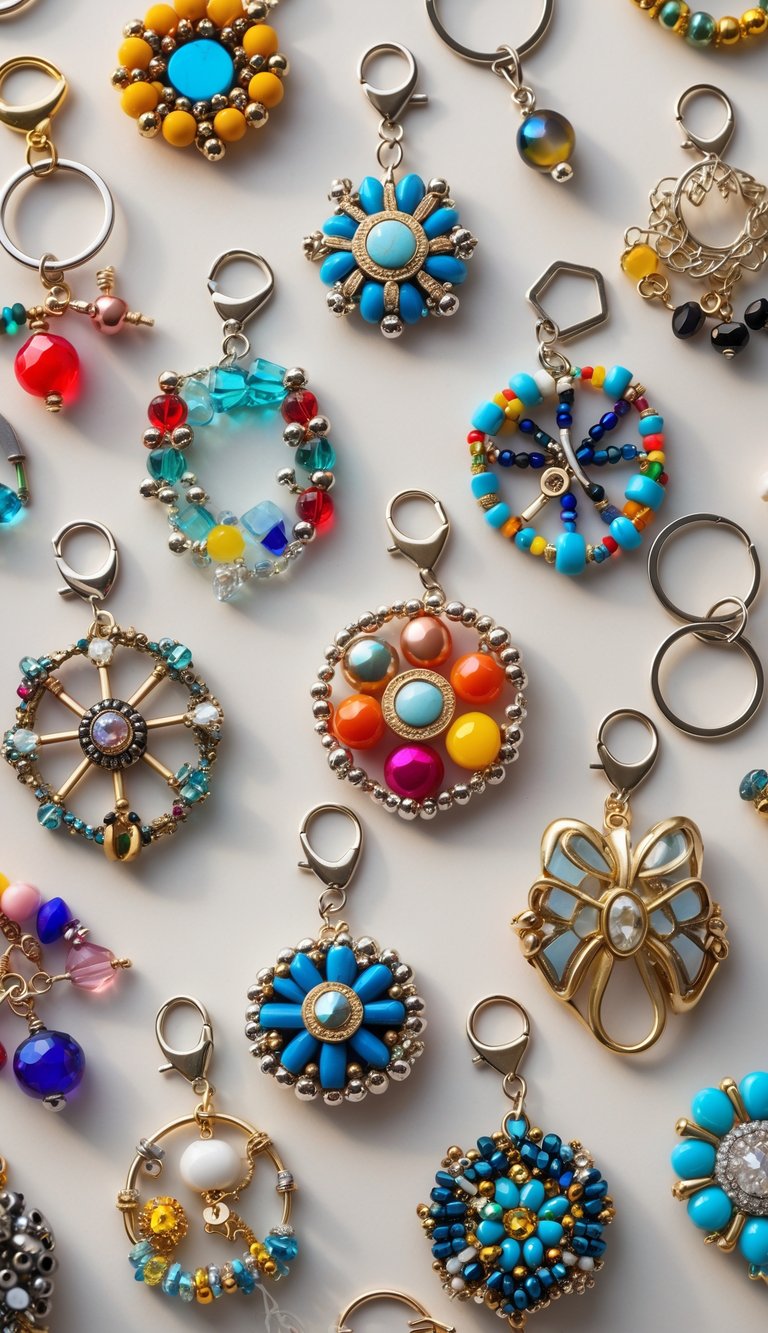
Old beaded necklaces and bracelets are perfect for keychains. I remove the beads, thread them onto a sturdy cord or wire, and tie them off before attaching them to a keyring. Sometimes I mix up the shapes and colors for a little extra flair—why not?
Browse The Items


How to Make Beaded Jewelry Keychains
Materials Needed:
- Assorted beads (from old necklaces or bracelets)
- Keychain rings or clasps
- Jewelry wire or sturdy thread
- Small pliers
- Jump rings
- Scissors
The Steps:
- Step 1: Plan Your Design
Gather all your materials and sort your beads by color and size. Lay out a simple design so you can see how your keychain will look before you start. - Step 2: Prepare the Wire or Thread
Cut a 6-inch piece of jewelry wire or strong thread. Attach one end securely to a jump ring using pliers or by tying a tight knot. - Step 3: Add the Beads
Thread your beads in the pattern you designed. Mix different sizes, shapes, and colors to create an interesting look. - Step 4: Secure the Ends
When you’ve added enough beads, twist or knot the end of the wire firmly to hold them in place. Use pliers to attach the end to your keychain ring. - Step 5: Finish and Trim
Check that everything feels tight and secure. Trim any extra wire or thread, and your upcycled beaded keychain is ready to use or gift!
8. Mixed Media Jewelry Collage
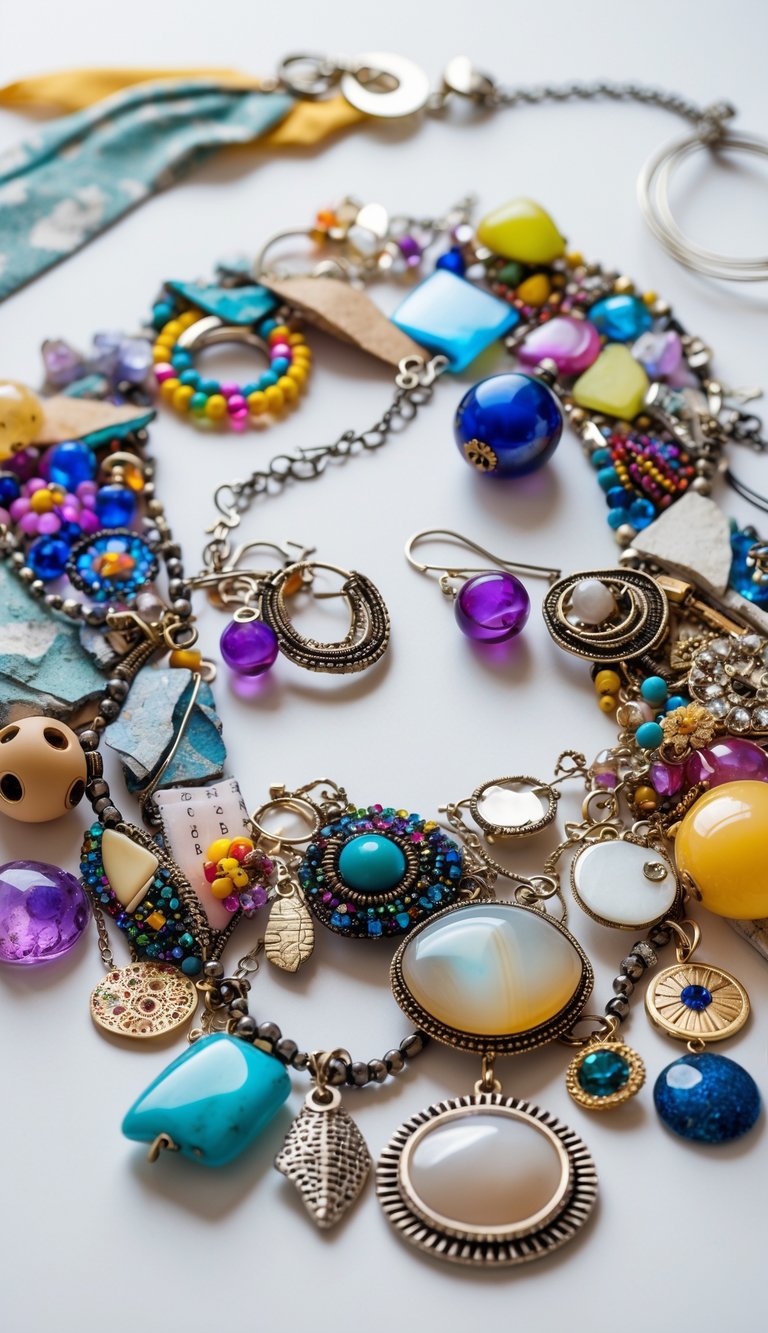
I collect bits of broken jewelry, beads, and small charms, then arrange them on a canvas or cardboard. I glue each piece down, layering them for a textured look. Sometimes I’ll add a splash of paint or a scrap of paper to fill in the gaps—it just feels more interesting that way.
Browse The Items


How to Make Mixed Media Jewelry Collage
Materials Needed:
- Old or broken jewelry pieces
- Assorted beads and charms
- Jewelry glue or a hot glue gun
- Small pliers
- A piece of fabric, felt, or canvas as a base
- Scissors
The Steps:
- Step 1: Choose Your Base
Select a sturdy surface like felt, fabric, or canvas to serve as the background for your collage. Make sure it’s clean and flat before you begin. - Step 2: Arrange the Pieces
Lay out your jewelry pieces and beads in a design that feels balanced. Mix colors, sizes, and shapes for an interesting composition. - Step 3: Secure the Jewelry
Use jewelry glue or a hot glue gun to attach each piece to the base. Start with larger items first, then fill in gaps with smaller beads or charms. - Step 4: Add Layers and Details
Layer different textures by overlapping pieces slightly. Add small details like sequins, stones, or chain links to create depth. - Step 5: Let It Dry and Display
Allow the collage to dry completely. Once set, you can frame it as wall art, attach a clasp to make it wearable, or gift it as a personalized keepsake.
9. Wire Wrapped Broken Pieces
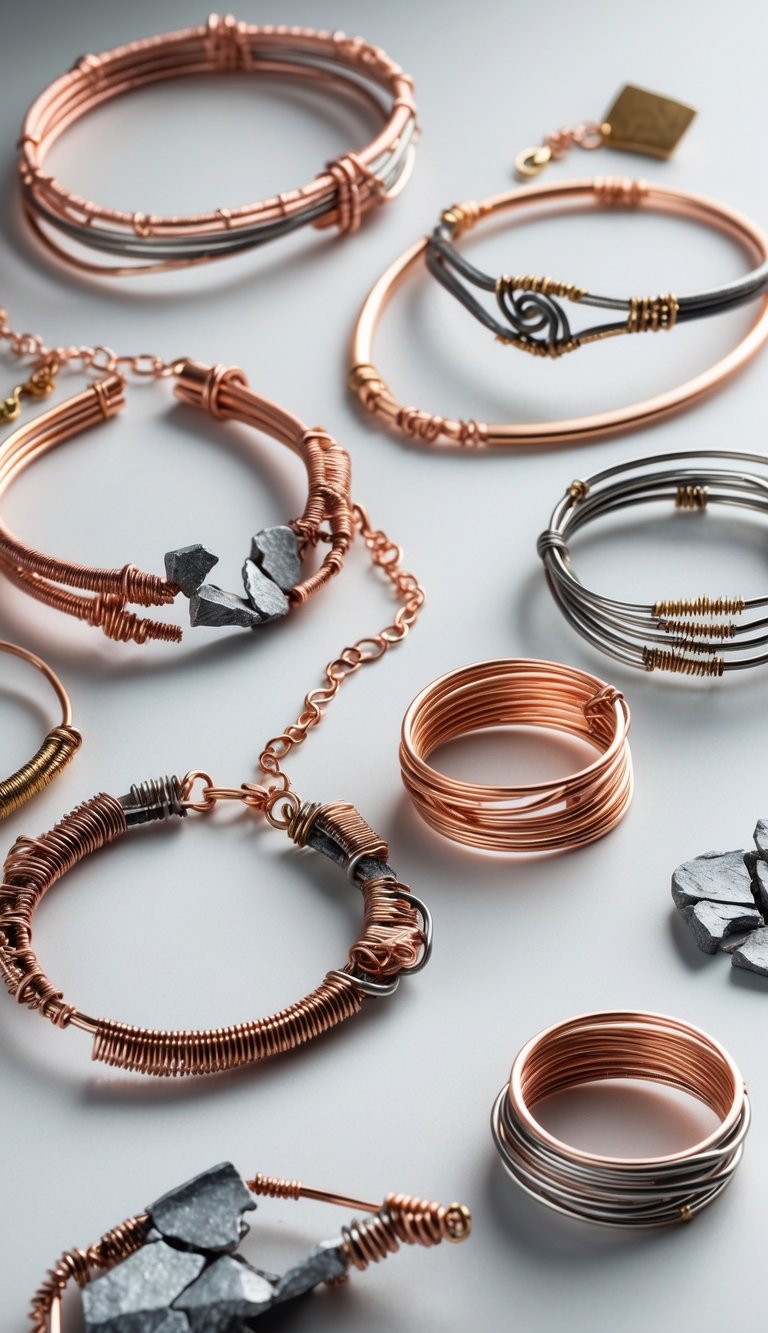
I grab a broken jewelry piece and clean it up if it’s dusty. With a thin wire that matches or contrasts, I wrap it snugly around the piece, maybe adding beads or charms if I’m in the mood. I twist the wire ends tight with pliers, and it’s done.
Browse The Items


How to Make Wire-Wrapped Broken Pieces
Materials Needed:
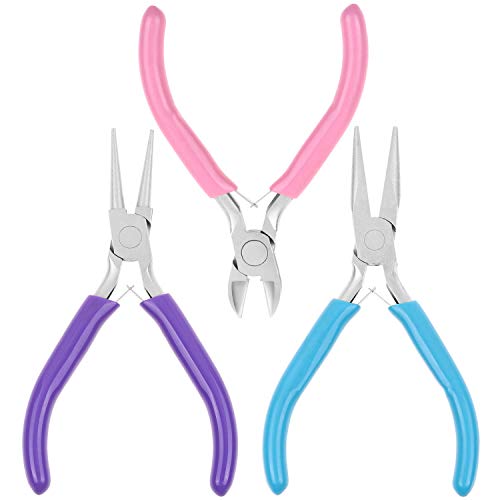
- Jewelry wire (copper, gold, or silver)
- Small pliers and wire cutters
- Broken jewelry pieces or stones
- Jump rings (optional)
- Sandpaper (for smoothing sharp edges)
The Steps:
- Step 1: Prepare the Pieces
Gather your broken jewelry or small stones and clean off any dirt or residue. Smooth any sharp edges using sandpaper to make them safe to handle. - Step 2: Cut and Shape the Wire
Cut a length of jewelry wire long enough to wrap around your chosen piece several times. Gently shape it into a rough loop or base with pliers. - Step 3: Wrap Around the Piece
Hold your stone or jewelry fragment in place and start wrapping the wire around it tightly. Use a combination of loops and twists to keep it secure while adding style. - Step 4: Secure the Ends
Once you’ve achieved the desired look, tuck or twist the wire ends neatly at the back using pliers so they don’t snag or poke out. - Step 5: Add the Finishing Touches
Attach a jump ring if you want to turn it into a pendant or link it to a bracelet chain. For rings or cuffs, gently shape the wire to fit your hand or wrist.
💎 Love these jewelry crafts?
Get the full collection in one easy-to-read ebook!
Download all 21 projects — ad-free, printable, and ready to use offline for just $2.99.
10. Resin Jewelry Paperweights
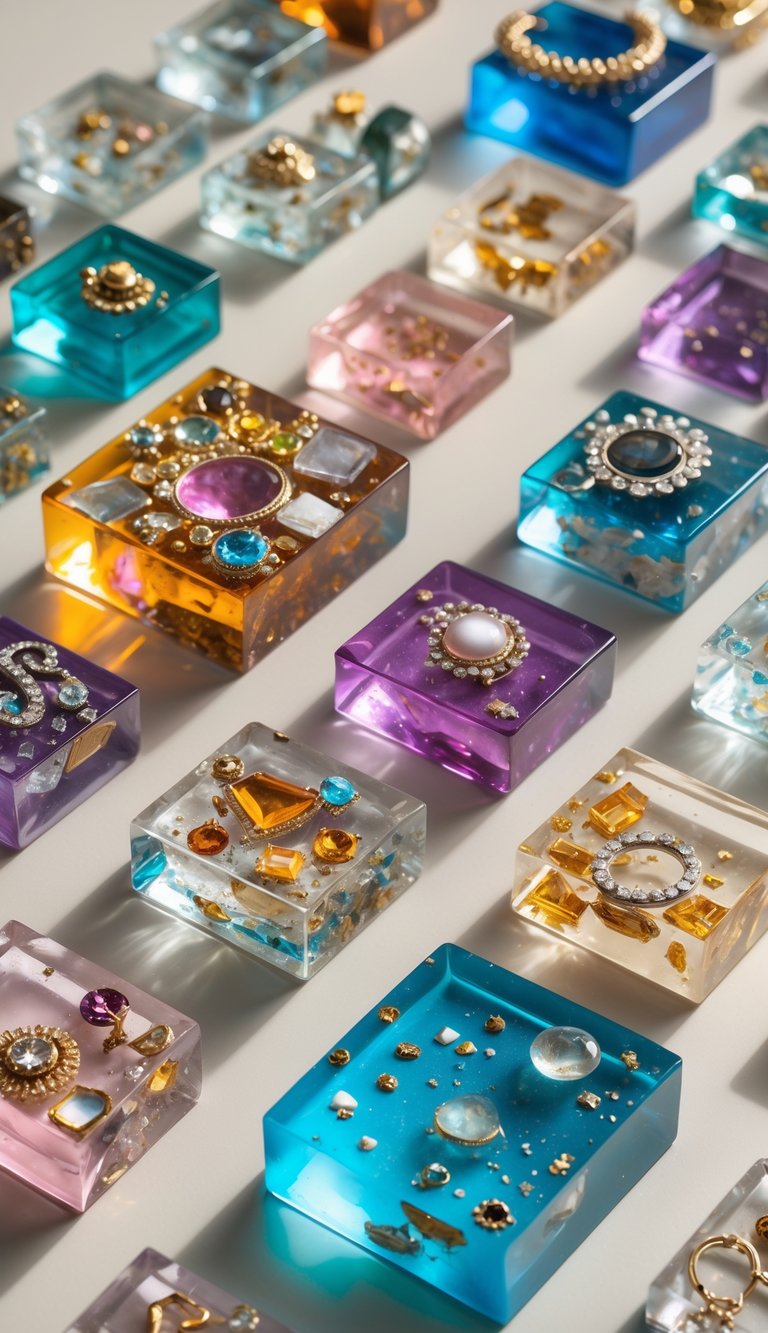
I gather small, broken jewelry bits and select some clear resin. I arrange the pieces in a mold, pour the resin over them, and let it harden. The finished paperweight shows off the jewelry in a totally new way—kind of mesmerizing, actually.
Browse The Items


How to Make Resin Jewelry Paperweights
Materials Needed:
- Epoxy resin and hardener
- Silicone molds (square or round)
- Broken or old jewelry pieces
- Mixing cups and stir sticks
- Gloves and protective surface
- Toothpick (for adjusting placement)
The Steps:
- Step 1: Prepare Your Work Area
Cover your workspace with paper or plastic to protect it. Make sure your molds are clean and free of dust for a smooth finish. - Step 2: Mix the Resin
In a mixing cup, combine the epoxy resin and hardener according to the package instructions. Stir slowly to avoid creating bubbles. - Step 3: Pour the First Layer
Pour a thin layer of resin into each mold and let it sit for a few minutes to start thickening slightly. This will help your jewelry stay in place. - Step 4: Add the Jewelry Pieces
Arrange your jewelry pieces gently on the semi-thick resin layer using a toothpick to position them. Pour more resin over the top until the mold is full. - Step 5: Cure and Unmold
Let the resin cure completely (usually 24–48 hours). Once hardened, carefully pop the paperweights out of the molds to reveal your glossy, gem-filled creations.
11. Jewelry-Embedded Coasters
I grab old beads, brooches, or pearls and arrange them in a silicone coaster mold. Then I mix up some clear resin and pour it over the jewelry until everything’s covered. After it cures, I pop out the coaster, and it’s ready for my coffee mug.
Browse The Items


How to Make Jewelry-Embedded Coasters
Materials Needed:
- Round wooden or cork coaster bases
- Broken jewelry pieces or gemstones
- Strong craft glue or epoxy resin
- Tweezers or toothpicks
- Clear sealant spray (optional)
The Steps:
- Step 1: Prepare the Base
Wipe your coaster base clean and make sure it’s dry. A smooth surface helps the glue stick better. - Step 2: Arrange the Jewelry
Lay out your jewelry pieces or gemstones on the coaster without glue first. Try different placements until you find a design you like. - Step 3: Glue the Pieces
Using craft glue or epoxy, carefully attach each jewelry piece to the coaster. Start with larger items and fill gaps with smaller gems. - Step 4: Add Details and Let Dry
Check for any open spaces and fill them with beads or glitter for extra shine. Let the glue dry completely, following the glue’s instructions. - Step 5: Seal the Surface
Once dry, spray the coasters with a clear sealant to protect the design and make them water-resistant. Allow to dry before using or displaying.
12. Upcycled Jewelry Hairpins
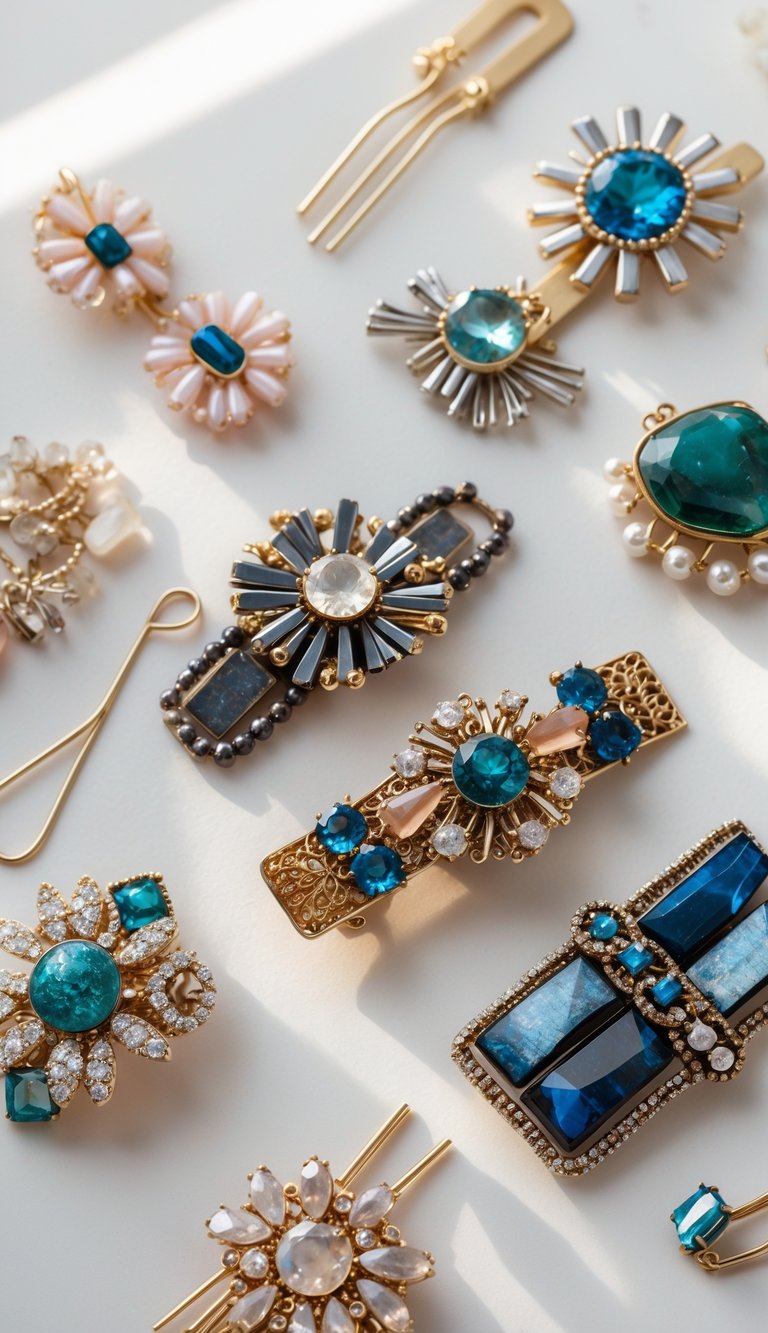
I pick out small, lightweight pieces—beads, charms, whatever catches my eye. A dab of strong glue attaches them to plain hairpins or bobby pins. I let them dry overnight on wax paper. The next day, I’ve got custom hairpins for a little extra sparkle.
Browse The Items


How to Make Upcycled Jewelry Hairpins
Materials Needed:
- Broken or old jewelry pieces (earrings, brooches, pendants)
- Plain metal hairpins or clips
- Strong jewelry or craft glue
- Small pliers
- Tweezers (optional)
The Steps:
- Step 1: Select Your Jewelry Pieces
Pick out small, lightweight jewelry pieces that will fit nicely on a hairpin or clip. Remove any sharp edges or old fastenings using pliers. - Step 2: Prepare the Hairpins
Lay your plain hairpins or clips on a flat surface. Wipe them clean to ensure the glue adheres properly. - Step 3: Apply the Glue
Add a small amount of jewelry glue to the back of each jewelry piece. Be careful not to overapply—it should be just enough to hold securely. - Step 4: Attach the Jewelry
Press the jewelry piece onto the flat part of the hairpin. Hold it in place for a few seconds to help it bond, then let it sit undisturbed. - Step 5: Let Dry and Use
Allow the hairpins to dry completely according to the glue’s instructions. Once dry, your upcycled jewelry hairpins are ready to wear or gift!
⏰ Don’t want to keep scrolling?
Download the full Broken Jewelry Crafts ebook for only $2.99 — view offline, print your favorites, and enjoy all the projects ad-free.
13. Decorative Jewelry Candle Holders
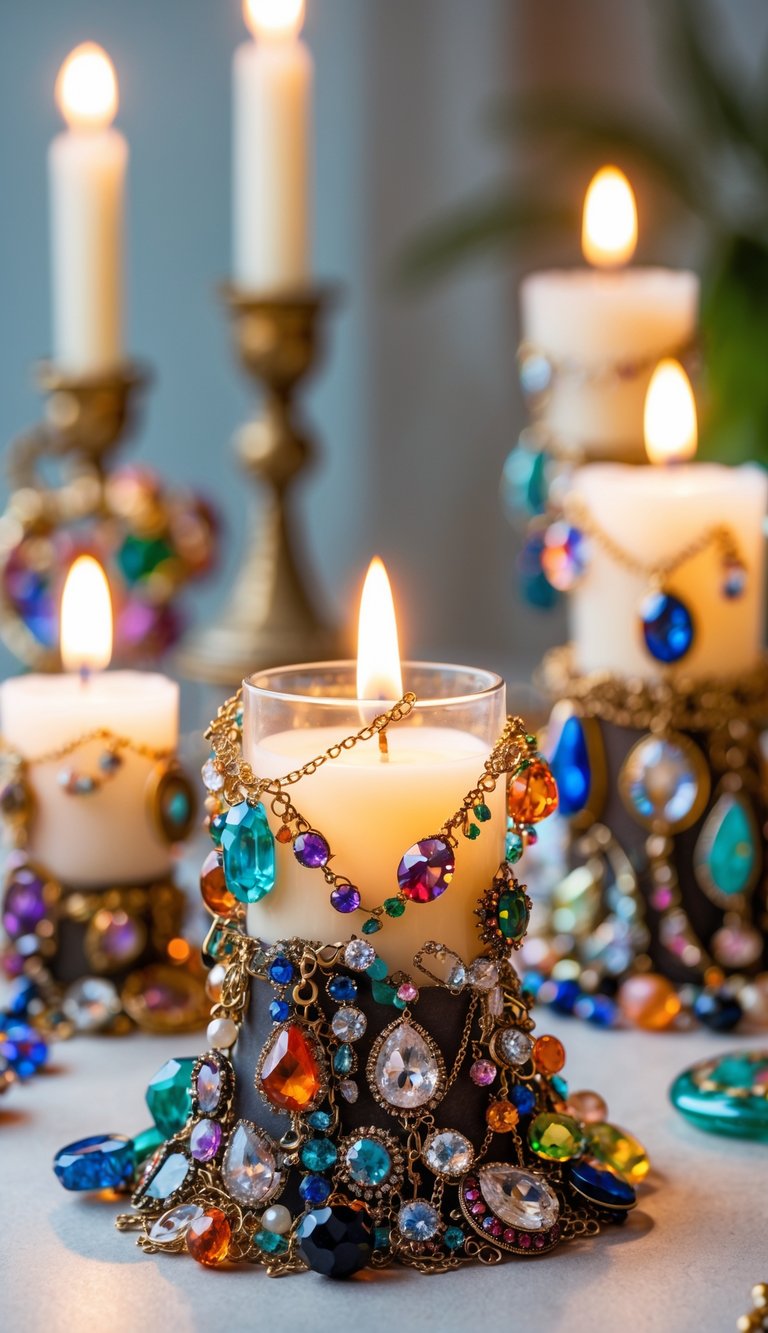
I clean a simple glass jar or tea light holder, then pick out some old brooches, earrings, or pendants with fun shapes or colors. I glue the jewelry around the outside, pressing each piece in place. After the glue dries, I drop in a candle and watch the light flicker through the designs—it’s surprisingly cozy.
Browse The Items


How to Make Decorative Jewelry Candle Holders
Materials Needed:
- Plain candles or glass candle holders
- Broken or unused jewelry (chains, earrings, pendants)
- Strong craft glue or hot glue gun
- Tweezers or small pliers
- Scissors
The Steps:
- Step 1: Choose Your Candle Base
Pick a plain candle or a glass holder that fits your desired style. Make sure the surface is clean and dry before decorating. - Step 2: Plan the Design
Lay out your jewelry pieces and plan where you’ll place each one. Use larger stones or pendants near the base and smaller accents higher up for balance. - Step 3: Attach the Jewelry
Apply a small amount of glue to the back of each piece and carefully press it onto the candle or holder. Wrap chains or bracelets around the base for added detail. - Step 4: Layer and Adjust
Continue adding pieces, layering different textures and colors to create a rich, decorative look. Adjust positions before the glue fully sets. - Step 5: Let Dry and Display
Allow the glue to dry completely. Once set, place your candle holders on a tray or table and enjoy the sparkle they bring to your décor.
14. Broken Jewelry Mobile Ornaments
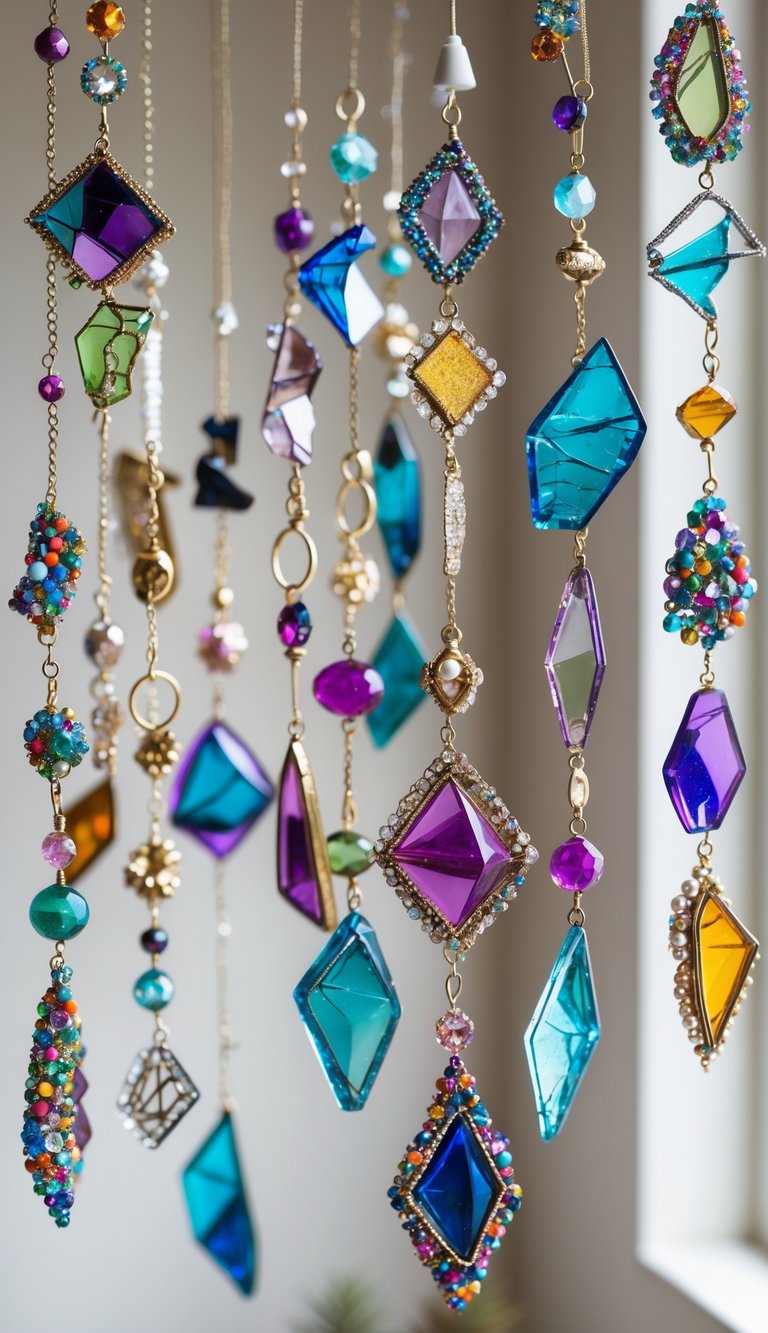
I gather beads, charms, and pendants, then attach each one to fishing line or thin wire. I tie them to a small branch or embroidery hoop, spacing them out. Hanging the mobile near a window, I get a bit of sparkle whenever the sun hits it just right.
Browse The Items


How to Make Broken Jewelry Mobile Ornaments
Materials Needed:
- Broken or old jewelry (pendants, beads, chains)
- Thin wire or strong thread
- Small metal rings or hoops
- Scissors
- Pliers
- Hooks or suction cups (for hanging)
The Steps:
- Step 1: Gather and Sort Pieces
Collect your broken jewelry and sort them by size, color, and shape. This makes it easier to create a balanced design for your mobile. - Step 2: Cut and Prepare Wires
Cut several lengths of wire or thread in different sizes. Each will hold one or more jewelry pieces for a layered look. - Step 3: Attach Jewelry Pieces
Thread or wrap jewelry pieces onto each wire strand. Secure them tightly using pliers or by tying strong knots so they won’t slip off. - Step 4: Connect to the Base
Attach all the strands to a metal ring or hoop, spacing them evenly around it. Make sure the strands hang at different lengths for movement and visual interest. - Step 5: Hang and Adjust
Use a hook or suction cup to hang your mobile near a window or light source. Adjust the strands so they move freely and catch the light beautifully.
⏰ Don’t want to keep scrolling?
Download the full Broken Jewelry Crafts ebook for only $2.99 — view offline, print your favorites, and enjoy all the projects ad-free.
15. Jewelry-Studded Mirror Frames
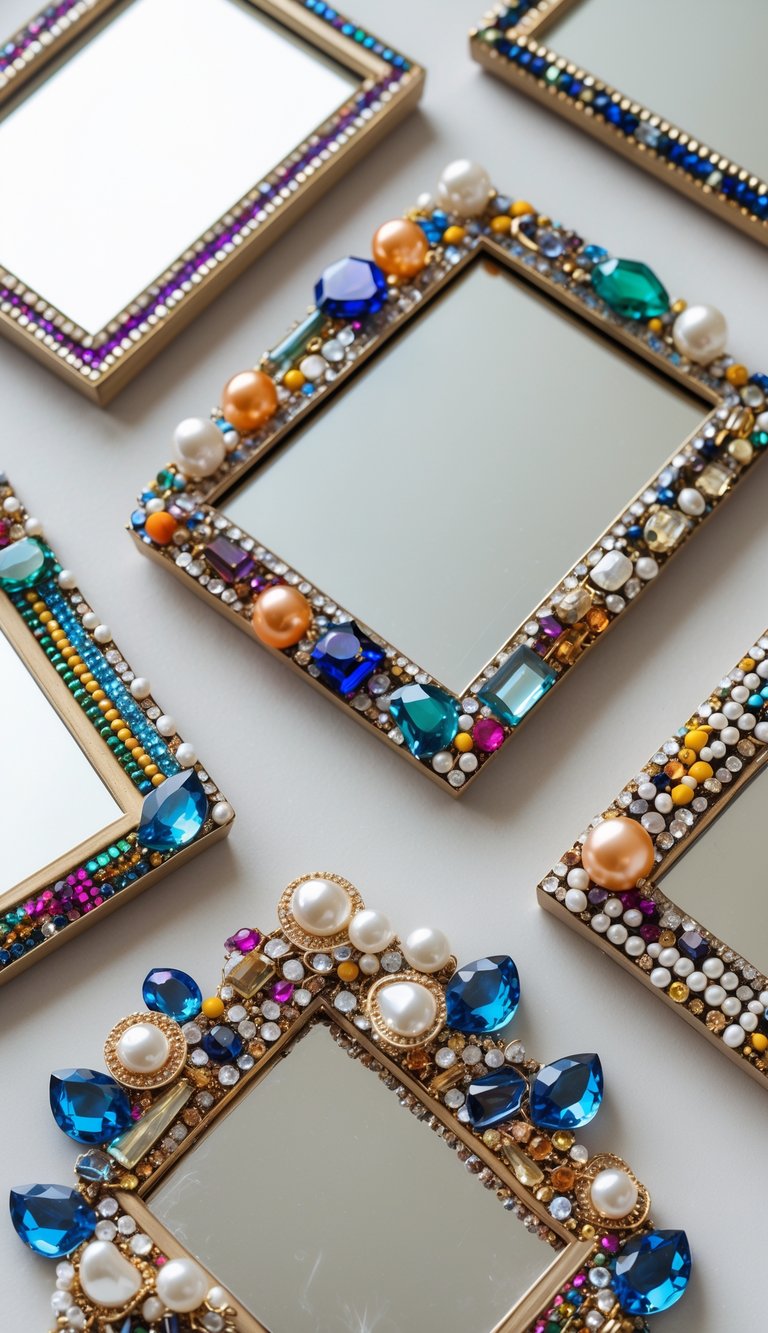
I pick an old mirror frame and lay out my broken jewelry pieces around the edge, shifting them until I’m happy with the look. I glue everything down, press firmly, and let it dry. Once it’s ready, I hang it up, and honestly, it makes the room feel a little fancier.
Browse The Items
How to Make Jewelry-Studded Mirror Frames
Materials Needed:
- A plain mirror with a flat frame
- Broken or unused jewelry pieces
- Strong craft glue or epoxy
- Tweezers or small pliers
- Paper towels or cloth (for cleanup)
The Steps:
- Step 1: Clean the Frame
Wipe the mirror frame thoroughly to remove dust and oils. A clean surface helps the glue adhere better. - Step 2: Plan the Design
Lay out your jewelry pieces around the frame without gluing them yet. Arrange larger gems in the corners and smaller ones along the edges for a balanced look. - Step 3: Apply the Glue
Working in small sections, apply glue to the frame where you want to place each piece. Avoid putting too much to prevent mess. - Step 4: Attach the Jewelry
Use tweezers or pliers to carefully press each jewelry piece into place. Continue until the entire frame is decorated. - Step 5: Let Dry and Polish
Allow the glue to dry completely. Once set, gently wipe the surface to remove any residue and hang your newly jeweled mirror where it can shine.
16. Repurposed Jewelry Napkin Rings
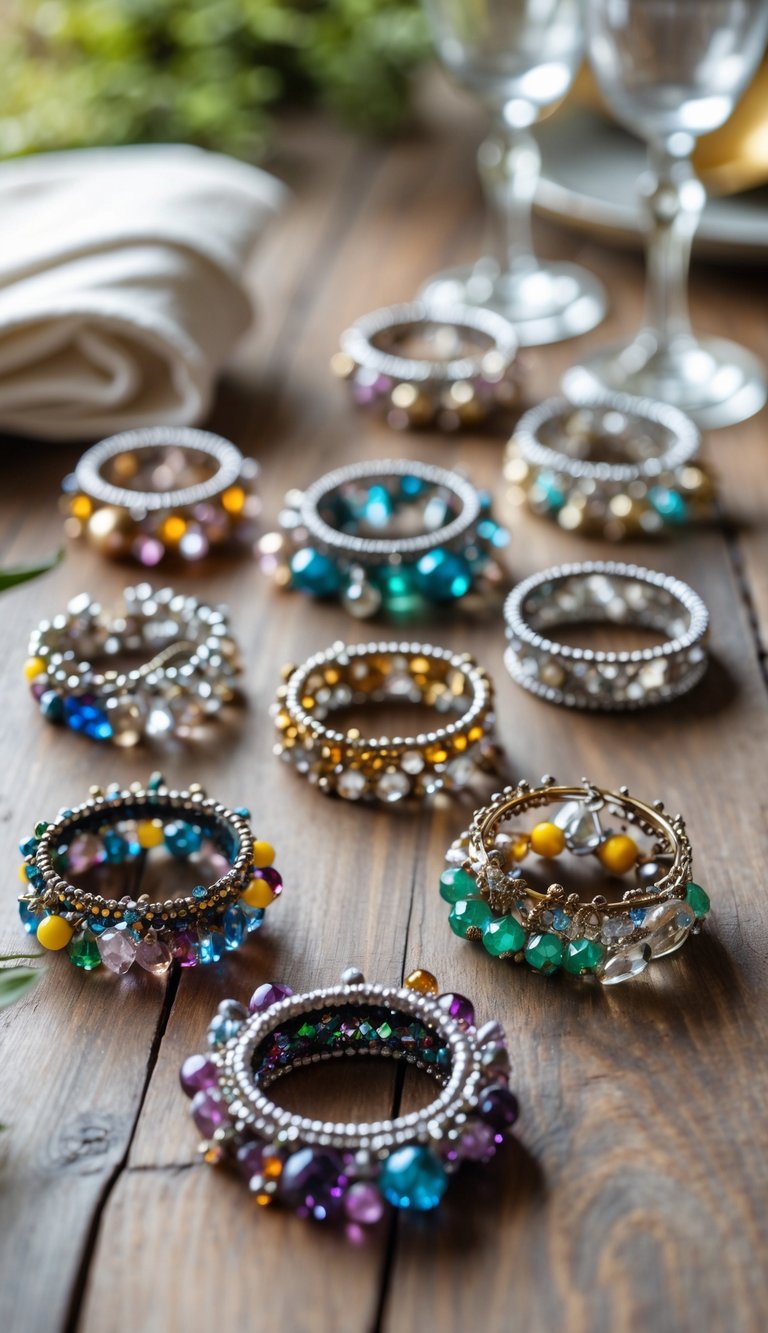
I grab a sturdy ring—metal or fabric works—and pick a brooch, pendant, or big earring from my broken jewelry stash. A little glue or thin wire attaches the jewelry to the ring. Once it’s dry, I slide my napkin through, and suddenly dinner feels a bit more special.
Browse The Items


How to Make Repurposed Jewelry Napkin Rings
Materials Needed:
- Broken jewelry pieces or loose beads
- Plain metal or wooden napkin rings
- Jewelry wire or strong glue
- Small pliers
- Scissors
The Steps:
- Step 1: Gather Your Materials
Collect jewelry pieces, beads, or charms that coordinate well together. Choose colors that complement your tableware or seasonal decor. - Step 2: Prepare the Base Rings
Clean your napkin rings to ensure they’re free from dust or oil. This helps the wire or glue stick firmly. - Step 3: Add the Jewelry Pieces
Wrap jewelry wire around the napkin ring, securing beads and charms as you go. If using glue, attach pieces one by one, holding them in place until they set. - Step 4: Fill in the Gaps
Continue wrapping or gluing until the ring looks full and balanced. Mix large and small beads for texture and shine. - Step 5: Let Dry and Use
Allow the rings to dry completely if you used glue. Once ready, slide them over napkins for a glamorous, upcycled touch to your dining table.
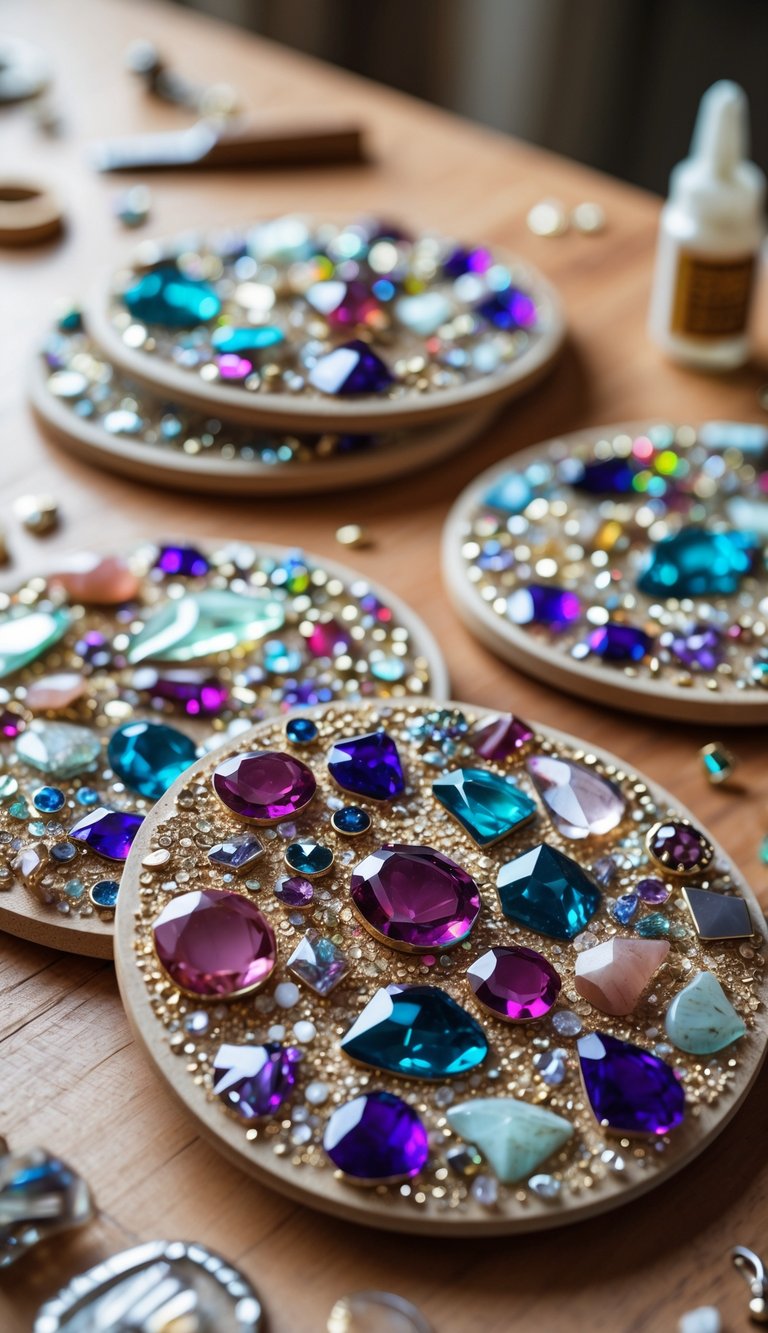
17. DIY Jewelry Mosaic Trays
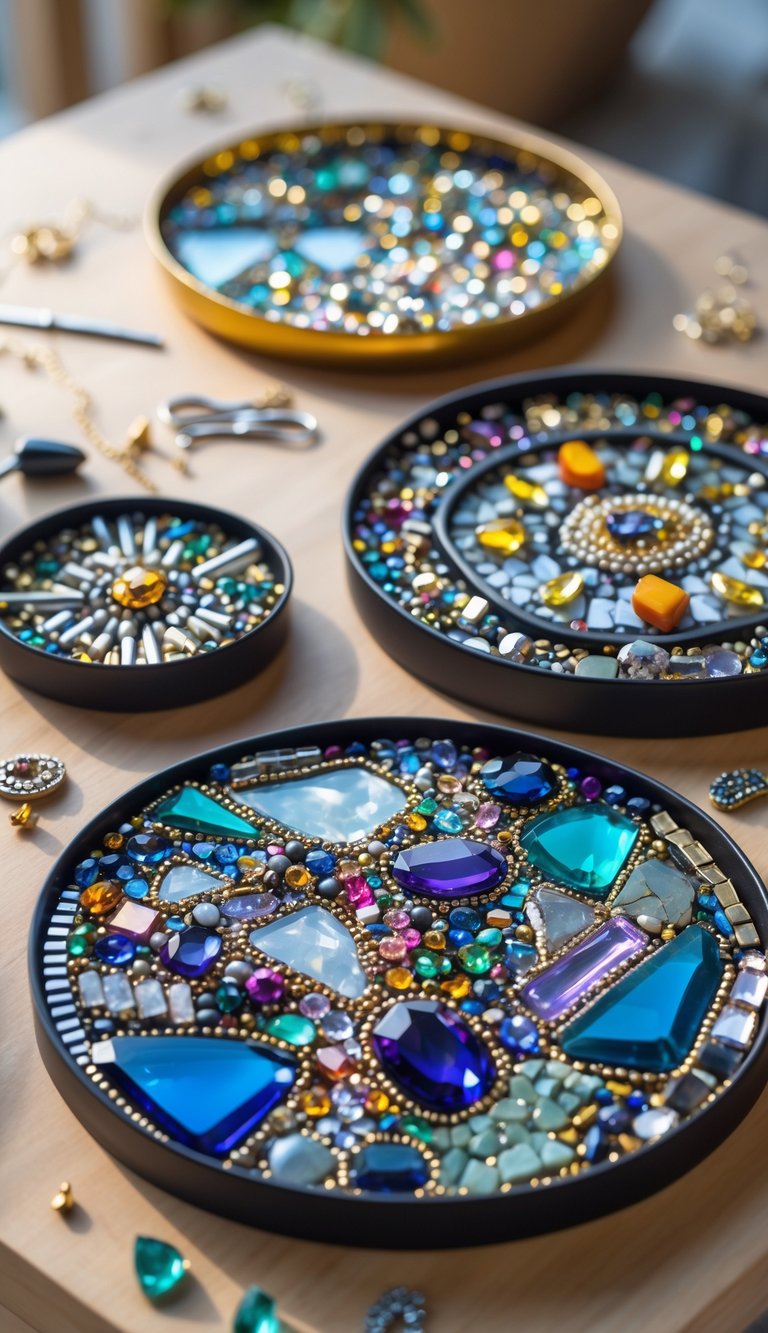
I clean up a plain wooden or ceramic tray, then arrange old earrings, beads, or charms into a pattern that feels right. I glue them down and let it dry, then seal the whole thing with clear resin or a sealer to keep the mosaic safe from spills.
Browse The Items


How to Make DIY Jewelry Mosaic Trays
Materials Needed:
- Plain serving trays (wood, metal, or plastic)
- Broken jewelry pieces, beads, or gems
- Strong craft glue or epoxy resin
- Tweezers or small pliers
- Grout or filler paste (optional for texture)
- Cloth for cleaning
The Steps:
- Step 1: Prepare the Tray
Clean the tray surface thoroughly and let it dry. If it’s a wooden tray, you can paint or stain it first for added color. - Step 2: Plan Your Design
Arrange your jewelry pieces and beads on the tray without gluing them down yet. Try creating patterns, shapes, or a random mosaic style. - Step 3: Glue the Pieces
Start gluing each piece one at a time, pressing gently to make sure they stick firmly. Use tweezers for smaller beads or gems. - Step 4: Fill the Gaps
Once all jewelry pieces are attached, fill any empty spaces with smaller beads or optional grout for a smooth finish. - Step 5: Let Dry and Clean
Allow the glue to dry completely. Wipe off any residue and your jewelry mosaic tray is ready to display or gift.
18. Statement Jewelry Brooches
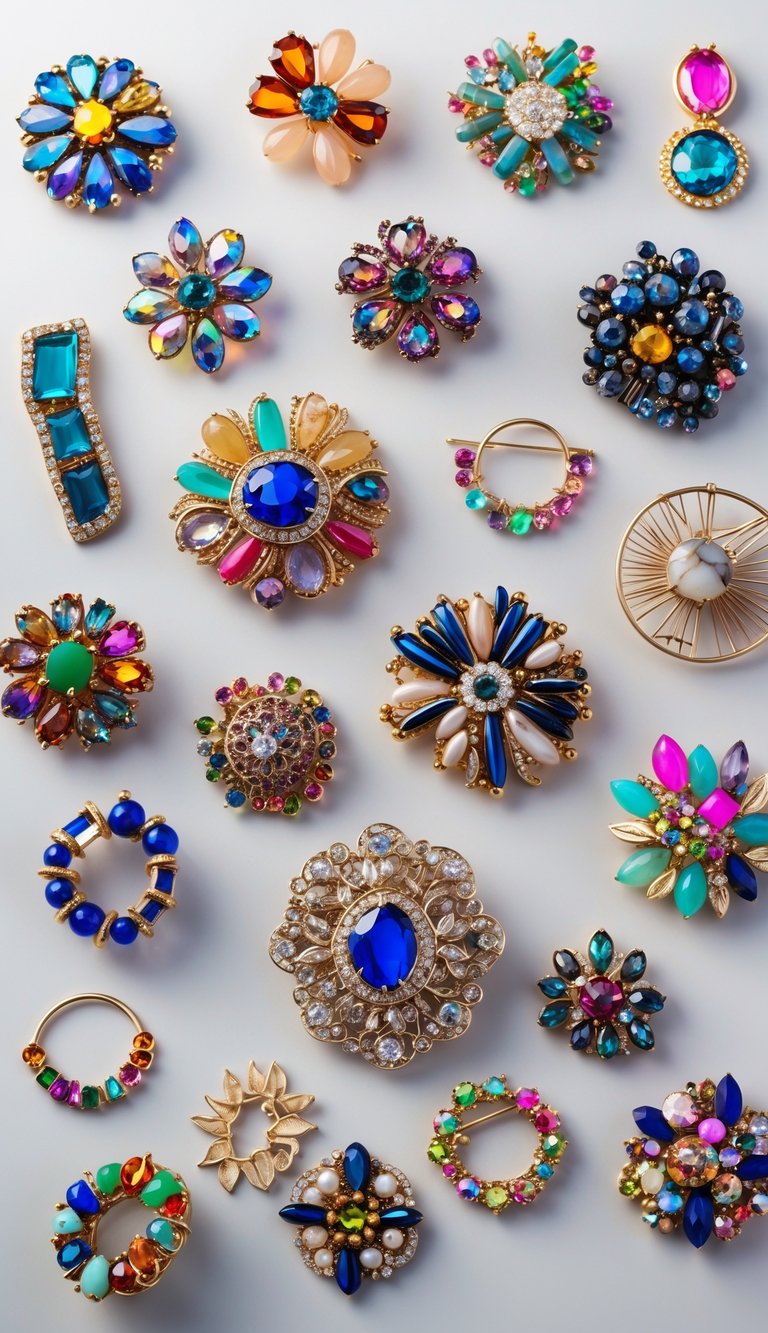
I dig through old brooches, broken pins, or bold necklace bits. With strong glue, I attach pin backs to the jewelry piece I like. Once it’s dry, I pin my new statement brooch to a jacket, hat, or bag—no way anyone else has the same one.
Browse The Items

How to Make Statement Jewelry Brooches
Materials Needed:
- Broken jewelry pieces or loose gems
- Brooch pin backs
- Strong jewelry glue or epoxy
- Tweezers or pliers
- Cardboard or tray for drying
The Steps:
- Step 1: Select Your Jewelry Pieces
Pick out large or decorative jewelry pieces that stand out. Look for items with interesting shapes or colorful stones. - Step 2: Prepare the Base
If your jewelry piece has rough or uneven edges, smooth them out with pliers. Make sure the back is flat enough to attach a pin. - Step 3: Attach the Pin Back
Apply a small amount of jewelry glue to the flat part of the brooch pin and press it onto the back of your jewelry piece. Hold it in place for a few seconds. - Step 4: Let It Set
Place the brooch on a flat surface and allow the glue to dry completely according to the product’s instructions. - Step 5: Style and Wear
Once dry, pin your new brooch to clothing, hats, or bags. It’s a simple way to reuse old jewelry while making a bold fashion statement.
19. Jewelry-Accented Tote Bags
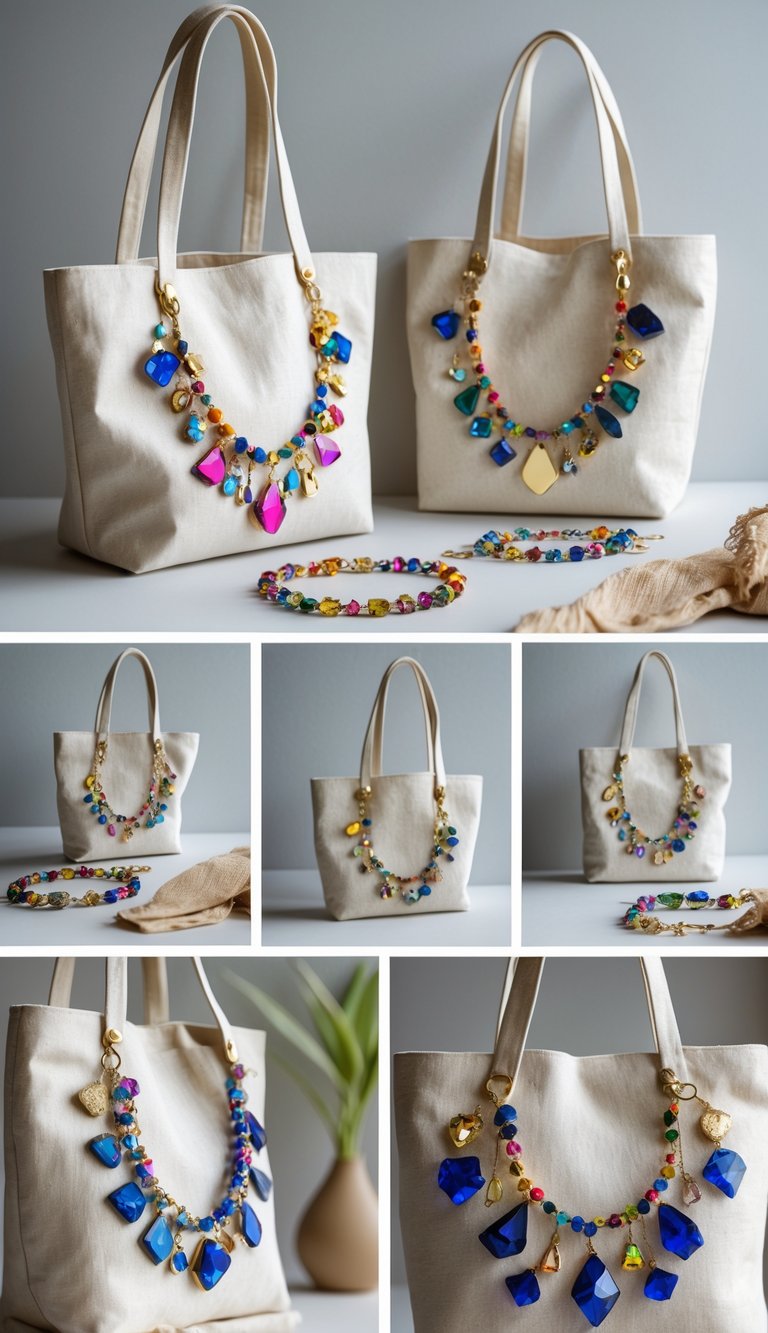
I like to scatter my broken jewelry pieces across a plain tote bag and play around with the arrangement until something clicks. Sometimes I’ll use strong fabric glue, other times I just sew the pieces on—it depends on my mood and how heavy the jewelry is.
Once everything’s secure and the glue’s fully dry (or I’ve finished sewing), I get to carry around a tote bag that’s basically a little gallery of my old jewelry. It’s fun and definitely not something you’ll spot at the store.
Browse The Items


How to Make Jewelry-Accented Tote Bags
Materials Needed:
- Plain canvas or fabric tote bag
- Broken jewelry pieces or statement necklaces
- Needle and thread or strong fabric glue
- Small scissors
- Pins or clips for placement
The Steps
- Step 1: Plan Your Design
Lay your tote bag flat and arrange the jewelry pieces where you’d like them to go. Popular placements include along the top edge or in a necklace-like shape. - Step 2: Secure the Jewelry
Use pins or clips to hold the jewelry in place before attaching. This ensures your design stays aligned as you work. - Step 3: Sew or Glue the Pieces
For a lasting finish, hand-stitch the jewelry onto the bag using strong thread. Alternatively, use fabric glue for a quicker option—just press each piece firmly. - Step 4: Reinforce the Attachments
Check each piece to make sure it’s secure. Add extra stitches or glue to heavier jewelry items if needed. - Step 5: Let Dry and Use
If you used glue, let it dry completely before handling. Your jewelry-accented tote bag is now ready to carry with style!
20. Broken Jewelry Wind Chimes
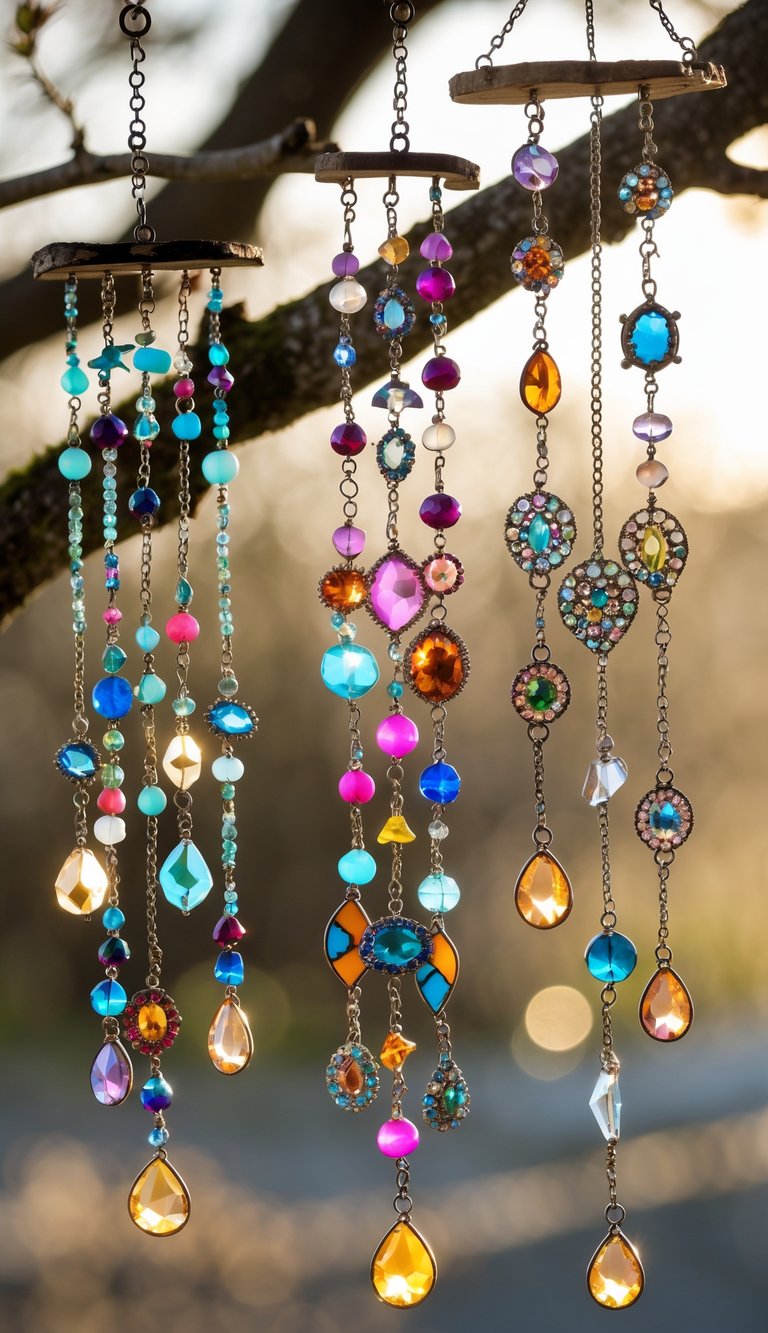
I gather up stray earrings, random beads, and any necklace bits that lost their partners. Then I hunt around for a base—sometimes it’s a branch, a metal ring, or even the top of an old cheese grater if I’m feeling quirky.
I tie each piece on with fishing line or thin wire, attaching them to the base however looks best. After that, I just hang the wind chime outside and let the sunlight and breeze do the rest. It’s a little chaotic, but that’s half the charm, right?
Browse The Items


How to Make Broken Jewelry Wind Chimes
Materials Needed:
- Broken jewelry pieces (chains, beads, pendants)
- Small metal or wooden rods/sticks
- Strong thread or fishing line
- Small pliers and scissors
- Hooks or wire for hanging
The Steps
- Step 1: Gather and Sort Jewelry
Collect your jewelry pieces and group them by color or length. Make sure each piece can hang freely without tangling. - Step 2: Prepare the Base
Choose a sturdy rod, stick, or small hoop as the base of your wind chime. Clean it and attach a hanging hook or loop at the top. - Step 3: Create Hanging Strands
Cut several lengths of fishing line or thread. Attach beads, charms, or pendants along each strand by tying or securing them with pliers. - Step 4: Attach the Strands to the Base
Tie each finished strand to the base, spacing them evenly. Make sure they vary in length for a layered, flowing look. - Step 5: Hang and Enjoy
Once all strands are attached, hang your wind chime in a sunny spot. Watch as the jewelry catches the light and gently moves in the breeze.
21. Reworked Jewelry Choker Necklaces
I spot a broken necklace chain and wrap it around my neck, eyeballing the fit for a choker. With a pair of pliers, I snip off any jagged bits or leftover hardware—nobody wants a scratchy necklace.
I’ll usually grab a charm or a quirky pendant from another old piece and hook it on for some personality. Then, I add a clasp at the ends so I can actually get the thing on and off without a struggle. Simple, kind of fun, and honestly, it feels good to give old jewelry a second shot.
Browse The Items


How to Make Reworked Jewelry Choker Necklaces
Materials Needed:
- Broken bracelets, beads, or jewelry chains
- Jewelry wire or elastic cord
- Clasp or chain extender
- Small pliers and wire cutters
- Jump rings
The Steps:
- Step 1: Select Your Pieces
Choose jewelry pieces that can fit comfortably around your neck once reassembled. Mix and match beads, pendants, or gems for a unique design. - Step 2: Prepare the Base
Cut a piece of jewelry wire or elastic cord to fit your neck size, adding about two inches for adjustments and attaching the clasp. - Step 3: String the Beads
Thread your beads or jewelry components onto the wire. Alternate colors and shapes for an interesting pattern that fits your personal style. - Step 4: Attach the Clasp
Use pliers to secure jump rings and a clasp at both ends of the choker. If using elastic, tie a tight knot and reinforce it with a dab of clear glue. - Step 5: Adjust and Wear
Test the fit around your neck, making sure it sits comfortably. Your reworked jewelry choker is now ready to wear or gift as a handmade statement piece.
✨ Enjoyed this post? Take it with you!
Get the complete ebook version of 21 Creative Broken Jewelry Craft Ideas for Adults — includes images, steps, and materials in one place.
Download for $2.99 and craft offline anytime.


Can you please post a picture of your finished bookmarks? I’m confused about how they would lay in a book?
Thank you for all of the great ideas!