
Table of Contents Show
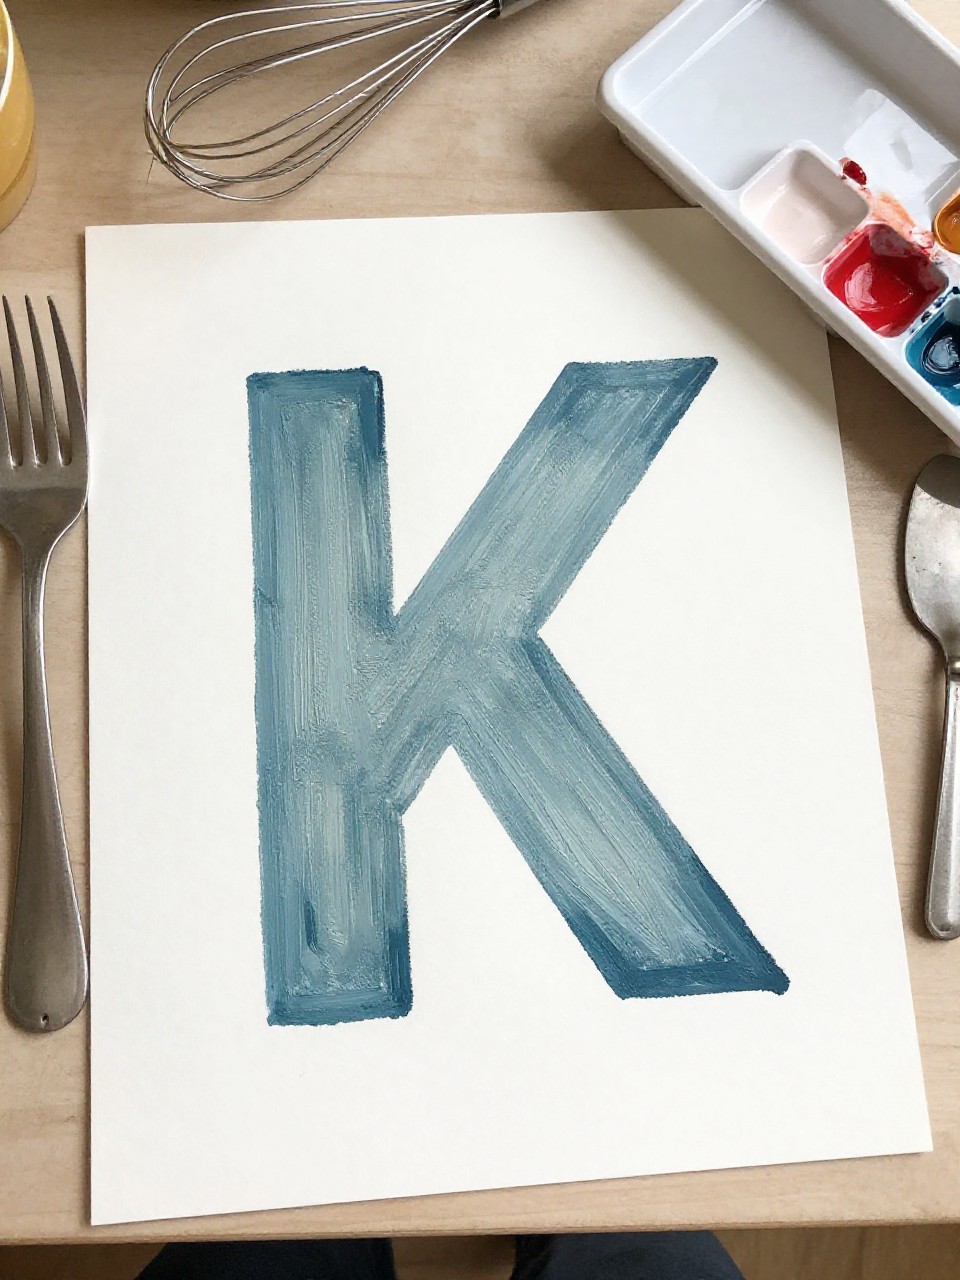
Keeping kids busy can be tough, especially on rainy days or when you need a quick classroom activity. If you’re teaching the alphabet or just want a theme, these Letter K crafts make learning hands-on and fun. Each project is simple, colorful, and easy to set up with common supplies.
Below, you’ll find 15 kid-friendly ideas that turn the letter K into creative keepsakes—let’s jump into the crafting!
1. Kingly Letter K Crown

This craft turns the letter K into a shiny crown shape kids can wear, with jewel stickers and bold colors. Children love decorating it and then pretending to be royal kings and queens; it’s simple and great for letter recognition.
Materials Needed:
- Construction paper (bright colors)
- Scissors
- Glue stick or tape
- Gem stickers or sequins
- Markers or crayons
How to make it:
For People Who Love to Make Things ✂️
- Cut a long crown band and a large letter K to attach to the front.
- Glue the K onto the crown band and size it to the child’s head.
- Add gem stickers, draw patterns, and color the K.
- Let glue dry, then tape the band closed and wear the crown.
2. Kite-Shaped Letter K Collage
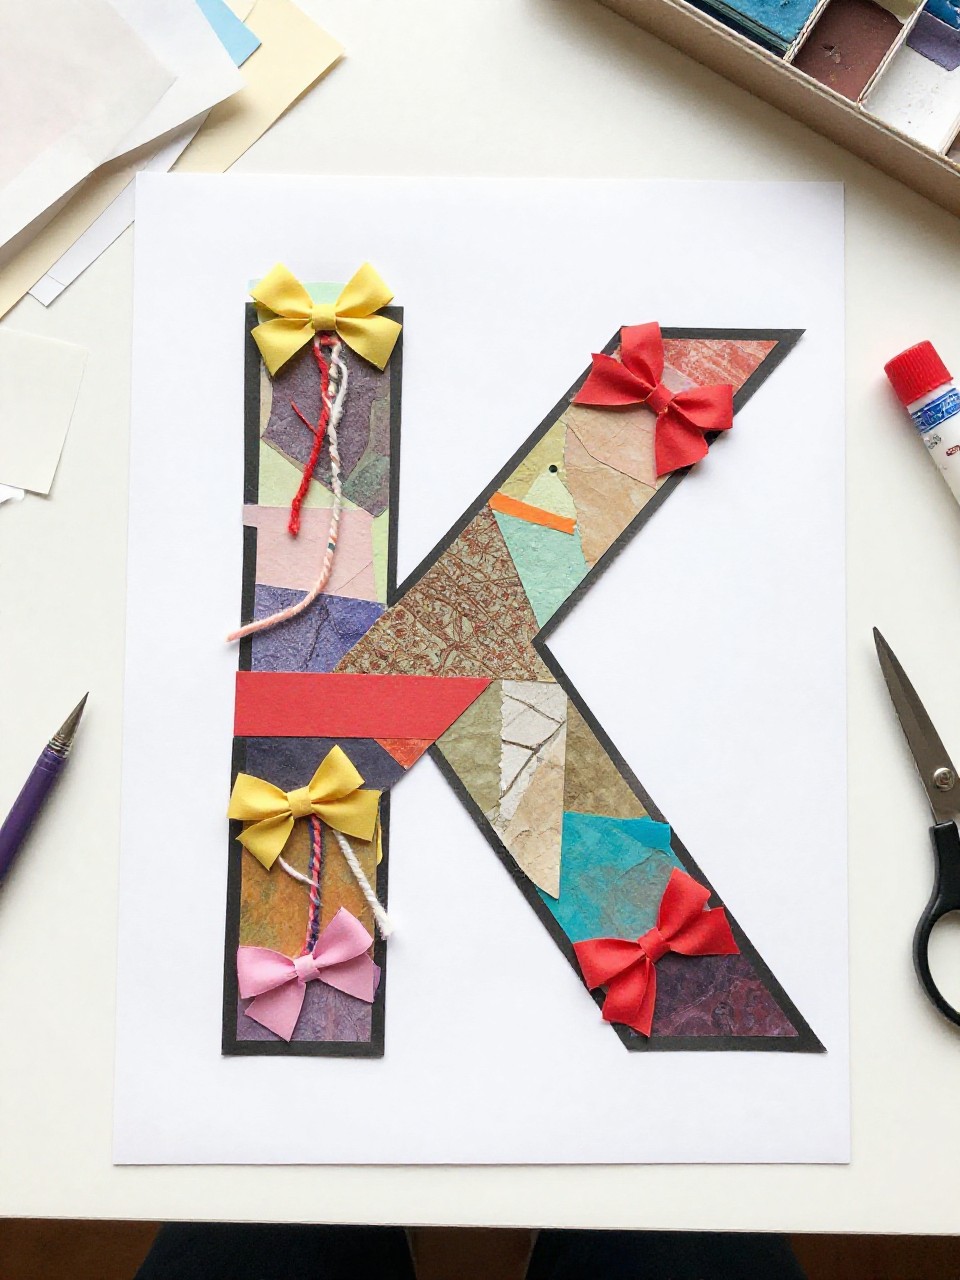
This project turns the letter K into a bright kite with a string tail and tiny bow ties. Kids enjoy choosing paper scraps and making patterns, and watching the flat K transform into a flying shape feels magical.
Materials Needed:
- Cardstock or construction paper (for K base)
- Scrap paper or tissue paper pieces
- Glue stick
- String or yarn
- Small bow shapes (cut from paper) or stickers
How to make it:
- Cut a large letter K from cardstock.
- Glue colorful paper scraps inside the K to make a kite pattern.
- Tape or glue yarn to the bottom of the K and add small paper bows along the “tail.”
- Press flat to dry and display on a wall.
3. Koala-on-a-K Paper Craft
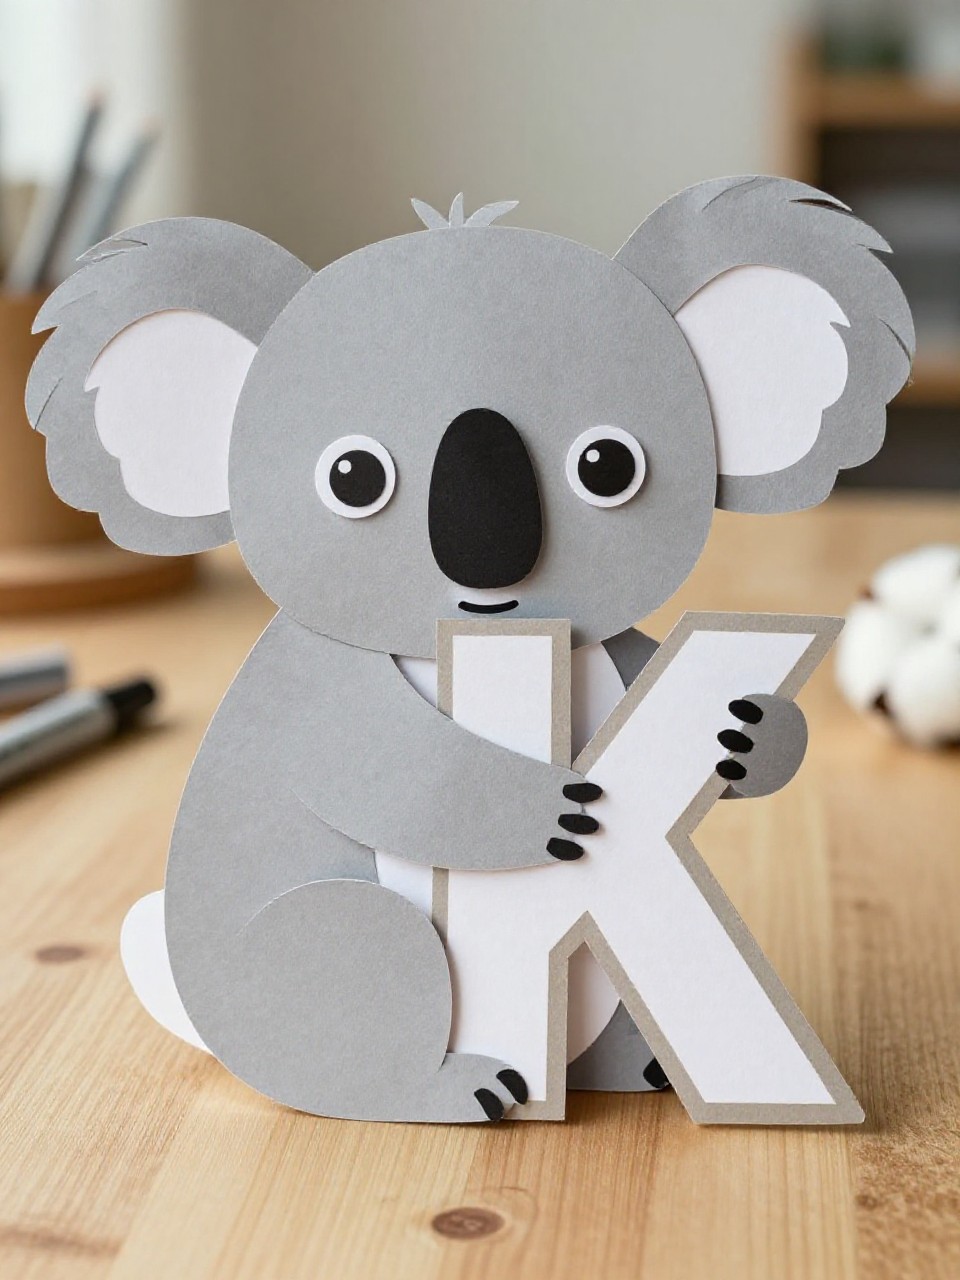
A sleepy koala clings to a big letter K like a tree trunk. Kids love adding fuzzy ears and a cute face, and it’s an easy way to connect animals with the alphabet.
Materials Needed:
- Gray, black, and white paper
- Cardstock for a large K
- Glue stick
- Googly eyes (optional)
- Cotton balls (optional for fluff)
How to make it:
- Cut a large K from sturdy paper.
- Cut simple koala shapes: head, oval ears, arms, and nose.
- Glue the koala hugging the K; add googly eyes or draw a face and fluff cotton on ears.
- Let dry and hang as animal alphabet art.
4. King’s Cape Letter K Banner
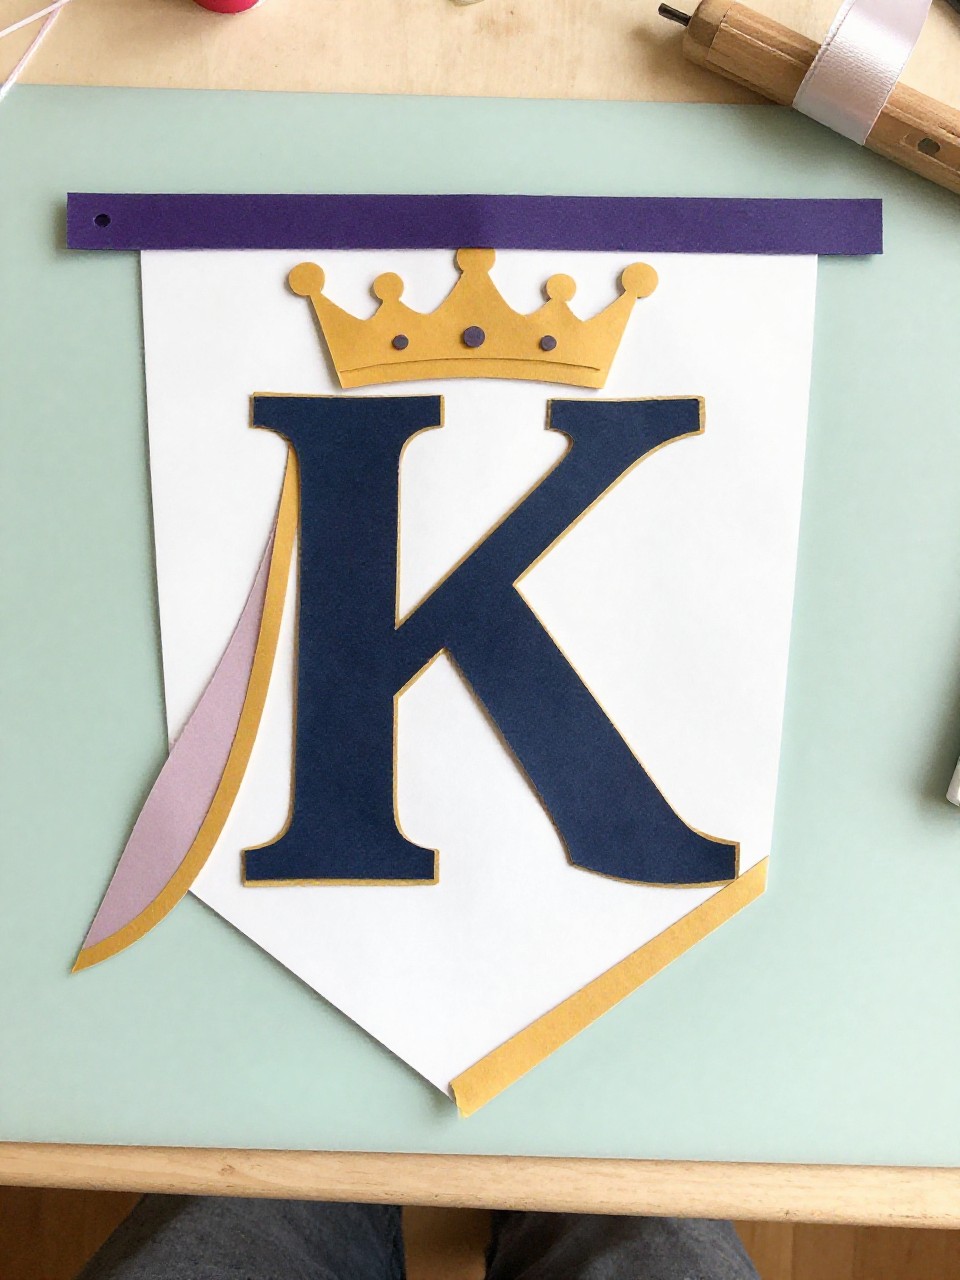
Create a mini banner where the letter K wears a royal cape and tiny crown. Kids enjoy layering felt or paper “fabric,” and the banner looks proud on a classroom wall.
Materials Needed:
- Felt or construction paper (red, yellow, and base color)
- String or ribbon
- Glue
- Markers
- Hole punch
How to make it:
- Cut a pennant shape and a large K for the center.
- Glue the K, then add a small crown and cape shapes on top.
- Draw gold trims and details with markers.
- Punch holes, thread ribbon, and hang the banner.
5. Key Ring Letter K Stamping
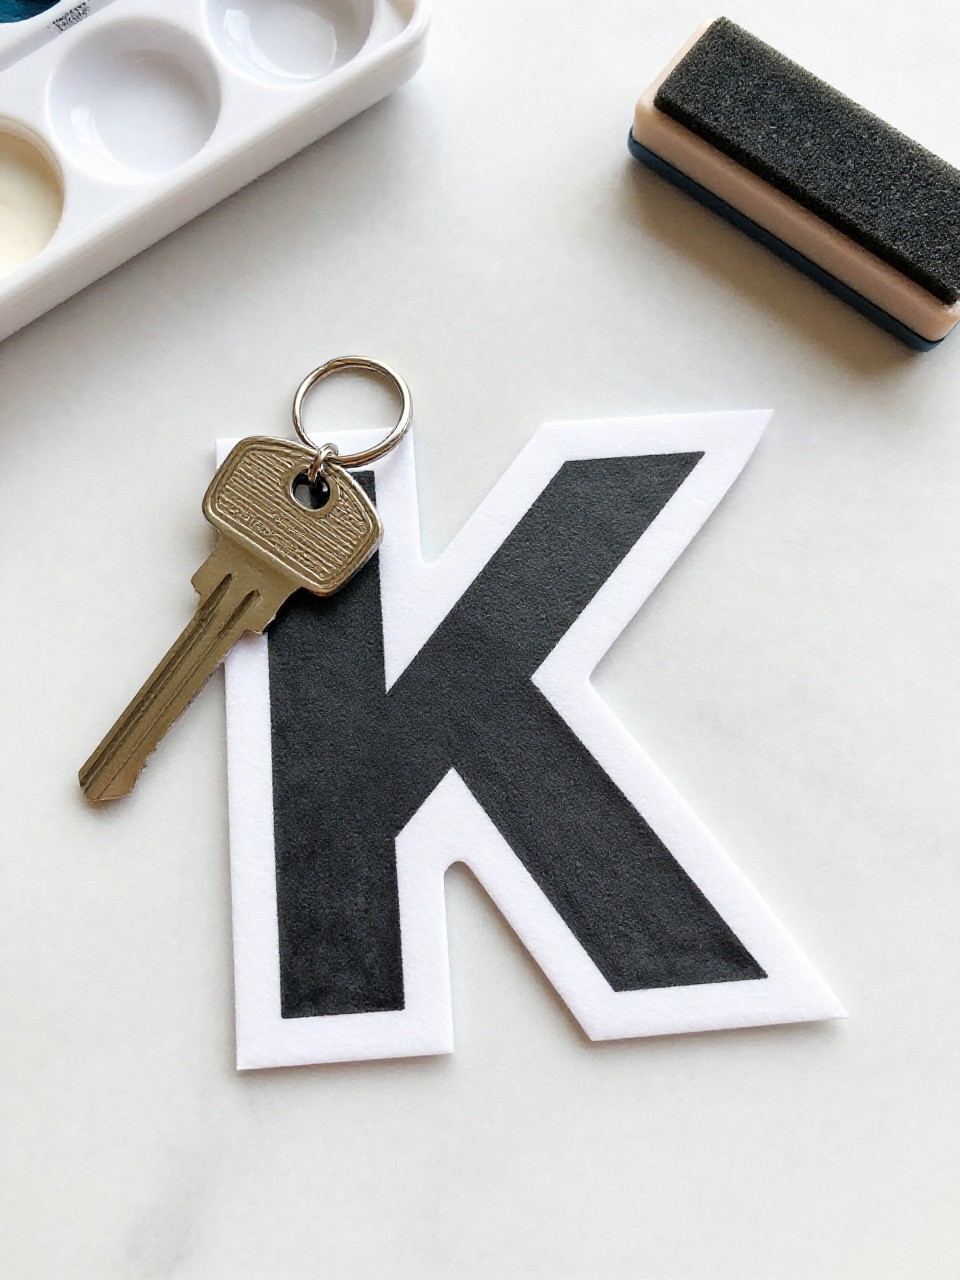
Make a key-themed art piece by stamping K shapes and adding paper keys on a ring. Kids like the bold prints and the shiny “key” accents.
Materials Needed:
- Cardstock
- Foam letter K stamp or cut sponge K
- Washable paint and tray
- Aluminum foil or metallic paper (for keys)
- Brass fastener or small binder ring
How to make it:
- Pour paint and practice stamping K shapes on cardstock.
- Cut simple key shapes from foil or metallic paper.
- Glue keys near the stamped Ks; punch a hole and add a fastener or ring.
- Let dry and display as a key-themed K print.
6. Kangaroo Pouch K Puppet
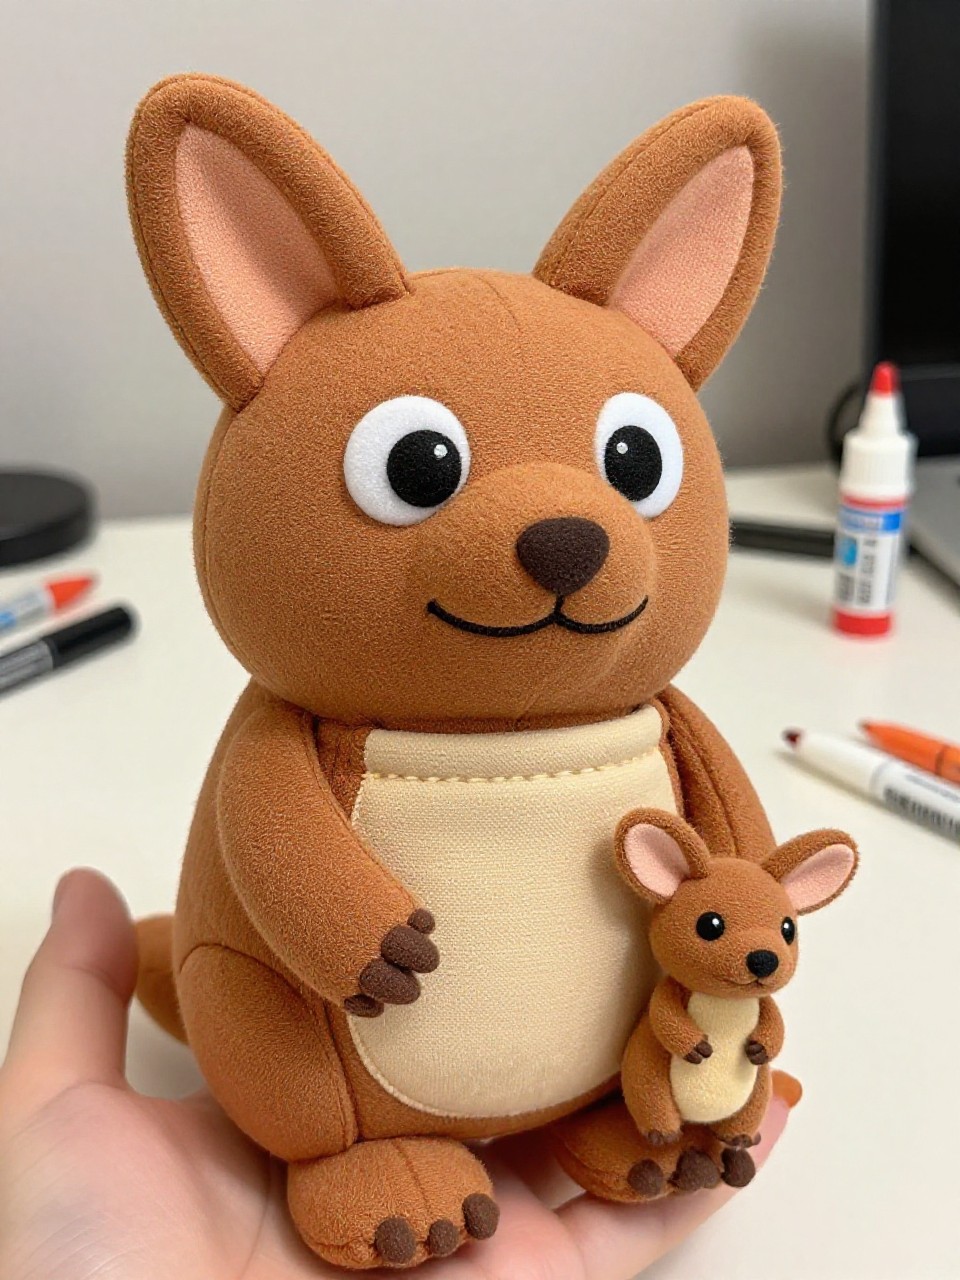
Turn the letter K into a friendly kangaroo puppet with a paper cup pouch. Kids love tucking a tiny joey into the pouch and using the puppet for stories.
Materials Needed:
- Brown construction paper and cardstock K
- Paper cup or envelope (for pouch)
- Glue and tape
- Markers
- Craft stick
How to make it:
- Cut a large K and attach it to a craft stick for a handle.
- Glue a paper cup bottom or small envelope as the pouch on the K.
- Add head, ears, arms, and draw a face; make a tiny joey to tuck inside.
- Let dry, then use as a storytelling puppet.
7. Kitchen Utensil K Print Art
Use safe kitchen tools like potato mashers or forks to print textures inside a big K outline. Kids enjoy the surprising patterns and seeing everyday items turn into art tools.
Materials Needed:
- Large K outline on cardstock
- Washable paint
- Tray or paper plate
- Fork, potato masher, whisk (clean)
- Apron or smock
How to make it:
- Place the K outline on a protected surface.
- Dip utensils in paint and press patterns inside the K.
- Layer colors and let textures overlap for a bold look.
- Dry flat and hang the art.
8. Klever Kaleidoscope K
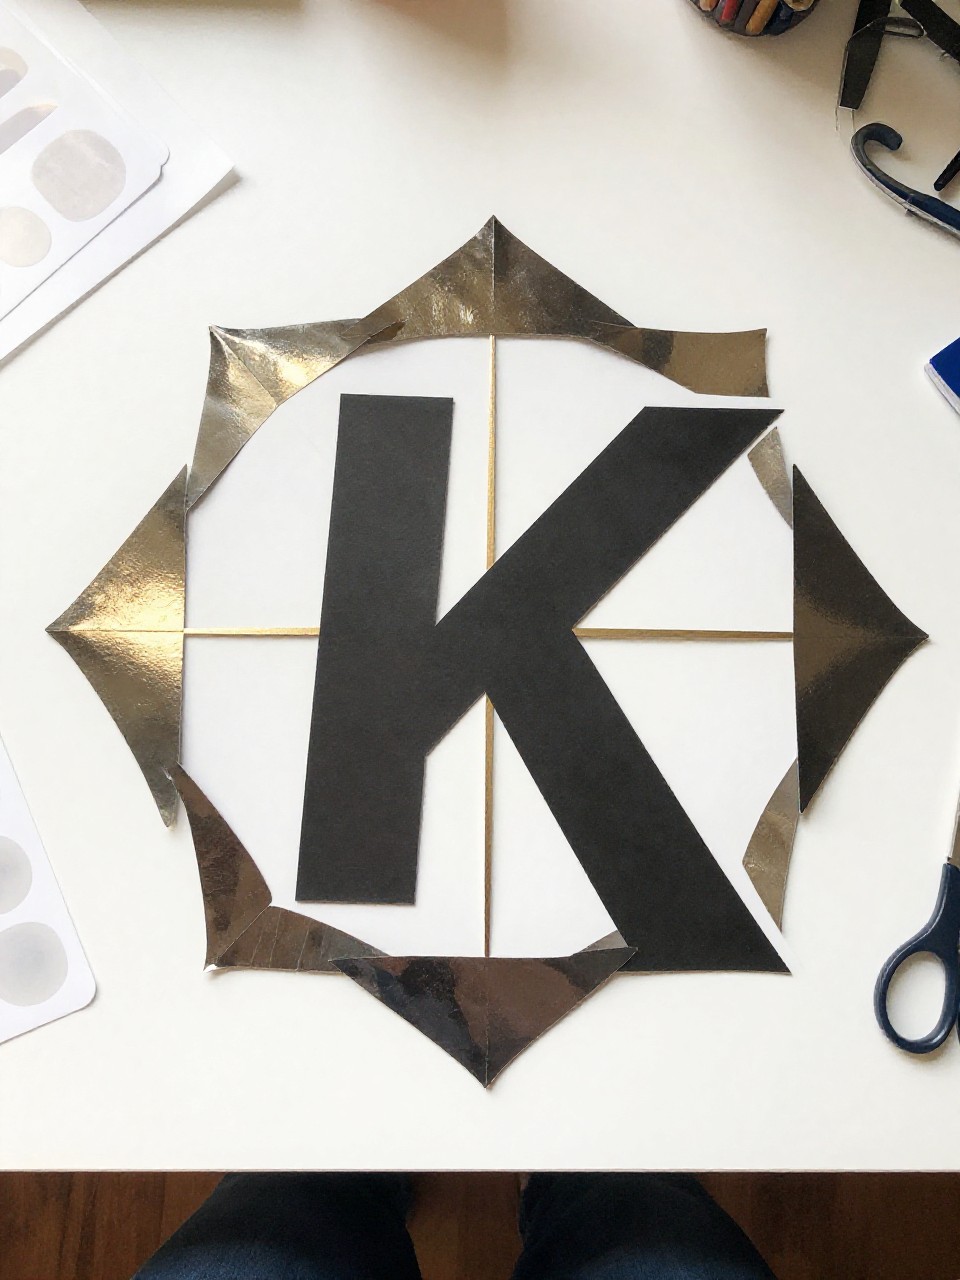
Create a simple paper “kaleidoscope” K with mirrored foam stickers and shiny paper. Kids love the sparkle and symmetry, and it feels magical without being tricky.
Materials Needed:
- Cardstock K base
- Foil paper or holo stickers
- Foam geometric stickers
- Glue stick
- Ruler and pencil (optional for symmetry)
How to make it:
- Cut a sturdy letter K from cardstock.
- Plan a mirrored design on both sides of the K’s spine.
- Stick on foil paper bits and foam shapes to form a symmetrical pattern.
- Press flat and display where it catches light.
9. Kindness K Note Holder
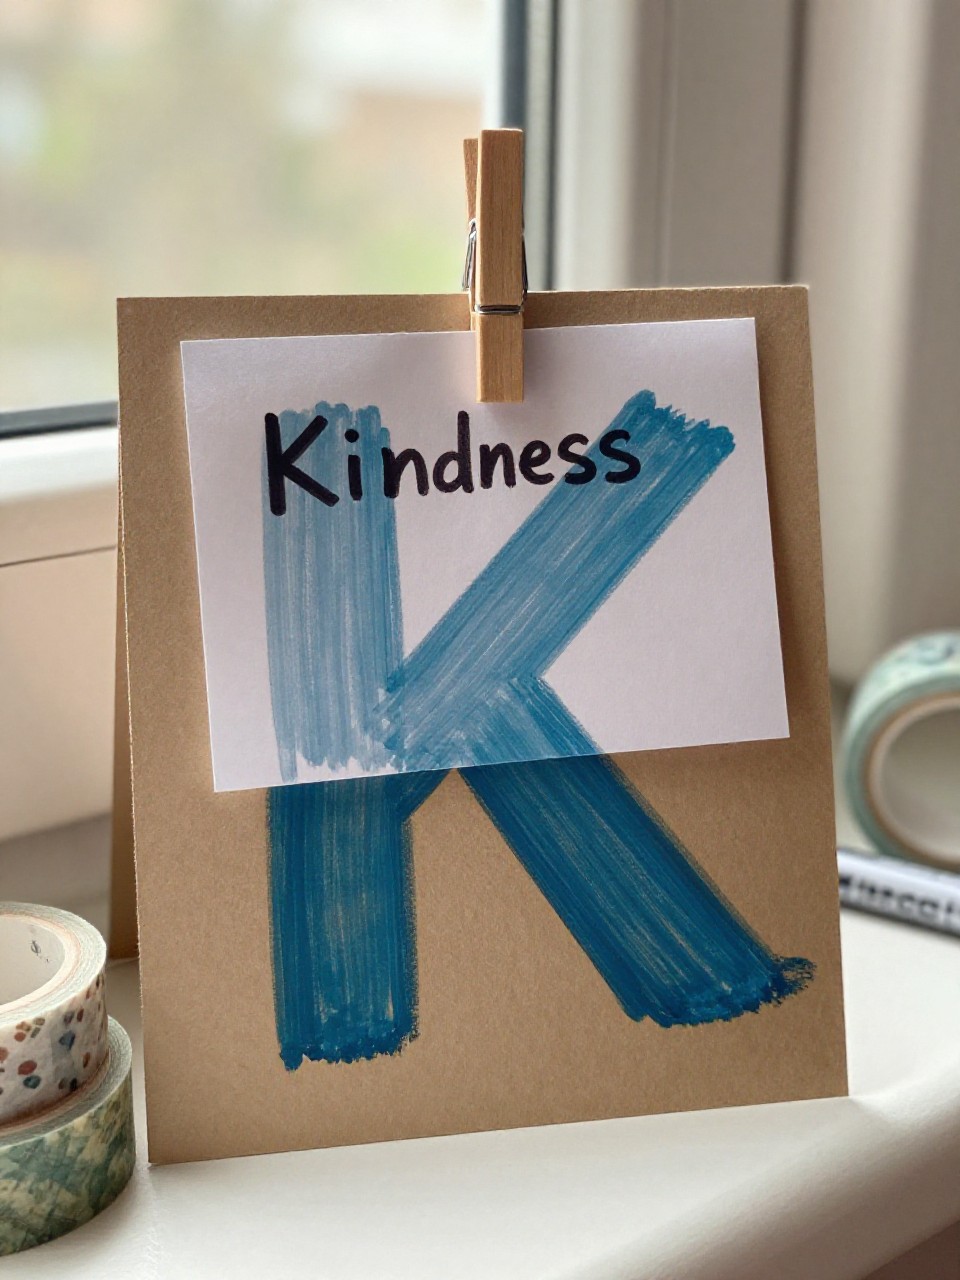
Make a standing K with a clothespin clip to hold kind notes. Kids enjoy writing simple compliments or “thank yous” and seeing them displayed.
Materials Needed:
- Thick cardboard or foam board K
- Paint and brush
- Wooden clothespin
- Glue (strong craft glue)
- Stickers or washi tape
How to make it:
- Cut or trace and cut a sturdy K; paint it a cheerful color.
- Glue a clothespin near the top to clip notes.
- Add stickers, washi borders, and the word “Kindness.”
- Let dry, then clip in a kind note or drawing.
10. Kiwi Slice K Art
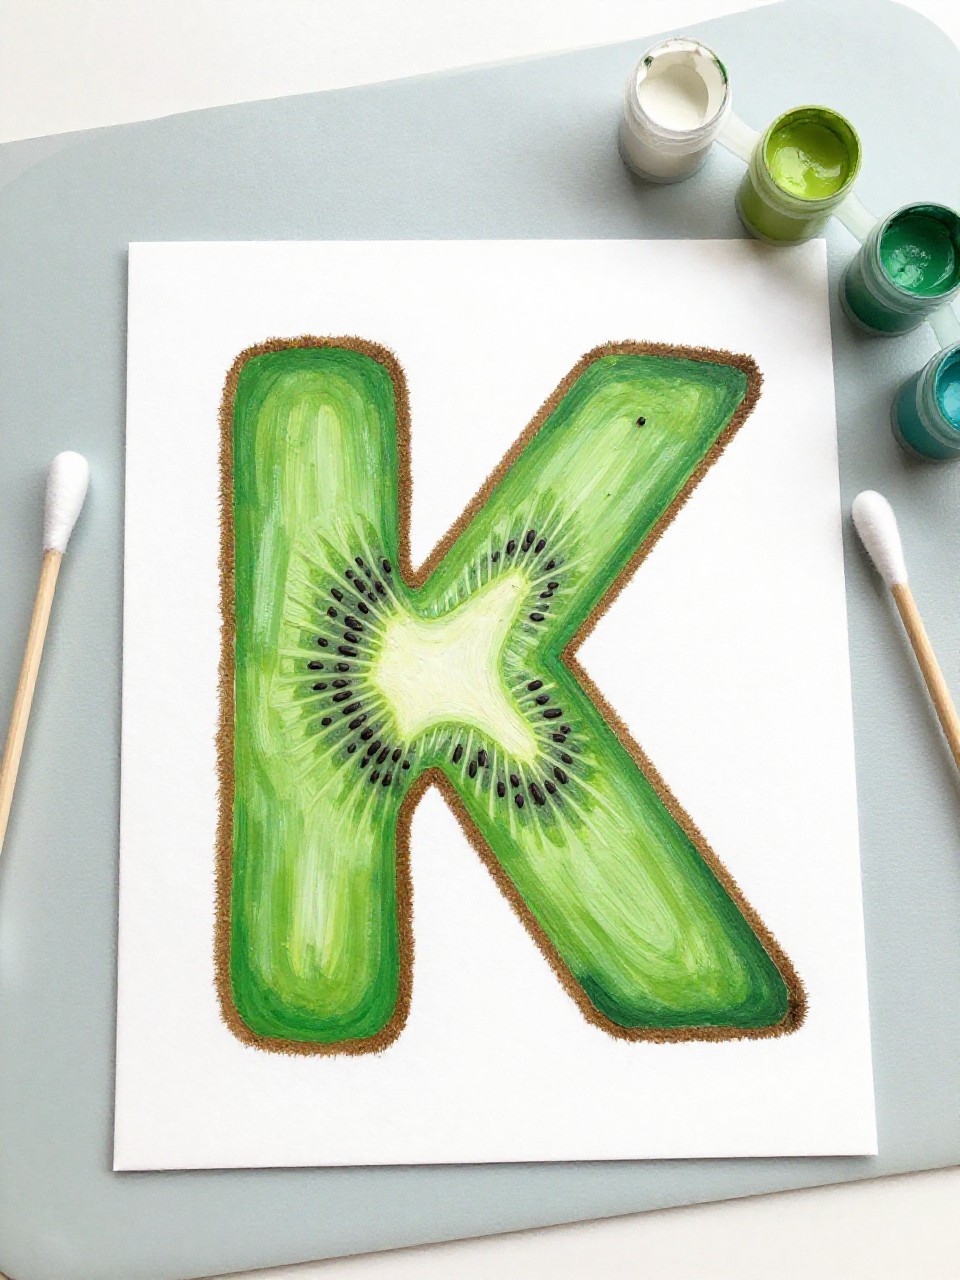
Turn the letter K into a juicy kiwi with painted green and black seed dots. Kids love the bright colors and simple dotting with cotton swabs.
Materials Needed:
- Cardstock K
- Green, white, and black washable paint
- Cotton swabs
- Paintbrush
- Paper plate palette
How to make it:
- Paint the K green and let it get slightly tacky.
- Add a white oval center on the K’s spine.
- Use cotton swabs to dot black kiwi seeds around the white.
- Dry completely and mount on contrasting paper.
11. Knight Shield Letter K
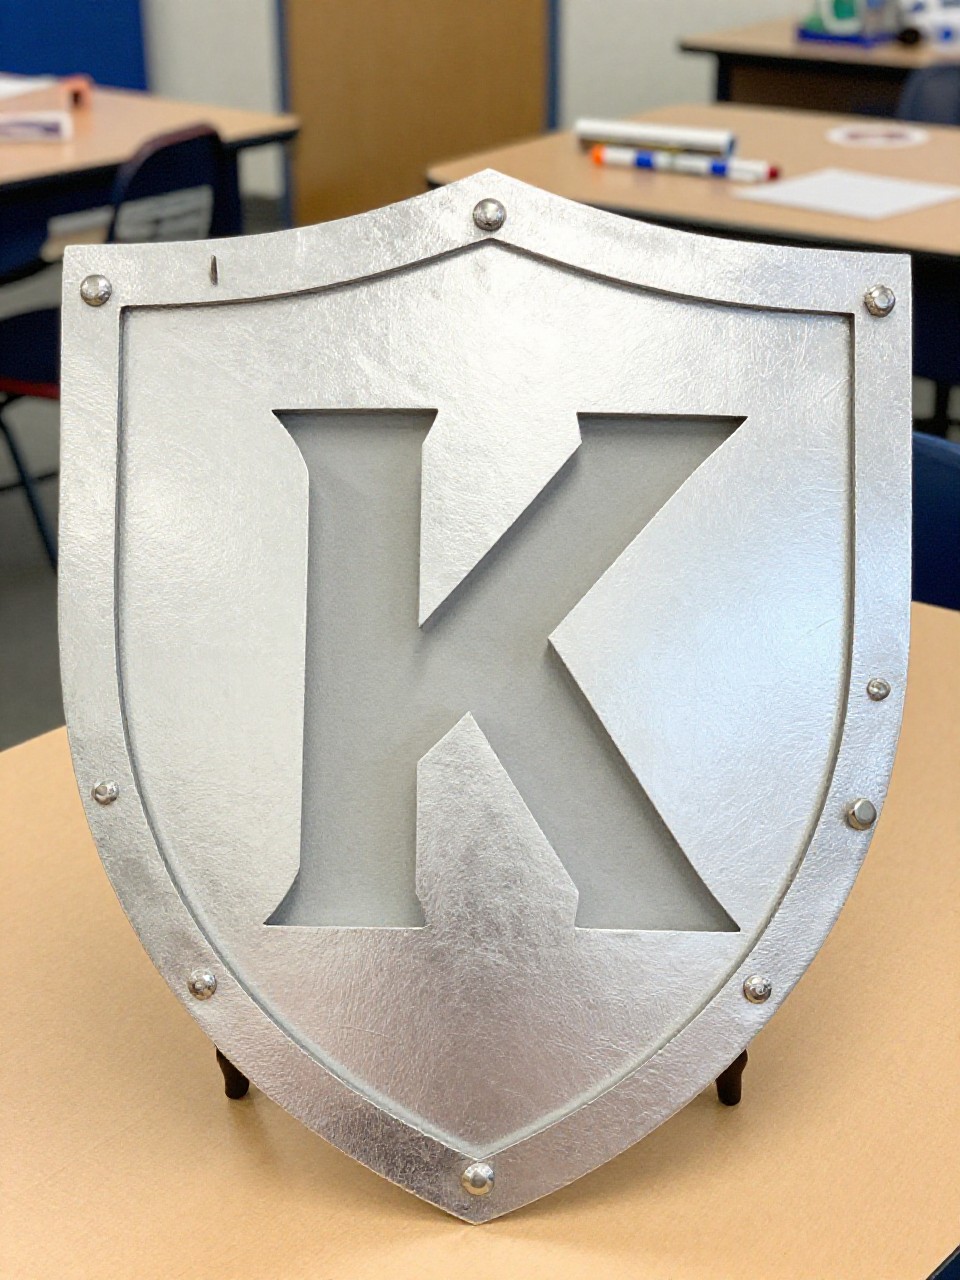
Build a mini knight’s shield with a bold K crest and a handle on the back. Kids enjoy pretending to guard the castle and learning the K sound with “knight.”
Materials Needed:
- Cardboard (shield shape)
- Aluminum foil
- Tape and glue
- Craft foam or paper for K
- Ribbon or cardboard strip for handle
How to make it:
- Cut a shield from cardboard and wrap the front with foil.
- Cut and glue a large foam or paper K as the crest.
- Add simple emblems or borders with markers.
- Tape a ribbon or cardboard loop on the back as a handle.
12. K is for Keys Sun Catcher
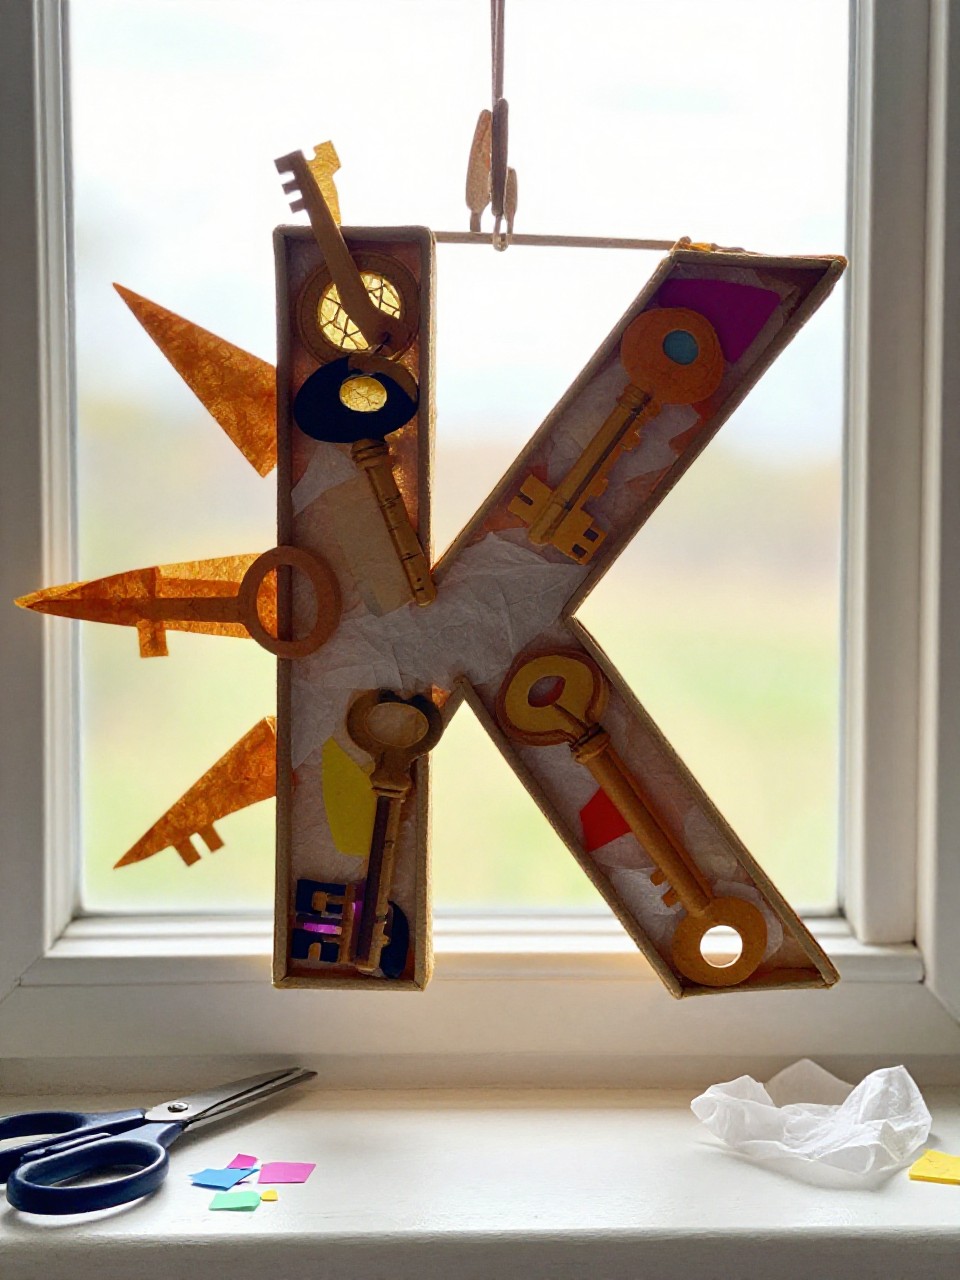
Make a window sun catcher with translucent paper keys floating around a big K. Kids love watching the colors glow when sunlight shines through.
Materials Needed:
- Clear contact paper or laminating sheets
- Tissue paper (various colors)
- Black construction paper K outline
- Scissors
- String (optional for hanging)
How to make it:
- Cut a thick K outline like a frame.
- Stick the K frame onto contact paper, sticky side up.
- Fill inside with tissue paper bits and add small tissue key shapes.
- Seal with another sheet, trim, and hang in a sunny spot.
13. Kitchen Kitten K Collage
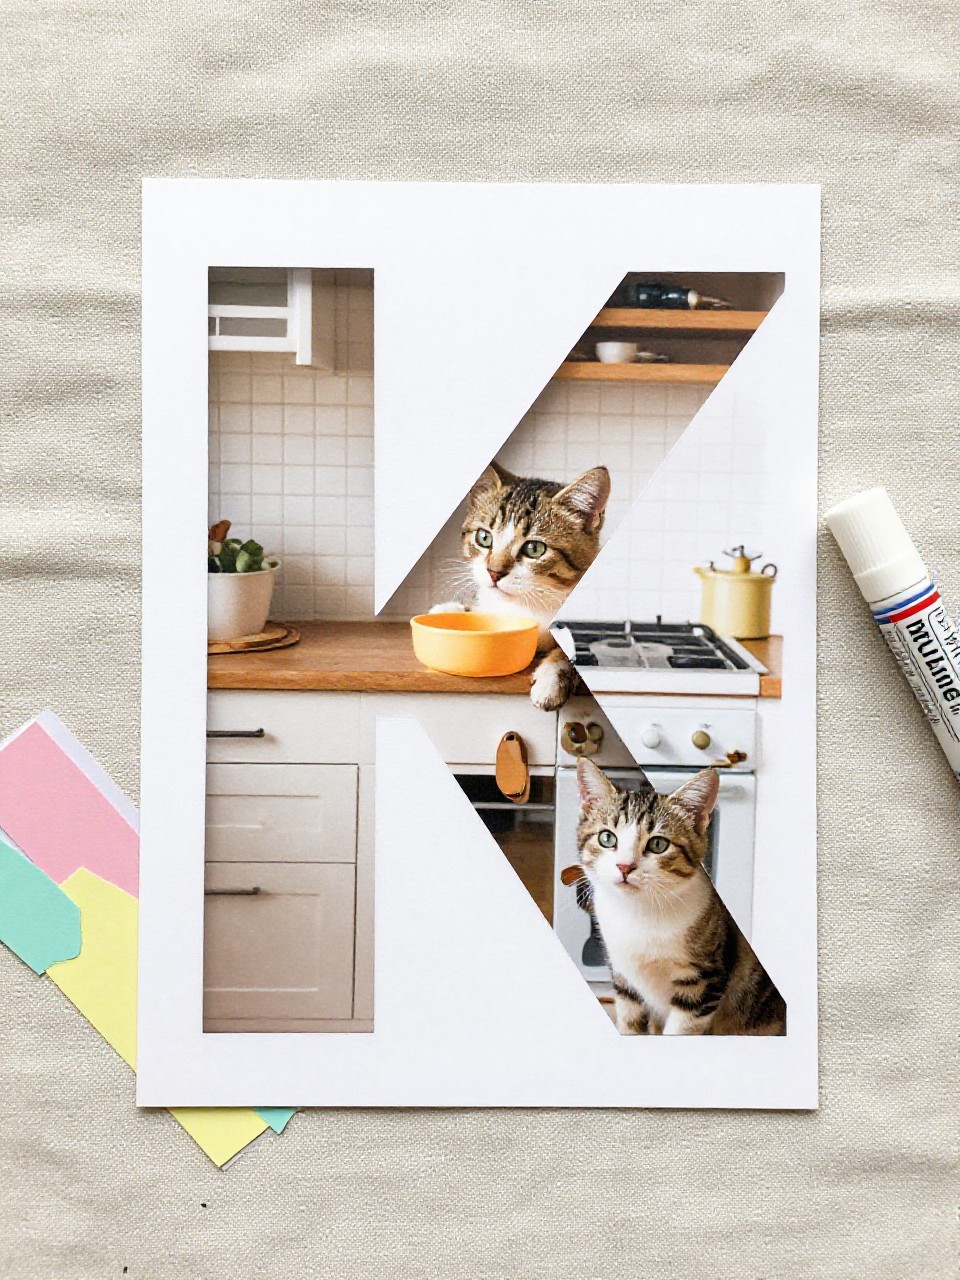
Create a playful kitten peeking over a letter K with tiny kitchen props like a paper bowl and spoon. Kids enjoy the story element and cute faces.
Materials Needed:
- Cardstock K
- Colored paper for kitten parts
- Mini paper bowl and spoon cutouts
- Glue stick
- Crayons or markers
How to make it:
- Cut and glue a large K as the base.
- Build a simple kitten face, paws, and ears and glue them peeking over the K.
- Add paper bowl and spoon near the bottom; draw whiskers and details.
- Press flat to dry and display.
14. Karate Kick Letter K
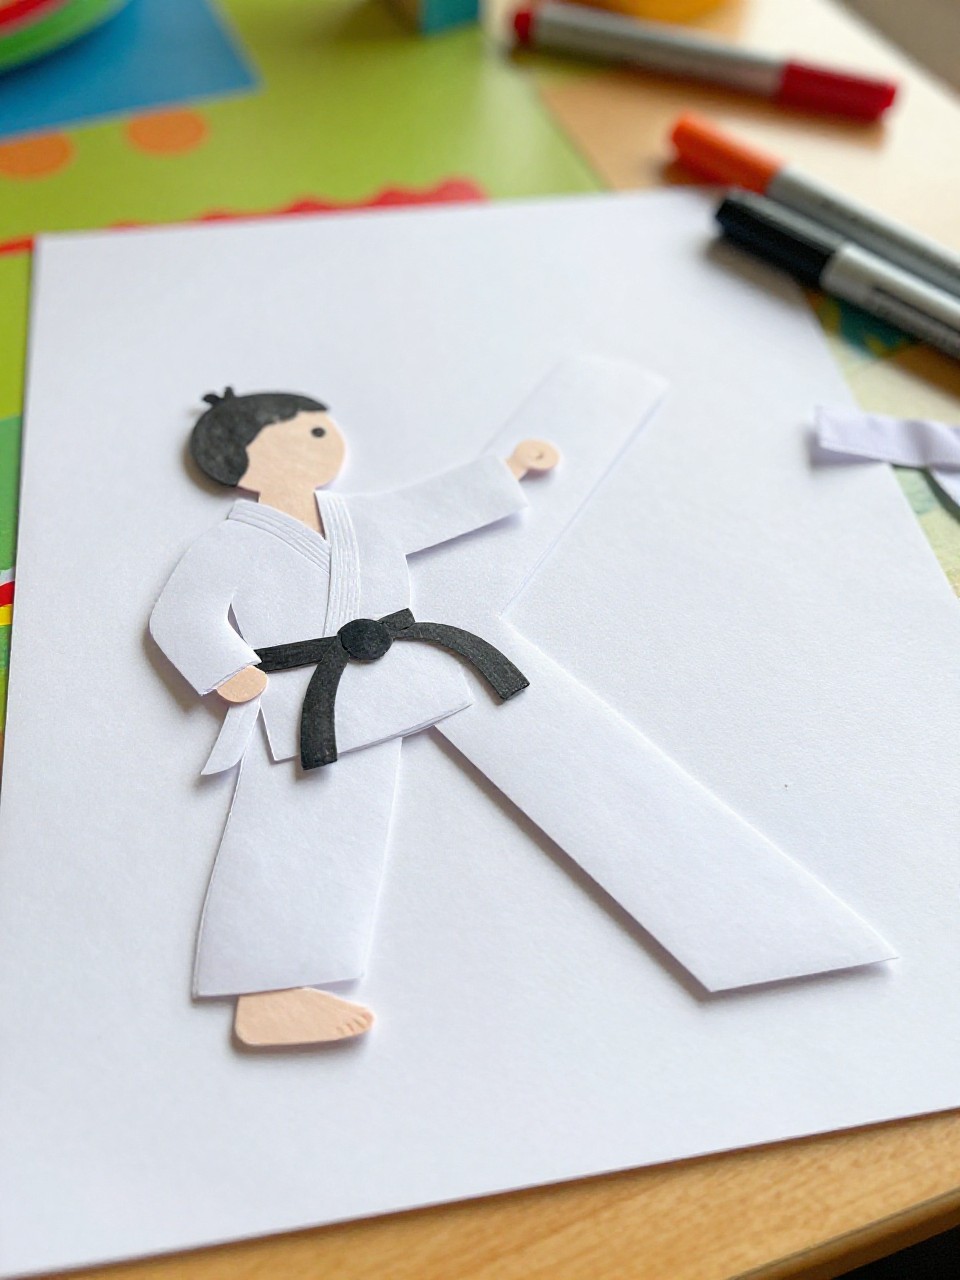
Pose a stick-figure kid doing a karate kick using the arms and legs of the K. Kids love the action pose and drawing tiny belts and uniforms.
Materials Needed:
- Cardstock K
- Black marker and crayons
- Small scrap of ribbon or paper (for belt)
- Glue stick
- Googly eyes (optional)
How to make it:
- Place the K sideways to look like kicking legs.
- Draw a simple head and body attached to the K’s spine.
- Glue a ribbon belt and add facial features or googly eyes.
- Color the “uniform” and display the action K.
15. Kindergarten Keepsake K
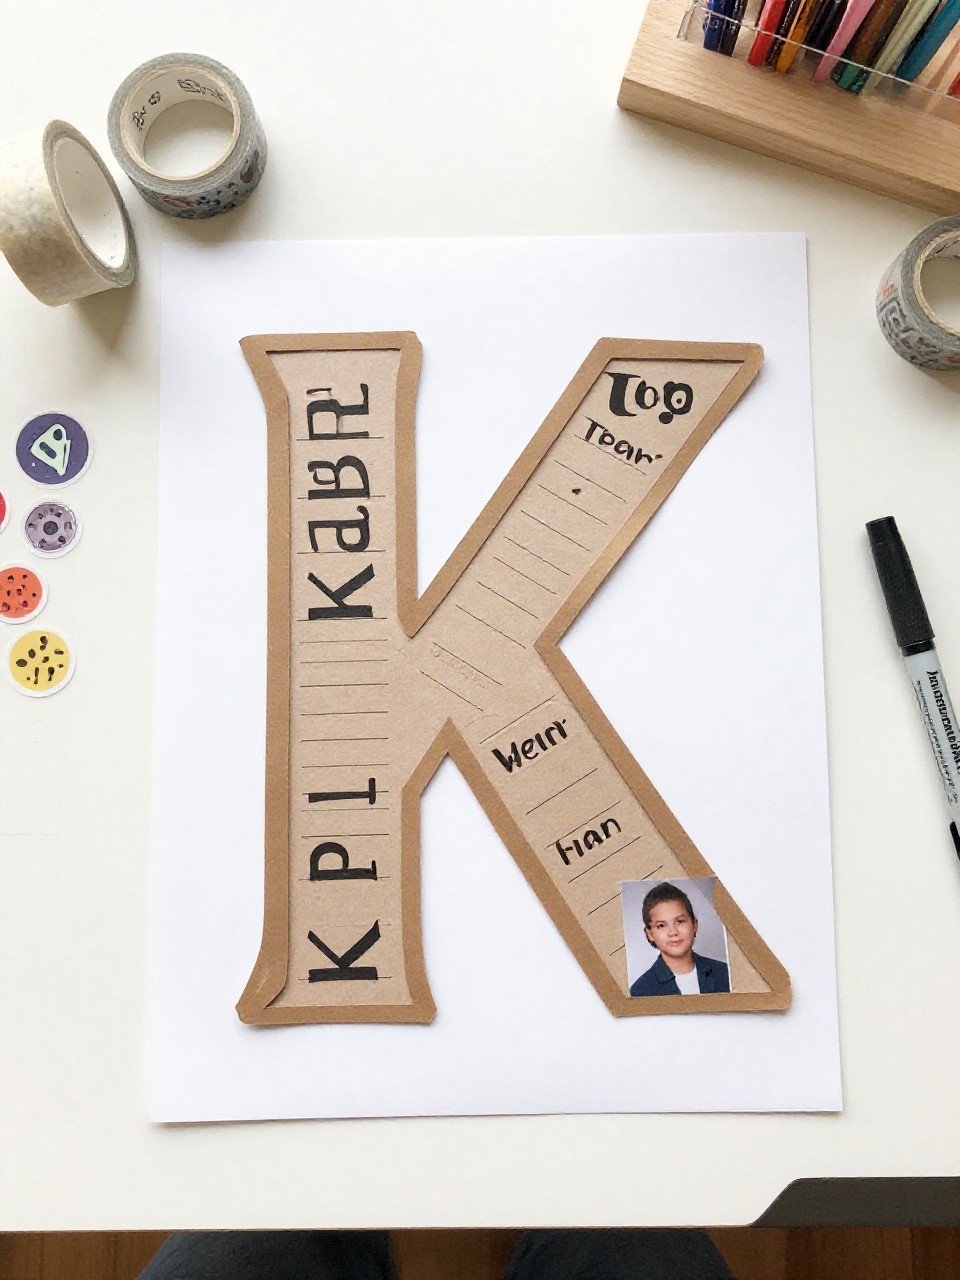
Create a memory K decorated with the child’s name, age, and favorite things from kindergarten. Kids enjoy personalizing it, and it makes a sweet end-of-year keepsake.
Materials Needed:
- Heavy cardstock K
- Stickers and washi tape
- Markers
- Small photo (optional)
- Glue stick
How to make it:
- Cut a large K and write the child’s name and year at the top.
- Add a small photo and decorate with washi borders and stickers.
- List favorite books, friends, and activities around the K.
- Let dry and save in a portfolio or frame it.