

Table of Contents Show
Keeping kids busy can be tough, especially on rainy days or when you need a quick classroom activity. If you’re hunting for simple, hands-on projects that build letter recognition, these Letter W crafts are perfect.
Each idea turns the letter W into something familiar and fun, like whales, watermelons, and wagons. You’ll find easy steps, short supply lists, and lots of cheerful results.
Let’s jump into 15 easy Letter W crafts kids can make today.
1. Paper Plate W Whale
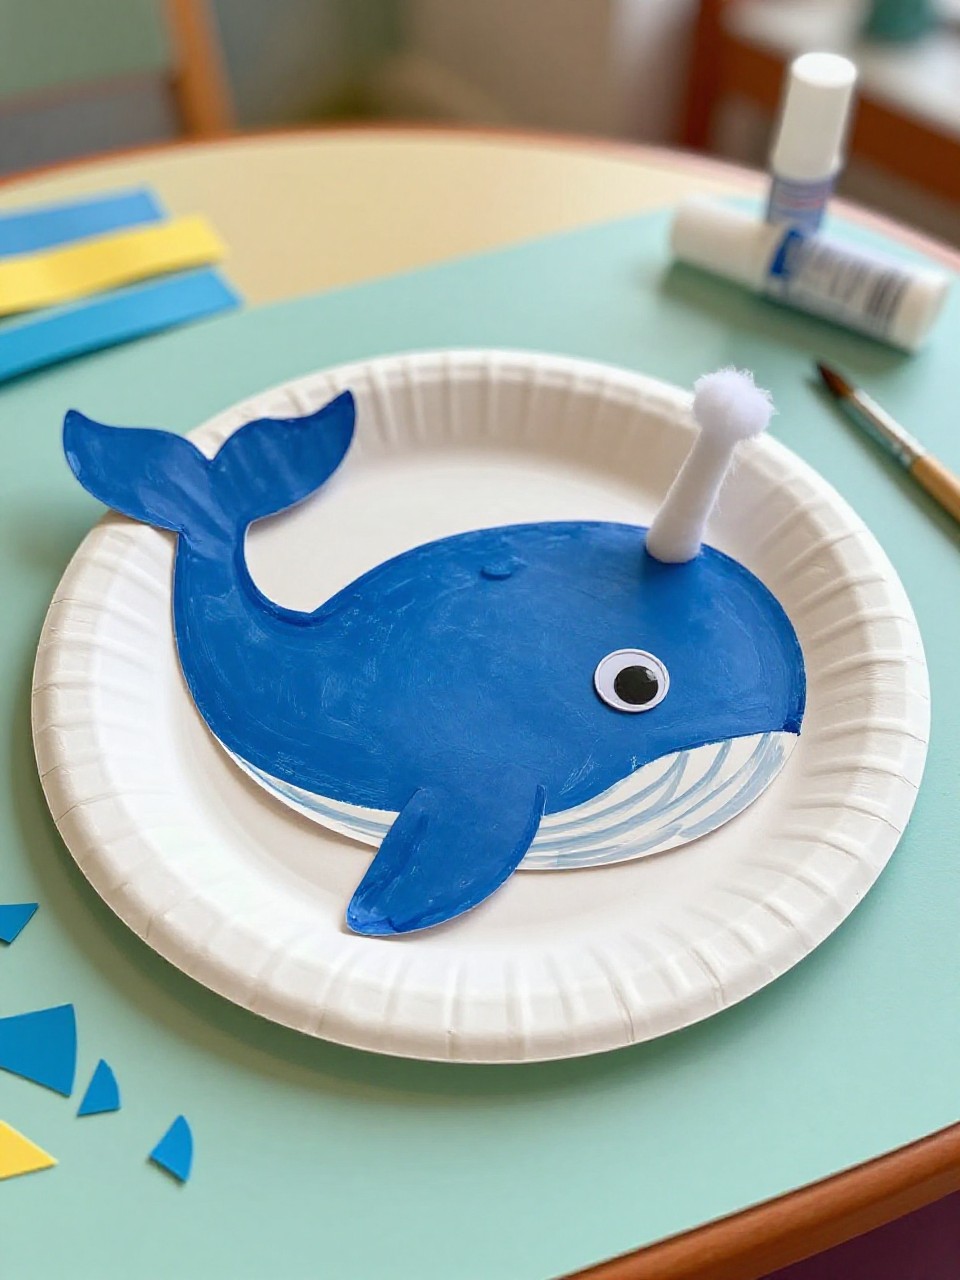
This craft turns a paper plate into a smiling blue whale with a big W-shaped tail. Kids love painting the plate and gluing on a splashy spout, and the final whale makes letter learning feel playful and simple.
Materials Needed:
For People Who Love to Make Things ✂️
- Paper plate (white)
- Blue paint or blue markers
- Construction paper (blue/white), googly eye
- Glue stick and scissors
- Cotton balls for water spout (optional)
How to make it:
- 1. Paint the paper plate blue and let it dry; cut a large W from blue paper for the tail.
- 2. Fold the plate slightly to form a whale body and glue the W as the tail on one edge.
- 3. Add a googly eye and a white paper belly; glue cotton balls at the top as a spout.
- 4. Let dry, then display your W Whale on a bulletin board or windowsill.
2. Handprint W Walrus
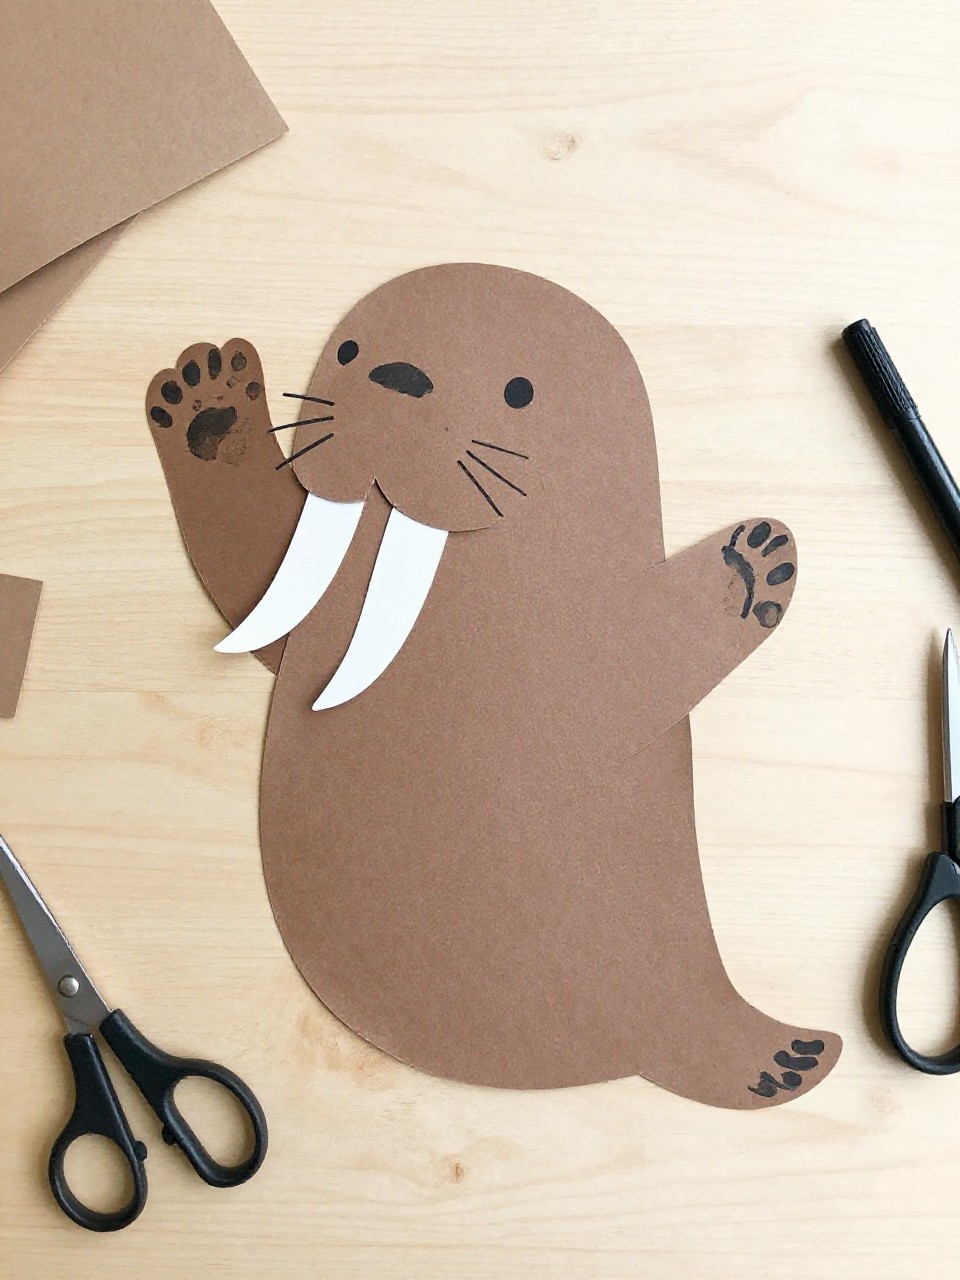
A big W forms the walrus body, and two handprints become flippers with long paper tusks. Kids enjoy tracing their hands and seeing how the letter changes into a friendly animal face.
Materials Needed:
- Brown and tan construction paper
- White paper for tusks
- Black marker and googly eyes
- Glue stick and scissors
- Pencil for tracing
How to make it:
- 1. Cut a large W from brown paper for the body.
- 2. Trace and cut two handprints from brown paper; glue them to the sides as flippers.
- 3. Add a tan oval face, googly eyes, and white tusks; draw whiskers and a nose.
- 4. Press flat to dry and hang on the wall for letter W animal fun.
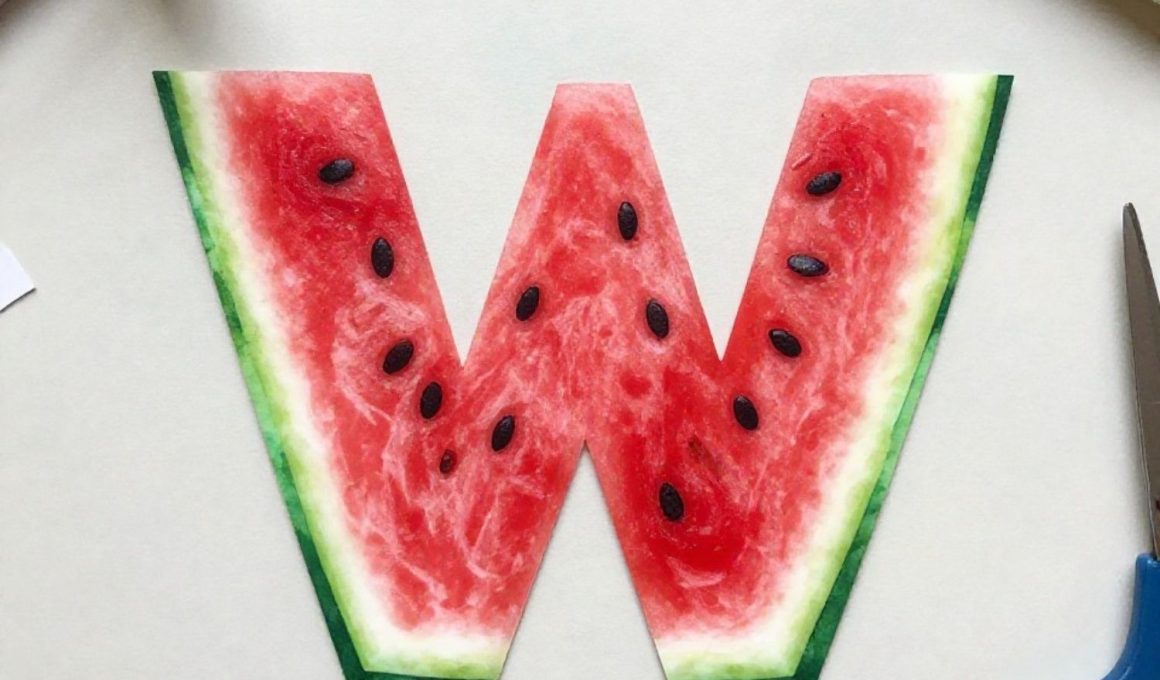
3. W is for Watermelon Collage
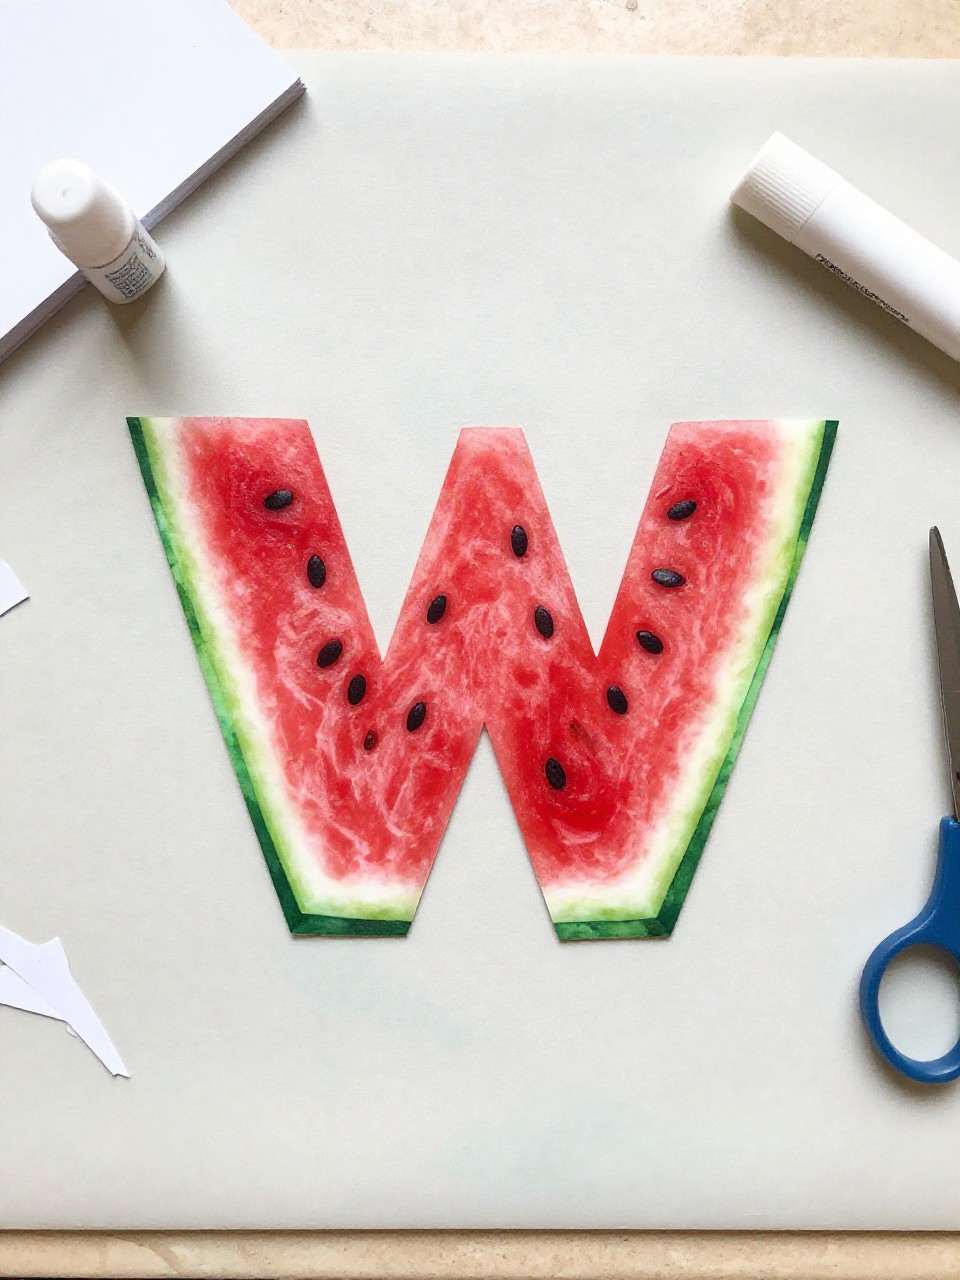
A giant W becomes a juicy slice of watermelon with green rind and black seed dots. Kids love the bright colors and simple cutting and gluing, perfect for beginners.
Materials Needed:
- Red, green, and white construction paper
- Black marker or tiny black paper for seeds
- Glue stick and scissors
- Pencil for tracing
- Optional glitter for a sparkly rind
How to make it:
- 1. Cut a large W from red paper.
- 2. Add a white paper strip and then a green strip along the bottom edges as the rind.
- 3. Draw or glue on black seeds all over the red W.
- 4. Let everything set and mount on another paper for a fruity display.
4. Popsicle Stick W Wagon
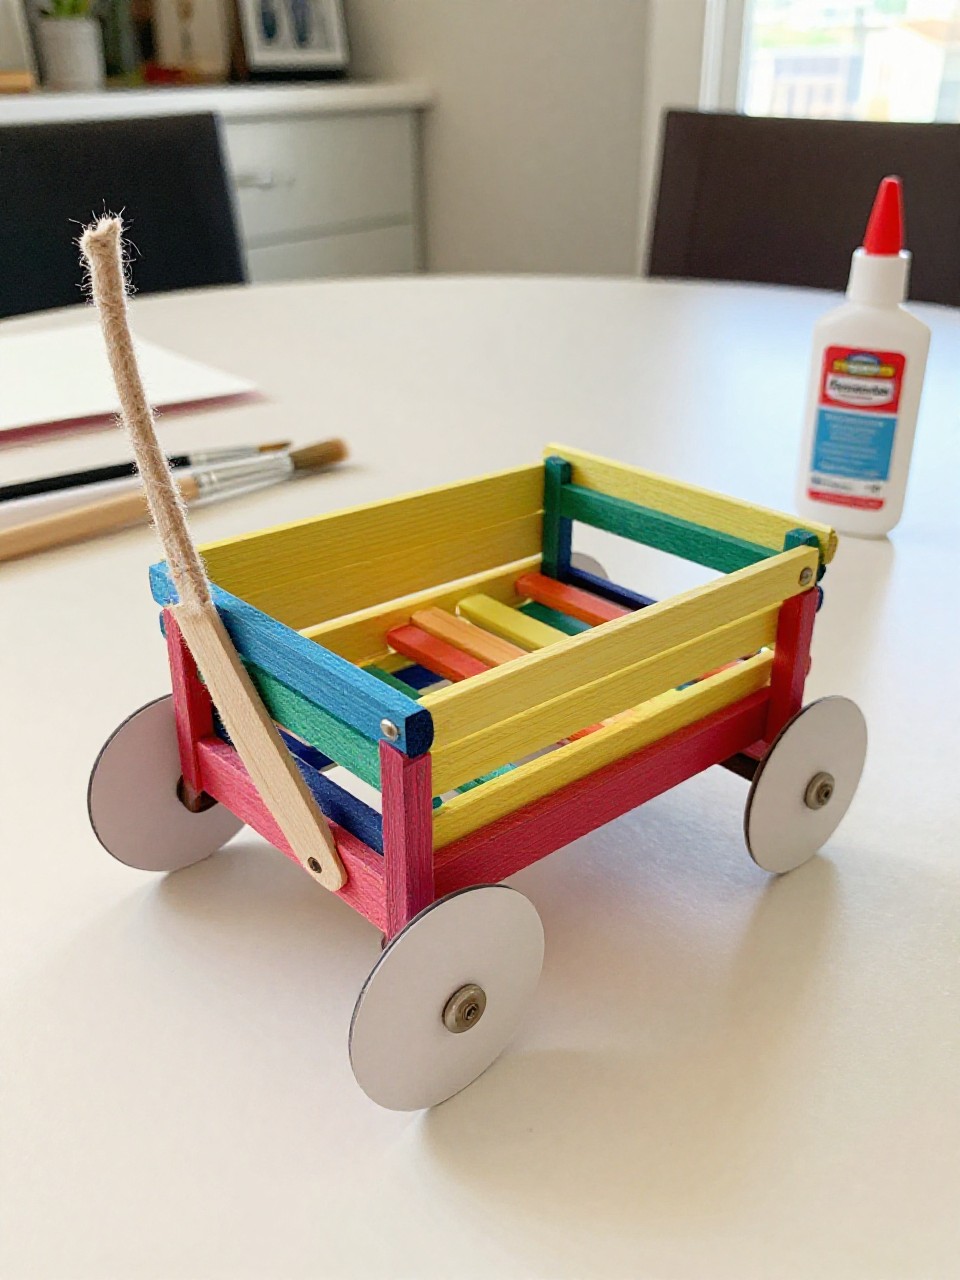
Build a bold W with craft sticks and add simple wheels to make a cute little wagon picture. Kids enjoy arranging the sticks and choosing colors for the wagon body.
Materials Needed:
- Popsicle sticks (6–8)
- Craft paint or markers
- Construction paper circles for wheels
- Glue (school glue or hot glue with adult help)
- String (optional pull handle)
How to make it:
- 1. Paint the sticks and let dry; glue four sticks in a zigzag to form a W.
- 2. Add two sticks across the bottom for the wagon base.
- 3. Glue on paper wheels and draw wheel hubs; tie string to the top as a handle.
- 4. Let dry, then prop it up or hang as wall art.
5. Coffee Filter W Wings Butterfly
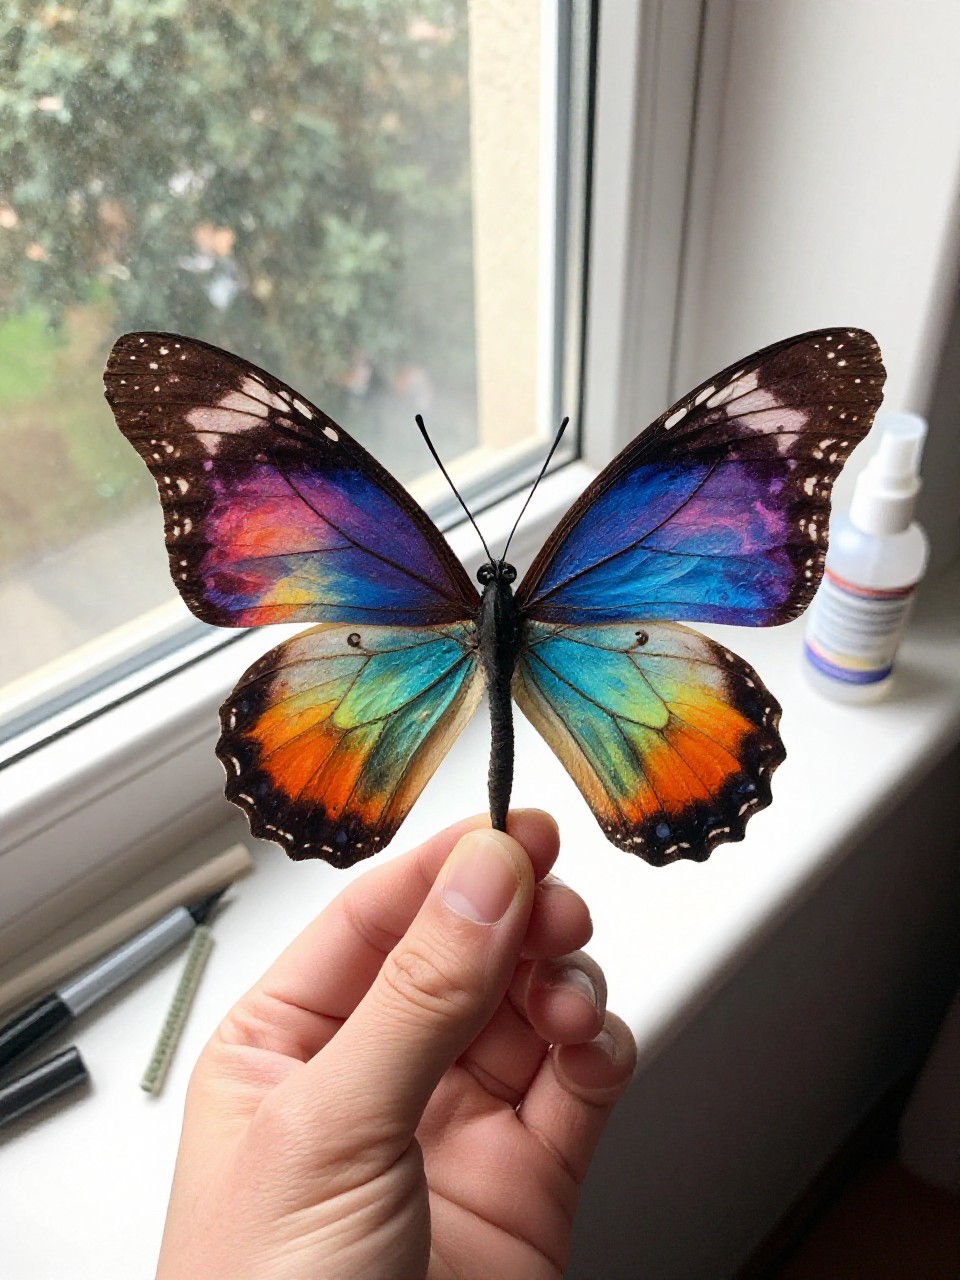
A letter W becomes the butterfly’s body, and a painted coffee filter folds into bright wings. Kids love watching the colors blend when they mist the filter with water.
Materials Needed:
- Coffee filter
- Washable markers and spray bottle
- Black or colorful construction paper for a large W
- Pipe cleaner for antennae
- Glue stick and scissors
How to make it:
- 1. Color the coffee filter with markers and lightly mist to blend; let dry, then fold like a fan.
- 2. Cut a big W from paper for the butterfly body.
- 3. Glue the folded filter behind the W, add pipe cleaner antennae and a smile.
- 4. Dry flat, then tape it to a window to let the colors shine.
6. W Weather Wheel
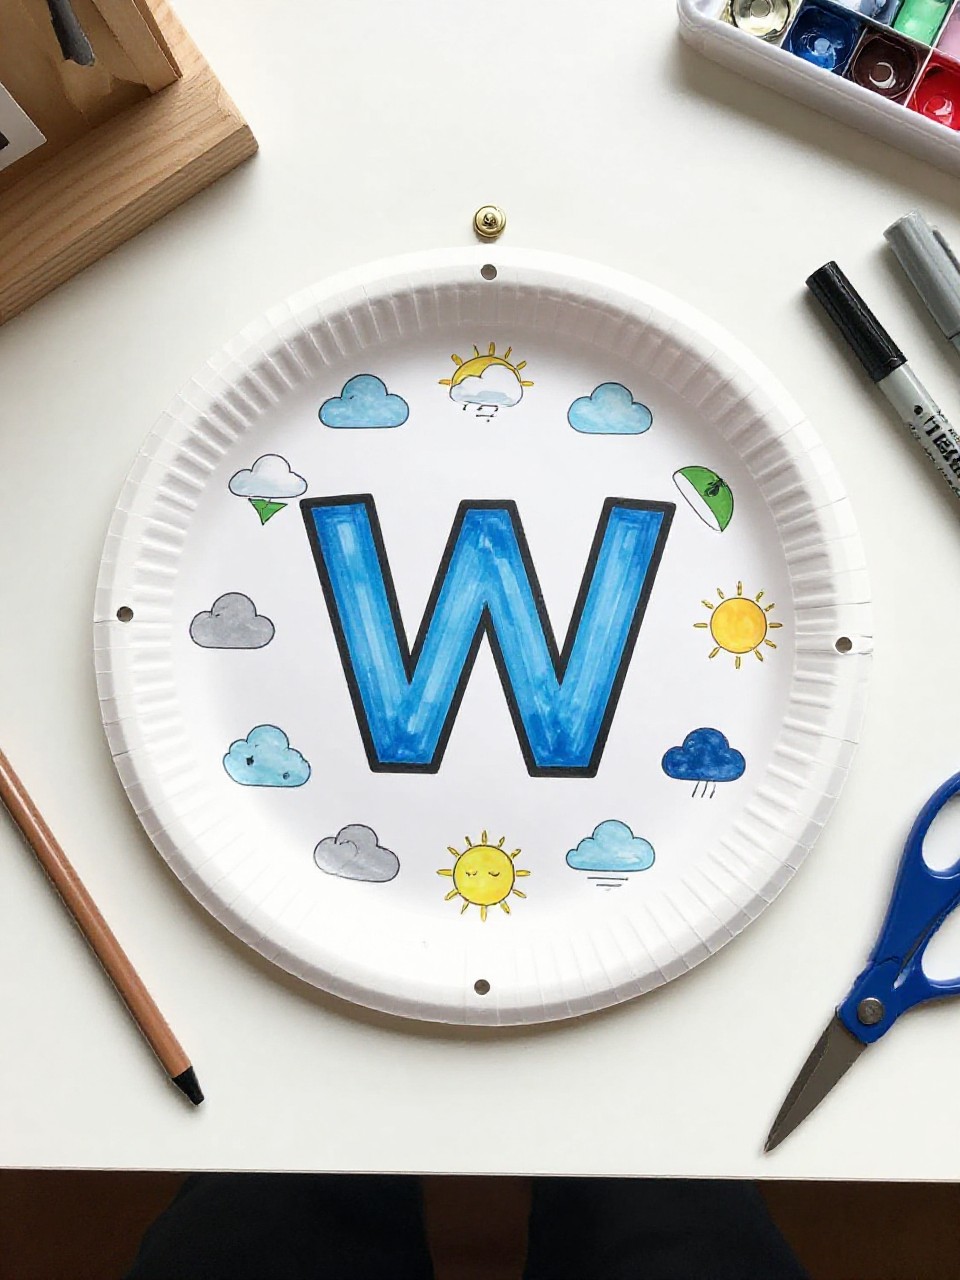
Create a spinning weather dial with a bold W centerpiece and icons for wind, rain, and sun. Kids enjoy moving the wheel to match the day and learning W is for Weather and Wind.
Materials Needed:
- Paper plate
- Brass fastener (paper brad)
- Construction paper for a large W and weather icons
- Markers and glue stick
- Scissors
How to make it:
- 1. Draw and cut a pointer arrow; poke a hole in the plate center and attach with a brad.
- 2. Cut a big W and glue it in the center; add sections for sun, cloud, rain, wind.
- 3. Color and label each section; outline the W for pop.
- 4. Spin the arrow to today’s weather and display on the fridge.
7. Woolly W Sheep
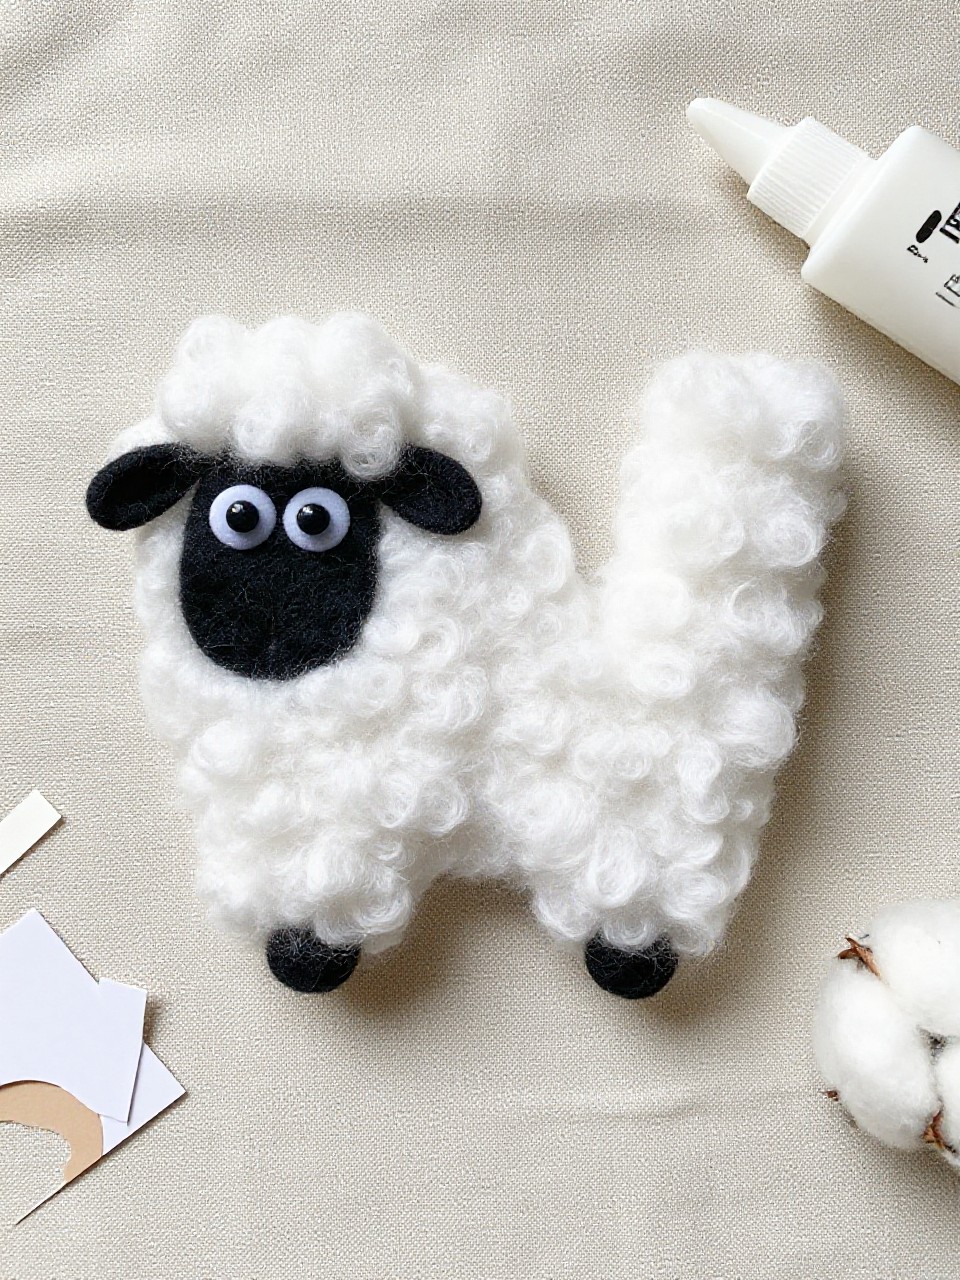
A chunky W becomes a fluffy sheep covered in cotton “wool.” Kids love the sensory feel of the cotton and the funny little face.
Materials Needed:
- Black or gray construction paper for W
- Cotton balls or cotton batting
- Googly eyes and small pink paper for ears
- Glue stick or school glue
- Black marker
How to make it:
- 1. Cut a large W from paper as the sheep body.
- 2. Pull cotton balls slightly and glue them all over the W.
- 3. Add a small face shape at the top with googly eyes and ears; draw a tiny smile.
- 4. Let dry, then mount on colored paper for contrast.
8. Watercolor Resist W Art
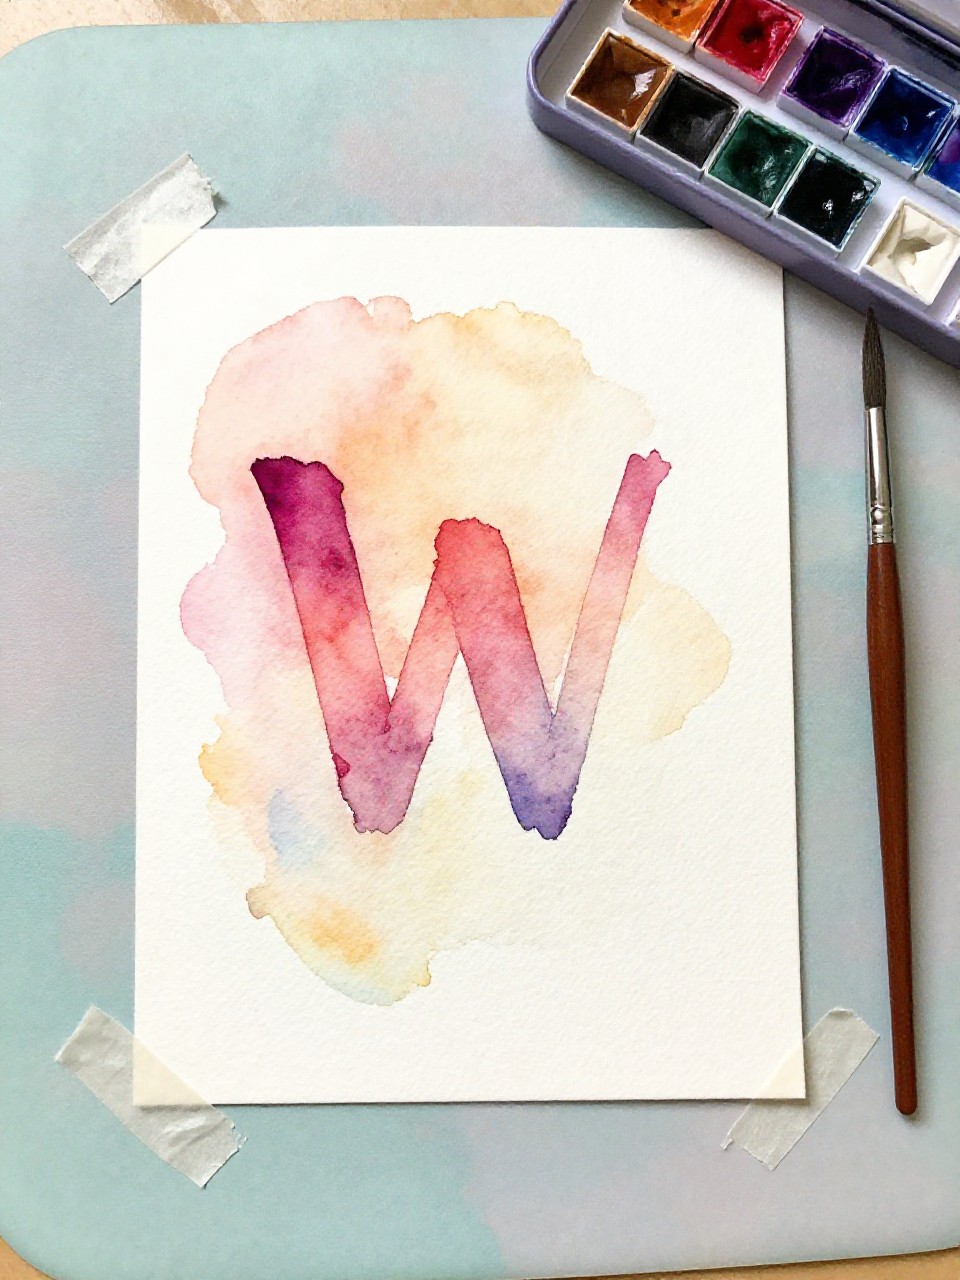
Make a bold crayon W and paint over it with watercolors to reveal a bright resist effect. Kids enjoy the magic of the W popping through the color wash.
Materials Needed:
- White watercolor paper
- White or bright oil pastel/crayon
- Watercolor paints and brush
- Cup of water and paper towel
- Painter’s tape (optional border)
How to make it:
- 1. Tape a border if desired; draw a large W with heavy crayon pressure.
- 2. Paint a colorful wash over the paper with watercolors.
- 3. Add splatters or stripes; watch the W resist the paint.
- 4. Remove tape and let dry before hanging.
9. W Wind Sock
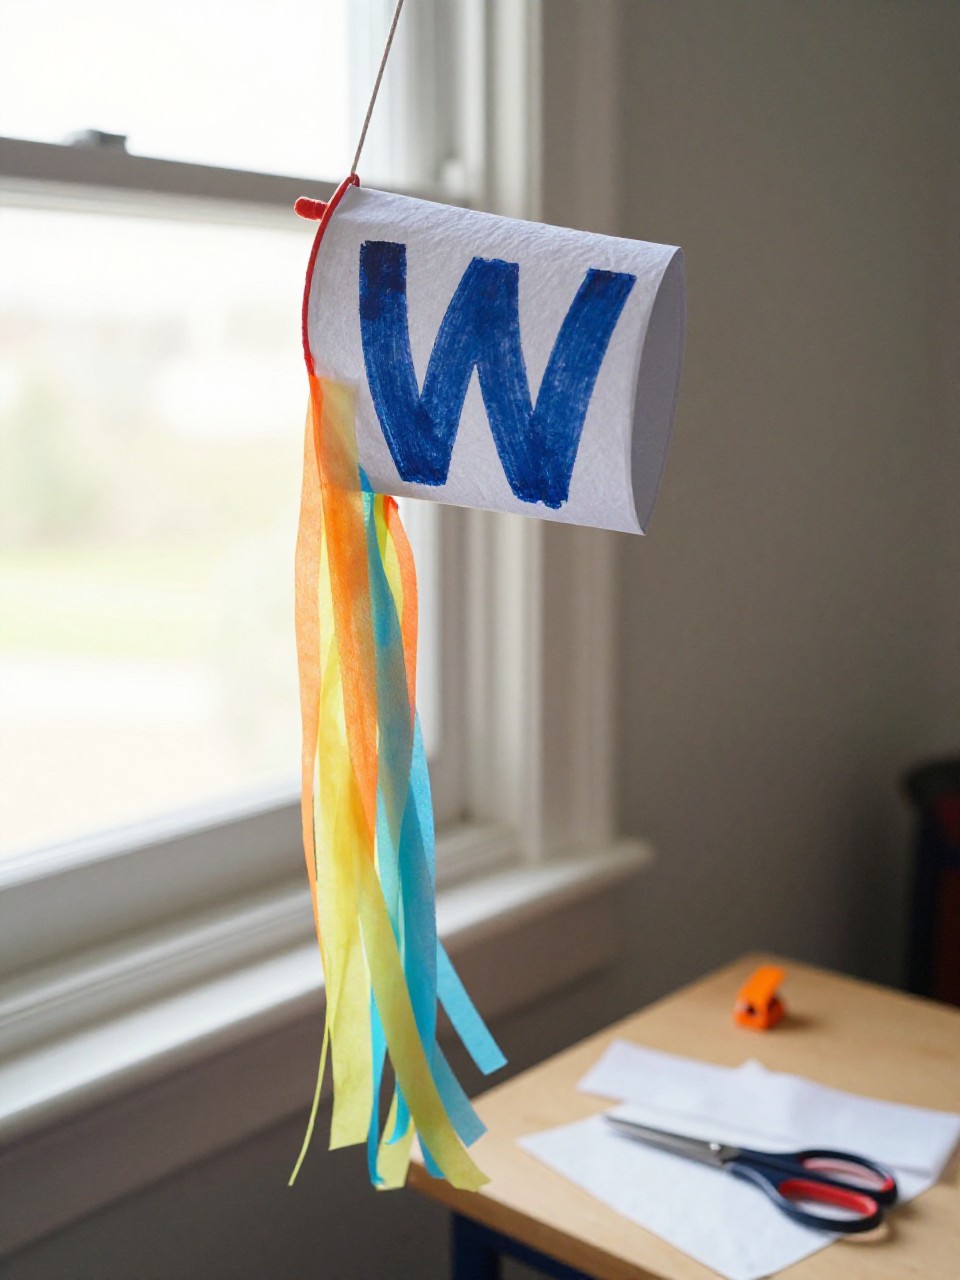
Turn a cardstock W into a cheerful wind sock with tissue paper streamers. Kids love hanging it outside and watching the strips flutter in the breeze.
Materials Needed:
- Cardstock or construction paper tube
- Large W cutout for front
- Tissue paper strips
- Tape or glue
- String for hanging and hole punch
How to make it:
- 1. Roll cardstock into a tube and tape; punch two holes at the top for a string handle.
- 2. Glue a big W on the front of the tube.
- 3. Tape tissue streamers around the bottom rim in rainbow colors.
- 4. Hang by a window or porch and enjoy the windy motion.
10. W Wildflower Letter Patch
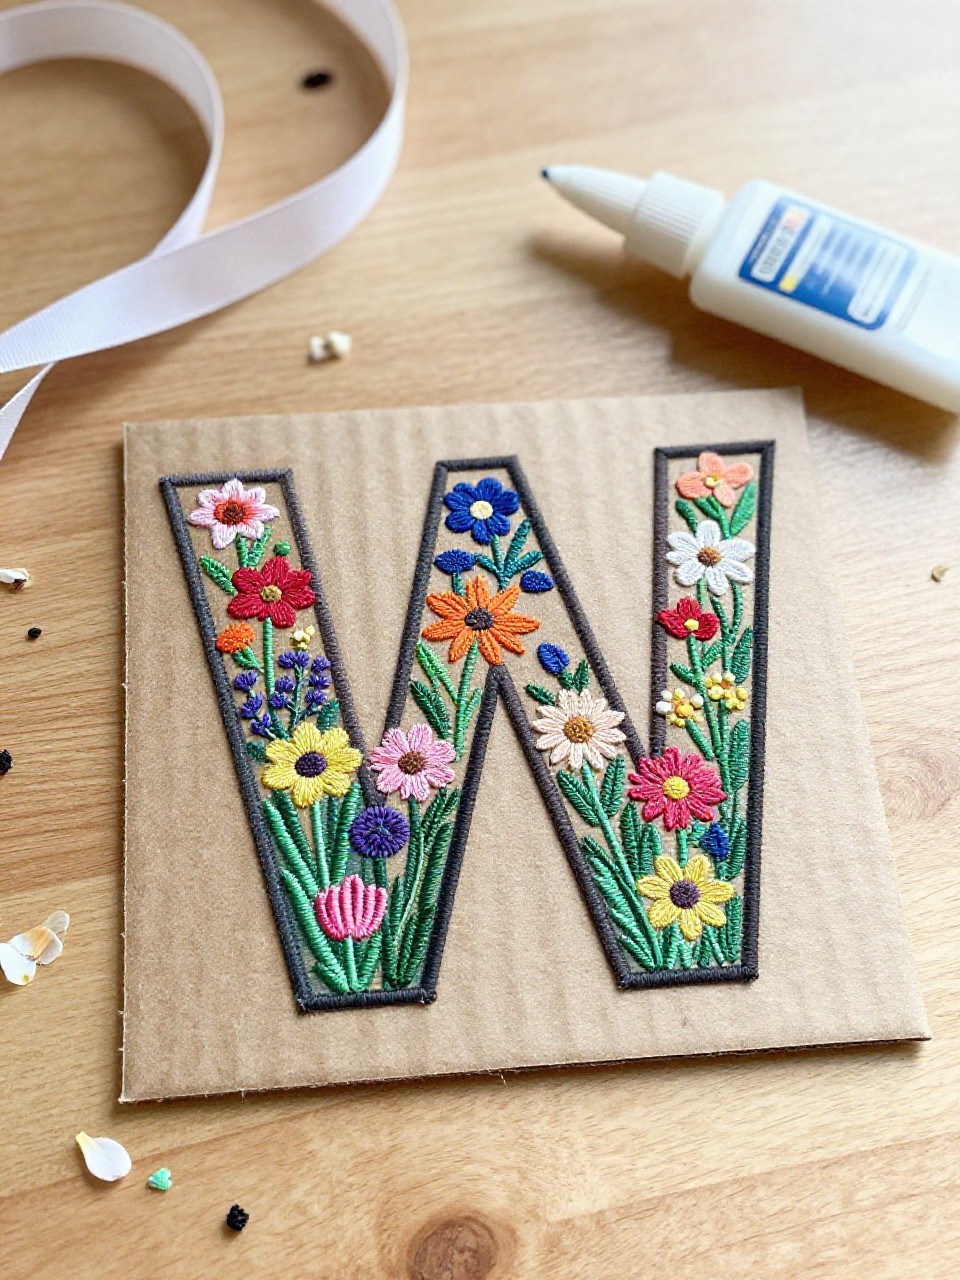
Decorate a cardboard W with pressed or faux flowers for a nature-inspired letter. Kids enjoy arranging tiny blooms and leaves to make a pretty display.
Materials Needed:
- Cardboard or chipboard W (store-bought or cut from box)
- Pressed flowers or silk flowers
- White glue or tacky glue
- Ribbon or twine for hanging
- Optional acrylic paint for base color
How to make it:
- 1. Paint the cardboard W if desired and let dry.
- 2. Plan your flower layout, then glue blooms and leaves across the letter.
- 3. Fill gaps with small petals or greenery; press gently to set.
- 4. Tie ribbon to hang on a door or shelf.
11. Wiggle-Eyed W Monster
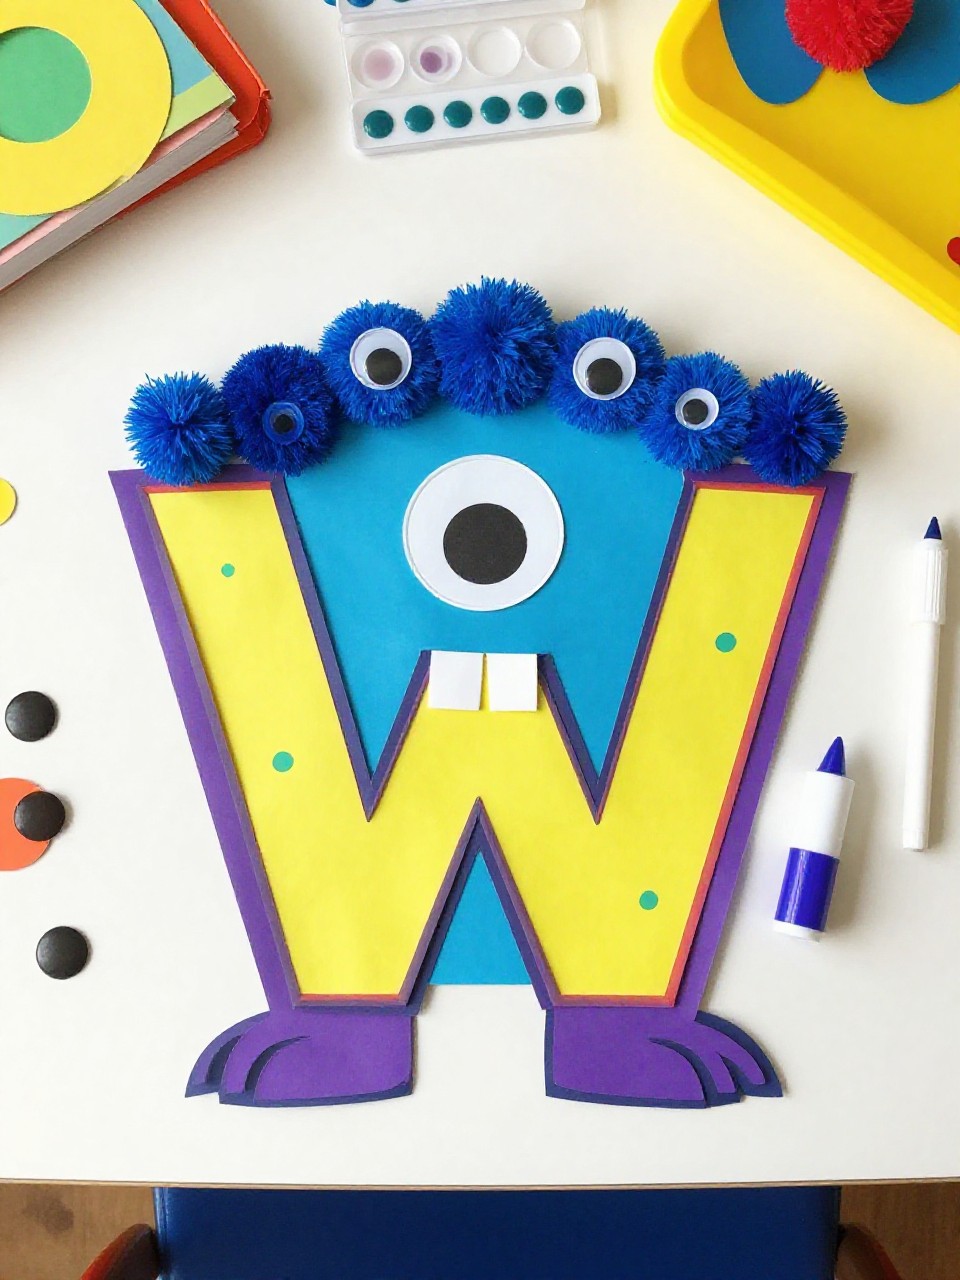
A big W turns into a silly monster with wiggle eyes, fuzzy eyebrows, and paper teeth. Kids love customizing the colors and making goofy expressions.
Materials Needed:
- Bright construction paper for a large W
- Googly eyes (many sizes)
- Felt or paper for mouth and teeth
- Glue stick and scissors
- Pom-poms or pipe cleaners (optional hair)
How to make it:
- 1. Cut a large W from bright paper.
- 2. Glue on a mouth shape and add zigzag paper teeth between the W points.
- 3. Add lots of googly eyes and fun hair with pom-poms or pipe cleaners.
- 4. Let dry and use as a classroom “monster of the week” sign.
12. W Weaving Mat
Use the letter W as a loom guide to weave strips of paper through slits and create a patterned mat. Kids enjoy the hands-on weaving motion and seeing the pattern form.
Materials Needed:
- Construction paper base (cut as a large W)
- Contrasting paper strips
- Ruler and pencil
- Scissors
- Tape for back
How to make it:
- 1. Cut a big W from sturdy paper; draw vertical lines across each leg and cut slits.
- 2. Weave strips over-under through the slits across the W.
- 3. Push strips snugly and alternate colors for a checker look.
- 4. Tape the back ends and display as a textured letter.
13. Washi Tape W Banner
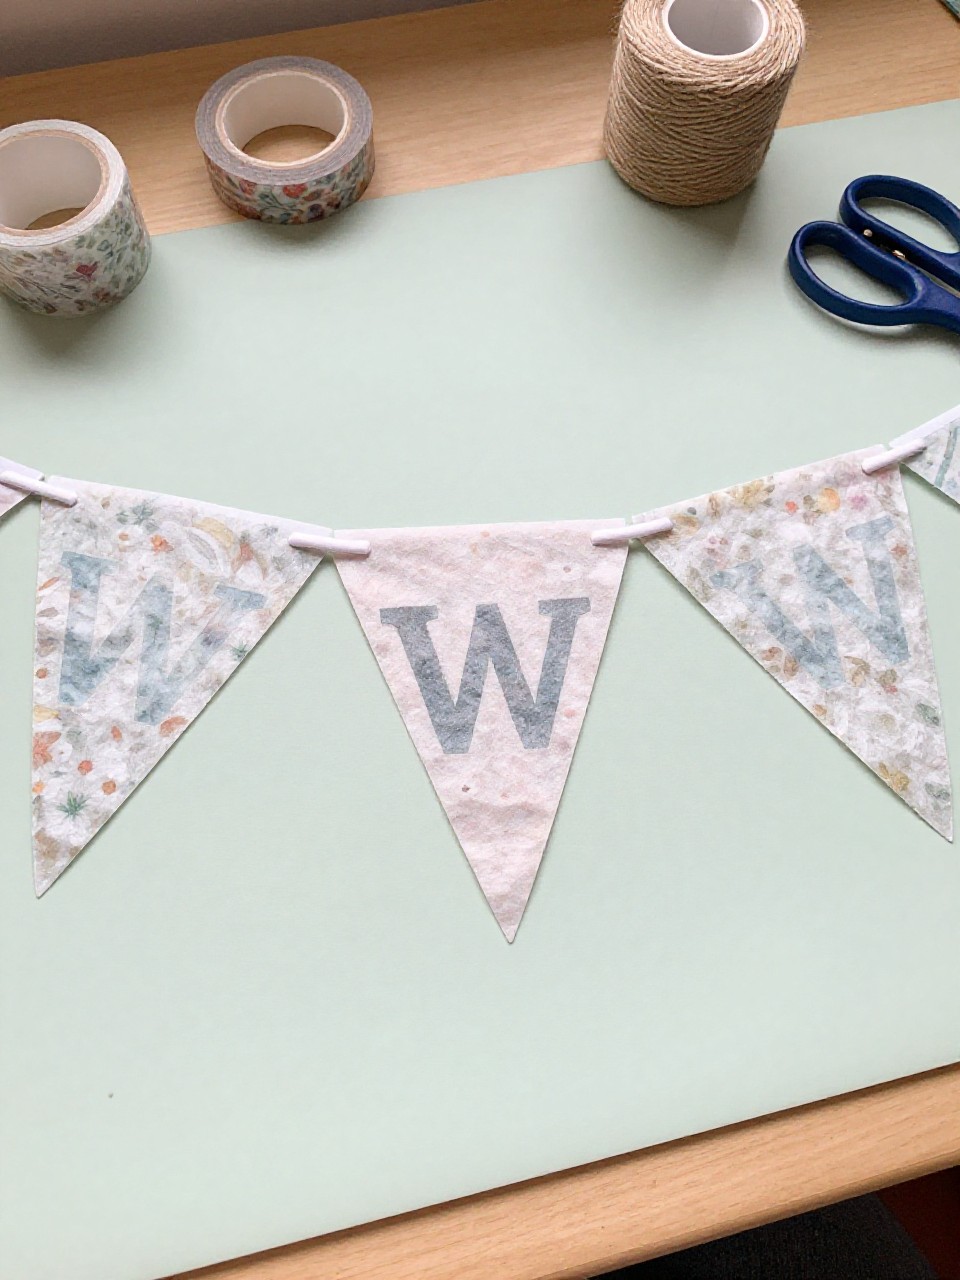
Create a mini banner where each flag shows a patterned washi-tape W. Kids enjoy picking tape designs and making a quick, bright decoration.
Materials Needed:
- Cardstock cut into small pennant flags
- Assorted washi tapes
- String or twine
- Hole punch
- Scissors
How to make it:
- 1. Cut several pennant flags and punch holes at the top corners.
- 2. Form a W on each flag with washi tape strips, trimming edges neatly.
- 3. Thread all flags onto twine in order; space them evenly.
- 4. Hang the banner across a shelf or doorway.
14. Window W Sun Catcher
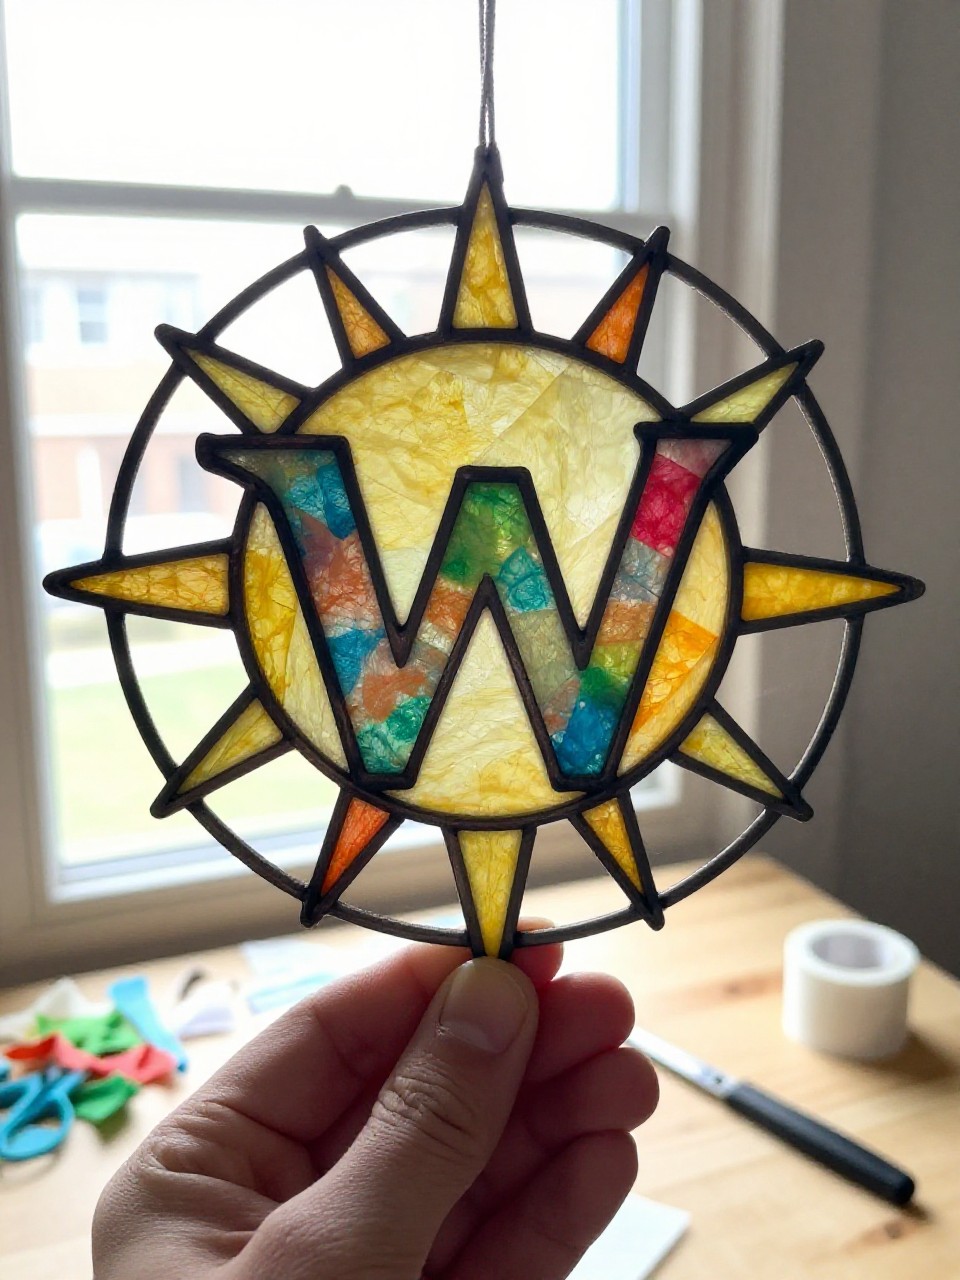
Make a stained-glass style W using contact paper and tissue bits to catch the light. Kids love sticking colorful pieces and seeing the sun glow through.
Materials Needed:
- Clear contact paper
- Black construction paper W outline (thick border)
- Tissue paper squares
- Scissors
- Tape
How to make it:
- 1. Cut a thick-outlined W frame from black paper.
- 2. Stick the W frame onto sticky contact paper, sticky side up.
- 3. Fill the inside with tissue squares, then seal with another contact sheet.
- 4. Trim edges and tape to a sunny window.
15. W Woodland Fox Mask
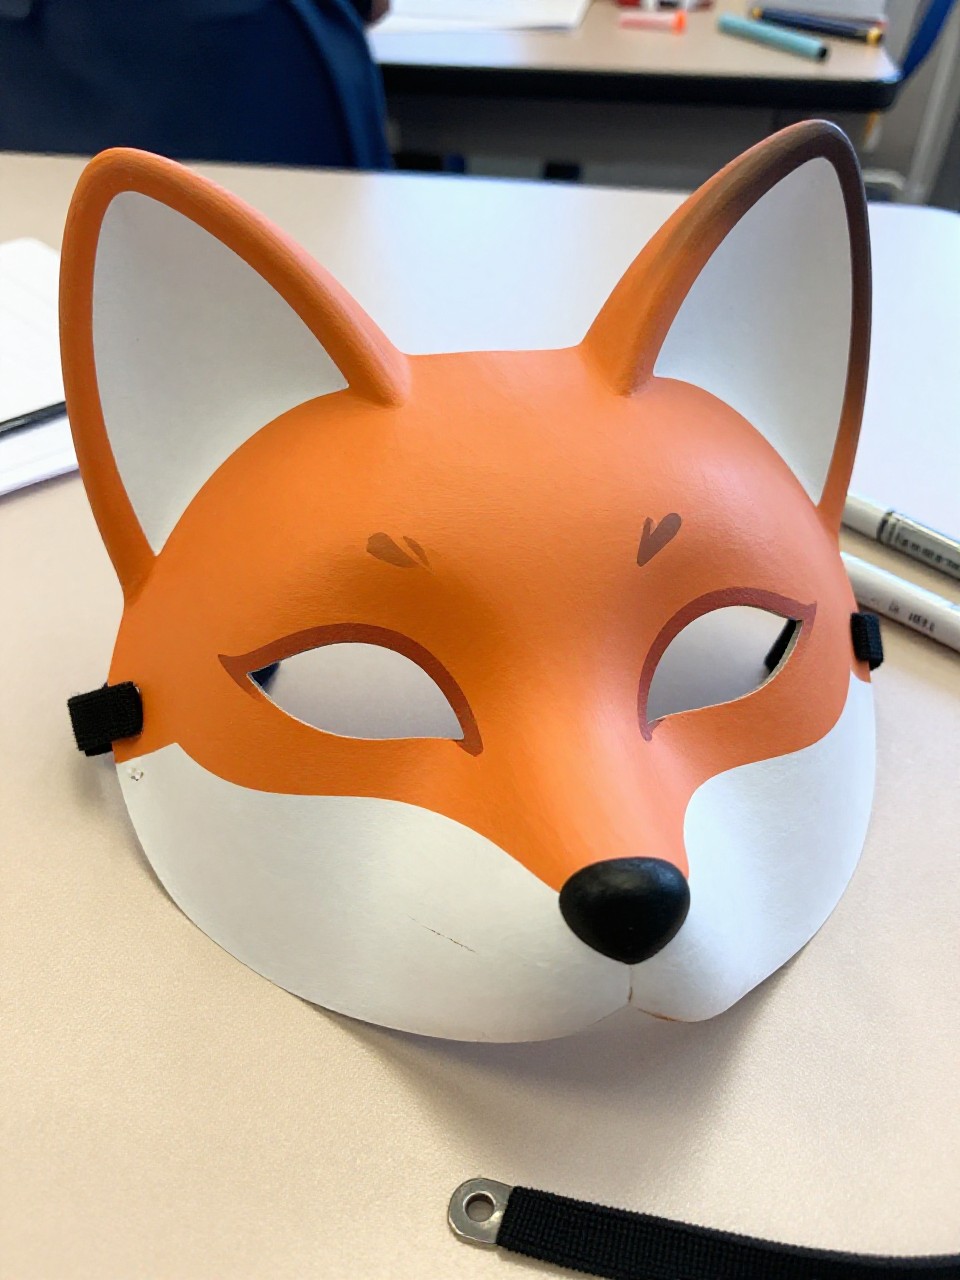
A W forms the base of a cute fox mask with pointy ears and whiskers. Kids enjoy pretending in playtime after making the simple, bold mask.
Materials Needed:
- Orange and white cardstock
- Large W template for mask base
- Elastic string
- Black marker and glue
- Scissors and hole punch
How to make it:
- 1. Cut a large W from orange cardstock; punch side holes for elastic.
- 2. Add white paper cheeks and inner ears; draw a nose and whiskers.
- 3. Cut eye holes carefully and outline details with marker.
- 4. Tie elastic to fit and start your woodland pretend play.