


Table of Contents Show
Summer window painting is a simple way to make your home feel brighter without buying new decor or making a long-term change. It works for family craft days, classroom activities, porch windows, kitchen windows, and even small apartment spaces that need a little seasonal color.
For this list, the ideas are made to feel fun but still useful for both kids and adults.
Some are playful and easy, while others feel more styled and decorative, so you can choose what fits your window, your space, and how much detail you want to paint.
1. Lemonade Stand Window Scene
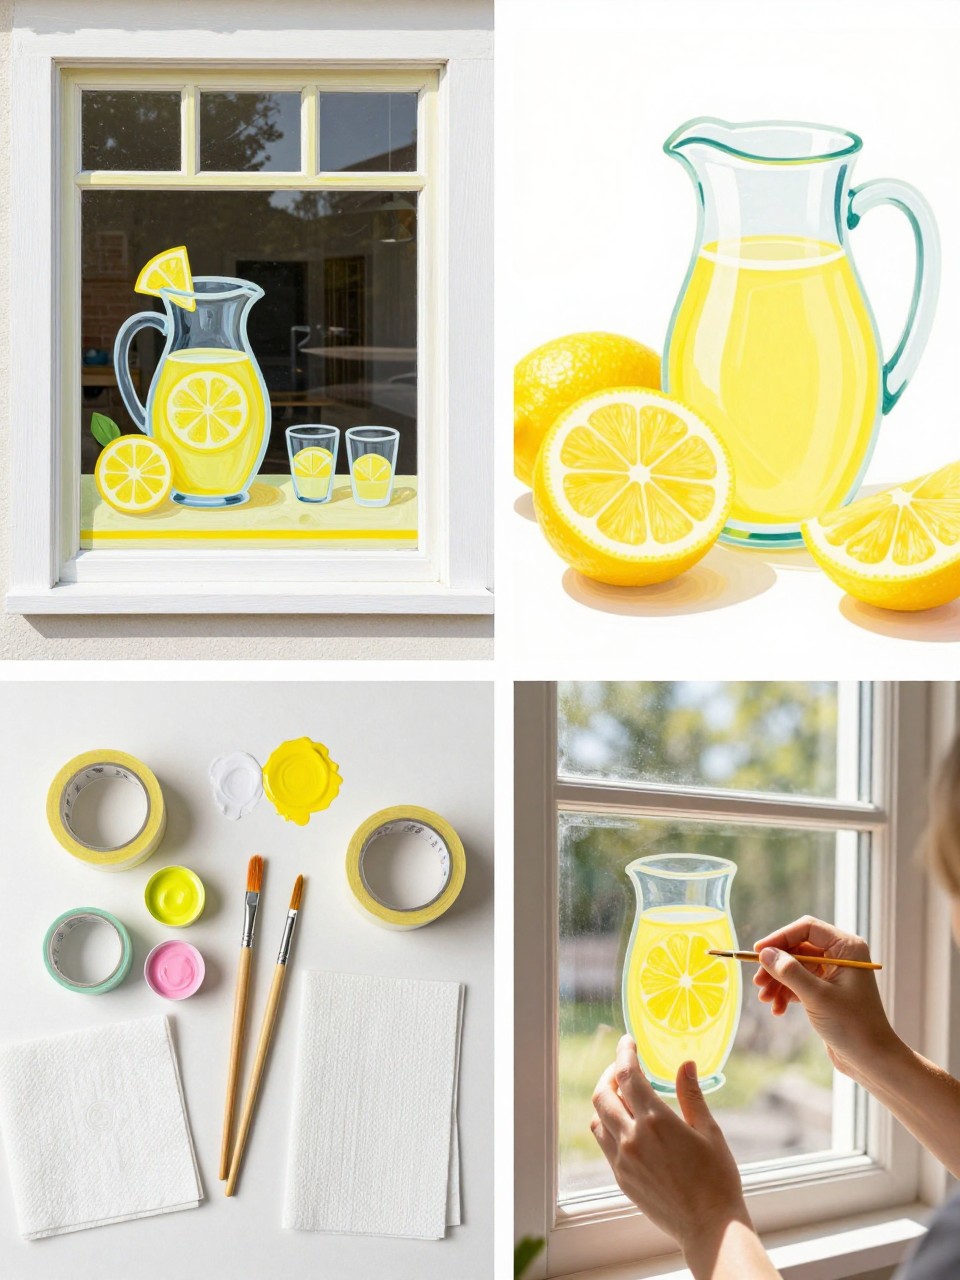
A lemonade stand window scene is a cute summer idea because it feels bright, playful, and easy to understand. Kids can paint simple cups and lemon slices, while adults can make the pitcher, border, and small details look more polished.
This design works nicely on a kitchen, porch, or playroom window. Keep the main painting near the bottom of the glass so the window still lets in plenty of natural light.
For People Who Love to Make Things ✂️
Materials Needed:
- Washable window paint
- Small and medium paintbrushes
- Painter’s tape
- Paper towels
- Cup of water
Steps To Make:
- Clean the window well before painting.
- Paint a simple pitcher shape and a few small cups near the bottom of the glass.
- Add yellow lemon circles, white highlights, and green leaves.
- Use a fine brush to add straw lines or small splash details.
- Let the paint dry, then clean any smudges with a damp paper towel.
2. Painted Sunglasses Window Doodles
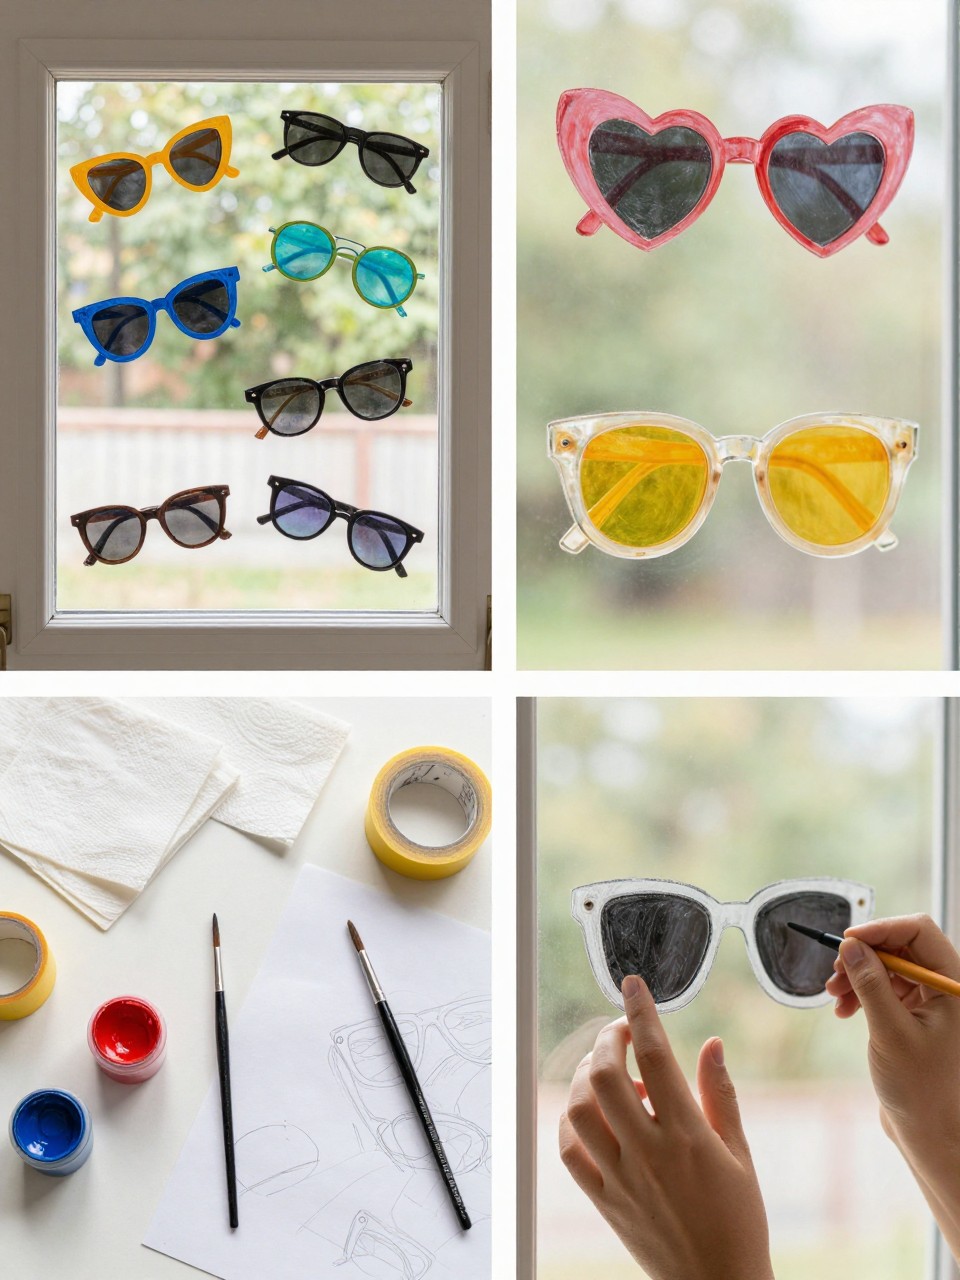
Painted sunglasses are fun because the shapes are simple, but the finished window can look very playful. You can paint round frames, heart frames, star frames, or classic beach-style sunglasses.
This idea is great for kids and adults because each person can paint their own pair in a different style. It works especially well for party windows, craft rooms, or a sunny bedroom.
Materials Needed:
- Washable window paint
- Detail paintbrushes
- Painter’s tape, optional
- Paper towels
- Cup of water
Steps To Make:
- Clean the glass and decide where each sunglasses shape will go.
- Paint the frame shape first using black, white, or bright colors.
- Fill the lenses with blue, pink, yellow, or purple paint.
- Add small highlights once the first layer dries.
- Wipe away uneven edges with a damp paper towel.
3. Underwater Fish Window Painting
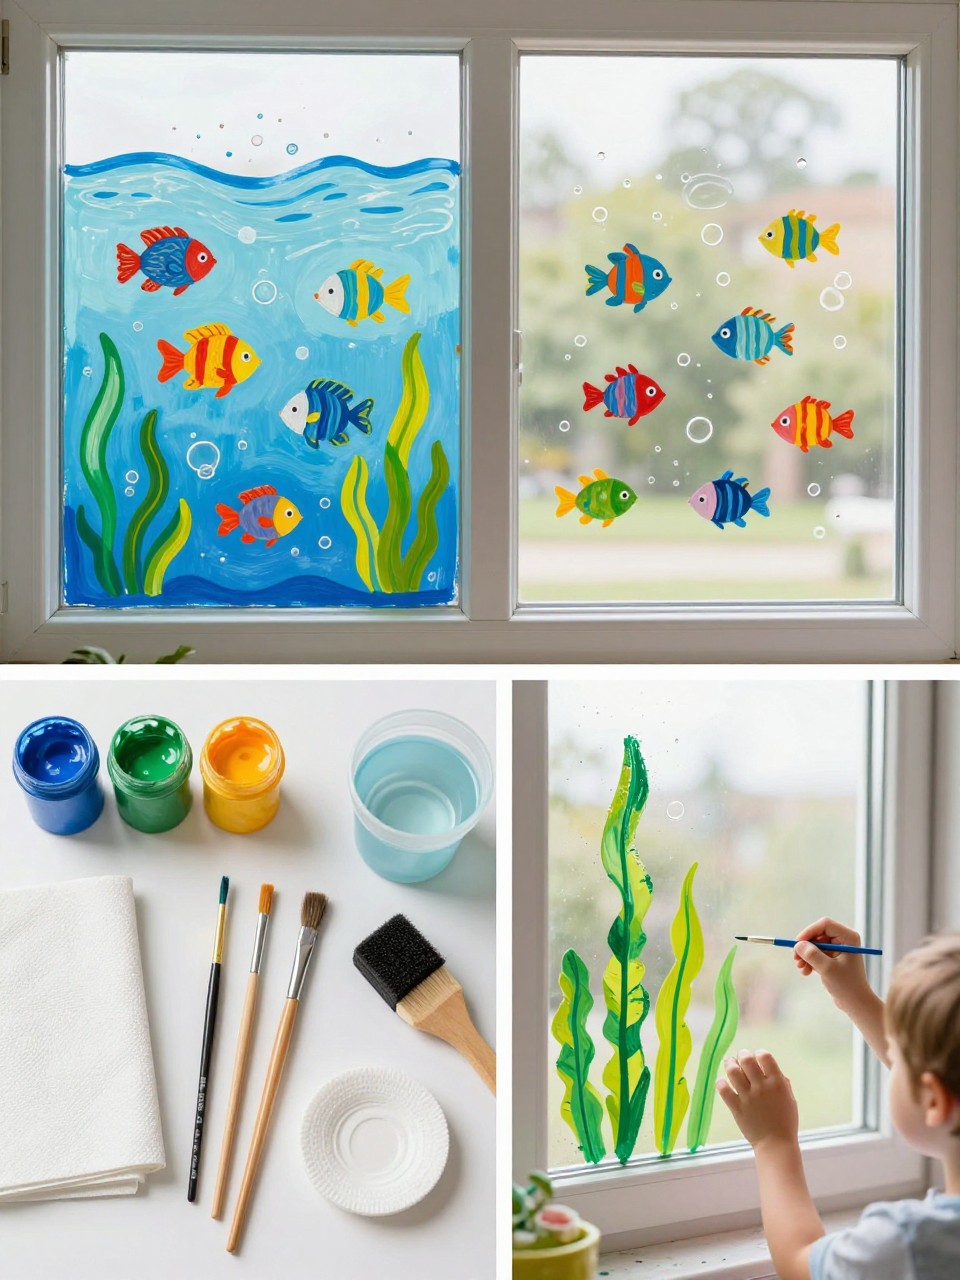
An underwater fish painting is a great summer window idea because it can be as simple or detailed as you want. Kids can paint bright fish and bubbles, while adults can add layered seaweed, soft water lines, and small coral shapes.
This design looks especially nice in bathrooms, playrooms, or any window that needs a fun summer theme. Keep the fish spread out so the window still feels light and open.
Materials Needed:
- Washable window paint
- Small paintbrushes
- Sponge brush, optional
- Paper towels
- Cup of water
Steps To Make:
- Clean the window and paint simple blue wave lines near the bottom.
- Add green seaweed shapes rising from the lower edge.
- Paint fish using oval bodies and triangle tails.
- Add bubble dots with white or pale blue paint.
- Let the first layer dry before adding fins, eyes, or small scale details.
4. Summer Picnic Window Border
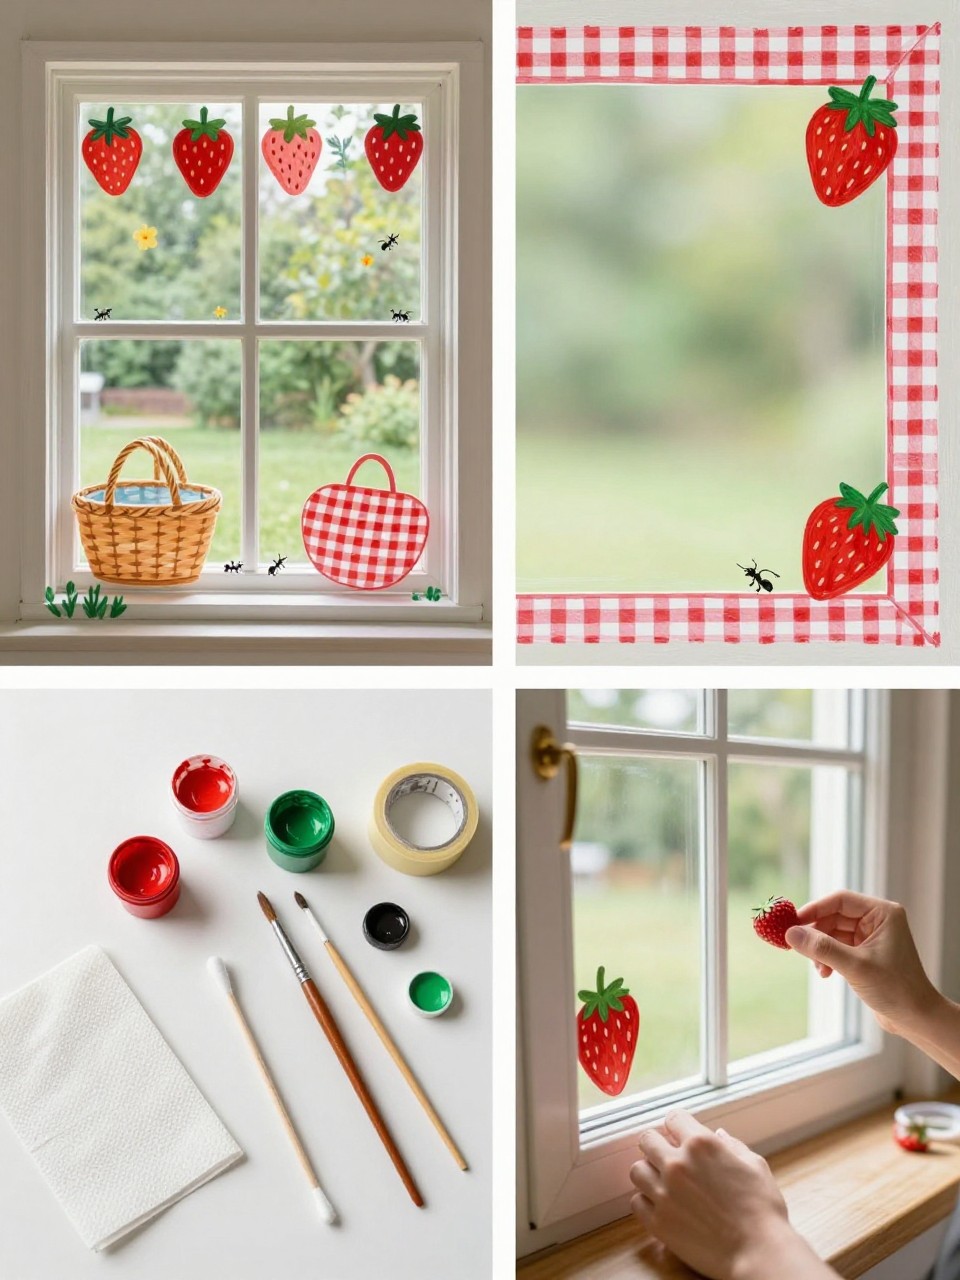
A summer picnic border adds a sweet seasonal touch without covering the whole window. Strawberries, tiny flowers, basket shapes, and simple gingham checks can make the glass feel bright and charming.
This idea works well for kitchens, dining rooms, and patio doors. Adults can make the border neat and balanced, while kids can help paint strawberries, dots, and little bugs.
Materials Needed:
- Washable window paint
- Small detail brushes
- Painter’s tape
- Cotton swabs
- Paper towels
Steps To Make:
- Clean the window and tape off a loose border area if needed.
- Paint small strawberries and basket shapes around the edges.
- Add a few gingham check blocks in red and white.
- Use a fine brush for tiny ants, leaves, and flower dots.
- Let the design dry before touching the glass.
5. Painted Flip-Flop Window Garland
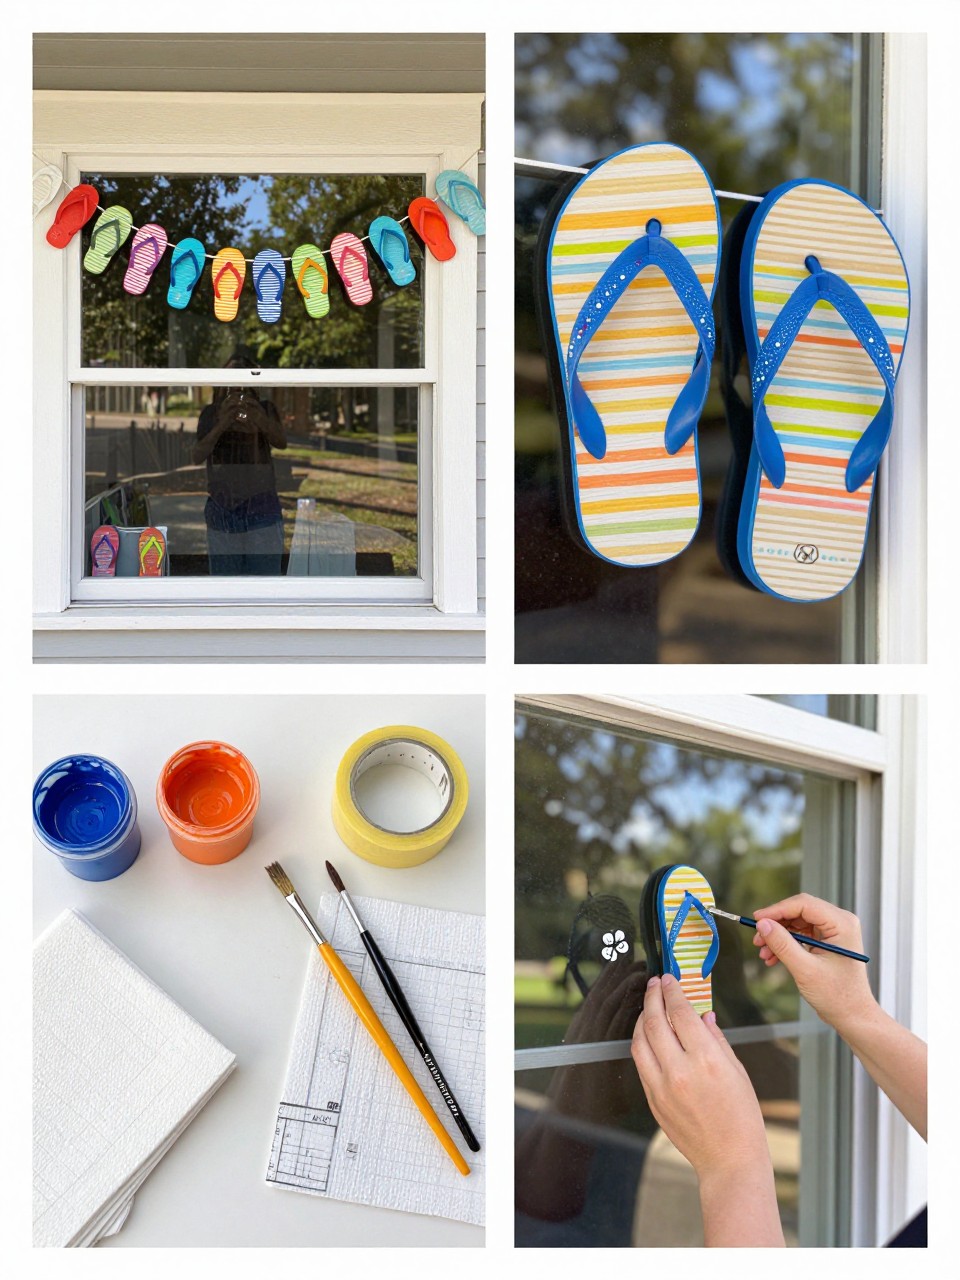
A flip-flop window garland is a fun way to decorate the top of a window for summer. The small sandal shapes are easy to paint, and each one can have a different color or pattern.
This is a good option for kids because the shapes are simple, but adults can make it look more styled by keeping the garland curve neat. It works well in mudrooms, porches, bathrooms, or playrooms.
Materials Needed:
- Washable window paint
- Small paintbrushes
- Painter’s tape
- Paper towels
- Sketch paper, optional
Steps To Make:
- Clean the window and lightly plan a curved garland shape across the top.
- Paint small oval flip-flop bases along the curve.
- Add simple strap lines in a contrasting color.
- Decorate each flip-flop with dots, stripes, or tiny flowers.
- Allow the paint to dry before adding extra details.
6. Firefly Jar Window Painting
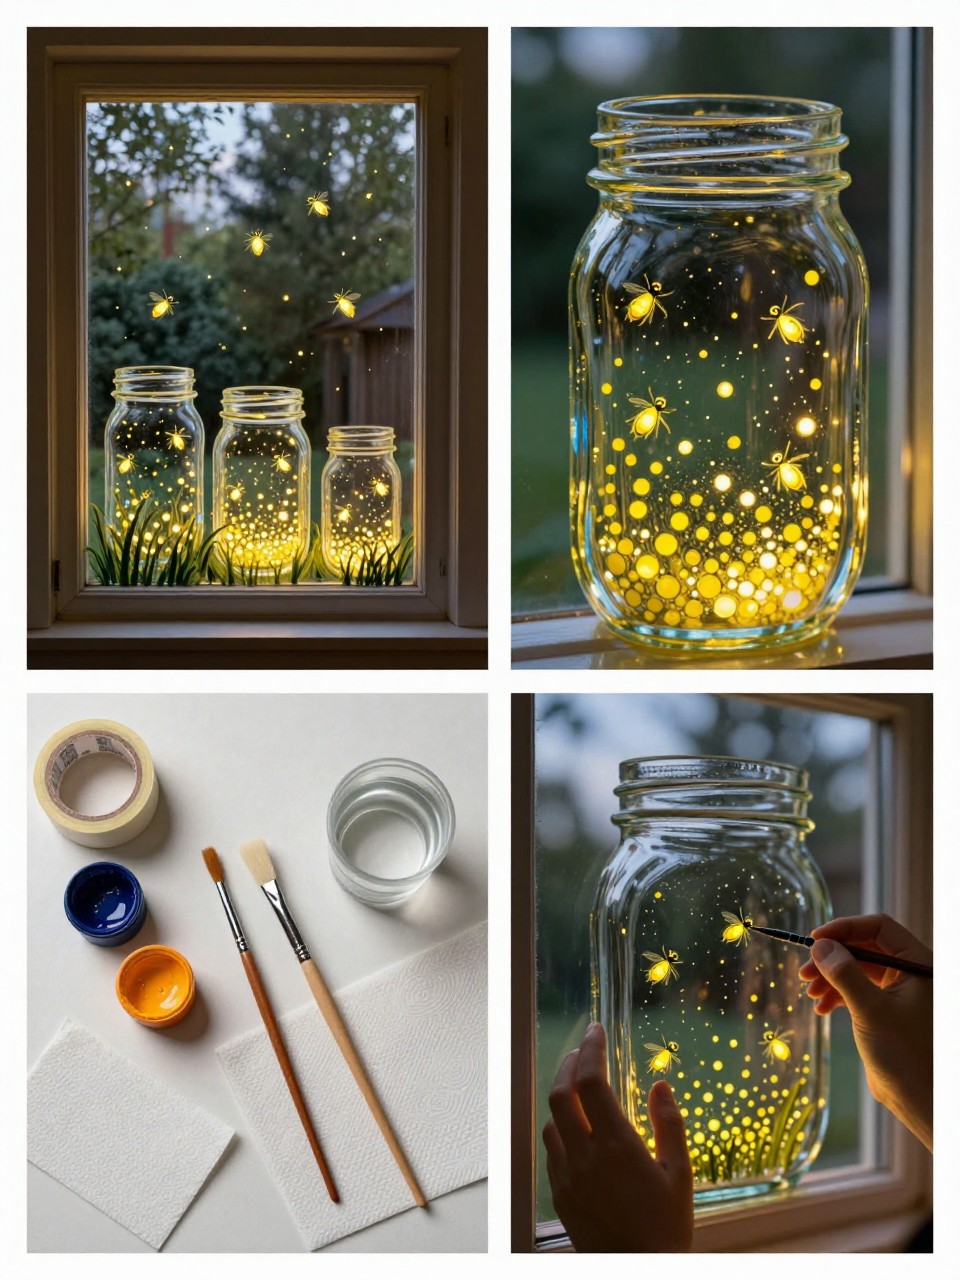
A firefly jar window painting has a soft summer evening feel. The design can be simple, with a few jar outlines and yellow dots, or more detailed with grass, stars, and tiny glowing trails.
This is a lovely idea for bedrooms, porches, and cozy corners. It feels playful enough for kids but still pretty enough for adults who want a softer seasonal window design.
Materials Needed:
- Washable window paint
- Fine paintbrushes
- Sponge brush, optional
- Painter’s tape
- Paper towels
Steps To Make:
- Clean the window and paint one or two simple jar outlines.
- Add small yellow dots inside and around the jars for fireflies.
- Paint short grass lines along the bottom edge.
- Add tiny stars or soft white glow marks around the fireflies.
- Let everything dry before adding a second layer of yellow if needed.
7. Popsicle Window Pattern

Popsicle paintings are easy for beginners because they mostly use rounded rectangles and straight stick shapes. The colors can be bright, pastel, striped, or fruit-inspired, so every popsicle can look different.
This idea is great for a playful summer window in a kitchen, kids’ room, or party space. Adults can keep the pattern neat, while kids can choose colors and add sprinkles or drips.
Materials Needed:
- Washable window paint
- Small paintbrushes
- Painter’s tape, optional
- Paper towels
- Cup of water
Steps To Make:
- Clean the glass and decide where to place each popsicle.
- Paint rounded rectangle shapes for the popsicle tops.
- Add small tan or brown sticks at the bottom.
- Paint stripes, drips, dots, or fruit details after the base dries.
- Clean around the shapes with a damp paper towel if needed.
8. Garden Bug Window Trail

A garden bug trail is a fun summer idea because it brings the outdoors onto the glass in a cute way. Ladybugs, bees, and dragonflies are simple to paint with circles, ovals, wings, and tiny dots.
This design can be scattered across the window or kept near one side. It works well for kids’ rooms, garden rooms, classrooms, and craft spaces.
Materials Needed:
- Washable window paint
- Fine paintbrushes
- Cotton swabs
- Paper towels
- Cup of water
Steps To Make:
- Clean the window and plan where the bug trail will move.
- Paint simple bug bodies using dots, ovals, or small circles.
- Add wings, stripes, spots, and antennae with a fine brush.
- Use tiny dots to create flight trails between the bugs.
- Let the design dry before adding extra leaves or flowers.
9. Painted Fruit Garland Window

A painted fruit garland feels colorful and fresh without being too hard to create. Cherries, peaches, strawberries, and blueberries use simple round or heart-like shapes, so they are beginner-friendly.
This design is a nice choice for kitchens and dining rooms. It keeps the window open while adding a fun seasonal frame near the top or sides.
Materials Needed:
- Washable window paint
- Fine paintbrushes
- Painter’s tape
- Paper towels
- Cup of water
Steps To Make:
- Clean the glass and paint a loose curved garland line.
- Add small fruit shapes along the line.
- Paint green leaves between some of the fruit pieces.
- Add tiny highlights or seed dots after the fruit dries.
- Let the design dry before touching the window.
10. Summer Kite Window Scene
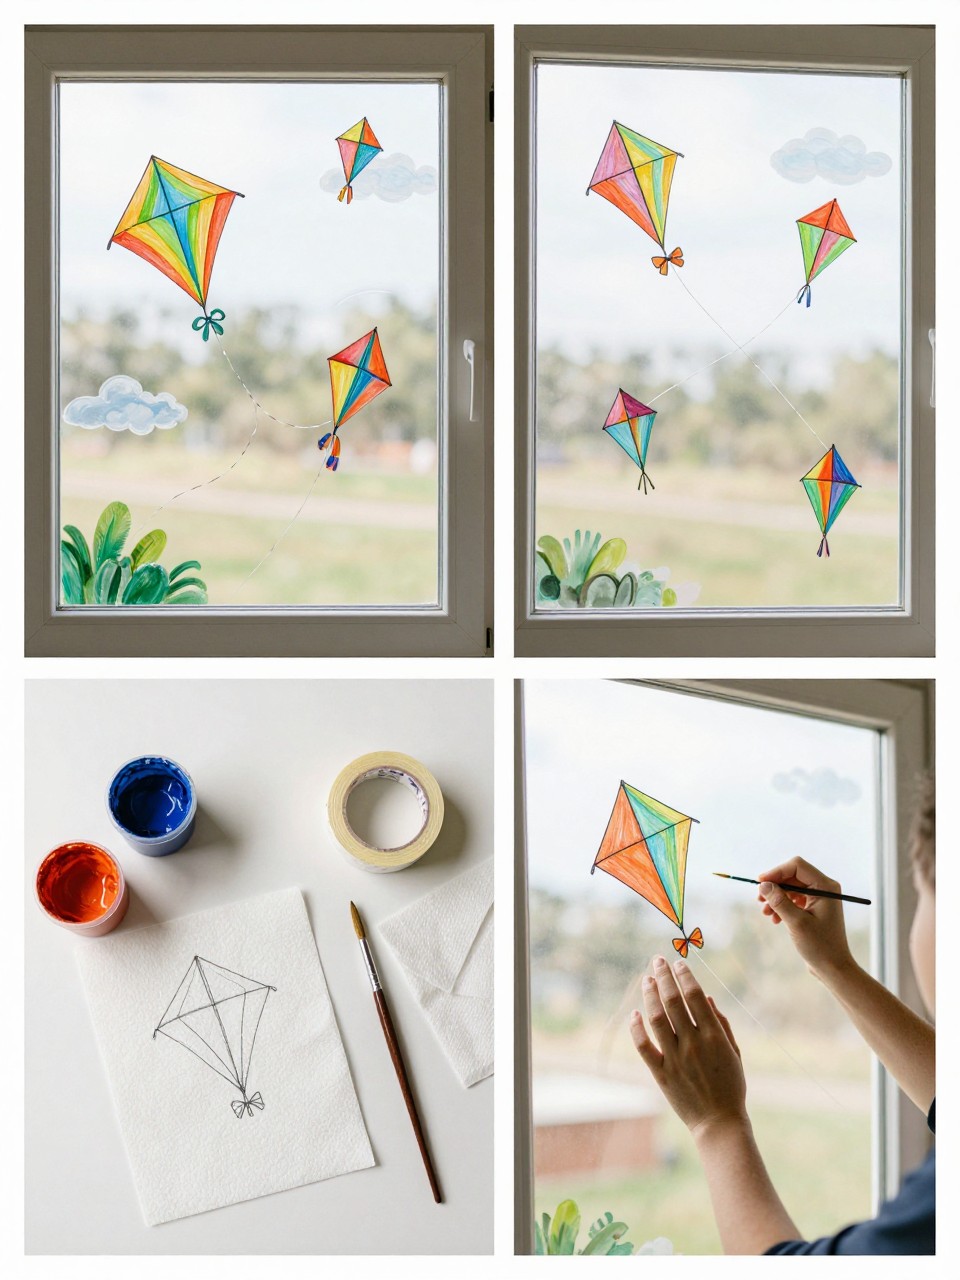
Kites make a sweet summer window scene because they add movement without needing a lot of detail. The diamond shapes are simple to paint, and the long string lines make the design feel light and playful.
This idea works well for tall windows because the kites can float up the glass. Kids can paint the kite colors, while adults can add the strings, bows, and cloud details.
Materials Needed:
- Washable window paint
- Small paintbrushes
- Fine detail brush
- Paper towels
- Cup of water
Steps To Make:
- Clean the window and choose where the kites will sit.
- Paint diamond shapes in different colors.
- Add thin string lines coming from each kite.
- Paint small bows along the strings if desired.
- Add soft cloud shapes or breeze marks around the kites.
11. Pool Float Window Painting

Pool float paintings are fun for summer because they feel playful and trendy. You can paint simple ring floats, star floats, or a basic flamingo shape if you want something extra cute.
This idea works nicely for kids and adults because the design can be as easy or detailed as you like. Add blue ripple lines around the floats to make the window feel like a mini pool scene.
Materials Needed:
- Washable window paint
- Medium and fine brushes
- Painter’s tape, optional
- Paper towels
- Cup of water
Steps To Make:
- Clean the window before painting.
- Paint round or shaped pool floats across the lower half of the glass.
- Add stripes, dots, or small details to each float.
- Paint blue ripple lines around the floats.
- Let the design dry before adding highlights.
12. Painted Summer Wreath Window
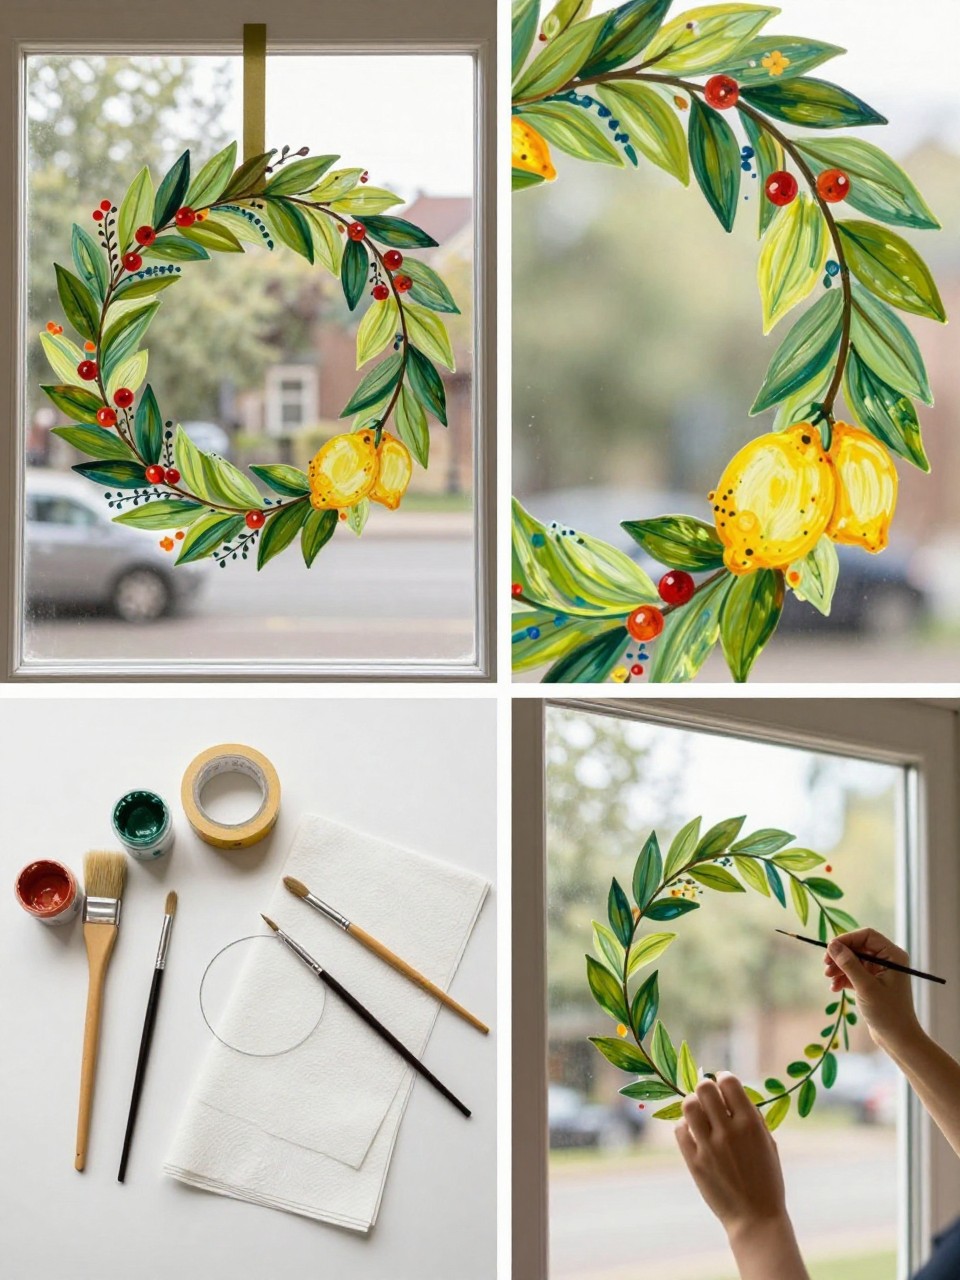
A painted summer wreath is a beautiful option for adults, but it is still simple enough for kids to help with. The circular shape makes the window feel styled, while the leaves, fruit, and flowers add a fresh seasonal look.
This design works well on entryway windows, glass doors, or a window that faces the front of the house. Use a bowl or plate as a guide if you want the circle to look even.
Materials Needed:
- Washable window paint
- Round brush and fine brushes
- Painter’s tape
- Bowl or plate for tracing, optional
- Paper towels
Steps To Make:
- Clean the glass and lightly mark a circle guide if needed.
- Paint small green leaves around the circle.
- Add tiny flowers, berries, lemons, or blue accent dots.
- Layer lighter details after the first paint layer dries.
- Wipe away any guide marks or smudges with a damp paper towel.
13. Starry Summer Night Window
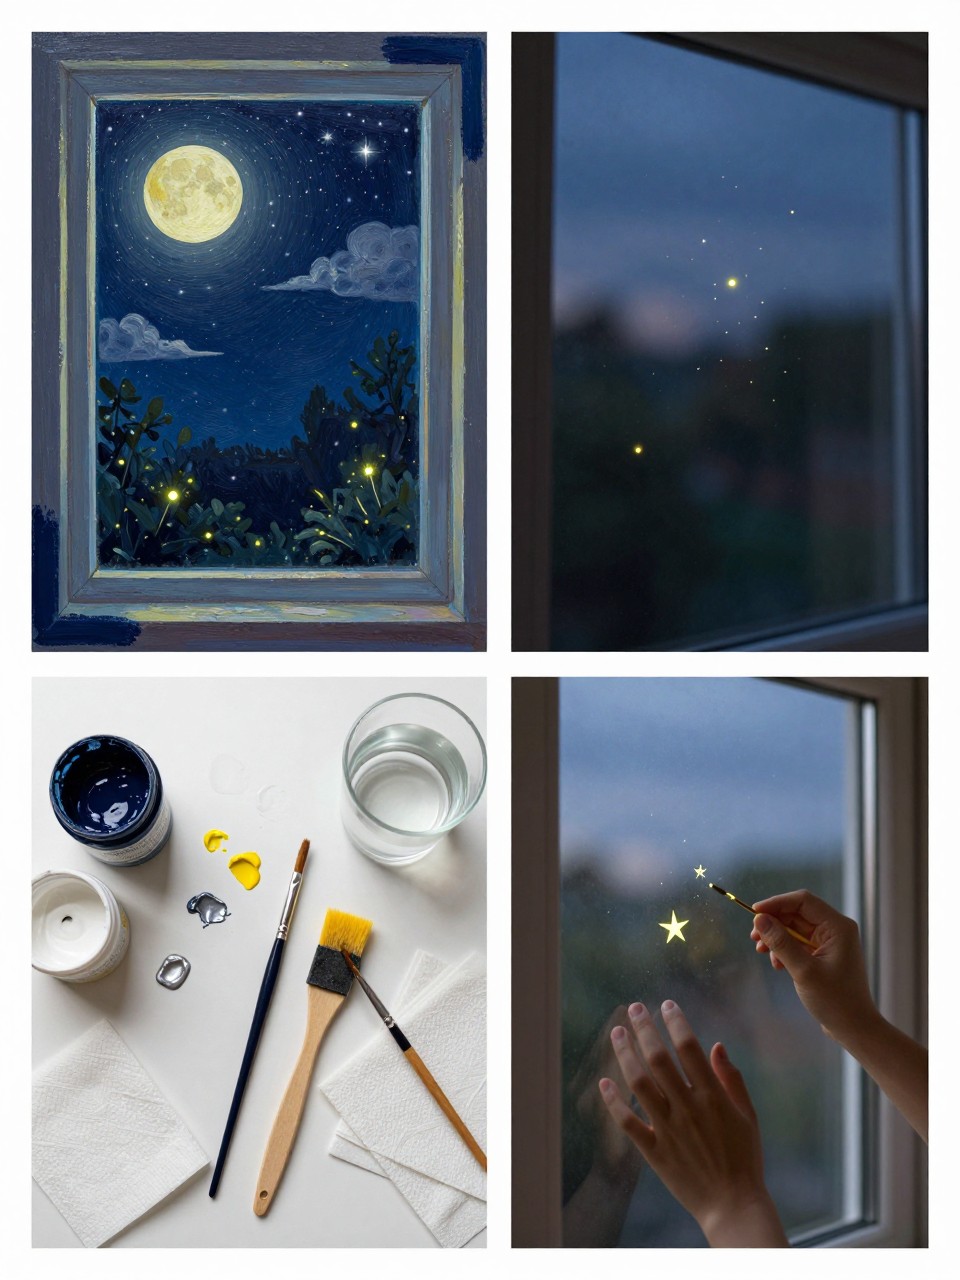
A starry summer night window is a calmer option for anyone who wants something soft instead of bright. A small moon, stars, and firefly dots can make the window feel cozy without covering too much glass.
This idea is especially nice for bedrooms, reading corners, or porch windows. Kids can add simple stars, while adults can build a more polished scene with soft clouds and layered glow details.
Materials Needed:
- Washable window paint
- Fine paintbrushes
- Sponge brush, optional
- Paper towels
- Cup of water
Steps To Make:
- Clean the window and choose one corner or side for the night design.
- Paint a small moon shape with white or pale yellow paint.
- Add stars using dots, crosses, and small starbursts.
- Paint a few firefly dots near the lower part of the window.
- Let the paint dry, then add a second layer to the brightest stars.