Table of Contents Show
Want to paint something that looks bold and moody, but still feels beginner-friendly? Eclipse art is perfect for that, because you can get a dramatic “wow” effect with simple shapes and a few colors.
If you’ve been craving a relaxing hobby or new wall decor, these ideas will help you start without overthinking.
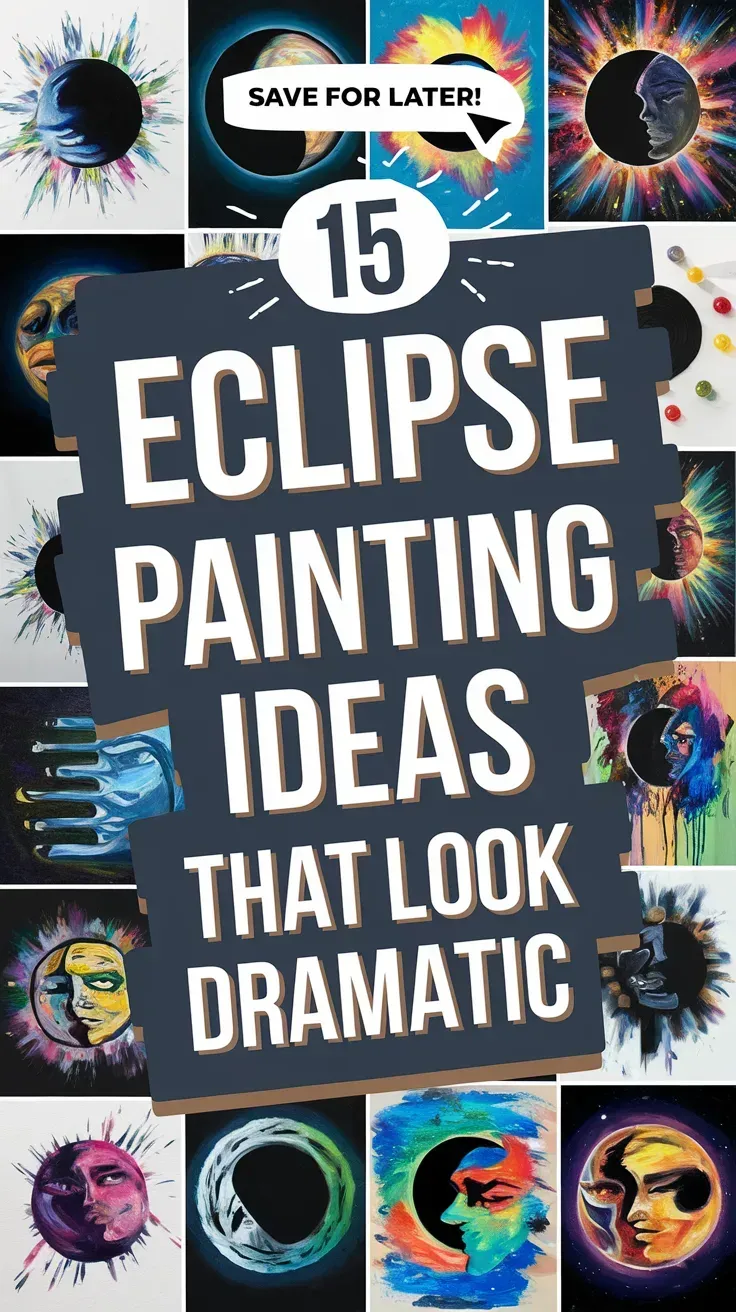
Here are 15 eclipse painting ideas that look intense, even if you’re just learning.
1. Total Eclipse Glow Canvas
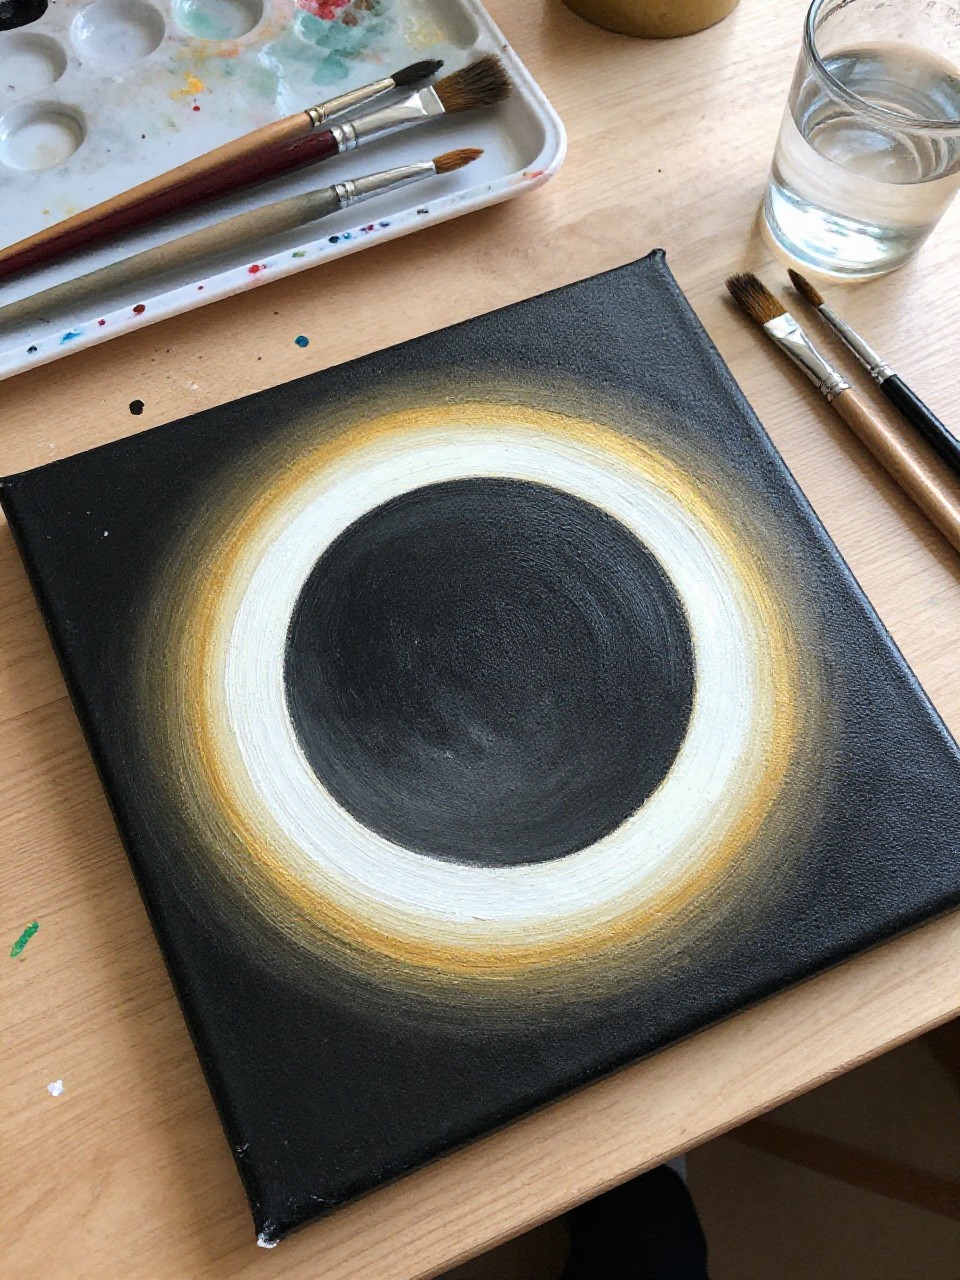
A deep black sky surrounds a dark circle, with a bright glowing ring that fades from white to gold around the edge. It’s soothing because you’re mostly blending and dry-brushing, so beginners can focus on soft transitions instead of tiny details.
Materials Needed:
For People Who Love to Make Things ✂️
- Stretched canvas
- Acrylic paint (black, white, yellow, orange)
- Paintbrushes in multiple sizes
- Palette or paint tray
- Optional gloss varnish
Steps to Make:
- Paint the whole canvas black and let it dry fully.
- Lightly sketch a circle in the center for the moon.
- Paint the circle very dark (black with a touch of blue) and soften the edge.
- Dry-brush white, then yellow and orange around the rim to create a glowing ring with visible strokes.
- Let it dry, add varnish if you want extra shine, and hang it where light hits the texture.
2. Blood Moon Eclipse Canvas Gradient
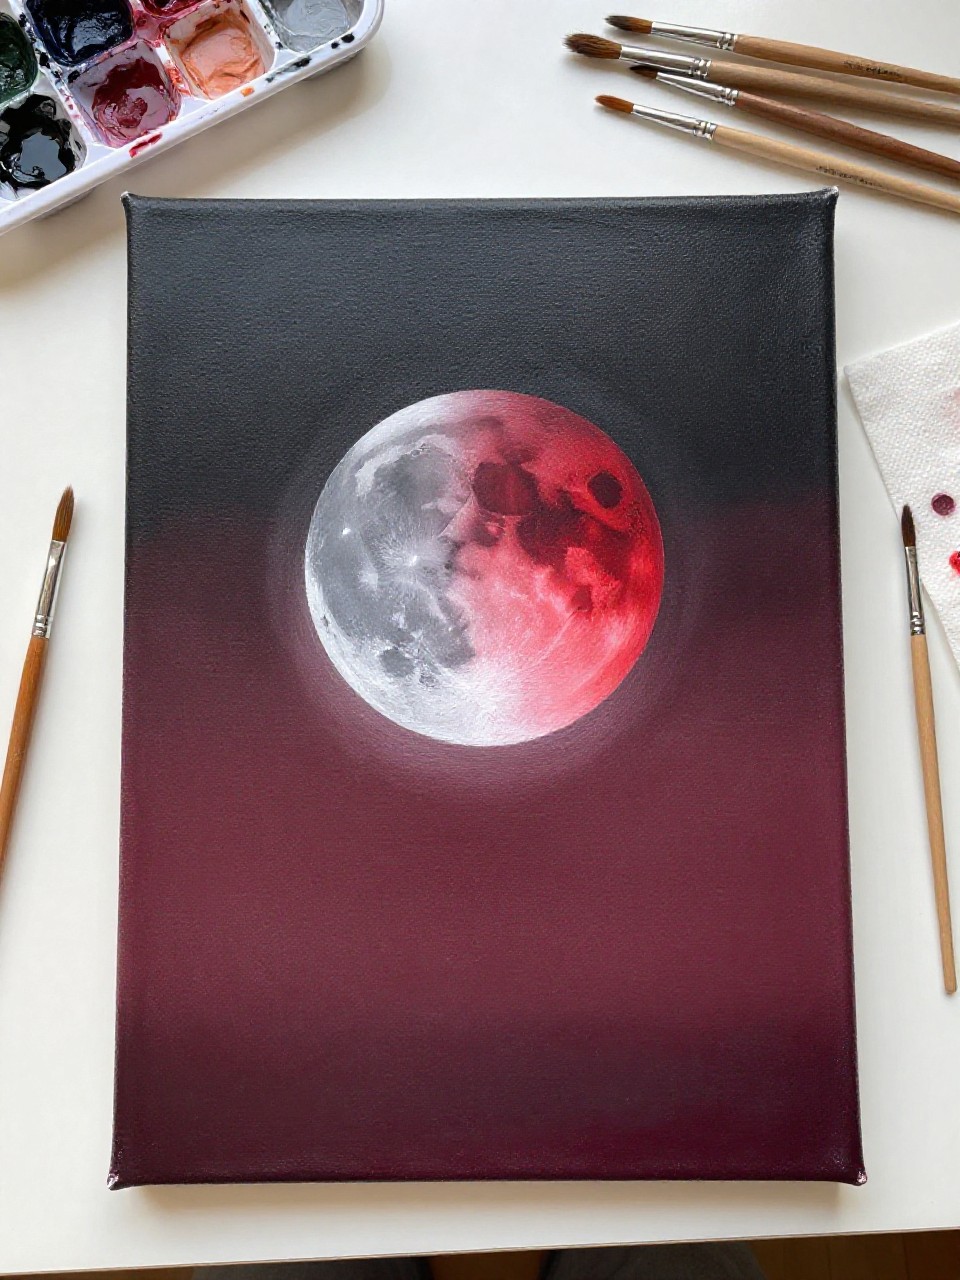
This painting shows a shadowed moon drifting into a rich red “blood moon,” with a smooth background that fades from charcoal to deep burgundy. It’s satisfying because the big color blends do most of the work, and the finished piece looks dramatic on any wall.
Materials Needed:
- Stretched canvas
- Acrylic paint (black, gray, red, burgundy, white)
- Paintbrushes in multiple sizes
- Palette or paint tray
- Optional matte varnish
Steps to Make:
- Base-coat the canvas with a dark gray-to-black gradient and dry it.
- Draw a large circle for the moon, slightly off-center.
- Paint the moon in gray, then shade one side darker to show the eclipse shadow.
- Glaze thin red and burgundy layers over the lit side, leaving uneven brush texture like real moon color.
- Add tiny white specks for distant stars and seal with matte varnish.
3. Eclipse Over Mountain Silhouette Canvas
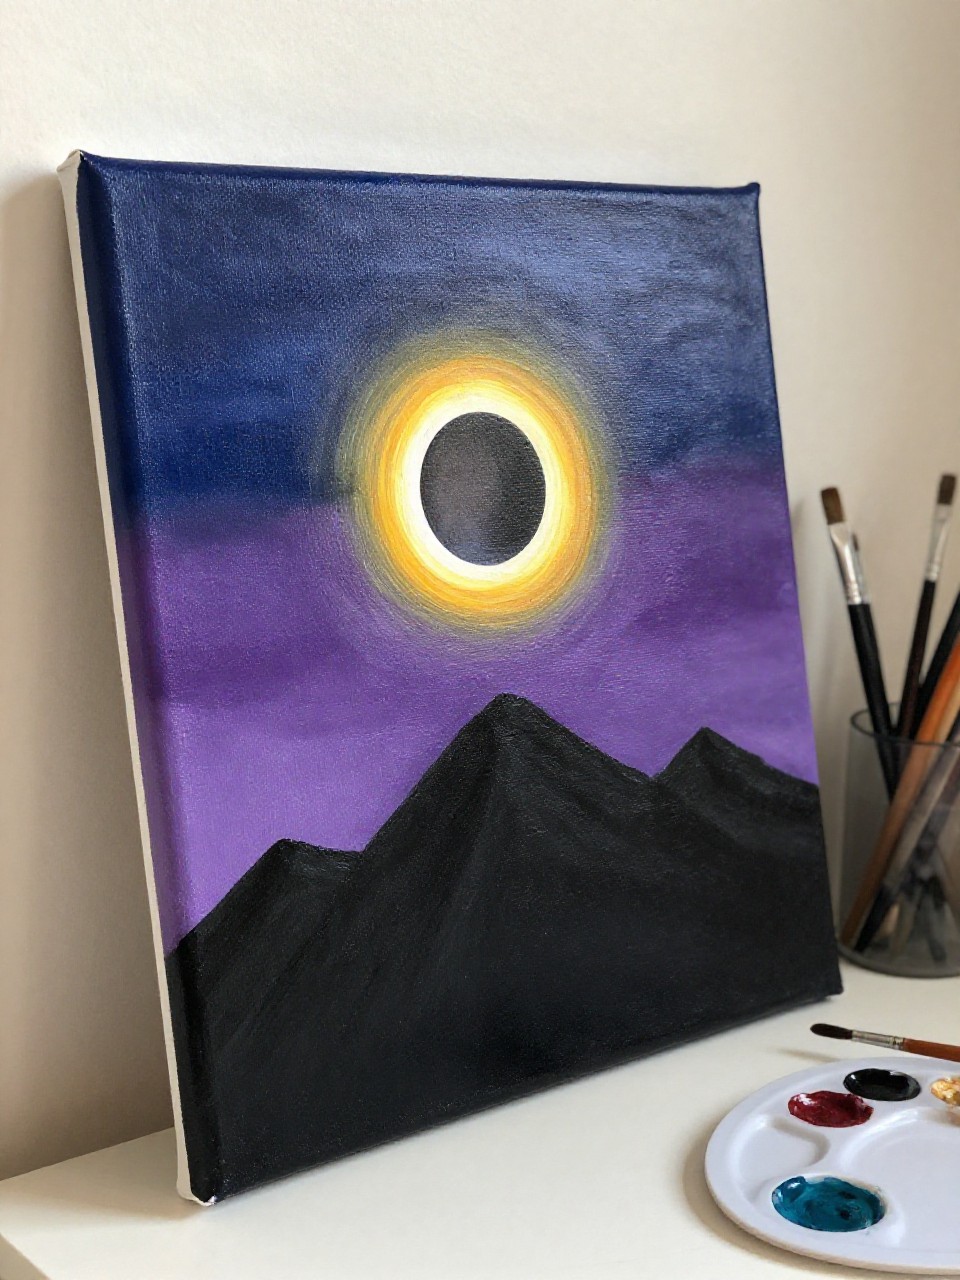
A glowing eclipse sits above simple black mountain shapes, with a misty night sky behind it. This one is great for beginners because the mountains are just bold silhouettes, and you can take your time building the sky in layers.
Materials Needed:
- Stretched canvas
- Acrylic paint (black, navy, purple, white, yellow)
- Paintbrushes in multiple sizes
- Palette or paint tray
- Optional sealer or varnish
Steps to Make:
- Paint a dark night-sky gradient from navy to purple and let it dry.
- Mark a circle near the top for the eclipsed sun.
- Create a bright ring with white and yellow, leaving the center dark.
- Block in mountain silhouettes along the bottom with thick black paint and uneven edges.
- Add a few star dots, dry fully, then seal for a finished look.
4. Eclipse Reflection on Water Canvas
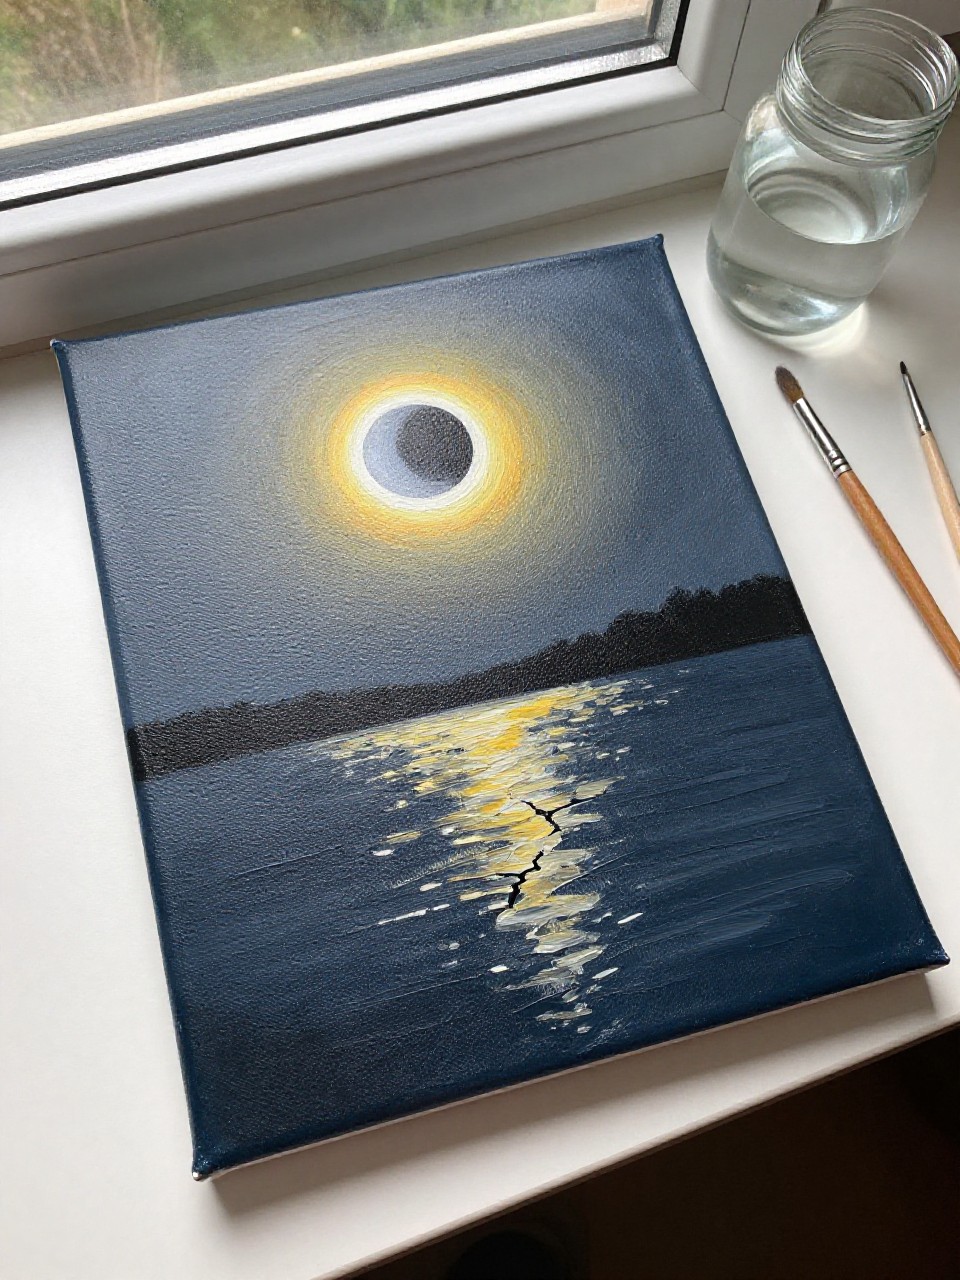
The canvas shows an eclipse in the sky and a shimmering, broken reflection below, like a quiet lake at night. It’s relaxing because the reflection is made with loose horizontal strokes, so it looks better when it’s not perfect.
Materials Needed:
- Stretched canvas
- Acrylic paint (black, indigo, teal, white, pale yellow)
- Paintbrushes in multiple sizes
- Palette or paint tray
- Optional gloss varnish
Steps to Make:
- Paint the background sky in deep indigo fading into black.
- Add a dark circle and paint a soft pale ring for the eclipse.
- Divide the canvas visually: sky above, water below, keeping the horizon simple.
- Use short horizontal strokes of white and pale yellow to “break” the reflection on the water surface.
- Let it dry, then add gloss varnish to make the water shine.
5. Galaxy Eclipse Splash Canvas
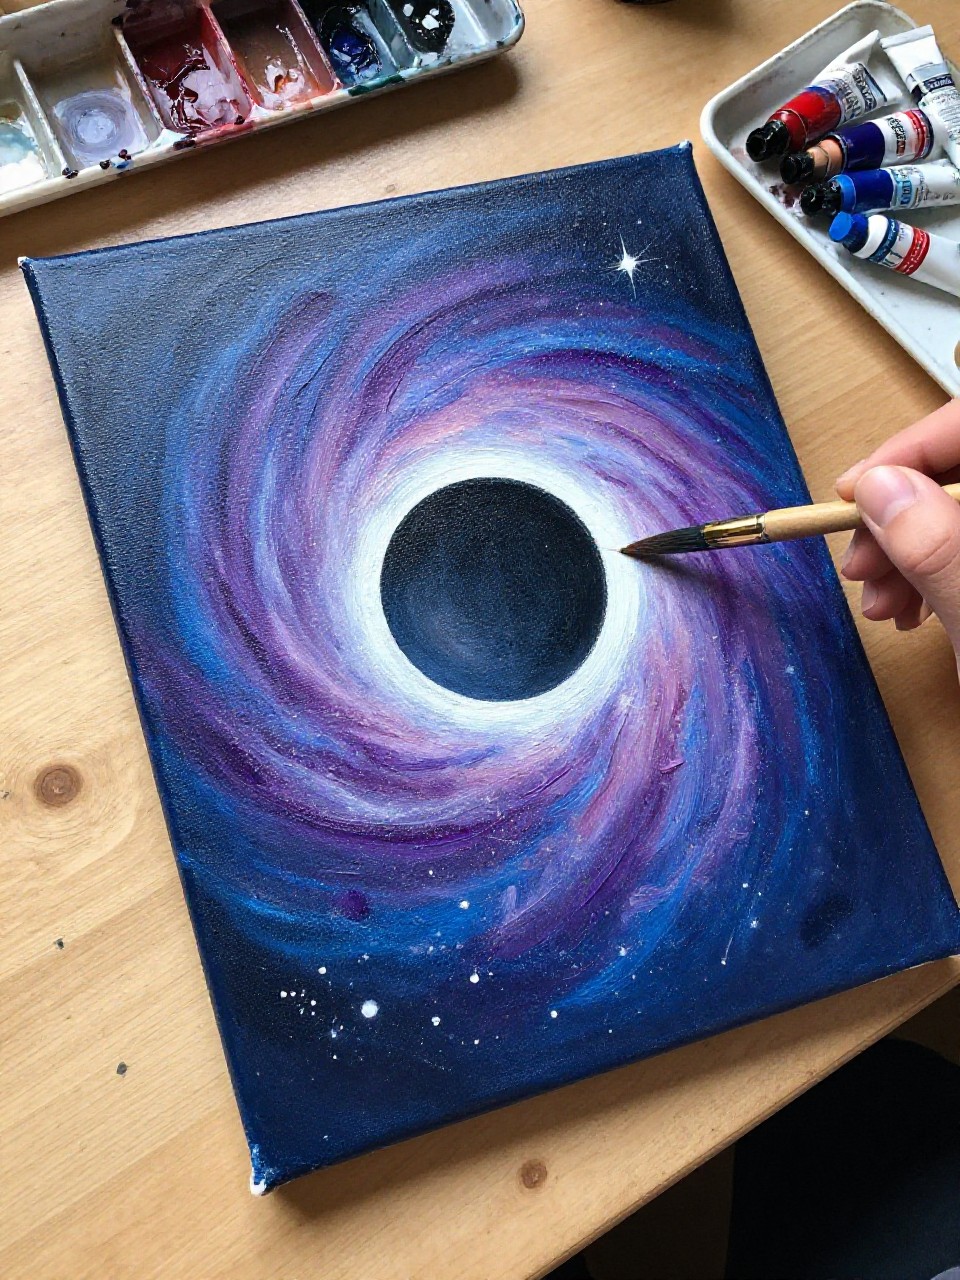
A dark eclipsed circle sits inside a colorful galaxy, with messy-looking paint splatters and swirling nebula strokes around it. This is perfect if you want drama fast, because splattering and swirling hides mistakes and makes the piece feel energetic.
Materials Needed:
- Stretched canvas
- Acrylic paint (black, blue, purple, pink, white)
- Paintbrushes in multiple sizes
- Palette or paint tray
- Old toothbrush or stiff brush (for splatter)
Steps to Make:
- Cover the canvas with black, then quickly blend blue and purple patches while still wet.
- Paint a clean dark eclipse circle in the center and soften the rim slightly.
- Add pink and white swirls around it using curved strokes and layered paint.
- Flick watered-down white paint with a toothbrush for star splatters and uneven dots.
- Dry completely and touch up the brightest highlights around the eclipse edge.
6. Minimal Black-and-White Eclipse Diptych Canvas Set
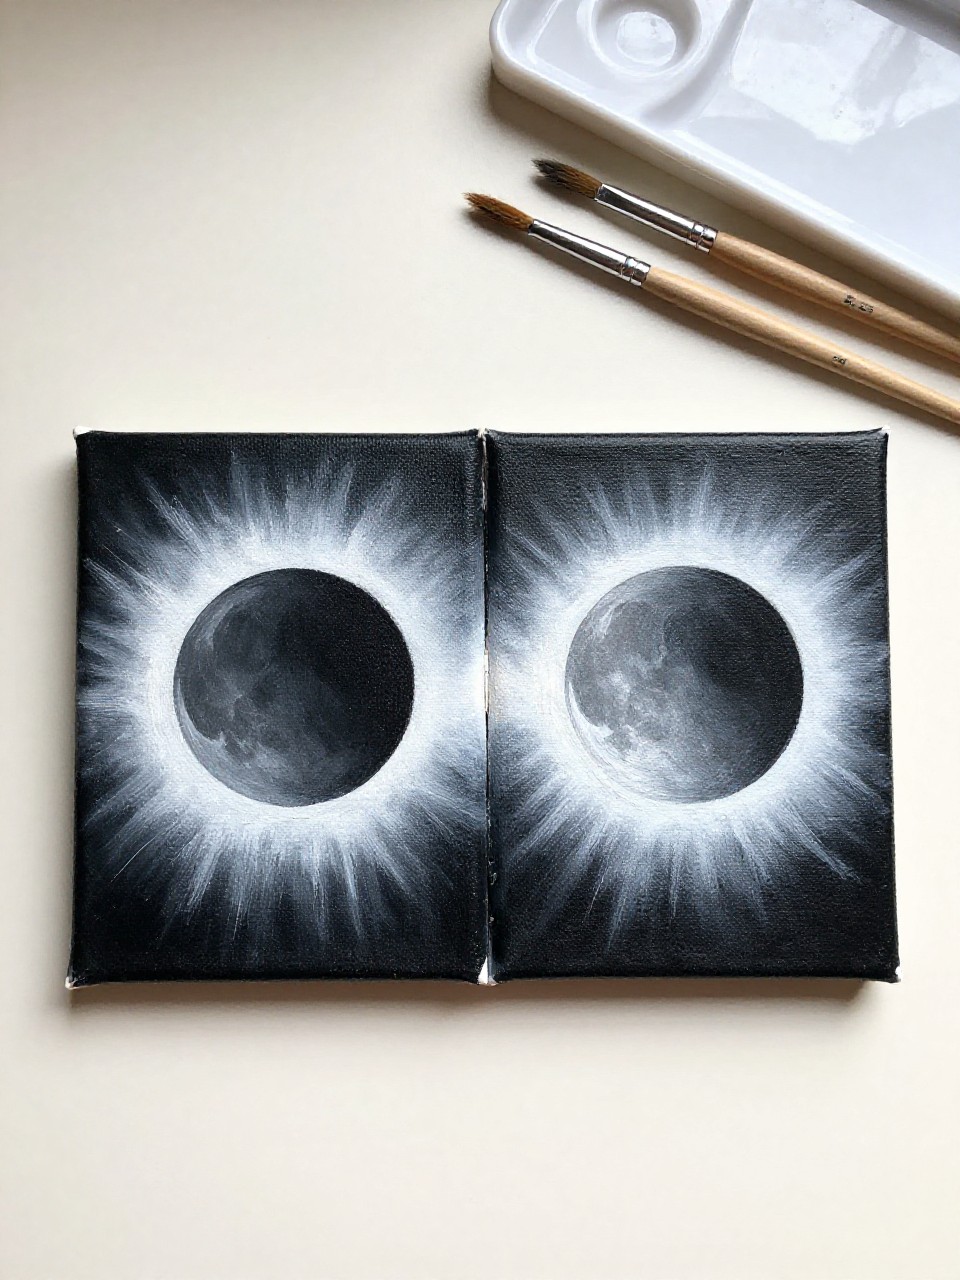
Two small canvases form one eclipse: one shows the dark moon, and the other shows the glowing corona crossing the seam. It’s great for beginners because you’re working simple shapes, and the split canvases make it look modern and gallery-like.
Materials Needed:
- Two small stretched canvases
- Acrylic paint (black, white, gray)
- Paintbrushes in multiple sizes
- Palette or paint tray
- Optional matte varnish
Steps to Make:
- Place the two canvases side-by-side and tape them in position so they don’t shift.
- Paint a soft gray background on both canvases and let it dry.
- Sketch one big circle that spans both canvases, then paint the moon area black.
- Dry-brush white around the circle edge for a hazy corona that continues across the gap.
- Remove tape, dry fully, and seal for a clean finished set.
7. Eclipse with Cloud Veil Canvas
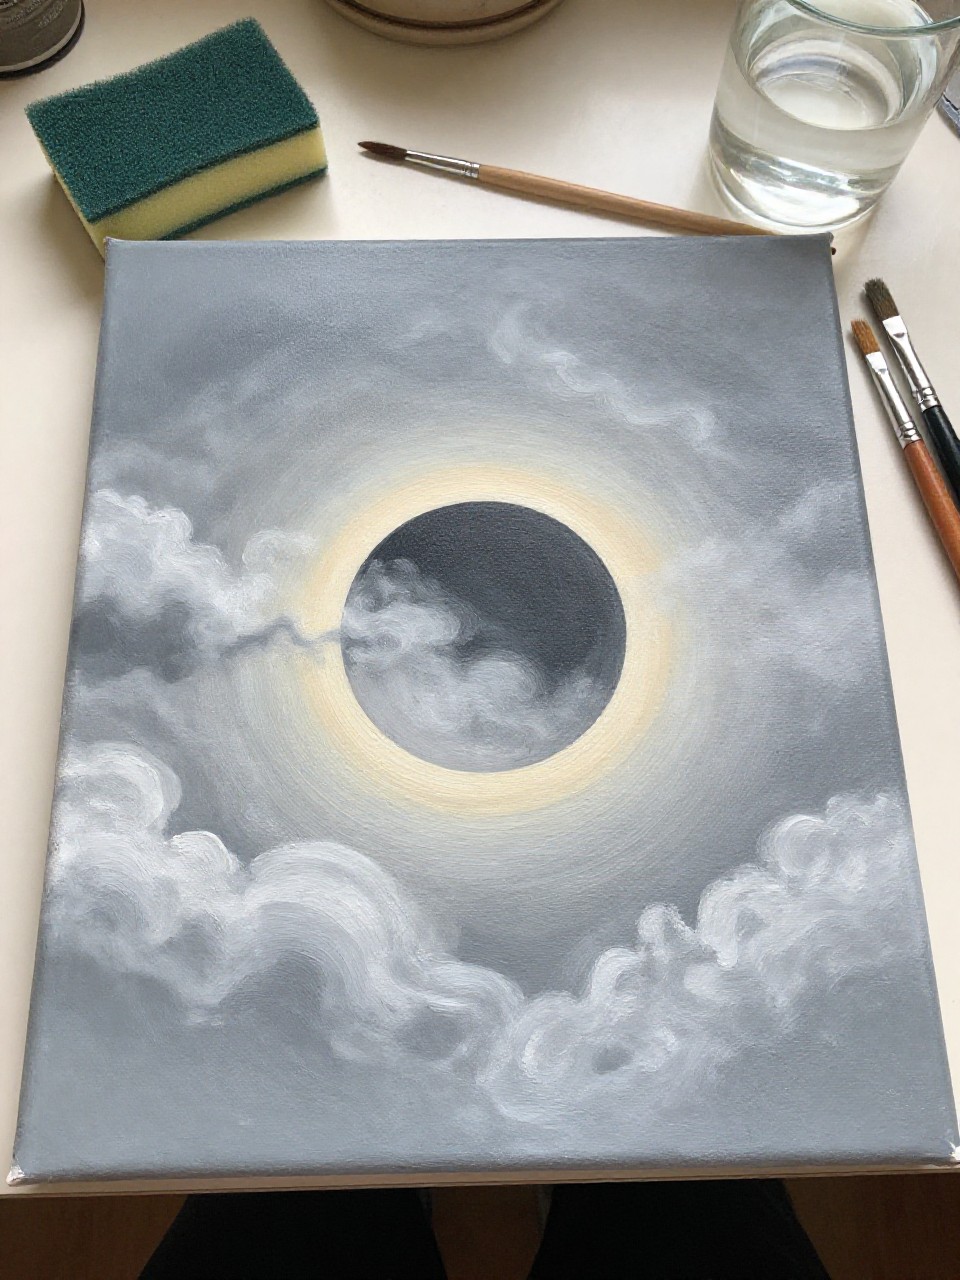
This piece shows an eclipse partly covered by thin, smoky clouds, making the light look mysterious and soft. It’s a calm project because the clouds are made with gentle, uneven brush blending, and it still looks dramatic even when the shapes stay loose.
Materials Needed:
- Stretched canvas
- Acrylic paint (black, gray, white, pale yellow)
- Paintbrushes in multiple sizes
- Palette or paint tray
- Soft sponge (optional for clouds)
Steps to Make:
- Paint a dark sky background and let it dry so clouds won’t smear.
- Add the eclipse circle and a pale glowing ring around it.
- Mix gray and white, then paint wispy cloud bands that pass over the eclipse using light pressure.
- Soften edges with a clean damp brush or sponge to keep cloud texture uneven.
- Dry fully and brighten small parts of the ring peeking through the clouds.
8. Eclipse Over Desert Dunes Canvas
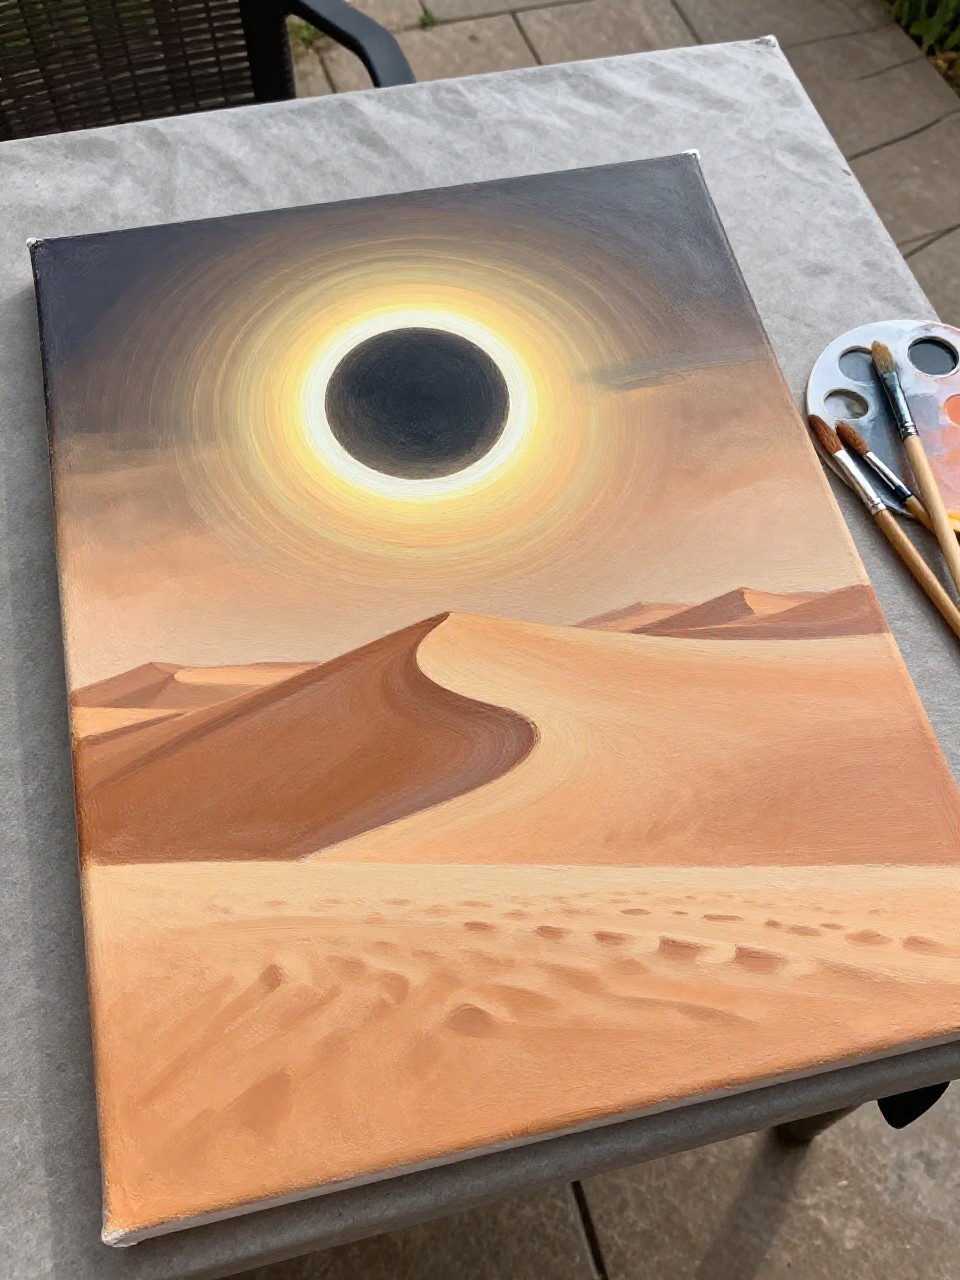
A bright ring eclipse hangs over simple desert dunes painted in warm browns, with long shadow shapes that add drama. Beginners tend to love this because dunes are just curved bands, and you can build depth by layering slightly different tones.
Materials Needed:
- Stretched canvas
- Acrylic paint (black, tan, brown, ochre, white)
- Paintbrushes in multiple sizes
- Palette or paint tray
- Optional varnish
Steps to Make:
- Paint the top half of the canvas a deep night tone and let it dry.
- Paint the lower half with a flat tan base for sand.
- Add a dark eclipse circle and a thin white ring with a soft halo.
- Layer curved dune bands using ochre and brown, then add long shadow strokes along one side of each dune.
- Let dry, then lightly dry-brush highlights on dune crests and seal if desired.
9. Eclipse and Pine Forest Canvas Silhouette
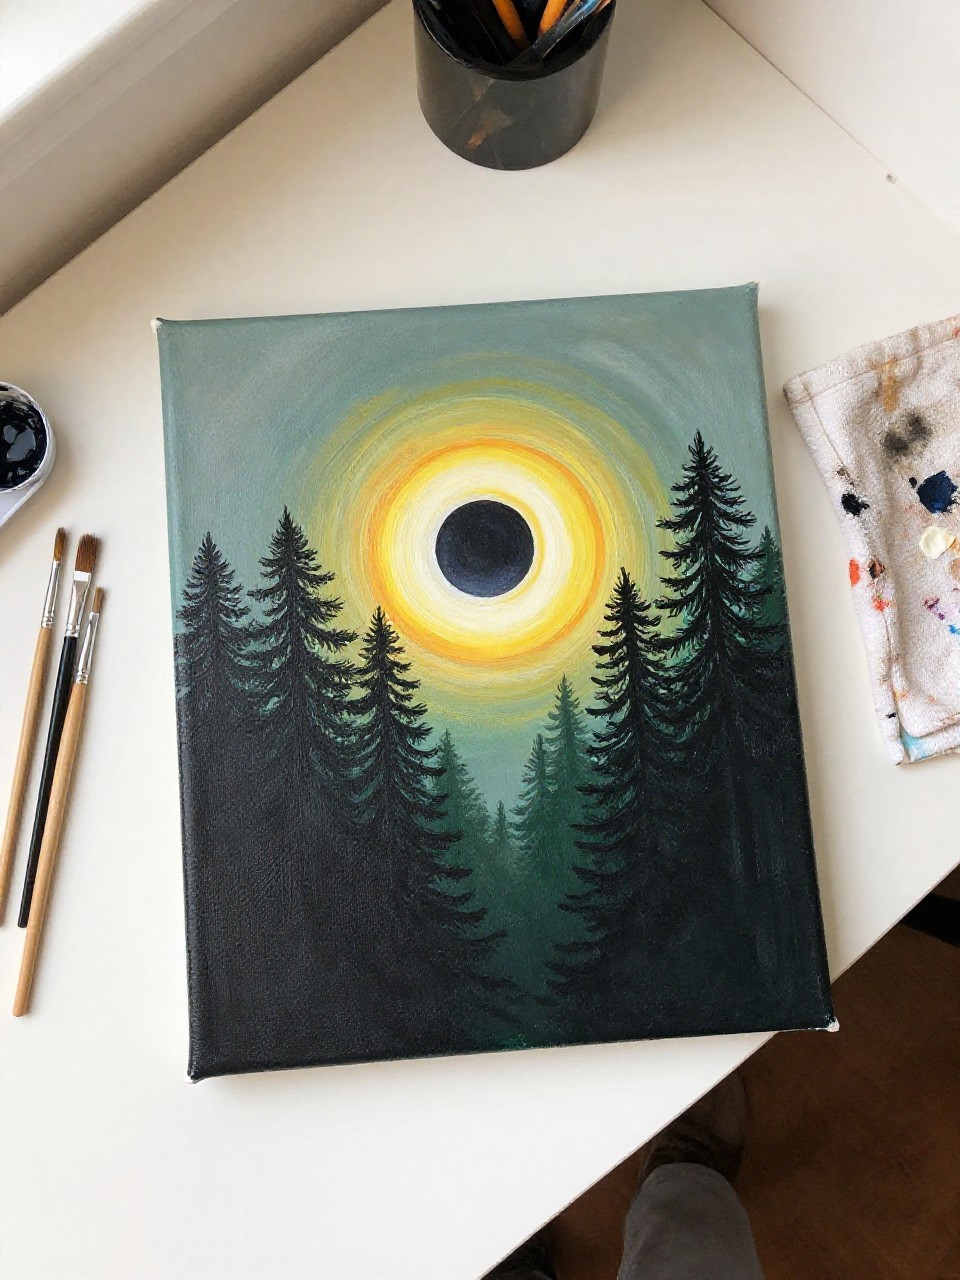
A crisp eclipse glow sits behind a row of tall pine silhouettes, making the scene feel bold and cinematic. This is a great beginner wall art idea because the trees can be simple triangle-like shapes, and the strong contrast makes everything pop.
Materials Needed:
- Stretched canvas
- Acrylic paint (black, dark green, gray, white, pale yellow)
- Paintbrushes in multiple sizes
- Palette or paint tray
- Optional matte varnish
Steps to Make:
- Blend a dark gray sky background, keeping it smoother near the center.
- Paint a dark circle and add a pale yellow-white corona around it.
- Along the bottom, block in a forest band with dark green mixed with black.
- Use a small brush to pull upward strokes into pine shapes, varying heights and spacing.
- Dry fully, add a few tiny stars, and finish with matte varnish.
10. Eclipse Ring with Metallic Accents Canvas
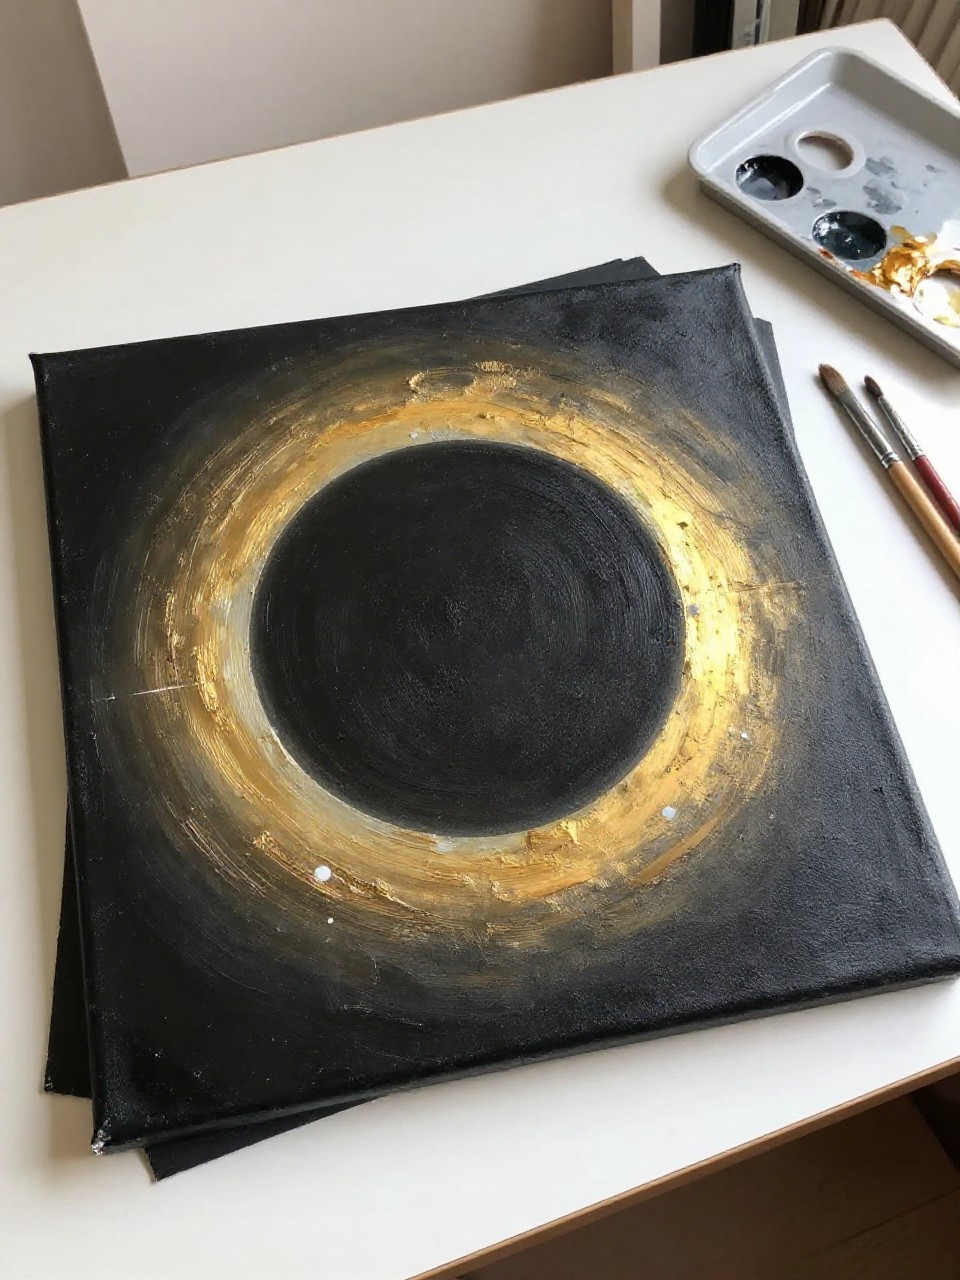
The eclipse ring looks like it’s lit with metal, using gold or copper paint that catches the light over a dark background. It’s satisfying because metallic paint is forgiving and instantly dramatic, and the simple circle design keeps it beginner-friendly and clean.
Materials Needed:
- Stretched canvas
- Acrylic paint (black, white) + metallic acrylic (gold or copper)
- Paintbrushes in multiple sizes
- Palette or paint tray
- Optional gloss varnish
Steps to Make:
- Paint the canvas black and let it dry until fully matte.
- Lightly draw a circle and paint the center dark, keeping edges smooth.
- Apply metallic paint around the rim in short strokes so the texture looks hand-painted and uneven in a good way.
- Add a few bright white highlights on the ring where “light” would hit.
- Dry completely and add gloss varnish to boost the metallic shine.
11. Eclipse with Star Map Lines Canvas

A bold eclipse sits in the middle, surrounded by simple constellation lines and dots like a hand-drawn star map. This feels relaxing because you can paint the background first, then slowly add the tiny dots and lines at your own pace.
Materials Needed:
- Stretched canvas
- Acrylic paint (black, navy, white, gray)
- Paintbrushes in multiple sizes
- Palette or paint tray
- White paint pen (optional for lines)
Steps to Make:
- Paint the background a deep navy-black gradient and let it dry.
- Create the eclipse circle and a soft gray-white glow ring.
- Dot small stars around the canvas using a small brush tip, varying sizes.
- Connect a few star groups with thin white lines to form simple constellations around the eclipse.
- Dry fully and sharpen a couple highlights on the ring for extra contrast.
12. Eclipse Sunrise Horizon Canvas

This scene shows an eclipse low on the horizon, with a sunrise band of orange and pink peeking under a dark sky. It’s great for beginners because the horizon is mostly straight lines and soft blending, and the color contrast makes it look more advanced than it is.
Materials Needed:
- Stretched canvas
- Acrylic paint (black, purple, orange, pink, white)
- Paintbrushes in multiple sizes
- Palette or paint tray
- Optional varnish
Steps to Make:
- Paint the sky with purple fading into black, leaving space near the horizon.
- Blend a thin horizon band of orange and pink, keeping brush strokes visible and layered.
- Add the eclipse circle touching the horizon line and paint a soft ring glow.
- Darken the upper sky with another thin black glaze to increase drama.
- Dry fully and add a few tiny star dots above the eclipse, then seal if desired.
13. Eclipse with Painted Crater Texture Canvas
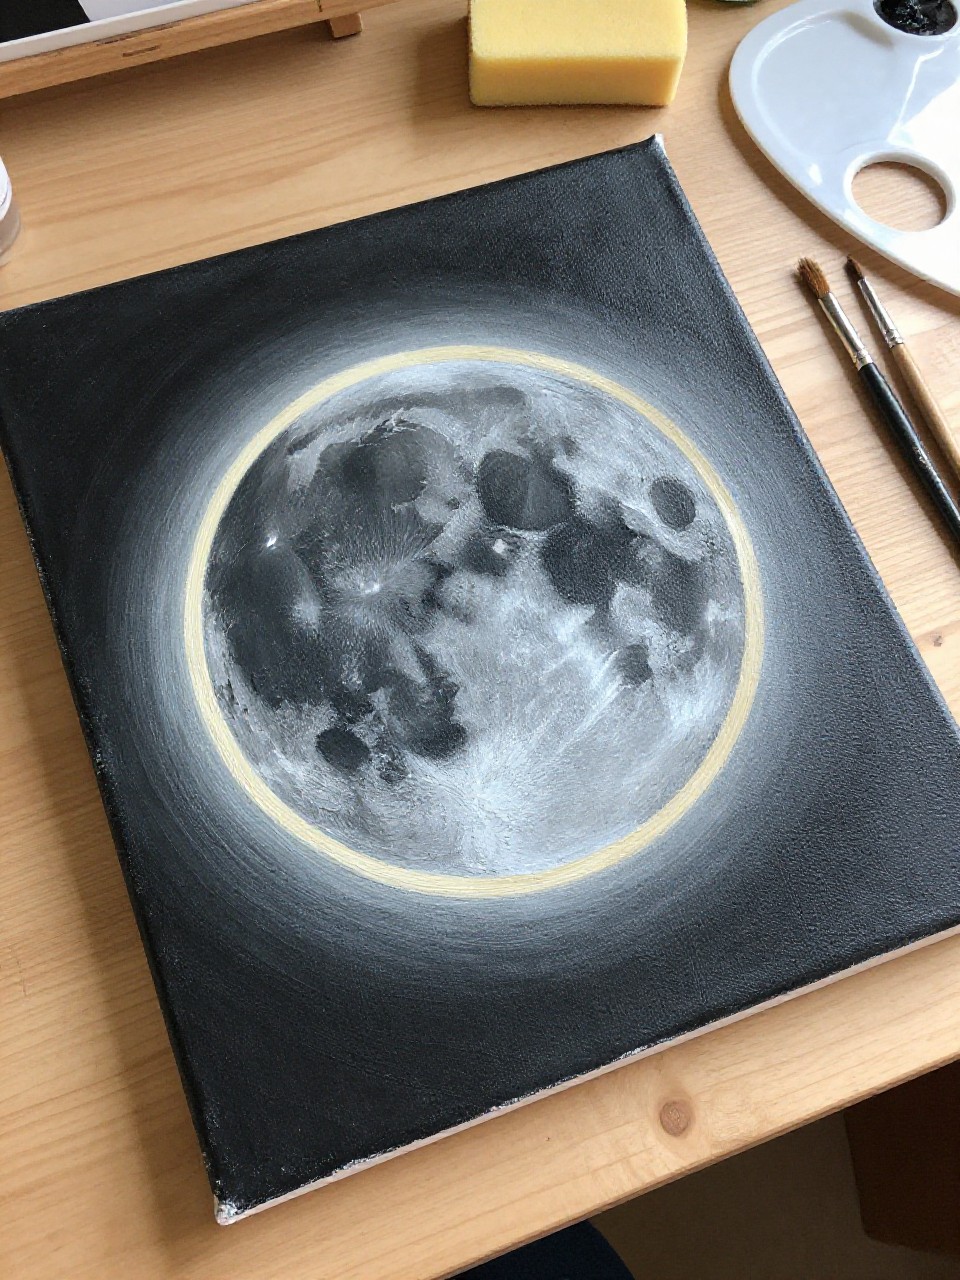
A close-up eclipse shows a dark moon with visible crater-like texture, plus a thin bright ring around it. It’s satisfying because you can make craters with simple dabbing and dry-brushing, and the rough texture makes the painting feel real and handmade.
Materials Needed:
- Stretched canvas
- Acrylic paint (black, gray, white, pale yellow)
- Paintbrushes in multiple sizes
- Palette or paint tray
- Small sponge or stiff brush (for dabbing texture)
Steps to Make:
- Paint the background a deep black and let it dry fully.
- Paint a large moon circle in dark gray, leaving room for the ring glow.
- Dab lighter gray and white patches with a sponge to build crater texture and uneven spots.
- Add a thin pale yellow-white ring around the moon and soften it outward with a dry brush.
- Dry completely, then deepen a few crater shadows with thin black-gray glaze.
14. Double Eclipse (Two Moons) Canvas Scene
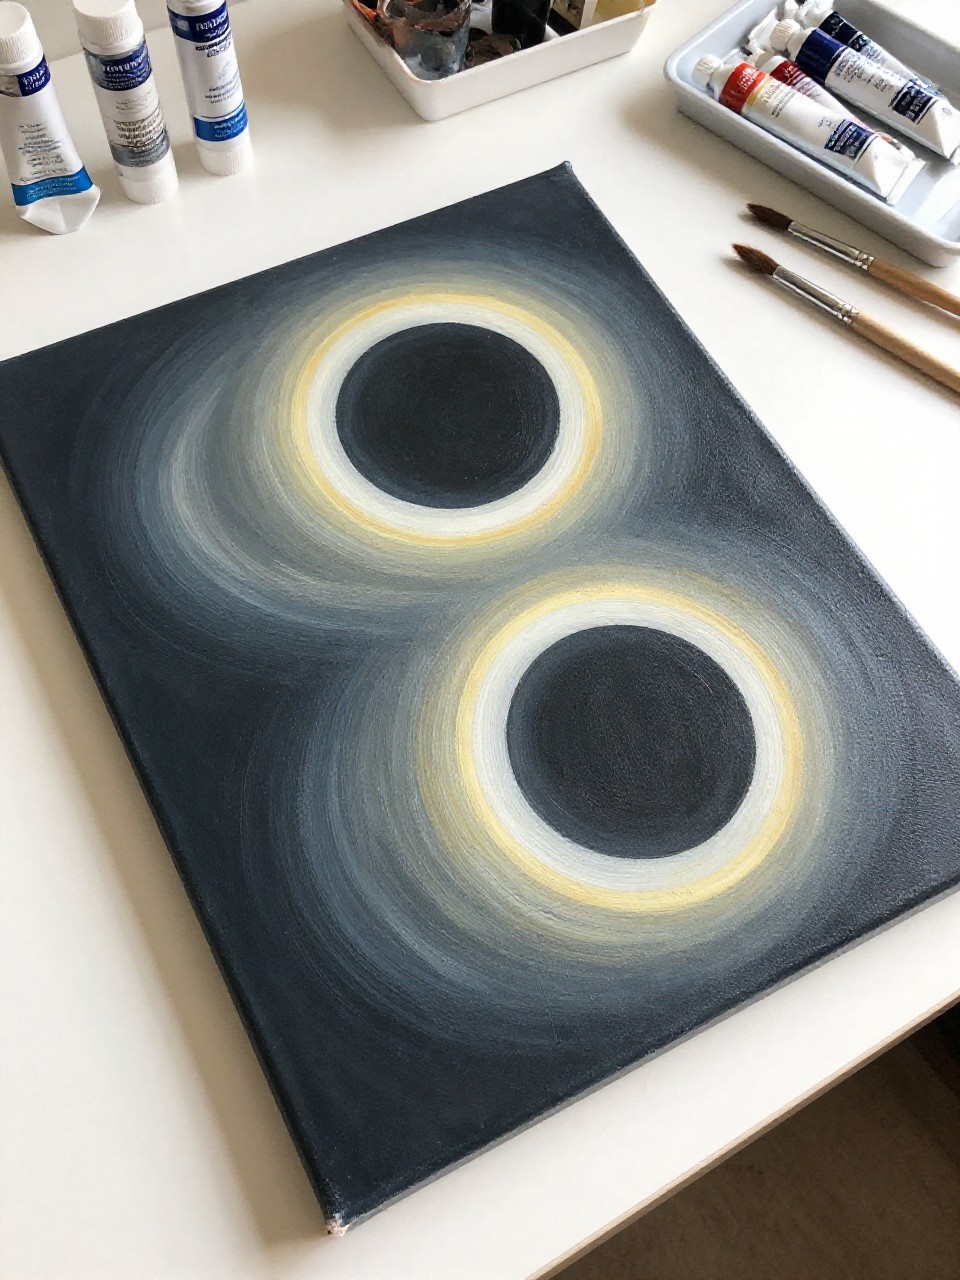
Two eclipsed circles overlap slightly in a dark sky, each with its own glow, creating a surreal double-eclipse moment. This is a fun beginner project because it’s mostly circles and blending, but it still looks bold and unusual as wall art.
Materials Needed:
- Stretched canvas
- Acrylic paint (black, blue, white, yellow, gray)
- Paintbrushes in multiple sizes
- Palette or paint tray
- Optional gloss varnish
Steps to Make:
- Paint a deep blue-black background and let it dry.
- Sketch two circles that overlap slightly, then paint both centers dark gray-black.
- Dry-brush a white glow around each circle, keeping the overlap area a little brighter.
- Add a touch of yellow tint on one ring to make the two eclipses feel different.
- Let it dry and add gloss varnish if you want the rings to look extra luminous.
15. Eclipse Shadow Path Canvas (Time-Lapse Strip)

This canvas shows a row of small moons across the sky, moving from full light to total eclipse and back, like a simple time-lapse. It’s calming to paint because you repeat the same shape, and it looks dramatic and “science-y” without needing complicated drawing.
Materials Needed:
- Stretched canvas
- Acrylic paint (black, navy, gray, white, pale yellow)
- Paintbrushes in multiple sizes
- Palette or paint tray
- Ruler or masking tape (optional for alignment)
Steps to Make:
- Paint a smooth dark sky background and let it dry.
- Use a ruler or light pencil marks to space out a row of circles across the canvas.
- Paint each moon in gray, then shade them gradually so the middle one becomes the darkest “total eclipse.”
- Add thin white-to-pale-yellow ring glow only around the darkest center moon for the big dramatic moment.
- Dry fully, clean up edges, and display it horizontally like a timeline.