

Table of Contents Show
Keeping kids busy can be tough, especially on rainy days or when you need a quick classroom activity. If you’re teaching the alphabet or just want simple, fun projects, these Letter A crafts are perfect.
Each idea is easy to set up and uses common supplies. This list will help you spark creativity while building letter recognition and fine motor skills.
Let’s jump into 15 adorable Letter A crafts kids will love to make.
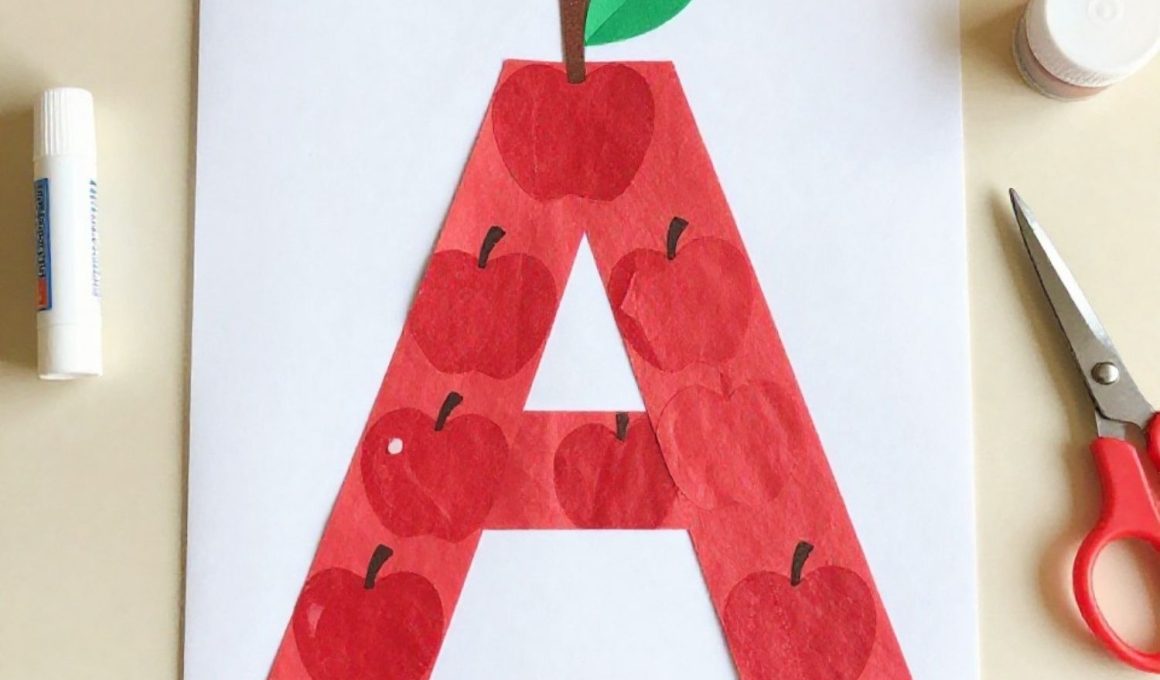
1. Apple Letter A Collage
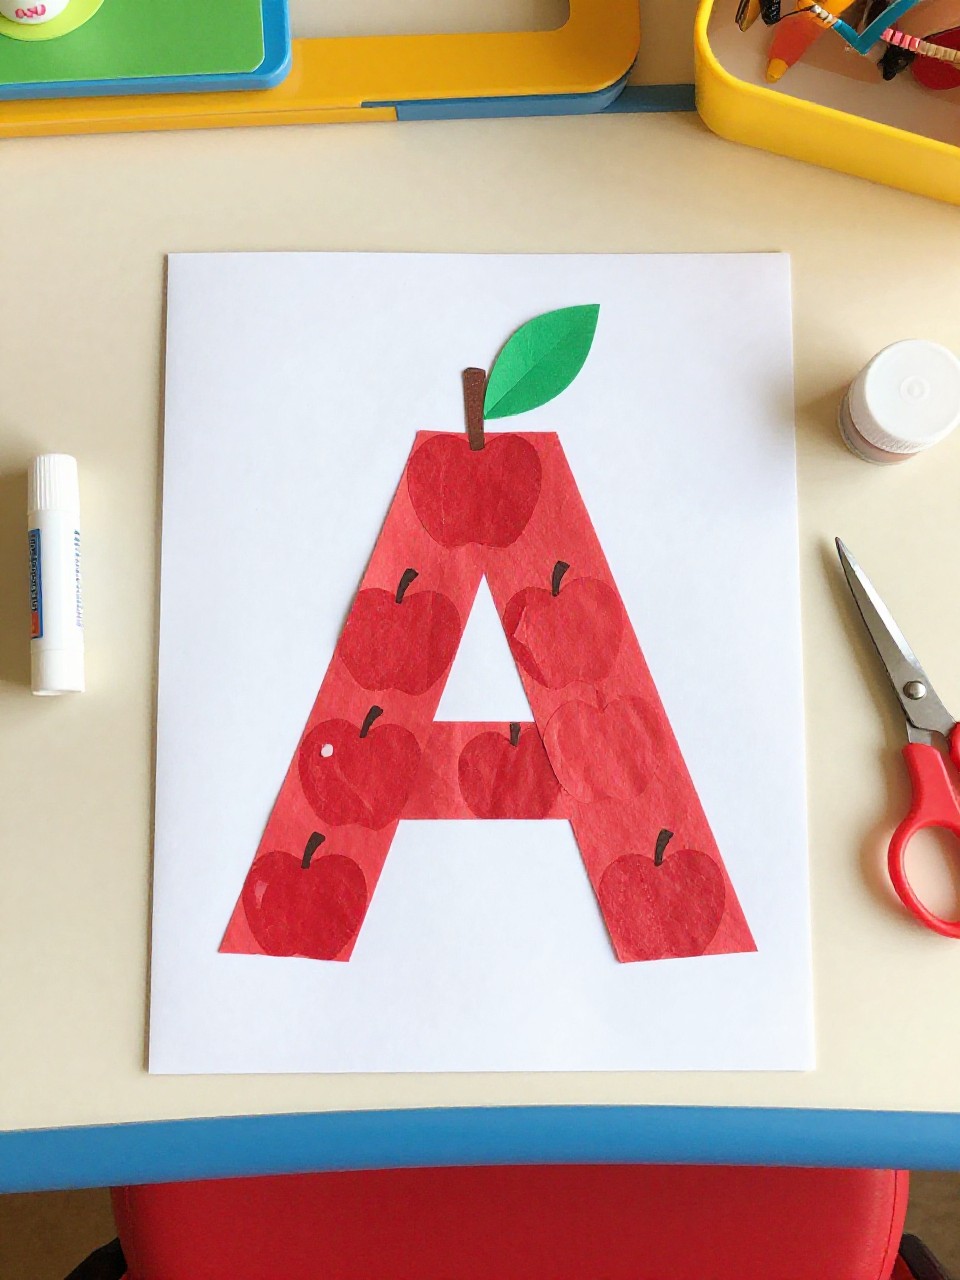
This craft makes a bold uppercase A filled with bright red “apples” made from tissue paper or pom-poms. Kids love the simple glue-and-stick action and watching the empty A shape turn into a juicy apple collage.
Materials Needed:
For People Who Love to Make Things ✂️
- Cardstock with a large bubble letter A drawn or printed
- Red tissue paper squares or red pom-poms
- Green paper for leaves
- Glue stick or white glue
- Crayon or marker for stem
How to make it:
- 1. Print or draw a big letter A on cardstock and cut it out if desired.
- 2. Crumple tissue squares or gather pom-poms and glue them to fill the A.
- 3. Add a green paper leaf and draw a short brown stem at the top.
- 4. Let dry and hang on a wall or fridge to show off the apple A.
2. Alligator A Puppet
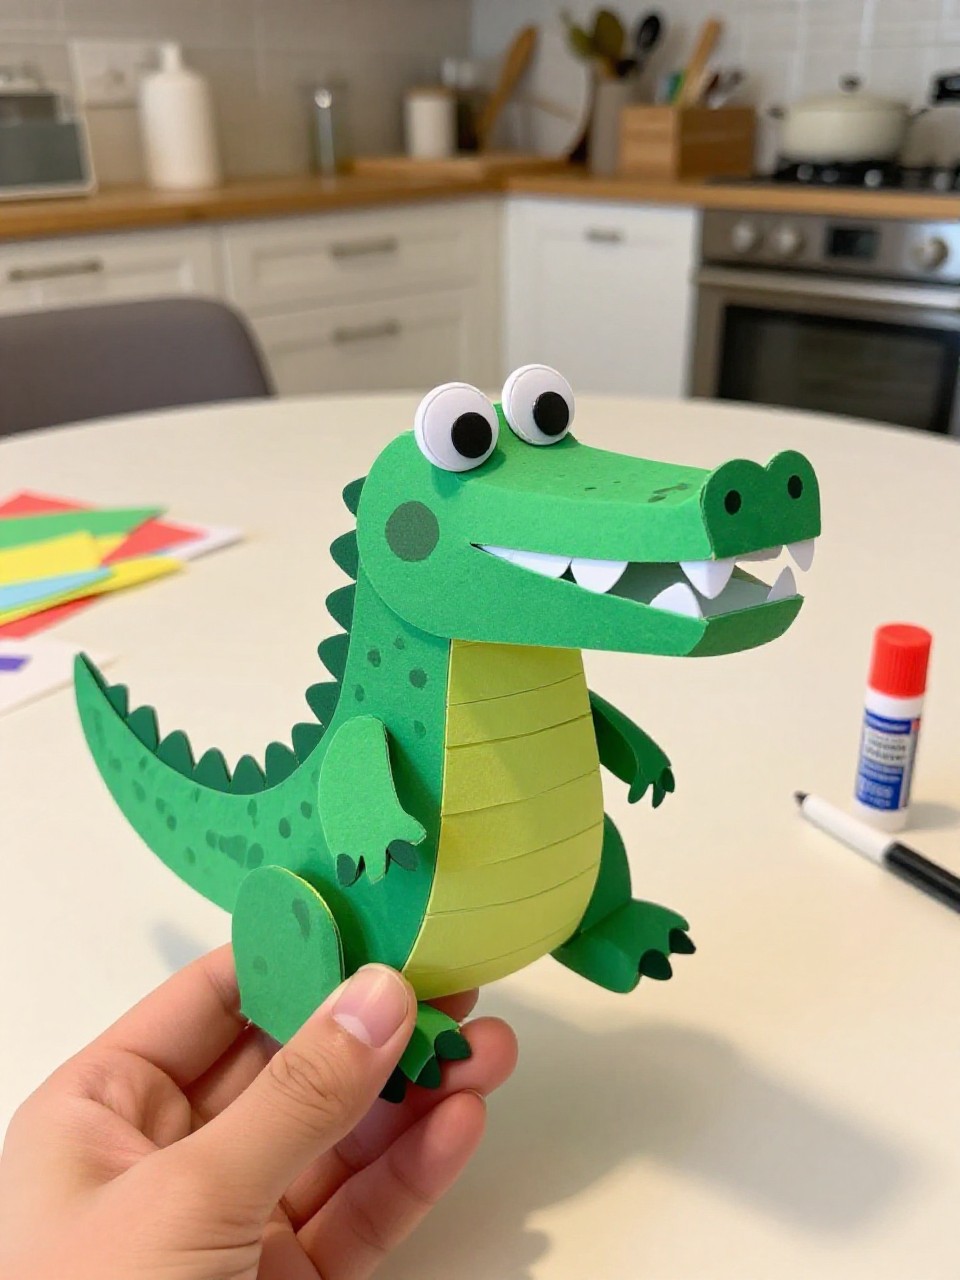
This puppet looks like a chomping alligator where the uppercase A forms the body, with googly eyes and zigzag teeth. Kids enjoy making the jaws snap and using it for pretend play while repeating the A sound.
Materials Needed:
- Green construction paper
- White paper for teeth
- Googly eyes
- Craft stick
- Glue and scissors
How to make it:
- 1. Cut a large green letter A and glue it to a craft stick as a handle.
- 2. Cut white zigzag strips and glue them along the inner sides of the A for teeth.
- 3. Add googly eyes at the top and draw scales or spots.
- 4. Let dry, then chomp and practice “A is for alligator!”
3. Airplane A Clothespin Flyer
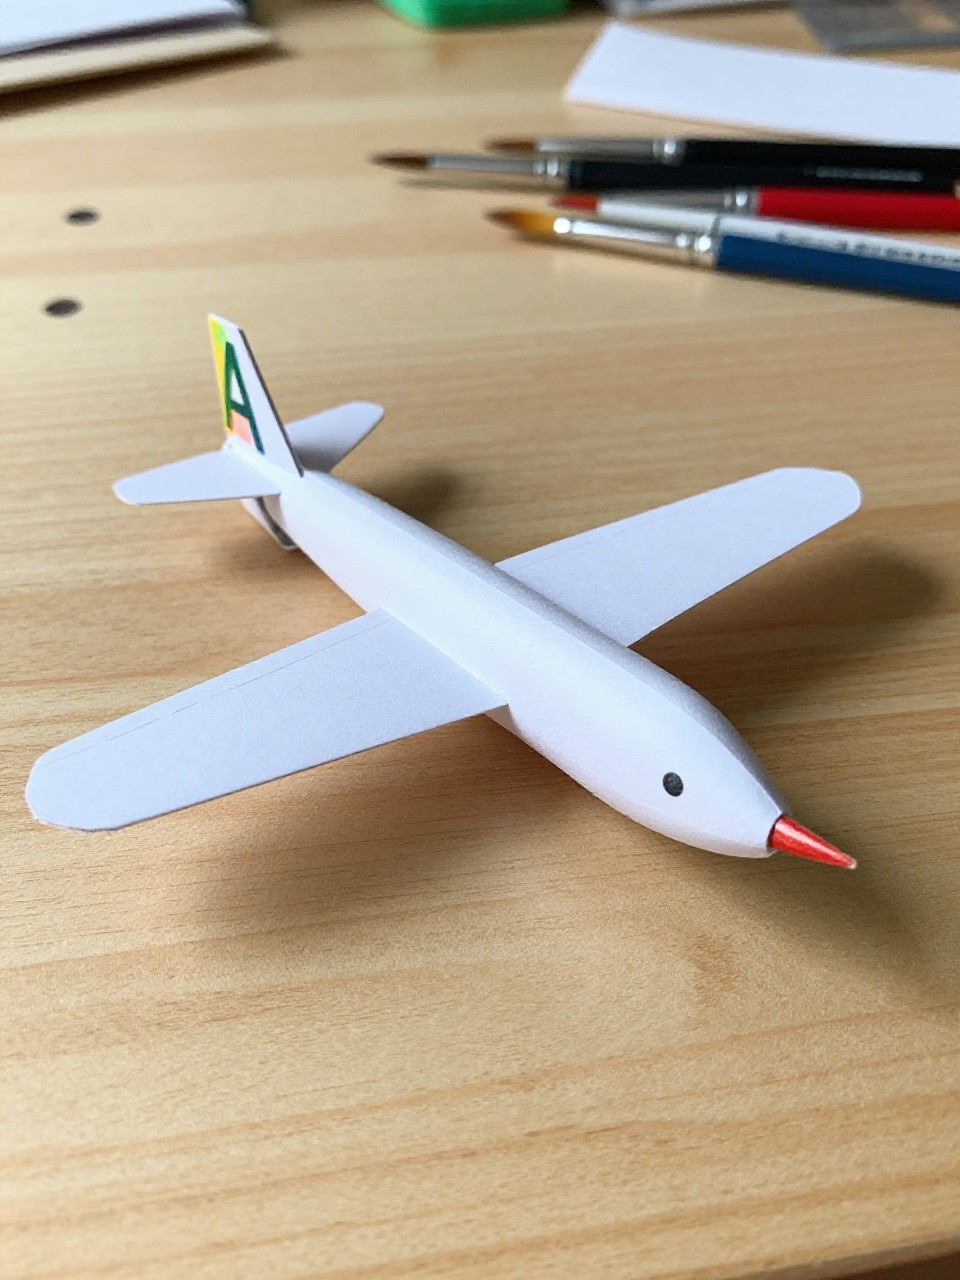
This craft turns a clothespin and craft sticks into a tiny plane with a letter A tail fin and side decals. Kids love launching it gently and decorating it with stripes and clouds.
Materials Needed:
- Wooden clothespin
- 2 craft sticks (one full, one cut shorter)
- Cardstock letter A cutout for tail
- Washable paint or markers
- Glue
How to make it:
- 1. Paint the clothespin and craft sticks; let dry.
- 2. Glue one full stick across the top for wings and the short piece under for a smaller wing.
- 3. Glue the cardstock A at the back as the tail and add decorative A stickers or drawn letters.
- 4. Dry fully, then pretend-fly the airplane across the room.
4. Handprint Ants on the A

This artwork shows a bold A path with cute black handprint ants marching along it. Kids enjoy the tickly paint on their hands and counting the ants as they stamp.
Materials Needed:
- White cardstock
- Black washable paint
- Marker for legs and antennae
- Printed or drawn large letter A
- Googly eyes (optional)
How to make it:
- 1. Draw or print a big A on white cardstock.
- 2. Paint a child’s palm with black paint and stamp handprints along the A.
- 3. Add legs, antennae, and eyes to turn prints into ants.
- 4. Let dry and display with the title “A is for Ants.”
5. Astronaut A Helmet Craft
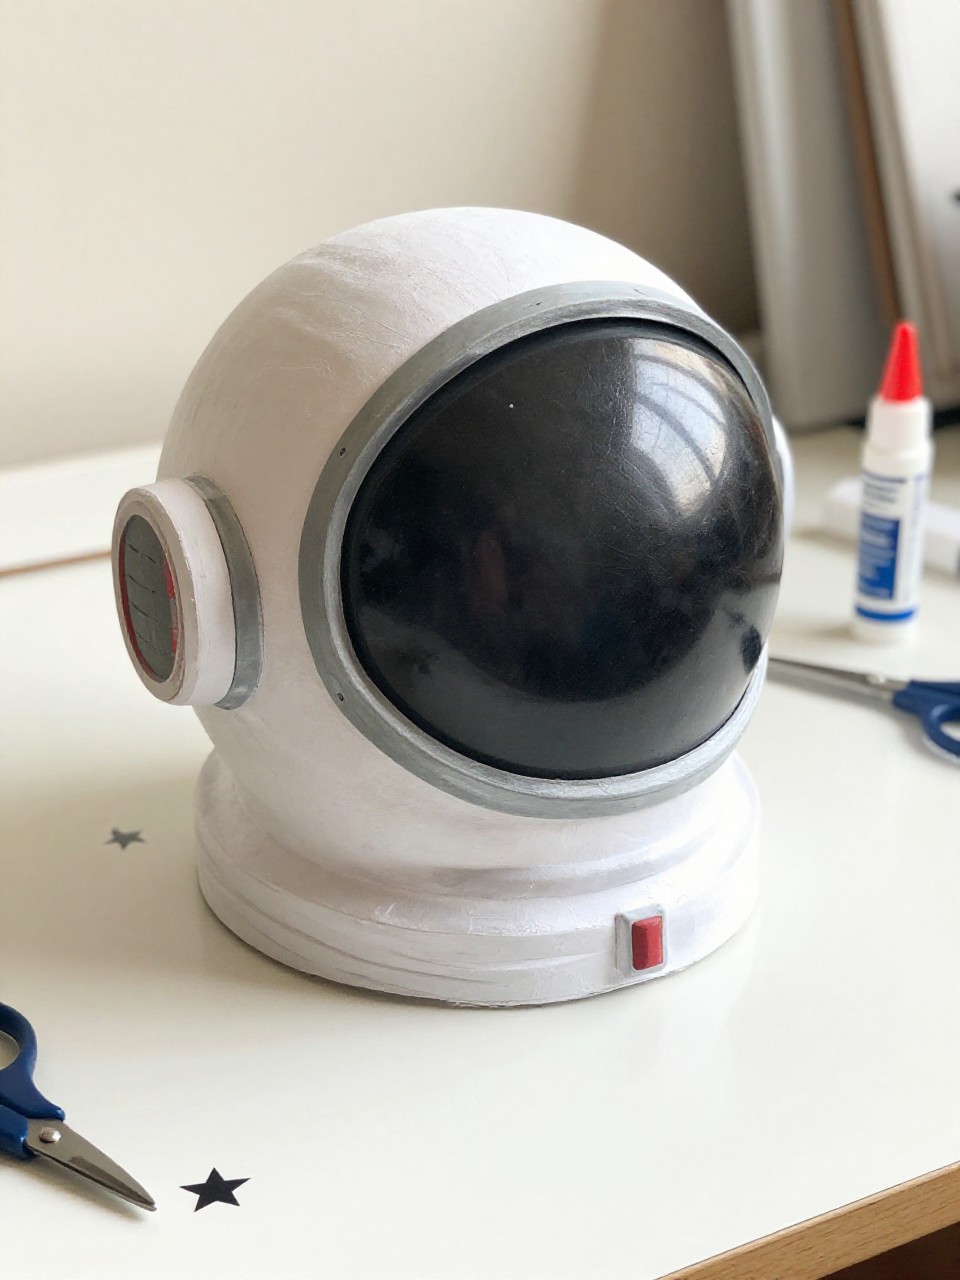
This project creates a letter A wearing a shiny paper astronaut helmet and tiny star stickers. Kids love imagining space adventures while decorating with sparkly touches.
Materials Needed:
- Silver or white cardstock
- Black paper for visor
- Star stickers or sequins
- Glue and scissors
- Marker for details
How to make it:
- 1. Cut a big letter A from silver or white cardstock.
- 2. Cut a round helmet shape with a black visor and glue it over the top of the A.
- 3. Add star stickers around the A and draw buttons or patches.
- 4. Let dry and hang on a “Space A” wall.
6. Acorn A Nature Art
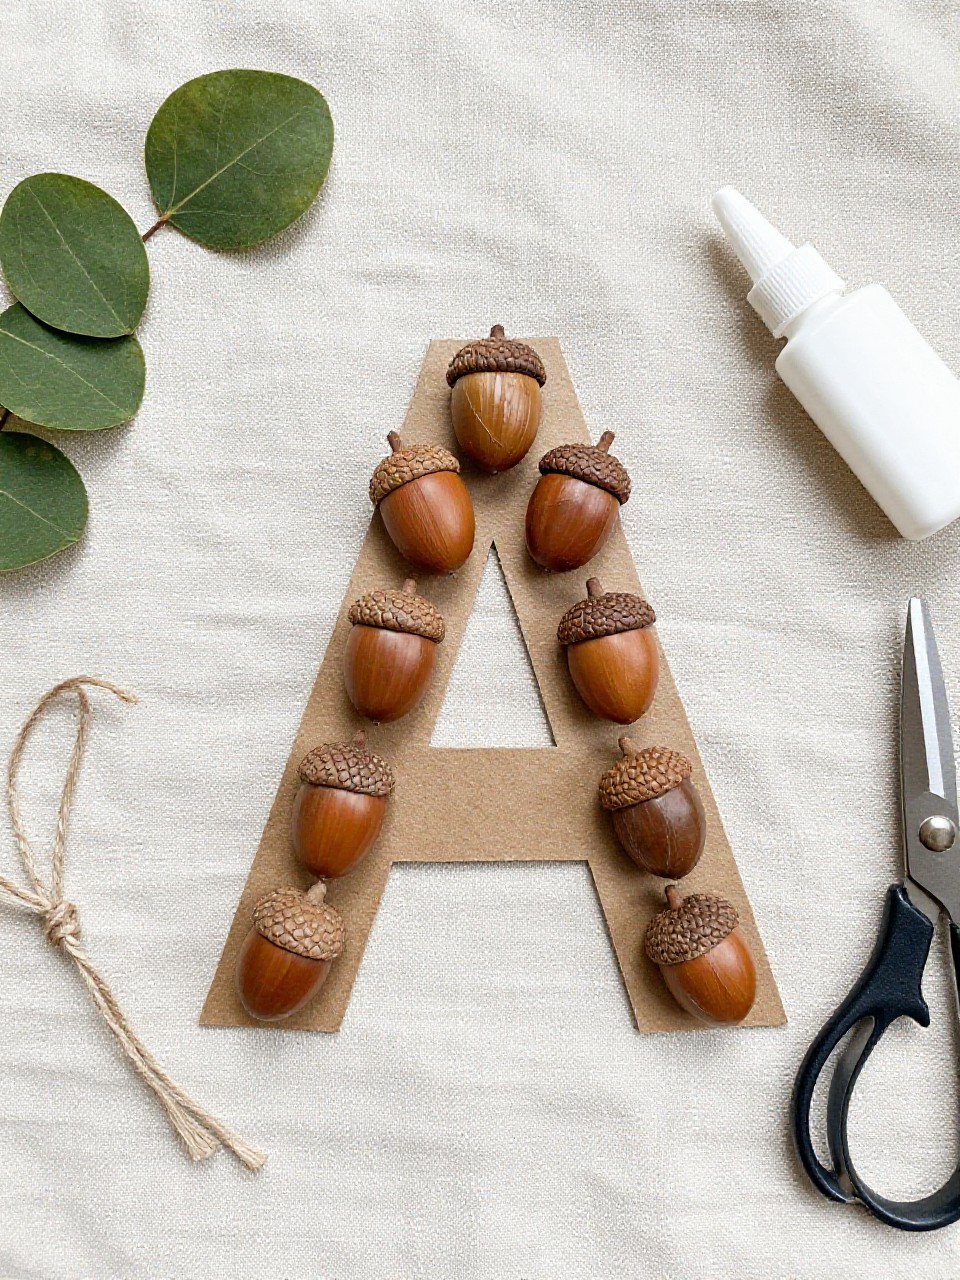
This craft turns a letter A into a fall design with real acorn caps and brown textures. Kids enjoy the sensory feel of natural items and the earthy colors.
Materials Needed:
- Cardboard letter A cutout
- Acorn caps and small leaves
- Brown paint or markers
- White glue
- Twine (optional hanger)
How to make it:
- 1. Cut a sturdy cardboard A and lightly color it brown.
- 2. Glue acorn caps along the crossbar and sides; add a few small leaves.
- 3. Fill any gaps with drawn dots, lines, or brown paper scraps.
- 4. Let dry and add a twine loop to hang.
7. Apple Core Peekaboo A
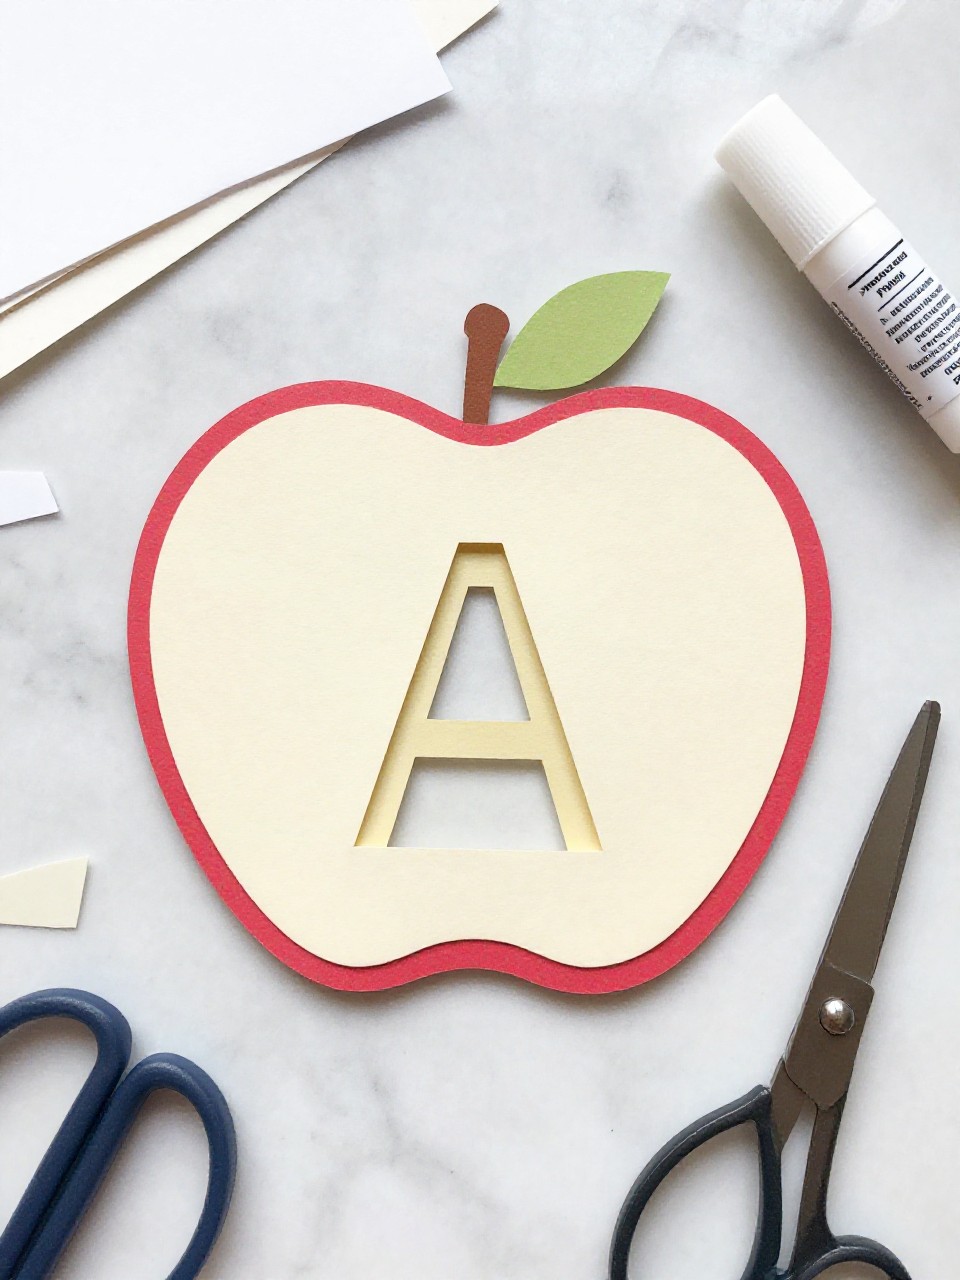
This picture shows an apple core cutout revealing a hidden letter A in the center. Kids love the surprise peekaboo window and choosing apple colors.
Materials Needed:
- Red, green, and cream construction paper
- Scissors and glue
- Black marker for seeds
- Printed or drawn letter A
- Googly eyes (optional)
How to make it:
- 1. Cut an apple shape from red paper and a smaller cream “core” shape.
- 2. Cut a window in the core shaped like a letter A.
- 3. Glue the red apple to a background, then glue the core on top; add seeds and leaf.
- 4. Finish with details and let dry; lift to admire the hidden A.
8. Alpaca A Paper Plate Puppet
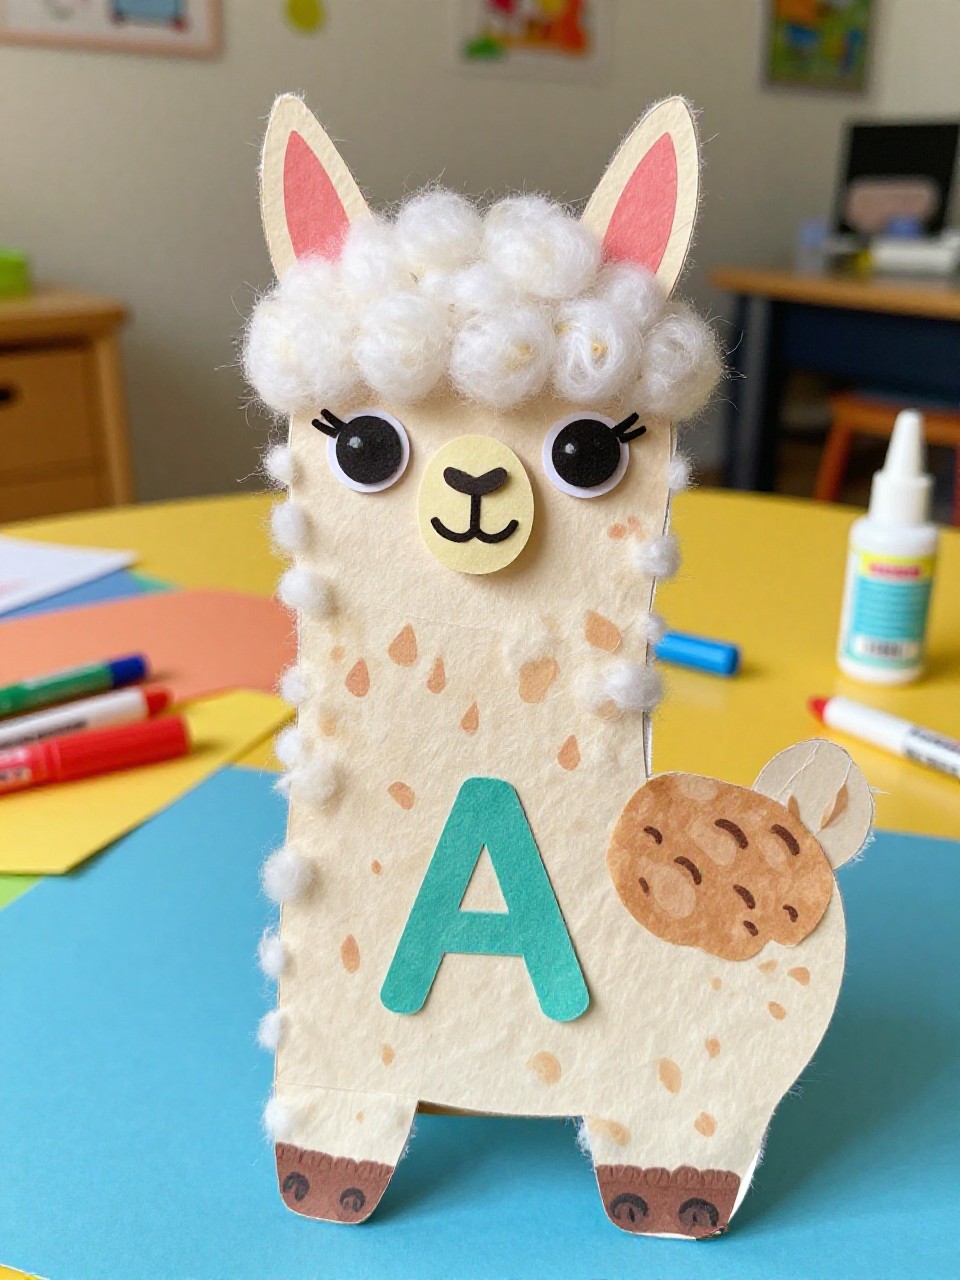
This puppet uses a paper plate face with a letter A body to make a fluffy alpaca. Kids enjoy gluing on “wool” and giving it a sweet smile.
Materials Needed:
- Paper plate
- Cardstock letter A (body)
- Cotton balls or yarn scraps
- Markers
- Glue and tape
How to make it:
- 1. Cut or print a large letter A from cardstock for the body.
- 2. Tape the paper plate to the top of the A as the alpaca’s head.
- 3. Glue cotton balls or yarn for fluff and draw eyes, nose, and ears.
- 4. Let dry and use for pretend farm play.
9. Arrow A Weaving Board
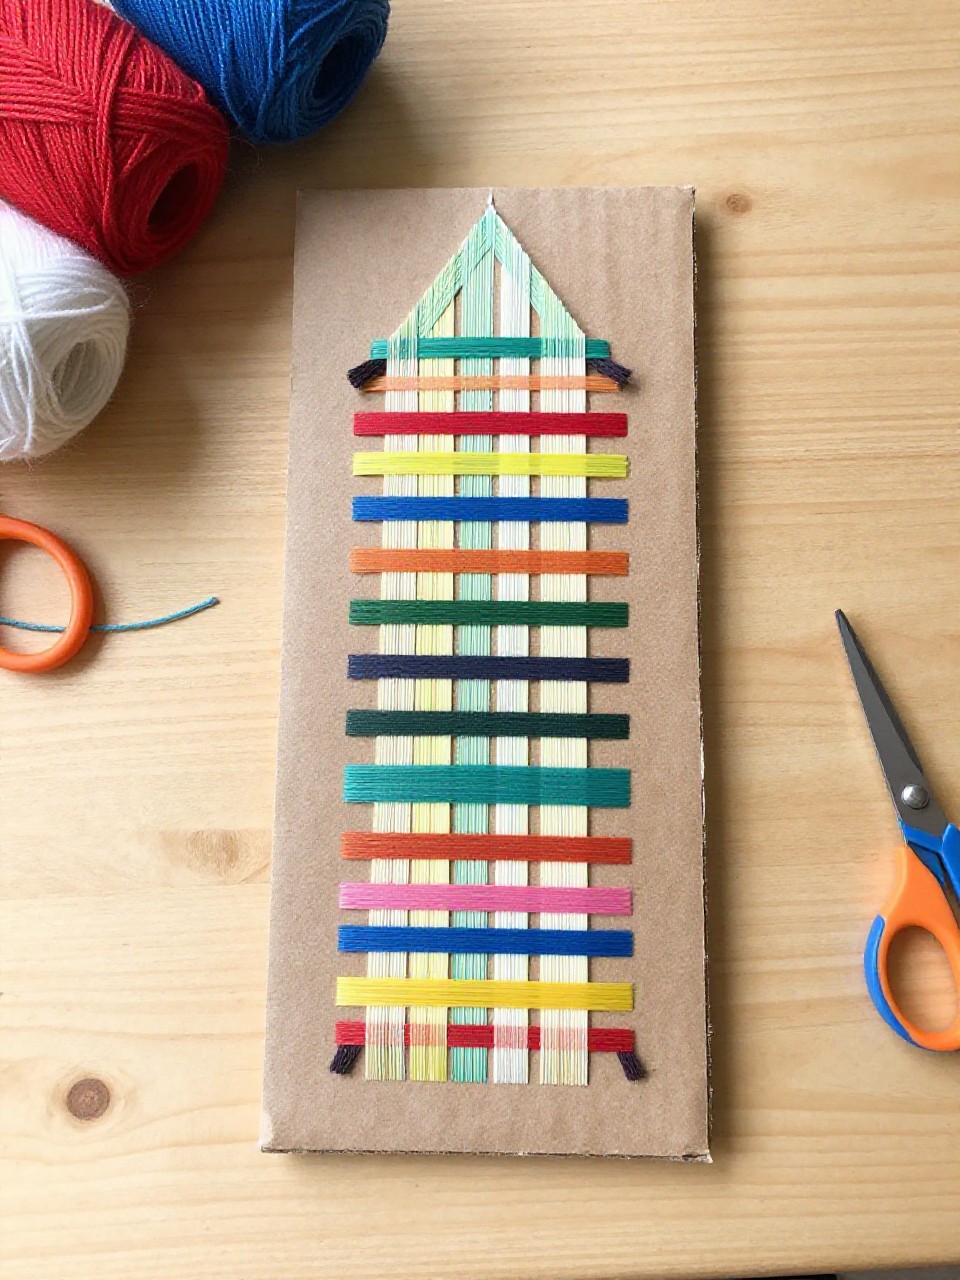
This activity makes a sturdy cardboard A with small slits for weaving yarn “arrows” across it. Kids enjoy the calming over-under motion and seeing patterns appear.
Materials Needed:
- Cardboard letter A
- Yarn in bright colors
- Scissors
- Tape for securing ends
- Stickers (optional)
How to make it:
- 1. Cut a large A from cardboard and snip small notches along both legs.
- 2. Tape one end of yarn to the back and weave across the A, catching yarn in the notches.
- 3. Change colors to create stripes or arrow patterns; add stickers.
- 4. Tuck and tape the final end on the back and display.
10. Aquarium A Sensory Bag
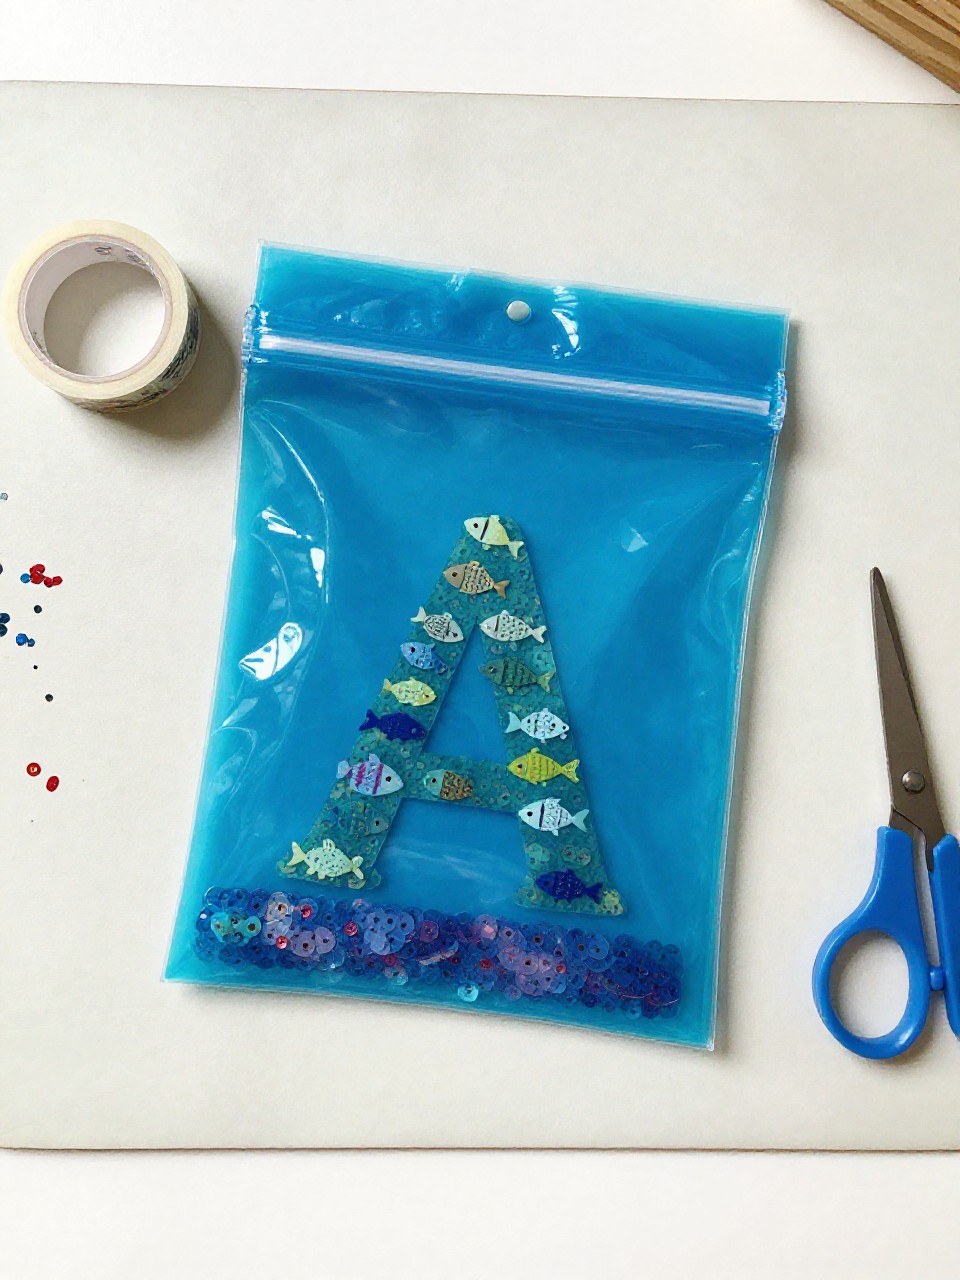
This sealed gel bag sits over a paper A and looks like a tiny aquarium with fish confetti. Kids love squishing the gel and moving the “fish” around the letter.
Materials Needed:
- Zip-top bag
- Clear hair gel or aloe gel
- Blue food coloring (1-2 drops)
- Fish confetti or sequins
- Paper with a large printed letter A
How to make it:
- 1. Print a big A and tape it to the table.
- 2. Fill the bag with gel, a drop of blue, and fish confetti; seal well and tape edges.
- 3. Place the bag over the A so kids can trace and push fish along the lines.
- 4. Supervise play and store flat when done.
11. Avocado A Paper Craft
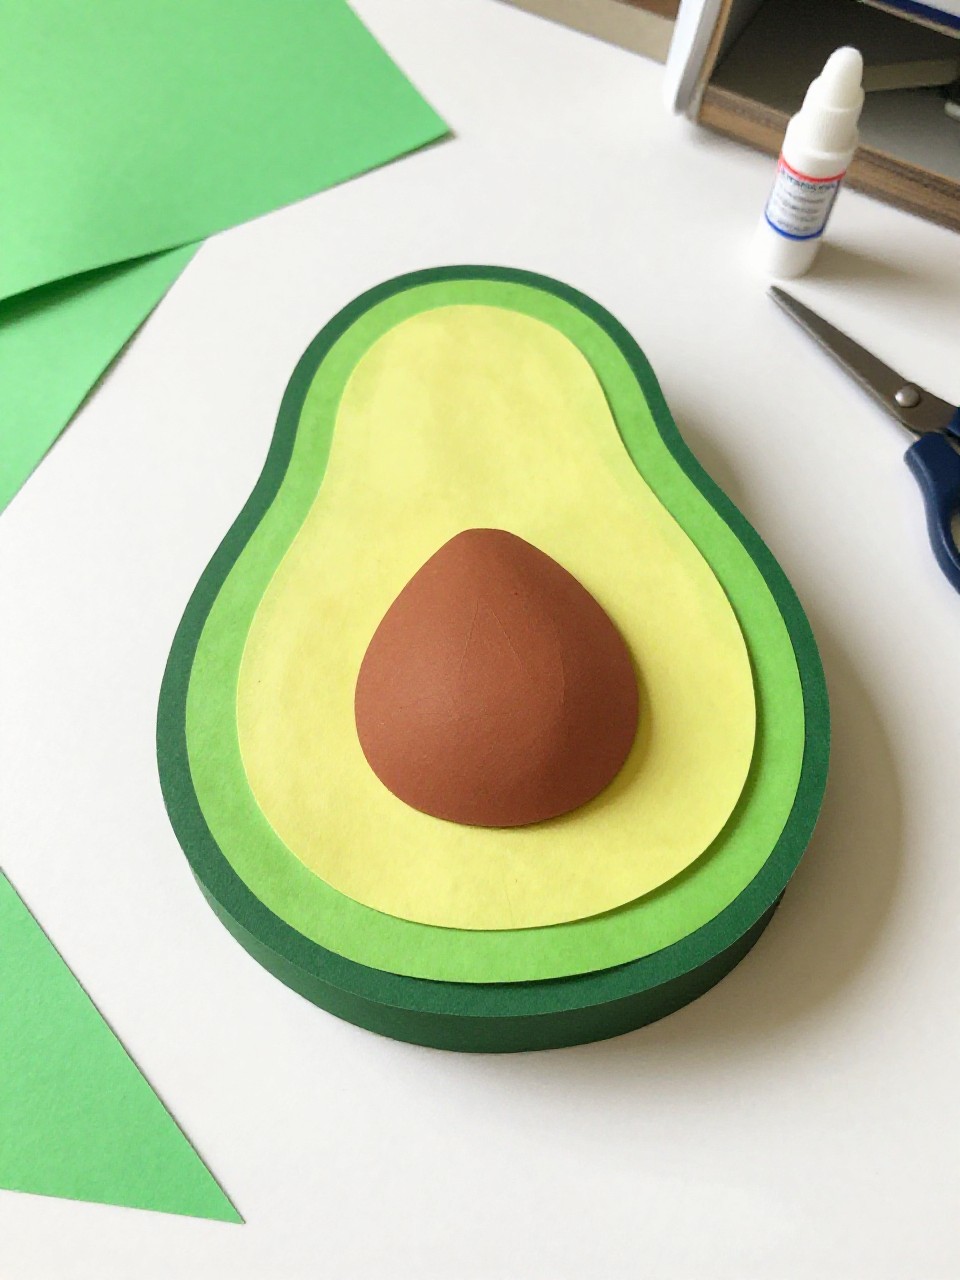
This cheerful avocado features a big letter A as the pit inside a green avocado shape. Kids enjoy building layers and adding a smiley face.
Materials Needed:
- Light and dark green construction paper
- Brown paper for the “A pit”
- Black marker
- Glue and scissors
- Googly eyes (optional)
How to make it:
- 1. Cut a large avocado outline from dark green and a smaller inner shape from light green.
- 2. Cut a bold brown letter A for the pit and glue it in the center.
- 3. Add eyes and a smile; glue all layers onto a background.
- 4. Smooth out edges and display your “A is for Avocado.”
12. Airplane Runway Letter A Track
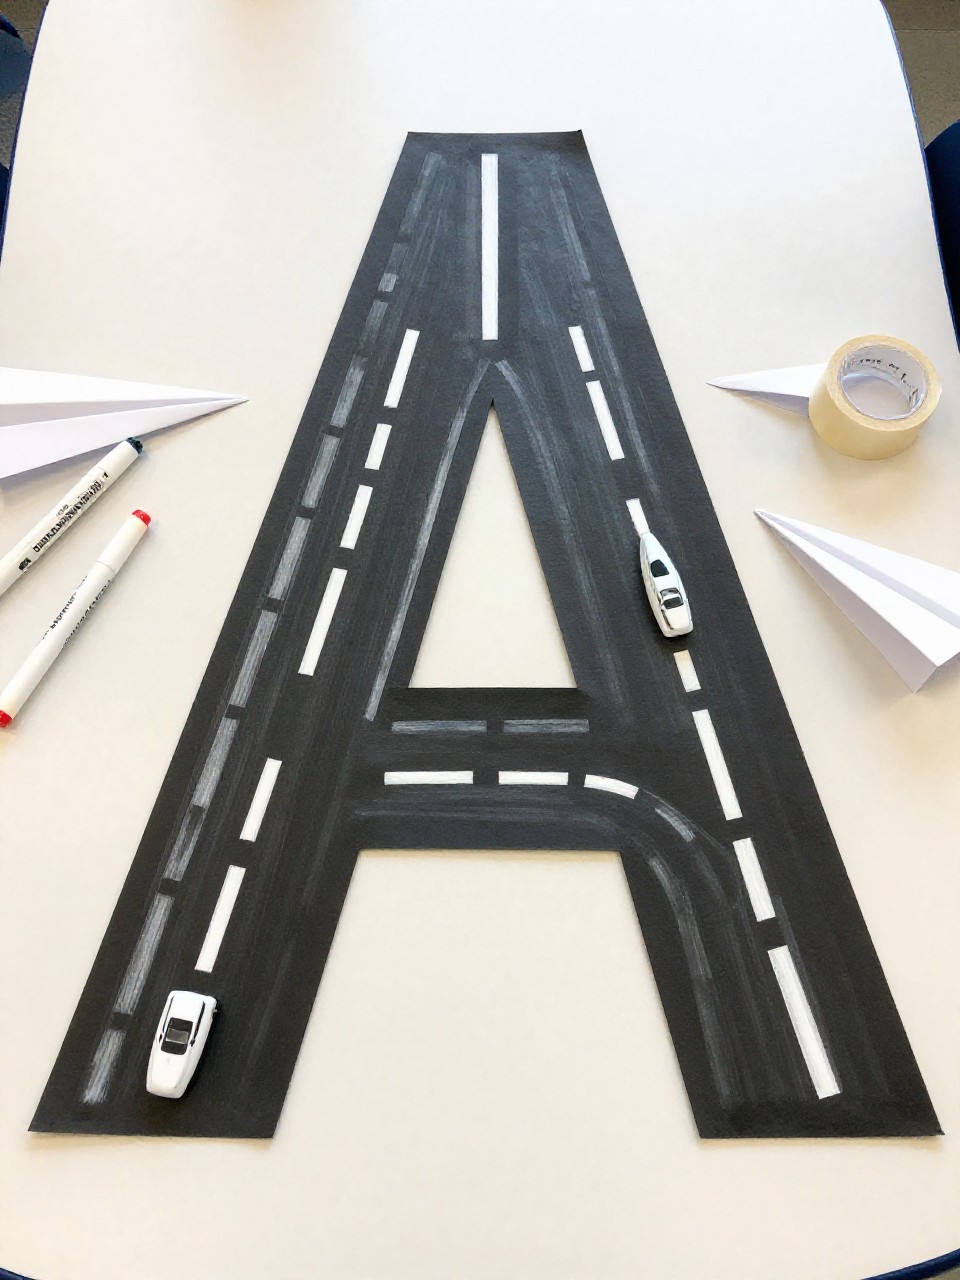
This play mat shows a capital A turned into a runway with dashed lines and tiny paper planes. Kids love driving toy planes along the letter and making whooshing sounds.
Materials Needed:
- Gray or black cardstock
- White paint pen or chalk marker
- Small paper airplanes or foam stickers
- Glue or tape
- Toy plane (optional)
How to make it:
- 1. Cut a large A from gray or black cardstock.
- 2. Draw runway dashes and centerline with a white paint pen.
- 3. Glue small paper planes or stickers around the runway.
- 4. Let dry and use a toy plane to taxi along the A.
13. Angel A Popsicle Stick Ornament
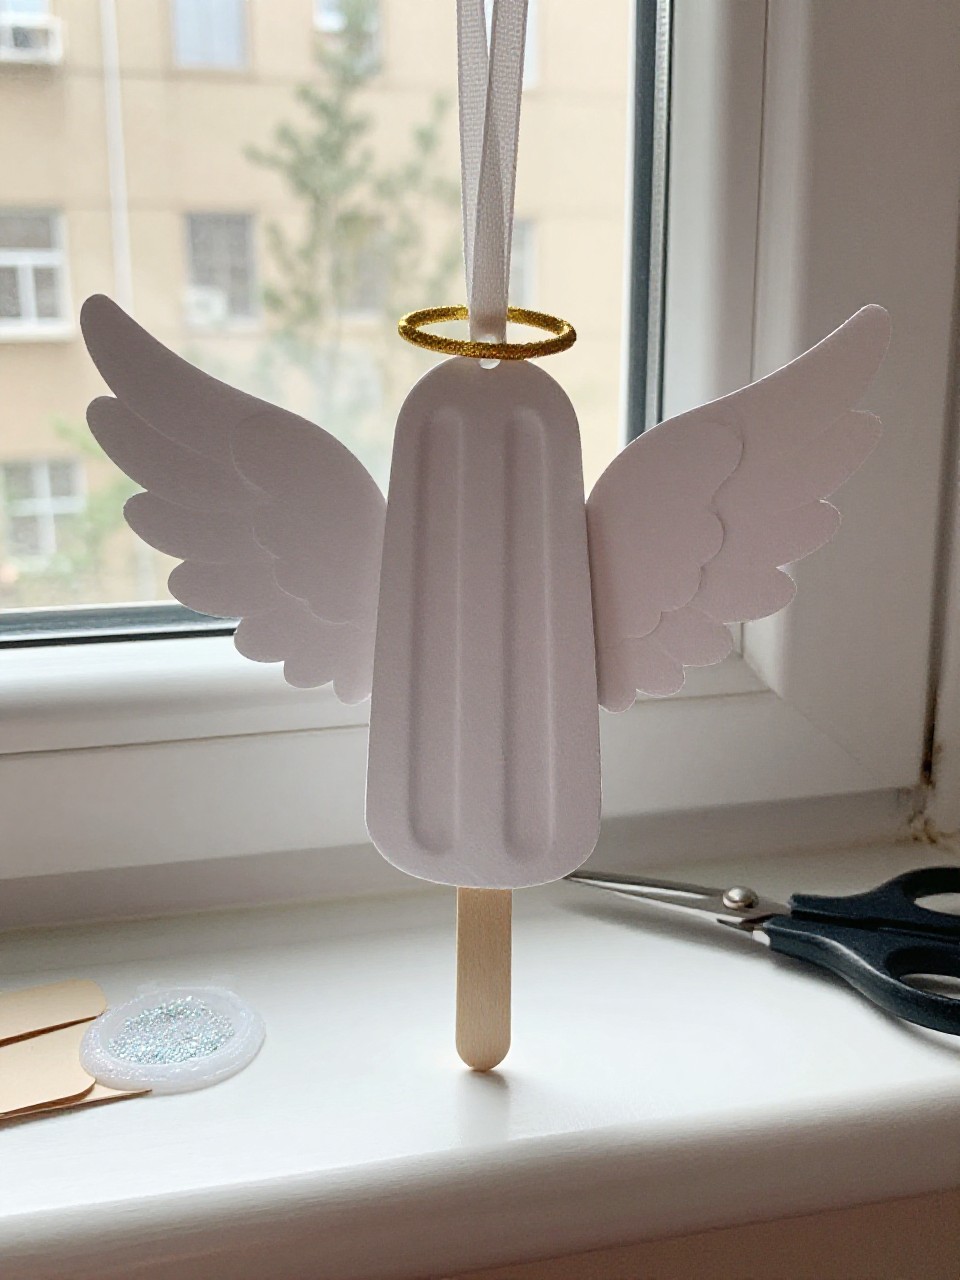
This ornament features a letter A body with popsicle stick wings and a tiny halo. Kids enjoy the gentle theme and adding glittery accents.
Materials Needed:
- Craft sticks
- Cardstock letter A
- Gold pipe cleaner (halo)
- White paint or glitter glue
- Ribbon for hanging
How to make it:
- 1. Paint craft sticks white and let dry.
- 2. Glue two sticks as wings behind the cardstock A.
- 3. Bend a pipe cleaner into a halo and attach at the top; add glitter details.
- 4. Tie a ribbon loop and hang your angel A.
14. Animal Print A Art
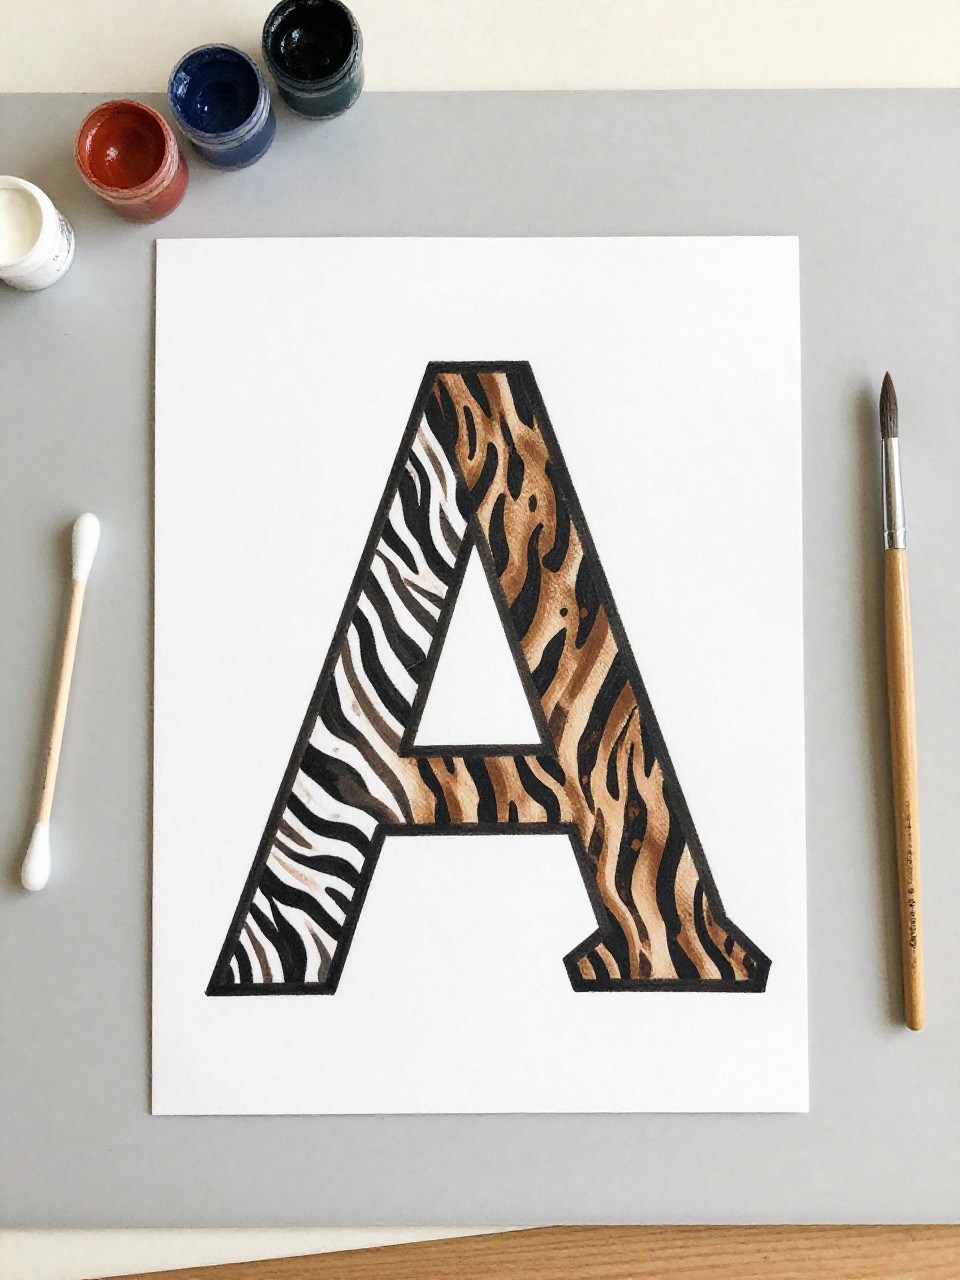
This poster shows a big A covered in bold animal prints like zebra stripes or cheetah spots. Kids love choosing their favorite animal and painting patterns.
Materials Needed:
- White cardstock with a large block letter A
- Washable paints or markers
- Paintbrushes or cotton swabs
- Scrap paper for testing patterns
- Apron or smock
How to make it:
- 1. Outline or print a big A on cardstock.
- 2. Pick an animal pattern and fill the A with stripes, spots, or patches.
- 3. Add a small label like “A is for Animal.”
- 4. Let dry and mount on colored paper.
15. Accordion Letter A Book

This mini book folds like an accordion and features the letter A on each panel with matching words and tiny drawings. Kids enjoy the flip-and-fold motion and making their own A-word pages.
Materials Needed:
- Long strip of cardstock
- Markers or crayons
- Stickers or small stamps
- Ruler (optional)
- Glue (optional for adding tabs)
How to make it:
- 1. Fold the cardstock strip back and forth to make 6–8 panels.
- 2. Write a big A on the cover and add A words (ant, apple, artist) on each page.
- 3. Draw or stamp small pictures to match each word.
- 4. Let dry, then read your A book and store on a shelf.