Table of Contents Show
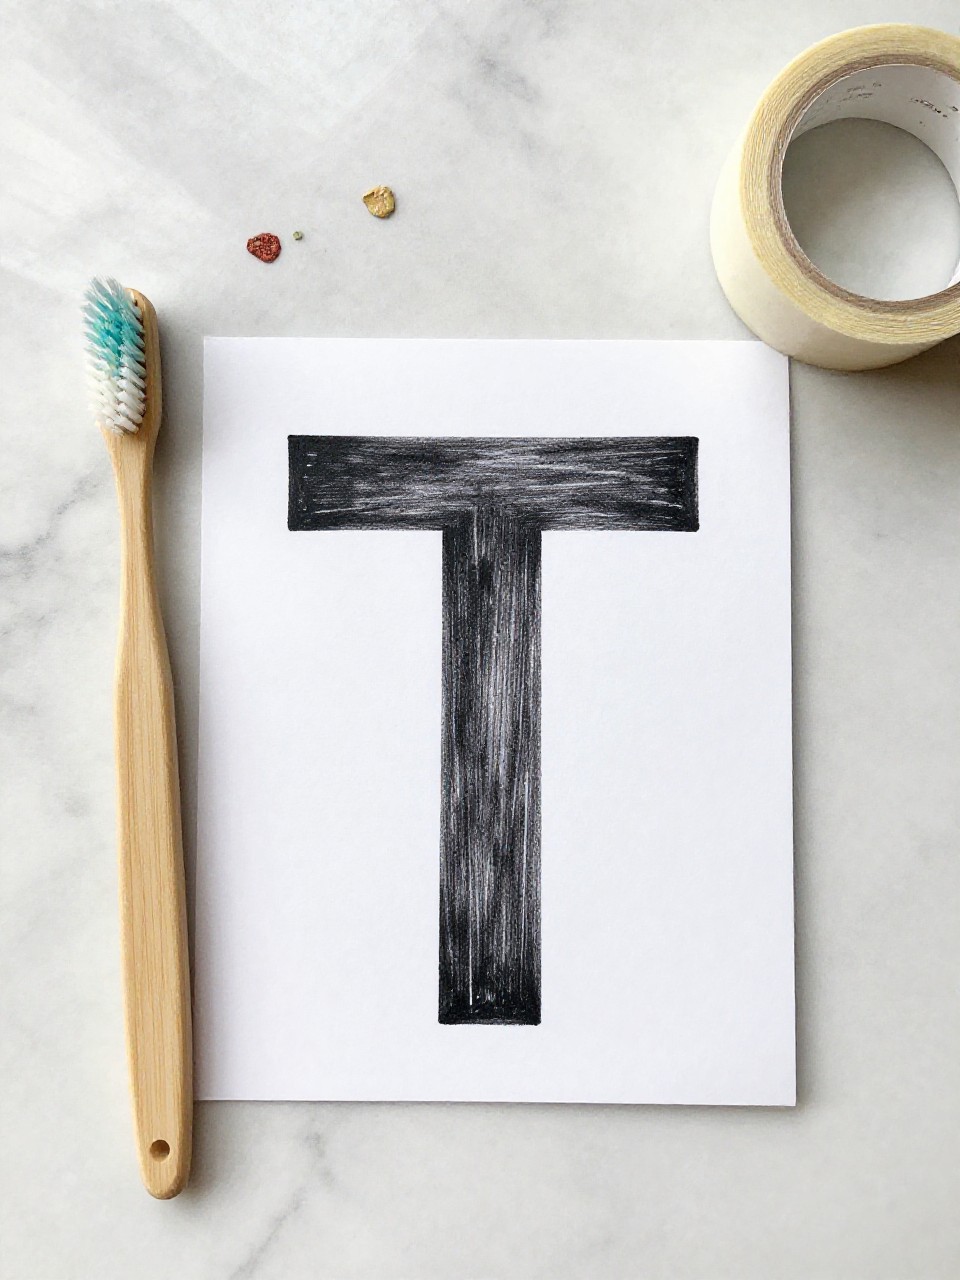
Keeping kids busy can be tough, especially when you want activities that are easy to set up and actually fun. If you’re teaching letters or just need a rainy-day project, these Letter T crafts are simple, colorful, and engaging.
Each one helps kids connect the shape and sound of T with something they can see and touch.
Ready for hands-on learning and less stress? Let’s jump into 15 fun Letter T crafts your little creators will love.
1. Big Block Letter T Collage
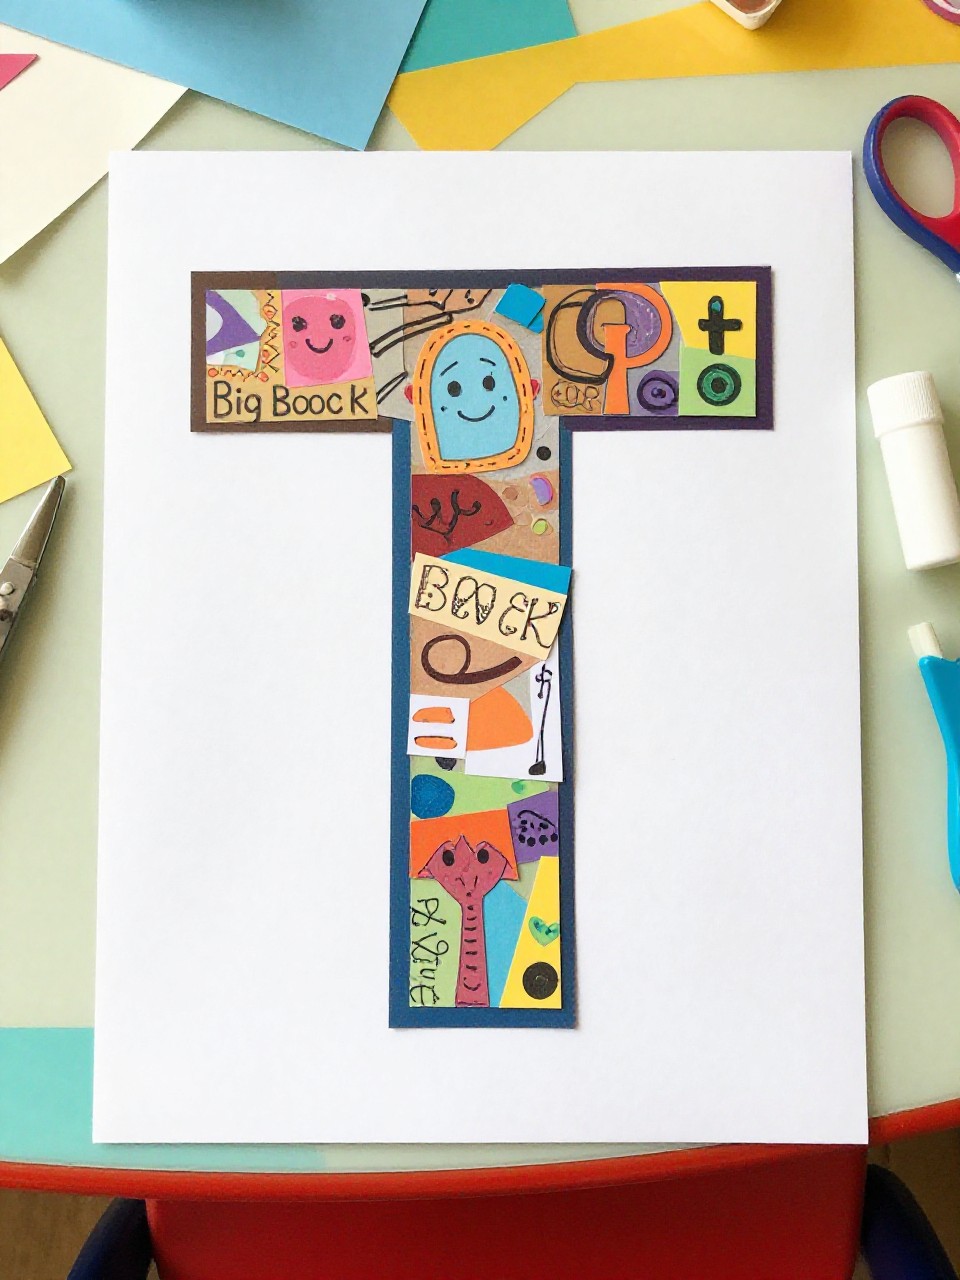
This craft makes a large, bold letter T filled with bright paper bits and textures. Kids love choosing colors and sticking pieces down, and it’s a great starter for learning the letter shape.
Materials Needed:
For People Who Love to Make Things ✂️
- Cardstock printed or drawn with a big block T
- Colorful paper scraps
- Glue stick
- Child-safe scissors
- Stickers (optional)
How to make it:
- 1. Print or draw a big block T on cardstock.
- 2. Cut small shapes from colorful paper.
- 3. Glue the paper pieces inside the T until it’s fully covered; add stickers if desired.
- 4. Let it dry and hang on the wall at kid eye level.
2. Textured T Rubbing Art
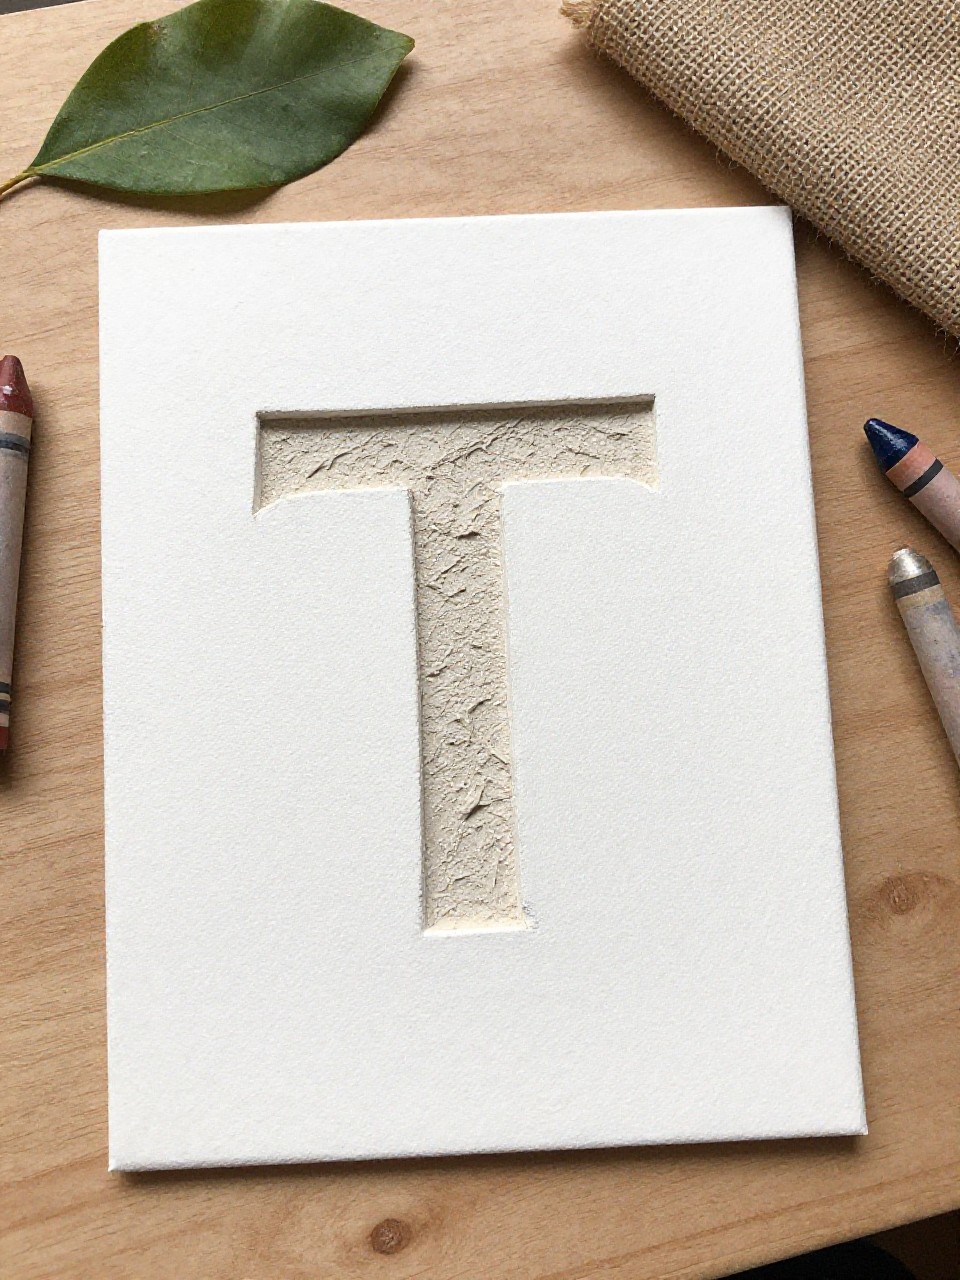
This project shows the letter T filled with textures from leaves, mesh, or fabric using crayon rubbings. Kids enjoy the surprise patterns that appear and the easy, sensory process.
Materials Needed:
- Copy paper with a large outlined T
- Leaves, burlap, lace, or textured objects
- Crayons (peeled)
- Tape
How to make it:
- 1. Place textured items on the table and tape the T paper on top.
- 2. Hold a crayon sideways and gently rub over the T outline.
- 3. Layer different textures and colors to fill the T.
- 4. Remove tape, smooth the paper, and display.
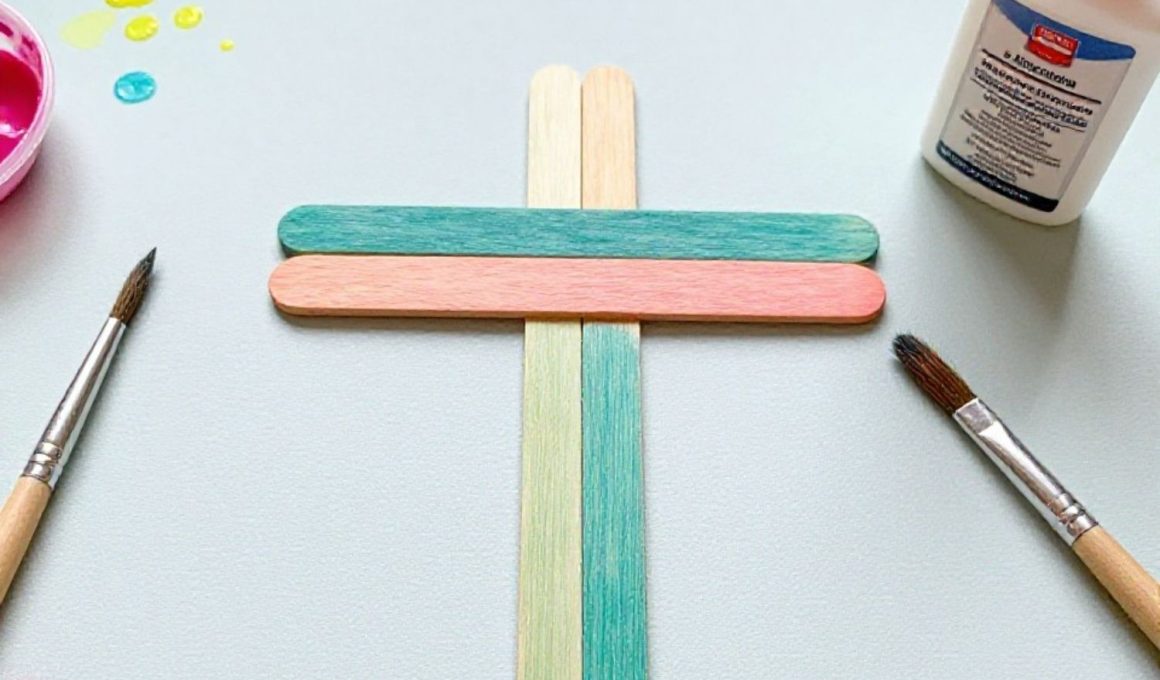
3. Popsicle Stick Tall T

This craft builds a sturdy uppercase T from wooden sticks, then kids paint and decorate it. The building step feels like mini engineering and is perfect for small hands.
Materials Needed:
- Jumbo popsicle sticks
- White glue
- Acrylic or tempera paint
- Sequins or buttons (optional)
How to make it:
- 1. Glue one stick upright and one across the top to form a T; let set.
- 2. Add a second layer of sticks for strength if desired.
- 3. Paint the T and decorate with sequins or buttons.
- 4. Dry fully and stand it against a book for display.
4. Tissue Paper Torn-T T
A fluffy, colorful T made by scrunching tissue paper into tiny “pom-poms.” Kids love the squish-and-stick motion and the 3D look.
Materials Needed:
- Cardstock with a big block T
- Tissue paper squares (assorted colors)
- Glue stick or school glue
- Pencil (optional for wrapping)
How to make it:
- 1. Outline a big T on cardstock.
- 2. Scrunch tissue paper squares (wrap on pencil tip if helpful).
- 3. Glue the scrunched pieces tightly inside the T.
- 4. Let dry and gently shake off any loose bits.
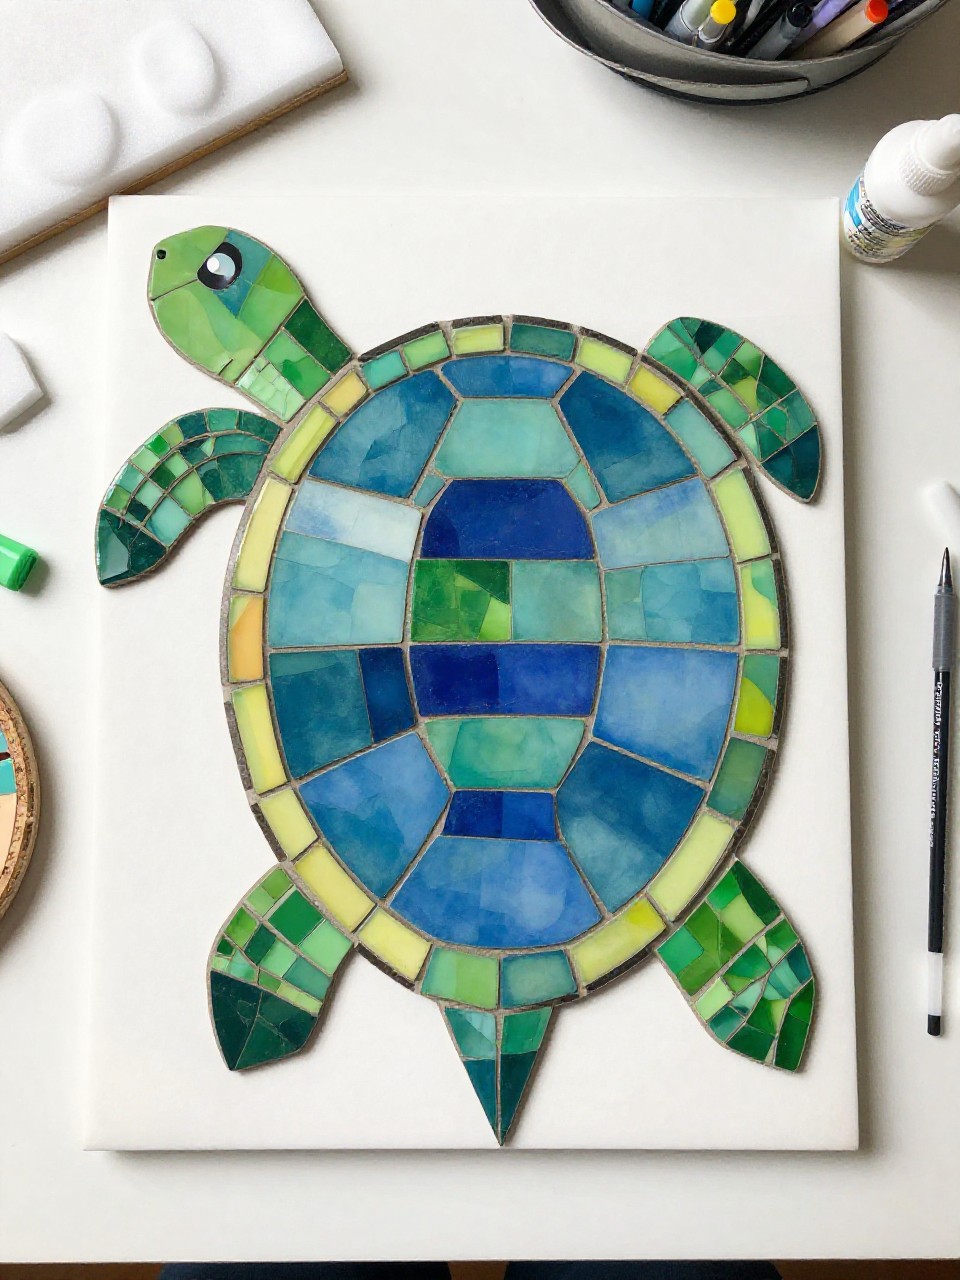
5. Turtle T Handprint Art
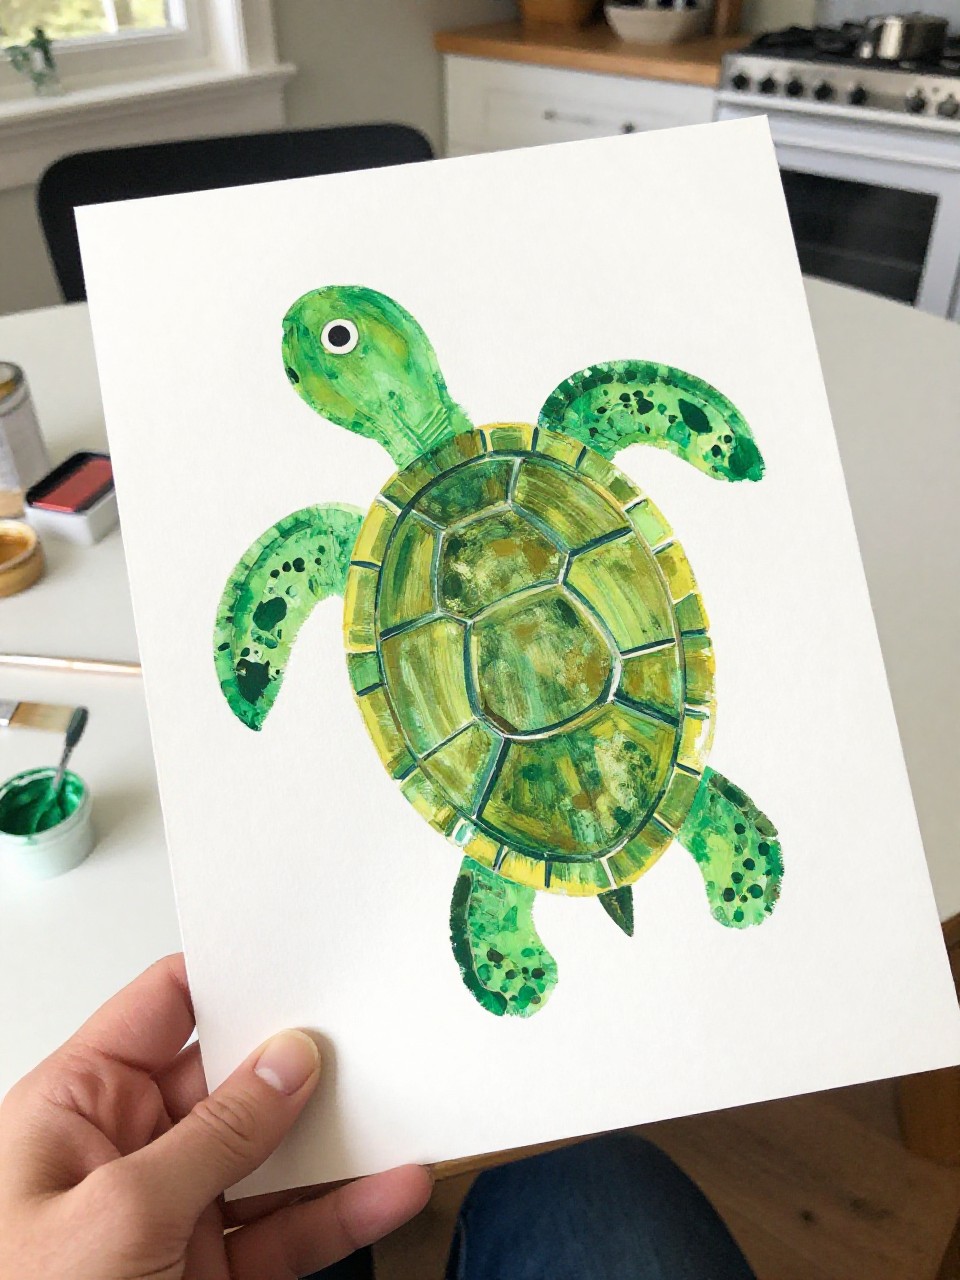
A green letter T turns into a friendly turtle, with a handprint shell. Kids enjoy seeing their handprint become part of the design.
Materials Needed:
- White paper or cardstock
- Green paint and brush
- Black marker
- Googly eyes (optional)
How to make it:
- 1. Paint a big green T on the paper.
- 2. Paint one hand green and press a handprint beside the T’s upright to form the shell.
- 3. Add head, legs, and tail around the T; draw patterns and stick on eyes.
- 4. Let it dry and label “T is for Turtle.”
6. Tractor T Paper Plate Scene
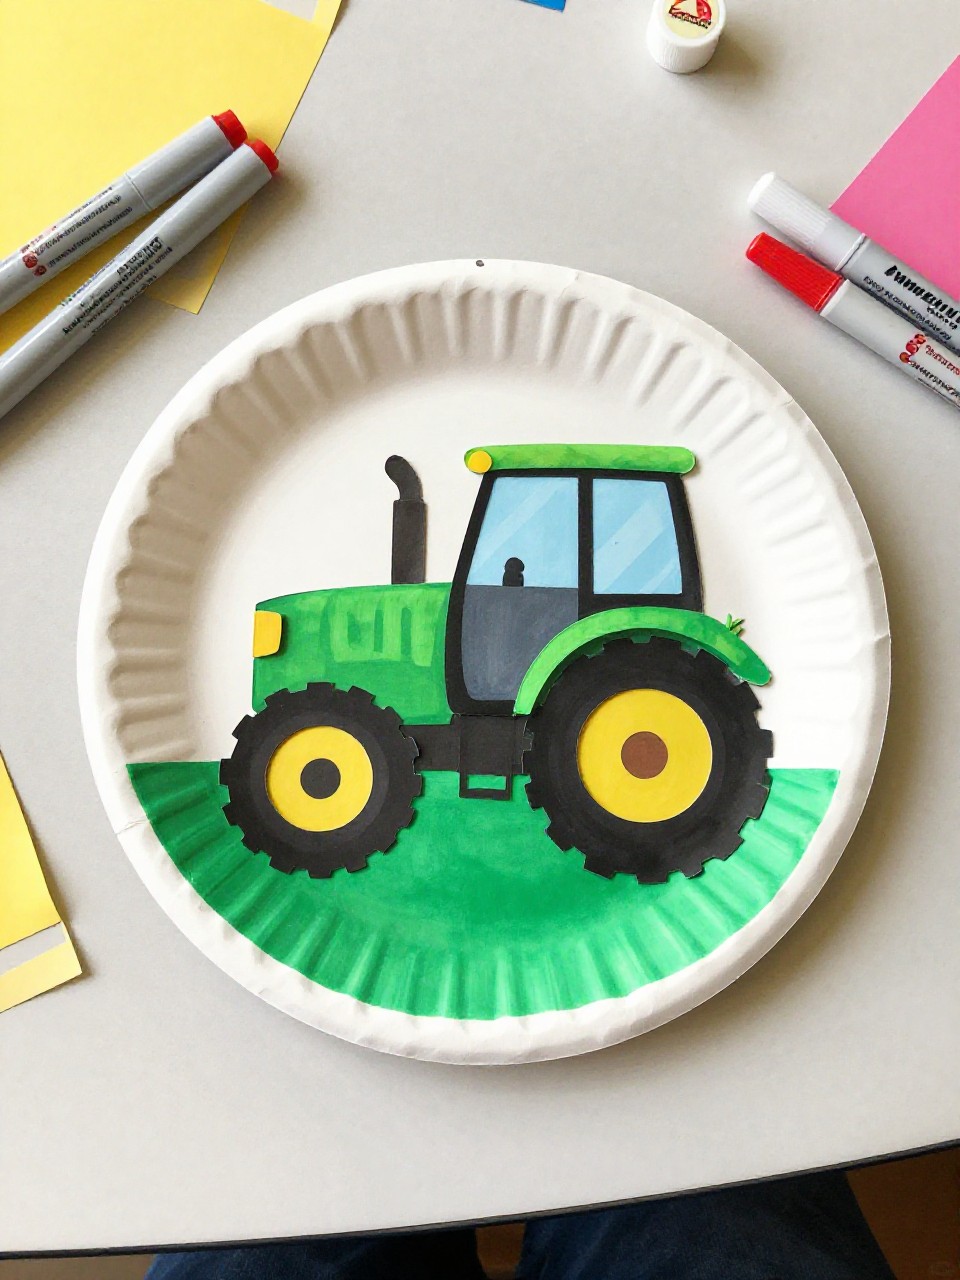
A bold T becomes a tractor body in a simple paper plate farm scene with wheels and a field. Kids love moving the plate and pointing out the tractor parts.
Materials Needed:
- Paper plate
- Green or yellow paper for a big T
- Black paper circles (wheels)
- Glue stick, markers
- Cotton ball clouds (optional)
How to make it:
- 1. Color the plate like a field and sky.
- 2. Cut and glue a big T as the tractor body across the plate.
- 3. Add wheels, window, and details with markers; stick cotton clouds.
- 4. Let dry and display on a stand or wall.
7. Tiger Stripe T
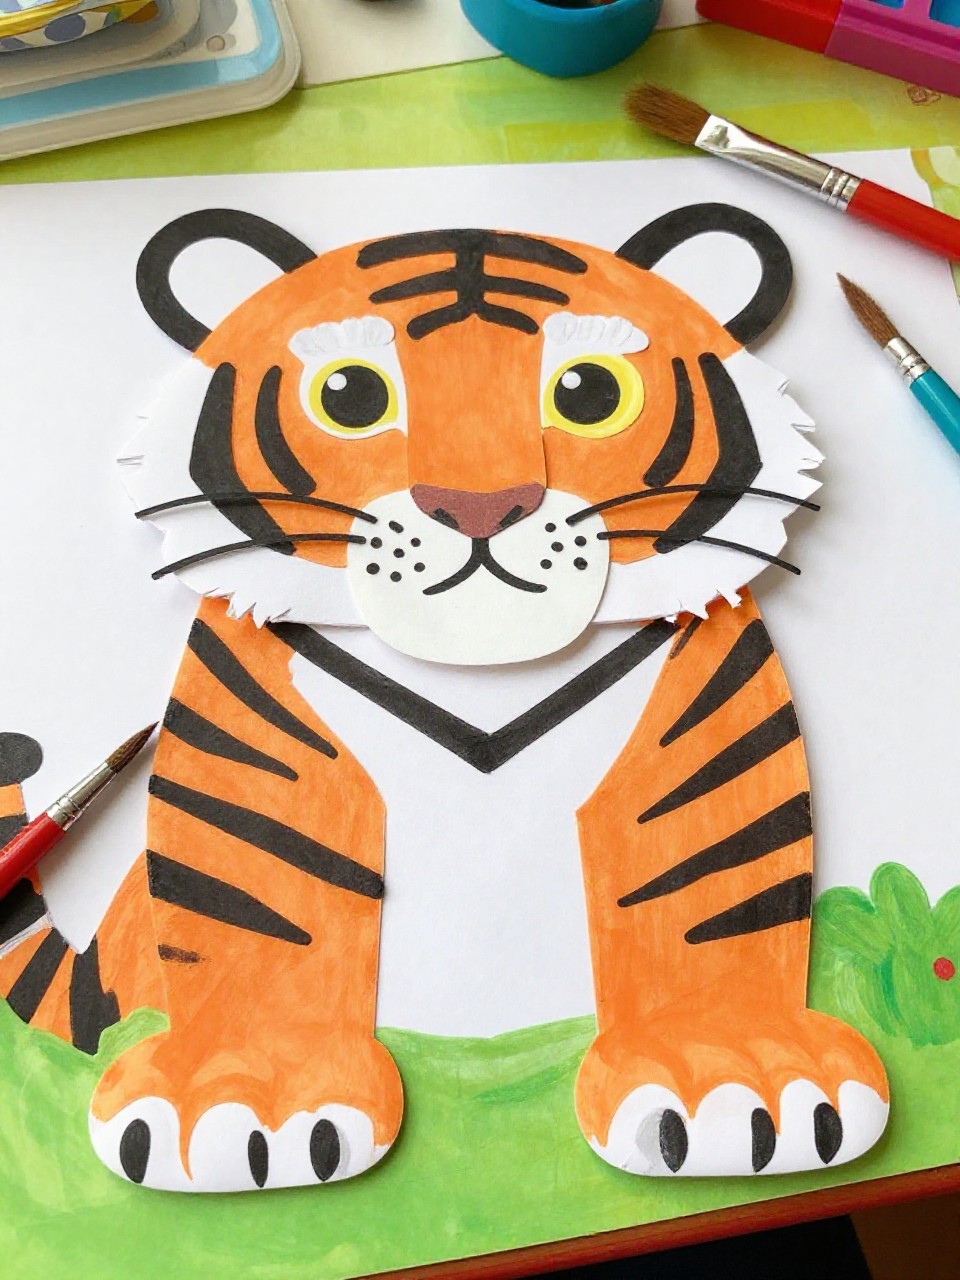
This craft turns a T into a tiger with orange paint and black stripes. Kids enjoy bold painting and adding a cute face.
Materials Needed:
- Cardstock with a large T
- Orange paint, black marker or paint
- Googly eyes
- Small pink paper for nose (optional)
How to make it:
- 1. Paint the big T orange and let it set a few minutes.
- 2. Add black stripes across and along the T.
- 3. Glue eyes and add ears, whiskers, and a nose around the top bar.
- 4. Dry fully and hang up with a clip.
8. Toothbrush-Print T
A playful letter T made with toothbrush paint stamping for a dotted, textured look. Kids love using a “new tool” and making speckled patterns.
Materials Needed:
- White paper with a taped-off T (masking tape)
- Washable paint
- New, clean toothbrush
- Paper plate palette
How to make it:
- 1. Tape a big T shape onto the paper.
- 2. Dip the toothbrush lightly in paint and dab around the taped T.
- 3. Use two or three colors for a confetti effect.
- 4. Peel the tape to reveal a crisp white T; dry flat.
9. Tiny Town T Diorama
A shoebox scene where a giant letter T stands like a town tower with tiny houses around it. Kids enjoy arranging mini details and storytelling.
Materials Needed:
- Small box or shoebox lid
- Cardboard letter T (cut from cereal box)
- Colored paper for houses
- Glue, markers
- Cotton or felt for greenery (optional)
How to make it:
- 1. Cover the box base with green or blue paper for ground/sky.
- 2. Cut and stand a cardboard T upright; glue or tape to secure.
- 3. Make mini houses and trees from paper; add doors, windows, and paths.
- 4. Let dry and use for pretend play.
10. Tulip-T Card
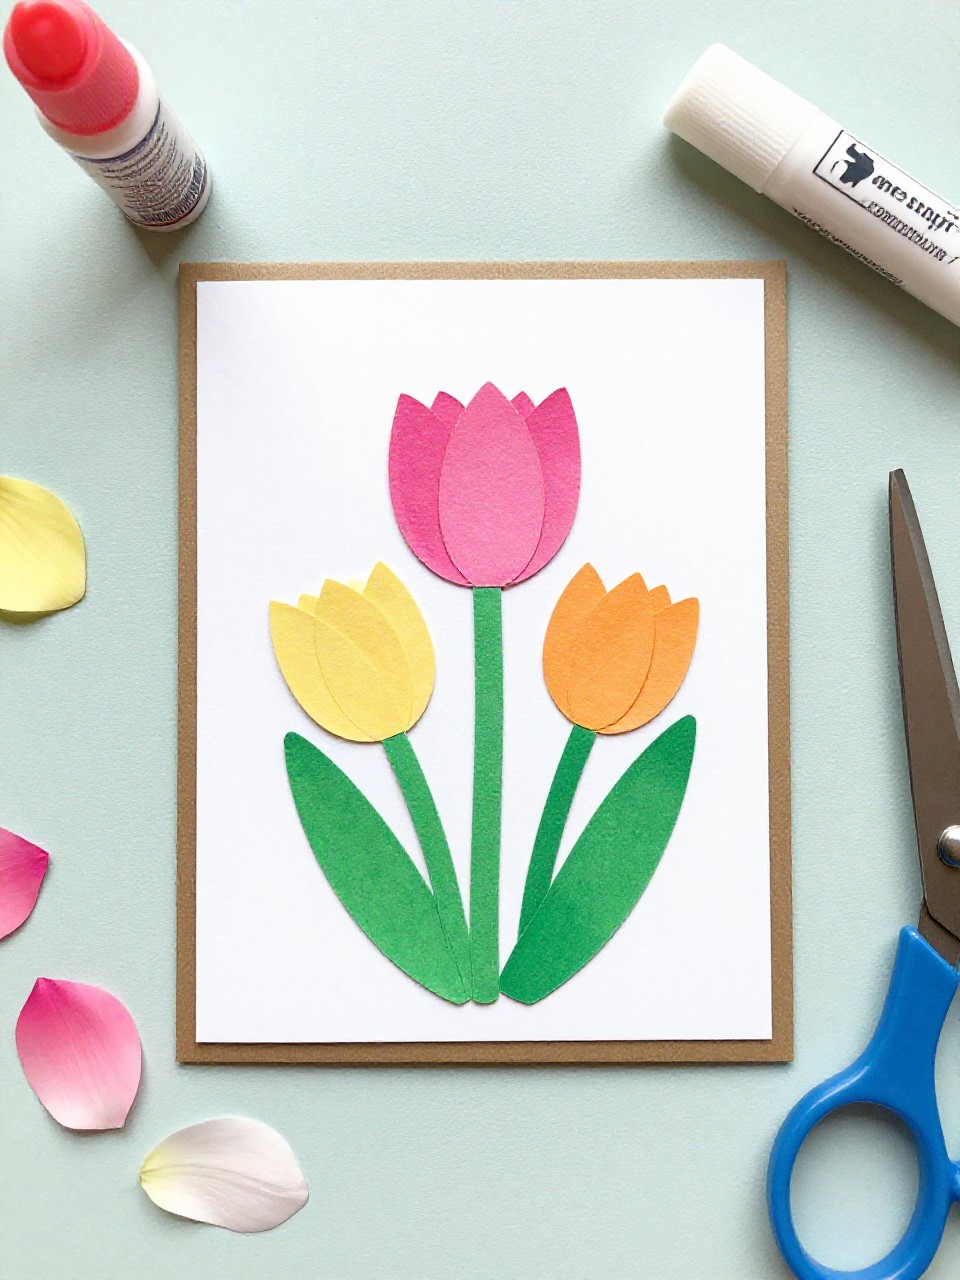
A sweet spring card where the T stem holds bright paper tulips on top. Kids love gifting it to family or teachers.
Materials Needed:
- Folded cardstock
- Green paper T (as the stem and crossbar)
- Colored paper tulip shapes
- Glue stick
- Markers
How to make it:
- 1. Fold cardstock into a card.
- 2. Glue a green T on the front as the stem and support.
- 3. Add tulip petals along the top bar; draw leaves and a message.
- 4. Press flat to set and gift it.
11. Turtle Shell T Mosaic
A chunky mosaic T filled with “shell” tiles made from cut cardboard or foam. Kids enjoy arranging the pieces like a puzzle.
Materials Needed:
- Cardstock with a large T
- Cardboard or craft foam squares
- Green and brown paint or markers
- Glue
How to make it:
- 1. Cut small square/hexagon “tiles.”
- 2. Color tiles in greens and browns.
- 3. Glue tiles edge-to-edge inside the T to mimic a turtle shell.
- 4. Dry and mount on colored paper.
12. Train Track T
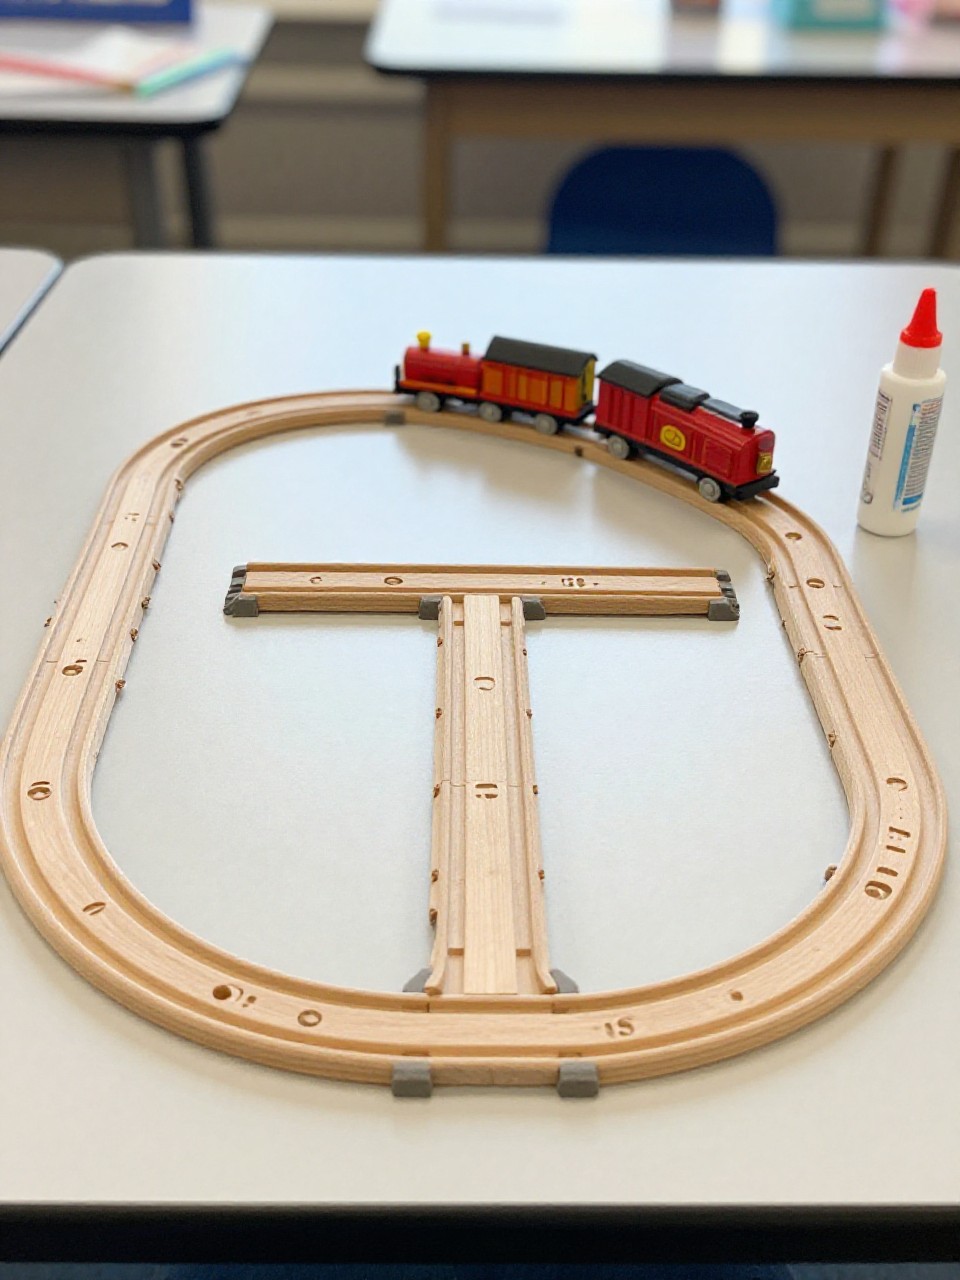
A bold letter T becomes a train track with wooden stick rails and marker ties. Kids love “chugging” a toy engine over their letter.
Materials Needed:
- Cardstock with a large T
- Thin craft sticks or strips of black paper
- Markers
- Toy train (optional)
How to make it:
- 1. Draw a thick T on cardstock.
- 2. Glue parallel sticks along the T to form rails.
- 3. Add short cross ties with marker; decorate signs or a tiny station.
- 4. Let dry and roll a toy train along the track.
13. Toucan T Paper Puppet
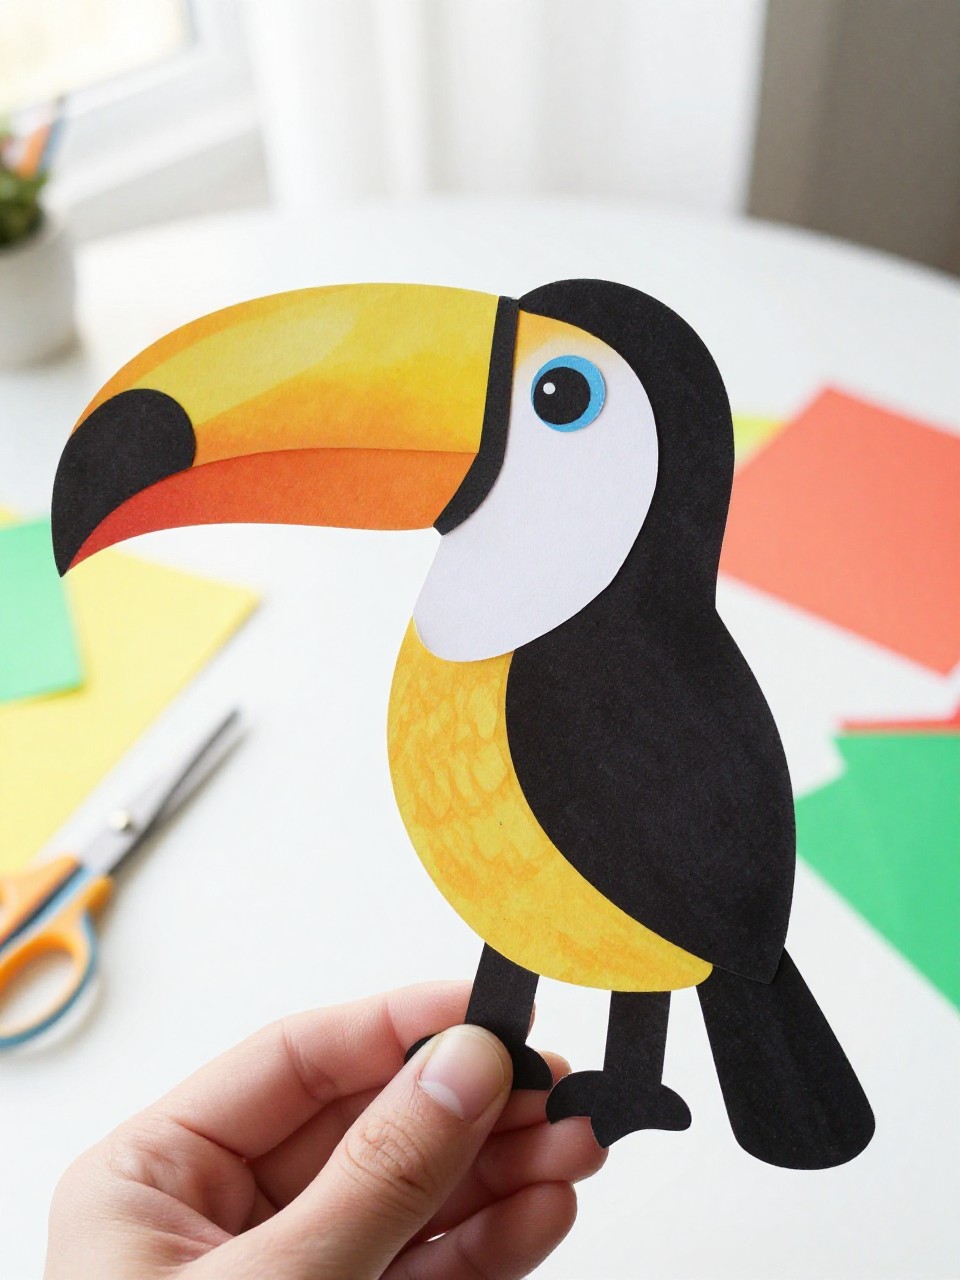
This puppet turns a T into a bright toucan with a big beak that opens. Kids enjoy making it “talk” while practicing the T sound.
Materials Needed:
- Construction paper (black, yellow, orange)
- Craft stick
- Googly eye
- Glue, markers
How to make it:
- 1. Cut a sturdy T from black paper.
- 2. Cut and glue a curved beak to the side of the top bar; add a yellow chest and eye.
- 3. Decorate with bright wing and tail shapes.
- 4. Glue a craft stick to the back as a handle and let dry.
14. Teapot T Watercolor Resist

A letter T becomes a cute teapot silhouette using crayon resist and watercolor wash. Kids love seeing the T stay bright while colors flow around it.
Materials Needed:
- Watercolor paper
- White crayon
- Watercolors and brush
- Pencil for light sketching
How to make it:
- 1. Lightly sketch a large T and simple spout/handle lines to suggest a teapot.
- 2. Trace the T and teapot edges with heavy white crayon.
- 3. Brush watercolor over the page; the crayon resists the paint.
- 4. Let dry flat and outline details if desired.
15. Tooth Fairy T Door Hanger
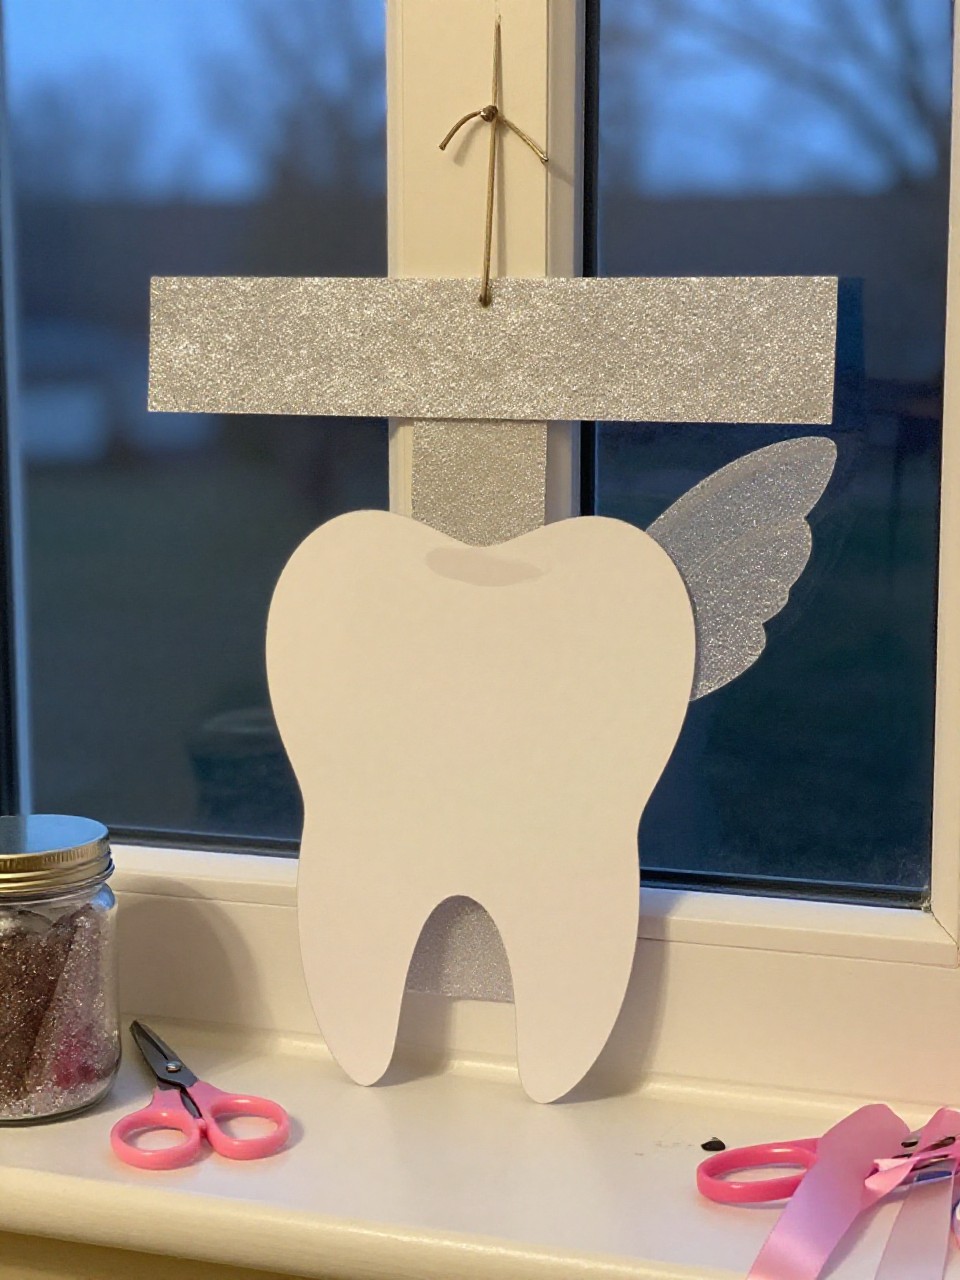
A sparkly T becomes a little door hanger pocket for the Tooth Fairy. Kids enjoy decorating it with stars and tucking in a tiny note.
Materials Needed:
- Foam sheet or sturdy felt
- Ribbon or yarn
- Glitter stickers or star sequins
- Glue
- Small paper for pocket
How to make it:
- 1. Cut a large T from foam or felt and a small rectangle for a pocket.
- 2. Glue the pocket to the lower bar, leaving the top open.
- 3. Add ribbon to the top for hanging and decorate with stars and glitter.
- 4. Let dry and hang on the bedroom doorknob.