


Table of Contents Show
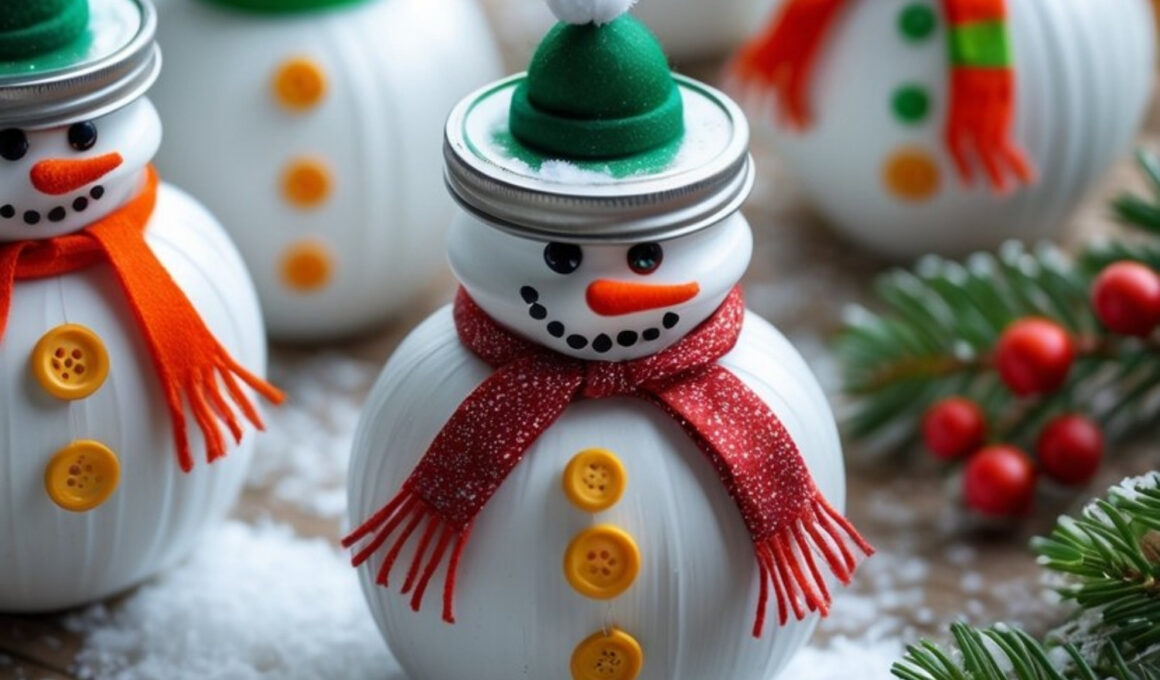
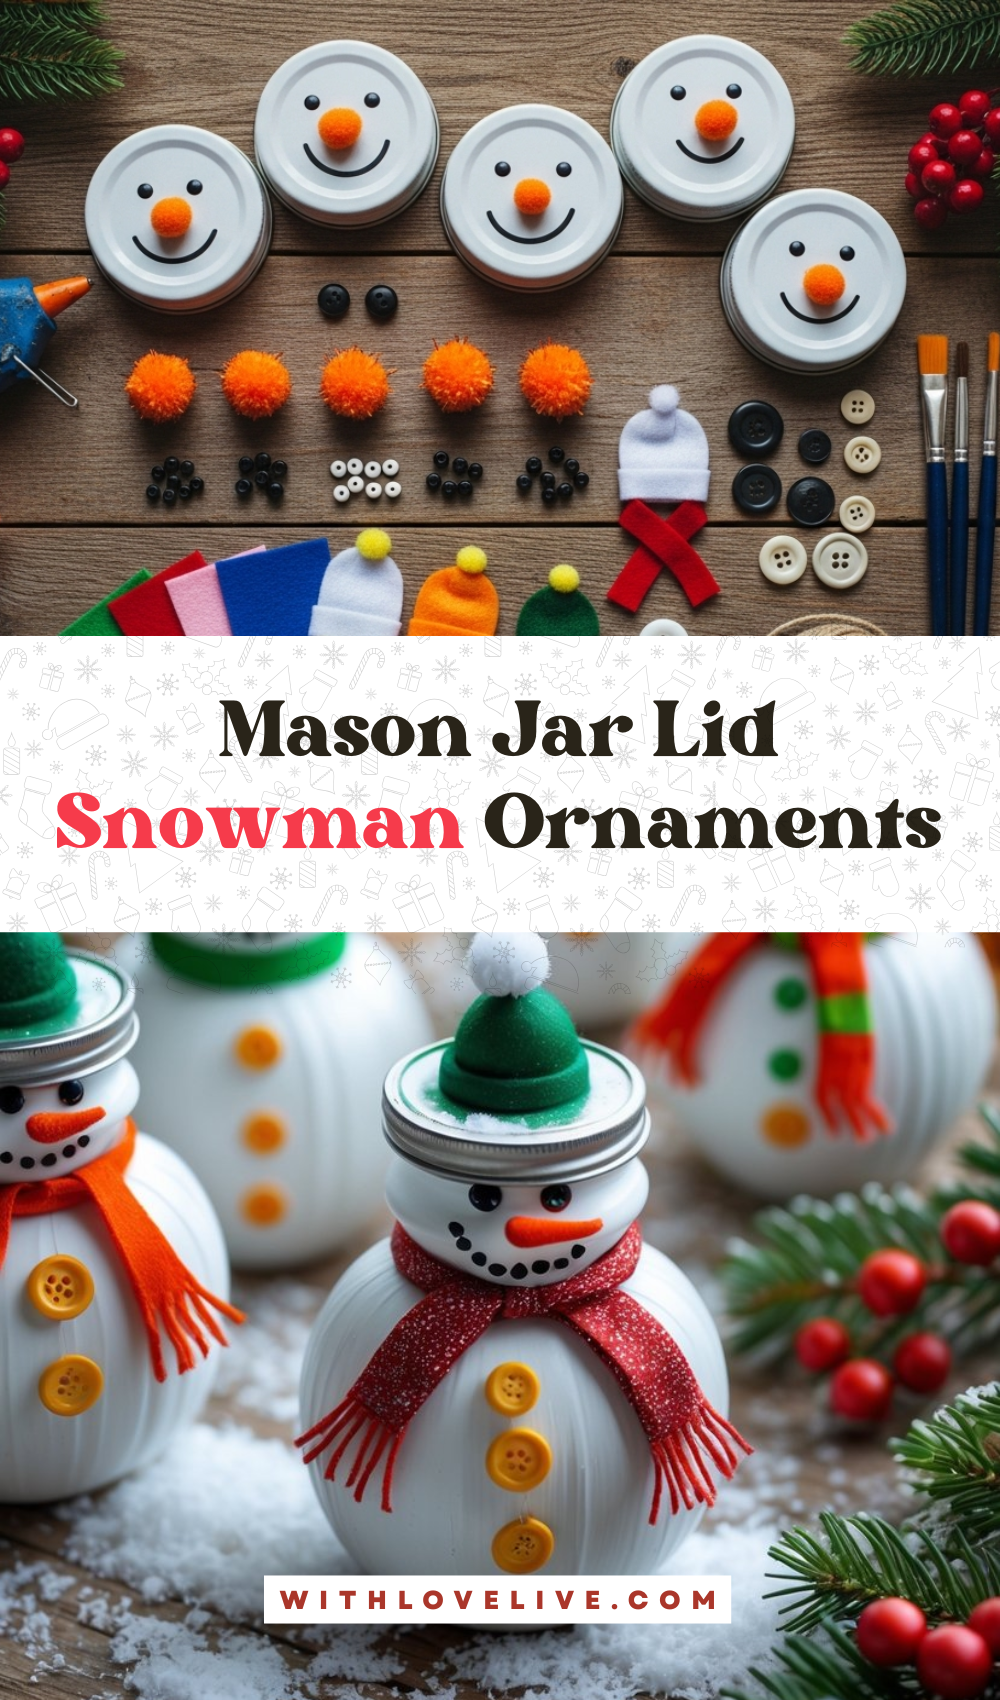
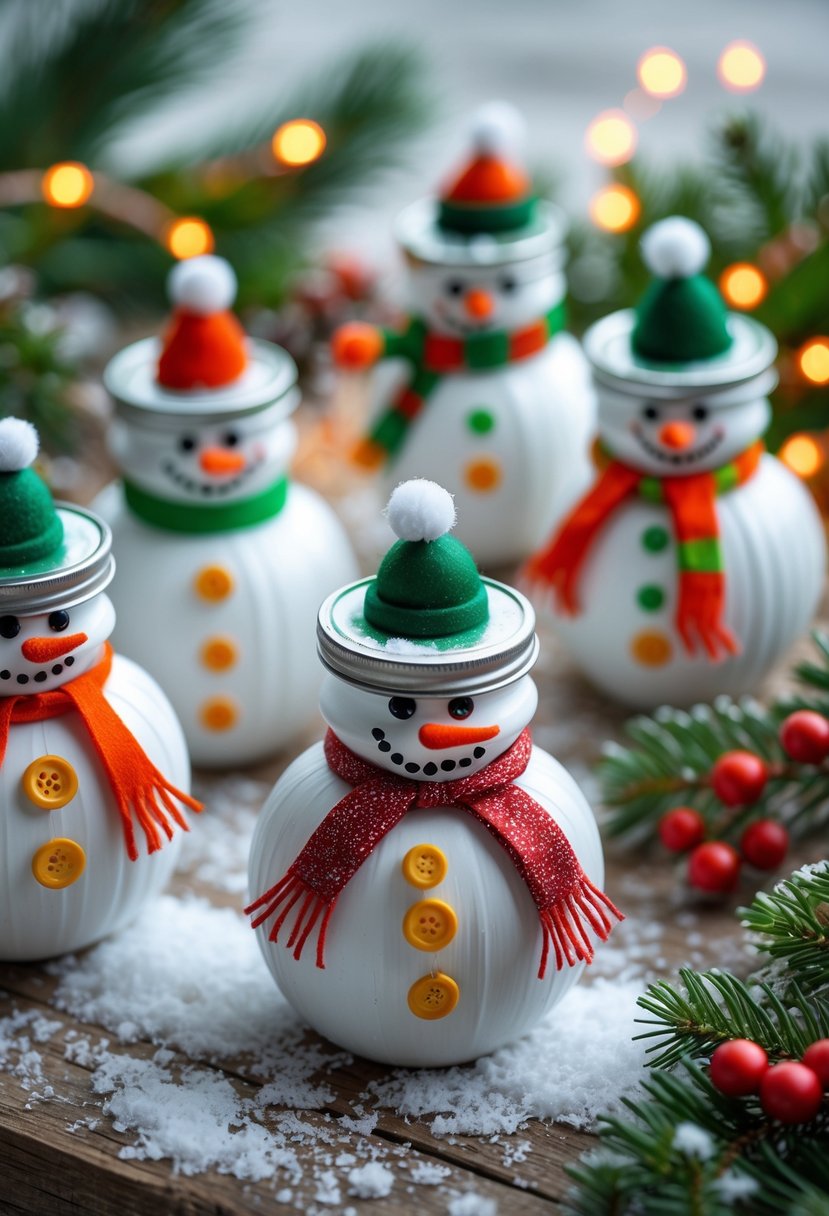
These Mason Jar Lid Snowman Ornaments are the kind of holiday craft that bring instant smiles — simple, festive, and full of personality. Each snowman is made from mason jar lids, turning an everyday household item into a charming Christmas decoration.
With their button details, cozy scarves, and cheerful faces, they’re perfect for hanging on your tree, giving as handmade gifts, or even displaying as part of a winter table centerpiece.
This craft is easy enough for beginners but creative enough to look like something you’d find in a holiday boutique.
How to Make Mason Jar Lid Snowman Ornaments
You can personalize each snowman with different hat colors, scarf patterns, and button designs to make every one unique.
For People Who Love to Make Things ✂️
Materials
- White acrylic paint or spray paint
- Paintbrush or foam brush
- Small black beads or paint for eyes and mouth
- Tiny orange pom-poms or polymer clay (for the nose)
- Fabric scraps, felt, or ribbon (for scarves and hats)
- Buttons (for snowman’s body)
- Hot glue gun and glue sticks
- String or twine (for hanging)
- Optional: glitter, faux snow, or sequins for extra sparkle
Shop the materials


The steps

Step 1: Paint the Lids
Begin by painting the mason jar lids white. You can either brush on white acrylic paint or use white spray paint for a smoother finish. Allow the lids to dry completely before moving on to the next step.
If you want a textured, snow-dusted look, lightly dab on some white glitter or iridescent paint while it’s still wet.
Tip: Painting the inside rims of the lids too will give your snowmen a more polished, 3D look.
Step 2: Create the Snowman’s Face
Once dry, use a fine brush or marker to paint two small black dots for the eyes and a dotted smile. For the nose, glue on a tiny orange pom-pom or shape a small carrot nose out of orange clay or felt.
Creative Idea: Vary your snowmen’s expressions — some smiling, some winking — to add a touch of whimsy to your collection.
Step 3: Add the Body and Buttons
If you’re stacking two lids for a full snowman body, glue them together vertically — one for the head, one for the body. Add colorful buttons down the front for decoration. For a single-lid version, you can skip this step and focus on decorating the face.
Pro Tip: Layer different sizes of lids (regular and wide) for a dimensional, tiered look.
Step 4: Dress Up Your Snowman
Cut small strips of fabric, ribbon, or felt to make scarves. Wrap them gently around the “neck” area and secure with a dab of hot glue. For hats, use tiny pom-poms and felt — simply roll a small piece of felt into a cone, glue it in place, and top with a pom-pom.
Optional: Add glitter or faux snow to the edges of the hat and scarf for a frosty, festive touch.
Step 5: Attach the Hanger
Glue a small loop of twine or ribbon to the back of the snowman so it can hang easily on your tree or wall. For tabletop decorations, skip the loop and display them upright on a mantel or tray surrounded by pine branches.
Alternate Use: Fill the jar lid’s inside with tiny decorations or snowflakes before sealing it — like a mini snow globe!
Step 6: Display and Enjoy
Your snowmen are now ready to bring cheer to your holiday decor. Arrange them in groups for a charming family of snowmen, or gift them individually as handmade keepsakes. They’re guaranteed to make anyone smile — and no two will ever look the same!