


Table of Contents Show
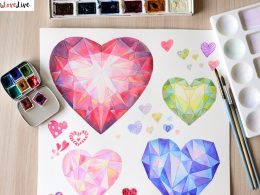
Summer is one of the easiest seasons to make art feel fun. Kids are already drawn to bright colors, outdoor themes, fruit, flowers, beaches, bugs, sunshine, and all the little things that make the season feel playful. A good summer art project should give them room to paint, stamp, mix, splash, glue, and explore without needing everything to look perfect.
These colorful summer art projects are made for home, camp, daycare, classrooms, and long afternoons when kids need something hands-on. They are simple enough to set up, but still creative enough to feel special when finished.
From salt-painted seashells to watercolor popsicles and bubble art fish, each idea gives kids a fun way to make something bright and worth displaying.
1. Watercolor Popsicle Art
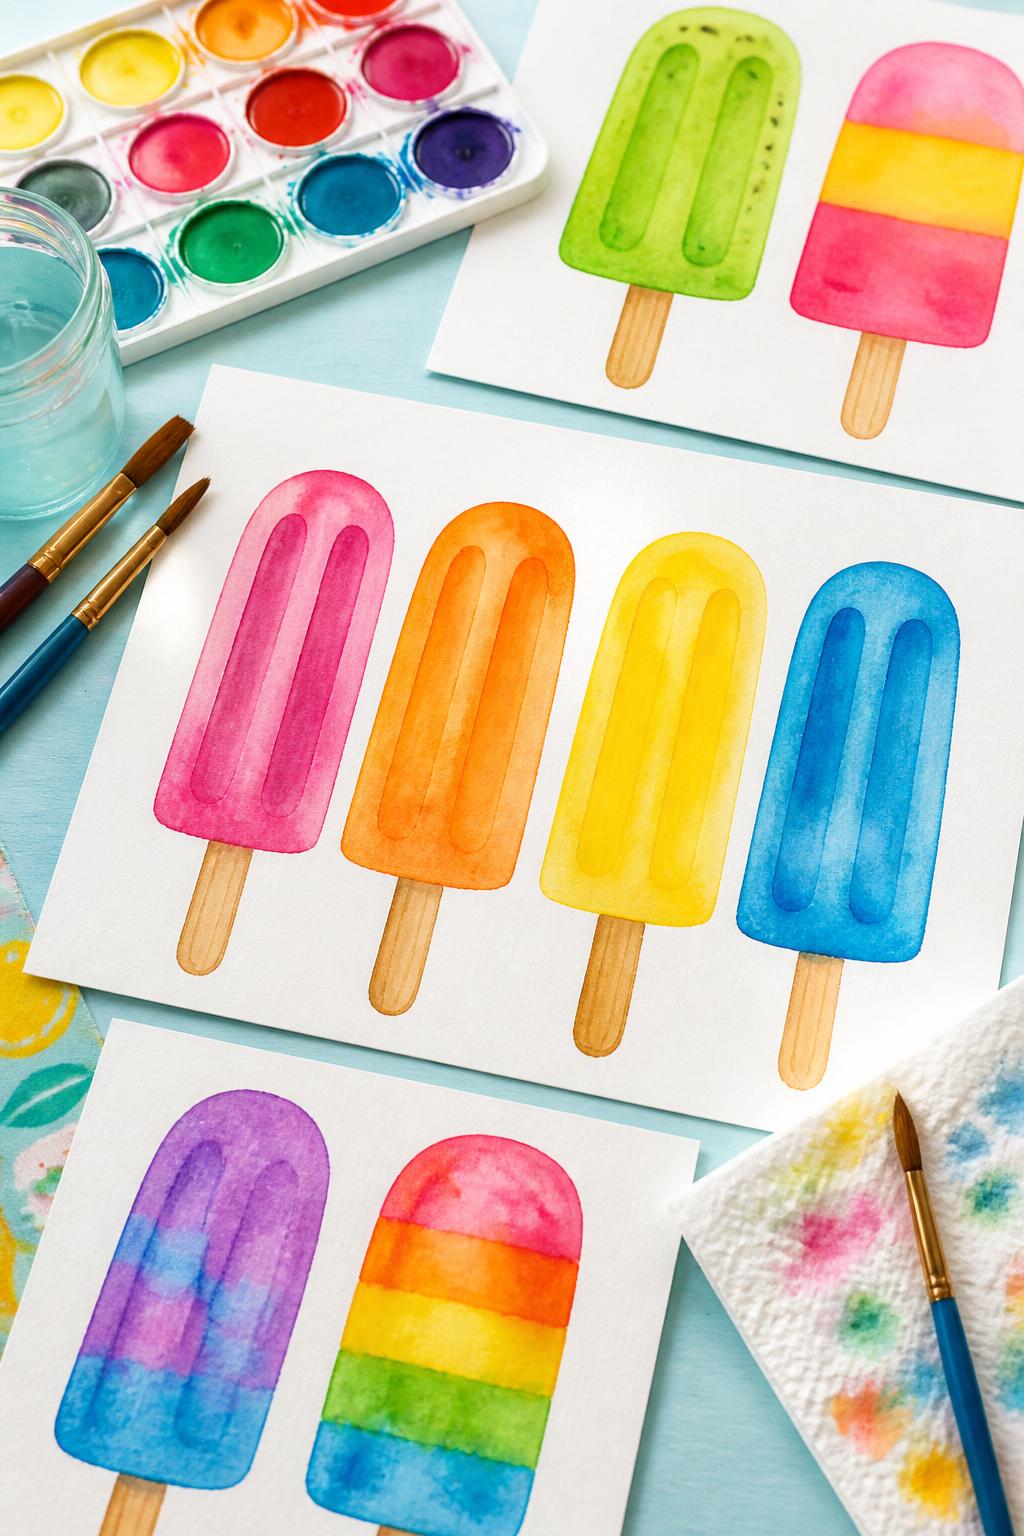
Watercolor popsicles are easy, cheerful, and perfect for summer. Kids can blend colors together to make rainbow popsicles, fruit-inspired popsicles, or silly pretend flavors that look fun on the page.
Materials Needed:
For People Who Love to Make Things ✂️
- Thick white paper or watercolor paper
- Watercolor paints
- Paintbrushes
- Cup of water
- Pencil
- Brown marker or crayon
- Paper towel
Steps To Make:
- Lightly draw several popsicle shapes on the paper.
- Paint each popsicle with watercolor.
- Let kids blend two or three colors together.
- Use a brown marker or crayon to draw the stick at the bottom.
- Add small dots, stripes, or swirls once the paint dries.
- Let the artwork dry flat before displaying it.
2. Salt Painted Seashells
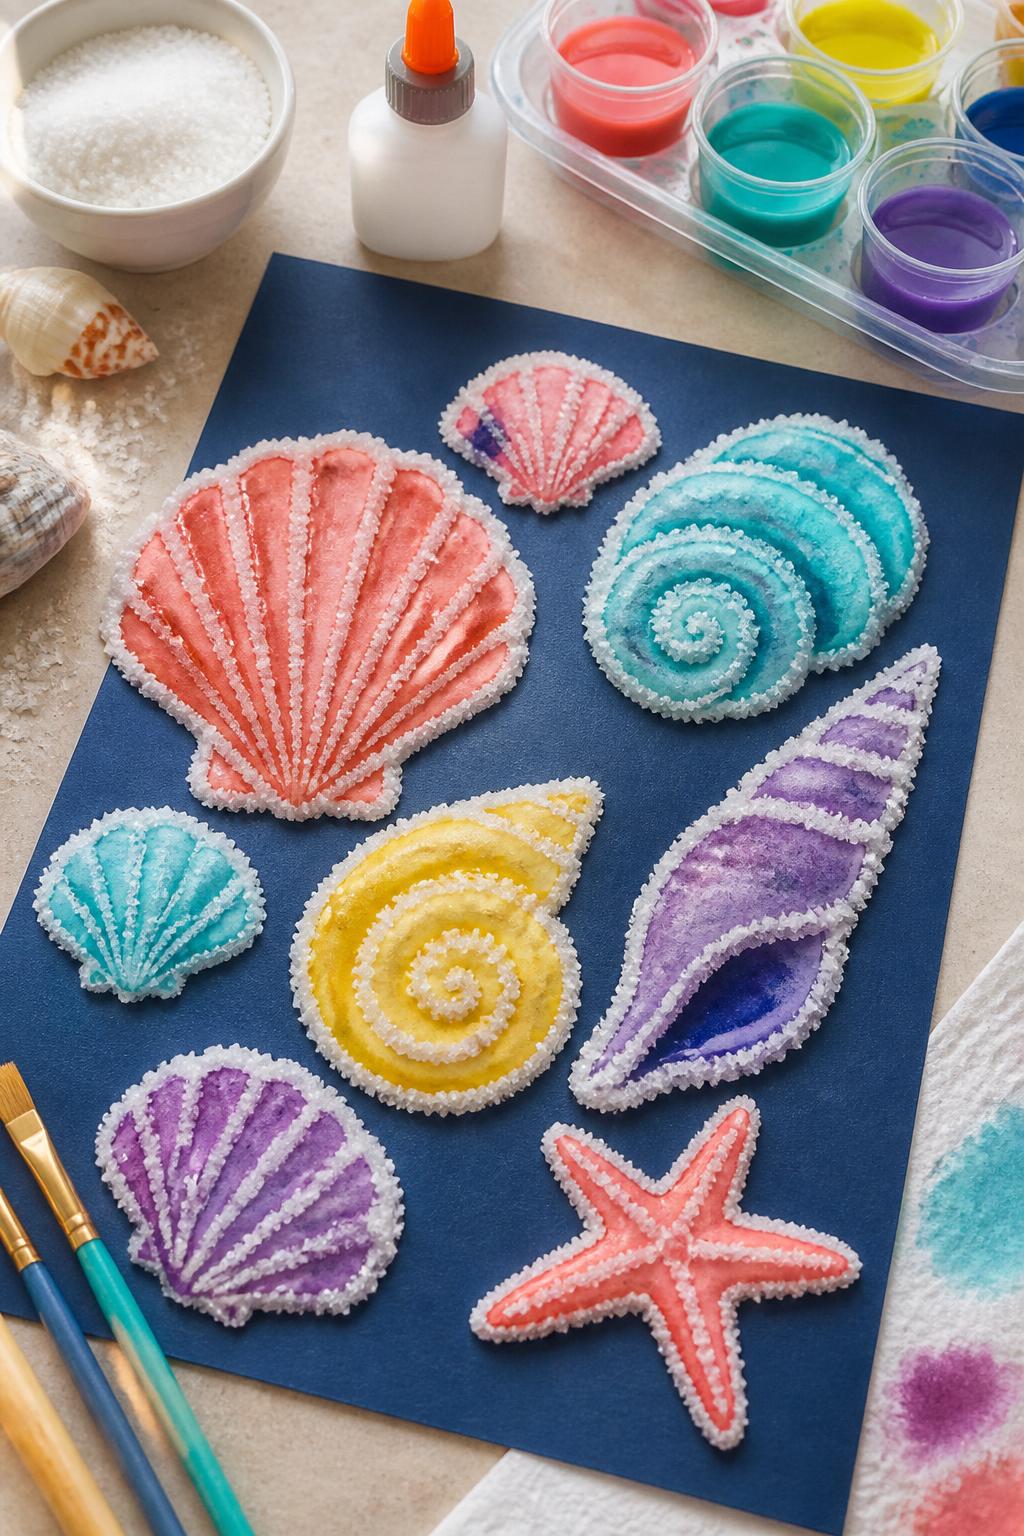
Salt painting makes this seashell art feel magical because the color spreads along the raised salt lines. It is a fun mix of art and simple science, which makes it great for curious kids.
Materials Needed:
- Dark blue or white cardstock
- White school glue
- Table salt
- Liquid watercolor or watered-down washable paint
- Paintbrushes
- Tray or paper plate
Steps To Make:
- Draw seashell shapes with white glue.
- Sprinkle salt over the glue until it is fully covered.
- Shake off the extra salt onto a tray.
- Dip a brush into liquid watercolor.
- Gently touch the brush to the salt lines and watch the color spread.
- Use different colors for each shell.
- Let the art dry flat without touching the salt.
3. Bubble Art Fish
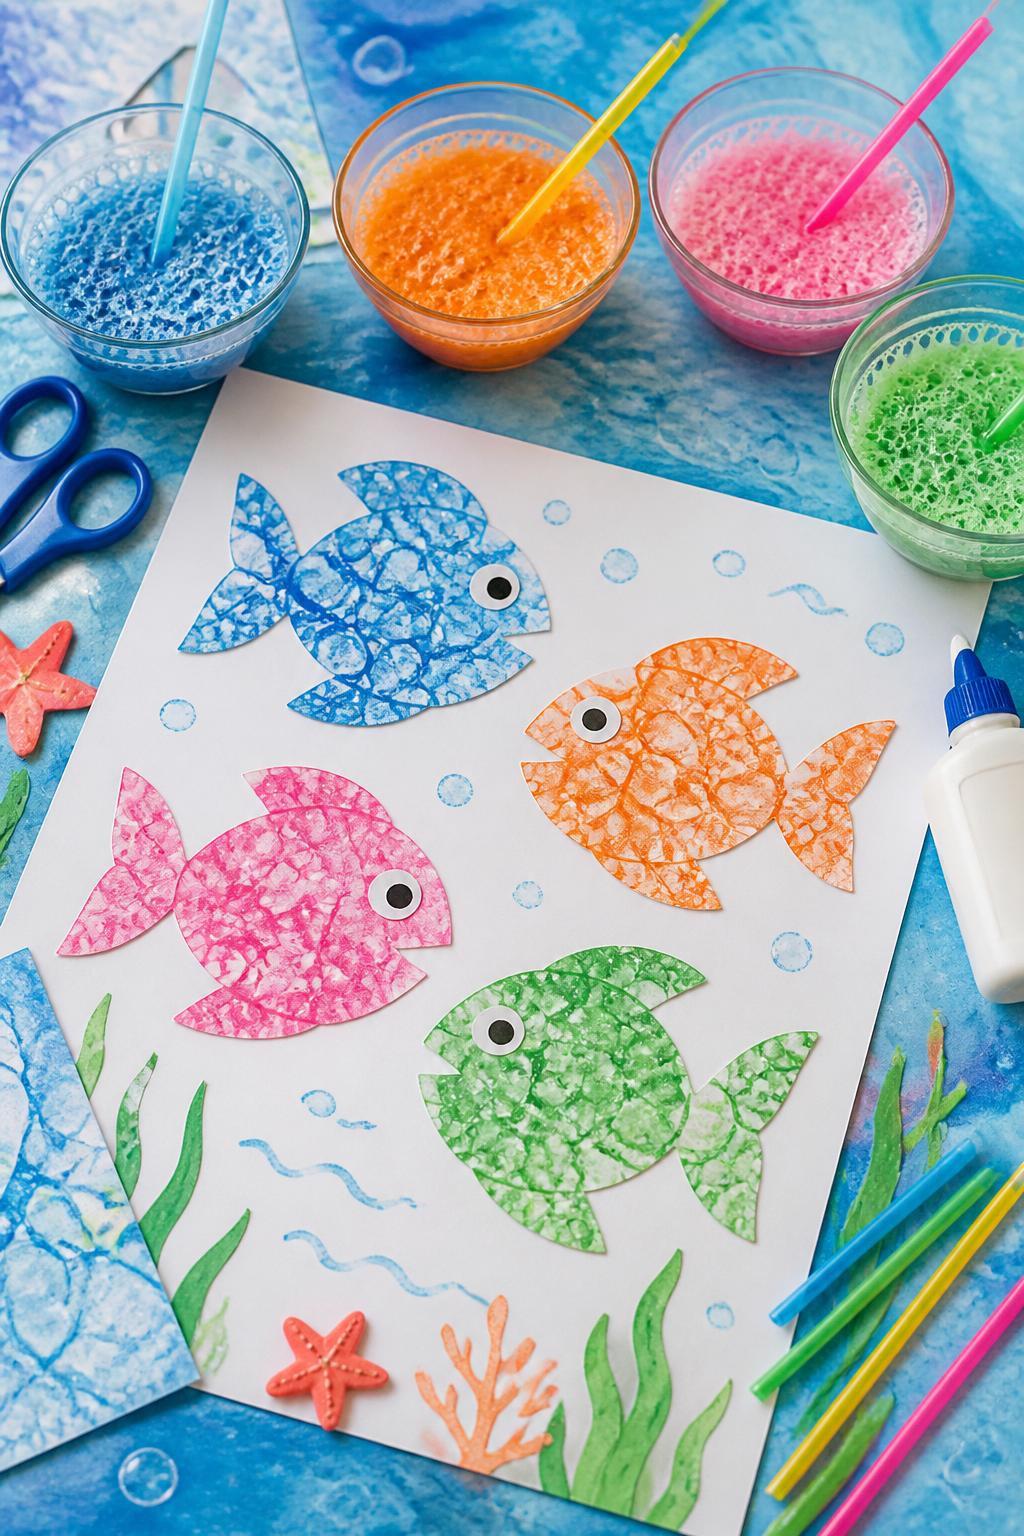
Bubble art gives fish scales a fun texture without needing careful painting. Kids will enjoy blowing bubbles and pressing the paper over the foam to create bright, watery patterns.
Materials Needed:
- White cardstock
- Washable paint
- Dish soap
- Water
- Bowls
- Straws
- Scissors
- Googly eyes, optional
Steps To Make:
- Mix paint, a little dish soap, and water in a bowl.
- Use a straw to blow bubbles into the paint mixture.
- Press white cardstock gently onto the bubbles.
- Let the printed paper dry.
- Cut fish shapes from the painted paper.
- Add eyes, fins, or tails with paper scraps.
- Glue the fish onto blue paper for an ocean scene.
4. Rainbow Sunburst Painting
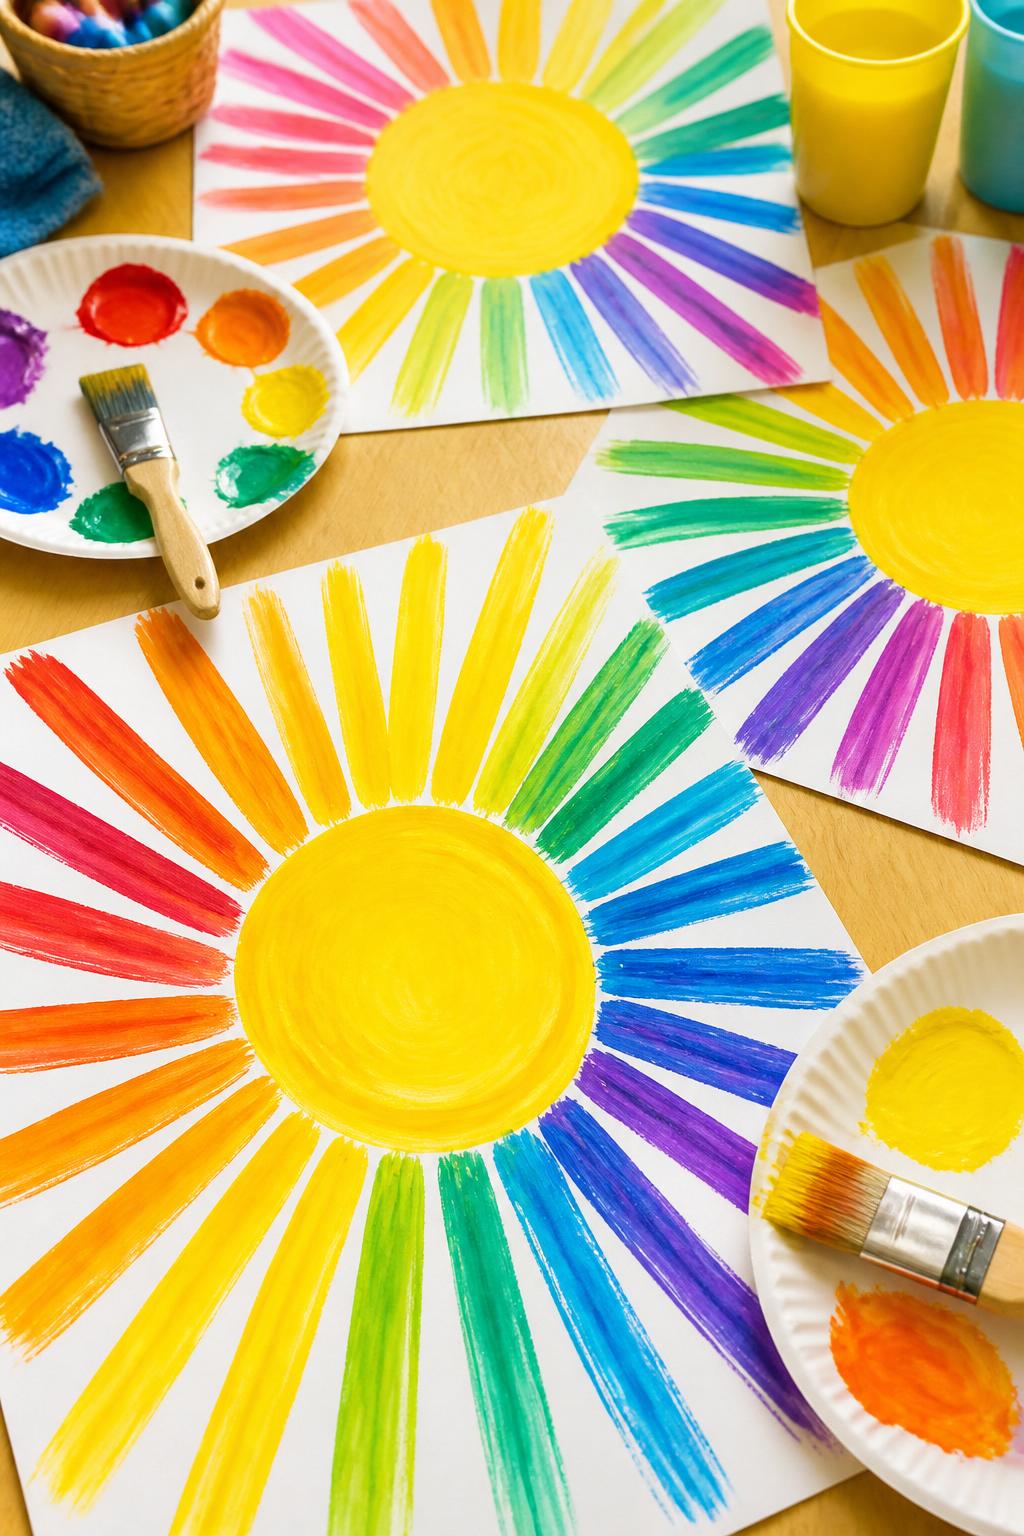
This sunburst project is bold, simple, and perfect for kids who love bright color. The long rays give them plenty of space to paint stripes, dots, patterns, or blended rainbow sections.
Materials Needed:
- White cardstock
- Washable paint
- Paintbrushes
- Paper plate
- Pencil
- Cup of water
Steps To Make:
- Draw a large circle near the middle or corner of the paper.
- Draw long triangle rays coming out from the circle.
- Paint the circle yellow or orange.
- Paint each ray in a different bright color.
- Let kids add dots, stripes, or small patterns.
- Allow the painting to dry fully.
- Hang several together for a summer wall display.
5. Ice Cube Painting
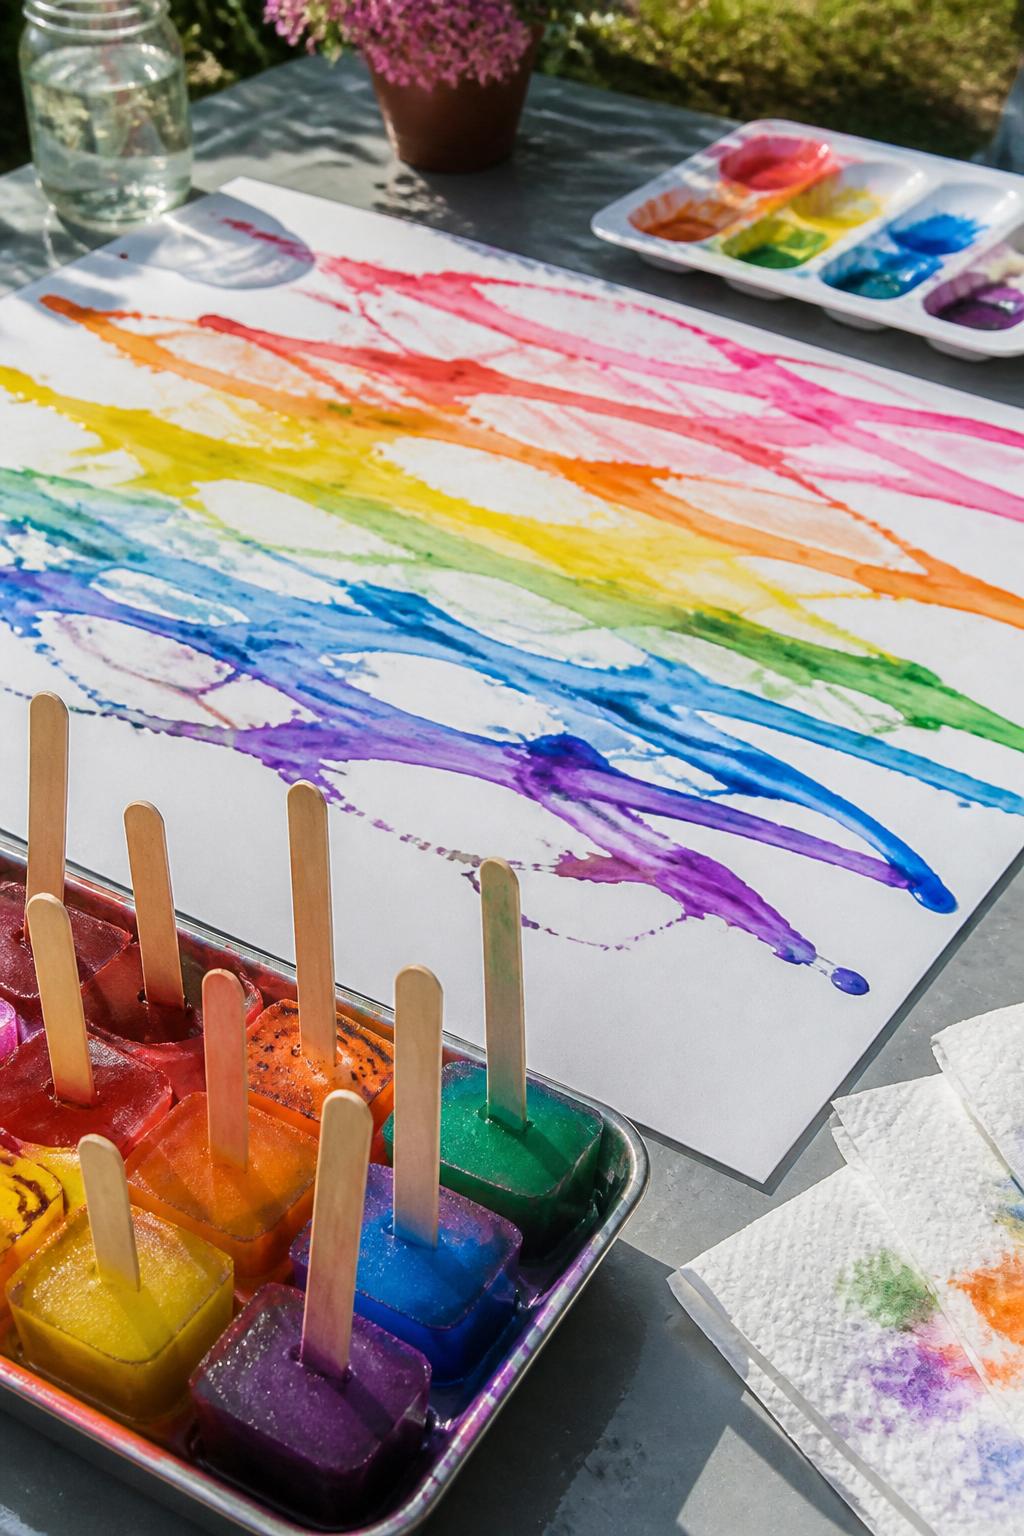
Ice cube painting is perfect for hot days because kids get to paint with frozen colors. The melting paint creates soft streaks and surprise blends that feel different from regular brush painting.
Materials Needed:
- Washable paint
- Ice cube tray
- Water
- Wooden craft sticks
- Thick white paper
- Tray or covered table
Steps To Make:
- Mix washable paint with a little water.
- Pour the mixture into an ice cube tray.
- Add a wooden craft stick to each section.
- Freeze until solid.
- Let kids move the paint cubes across thick paper.
- Watch the colors melt and blend.
- Let the artwork dry flat.
6. Painted Paper Plate Beach Scene
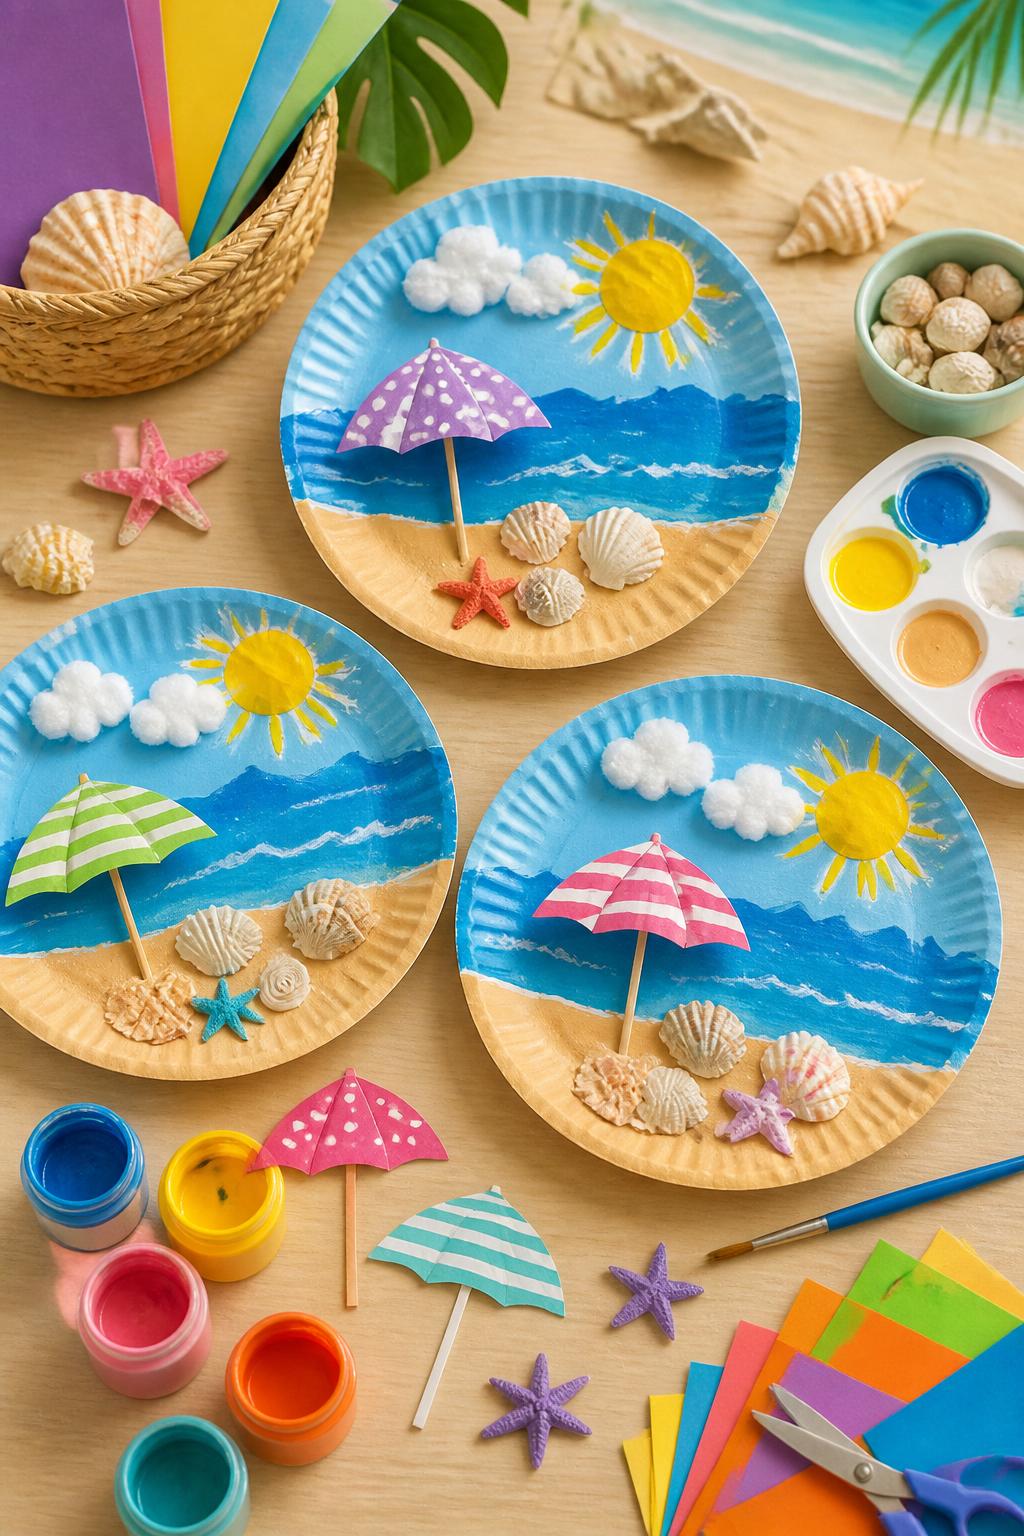
This paper plate beach scene is a sweet way for kids to build a full summer picture in a small round space. They can paint the background first, then add paper pieces for extra detail.
Materials Needed:
- Paper plates
- Blue, tan, and yellow washable paint
- Construction paper
- Cotton balls
- Glue stick
- Paintbrushes
- Child-safe scissors
Steps To Make:
- Paint half the plate blue for the ocean.
- Paint the other half tan for the sand.
- Add a yellow sun near the top.
- Cut small paper umbrellas, beach towels, or shells.
- Glue the paper pieces onto the plate.
- Add cotton clouds if desired.
- Let the scene dry before displaying it.
7. Dot Marker Summer Fruit Art
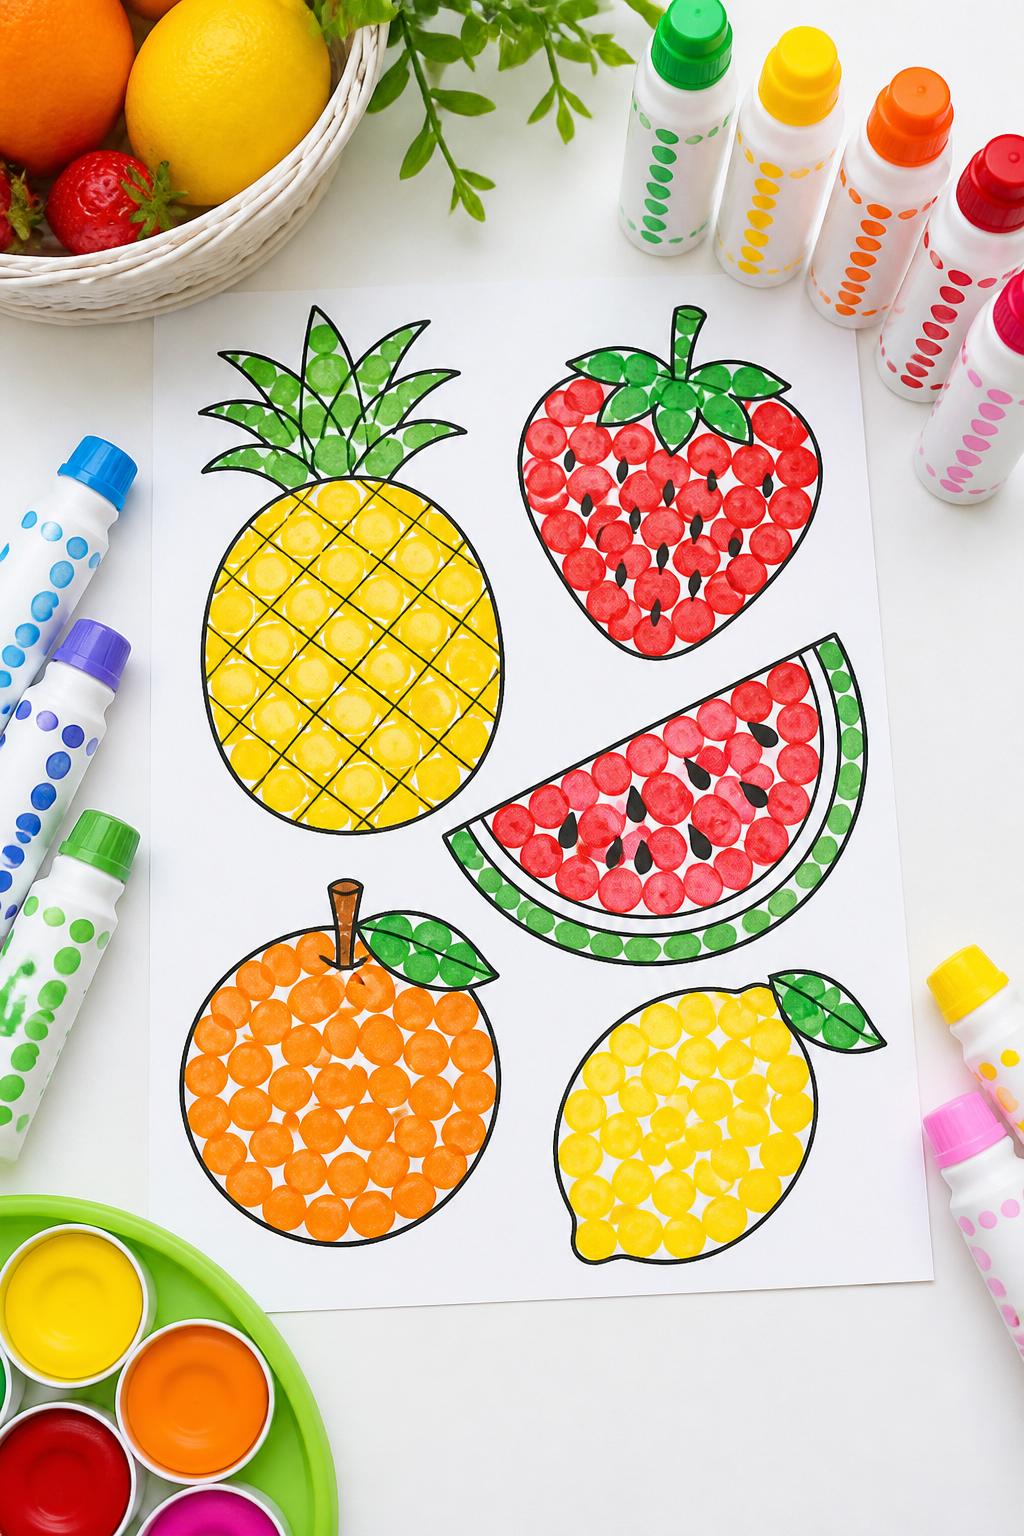
Dot markers make this art project easy for younger kids, but older kids can still enjoy making patterns. The fruit shapes keep everything bright and summer-ready.
Materials Needed:
- White paper
- Fruit outline templates
- Dot markers
- Crayons or markers
- Optional stickers
Steps To Make:
- Draw or print large fruit outlines.
- Give kids dot markers in fruit colors.
- Let them fill each shape with dots.
- Add leaves, seeds, or peel lines with crayons.
- Use different dot patterns for each fruit.
- Let the ink dry.
- Cut out the fruits or display them as one bright page.
8. Shaving Cream Marbled Ocean Art
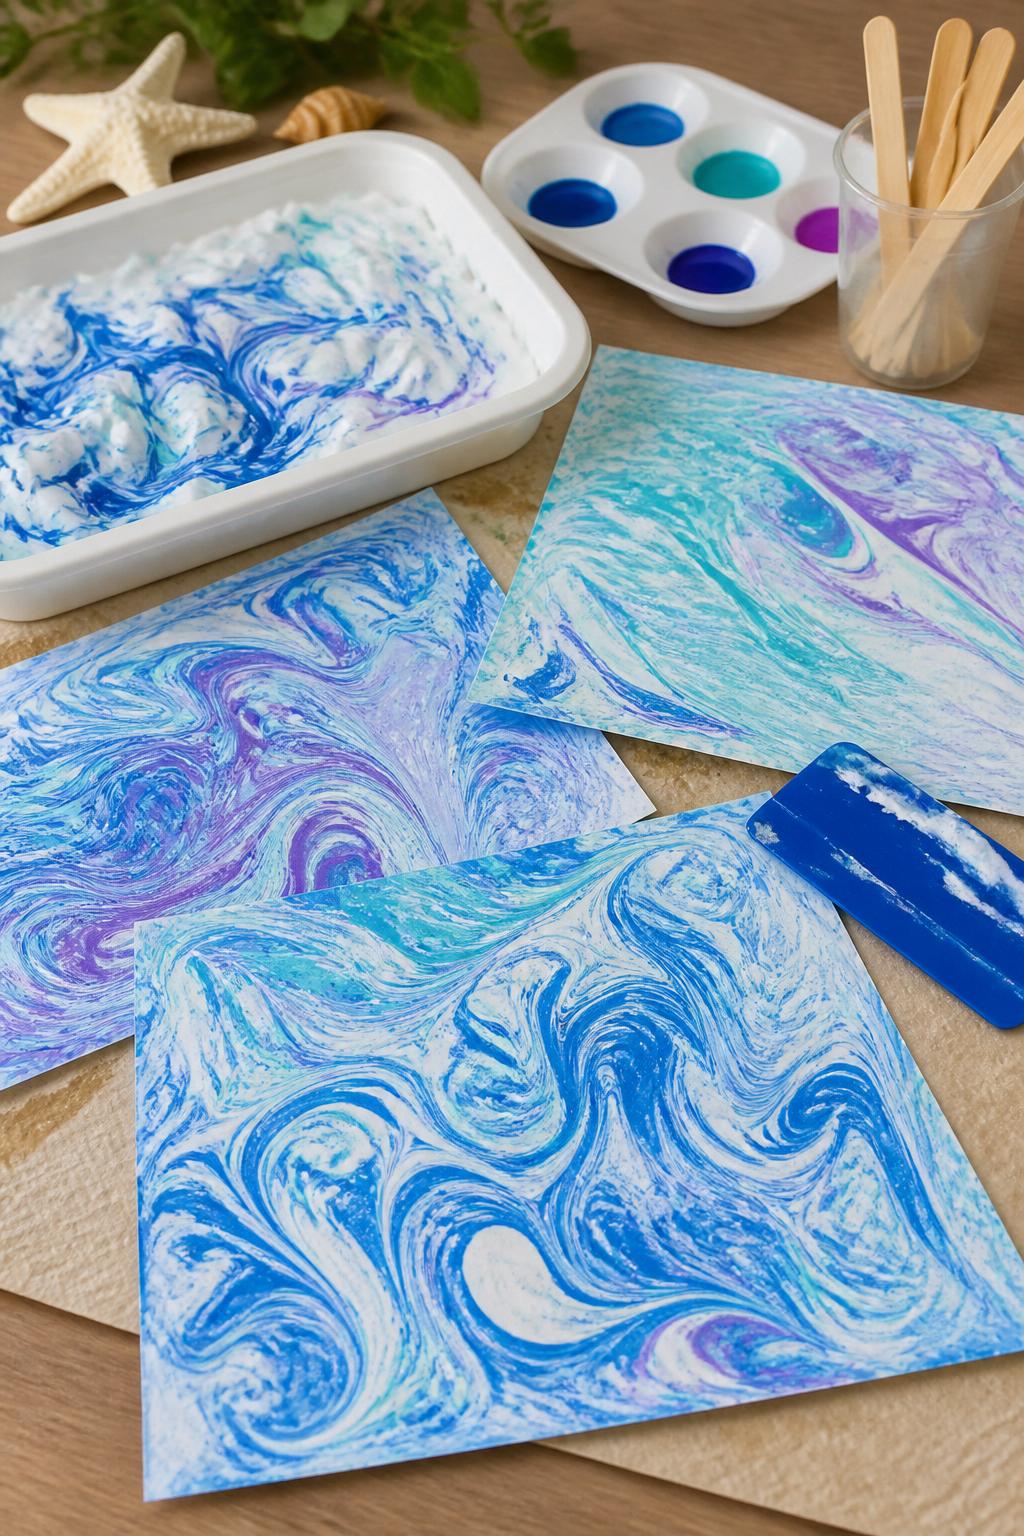
This project creates beautiful ocean-style paper with soft swirls and waves. Kids will love mixing the colors, and the finished paper can be used later for fish, shells, bookmarks, or cards.
Materials Needed:
- Shaving cream
- Washable paint or liquid watercolor
- Tray
- Craft stick
- White cardstock
- Ruler or cardboard scraper
- Paper towels
Steps To Make:
- Spread shaving cream across a tray.
- Drop blue, teal, white, and purple paint onto the foam.
- Swirl the colors gently with a craft stick.
- Press cardstock onto the surface.
- Lift the paper carefully.
- Scrape off extra shaving cream.
- Let the marbled paper dry flat.
9. Nature Paintbrush Art
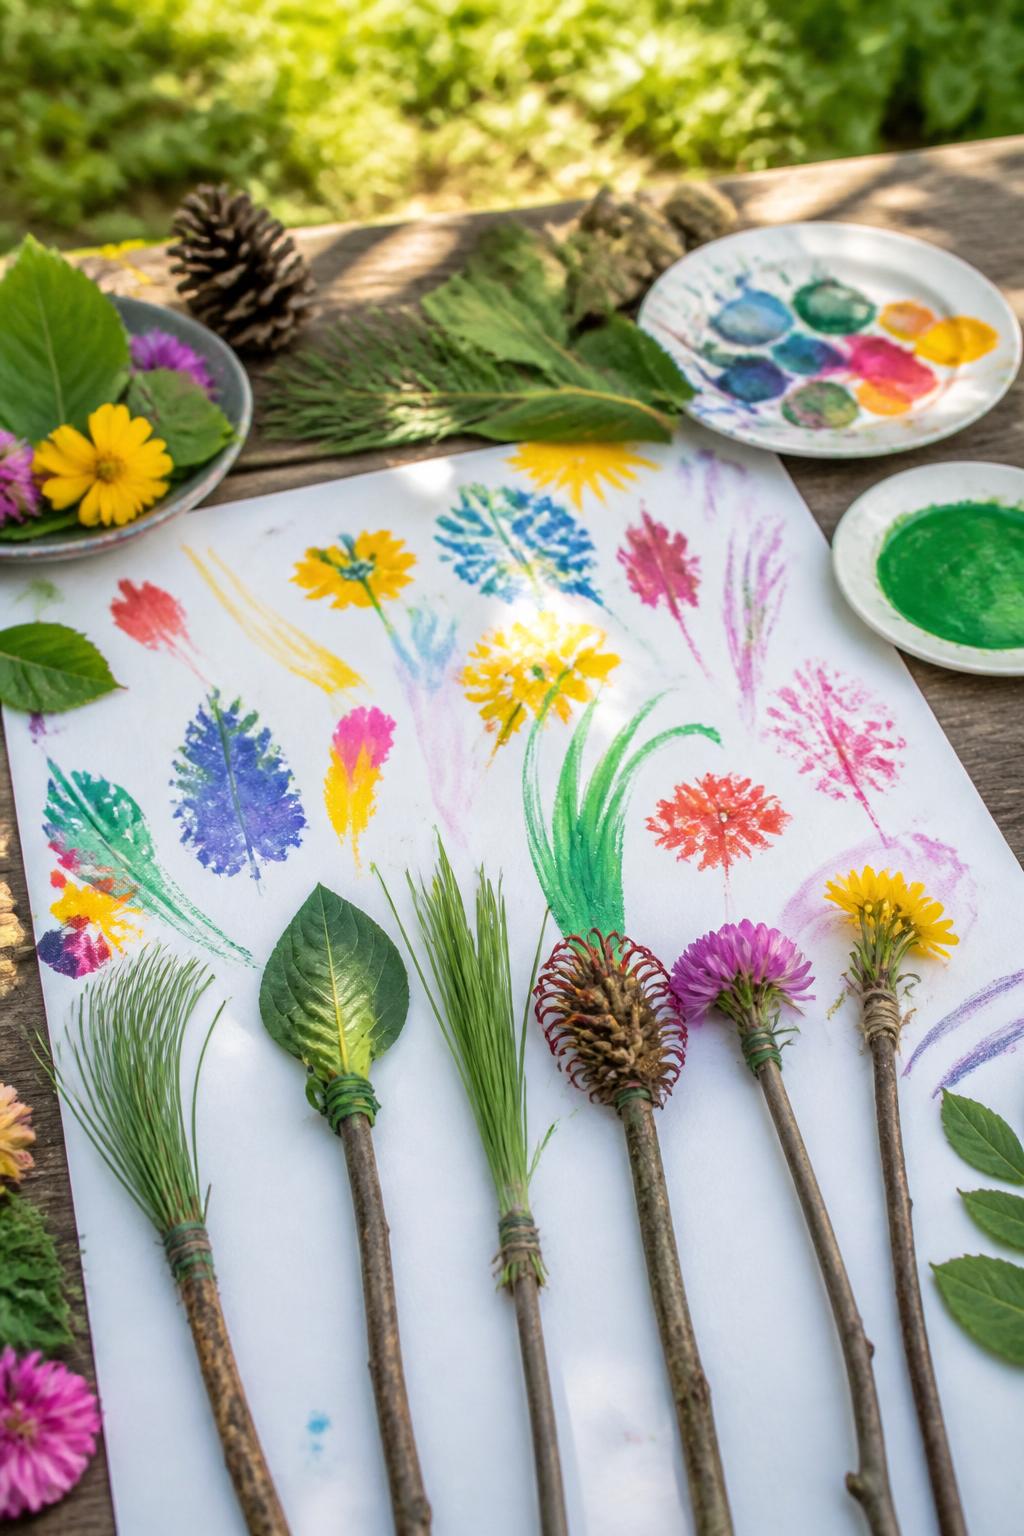
Nature paintbrushes make art feel like an outdoor adventure. Kids can test how leaves, grass, flowers, and twigs create different marks, textures, and patterns.
Materials Needed:
- Small sticks
- Leaves, grass, flowers, or pine needles
- Rubber bands or string
- Washable paint
- White paper
- Paper plates
Steps To Make:
- Collect small nature items from outside.
- Attach leaves, grass, or flowers to sticks with rubber bands.
- Pour paint onto paper plates.
- Dip the nature brushes into paint.
- Let kids stamp, drag, dab, and swirl the brushes across paper.
- Compare the different textures.
- Let the artwork dry.
10. Painted Butterfly Symmetry Art
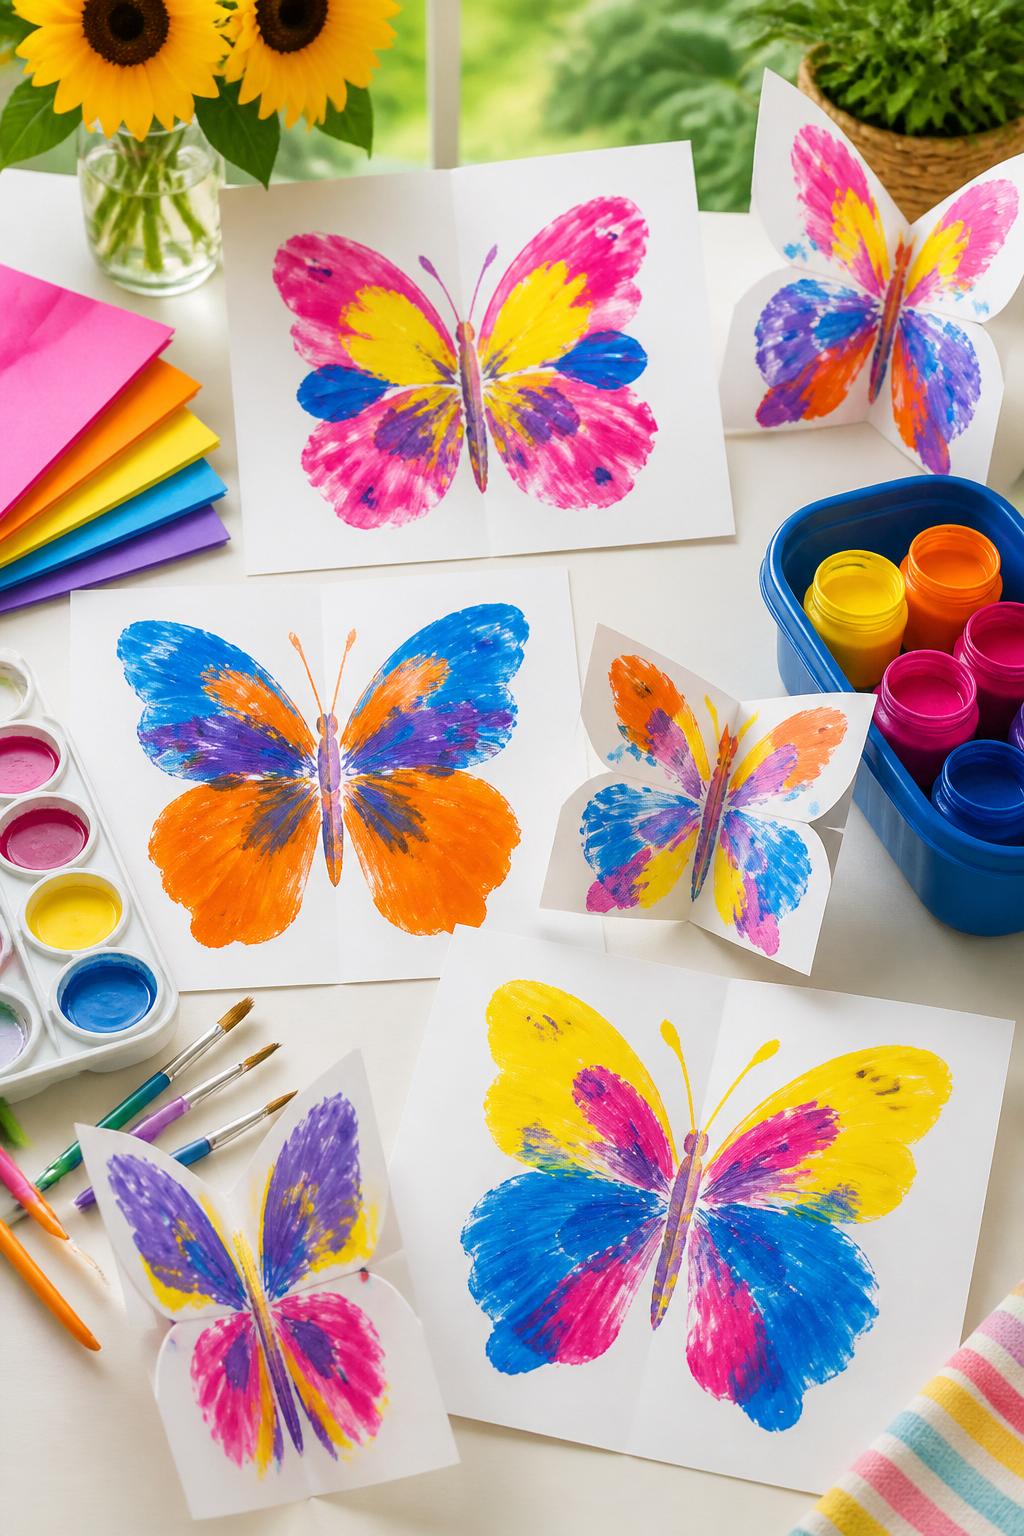
Butterfly symmetry art feels like a surprise every time kids open the paper. It is simple, colorful, and a fun way to introduce matching patterns.
Materials Needed:
- White paper
- Washable paint
- Paintbrushes
- Pencil
- Scissors
- Paper plate
Steps To Make:
- Fold a piece of white paper in half.
- Draw half of a butterfly shape along the fold.
- Cut it out while folded.
- Open the butterfly shape.
- Add paint to one side only.
- Fold the butterfly closed and press gently.
- Open it to reveal a matching design and let it dry.
11. Chalk Pastel Sunset Art
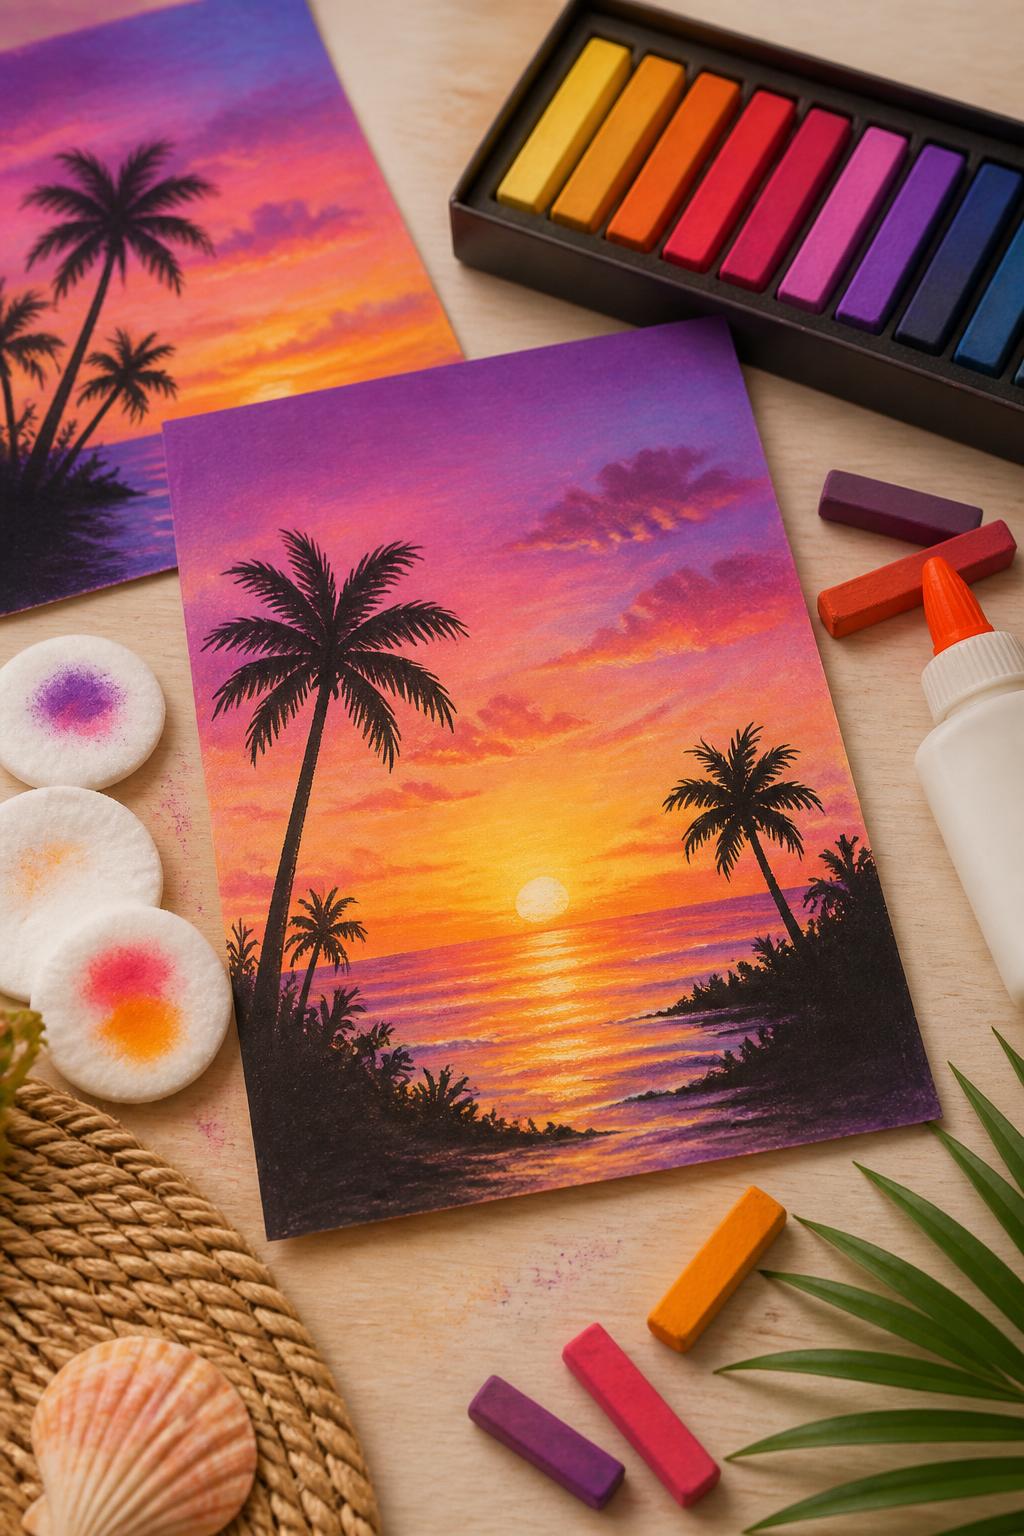
Chalk pastels are great for creating soft summer skies. Kids can blend warm colors together, then add simple silhouettes to make the sunset scene stand out.
Materials Needed:
- White or light-colored paper
- Chalk pastels
- Cotton balls or tissues
- Black construction paper
- Glue stick
- Scissors
- Apron or old shirt
Steps To Make:
- Rub sunset colors across the paper using chalk pastels.
- Blend the colors with cotton balls or tissues.
- Cut simple palm trees, birds, or hill shapes from black paper.
- Glue the black shapes onto the sunset background.
- Add more color around the edges if needed.
- Shake off extra chalk dust gently.
- Display once the glue dries.
12. Paper Mosaic Ice Cream Cone
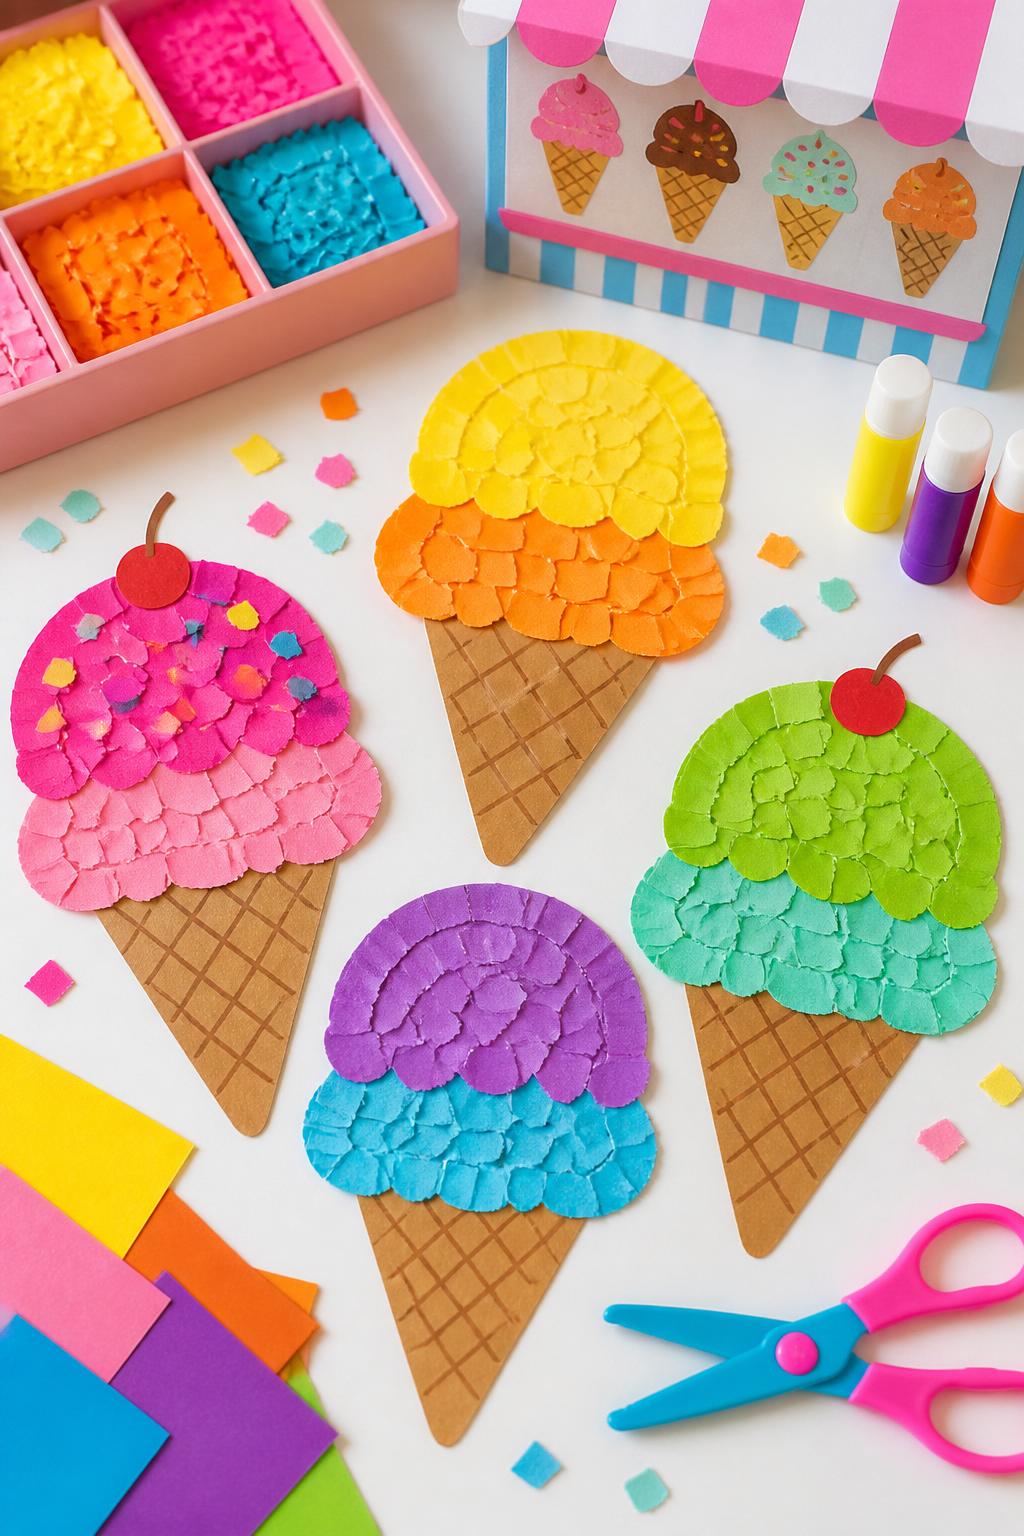
This mosaic project is great for building patience and fine motor skills. Kids can tear or cut paper pieces, then fill the ice cream shape with bright little color blocks.
Materials Needed:
- White cardstock
- Colored construction paper
- Brown paper
- Glue stick
- Pencil
- Child-safe scissors
Steps To Make:
- Draw a large ice cream cone outline on cardstock.
- Tear or cut colored paper into small pieces.
- Tear brown paper pieces for the cone.
- Glue the brown pieces inside the cone shape.
- Glue colorful pieces inside the scoop shapes.
- Leave small spaces between pieces for a mosaic look.
- Let the art dry flat.
13. Water Balloon Splatter Painting
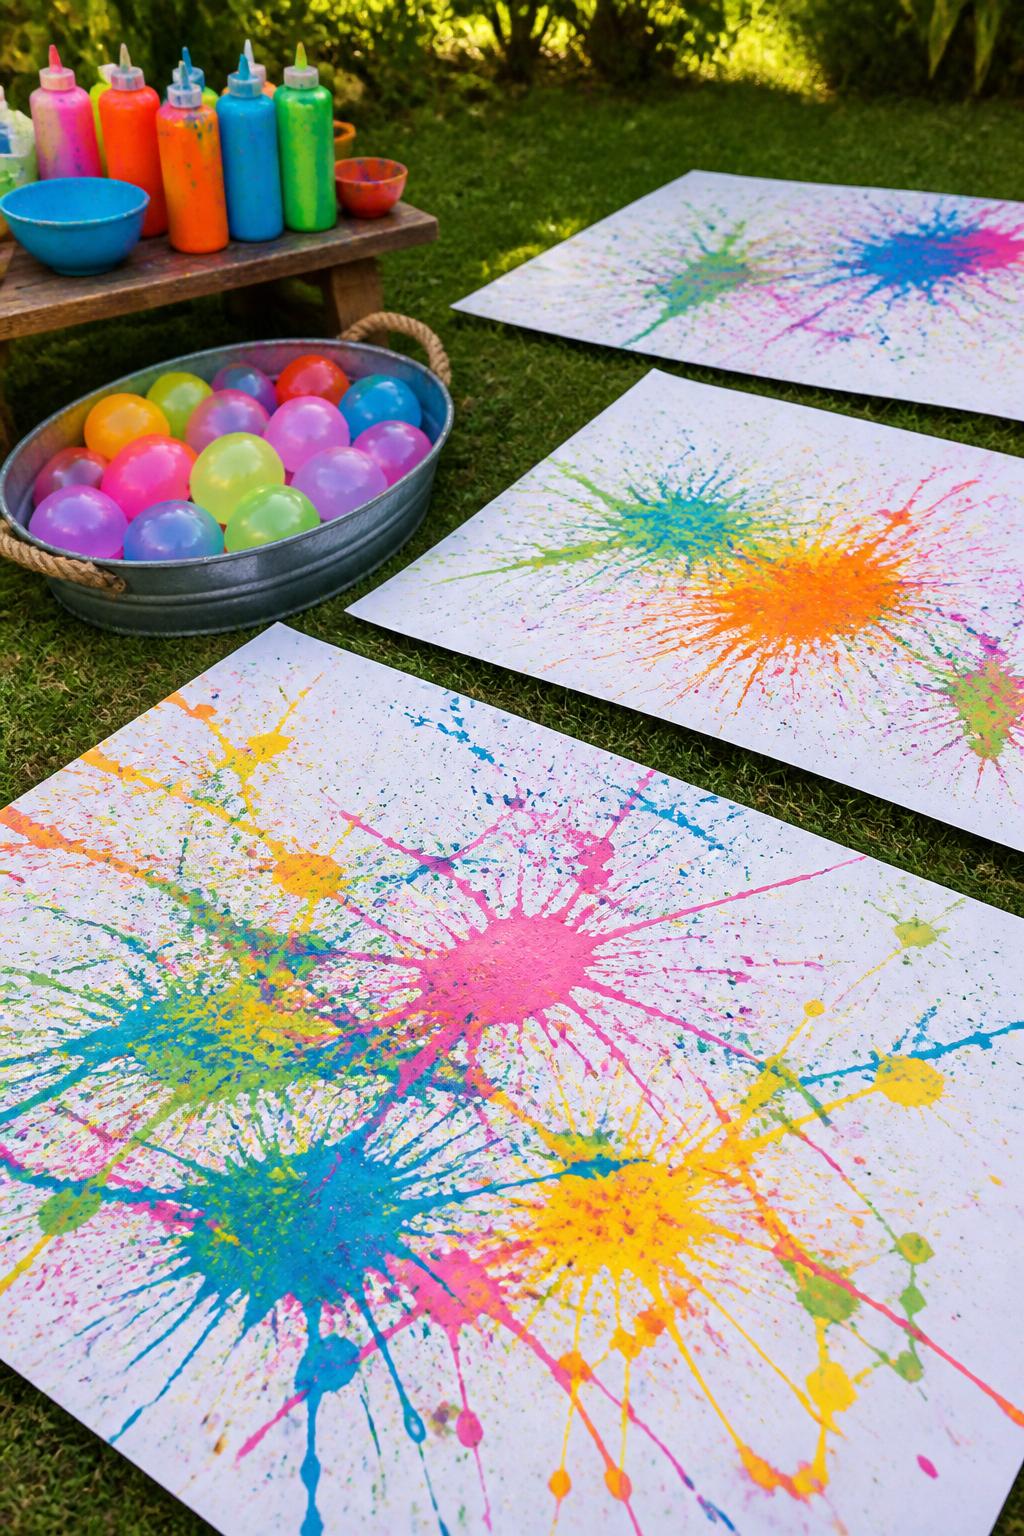
This project is messy, exciting, and best done outdoors. Kids get to turn a hot summer day into a bold abstract art session with color, movement, and lots of laughs.
Materials Needed:
- Large white paper or poster board
- Washable paint
- Water balloons
- Water
- Outdoor space
- Tray or bucket
- Old clothes or apron
Steps To Make:
- Add a small amount of washable paint into each balloon.
- Fill the balloons with water and tie them closed.
- Place large paper outside on the grass or driveway.
- Let kids toss the balloons onto the paper.
- Add more colors until the paper is covered.
- Leave the painting flat to dry.
- Cut the dried art into cards, bookmarks, or wall art if desired.
14. Summer Flower Stamp Art
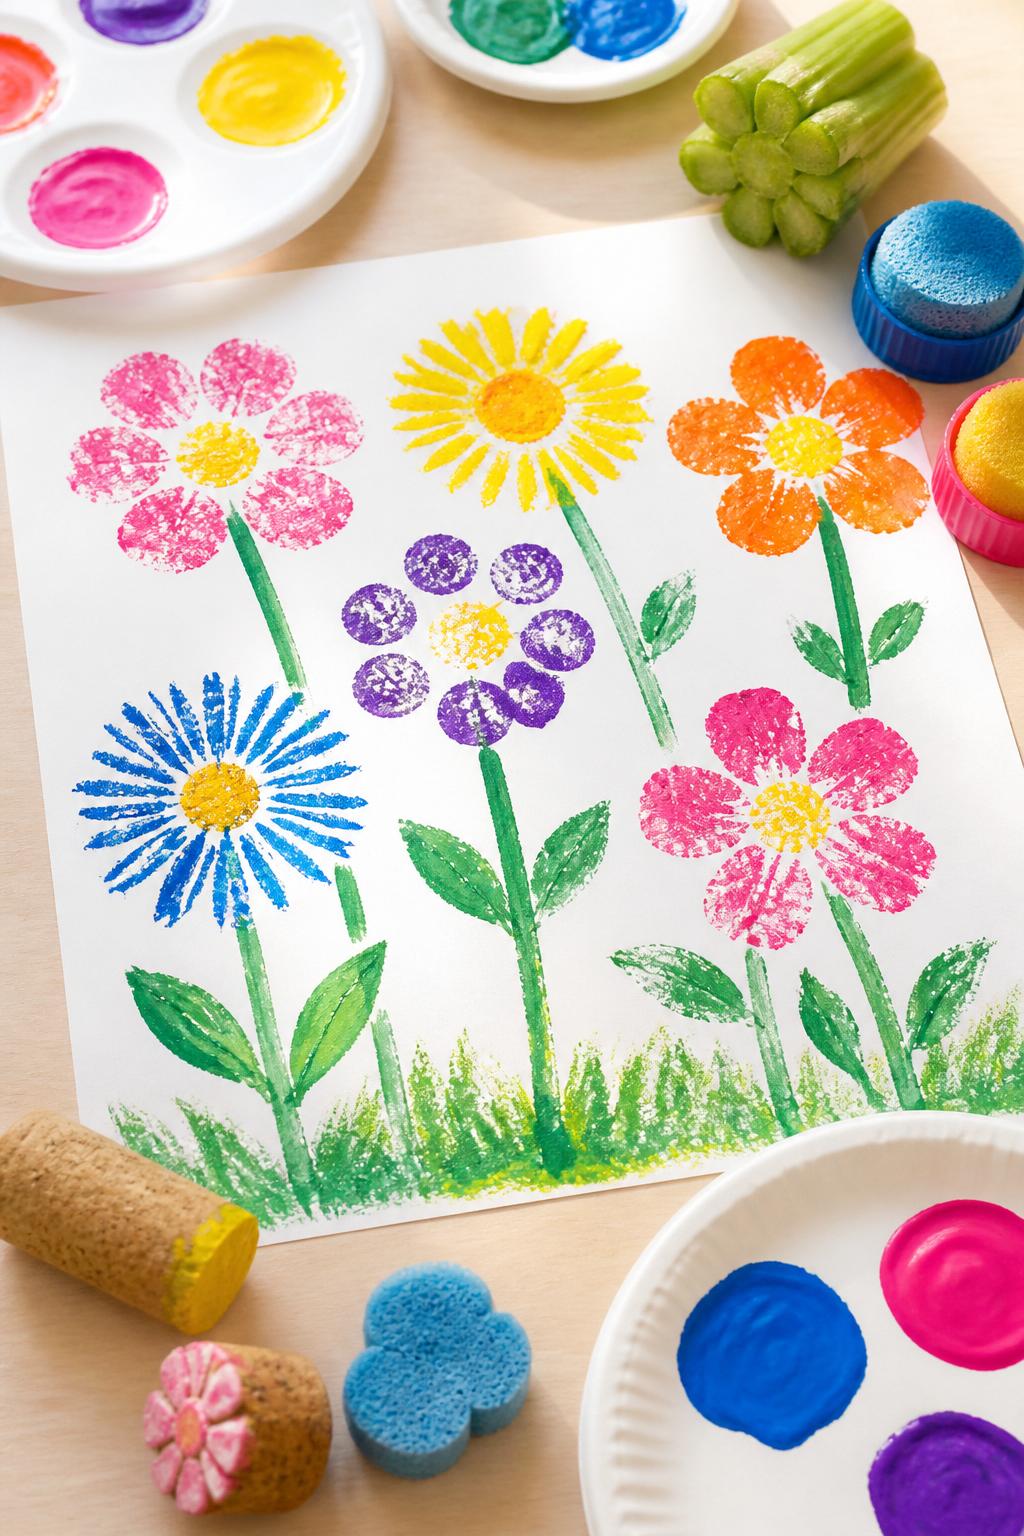
Flower stamping is easy and full of color. Kids can use simple household items to make petals, centers, and leaves, which keeps the project creative without needing special supplies.
Materials Needed:
- White paper
- Washable paint
- Celery ends, corks, bottle caps, or sponge pieces
- Paintbrush
- Paper plates
- Green marker or paint
Steps To Make:
- Pour paint onto paper plates.
- Dip a celery end, cork, or bottle cap into paint.
- Stamp flower shapes onto the paper.
- Use different tools for different flower styles.
- Add stems and leaves with green paint or marker.
- Fill the page with a summer garden.
- Let the artwork dry.
15. Painted Cardboard Sunglasses Art
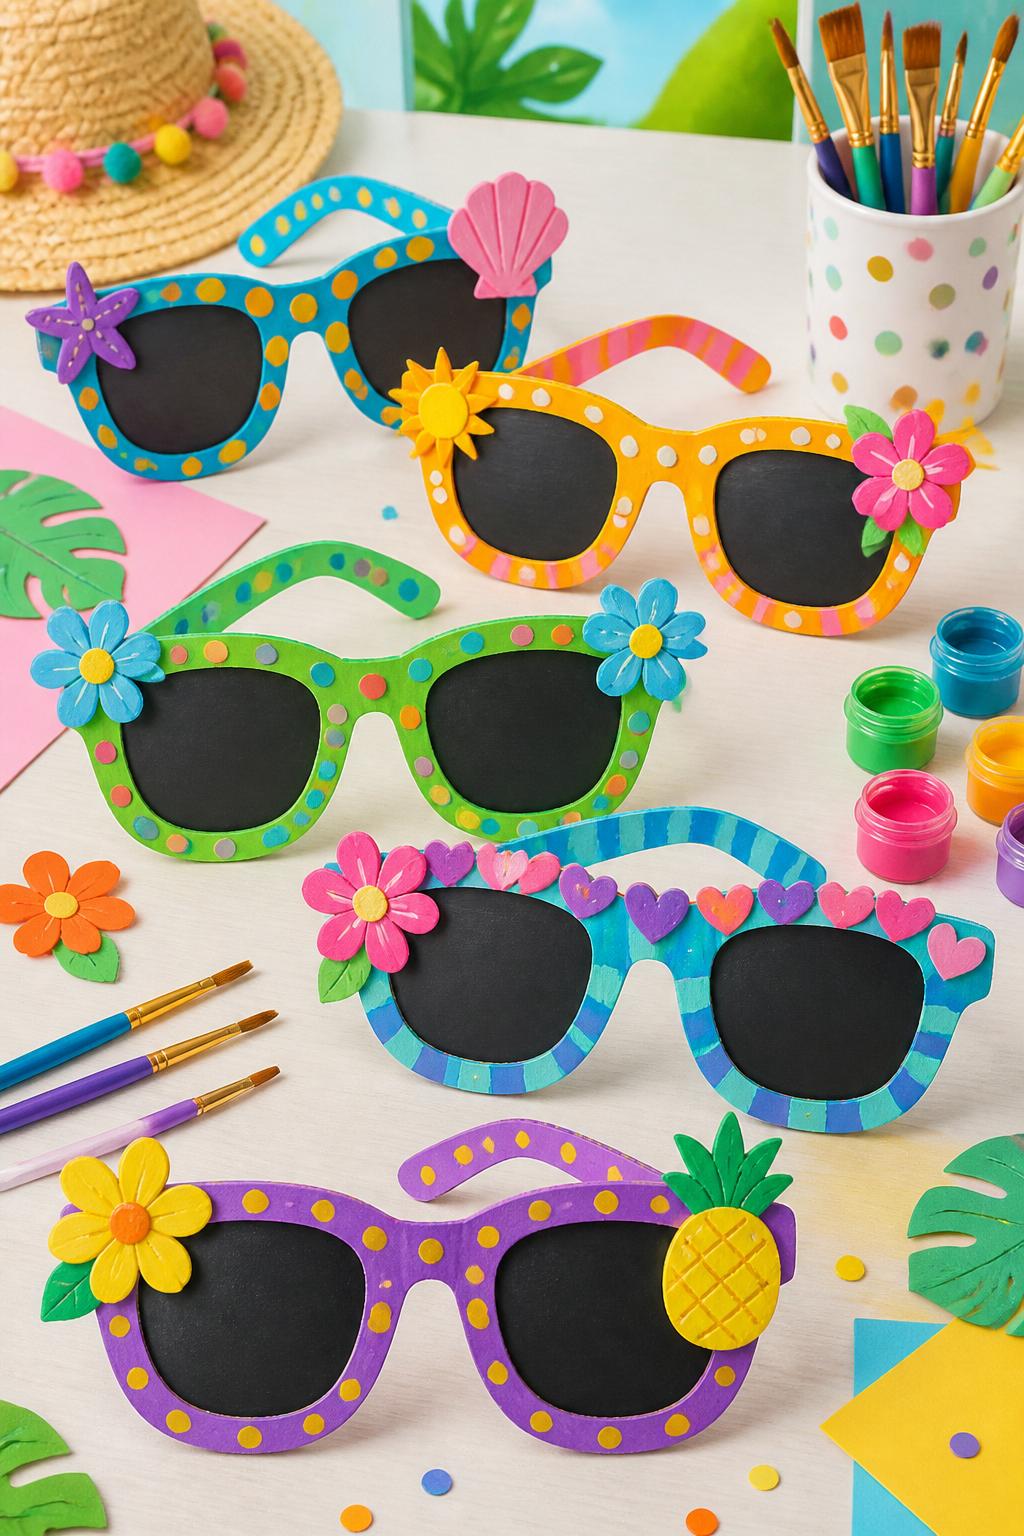
Oversized cardboard sunglasses make a fun summer art project because kids can design something bold and silly. They can go bright, floral, beachy, fruity, or rainbow-inspired.
Materials Needed:
- Cardboard
- Pencil
- Child-safe scissors, adult help recommended
- Washable paint
- Stickers
- Paper flowers or foam shapes
- Glue
- Paintbrushes
Steps To Make:
- Draw a large sunglasses shape on cardboard.
- Cut out the shape with adult help.
- Paint the sunglasses in a bright base color.
- Add dots, stripes, flowers, fruit shapes, or stickers.
- Glue on paper decorations around the frames.
- Let everything dry fully.
- Use the finished sunglasses as wall art or party decor.