
Table of Contents Show
Painting a clipboard is such a simple way to make everyday tasks feel a little calmer and more personal. If you’ve ever wanted a relaxing hobby or a beginner-friendly painting project that you can actually use, this list is for you.
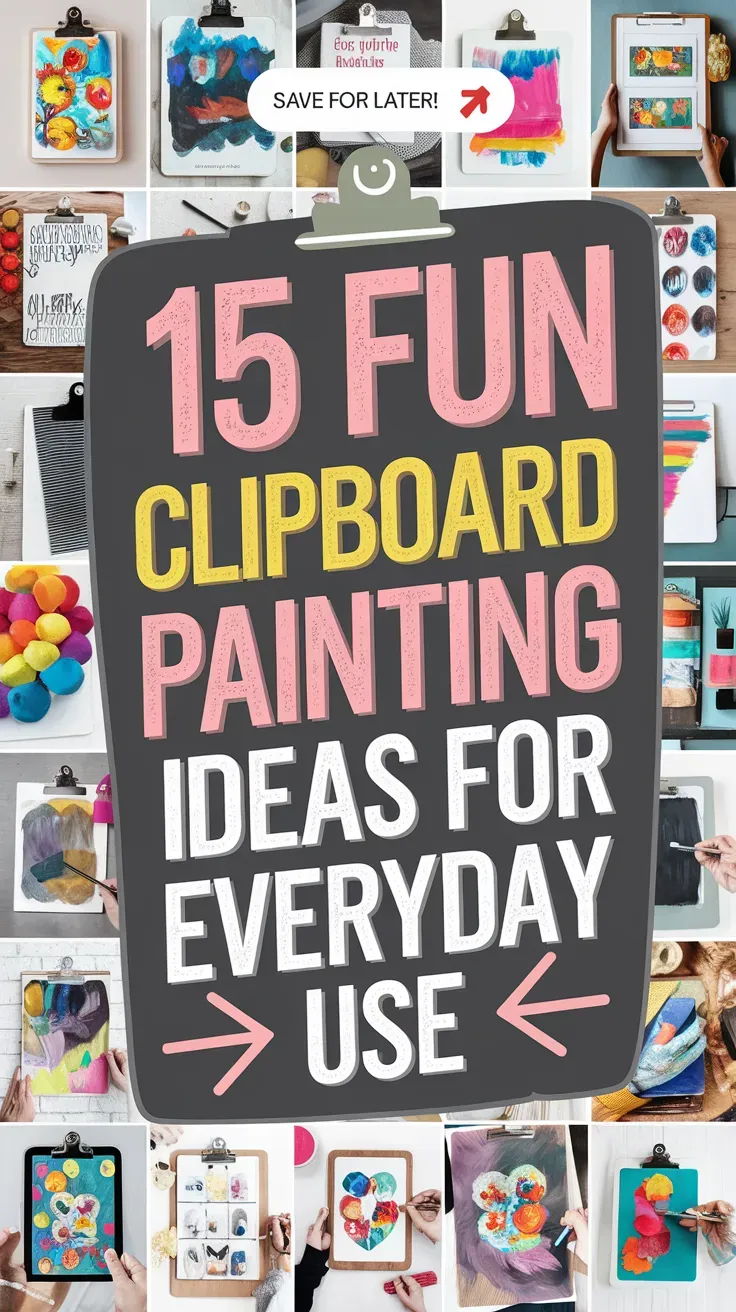
Clipboards are small, affordable, and easy to finish in one sitting, but they still look great on a desk or kitchen counter.
Here are 15 fun clipboard painting ideas to spark your next cozy DIY session.
1. Wildflower Border Clipboard
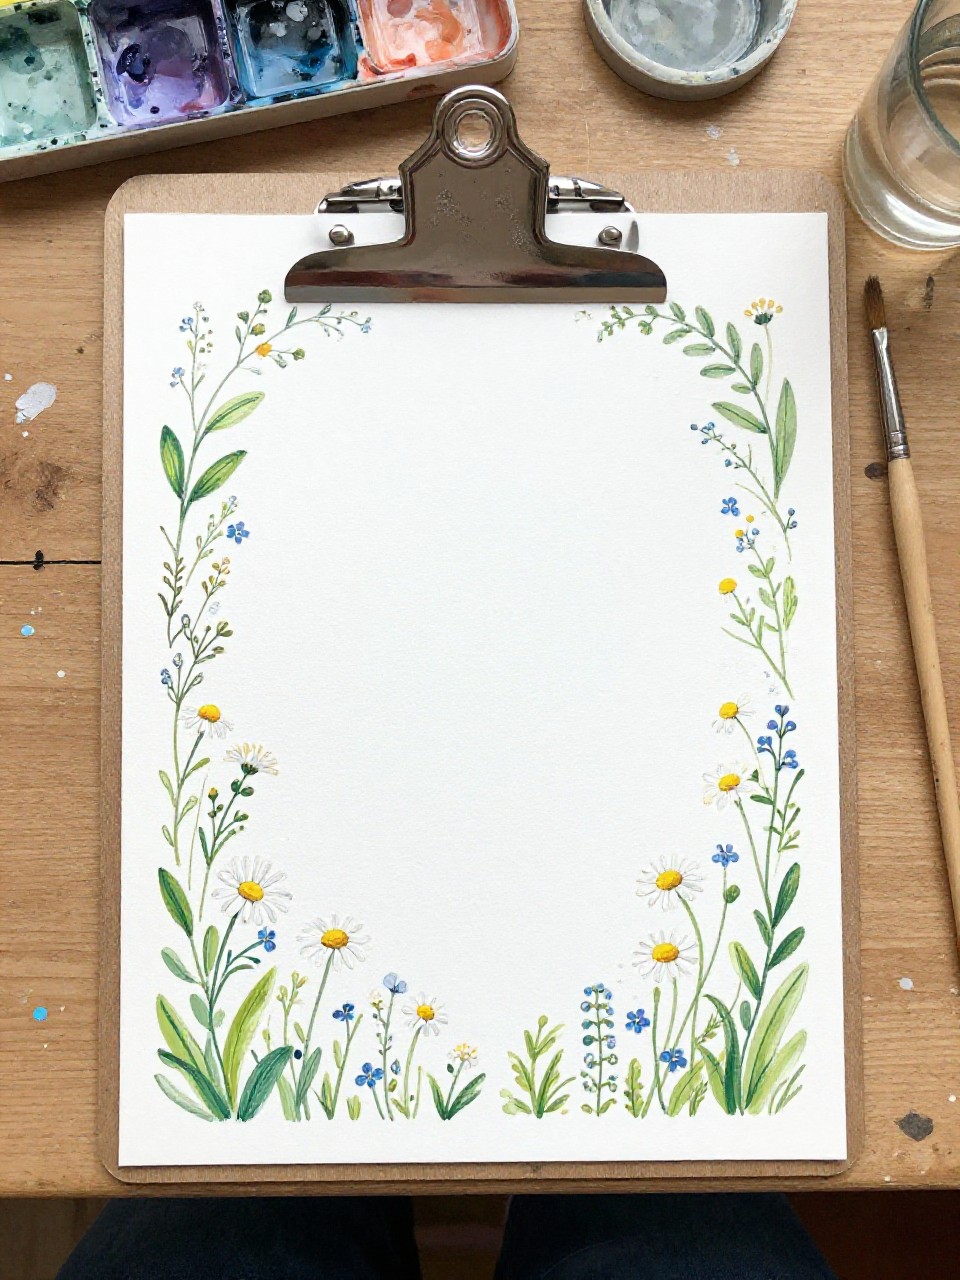
A plain clipboard turns into a fresh garden frame with a soft border of tiny wildflowers around the edges. It’s satisfying because you can keep the middle clean for notes while practicing simple petals, leaves, and dots. This one feels calm and “finished” even with beginner brushwork.
Materials Needed:
For People Who Love to Make Things ✂️
- Clipboard (wood or MDF)
- Acrylic paint
- Paintbrushes in multiple sizes
- Palette or paint tray
- Optional clear sealer or varnish
Steps to Make:
- Wipe the clipboard clean and paint a light base coat; let it dry fully.
- Lightly pencil a thin border line about 1 inch from the edges.
- Paint small flower shapes around the border, switching colors as you go.
- Add leaves, stems, and dot centers with a smaller brush for detail.
- Let dry, then seal the front surface and edges for everyday use.
2. Minimal Pastel Color-Block Clipboard
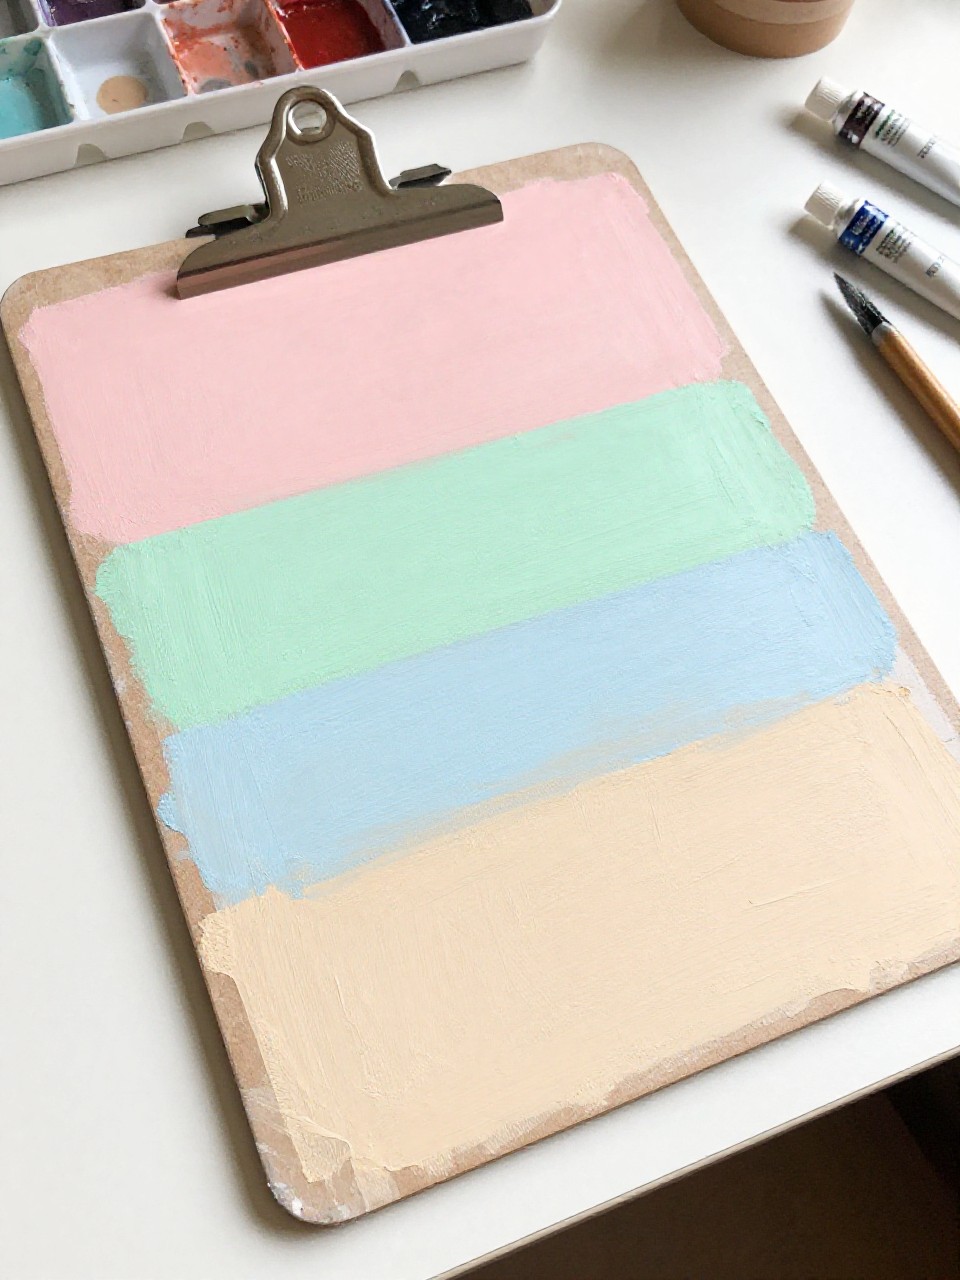
This clipboard looks modern with a few soft pastel blocks that overlap like simple shapes in a poster. It’s great for beginners because straight edges are easy with painter’s tape, and you don’t need perfect drawing skills. The finished piece looks neat on a desk or homework station.
Materials Needed:
- Clipboard (wood or MDF)
- Acrylic paint
- Paintbrushes in multiple sizes
- Palette or paint tray
- Painter’s tape
- Optional clear sealer or varnish
Steps to Make:
- Tape off the metal clip so paint doesn’t get stuck in the springs.
- Paint a white or cream base coat and let it dry.
- Use painter’s tape to mark off 3–5 angled sections.
- Fill each section with a different pastel color, then peel tape while paint is slightly wet.
- Touch up edges with a small brush, dry, then seal the painted surface.
3. Lemon Slice Kitchen Clipboard
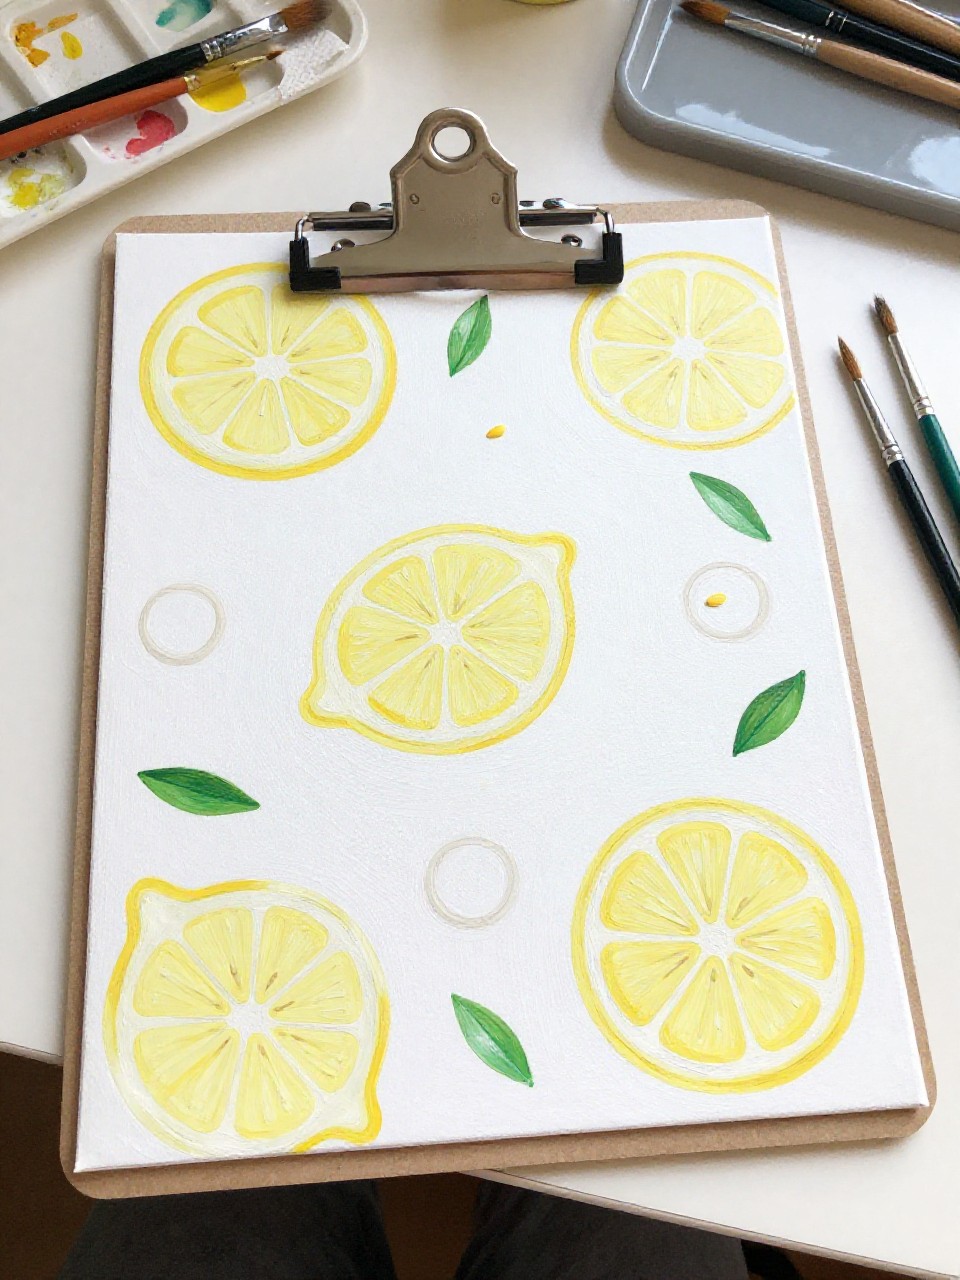
This clipboard looks cheerful with bright lemon slices and a few green leaves scattered across a clean white background. It’s a happy project for anyone who wants a simple kitchen-themed piece for recipes, grocery lists, or meal planning. The round lemon shapes are easy to build with layers.
Materials Needed:
- Clipboard (wood or MDF)
- Acrylic paint
- Paintbrushes in multiple sizes
- Palette or paint tray
- Optional clear sealer or varnish
Steps to Make:
- Paint the clipboard white and let it dry until it feels smooth.
- Sketch a few circles where you want lemon slices, leaving breathing space.
- Paint the circles yellow, then add lighter wedge lines radiating from the center.
- Add a thin white ring and tiny seeds, plus a few leafy green accents.
- Dry completely and seal so it can handle kitchen splashes and wiping.
4. Starry Night Gradient Clipboard
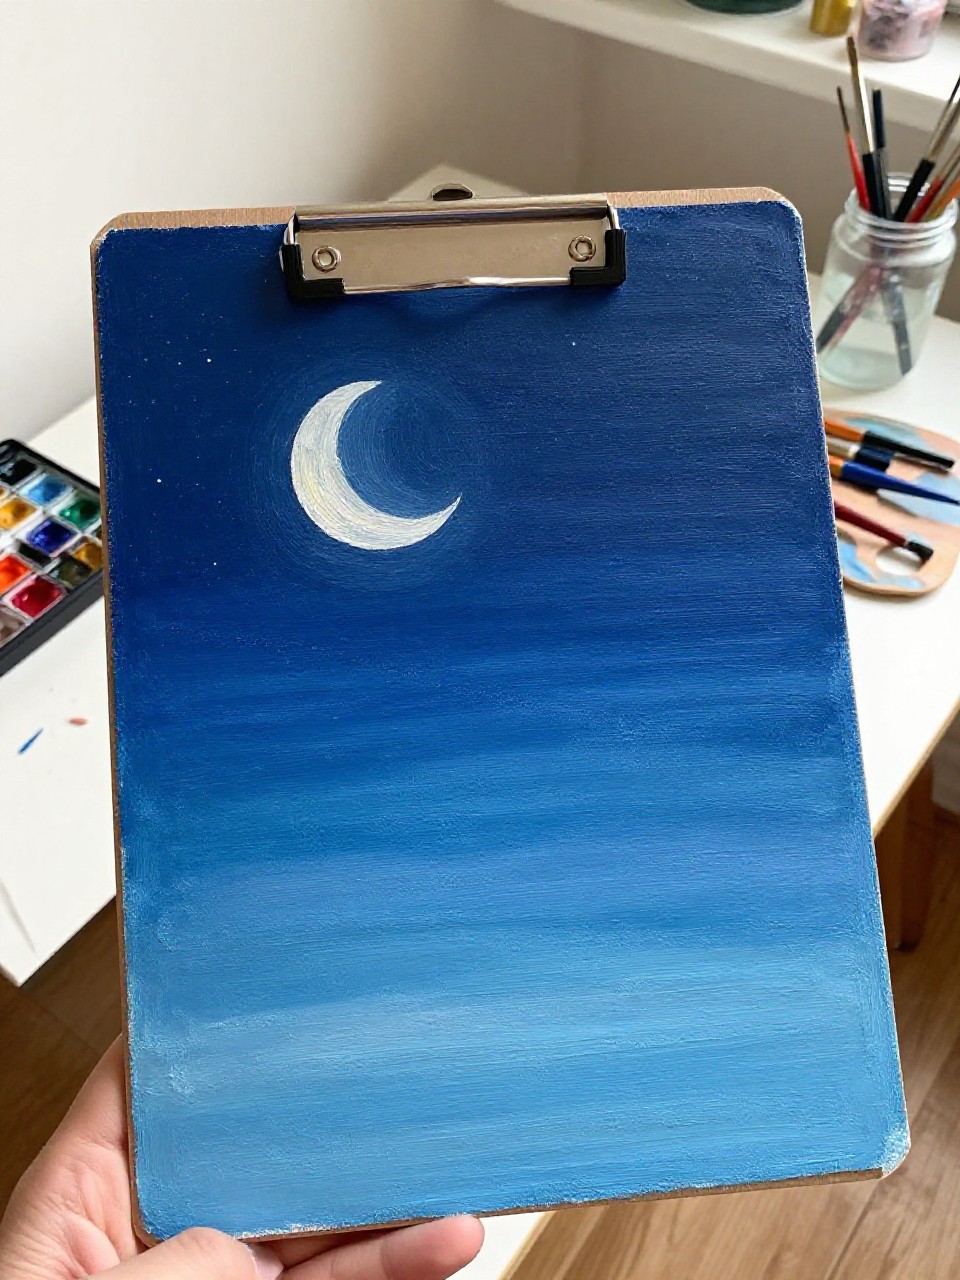
The finished clipboard fades from deep navy to a lighter blue, with tiny stars and a soft moon painted on top. It’s relaxing because blending the background is calming, and the star dots don’t need to be perfect. This makes a great “night notes” board for journaling or bedtime reminders.
Materials Needed:
- Clipboard (wood or MDF)
- Acrylic paint
- Paintbrushes in multiple sizes
- Palette or paint tray
- White paint pen (optional)
- Optional clear sealer or varnish
Steps to Make:
- Paint a dark-to-light gradient from top to bottom using a damp brush for blending.
- Let the background dry, then add a pale moon circle near one corner.
- Dot on stars using the tip of a small brush or a paint pen for crisp points.
- Add a few slightly larger stars with thicker paint for texture and glow.
- Dry fully and seal to protect the layered night colors.
5. Gingham Picnic Clipboard
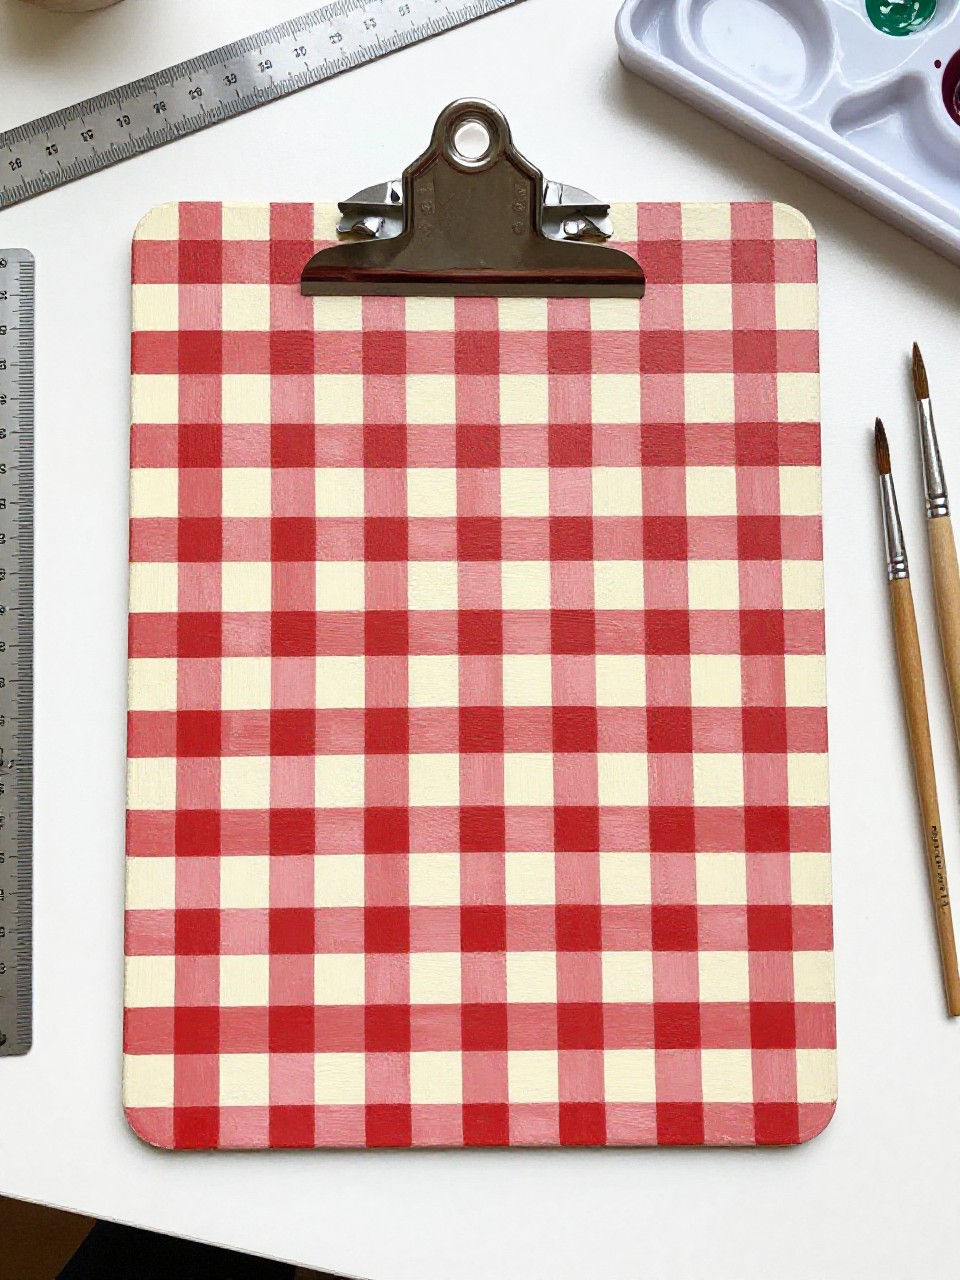
This clipboard has a classic gingham pattern, like a picnic blanket, in two or three colors. It looks tidy, but it’s built from simple stripes and a little patience. If you enjoy repetitive, soothing painting, this one feels almost like a craft meditation.
Materials Needed:
- Clipboard (wood or MDF)
- Acrylic paint
- Paintbrushes in multiple sizes
- Palette or paint tray
- Ruler (optional)
- Optional clear sealer or varnish
Steps to Make:
- Paint a light base color and let it dry so lines don’t drag.
- Mark evenly spaced vertical stripes with light pencil or a ruler.
- Paint the vertical stripes in a mid-tone color, leaving gaps between them.
- Add horizontal stripes, then darken the overlapping squares for the gingham effect.
- Dry well and seal so the pattern stays crisp with daily use.
6. Rainbow Stripe Homework Clipboard
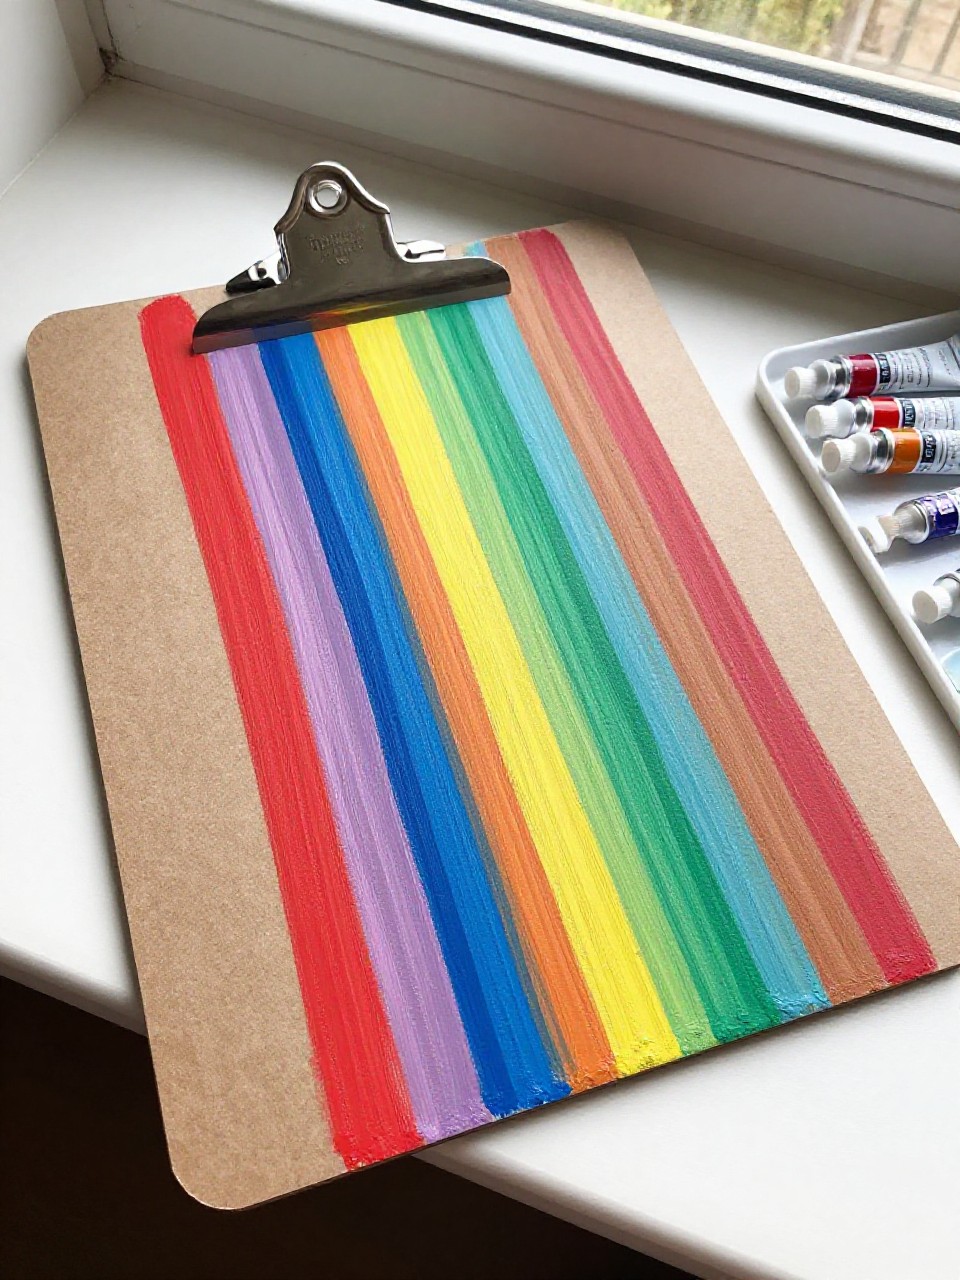
The clipboard shows bright rainbow stripes running from top to bottom, with each band slightly uneven in a charming hand-painted way. It’s perfect for kids’ art time or anyone who wants their school or work papers to feel less boring. Painting stripes helps you practice steady brush control.
Materials Needed:
- Clipboard (wood or MDF)
- Acrylic paint
- Paintbrushes in multiple sizes
- Palette or paint tray
- Painter’s tape (optional)
- Optional clear sealer or varnish
Steps to Make:
- Paint a white base coat and dry it fully so colors pop.
- Plan your stripe order lightly with pencil lines, or tape for straighter edges.
- Paint each stripe one at a time, letting colors meet cleanly at the edges.
- Add a thin highlight line on a few stripes to show brush texture and depth.
- Let it dry, then seal for a durable, wipeable finish.
7. Blue Botanical Linework Clipboard
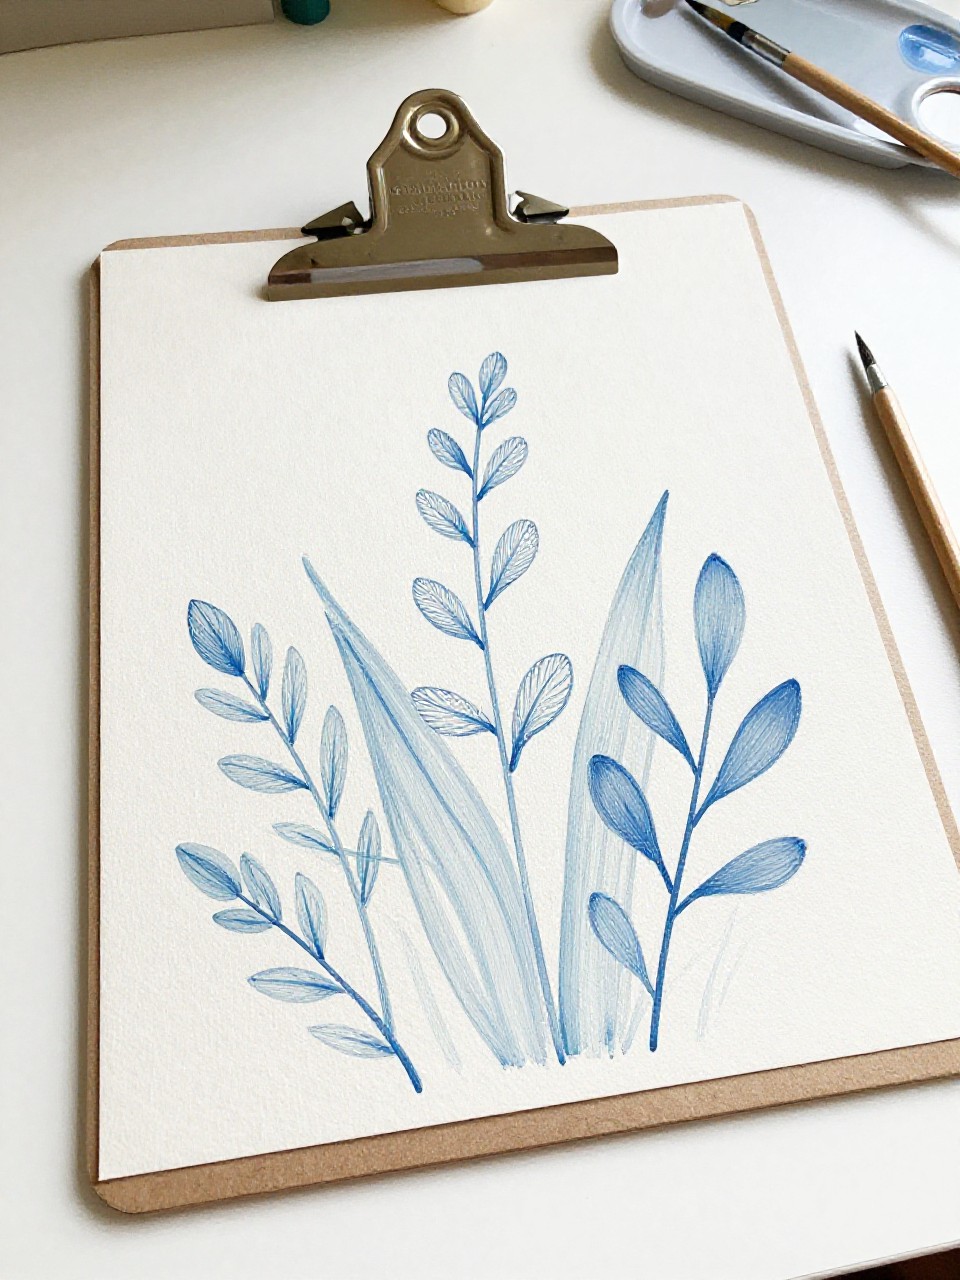
This clipboard looks clean and classic with simple blue leaves and stems painted like airy line drawings over a pale background. It’s great for beginners who like calm, controlled strokes and a limited color palette. The design feels peaceful for a home office or study space.
Materials Needed:
- Clipboard (wood or MDF)
- Acrylic paint
- Paintbrushes in multiple sizes
- Palette or paint tray
- Pencil (optional)
- Optional clear sealer or varnish
Steps to Make:
- Paint a pale background color (warm white or light gray) and let it dry.
- Lightly sketch a few leaf stems sweeping across the board.
- Use a small brush to paint thin blue stems with gentle curves.
- Add simple leaf shapes using quick one-stroke pulls for a hand-painted look.
- Dry completely and seal so the thin lines don’t scuff.
8. Marble-Swirl Clipboard (Paint-Pour Look)
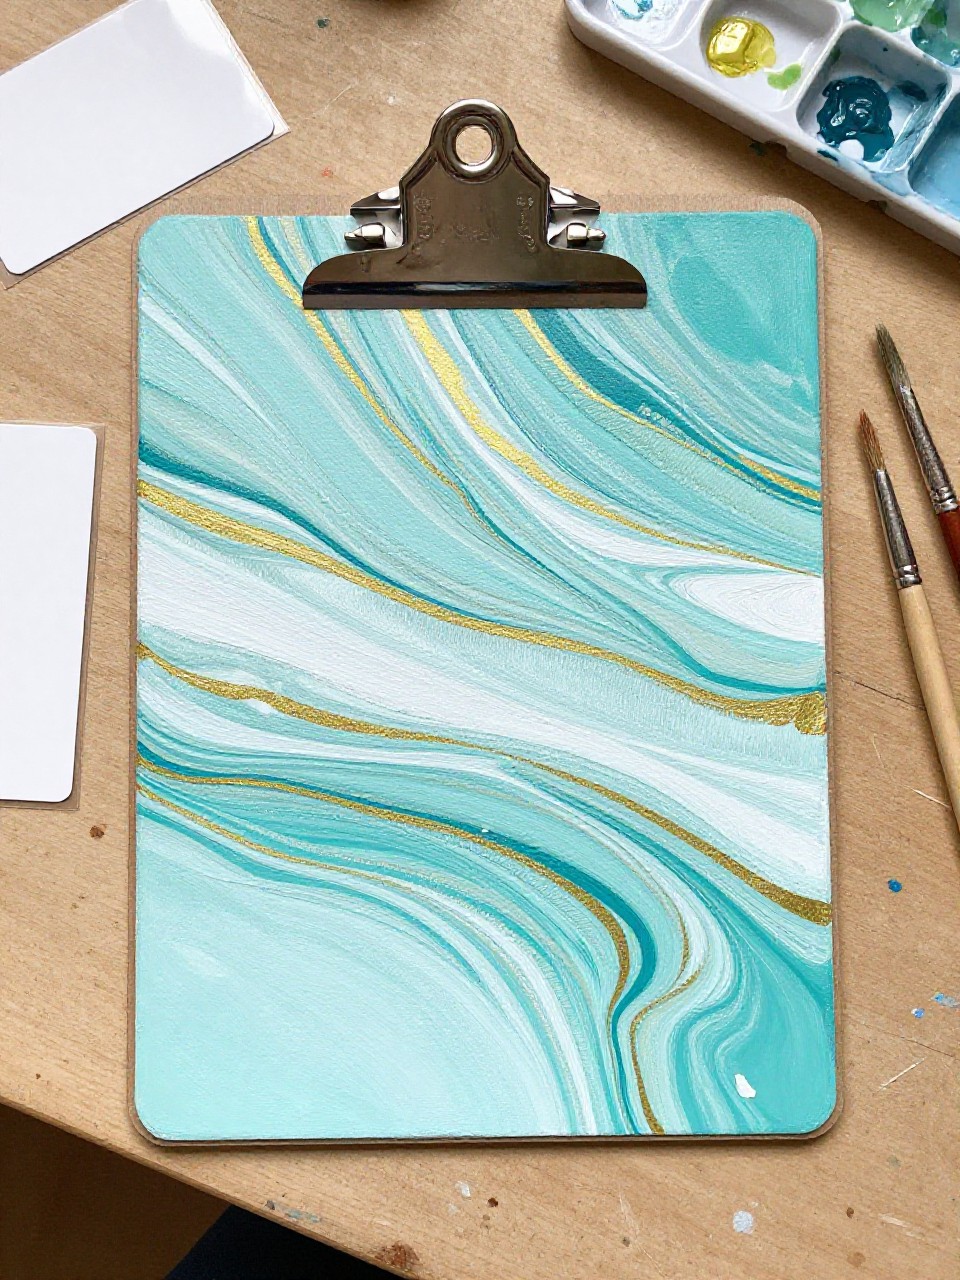
The finished clipboard has swirly “marble” ribbons of two or three colors that blend and loop across the surface. It’s a fun choice if you want something loose and playful without detailed drawing. Each swirl turns out different, so it feels like a surprise every time.
Materials Needed:
- Clipboard (wood or MDF)
- Acrylic paint
- Paintbrushes in multiple sizes
- Palette or paint tray
- Plastic card or old gift card
- Optional clear sealer or varnish
Steps to Make:
- Paint the clipboard a solid light base and let it dry.
- Add thin puddles of two or three colors in wavy lines across the board.
- Drag a plastic card lightly through the paint to pull the colors into swirls.
- Use a small brush to add a few extra curls or thin veins where needed.
- Let it dry flat, then seal to protect the glossy, layered look.
9. Cozy Plaid Fall Clipboard
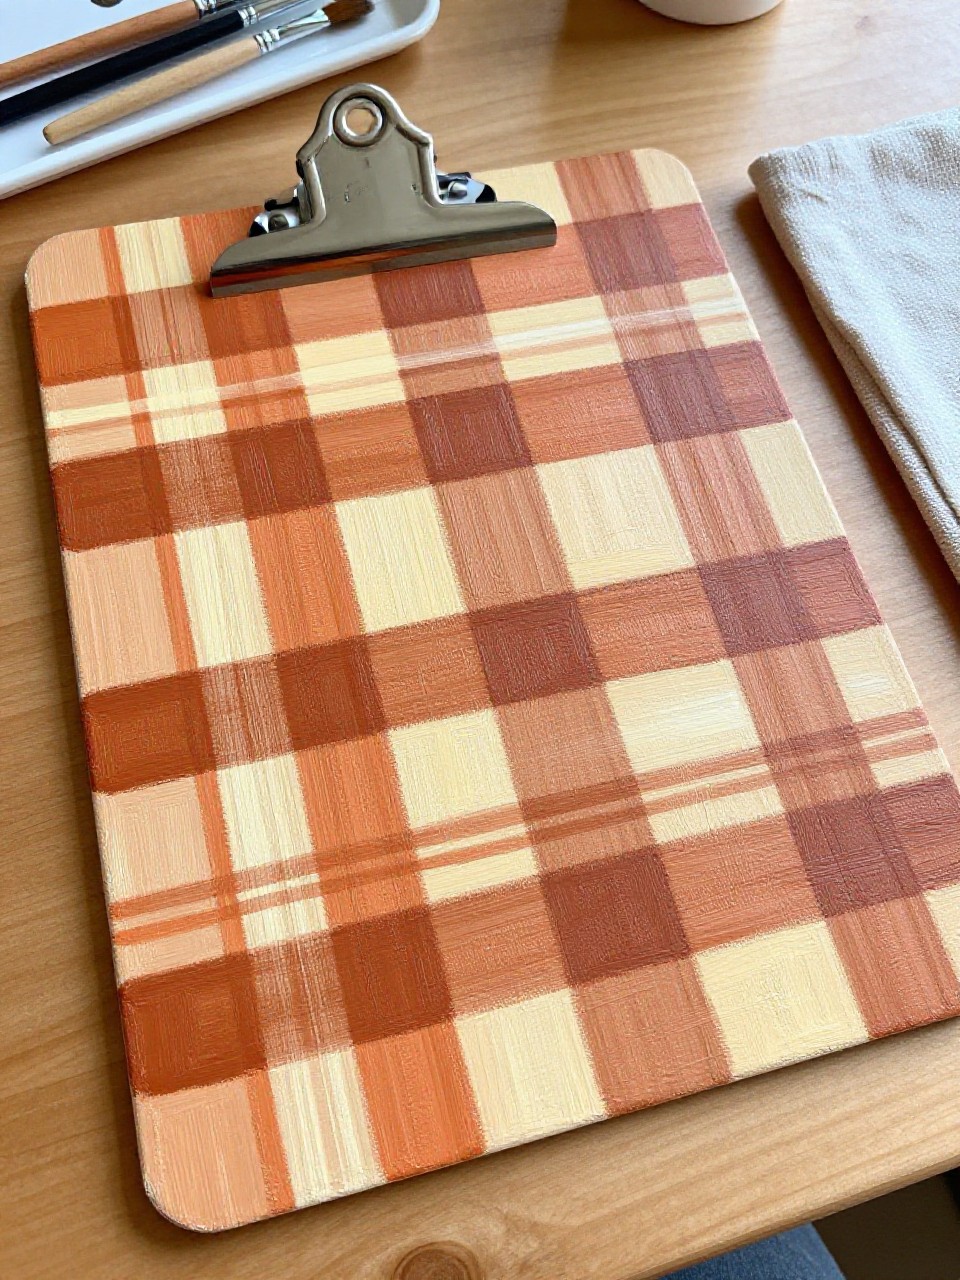
This clipboard looks warm and autumn-ready with a simple plaid in rusty orange, cream, and deep brown. It’s a nice beginner project because it’s mostly stripes, and tiny wobble lines just make it feel more handmade. Use it for seasonal to-do lists or a fall recipe board.
Materials Needed:
- Clipboard (wood or MDF)
- Acrylic paint
- Paintbrushes in multiple sizes
- Palette or paint tray
- Ruler (optional)
- Optional clear sealer or varnish
Steps to Make:
- Paint a cream base coat and let it dry completely.
- Mark a grid lightly, or just plan wide stripes by eye for a softer look.
- Paint the main wide stripes in rusty orange, leaving cream gaps.
- Add thinner dark stripes over parts of the orange and cream to form plaid crossings.
- Dry, then seal so the layered stripes stay protected from scuffs.
10. Ocean Wave Edge Clipboard
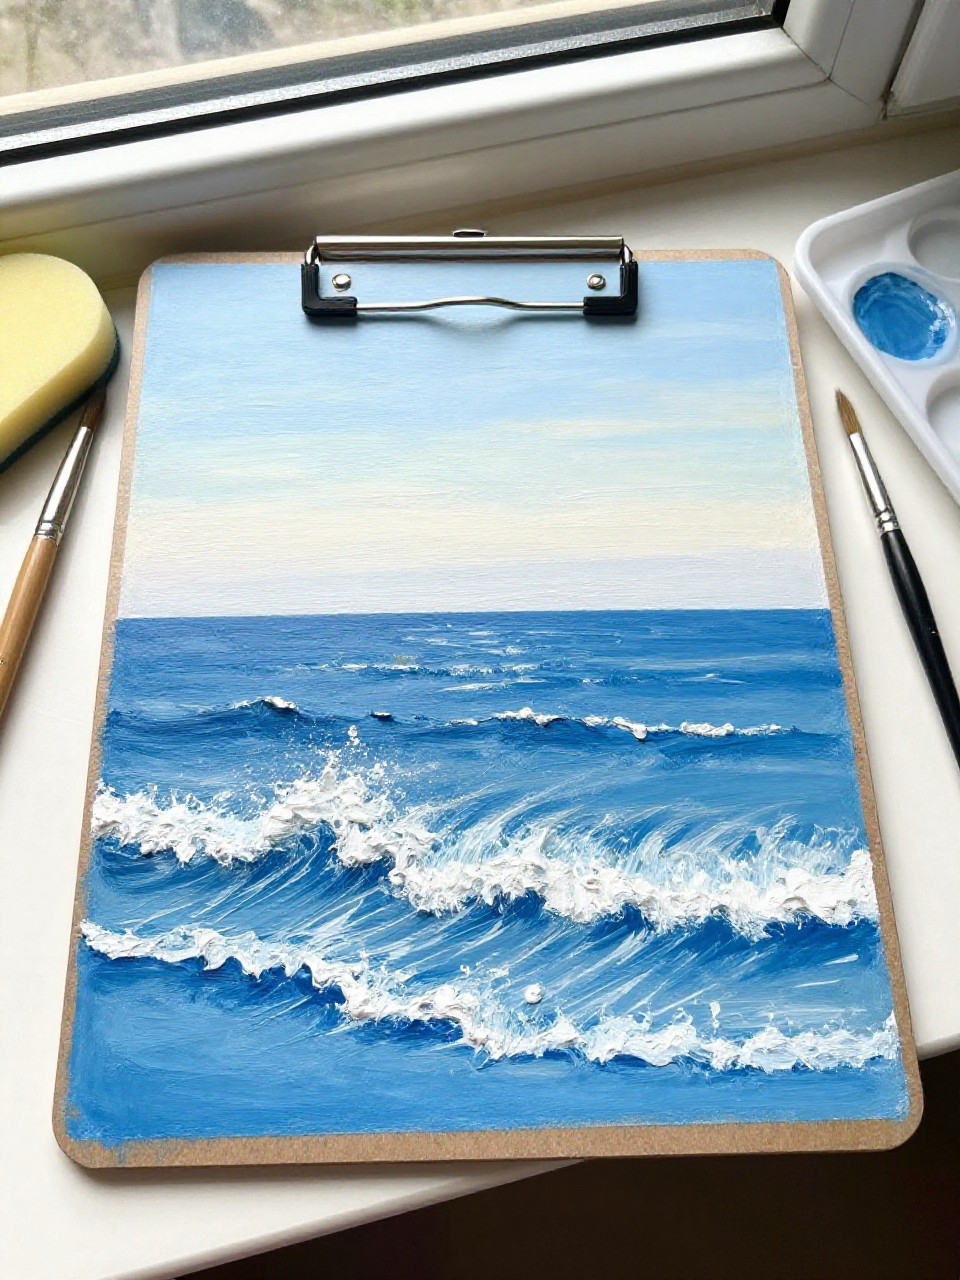
The clipboard has rolling ocean waves painted along the bottom edge, with seafoam highlights and a calm sky above. It’s satisfying because you can practice blending blues and adding little white foam details that instantly make it look like water. It’s perfect for a relaxing beachy desk vibe.
Materials Needed:
- Clipboard (wood or MDF)
- Acrylic paint
- Paintbrushes in multiple sizes
- Palette or paint tray
- Sponge piece (optional)
- Optional clear sealer or varnish
Steps to Make:
- Paint a light sky background on the top two-thirds and let it dry.
- Block in a deeper blue band along the bottom for the sea.
- Shape wave curves with mid-blue, then blend darker blue into the troughs.
- Tap on seafoam with white paint using a sponge or small brush for texture.
- Dry fully and seal so the foamy highlights don’t rub off.
11. Fruit Sticker-Style Cherry Clipboard
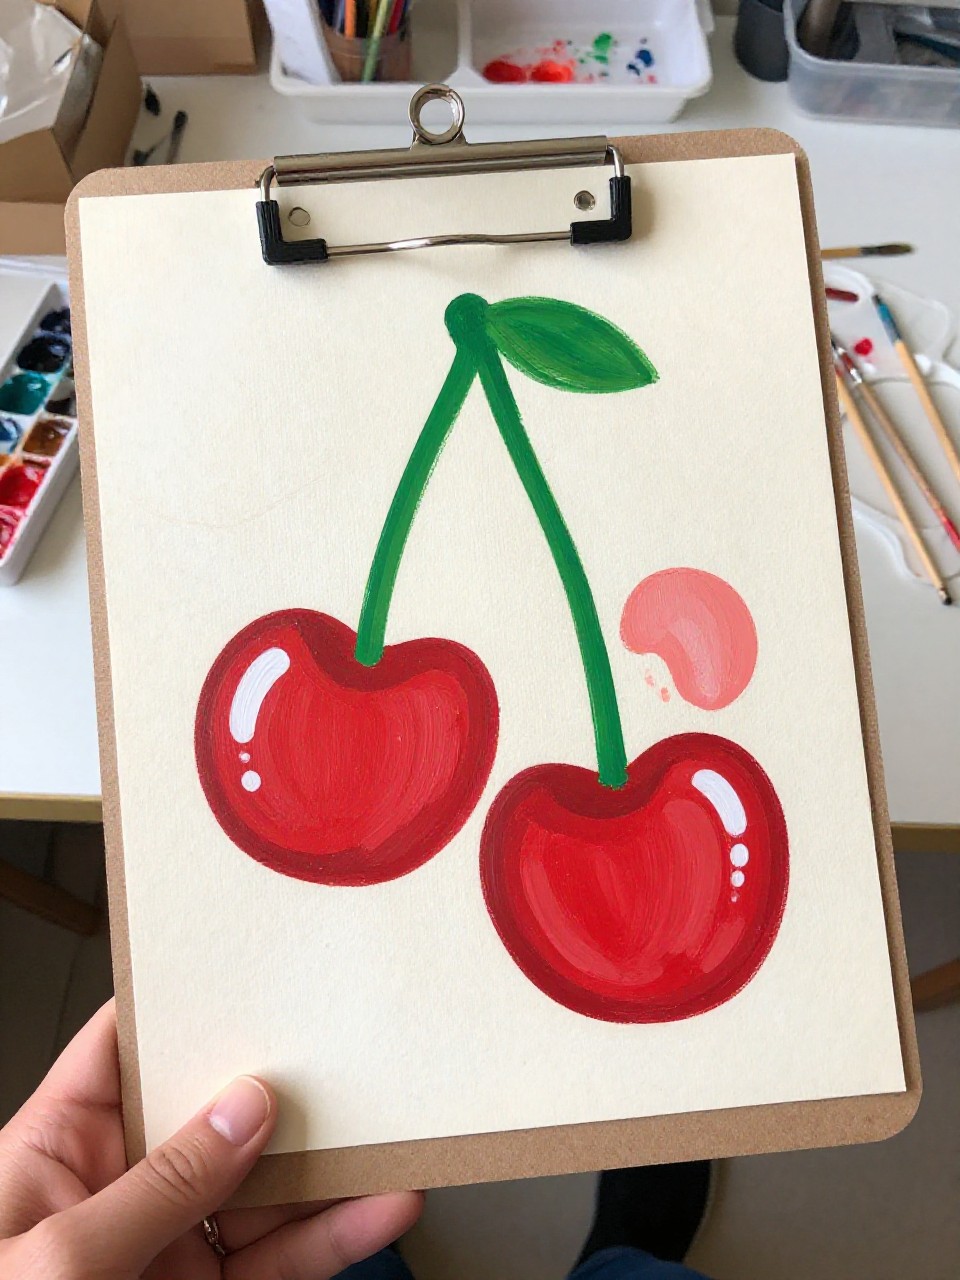
This clipboard looks like a playful “sticker” design, with bright red cherries painted in bold shapes and thick highlights. It’s great for beginners because each cherry is just a couple of circles, a stem, and a shine mark. The cheerful look makes daily notes feel more fun.
Materials Needed:
- Clipboard (wood or MDF)
- Acrylic paint
- Paintbrushes in multiple sizes
- Palette or paint tray
- White paint pen (optional)
- Optional clear sealer or varnish
Steps to Make:
- Paint a clean light background and let it dry fully.
- Sketch a few cherry pairs across the board, spacing them evenly.
- Paint the cherries in red with slightly darker red on one side for shading.
- Add stems and a few leaves, then paint small white highlight curves on each cherry.
- Dry completely and seal to keep the shiny “sticker” look durable.
12. Simple Mandala Corner Clipboard
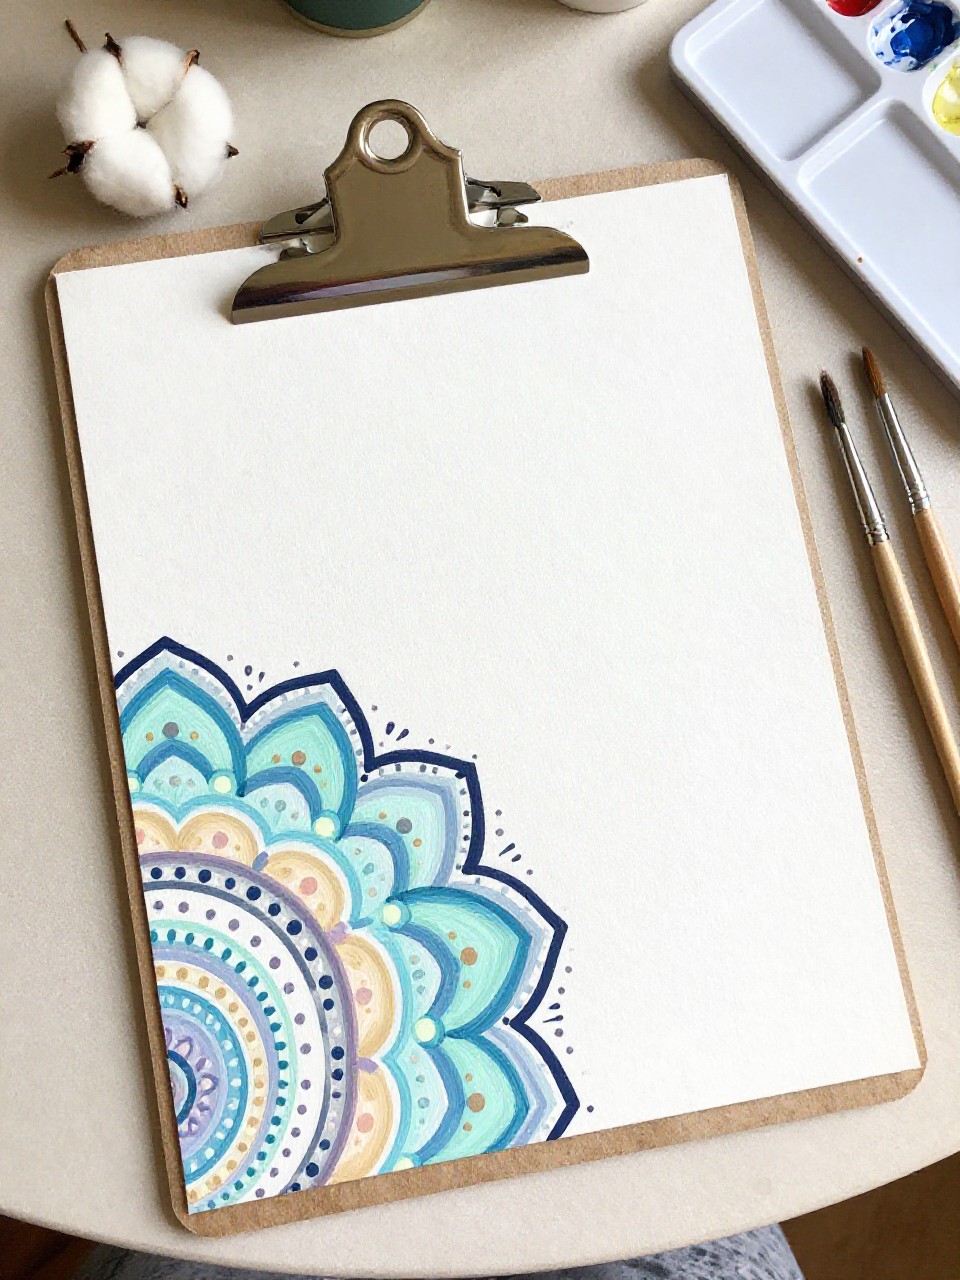
The finished clipboard has a small mandala blooming from one corner, leaving the rest open for writing space. It’s soothing because you build it slowly with repeated shapes, dots, and curved petals. Even if your lines aren’t perfect, the overall pattern still looks balanced and pretty.
Materials Needed:
- Clipboard (wood or MDF)
- Acrylic paint
- Paintbrushes in multiple sizes
- Palette or paint tray
- Dotting tool or cotton swab (optional)
- Optional clear sealer or varnish
Steps to Make:
- Paint a solid background color and let it dry without tackiness.
- Lightly pencil a quarter-circle guide in one corner for your mandala.
- Paint layered petal shapes from the corner outward, changing colors by ring.
- Add dots and tiny line details with a small brush or cotton swab.
- Dry well and seal to protect the fine pattern work.
13. Quote Banner Clipboard with Painted Background

This clipboard has a soft painted background with a simple banner shape holding a short quote like “One Step at a Time.” It’s a nice beginner project because the lettering can be simple, and you can fix small mistakes by painting over them. It makes a sweet gift for students or coworkers.
Materials Needed:
- Clipboard (wood or MDF)
- Acrylic paint
- Paintbrushes in multiple sizes
- Palette or paint tray
- Pencil (optional)
- Optional clear sealer or varnish
Steps to Make:
- Paint a gentle background wash (like light peach or pale blue) and dry it.
- Sketch a ribbon banner across the middle with light pencil lines.
- Paint the banner a solid color, then add small shadow strokes for depth.
- Write the quote with a small brush, keeping letters simple and readable.
- Dry fully and seal so the quote stays crisp with daily handling.
14. Polka Dot Confetti Clipboard
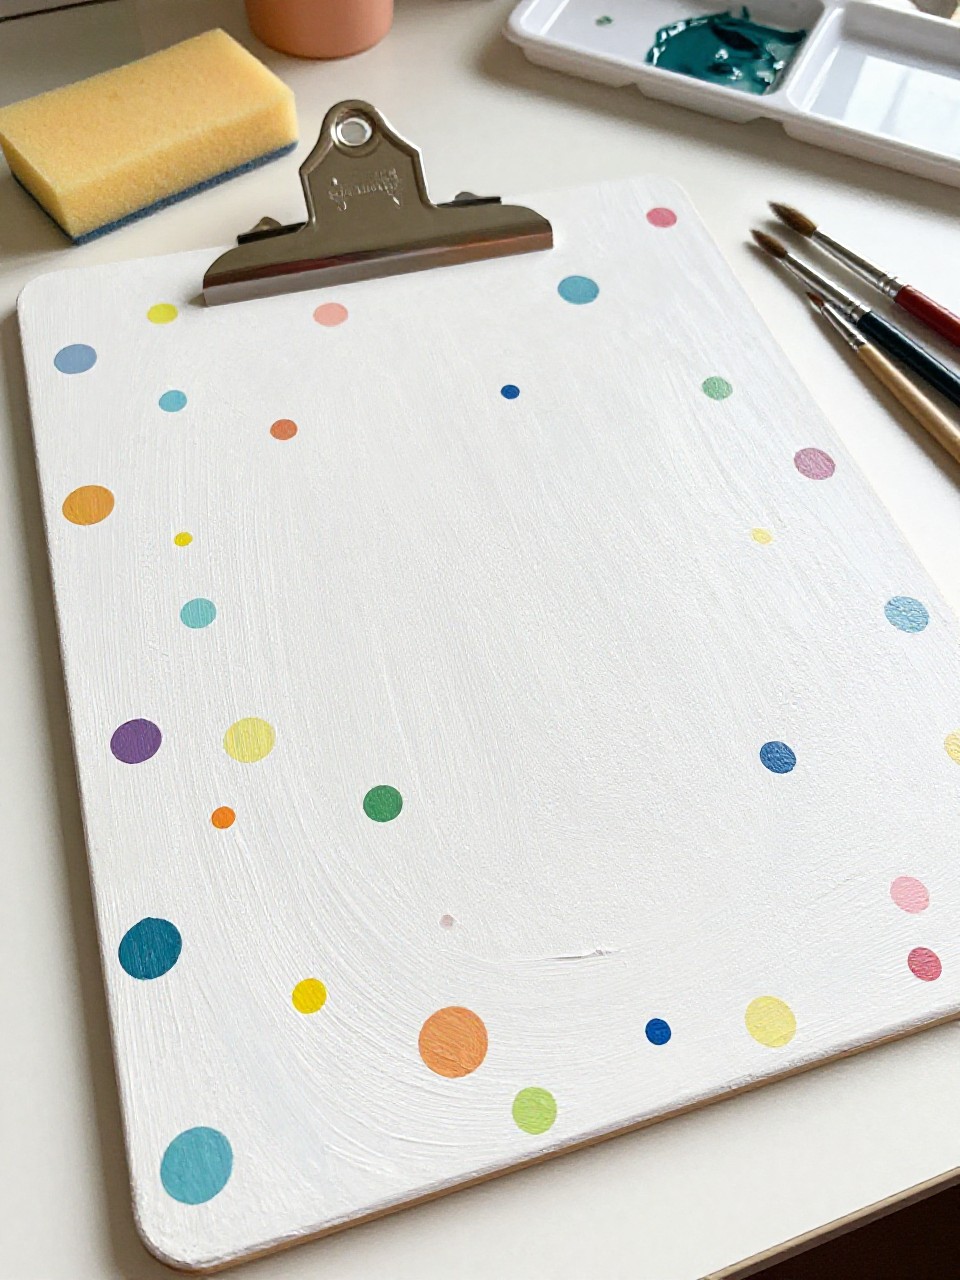
The finished clipboard is covered in playful confetti dots in different sizes, with a few overlapping spots that show thicker paint. It’s an easy project when you want to paint without planning too much, and it still looks bright and tidy. Great for a family craft night or quick weekend reset.
Materials Needed:
- Clipboard (wood or MDF)
- Acrylic paint
- Paintbrushes in multiple sizes
- Palette or paint tray
- Round sponge dauber (optional)
- Optional clear sealer or varnish
Steps to Make:
- Paint the clipboard a solid base color and let it dry completely.
- Choose 4–6 bright colors and pour small amounts onto your palette.
- Dot on large circles first with a brush handle end or sponge dauber.
- Fill in with smaller dots, letting a few overlap for a layered confetti look.
- Dry well and seal so the raised dots don’t chip with use.
15. Garden Herb Label Clipboard
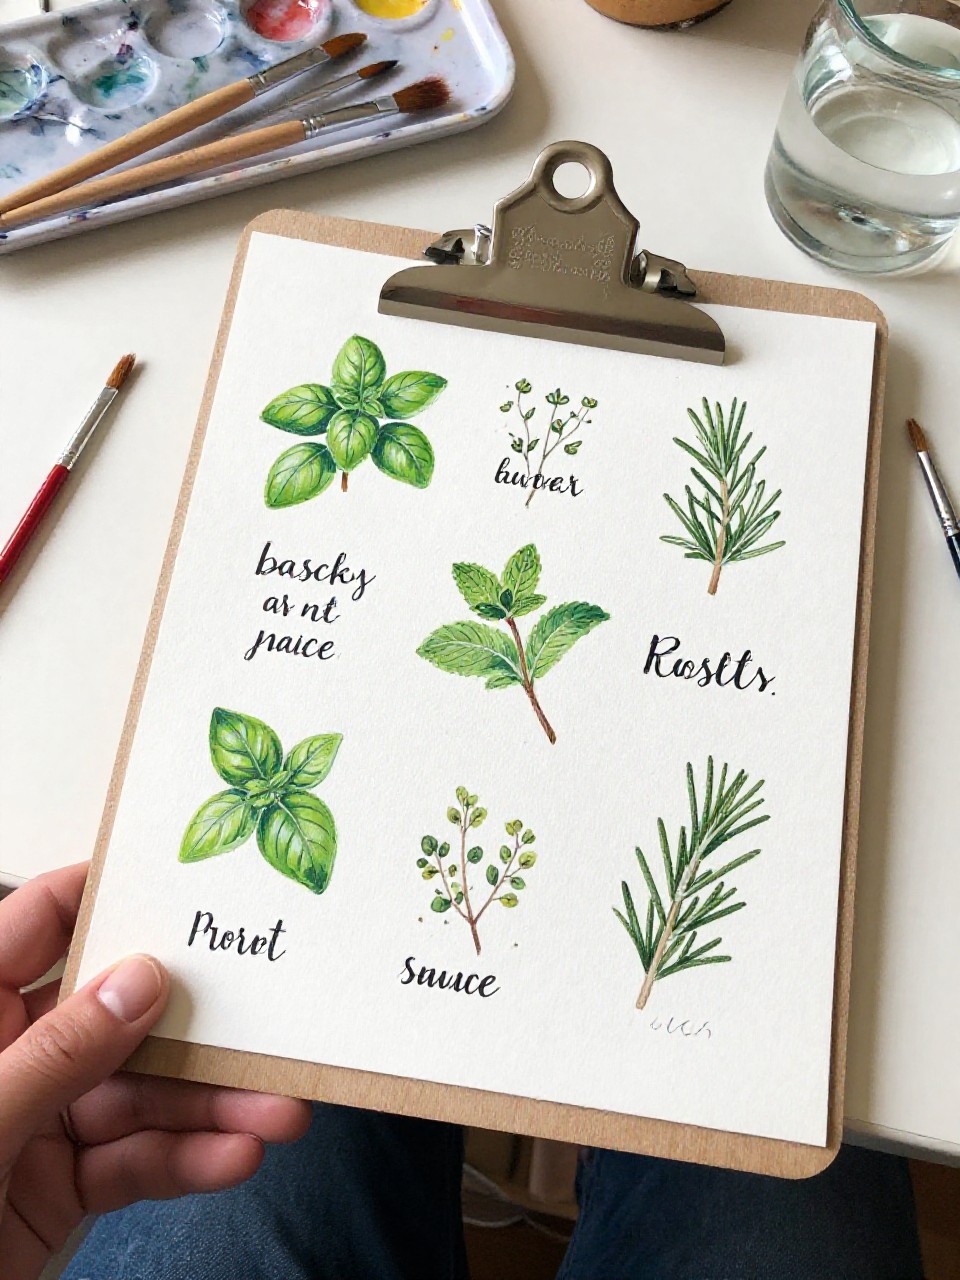
This clipboard looks like a mini herb garden chart, with small painted herb sprigs and hand-lettered labels like “Basil,” “Mint,” and “Rosemary.” It’s relaxing because you can paint one simple plant at a time and keep the style loose. It’s also handy for kitchen notes or garden planning.
Materials Needed:
- Clipboard (wood or MDF)
- Acrylic paint
- Paintbrushes in multiple sizes
- Palette or paint tray
- Pencil (optional)
- Optional clear sealer or varnish
Steps to Make:
- Paint a warm white or light kraft-tan background and let it dry.
- Lightly pencil a few label rectangles or lines, leaving space for drawings.
- Paint simple herb sprigs with thin stems and quick leaf strokes.
- Add the herb names with a small brush, keeping letters clear and casual.
- Dry completely, then seal so the clipboard stays wipeable and sturdy.