
Table of Contents Show
Keeping little hands busy can be tough, especially on rainy days or during quiet classroom times. If you’re searching for simple, fun activities that spark imagination, airplane crafts are a great pick.
This list gives you easy, colorful projects that preschool kids can make with common supplies.
You’ll find ideas that build fine motor skills, encourage pretend play, and look great on display. Let’s take off into these playful airplane crafts!
1. Paper Plate Jet Plane
This craft turns a paper plate into a sleek jet with wings and a tail, painted bright with windows and a smiling pilot. Kids love how fast it “flies” in pretend play, and the simple cuts and glue make it easy for beginners.
Materials Needed:
For People Who Love to Make Things ✂️
- Paper plate (9-inch)
- Child-safe scissors
- Glue stick or school glue
- Markers or paint
- Googly eyes (optional)
How to make it:
- Cut a paper plate in half; use one half as the plane body and trim the other half into two wings and a tail fin.
- Glue the wings along the sides and the tail fin at the back.
- Draw windows, stripes, and a cockpit; add googly eyes to the cockpit if you like.
- Let the glue dry and zoom your jet around the room.
2. Toilet Paper Roll Airliner

A cardboard tube becomes a friendly airliner with cut paper wings, windows, and a nose cone. Kids enjoy rolling it along the floor and pretending it’s boarding passengers, and the tube is easy for small hands to hold.
Materials Needed:
- Empty toilet paper roll
- Construction paper (for wings and nose)
- Glue stick
- Black marker
- Stickers (optional)
How to make it:
- Wrap the tube with colored paper if desired.
- Cut two wing shapes and a small triangle tail; glue them to the tube.
- Draw rows of windows and a door, then add stickers for logos.
- Let it set and push your plane along a “runway” on the table.
3. Clothespin and Popsicle Stick Glider
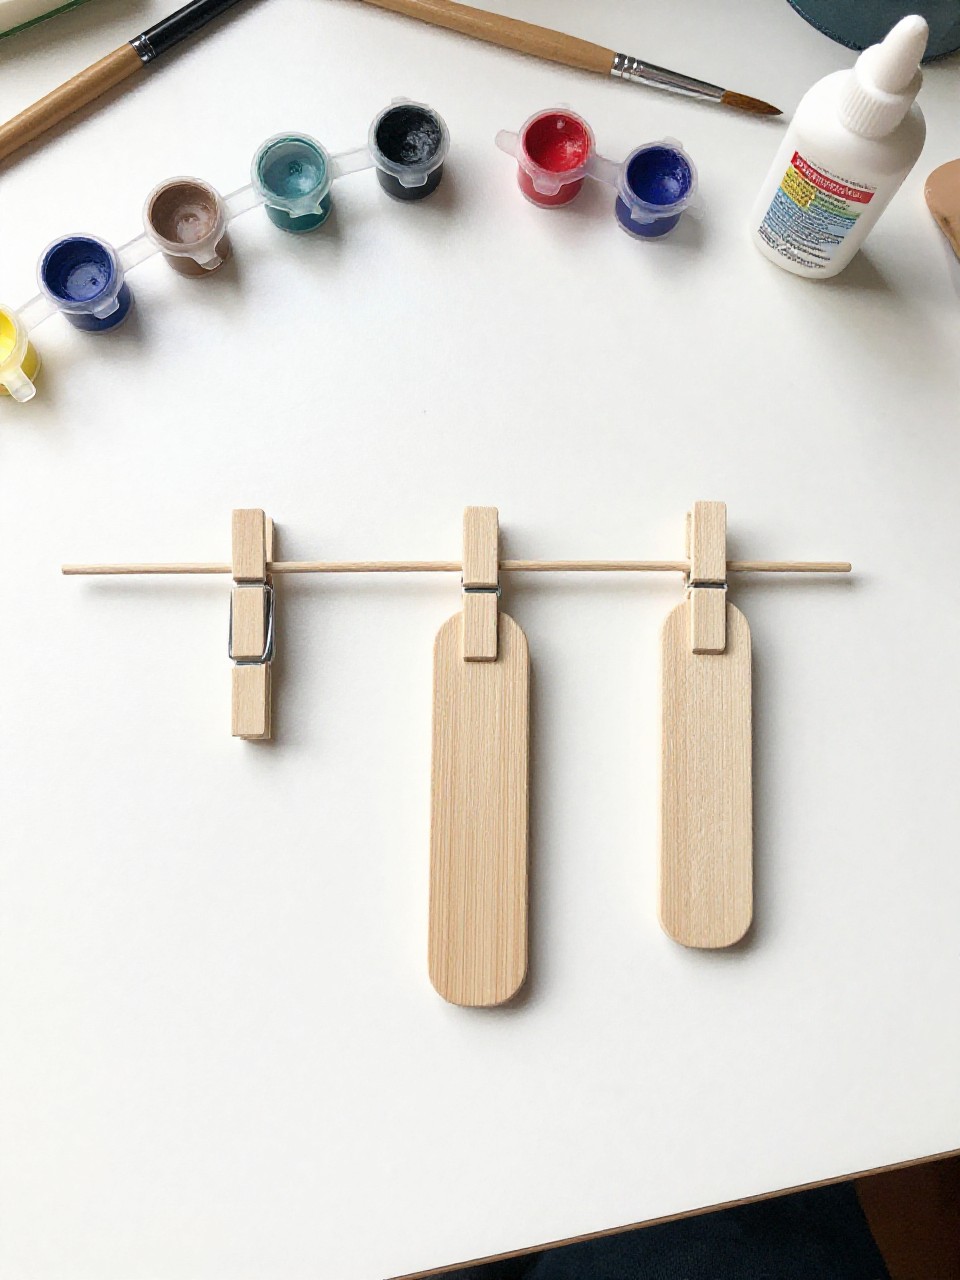
This tiny plane has a wooden clothespin body and popsicle stick wings, painted in cheerful colors. Kids love clipping it onto bags or curtains and “flying” it around, and assembly is quick and satisfying.
Materials Needed:
- Wooden clothespin
- 2 regular popsicle sticks
- Washable paint or markers
- School glue
- Small star stickers (optional)
How to make it:
- Color the clothespin and sticks; let them dry briefly.
- Glue one stick across the top front and one across the back for tail wings.
- Add stripes, dots, or star stickers.
- Clip it to your finger and zoom it through the air.
4. Handprint Airplane Art
A painted handprint becomes the plane body, with paper wings and a drawn sky full of clouds. Kids love seeing their own hand become a plane, and the sensory paint experience makes it extra fun.
Materials Needed:
- White cardstock
- Washable paint
- Construction paper (for wings and tail)
- Glue stick
- Blue crayon or cotton balls for clouds
How to make it:
- Paint a hand and press it onto cardstock with fingers pointing back to form the plane body.
- Cut and glue simple wing and tail shapes near the palm.
- Draw windows and add clouds with a blue crayon or glue on cotton ball clouds.
- Let it dry and hang the artwork on the wall.
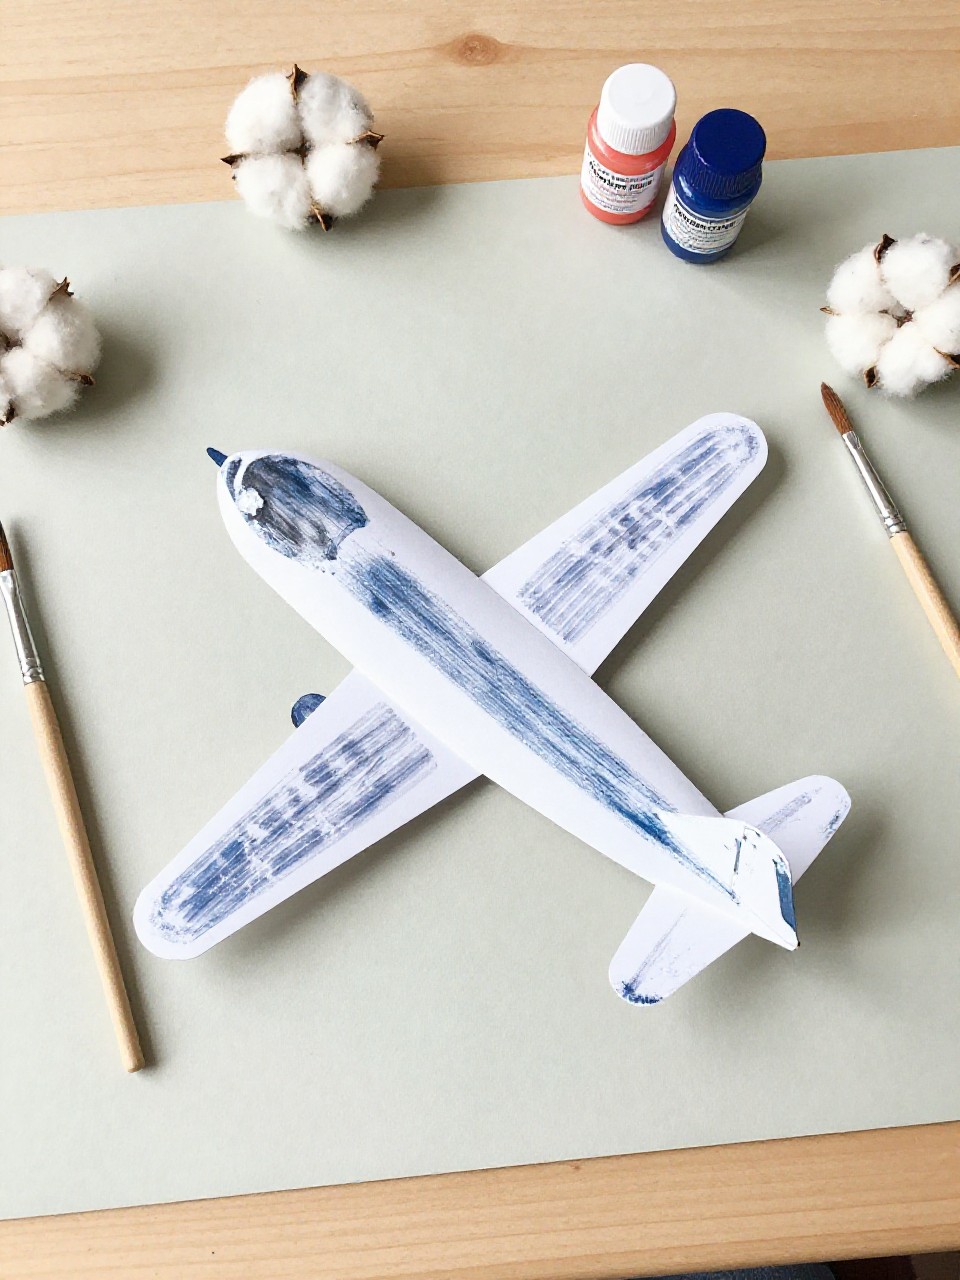
5. Paper Straw Biplane
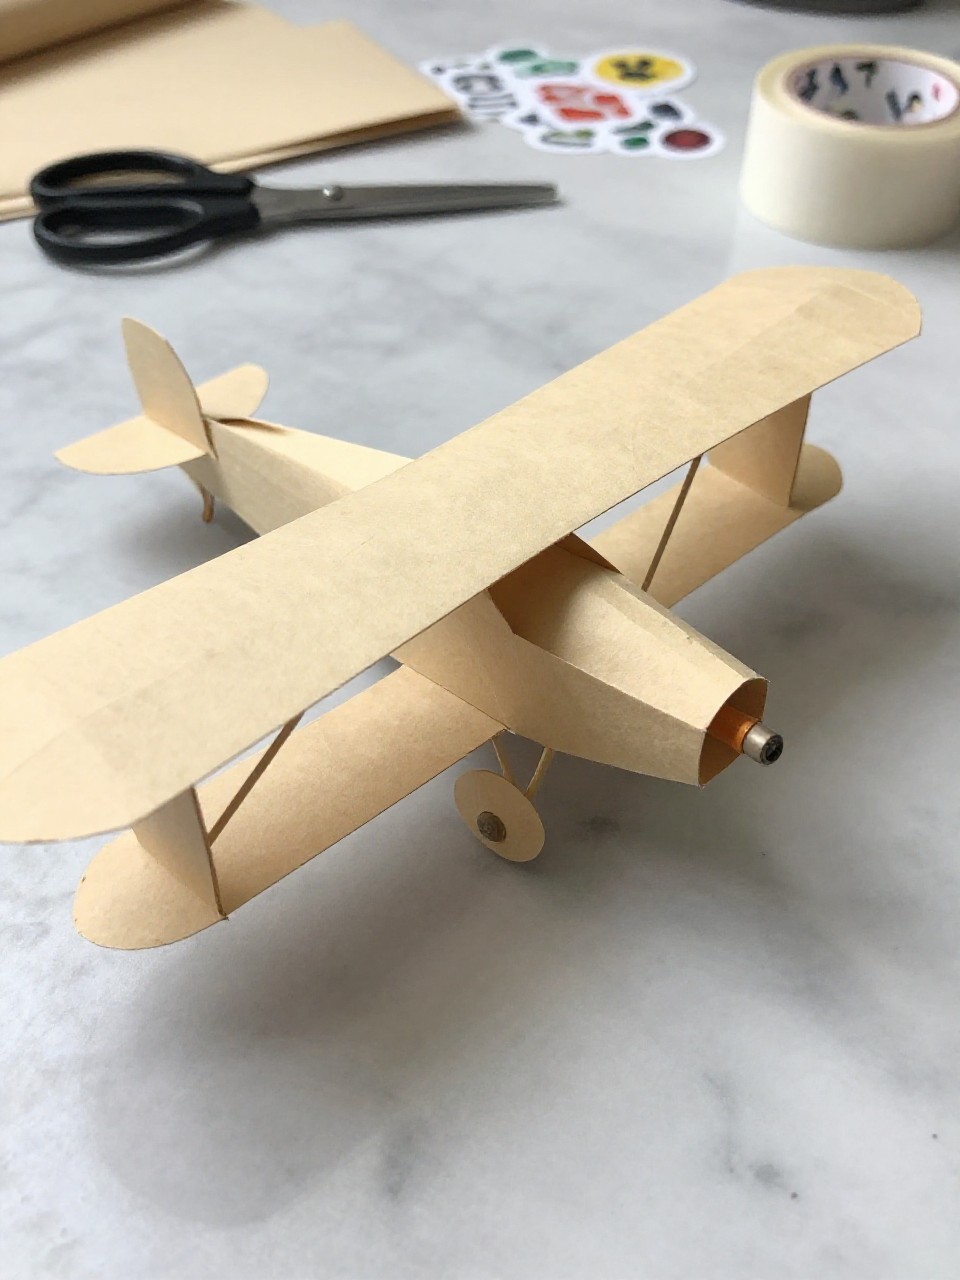
Two paper straws become stacked wings on a folded cardstock body, creating a cute biplane look. Preschoolers enjoy choosing colors and seeing the classic double-wing style come together.
Materials Needed:
- Cardstock (for body)
- 2 paper straws
- Glue or double-sided tape
- Marker
- Small circle stickers (optional)
How to make it:
- Fold a strip of cardstock in half for the fuselage.
- Cut straws to size and glue one on top and one underneath as double wings.
- Draw a cockpit and place circle stickers as windows.
- Let dry and stand it up for play or display.
6. Sponge-Stamped Airplane Sky
Kids stamp airplane silhouettes using simple sponge shapes onto a blue sky background. It’s great for repetition, pattern play, and little hands who love stamping.
Materials Needed:
- Blue construction paper
- Kitchen sponge cut into a plane shape
- Washable paint (white or bright colors)
- Paper plate (palette)
- Cotton swabs (optional details)
How to make it:
- Cut a sponge into a basic airplane shape.
- Dip the sponge in paint and stamp planes across the blue paper.
- Use cotton swabs to add tiny windows, trails, or stars.
- Set aside to dry and display as a sky collage.
7. Foam Shape Airplane Collage
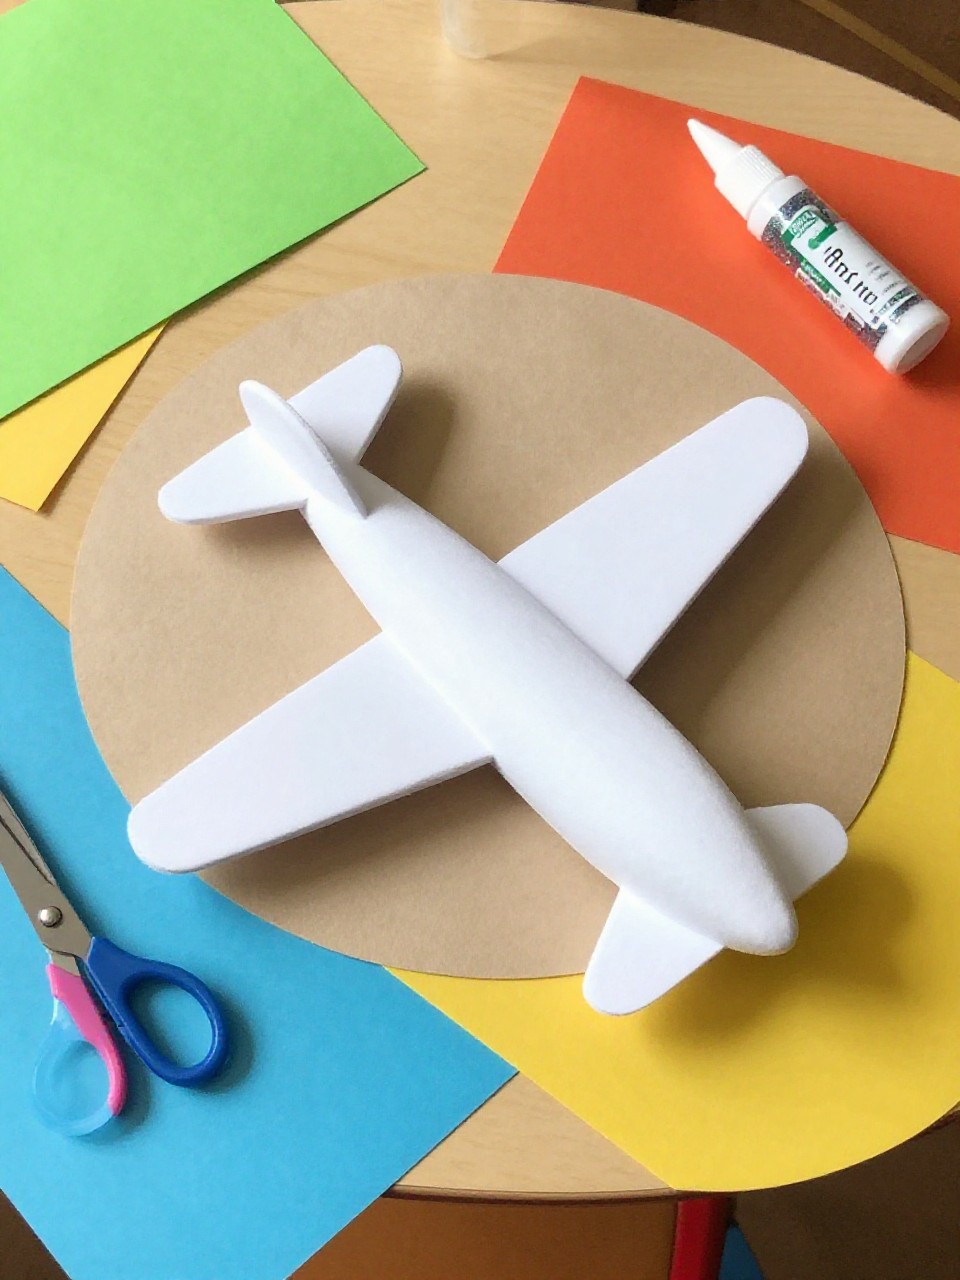
Soft foam shapes form a chunky airplane on cardstock with bold wings, windows, and a tail. Kids enjoy peeling and sticking, which is perfect for fine motor skills.
Materials Needed:
- Adhesive foam shapes or foam sheets
- Safety scissors (if cutting shapes)
- Cardstock base
- Marker
- Glitter glue (optional)
How to make it:
- Cut or pick foam shapes for body, wings, tail, and windows.
- Arrange and stick them onto cardstock to build the plane.
- Outline edges with marker and add glitter glue accents.
- Let dry and place the collage in a window or on a bulletin board.
8. Envelope Paper Airplane Mailer
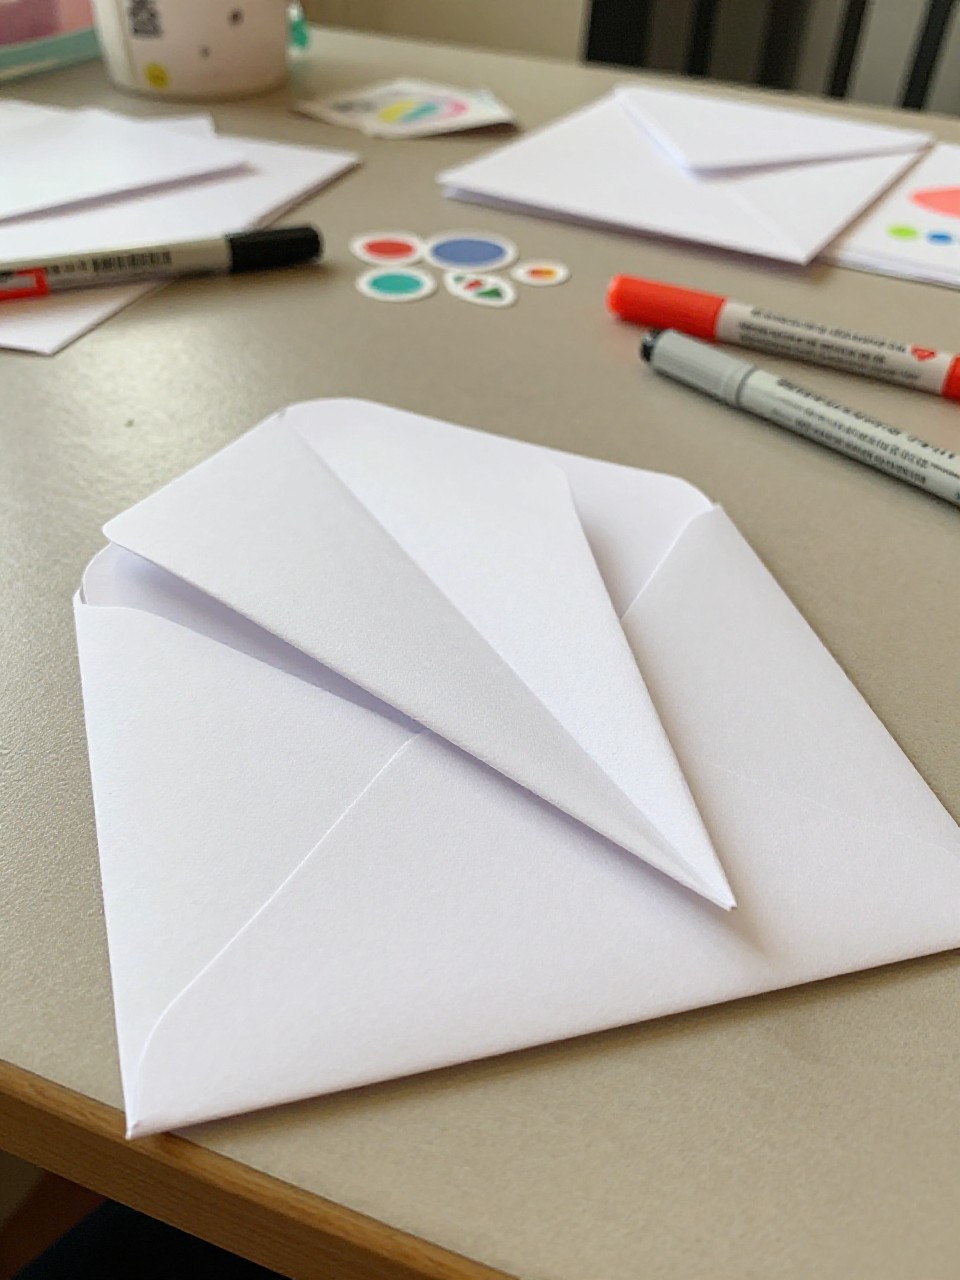
A small envelope becomes an airplane with paper wings and a drawn mailbox banner, perfect for pretend “airmail.” Children love hiding a tiny note inside and delivering it around the room.
Materials Needed:
- Small envelope
- Construction paper (for wings and tail)
- Glue stick
- Markers
- Small sticker stamp (optional)
How to make it:
- Seal the envelope and turn it sideways for the body.
- Cut and glue wings and a tail to the back.
- Draw windows and write “Air Mail” on the side; add a sticker stamp.
- Slip a tiny message inside and deliver your mail plane.
9. CD and Bottle Cap Propeller Plane
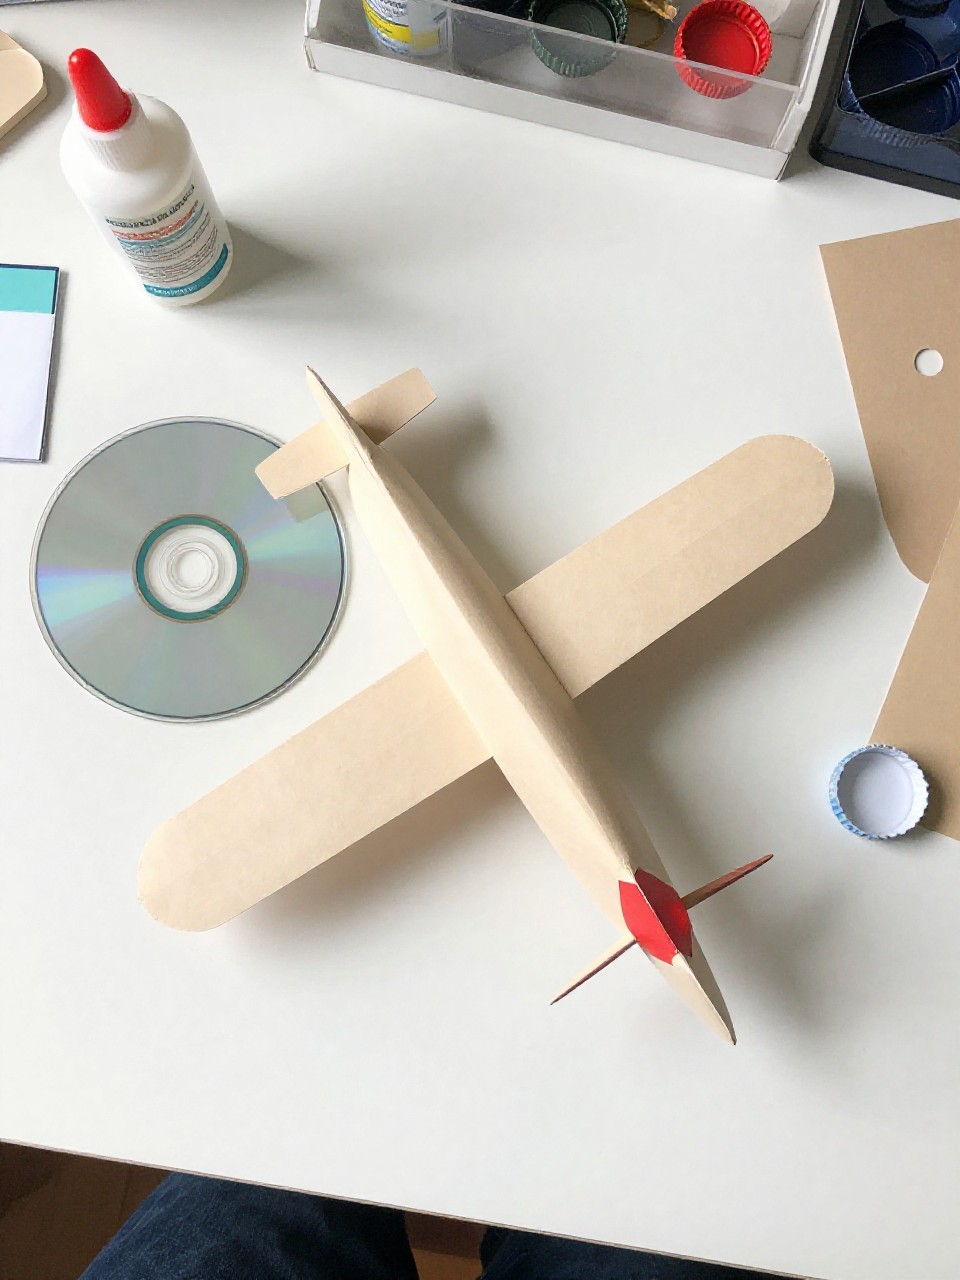
An old CD becomes the round airplane body, with a bottle cap propeller and paper wings. Kids love how shiny the CD looks and how the cap spins a little.
Materials Needed:
- Old CD or DVD
- Bottle cap
- Construction paper (wings and tail)
- Glue
- Marker
How to make it:
- Glue paper wings to the back of the CD and a tail fin at the top.
- Attach the bottle cap to the CD center as the propeller hub.
- Draw windows and add stripes around the CD surface.
- Let dry and display it on a small stand or hang it with string.
10. Finger-Painted Runway Airplane Scene
Kids finger-paint a gray runway and add a simple cut-paper plane landing with bright lights along the sides. The mix of painting and pasting keeps it engaging and sensory-friendly.
Materials Needed:
- White cardstock
- Washable paint (gray, yellow, red)
- Construction paper (plane shapes)
- Glue stick
- Cotton swab (for tiny dots)
How to make it:
- Finger-paint a long gray runway down the page; let it set for a minute.
- Glue a simple paper airplane body, wings, and tail near the runway.
- Dot yellow lights along the edges with a cotton swab; add red stripes to the plane.
- Dry flat and show off your airport scene.
11. Bubble Wrap Print Airplane Clouds
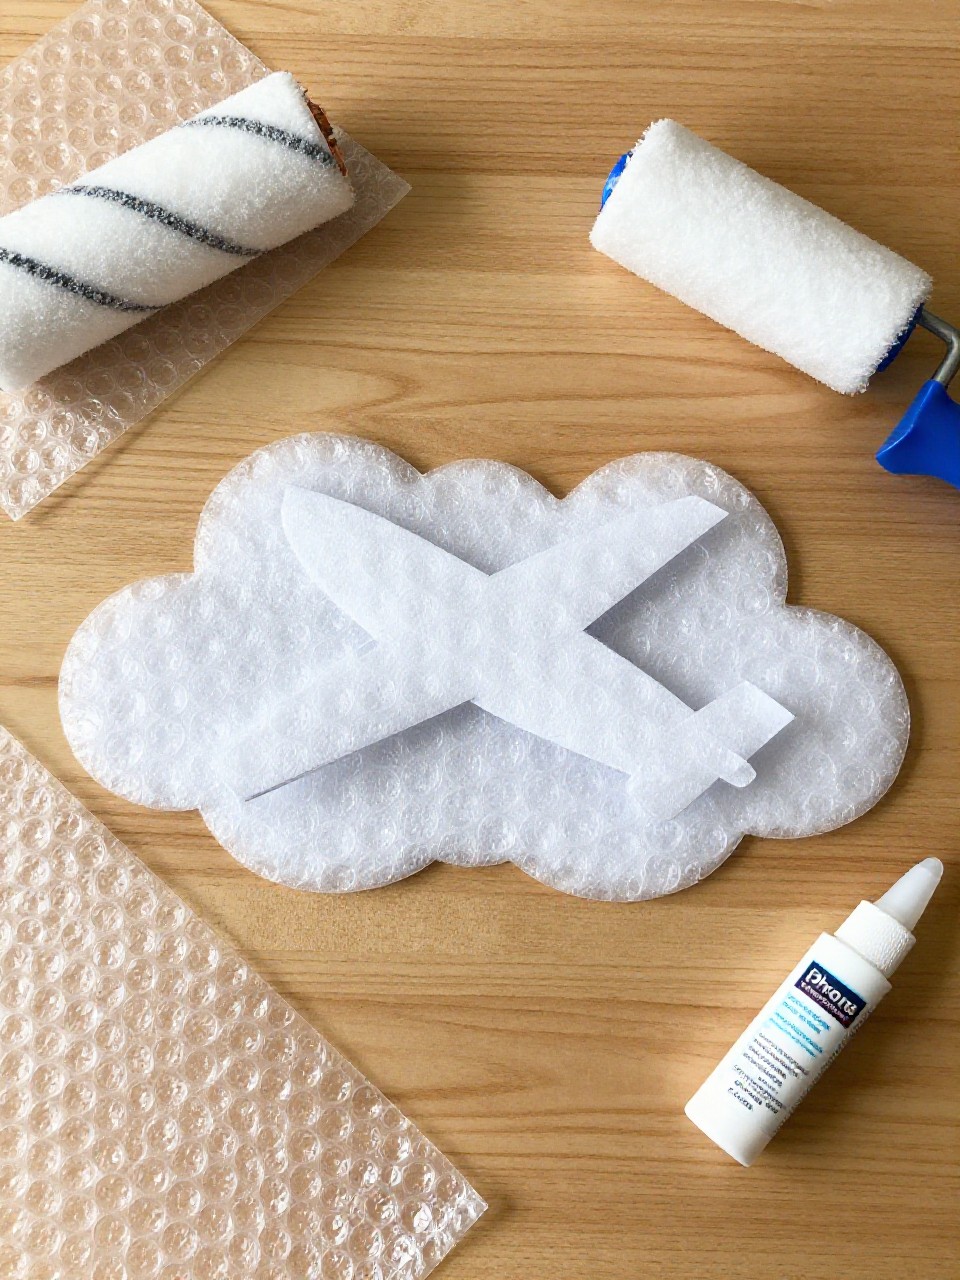
This art makes a fluffy cloud sky using bubble wrap prints with a bold paper airplane on top. Kids love pressing and popping sounds while they print.
Materials Needed:
- White paper
- Bubble wrap
- Blue paint
- Construction paper (airplane pieces)
- Glue stick
How to make it:
- Paint bubble wrap with blue paint and press it onto paper to make dotty skies.
- Cut a simple airplane body, wings, and tail from colored paper.
- Glue the plane onto the sky and add a few window dots.
- Dry and display the textured artwork.
12. Paper Cup Propeller Plane
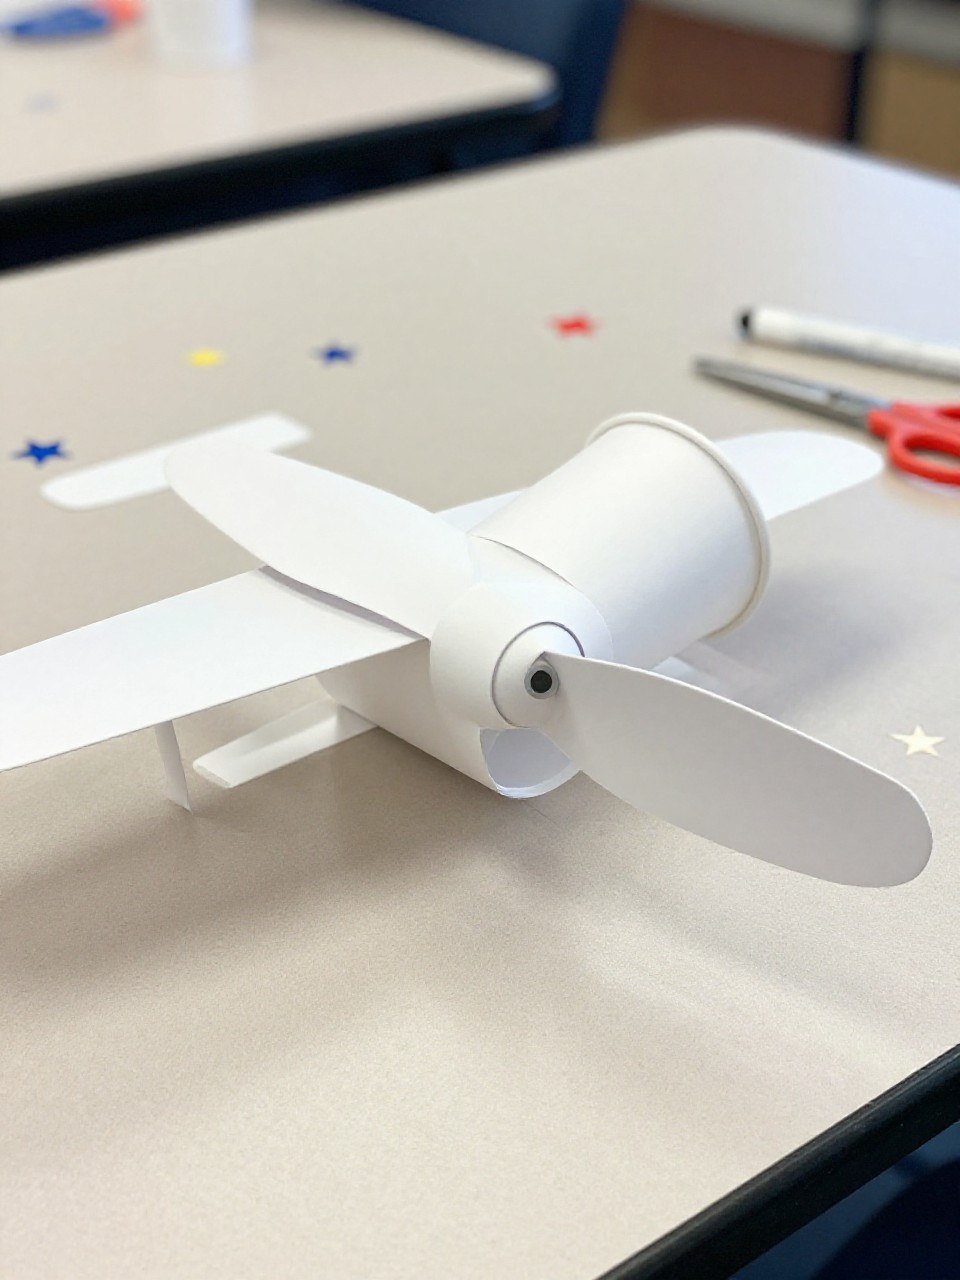
A small paper cup turns into a sturdy little plane with a paper propeller and marker windows. Kids enjoy spinning the front prop and setting it on its side to “taxi.”
Materials Needed:
- Small paper cup
- Construction paper (wings, tail, propeller)
- Brass fastener or glue (for propeller)
- Markers
- Stickers (optional)
How to make it:
- Turn the cup on its side; draw windows and a door.
- Cut and glue wings on top and a tail at the back edge.
- Attach a paper propeller to the cup bottom with a fastener so it spins, or glue it on.
- Add stickers and roll your plane along a tabletop runway.
13. Window-View Airplane Oval
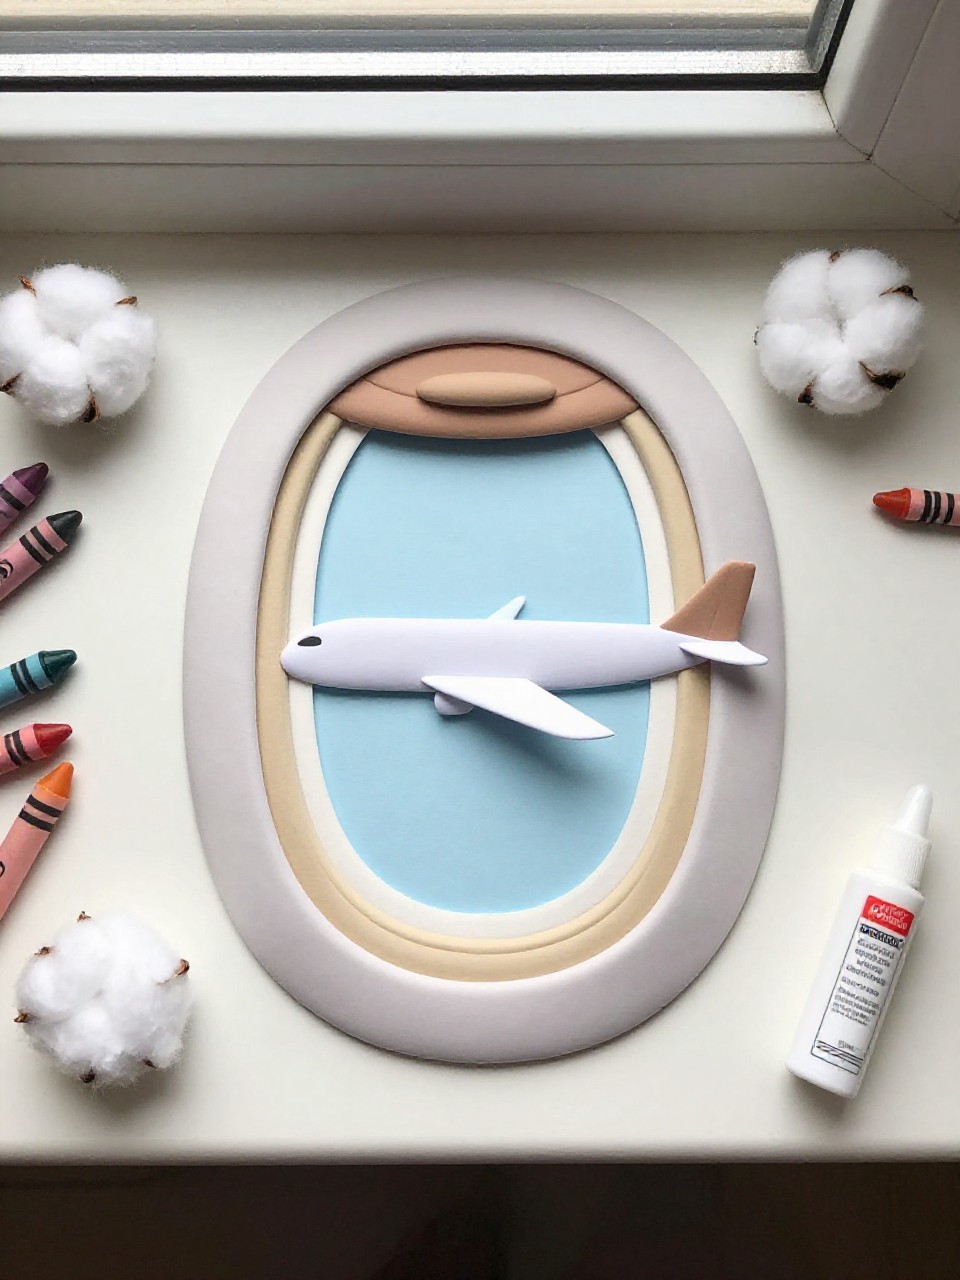
This craft shows the view from an airplane window, made with an oval frame and cotton clouds. Kids love pretending they are passengers looking out over fields, mountains, or the sea.
Materials Needed:
- Cardstock
- Construction paper (for oval frame)
- Cotton balls
- Crayons or markers
- Glue stick
How to make it:
- Draw or cut an oval “window” frame and glue it onto cardstock.
- Color a sky scene inside the oval with land or ocean below.
- Glue small cotton clouds partly over the frame for a 3D touch.
- Let dry and hang as a window-seat view.
14. Triangle Wing Paper Airplane Garland
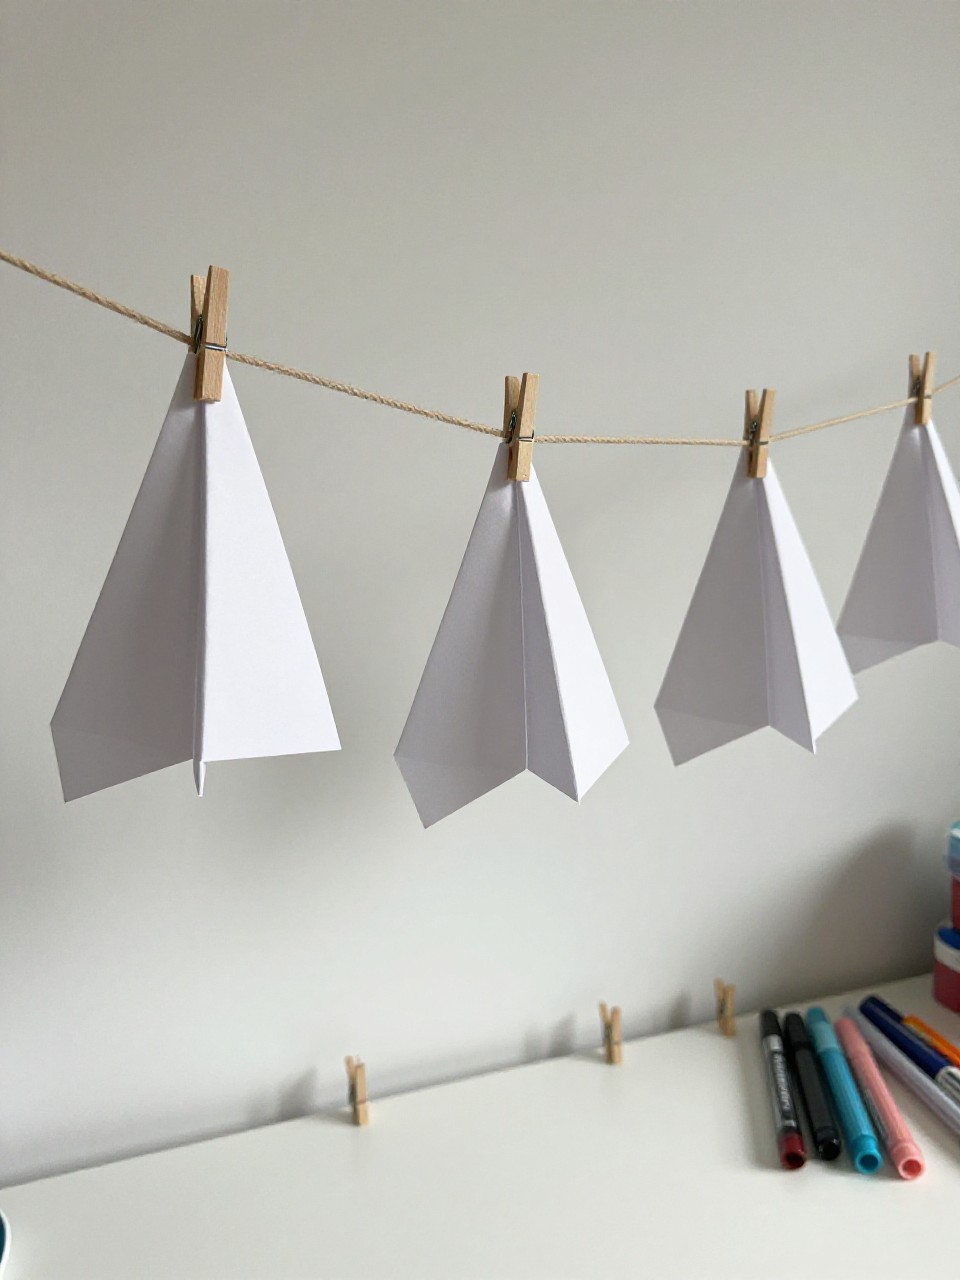
Make simple paper airplanes with triangle wings and string them into a cheerful hanging garland. Kids enjoy folding a few planes and watching them dangle and “soar.”
Materials Needed:
- Colored paper
- Yarn or string
- Tape or mini clothespins
- Markers
- Hole punch (optional)
How to make it:
- Fold several simple paper airplanes from colored paper.
- Decorate each with windows, stripes, or smiley pilots.
- Punch a hole or clip each plane to the string with tape or mini clothespins.
- Hang the garland across a wall or window.
15. Sticker-Track Airport Map with Mini Planes

Kids build a simple airport map using tape runways and fly tiny paper planes around it. The map invites storytelling and play after the crafting is done.
Materials Needed:
- Large sheet of poster board
- Black tape or black marker for runways
- Construction paper (mini planes)
- Glue stick
- Dot stickers (for lights)
How to make it:
- Draw or tape a big runway with crossing lines on poster board.
- Cut a few tiny planes from paper and glue on small wings.
- Add dot sticker runway lights and draw a control tower.
- Use the map for imaginative landing and takeoff games.
16. Felt Airplane Finger Puppet
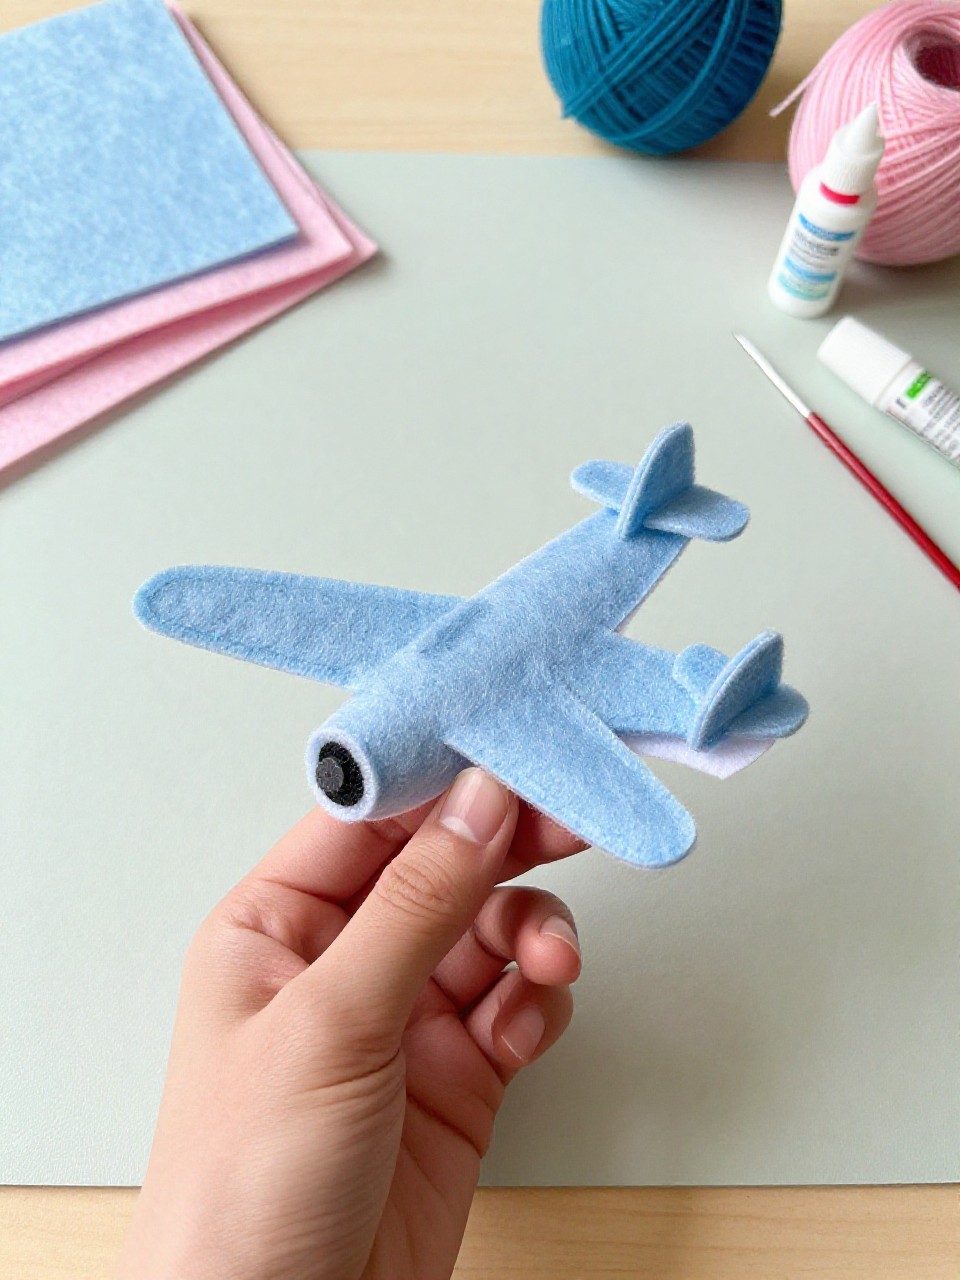
A simple felt airplane slips over a finger, with stitched or glued edges and tiny felt windows. Kids love using it for songs and puppet shows, and it’s soft and safe.
Materials Needed:
- Felt sheets (two colors)
- Child-safe needle and yarn or fabric glue
- Small felt scraps (windows, tail)
- Chalk or pencil (for tracing)
- Googly eye (optional)
How to make it:
- Trace and cut two matching airplane shapes from felt.
- Glue or lightly stitch around the edges, leaving a bottom opening for a finger.
- Add small felt windows, stripes, and a tail detail; optional googly eye as a pilot.
- Let glue dry and fly your puppet through the air.