


Table of Contents Show
You’ve got a little train lover and about 15 minutes before the “I’m bored” whistle blows. You want crafts that don’t make a giant mess, still look wow-worthy on the fridge, and are easy enough for small hands.
This list is your quick station stop: creative, unique train projects that use simple supplies and turn into keepsakes you’ll both love.
Each idea is beginner-friendly, quietly builds fine motor skills, and gives your child that “I made this!” pride—all aboard the craft express.
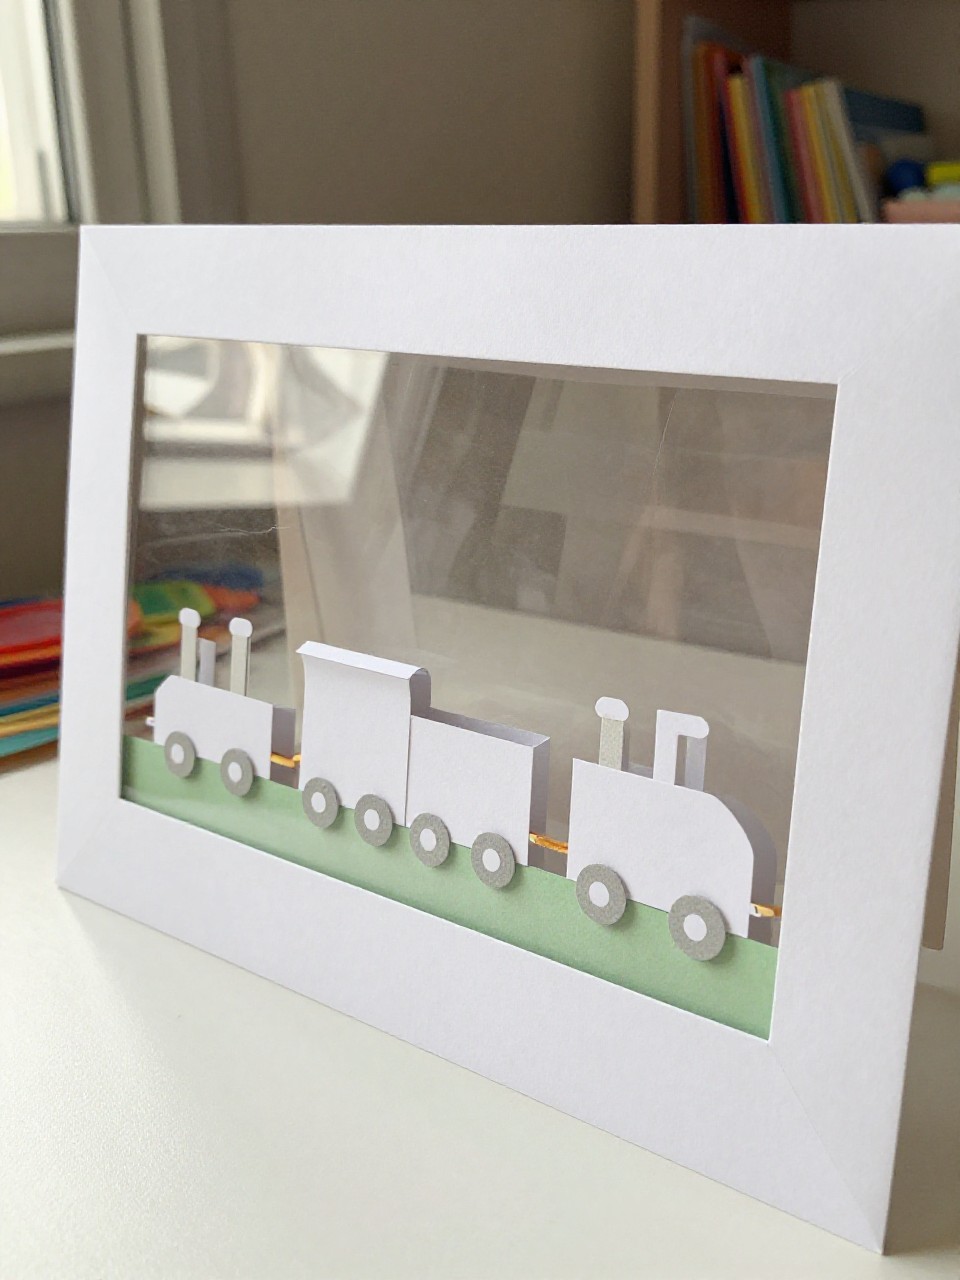
1. Puffy Cloud Steam Train Collage
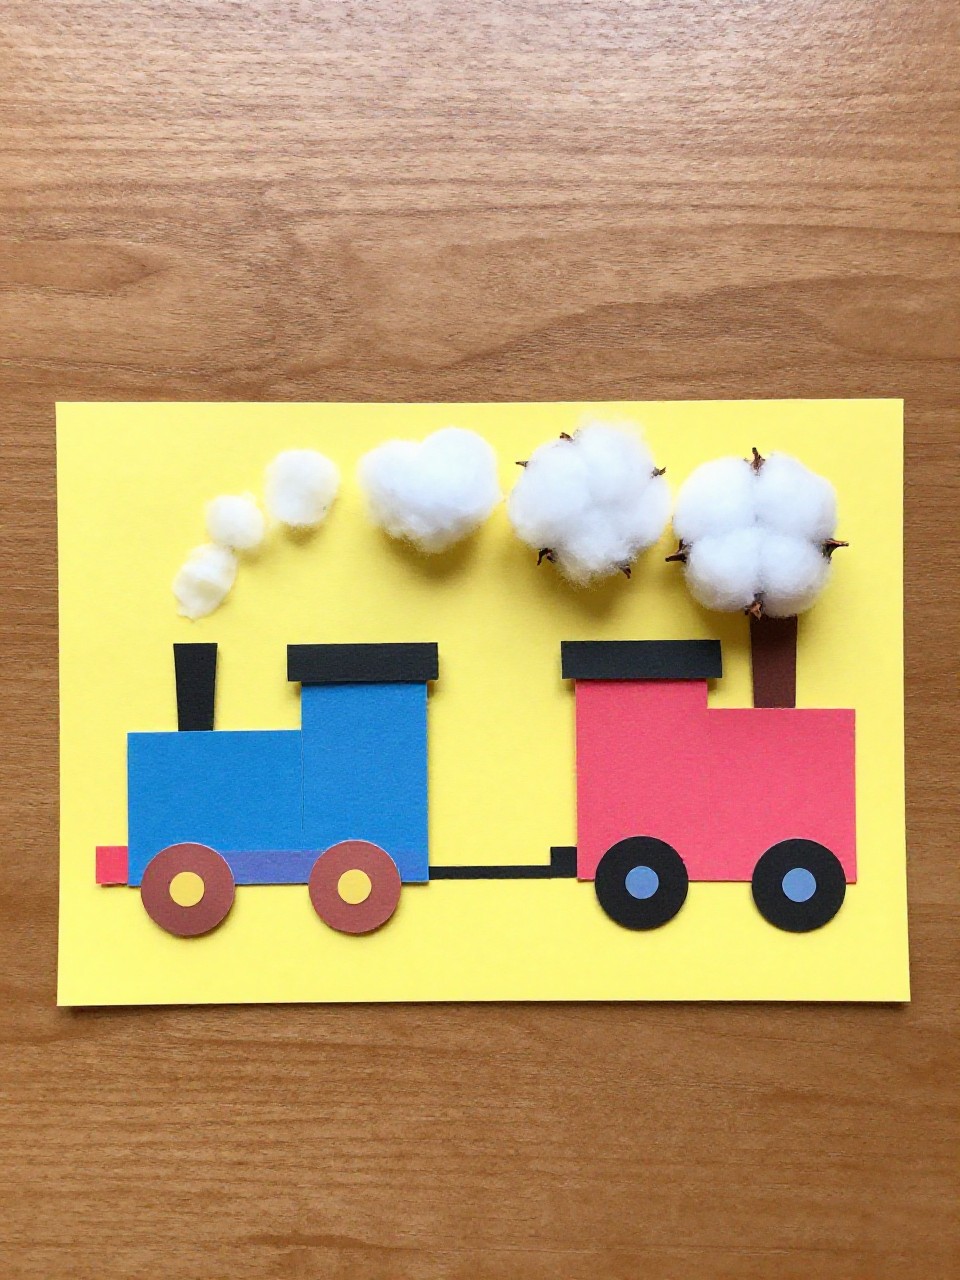
Soft, fluffy steam puffs float over a bright little train—simple to assemble and so satisfying to touch. The cotton clouds and bold paper cars give a playful, storybook look you’ll want to frame.
Materials Needed:
For People Who Love to Make Things ✂️
- Colored cardstock
- Cotton balls
- Glue stick
How to make it:
- 1. Cut a rectangle engine and small squares/rectangles for cars from cardstock.
- 2. Glue the engine and cars in a row on a background sheet.
- 3. Tear and fluff cotton balls, then glue as steam above the engine.
- 4. Draw wheels and couplers with marker for finishing details.
2. Paint-Stamped Circle Wheels Train
Big, perfect wheels made with cup stamps make this train look neat without any fuss. The bold circles and simple shapes turn into a graphic, poster-style masterpiece.
Materials Needed:
- Paper cups (for stamping)
- Washable paint
- Construction paper
How to make it:
- 1. Pour a small puddle of paint on a plate and dip cup rims into it.
- 2. Stamp two or three circles in a row for train wheels.
- 3. Glue paper rectangles above the wheels for engine and cars.
- 4. Add a small triangle for a cowcatcher and a square for the cab.
3. Sponge-Track Roller Print
A homemade “roller” prints perfect train tracks across the page—kids love the reveal. The repeating ties look detailed, yet the process is easy and fun.
Materials Needed:
- Kitchen sponge
- Paper towel tube
- Washable paint
How to make it:
- 1. Cut the sponge into thin strips and glue them around the tube with small gaps.
- 2. Roll the tube in paint on a tray.
- 3. Roll across paper to print track ties.
- 4. Let dry, then draw a simple train on top with marker.
4. Shape Sticker Express

Sticker shapes turn into an artsy train with crisp edges and bright blocks of color—no scissors needed. It’s satisfying arranging windows, doors, and cars like a mini puzzle.
Materials Needed:
- Assorted shape stickers
- White cardstock
- Black marker
How to make it:
- 1. Place big rectangle stickers for the engine and cars in a line.
- 2. Add small squares for windows and circles for wheels.
- 3. Use triangles for the front and steam funnel.
- 4. Outline with marker to make edges pop.
5. Textured Track Rubbing Train
Crayon rubbings over cardboard make realistic wooden ties and rails. The texture looks advanced but takes only moments, creating a cool backdrop for a simple paper train.
Materials Needed:
- Corrugated cardboard
- White paper
- Crayons
How to make it:
- 1. Cut two long cardboard strips (rails) and short strips (ties) and arrange under the paper.
- 2. Hold paper steady and rub crayons sideways to reveal the track pattern.
- 3. Cut and glue a small paper engine over one section.
- 4. Add smoke puffs with light gray crayon.
6. Envelope-Pocket Mail Train
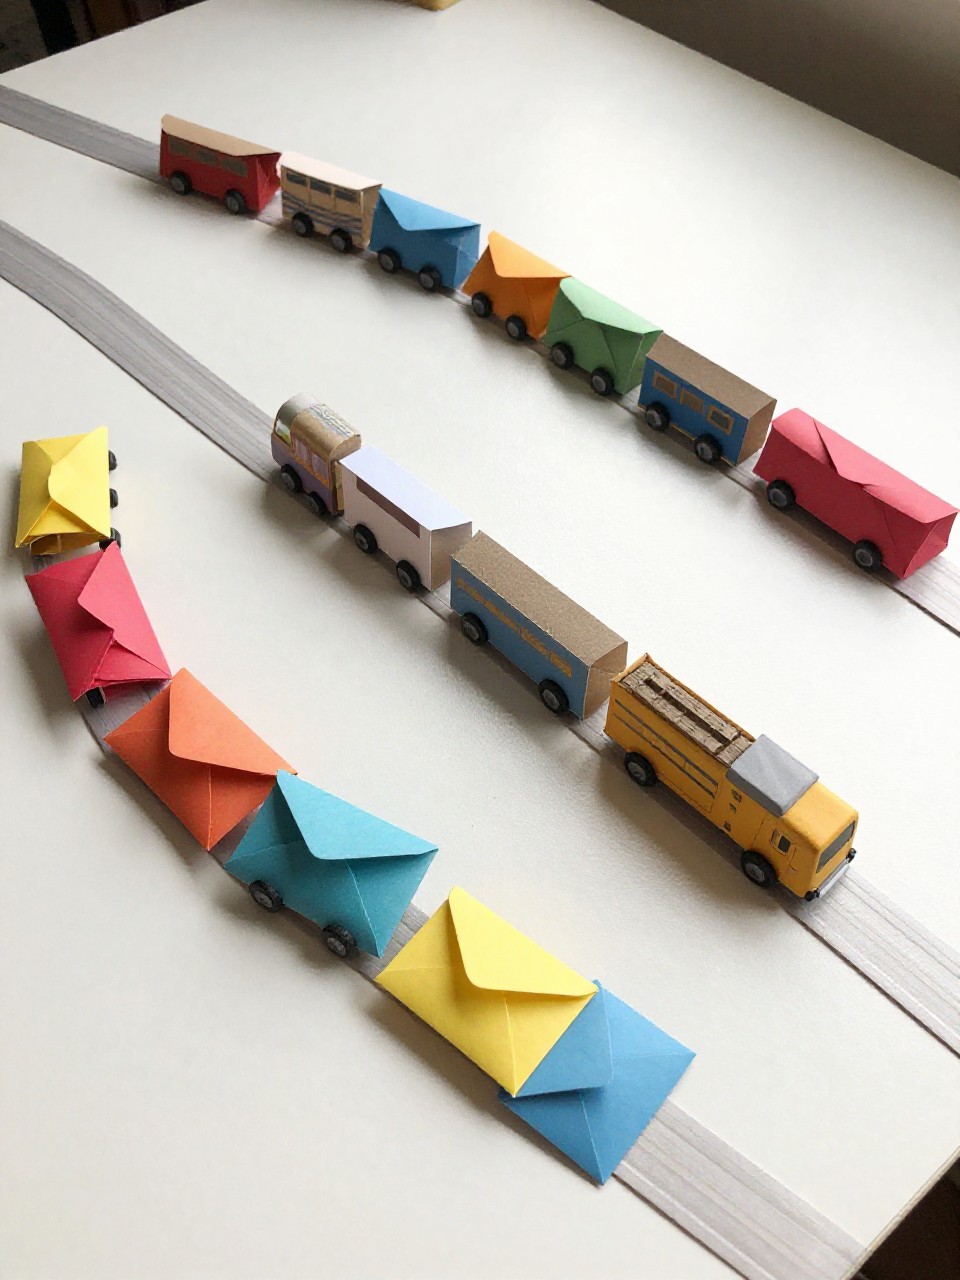
Tiny paper envelopes become cozy train cars that can “carry” notes or stickers. The pockets invite play and storage—adorable and practical.
Materials Needed:
- Mini envelopes
- Cardstock
- Glue stick
How to make it:
- 1. Glue three or four mini envelopes in a row on cardstock.
- 2. Add a rectangle engine shape before the first envelope.
- 3. Draw wheels and couplers; decorate envelopes as cars.
- 4. Tuck in mini drawings or stickers as cargo.
7. Washi-Tape Rainbow Rails
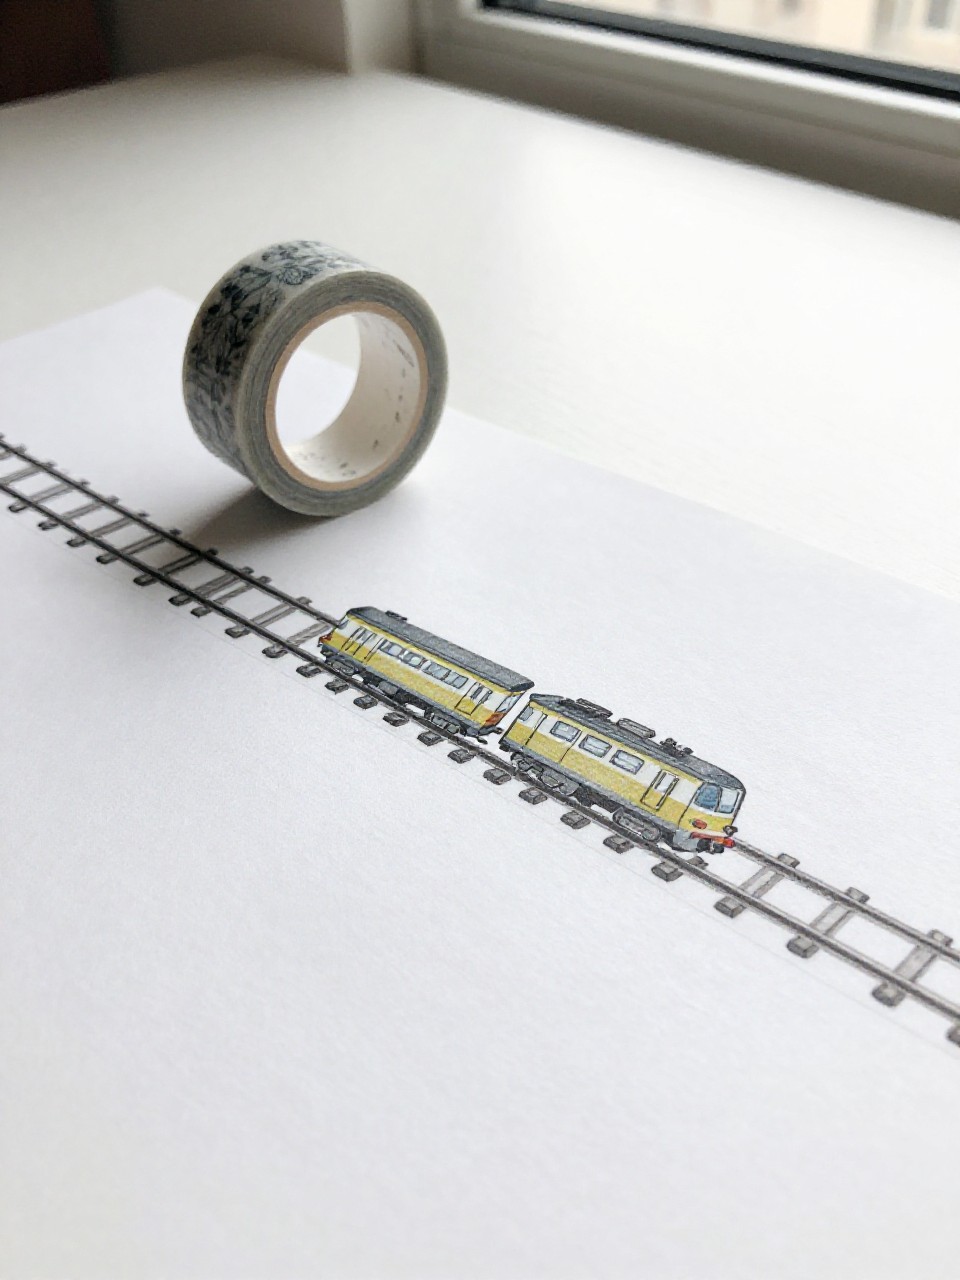
Patterned tape makes crisp rails and ties that look like modern art. The colorful stripes feel polished without tricky cutting.
Materials Needed:
- Washi tape (assorted)
- White paper
- Black marker
How to make it:
- 1. Lay two parallel washi tape lines for rails.
- 2. Add short tape pieces across for ties.
- 3. Draw a simple engine and one car riding the rails.
- 4. Add puffs of steam and a sun for a happy finish.
8. Bubble Wrap Print Steam
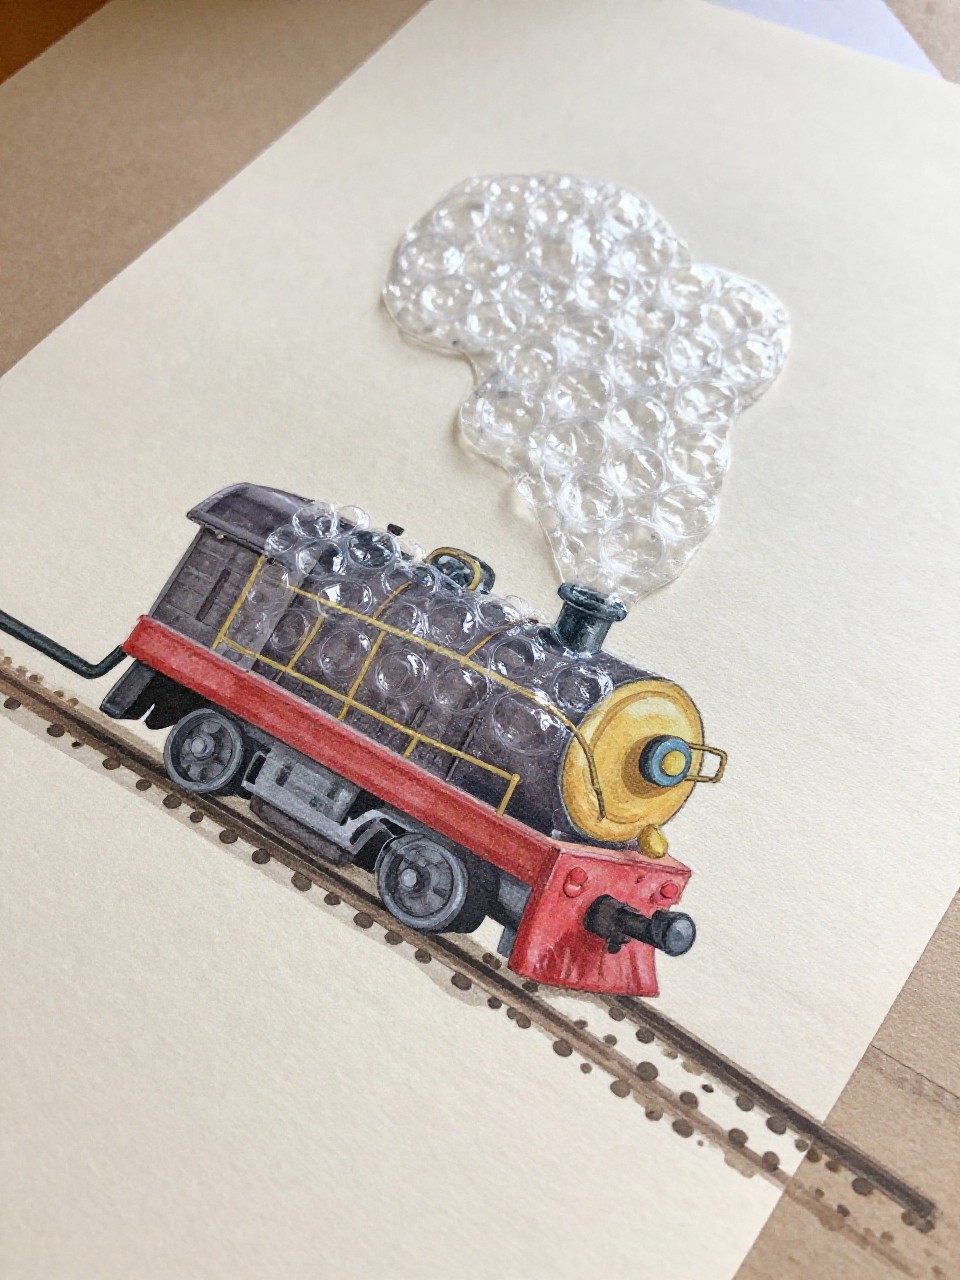
Bubble wrap stamping makes dreamy, dotted steam clouds that look magical. Paired with a simple engine, the texture feels fancy with zero stress.
Materials Needed:
- Bubble wrap
- Washable white paint
- Colored paper
How to make it:
- 1. Paint a patch of white onto bubble wrap.
- 2. Press it above where the engine will go to create dotted steam.
- 3. Cut and glue a basic paper engine under the steam.
- 4. Add wheels and details with marker.
9. Leaf Car Train
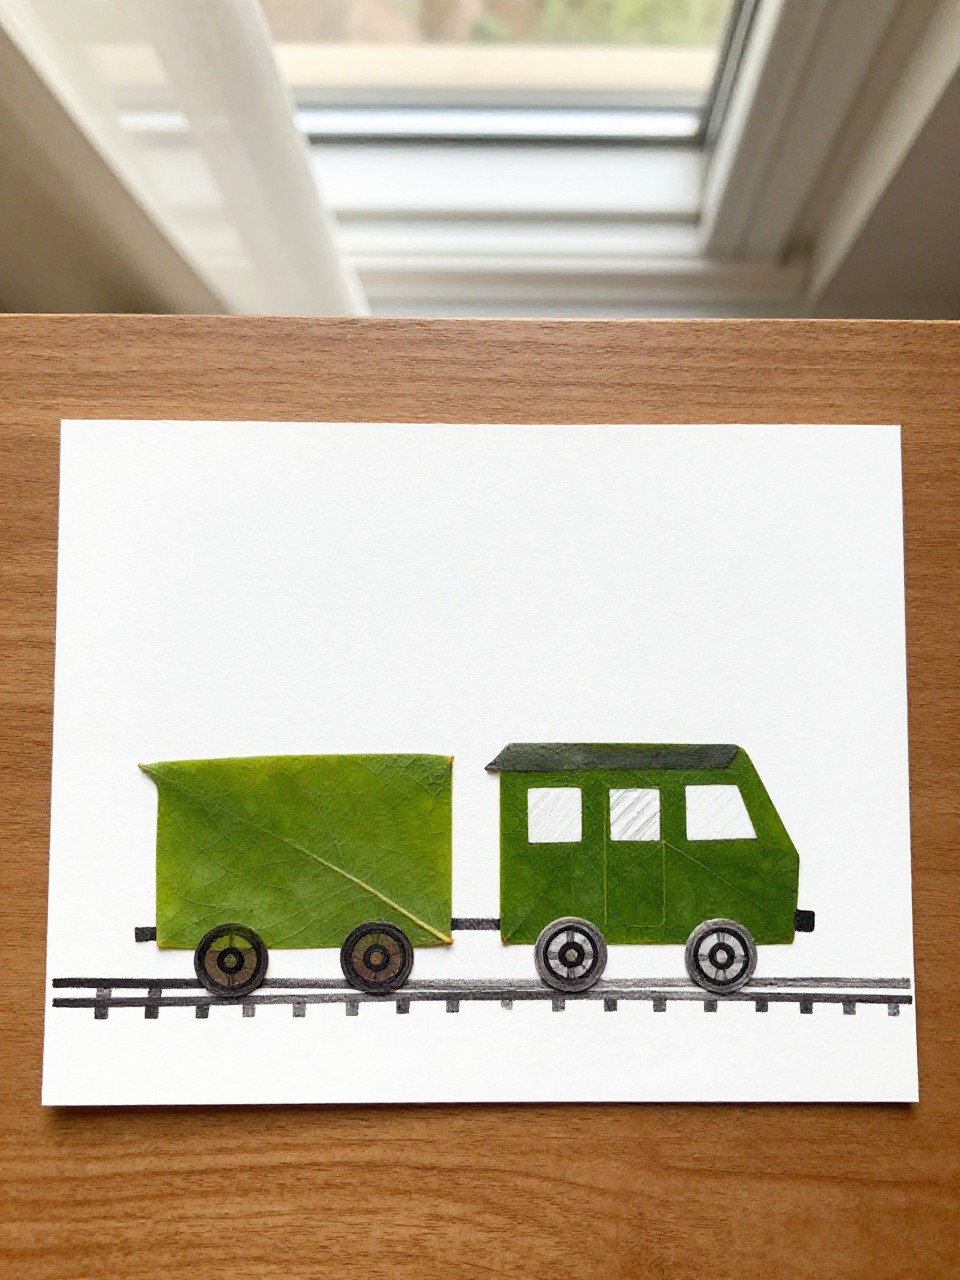
Real leaves become whimsical train cars with natural shapes and shades. It looks like a forest train chugging through autumn.
Materials Needed:
- Assorted leaves
- Glue stick
- White cardstock
How to make it:
- 1. Arrange leaves in a line as cars (stems facing one direction).
- 2. Glue a larger leaf first as the engine.
- 3. Draw wheels, windows, and a track with marker.
- 4. Press gently with a book for a few minutes to set.
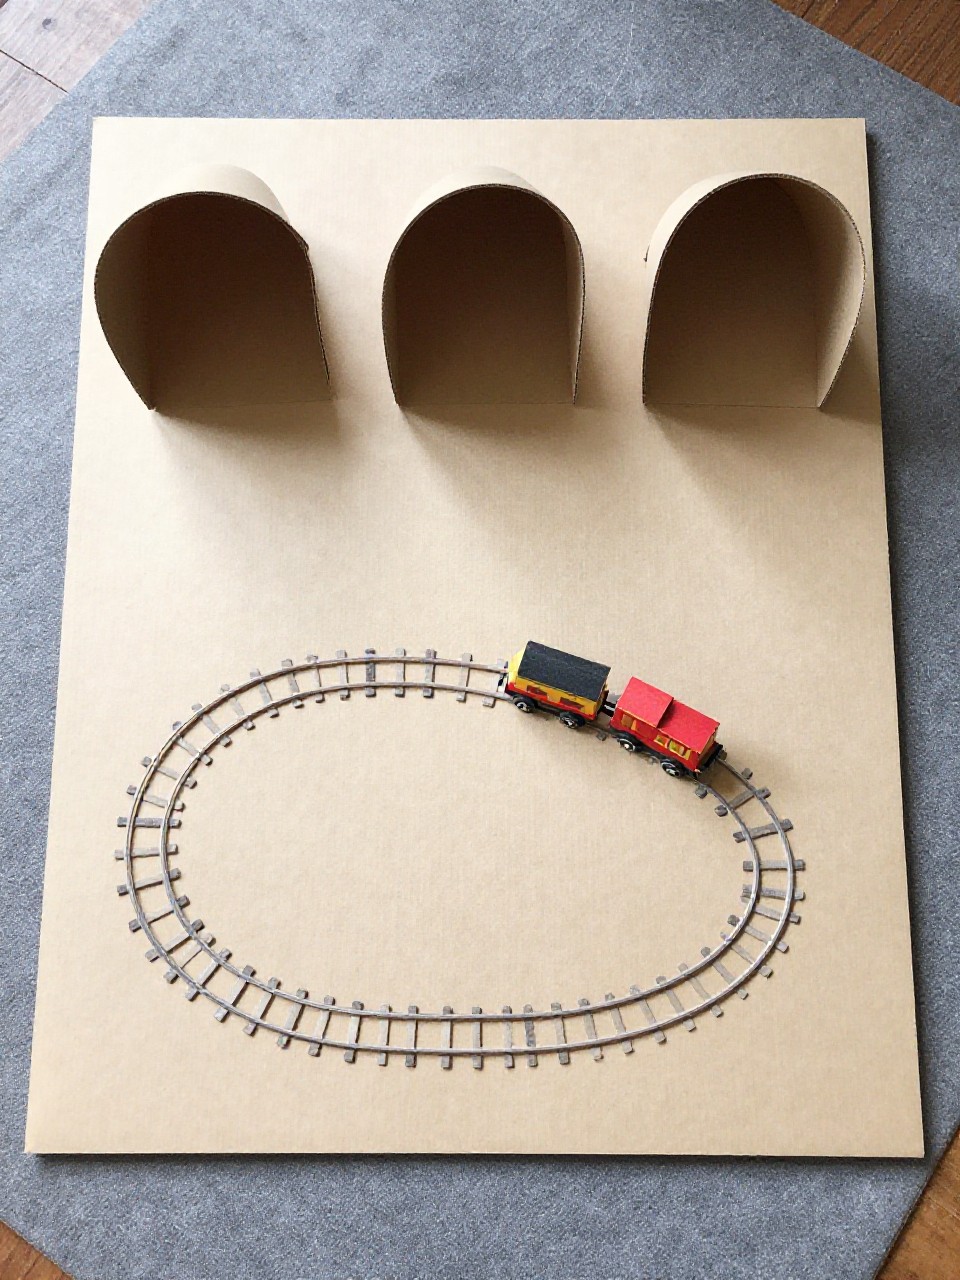
10. Cereal Box Tunnel Scene

A cut-out cereal box becomes a 3D tunnel with a peek-through surprise. It looks like a tiny diorama, yet it’s easy and sturdy.
Materials Needed:
- Empty cereal box
- Construction paper
- Crayons
How to make it:
- 1. Cut a large arch in the front panel of the box to make a tunnel opening.
- 2. Line the inside with dark paper for the tunnel walls.
- 3. Draw and glue a paper train inside peeking out.
- 4. Add trees and sky around the arch on the outside.
11. Clothespin Clip Cars
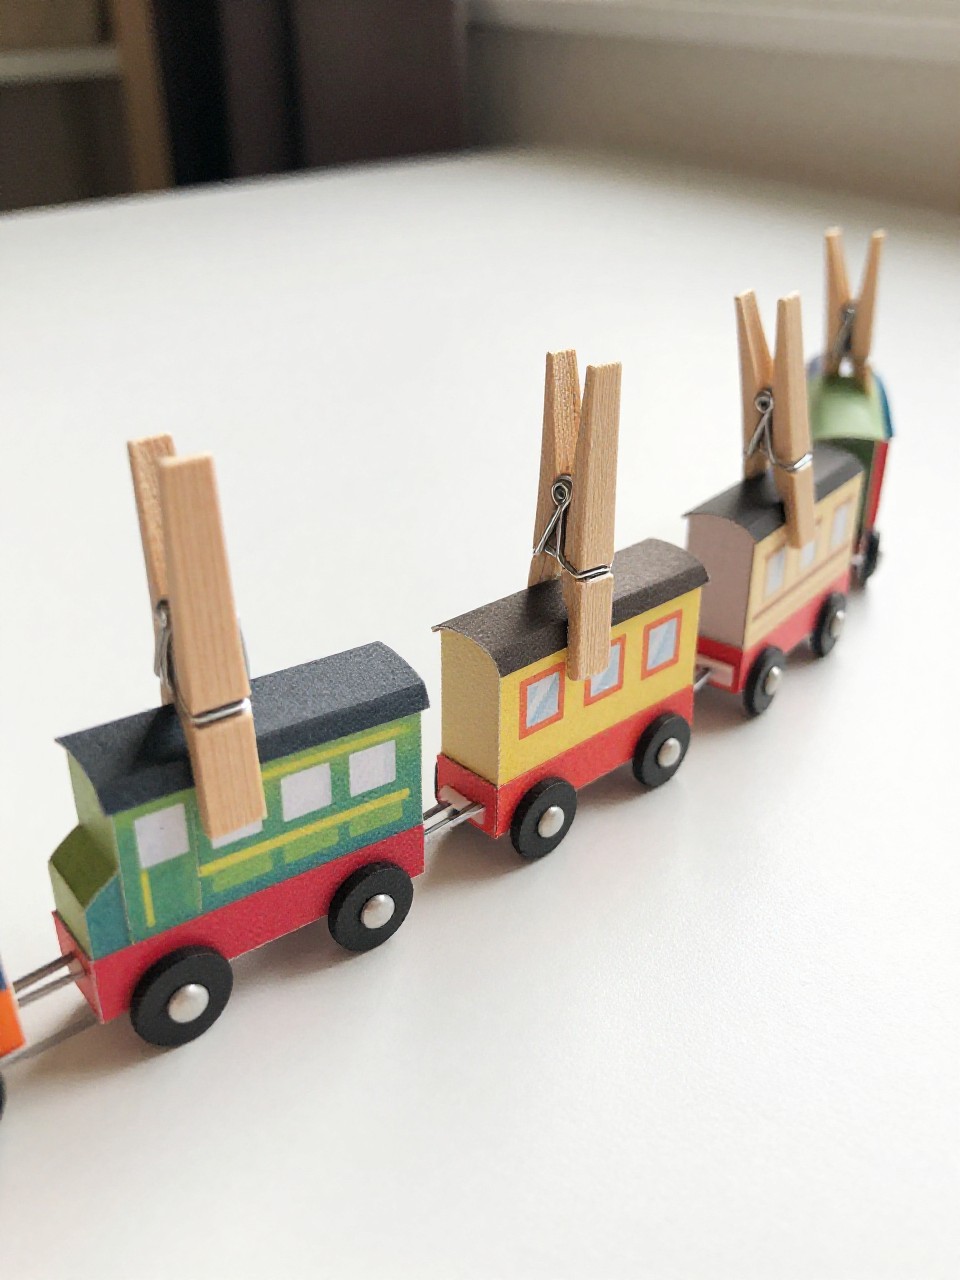
Clothespins become little couplers that click cars together—so fun to build and rebuild. The mixed textures make it look like a boutique toy.
Materials Needed:
- Wooden clothespins
- Cardstock
- Markers
How to make it:
- 1. Cut small rectangles for cars and one for an engine.
- 2. Decorate with windows and doors using markers.
- 3. Clip each car bottom with a clothespin as the wheels/coupler.
- 4. Pin cars together in a line to make a train.
12. Dot Marker Countdown Train
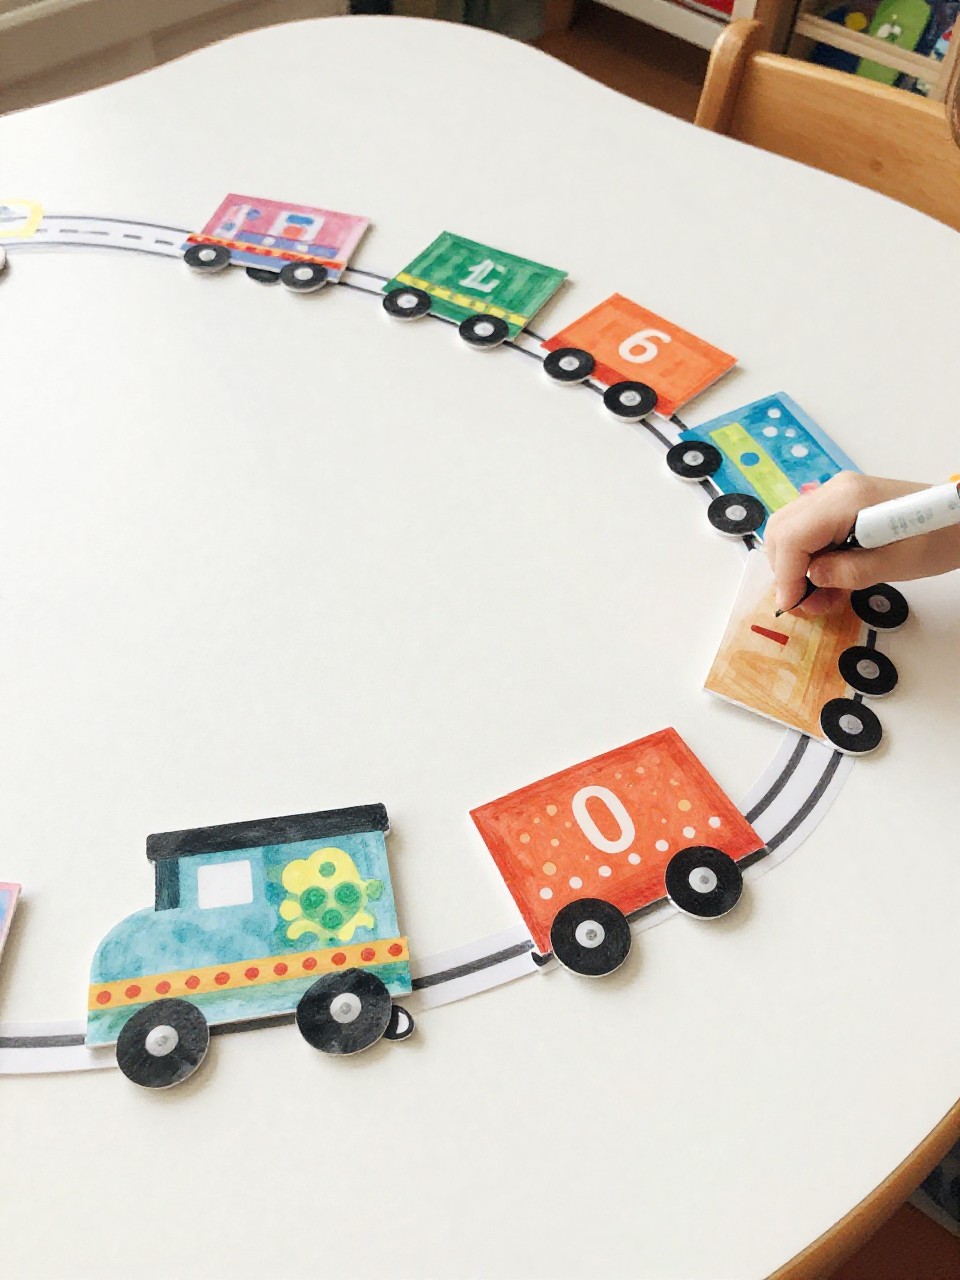
Bold bingo-dot windows and wheels create a cheerful, graphic train you can number for counting practice. The dots give it a playful, polka-dot charm.
Materials Needed:
- Dot markers (bingo daubers)
- White paper
- Black marker
How to make it:
- 1. Draw a simple outline of an engine and cars.
- 2. Use dot markers to stamp windows and wheels.
- 3. Stamp a row of dots as “cargo” on open cars.
- 4. Number each car together for a fun countdown.
13. Cup Sleeve Tunnel Tracks
Coffee cup sleeves become textured tunnels and bridges—instant charm. The ridges add a professional look without any special tools.
Materials Needed:
- Cardboard coffee cup sleeves
- Glue stick
- Poster board
How to make it:
- 1. Flatten sleeves and glue them as arched tunnels on poster board.
- 2. Draw rails and ties running through the arches.
- 3. Add a simple paper train near a tunnel.
- 4. Decorate with trees, clouds, and signs.
14. Ribbon Pull-Past Train Window
Create a moving scene: pull a ribbon and watch the train glide past a “window.” It feels like a magic trick, yet it’s kid-simple.
Materials Needed:
- Cardstock
- Ribbon
- Tape
How to make it:
- 1. Cut a rectangular “window” in a cardstock sheet.
- 2. Tape a ribbon across the back so it slides left-right.
- 3. Draw a small train on a paper piece and tape it to the ribbon’s center.
- 4. Slide the ribbon to make the train pass the window.
15. Fingerprint Passenger Cars
Tiny fingerprint faces become passengers peeking out of windows. It’s cute, personal, and frame-worthy.
Materials Needed:
- Washable ink pad or paint
- White cardstock
- Black pen
How to make it:
- 1. Draw a simple train with big window rectangles.
- 2. Press fingertip prints inside the windows.
- 3. Add smiley faces, hair, and hats with a pen.
- 4. Finish with wheels and a puff of steam.
16. Foam Shape Slider Train
A foam engine slides along a slit track—smooth and satisfying to move. The bright foam colors look toy-like and polished.
Materials Needed:
- Craft foam sheets
- Jumbo craft stick
- Scissors
How to make it:
- 1. Cut a long slit across a cardstock background for the track path.
- 2. Glue a craft stick behind a foam engine so the stick slides through the slit.
- 3. Add foam circles for wheels and a triangle front.
- 4. Slide the engine back and forth along the track.
17. Salt-Paint Sparkle Steam
Watercolor bleeds into salt crystals to make shimmering, frosty steam. The effect looks magical and artsy with almost no effort.
Materials Needed:
- Watercolors
- Table salt
- Heavy paper
How to make it:
- 1. Paint a simple engine at the bottom of the page with watercolor.
- 2. While wet, paint a cloud of steam above the stack.
- 3. Sprinkle salt over the wet steam area.
- 4. Let dry completely, then brush off salt to reveal sparkles.