


Table of Contents Show
Want to paint something relaxing but feel stuck staring at a blank tile? Tiles are a great beginner surface because they’re small, sturdy, and easy to display or gift. This list is here to spark ideas that look unique without needing fancy skills.
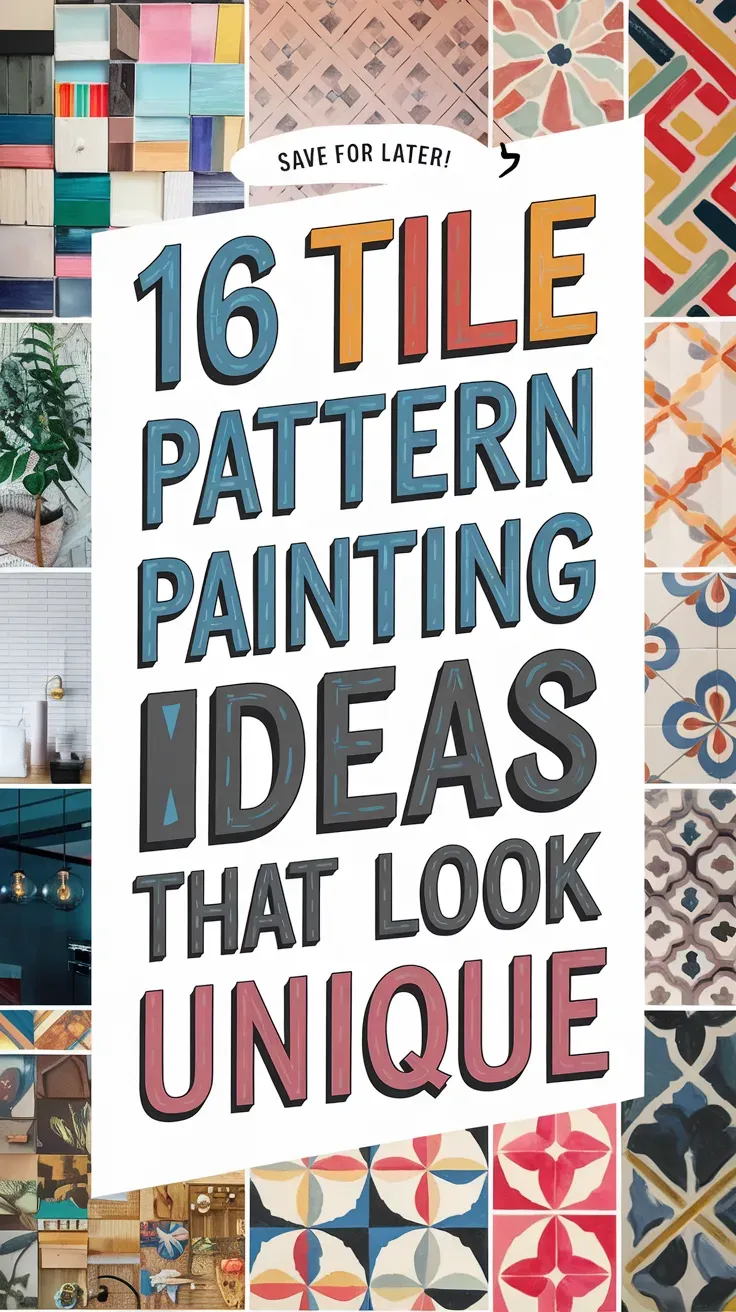
Pick one pattern style, set out a few colors, and let’s get into the tile painting ideas.
1. Soft Checkerboard Tile Pattern

A hand-painted checkerboard tile with slightly uneven squares looks cozy, modern, and perfectly DIY. It’s satisfying because you only repeat two shapes, so beginners can relax and focus on clean edges and color mixing. This one looks great as a coaster, a small tray insert, or shelf decor.
Materials Needed:
- Ceramic tile
- Acrylic paint
- Paintbrushes in multiple sizes
- Palette or paint tray
- Painter’s tape
- Optional sealer or varnish
Steps to Make:
For People Who Love to Make Things ✂️
- Clean the tile and tape a neat border around the edges.
- Lightly pencil a grid so your squares are the same size.
- Paint every other square with your first color, then let it dry.
- Fill the remaining squares with the second color and touch up edges with a small brush.
- Peel tape slowly, let dry fully, and seal for a wipe-clean finish.
2. Mediterranean Blue Border Tile

A bright white tile with a hand-painted cobalt border and tiny corner flourishes feels like a little vacation piece. It’s great for beginners because the center stays simple while the border carries the design. The repeating edge pattern is calming and looks polished once sealed.
Materials Needed:
- Ceramic tile
- Acrylic paint
- Paintbrushes in multiple sizes
- Palette or paint tray
- Pencil
- Optional sealer or varnish
Steps to Make:
- Wipe the tile clean and sketch a border line about 1 cm from the edge.
- Paint the border band in cobalt blue, leaving the center white.
- Add simple corner shapes like small leaves, dots, or curls.
- Deepen color in a few spots to show brush texture and make it look hand-painted.
- Let it dry completely, then seal to protect the border from scuffs.
3. Sunset Ombre Stripe Tile
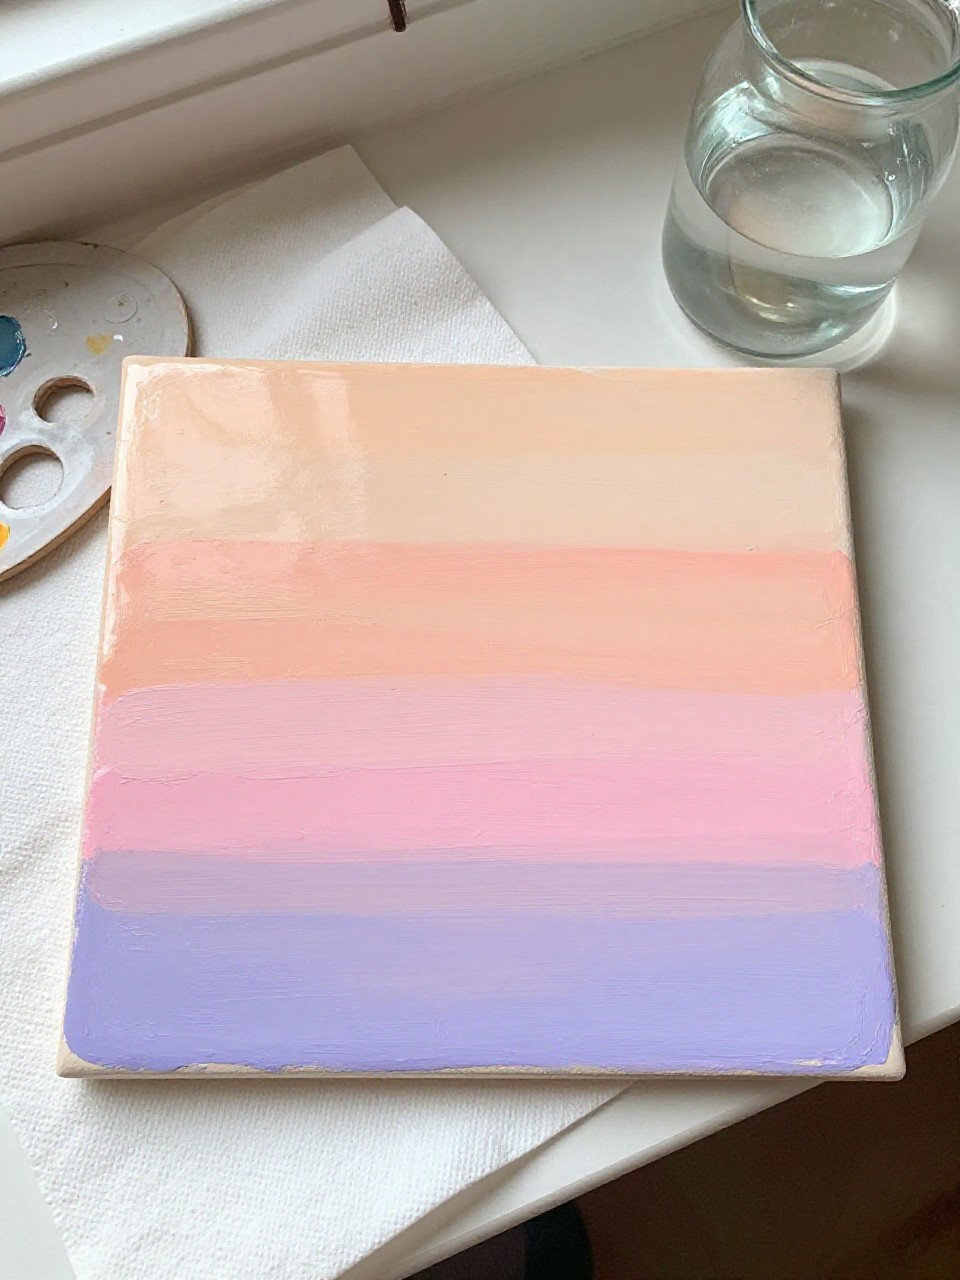
This tile has wide stripes that fade from peach to pink to lavender, with visible blending lines that make it feel real and handmade. It’s a relaxing project because you can take your time blending colors and letting the brush marks show. It makes a pretty coaster set when you paint a few in different sunsets.
Materials Needed:
- Ceramic tile
- Acrylic paint
- Paintbrushes in multiple sizes
- Palette or paint tray
- Sponge (optional)
- Optional sealer or varnish
Steps to Make:
- Clean the tile and plan 4–6 horizontal stripes with light pencil marks.
- Paint the first stripe in peach, then paint the next stripe in pink while the edge is still damp.
- Blend where the stripes meet using a clean, slightly damp brush or sponge.
- Repeat with lavender and a deeper purple, letting some brush texture remain.
- Dry fully and seal so the colors stay bright and smooth to wipe.
4. Tiny Daisy Scatter Tile

A light-colored tile covered in small hand-painted daisies and dots looks sweet, fresh, and a little vintage. It’s beginner-friendly because each flower is just simple petals around a center, and small mistakes disappear in the pattern. This design is perfect for spring decor or a cute handmade gift.
Materials Needed:
- Ceramic tile
- Acrylic paint
- Paintbrushes in multiple sizes
- Palette or paint tray
- Cotton swab (for dots)
- Optional sealer or varnish
Steps to Make:
- Wipe the tile and paint a soft background color if you want (like pale sage or cream).
- Dot flower centers across the tile, spacing them out unevenly for a natural look.
- Add short petal strokes around each center with a small round brush.
- Fill gaps with tiny dots or leaves to balance the pattern.
- Let dry, then seal so the small details don’t chip over time.
5. Modern Terrazzo Speckle Tile
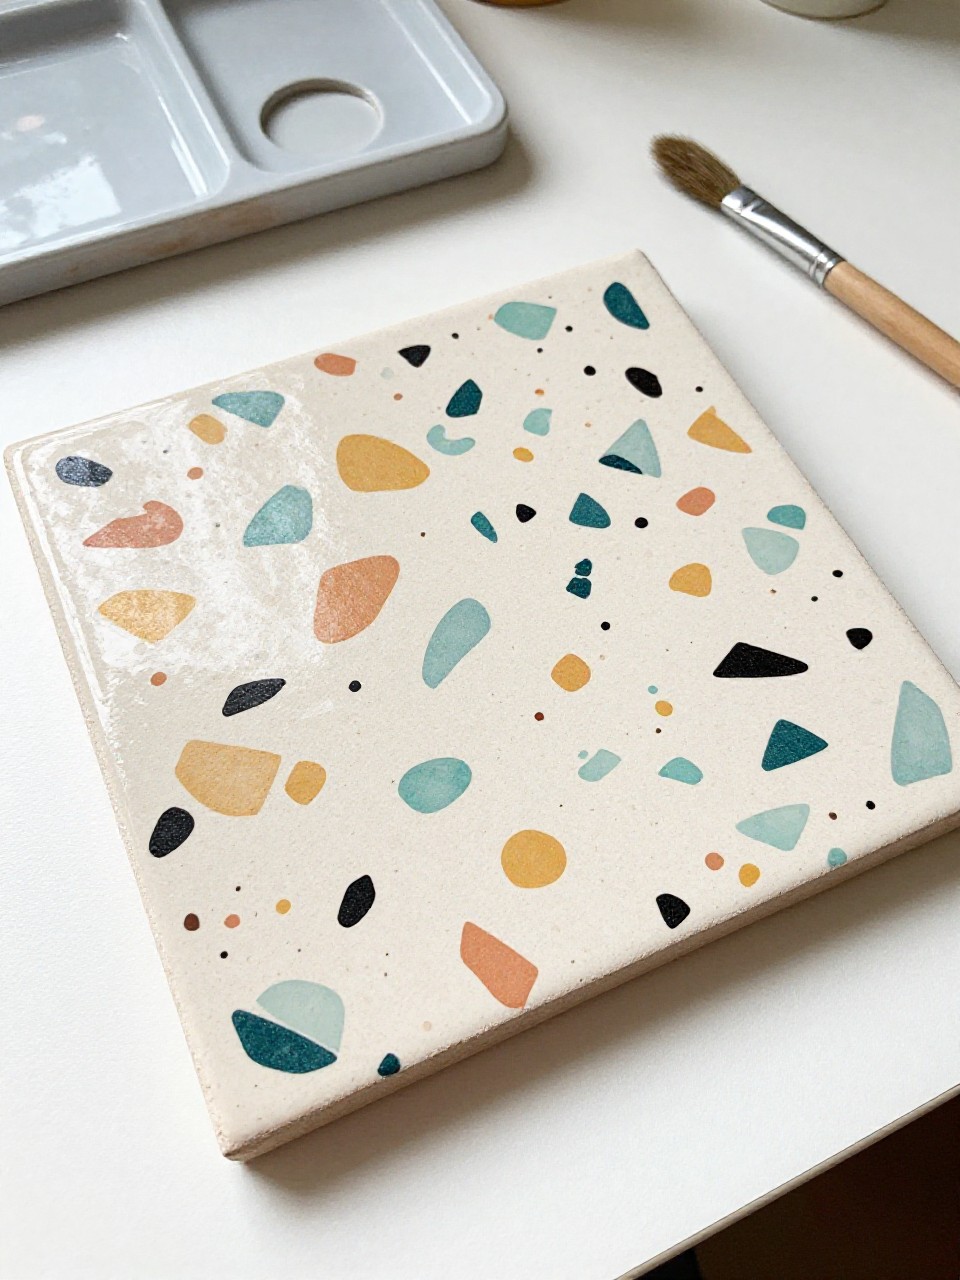
This tile looks like terrazzo with hand-painted speckles in mixed colors and different shapes, from tiny dots to chunky blobs. It’s satisfying because there’s no “perfect” layout—just a playful scatter that still looks stylish. Beginners love it since every mark is quick and forgiving.
Materials Needed:
- Ceramic tile
- Acrylic paint
- Paintbrushes in multiple sizes
- Palette or paint tray
- Toothbrush or stiff brush (for flicking)
- Optional sealer or varnish
Steps to Make:
- Clean the tile and paint a solid base color like warm white or light gray.
- Mix 3–5 accent colors and load a small brush for random dashes and blobs.
- Add smaller speckles by lightly flicking paint with a stiff brush.
- Layer a few marks on top of others so it looks naturally busy and textured.
- Dry fully and seal to keep the speckles from rubbing off.
6. Black-and-White Wavy Line Tile
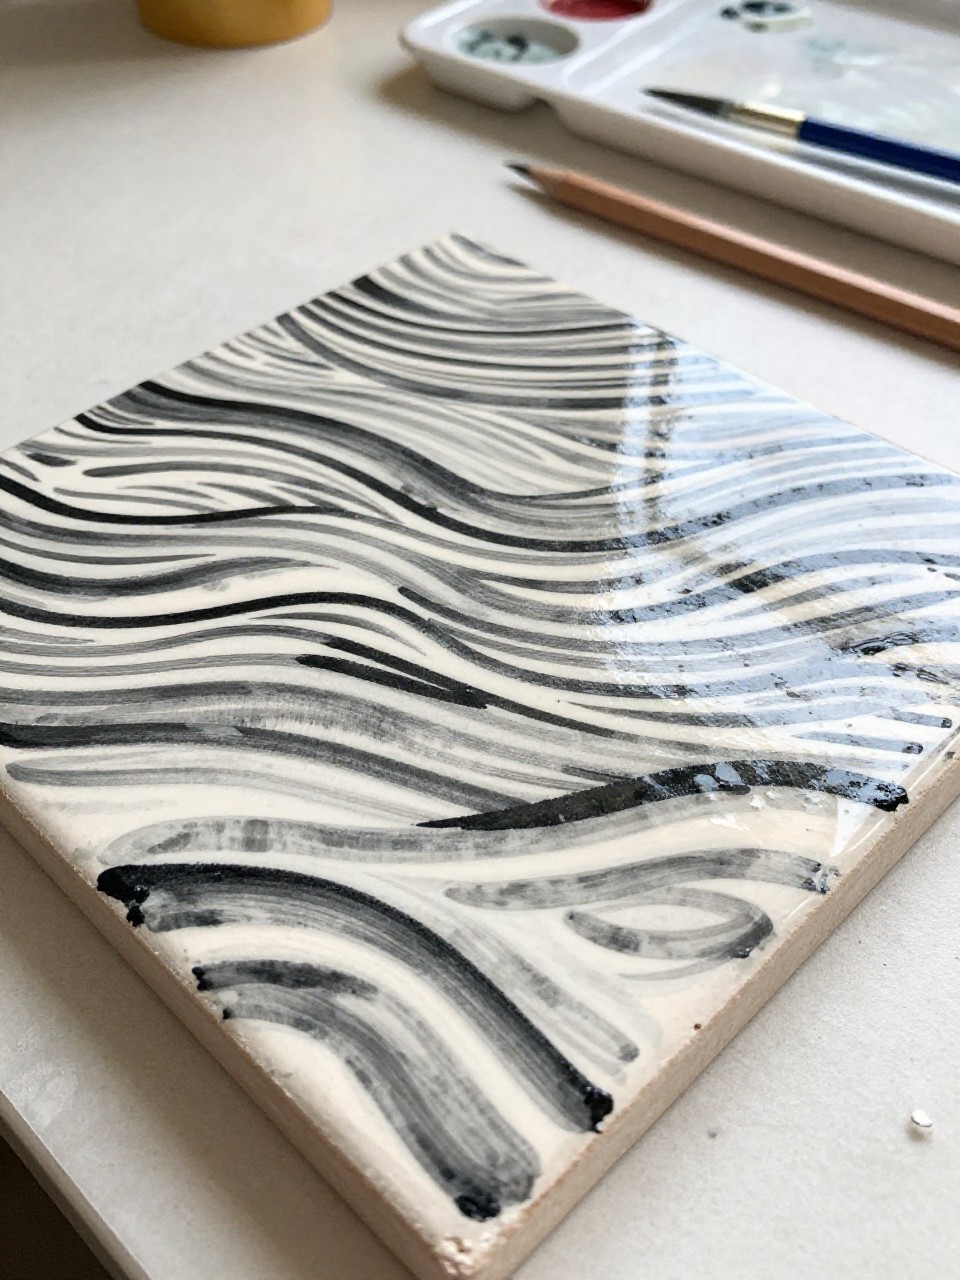
A white tile with hand-painted wavy black lines feels modern, calm, and a little artsy. It’s great for beginners because you can keep the lines loose, and the slight wobble makes it look more handmade. This looks especially nice as a set of two or four tiles on a shelf.
Materials Needed:
- Ceramic tile
- Acrylic paint
- Paintbrushes in multiple sizes
- Palette or paint tray
- Pencil
- Optional sealer or varnish
Steps to Make:
- Clean the tile and lightly sketch a few guidelines for where the waves will flow.
- Paint long wavy lines with a medium brush, letting the strokes stay visible.
- Add a few thinner lines between the thick ones for depth and rhythm.
- Touch up corners and vary line thickness to keep it interesting.
- Dry completely, then seal for a smooth, durable finish.
7. Moroccan Starburst Tile Pattern

This tile has a bold starburst in the center with simple geometric shapes radiating out like a Moroccan-inspired pattern. It feels impressive, but it’s built from easy steps: triangles, diamonds, and dots. Beginners can use slow, steady brushwork and still get a crisp look.
Materials Needed:
- Ceramic tile
- Acrylic paint
- Paintbrushes in multiple sizes
- Palette or paint tray
- Ruler
- Optional sealer or varnish
Steps to Make:
- Clean the tile and use a ruler to find the center with light pencil lines.
- Block in a central star shape using triangles, painting one section at a time.
- Add surrounding diamonds or petal-like shapes in two matching colors.
- Outline key edges with a thin brush and add dot accents for charm.
- Let dry and seal to protect the detailed lines.
8. Pastel Grid with Tiny Hearts Tile
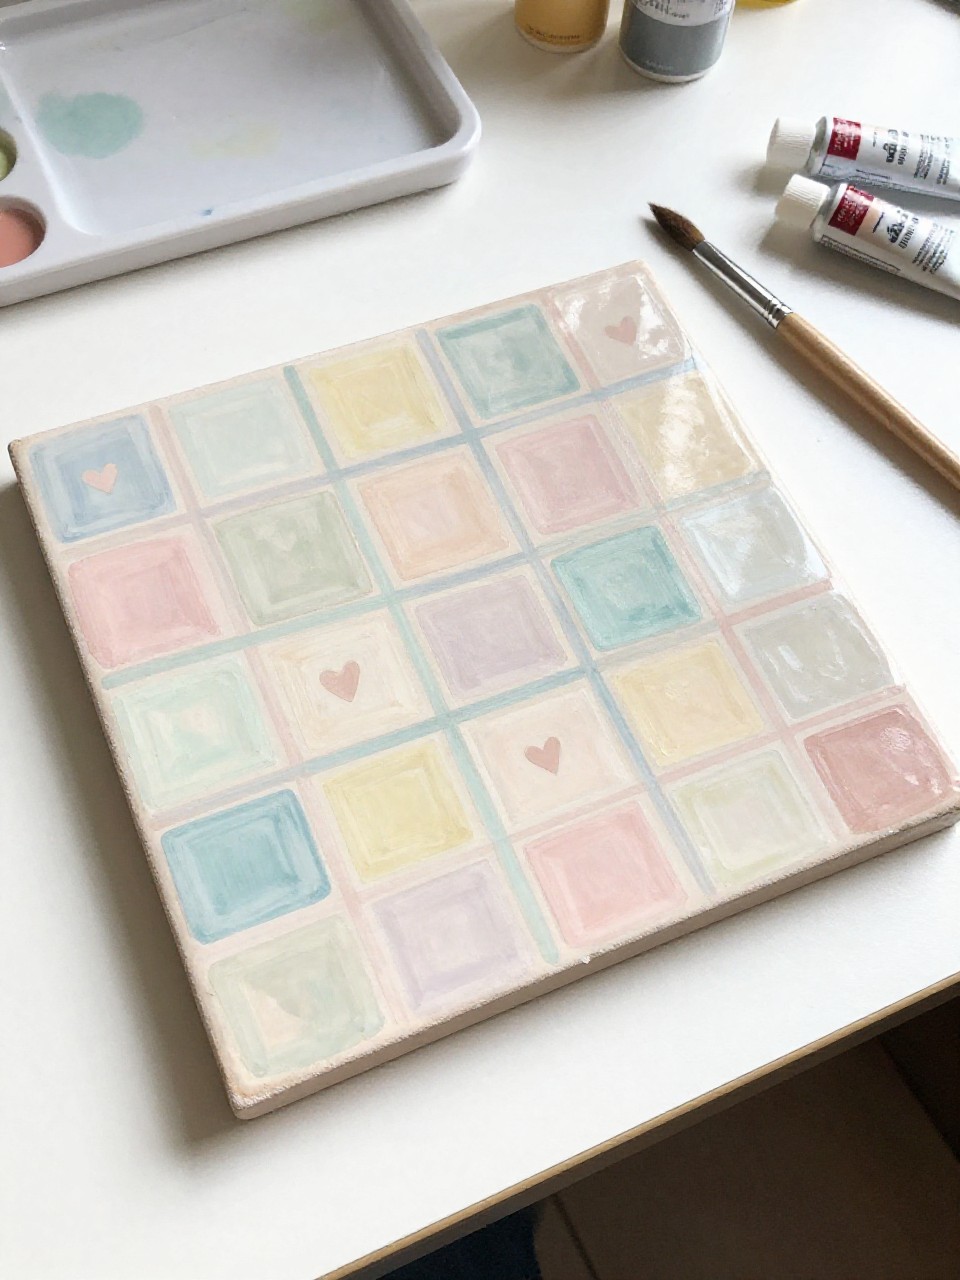
A soft pastel grid with tiny hand-painted hearts tucked into a few squares looks gentle and cute without being too busy. It’s relaxing because the grid gives you structure, and the hearts add a personal touch. This is a nice idea for a small gallery wall using multiple painted tiles.
Materials Needed:
- Ceramic tile
- Acrylic paint
- Paintbrushes in multiple sizes
- Palette or paint tray
- Pencil
- Optional sealer or varnish
Steps to Make:
- Wipe the tile and sketch a simple grid with evenly spaced squares.
- Paint thin grid lines in a pastel color, keeping lines slightly imperfect for charm.
- Fill a few random squares with very light washes of color for variety.
- Add tiny hearts in 3–5 squares using a fine brush and a steady hand.
- Dry fully and seal so the thin lines stay protected.
9. Citrus Slice Tile Coaster

This tile looks like a juicy citrus slice—lemon, orange, or grapefruit—with curved segments and shiny highlights painted in. It’s satisfying because the circle shape teaches brush control, but it’s still simple enough for beginners. Make a set of four and they’ll brighten up any coffee table.
Materials Needed:
- Ceramic tile
- Acrylic paint
- Paintbrushes in multiple sizes
- Palette or paint tray
- Pencil
- Optional sealer or varnish
Steps to Make:
- Clean the tile and lightly draw a large circle in the center.
- Paint the rind first, then fill the inside with a lighter citrus color.
- Add curved segment lines radiating from the center, keeping them slightly uneven.
- Dot in highlights and a few darker edges to make the slice look juicy.
- Dry and seal for a coaster-ready surface.
10. Navy Tile with Gold Dot Constellations
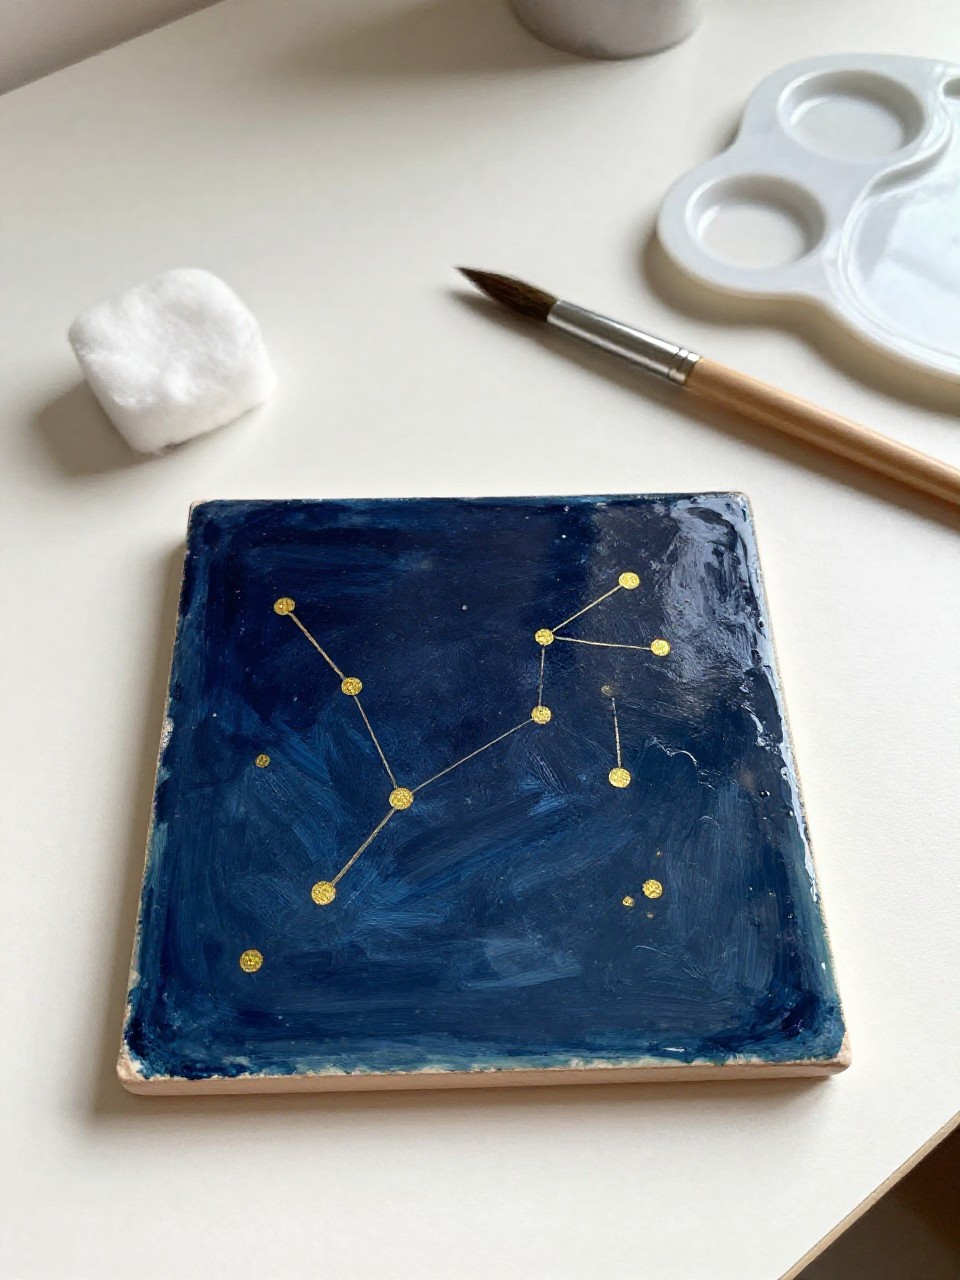
A deep navy tile sprinkled with gold dots and simple line connections looks like a night sky you can hold. It’s great for beginners because dots are easy, and the tiny lines don’t need to be perfect. This pattern looks beautiful as a small display tile on a stand.
Materials Needed:
- Ceramic tile
- Acrylic paint
- Paintbrushes in multiple sizes
- Palette or paint tray
- Cotton swab (for dots)
- Optional sealer or varnish
Steps to Make:
- Clean the tile and paint the whole surface navy, letting brush strokes show slightly.
- Add clusters of gold dots using a cotton swab or the end of a brush.
- Connect a few dots with thin lines to suggest constellations.
- Layer a few lighter blue dots for depth, like distant stars.
- Let dry completely and seal to protect the dark background from scratches.
11. Rainbow Arch Tile Pattern

This tile shows stacked rainbow arches, like soft half-circles repeating across the surface. It’s relaxing because you paint the same curved shape again and again, and small wobbles make it feel more handmade. It’s a cheerful option for kids’ rooms, craft corners, or gifts.
Materials Needed:
- Ceramic tile
- Acrylic paint
- Paintbrushes in multiple sizes
- Palette or paint tray
- Pencil
- Optional sealer or varnish
Steps to Make:
- Wipe the tile and lightly sketch repeating half-circle arches in rows.
- Paint the largest arch band first in a muted color like terracotta or coral.
- Add smaller bands inside each arch, switching colors for a soft rainbow effect.
- Outline a few arches lightly or add tiny dots between arches to fill gaps.
- Dry fully and seal so the bands stay bright and clean.
12. Faux Patchwork Quilt Tile

A patchwork tile looks like stitched fabric squares, with each section painted in a different mini pattern like dots, stripes, and little flowers. It’s perfect for beginners because you work in small areas, and every square can be simple. The finished tile feels homey and detailed without being hard.
Materials Needed:
- Ceramic tile
- Acrylic paint
- Paintbrushes in multiple sizes
- Palette or paint tray
- Painter’s tape
- Optional sealer or varnish
Steps to Make:
- Clean the tile and tape a grid of squares like a quilt layout.
- Paint each square a different base color, then let it dry.
- Add mini patterns inside each square: dots, tiny leaves, stripes, or checks.
- Paint thin “stitch” lines along a few seams using a fine brush.
- Remove tape carefully, dry fully, and seal for a finished patchwork look.
13. Botanical Vine Corner Tile
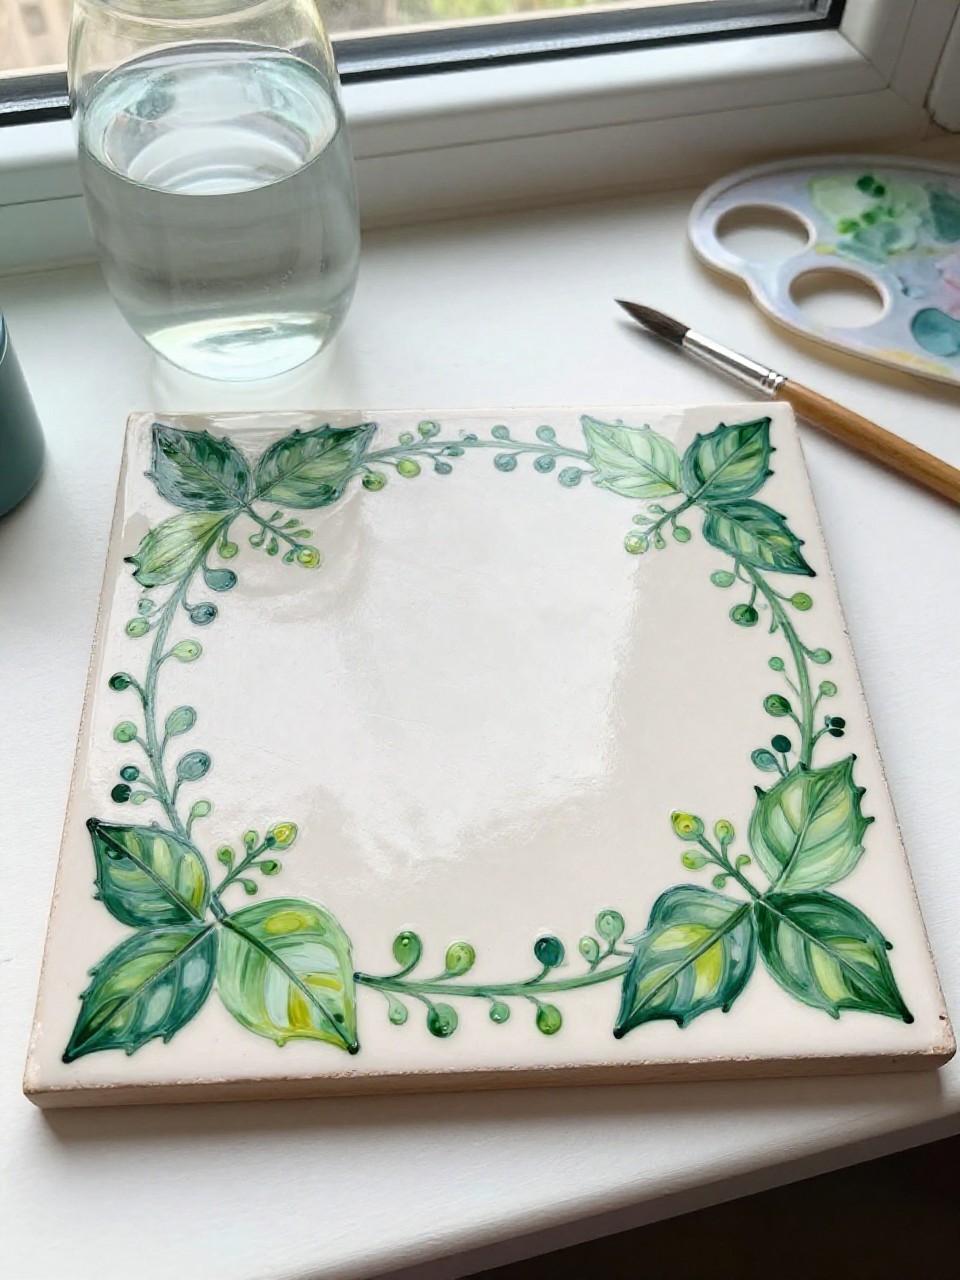
This tile has leafy vines that curl from two corners, leaving airy blank space in the middle. It’s satisfying because you can paint leaves with simple teardrop strokes and build the vine slowly. Beginners often love it since it feels calm and organic, not strict or geometric.
Materials Needed:
- Ceramic tile
- Acrylic paint
- Paintbrushes in multiple sizes
- Palette or paint tray
- Pencil
- Optional sealer or varnish
Steps to Make:
- Wipe the tile and lightly sketch two curling vines starting from opposite corners.
- Paint the vine stems with a thin brush, letting the line vary naturally.
- Add leaves using simple one-stroke or two-stroke teardrop shapes.
- Layer darker green on a few leaves for depth and add tiny buds or dots.
- Let dry completely and seal to protect the delicate corners.
14. Art Deco Fan Pattern Tile
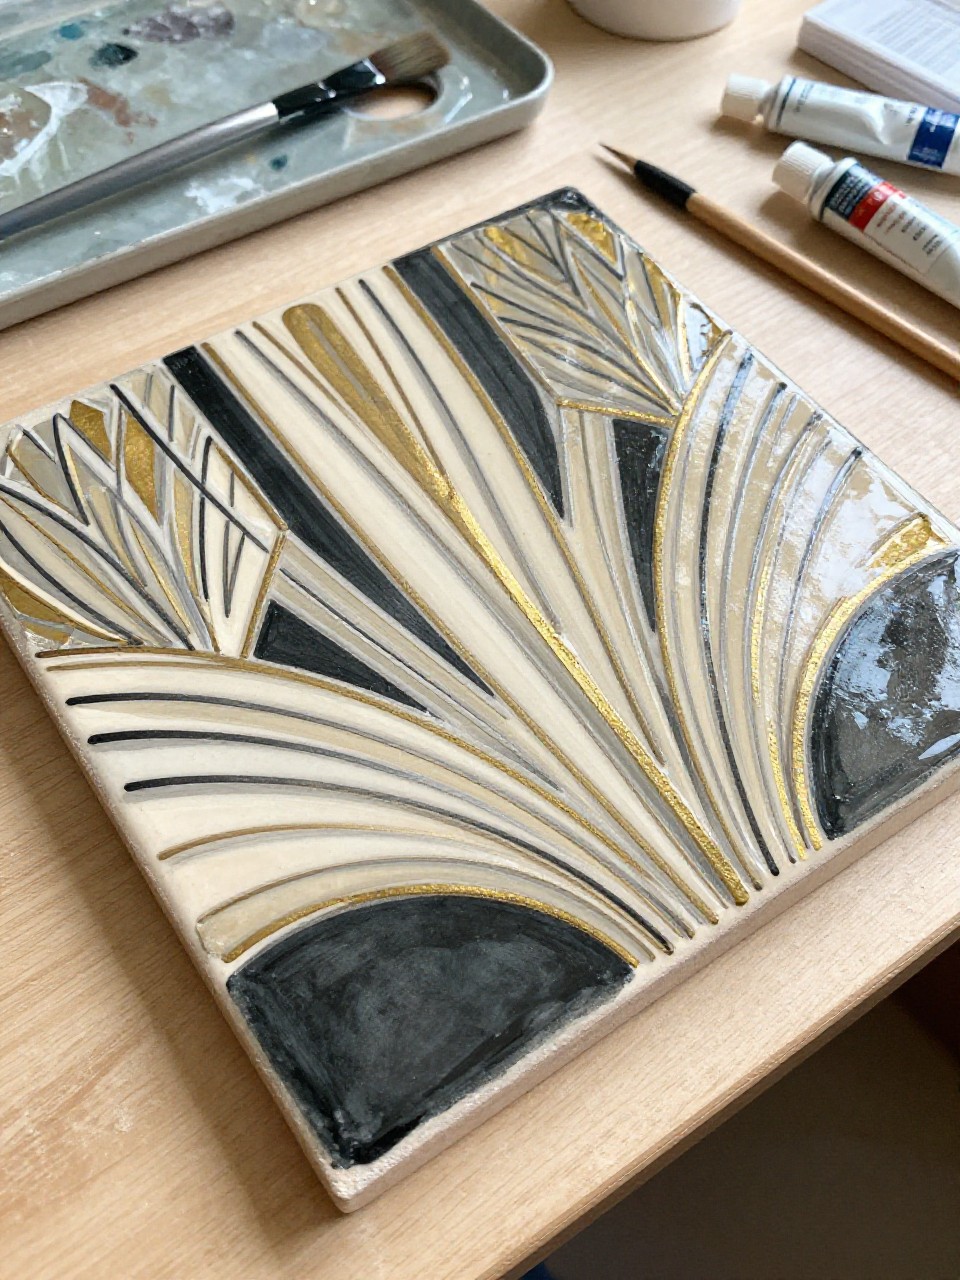
An Art Deco fan pattern tile has curved fan shapes, thin lines, and bold color blocks that feel classy and vintage. It’s beginner-friendly because you can build it from simple arcs and stripes, then tidy it up with a liner brush. The result looks fancy even with a small color palette.
Materials Needed:
- Ceramic tile
- Acrylic paint
- Paintbrushes in multiple sizes
- Palette or paint tray
- Pencil
- Optional sealer or varnish
Steps to Make:
- Clean the tile and sketch three to five fan shapes rising from the bottom edge.
- Paint the fan sections in two main colors, leaving thin gaps for linework.
- Add darker arcs and straight lines to emphasize the Art Deco look.
- Dot or paint small accent shapes near the fan bases for extra detail.
- Dry fully and seal for a glossy, display-ready tile.
15. Minimal Triangle Mosaic Tile

This tile looks like a mosaic made of hand-painted triangles in a repeating pattern, with small variations that prove it’s truly painted. It’s great for beginners because triangles are easy to block in, and you can keep the colors simple. It’s also a nice practice project for cleaner edges.
Materials Needed:
- Ceramic tile
- Acrylic paint
- Paintbrushes in multiple sizes
- Palette or paint tray
- Ruler
- Optional sealer or varnish
Steps to Make:
- Wipe the tile and draw a triangle grid lightly using a ruler.
- Paint triangles in two or three colors, alternating to create a rhythm.
- Let one color dry before painting triangles right next to it to avoid smudges.
- Outline a few triangle edges with a thin brush to sharpen the pattern.
- Dry completely and seal to keep the mosaic look crisp.
16. Hand-Painted Mandala Dot Tile
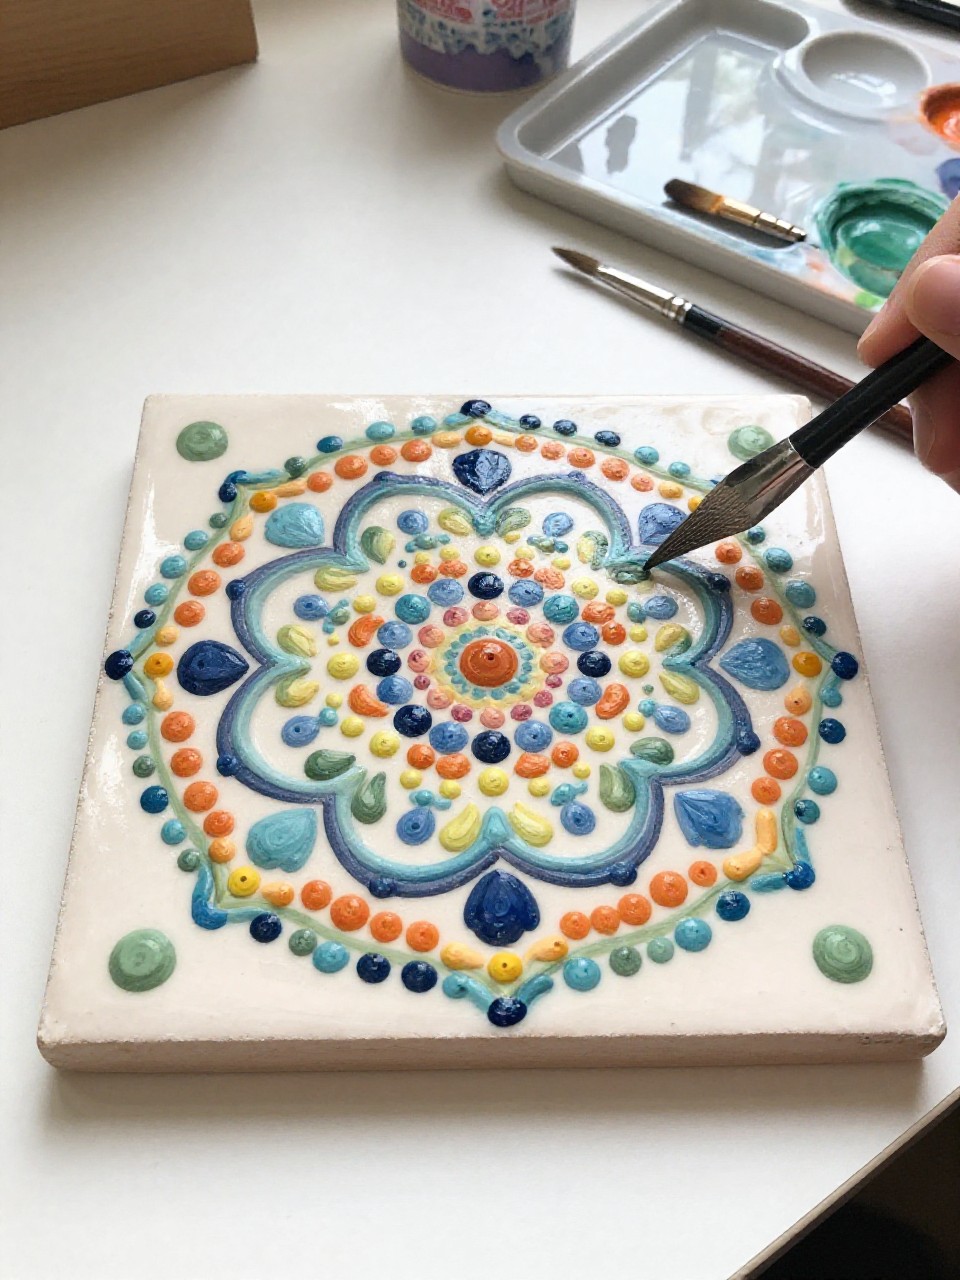
A mandala dot tile has rings of dots and tiny petal shapes radiating from the center, with visible layering where the paint builds up. It’s soothing because you work slowly, dot by dot, and the design grows in a steady rhythm. Beginners can keep it simple with two colors or go bold with many.
Materials Needed:
- Ceramic tile
- Acrylic paint
- Paintbrushes in multiple sizes
- Palette or paint tray
- Dotting tool or toothpick
- Optional sealer or varnish
Steps to Make:
- Clean the tile and mark the center point with a small pencil dot.
- Paint a central dot, then add a ring of evenly spaced dots around it.
- Build outward with larger dots and small petal strokes, changing colors by ring.
- Layer a few dots twice to create raised texture and richer color.
- Let it dry fully, then seal to protect the dotted surface.