

Table of Contents Show
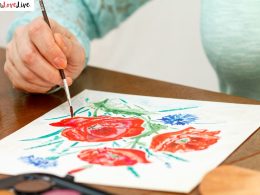
Keeping little hands busy can be tough, especially on rainy days or when you need a quick classroom activity. If you’re looking for simple projects that teach the alphabet while letting kids be creative, these ideas are for you.
This list gathers cute, easy Letter G crafts that use common supplies and take little prep. You’ll get fun, hands-on ways to practice the letter while making art.
Let’s jump into the G-filled goodness!
1. Giant Letter G Collage
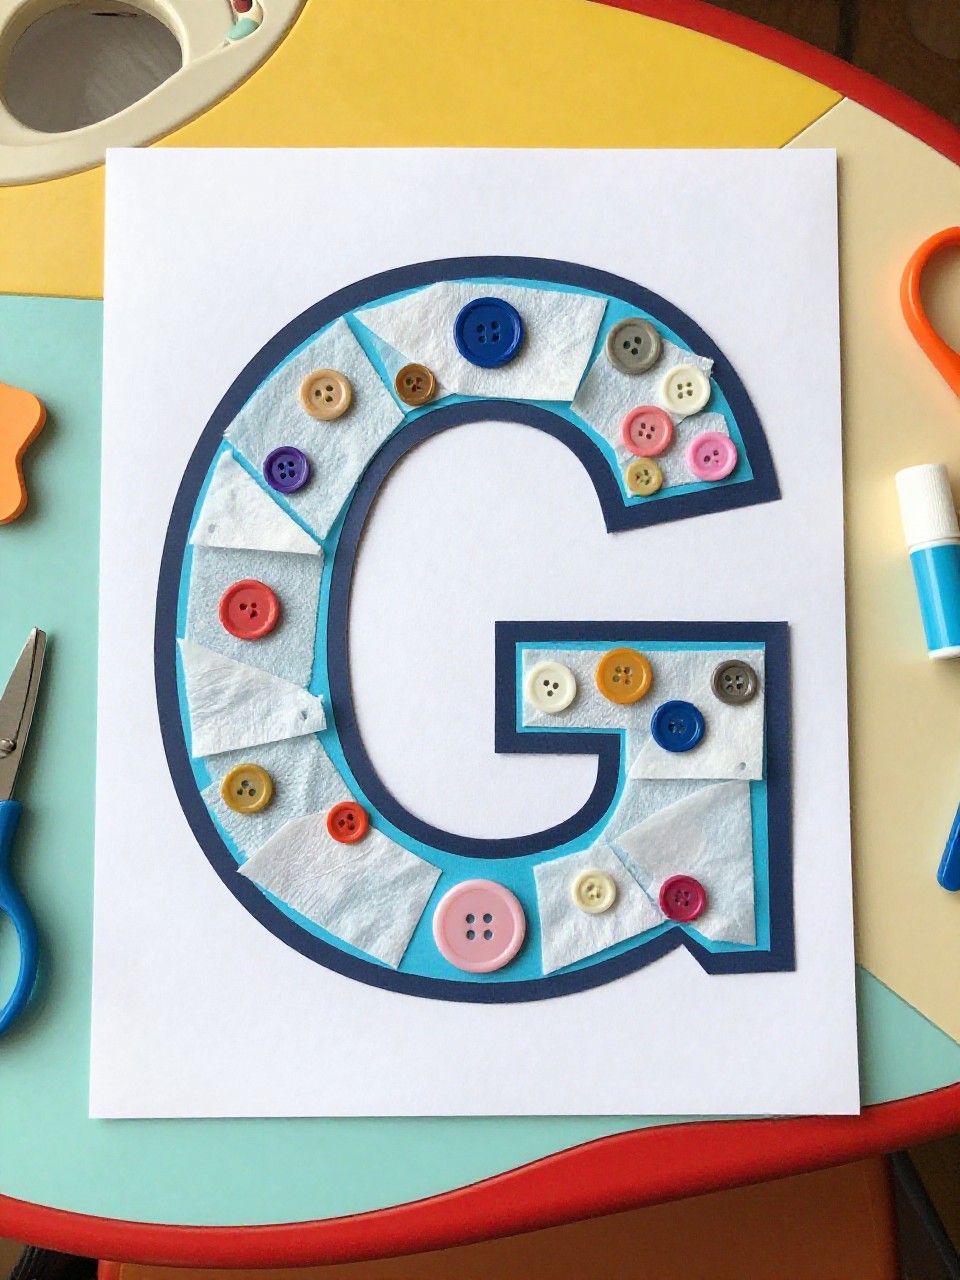
This craft makes a big bubble-letter G covered in textured scraps like tissue paper, buttons, and yarn. Kids love choosing pieces and filling the shape, and it’s a calm, beginner-friendly project that looks bold on a wall.
Materials Needed:
For People Who Love to Make Things ✂️
- Cardstock printed with a large bubble-letter G
- Glue stick or white glue
- Tissue paper squares, buttons, yarn bits
- Safety scissors
- Markers (optional)
How to make it:
- 1. Print or draw a large G on cardstock and cut out the outer shape.
- 2. Spread glue within the G and press on tissue, buttons, and yarn.
- 3. Add marker patterns or dots to fill gaps.
- 4. Let dry flat, then hang on the fridge or classroom board.
2. Green Glitter G
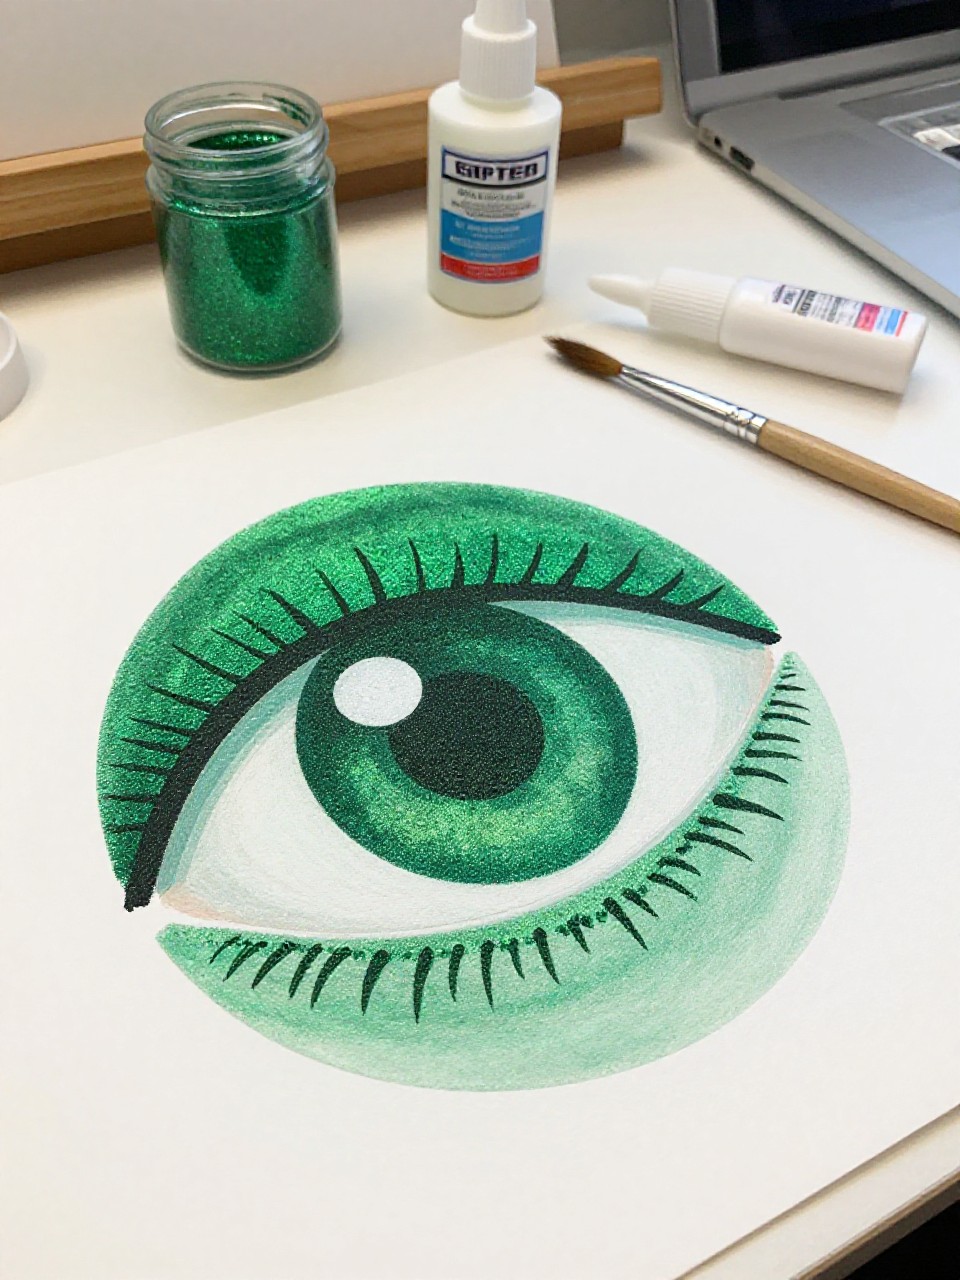
A bold letter G sparkles with green glitter and sits on a contrasting background. Kids enjoy the shiny reveal when they shake off extra glitter, and it’s a quick, satisfying win.
Materials Needed:
- Cardstock letter G cutout
- White glue
- Green glitter
- Construction paper background
- Paintbrush (for spreading glue)
How to make it:
- 1. Cut a large G from cardstock and place it on a scrap tray.
- 2. Brush glue over the G and sprinkle with green glitter.
- 3. Tap off excess, then glue the glittery G onto a background.
- 4. Let dry and display in a glitter-safe area.
3. Googly-Eyed G Monster
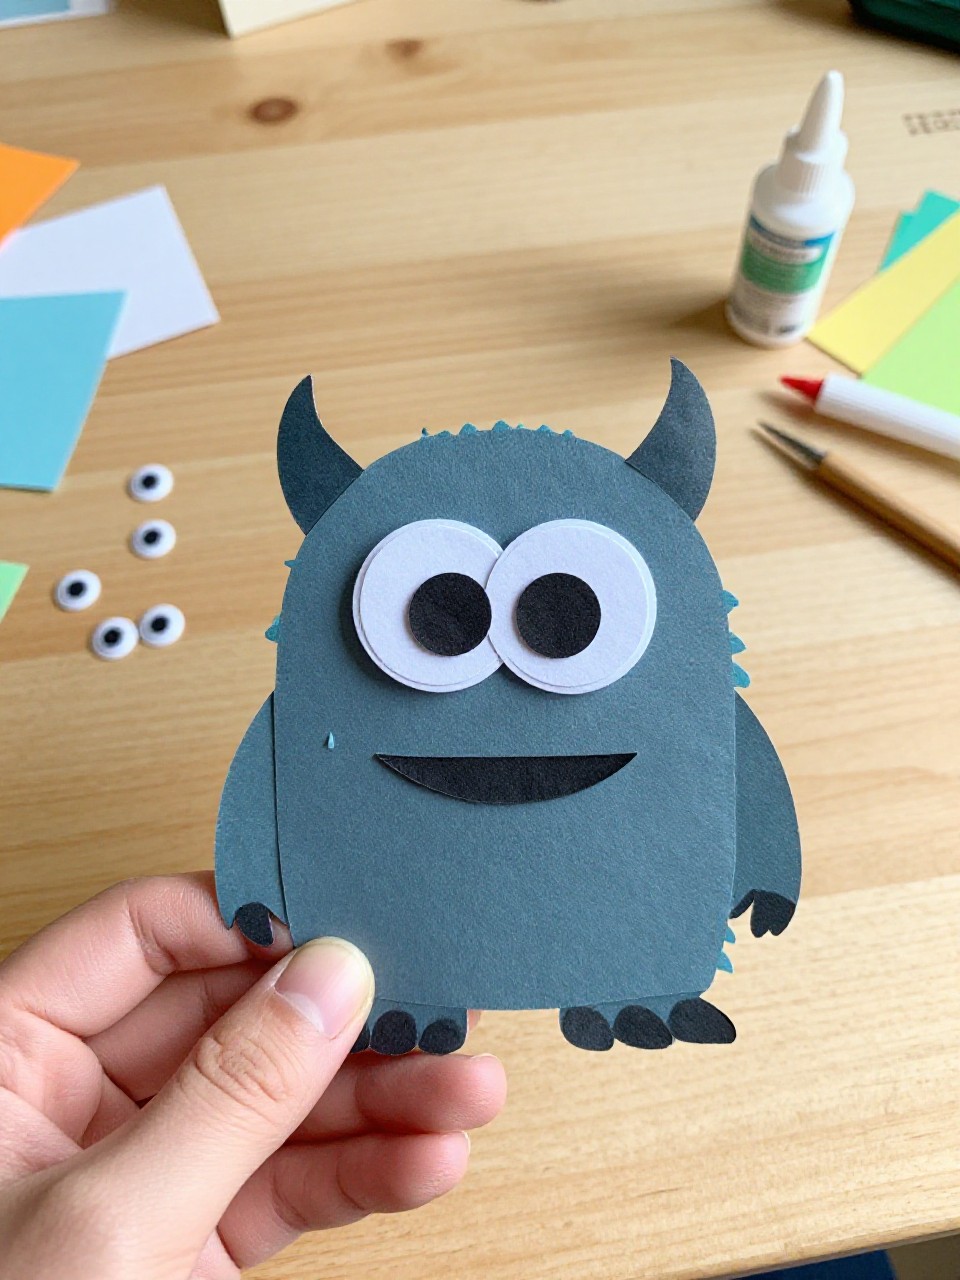
This G turns into a silly monster with bright colors, teeth, and a pile of googly eyes. Kids love choosing where the eyes go and giving the monster a goofy grin.
Materials Needed:
- Foam or cardstock letter G
- Googly eyes (various sizes)
- White glue
- Scrap paper for teeth and tongue
- Markers
How to make it:
- 1. Cut or use a pre-made foam/cardstock G.
- 2. Glue on lots of googly eyes all over the letter.
- 3. Cut small white triangles for teeth and a red tongue; glue them to the inner curve.
- 4. Add marker dots and lines, then let it dry before wiggling the eyes.
4. G Is for Giraffe Letter
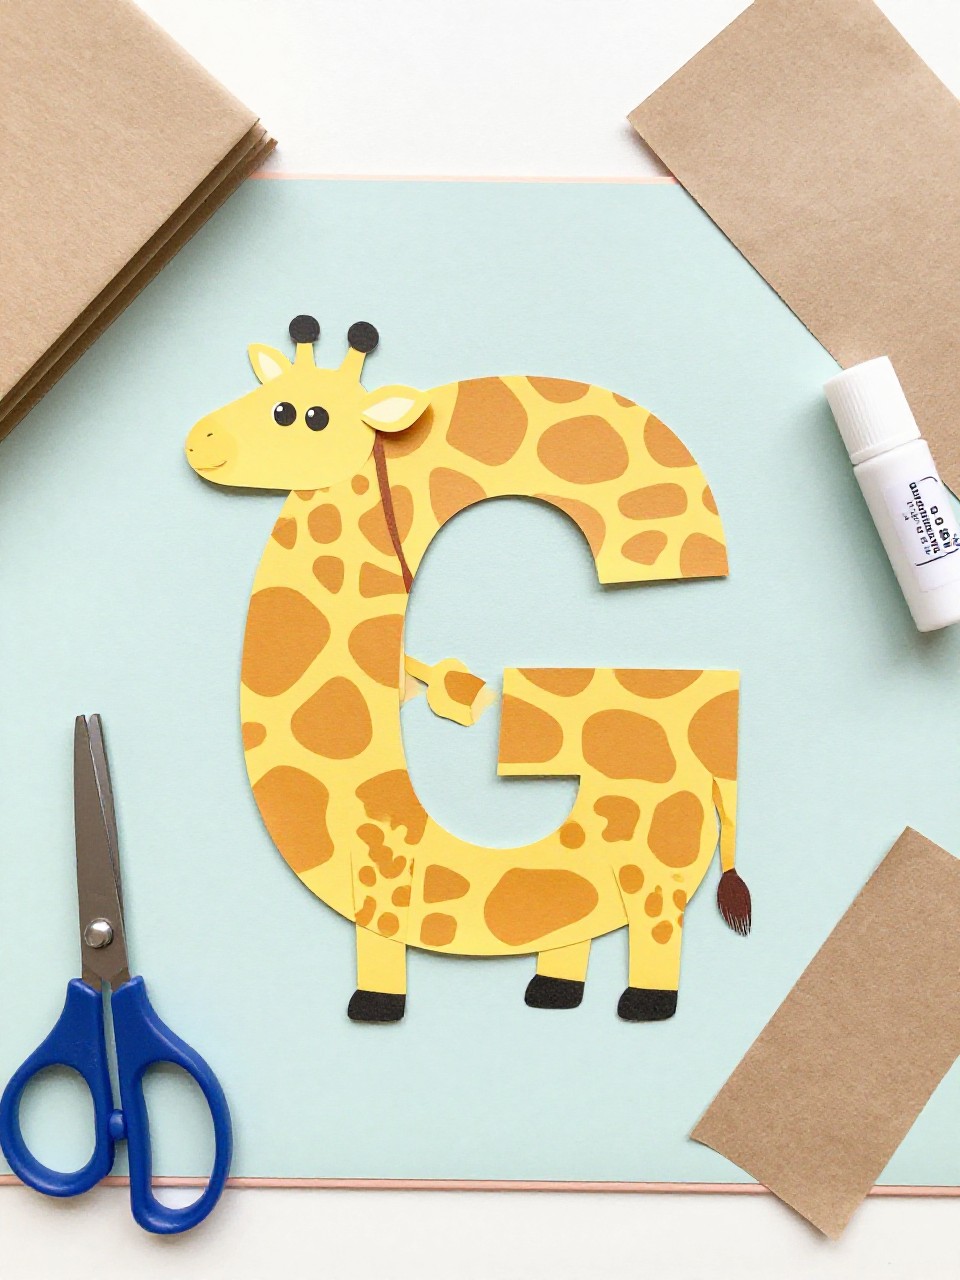
A letter G becomes a giraffe with spots, tiny ears, and a mini paper mane. Kids enjoy turning the curved shape into an animal and learning letter-sound connections.
Materials Needed:
- Yellow construction paper G
- Brown paper for spots and horns (ossicones)
- Glue stick
- Black marker
- Scissors
How to make it:
- 1. Cut a large G from yellow paper.
- 2. Cut brown spots, two small horns, and ears; glue them onto the G.
- 3. Draw eyes, nostrils, and a smile with the marker.
- 4. Add short paper fringe for a mane and display.
5. Garden G Finger-Paint Scene
This looks like a big G sitting in a tiny painted garden with flowers, grass, and buzzing dots for bees. Kids love finger-painting stems and petals, and the mess is small but fun.
Materials Needed:
- White cardstock
- Pre-cut letter G (green)
- Washable paints (green, pink, yellow)
- Cotton swabs or fingers
- Glue stick
How to make it:
- 1. Glue the green G onto the cardstock.
- 2. Use fingers or swabs to paint grass under the G.
- 3. Dot colorful flowers and tiny yellow “bees” around the letter.
- 4. Let dry flat and hang as a springy alphabet poster.
6. Gumball Machine Letter G
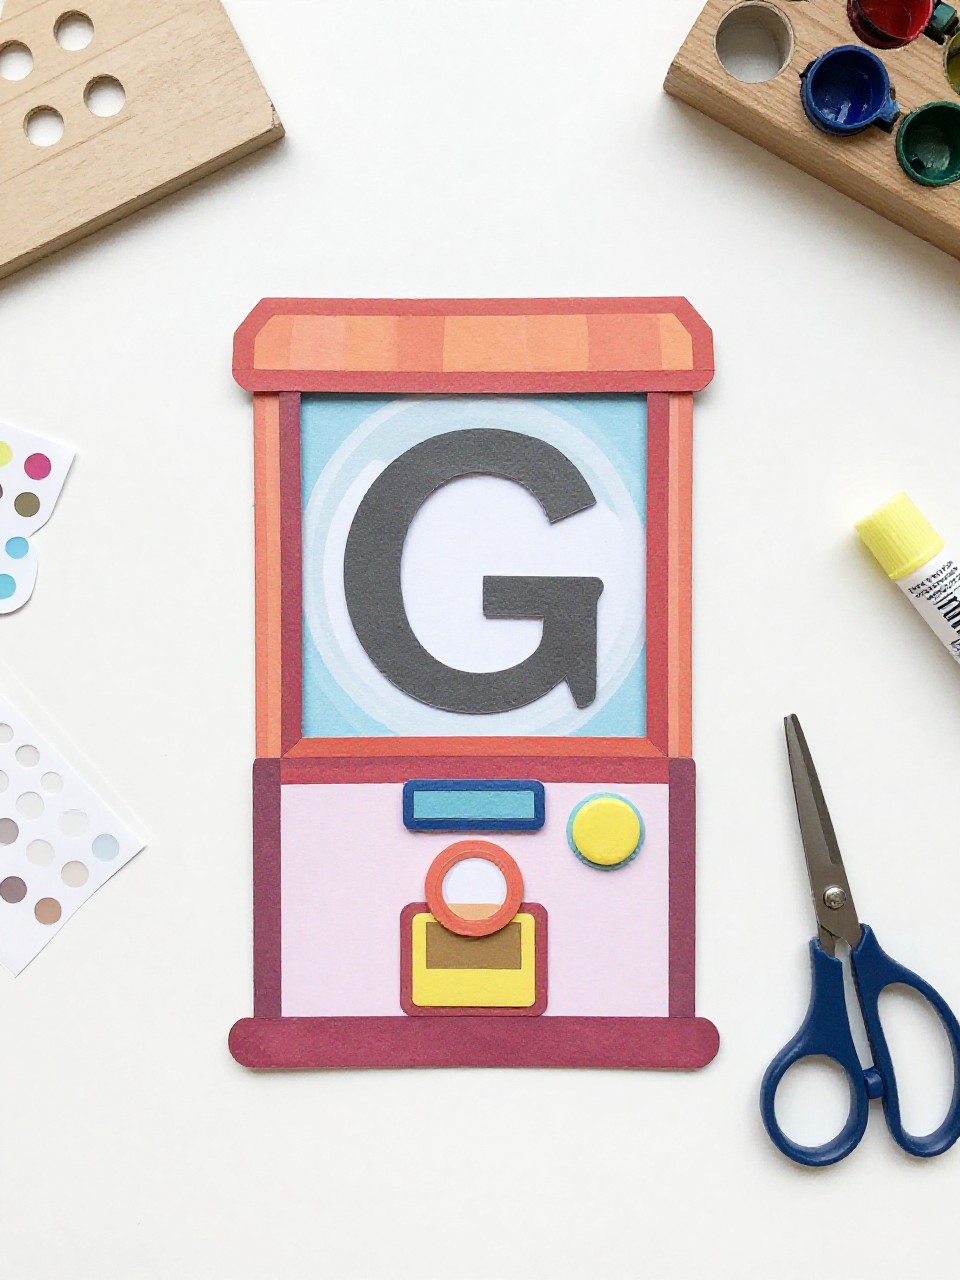
A G becomes the base of a cute paper gumball machine filled with bright circles. Kids enjoy punching or cutting the “gumballs” and choosing a candy rainbow.
Materials Needed:
- Red and gray construction paper
- Clear plastic from packaging or wax paper circle
- Colorful paper scraps or dot stickers
- Glue stick and tape
- Scissors (circle punch optional)
How to make it:
- 1. Cut a large red G for the machine base and a gray rectangle for the coin slot.
- 2. Tape a clear circle or wax paper “globe” over the opening of the G.
- 3. Add paper dots or stickers inside the globe as gumballs.
- 4. Glue on the coin slot and draw a knob; display upright.
7. Paper Plate Goat G
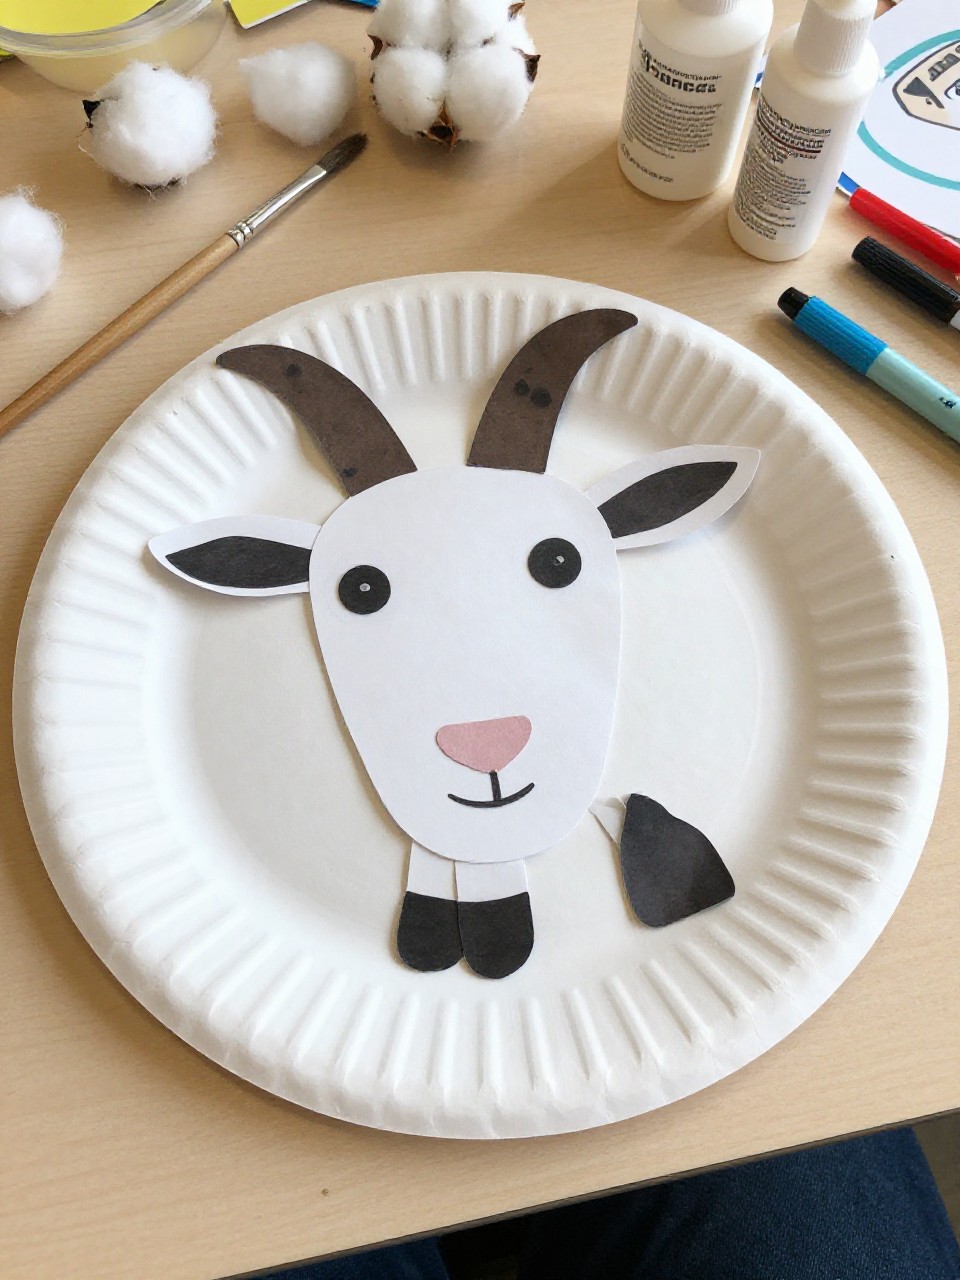
A paper plate goat wraps around a G cutout, with floppy ears and a little beard. Kids like adding texture with cotton balls and making gentle goat faces.
Materials Needed:
- Paper plate
- Gray or brown paint and brush
- Cotton balls
- Construction paper G
- Glue, scissors, black marker
How to make it:
- 1. Paint the plate gray or brown and let it dry.
- 2. Cut the center to fit and glue the G across the plate as the goat’s body.
- 3. Add paper ears, horns, and a small cotton-ball beard.
- 4. Draw eyes and a nose, then display.
8. Glittery Galaxy G
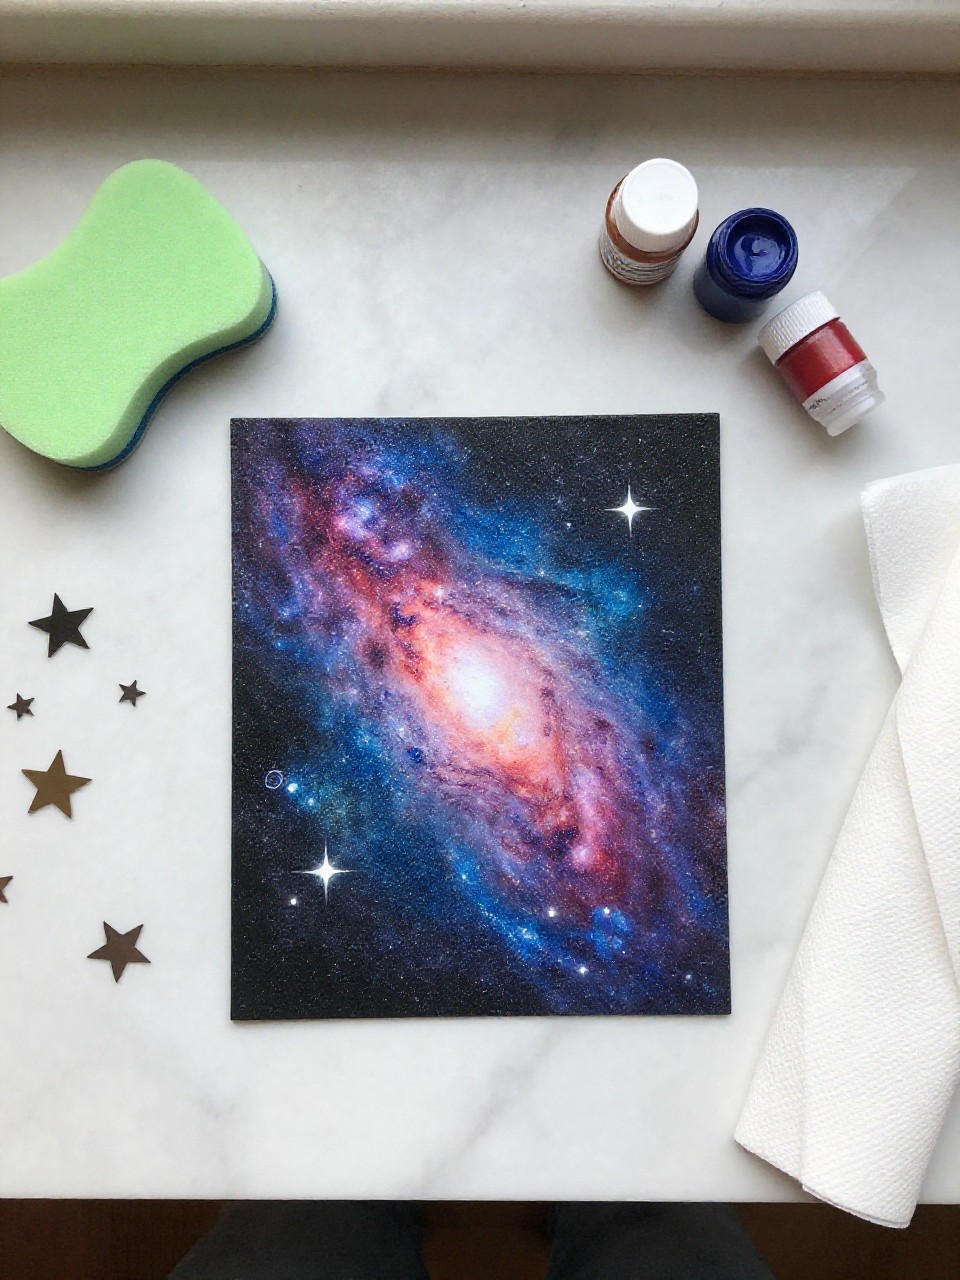
This G looks like outer space with sponge-painted blues, purples, and star stickers. Kids love blending colors and adding twinkly stars for a dreamy sky effect.
Materials Needed:
- Black cardstock letter G
- Acrylic or tempera paints (blue, purple, white)
- Sponge or foam brush
- Star stickers or white paint pen
- Paper towel
How to make it:
- 1. Place the black G on a protected surface.
- 2. Dab blues and purples with a sponge to blend a galaxy.
- 3. Add stars with stickers or a white paint pen.
- 4. Let dry and mount on silver paper.
9. Gold-Leaf Style G (Foil)
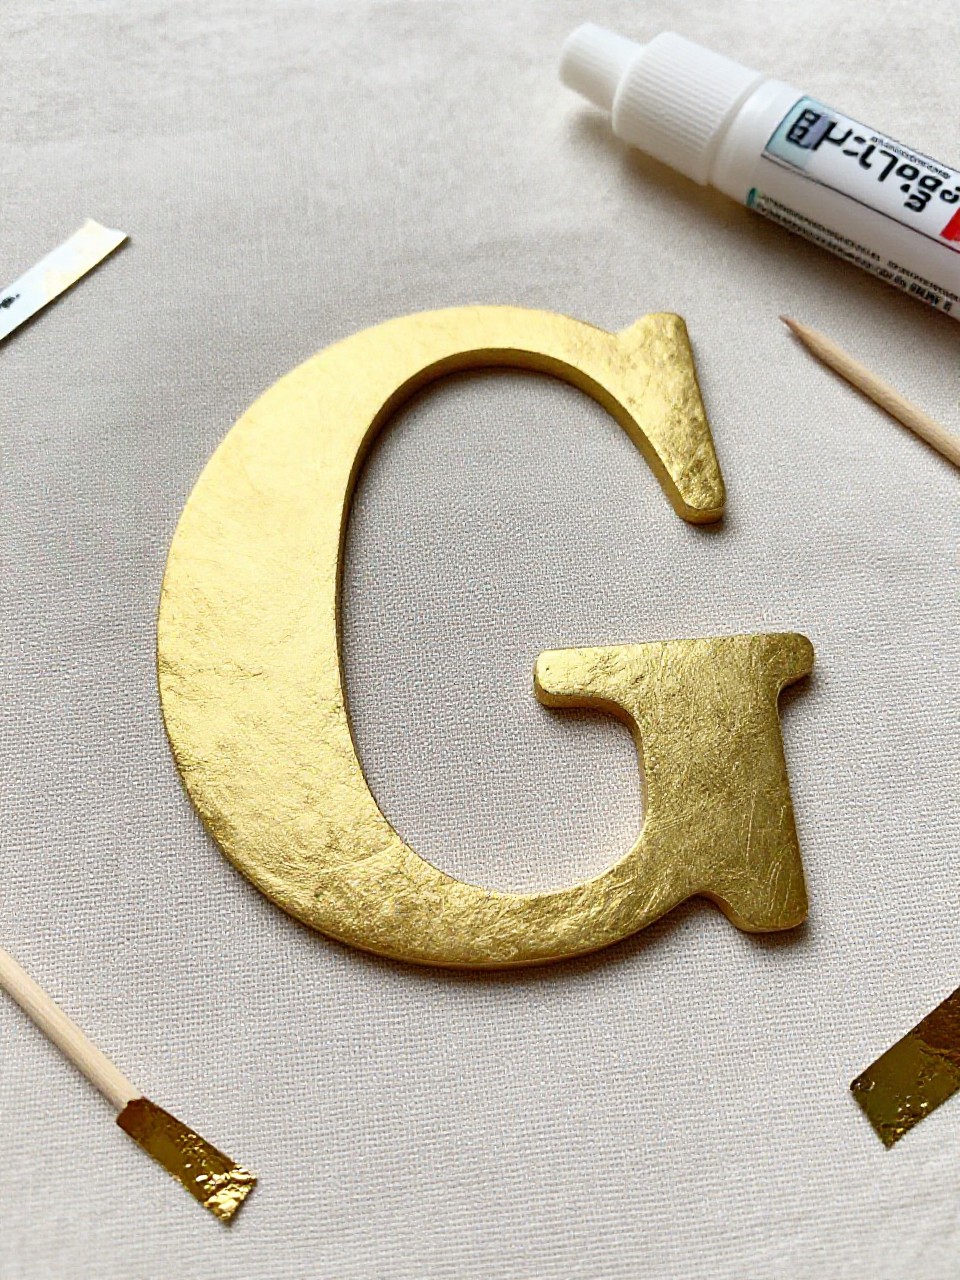
A shiny gold G made with torn foil pieces gives a fancy effect without real gold leaf. Kids enjoy the instant sparkle and the simple press-and-glue steps.
Materials Needed:
- Cardboard or thick cardstock G
- Aluminum foil (gold-colored foil or standard foil colored with yellow marker)
- Glue stick
- Craft stick (for smoothing)
- Ribbon for hanging (optional)
How to make it:
- 1. Cut a sturdy G from cardboard.
- 2. Tear small foil pieces and glue them onto the G, overlapping.
- 3. Smooth with a craft stick and color lightly with a yellow marker if using silver foil.
- 4. Add ribbon to hang and let set.
10. G Is for Garden Gnome
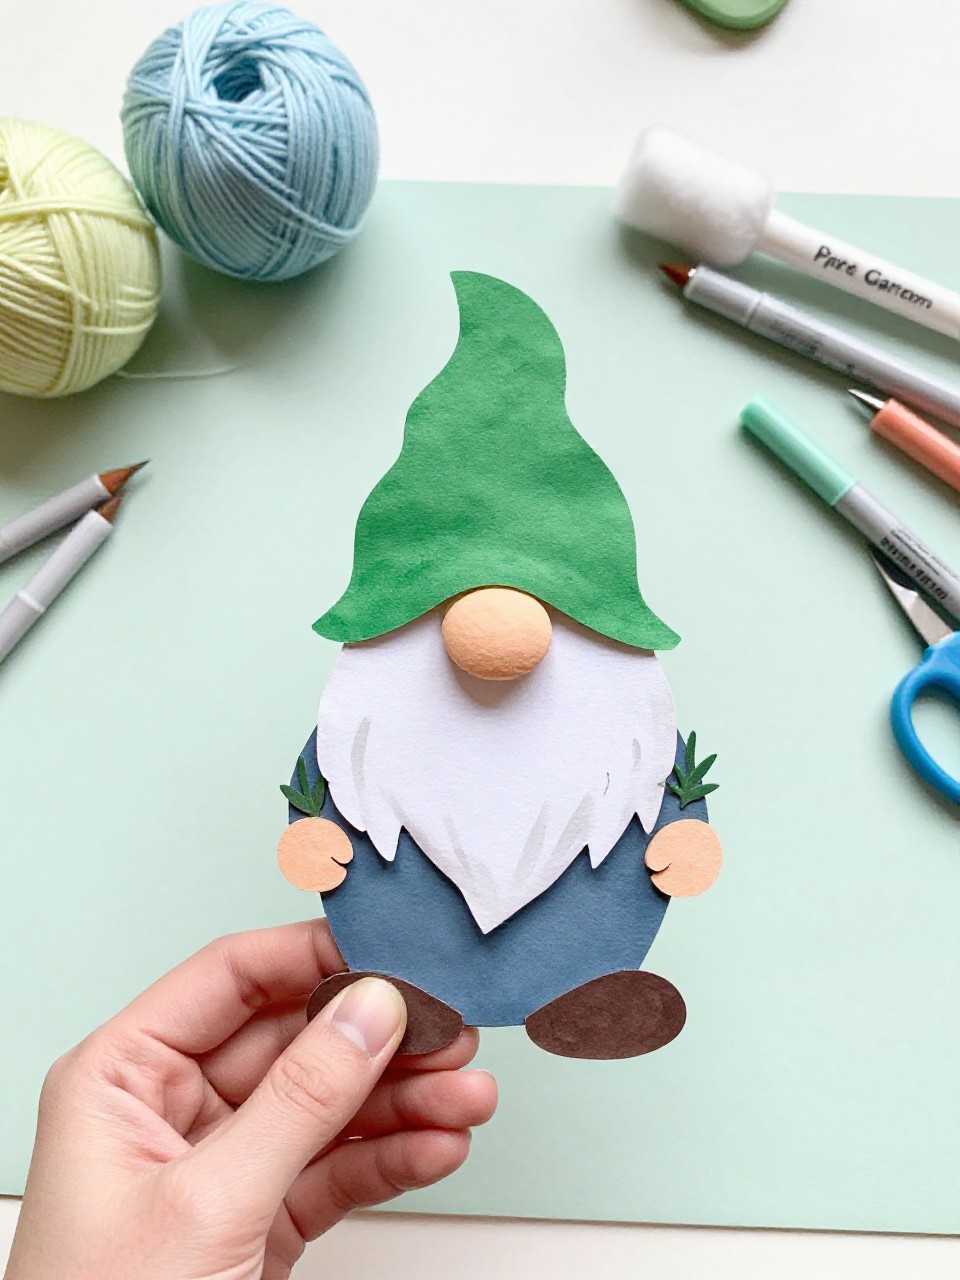
A playful G wears a tall hat and beard like a tiny garden gnome. Kids love decorating the hat with dots and giving the gnome a cheerful face.
Materials Needed:
- Cardstock letter G
- Colored paper for hat and nose
- Cotton or yarn for beard
- Glue
- Markers
How to make it:
- 1. Cut a triangle hat and a small circle nose.
- 2. Glue the hat to the top curve of the G and add the nose.
- 3. Attach cotton or yarn under the hat for a fluffy beard.
- 4. Draw eyes and details, then display.
11. Green Grass G Texture Rubbing

This project makes a textured green G using crayon rubbings over real grass or a texture plate. Kids enjoy the surprise patterns that appear as they color.
Materials Needed:
- White paper with a large outlined G
- Leafy grass blades or texture plate
- Green crayons (paper peeled)
- Tape
- Scissors
How to make it:
- 1. Place grass or a texture plate under the paper and tape in place.
- 2. Rub the side of a green crayon over the G outline to capture texture.
- 3. Cut out the G to make a bold textured letter.
- 4. Mount on dark paper for contrast.
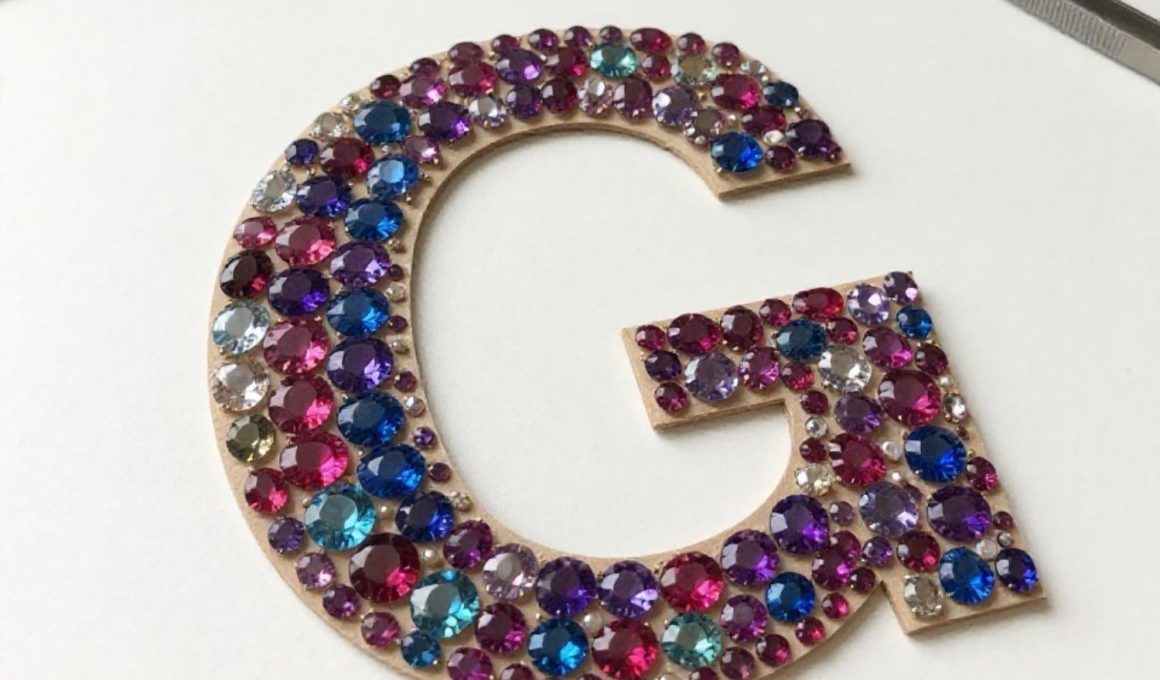
12. Gem-Studded Letter G
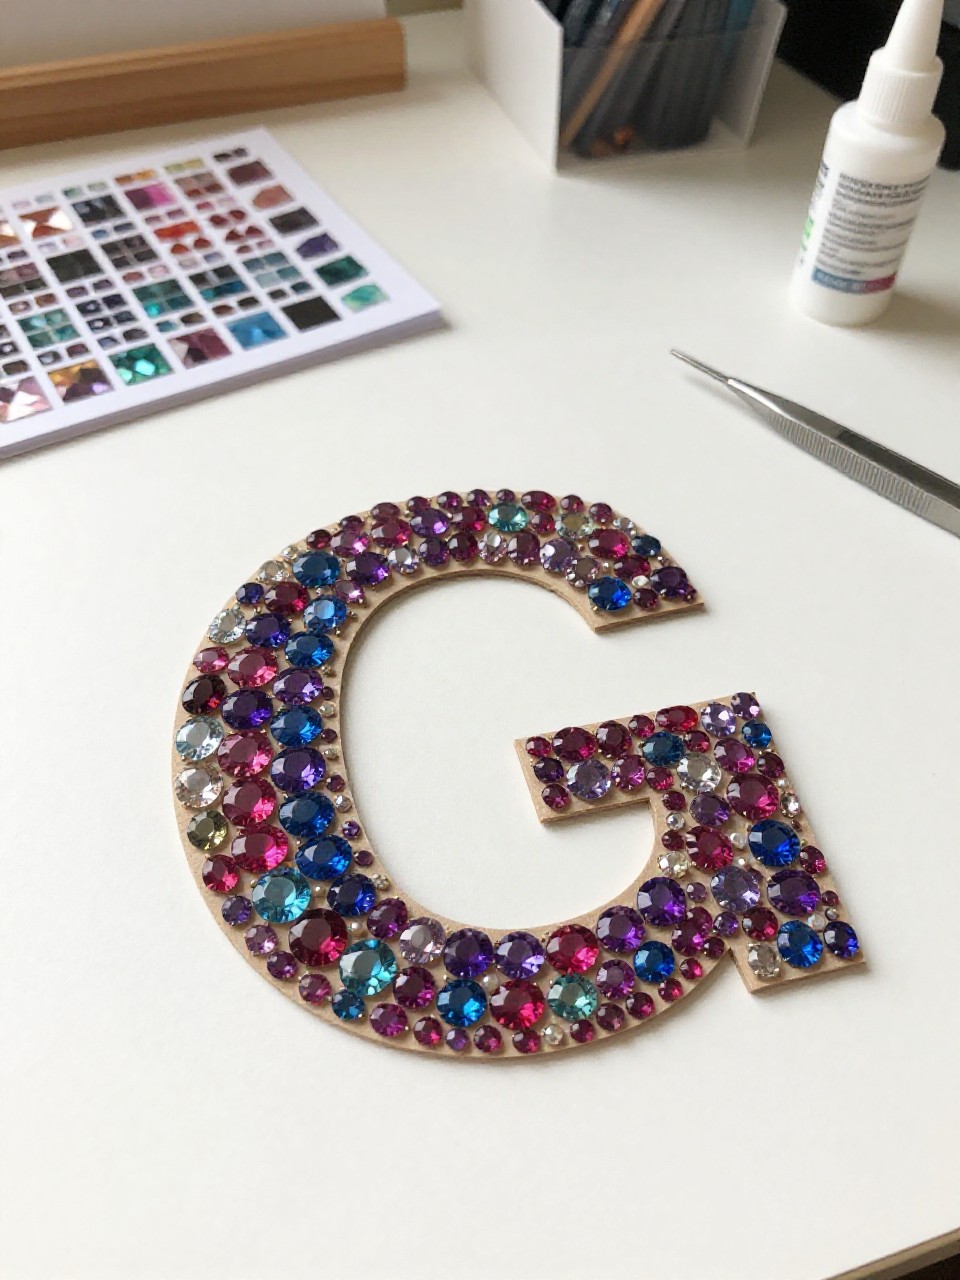
A glamorous G is covered with flat-back craft gems in rainbow rows. Kids love the sparkle and simple stick-and-press rhythm.
Materials Needed:
- Foam letter G or cardstock G
- Self-adhesive craft gems or sequins
- Glue (if gems aren’t sticky)
- Tweezers (optional)
- Black or white background paper
How to make it:
- 1. Place the G on a background paper.
- 2. Press gems onto the G, filling it from one side to the other.
- 3. Add tiny sequins to fill gaps.
- 4. Let glue set and frame if desired.
13. Glitter Glue Galaxy G Bookmark
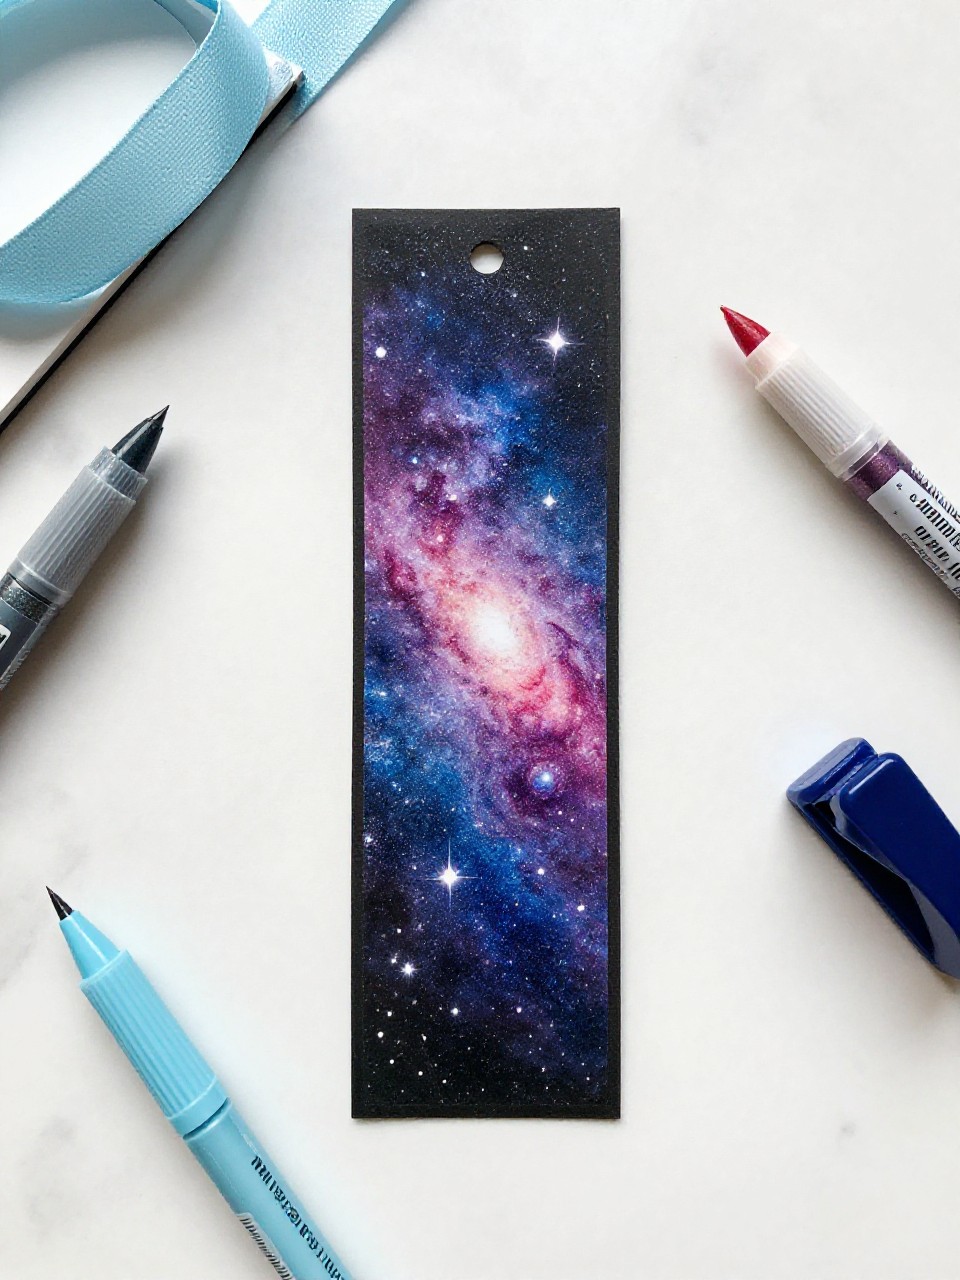
A slim G-shaped bookmark gets swirls of glitter glue like a mini night sky. Kids enjoy squeezing the glitter lines and using the bookmark later.
Materials Needed:
- Heavy cardstock G cut to bookmark size
- Glitter glue pens (blue, purple, silver)
- Hole punch
- Ribbon or yarn
- Wax paper for drying
How to make it:
- 1. Cut a narrow G suitable for a bookmark and punch a top hole.
- 2. Draw swirls and dots with glitter glue across the G.
- 3. Place on wax paper to dry fully.
- 4. Tie on a ribbon and use in a favorite book.
14. Goofy Glasses G Mask
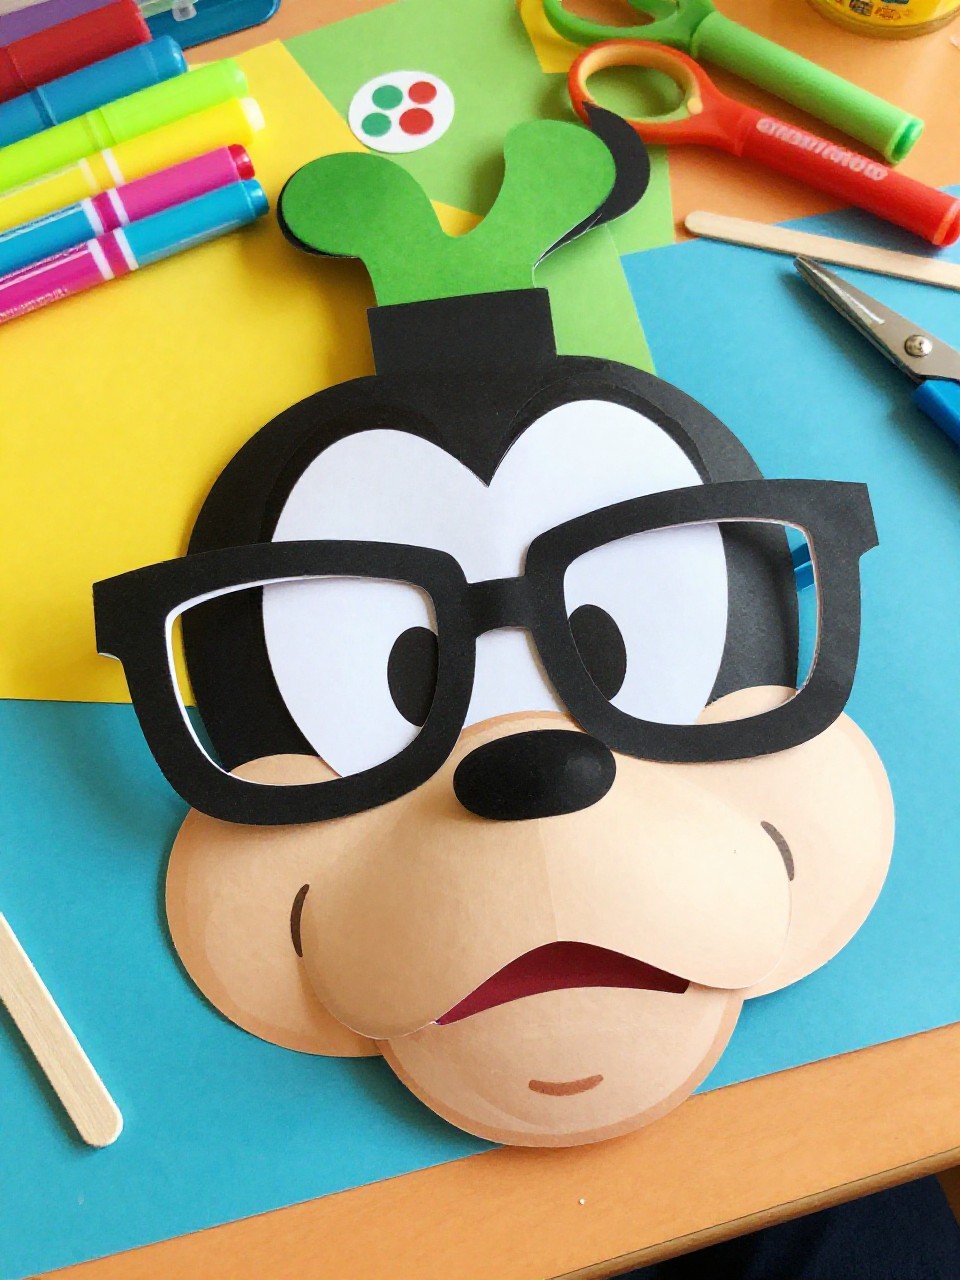
This G turns into a silly glasses mask with cut-out eye holes and a popsicle stick handle. Kids like trying it on and acting out the “G” sound while they play.
Materials Needed:
- Thick cardstock letter G
- Craft knife or scissors (adult help)
- Markers or paint
- Stickers
- Popsicle stick and tape
How to make it:
- 1. Cut a large G and carefully make two eye holes in the upper curve.
- 2. Color or paint the G and add stickers.
- 3. Tape a popsicle stick to the side as a handle.
- 4. Let dry and try on the goofy glasses.
15. “G Is for Grapes” Bubble Wrap Print
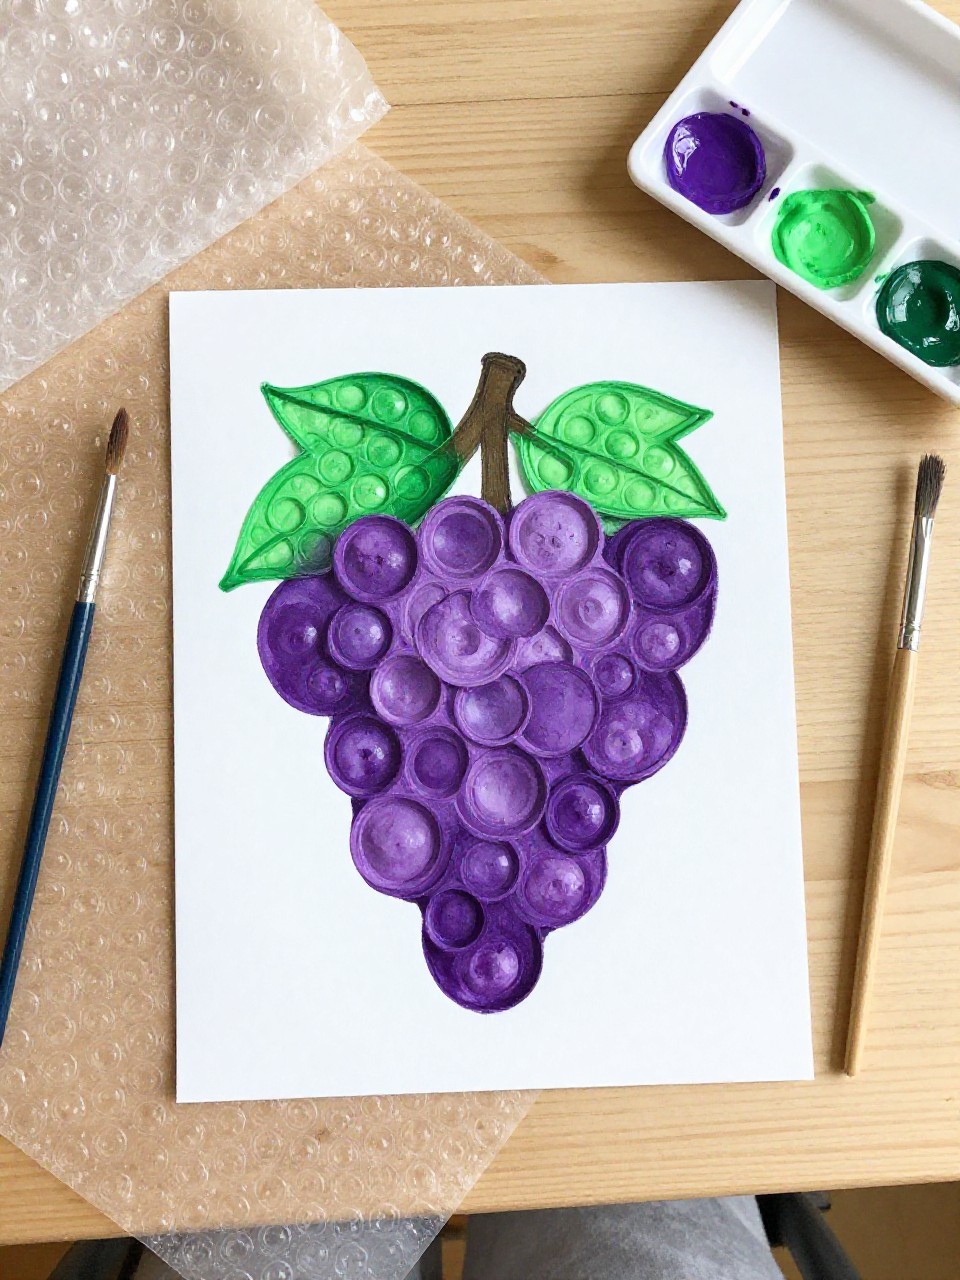
A cluster of purple grape circles fills the inside of a G using bubble wrap stamping. Kids love pressing the bumpy wrap and seeing perfect dots appear.
Materials Needed:
- White cardstock with a large outlined G
- Bubble wrap square
- Purple and green paint
- Paint tray
- Small brush
How to make it:
- 1. Place bubble wrap face-up and roll purple paint on the bubbles.
- 2. Press it inside the G outline to make grape clusters.
- 3. Use a brush to add a green stem and tiny leaf at the top of the G.
- 4. Let dry and cut out the letter to display.