
Table of Contents Show
Keeping kids busy at home can be tough, especially when you want something simple, low-mess, and engaging. Letter crafts are a great way to mix learning with hands-on fun. This list gives you creative, easy Letter D crafts that build fine motor skills and help kids remember the letter sound.
Grab a few basic supplies, and let’s make playful projects that clearly look like D—then roll right into the ideas below.
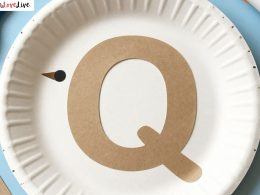
1. Paper Plate Letter D Donut
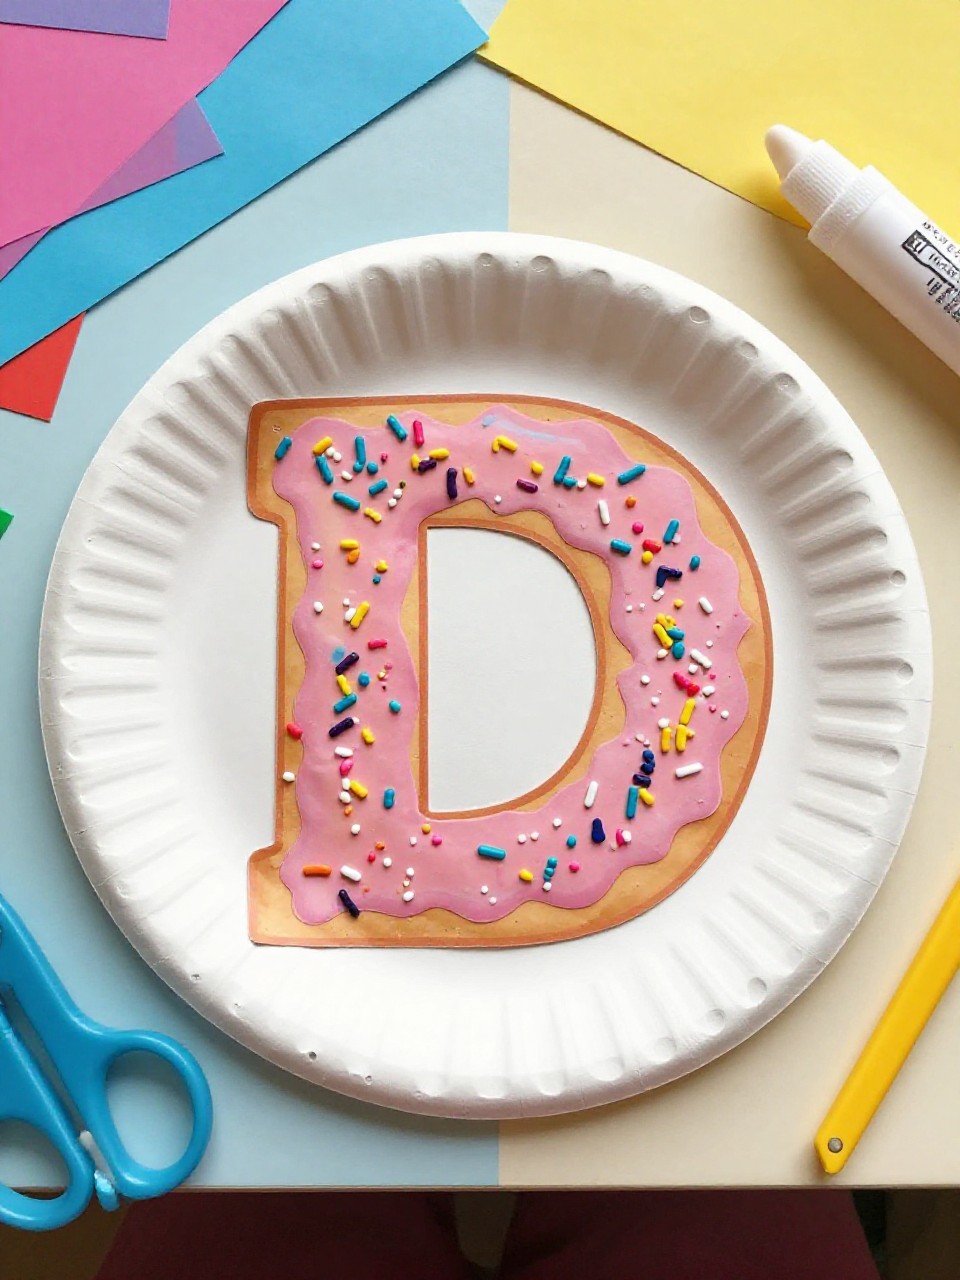
This craft looks like a big letter D turned into a frosted donut with colorful “sprinkles.” Kids love choosing frosting colors and shaking on paper sprinkle bits, and the cutting step is easy for beginners.
Materials Needed:
- Paper plate (sturdy)
- Scissors
- Brown and pink paint (or markers)
- Glue stick
- Colored paper scraps for sprinkles
How to make it:
For People Who Love to Make Things ✂️
- 1. Cut a large D shape from a paper plate by trimming one side flat and cutting a center hole.
- 2. Paint the D light brown, then add a pink “frosting” layer on top.
- 3. Cut tiny sprinkle strips from colored scraps and glue them all over the frosting.
- 4. Let dry and hang on the fridge with tape or a magnet.
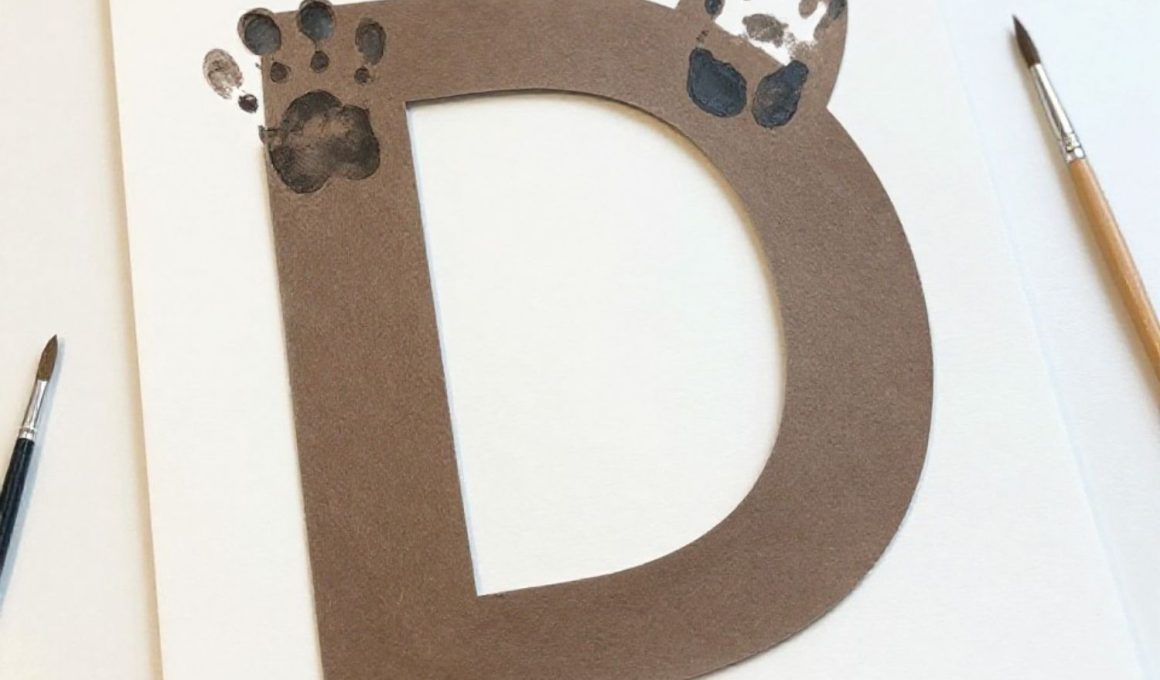
2. Handprint D is for Dog
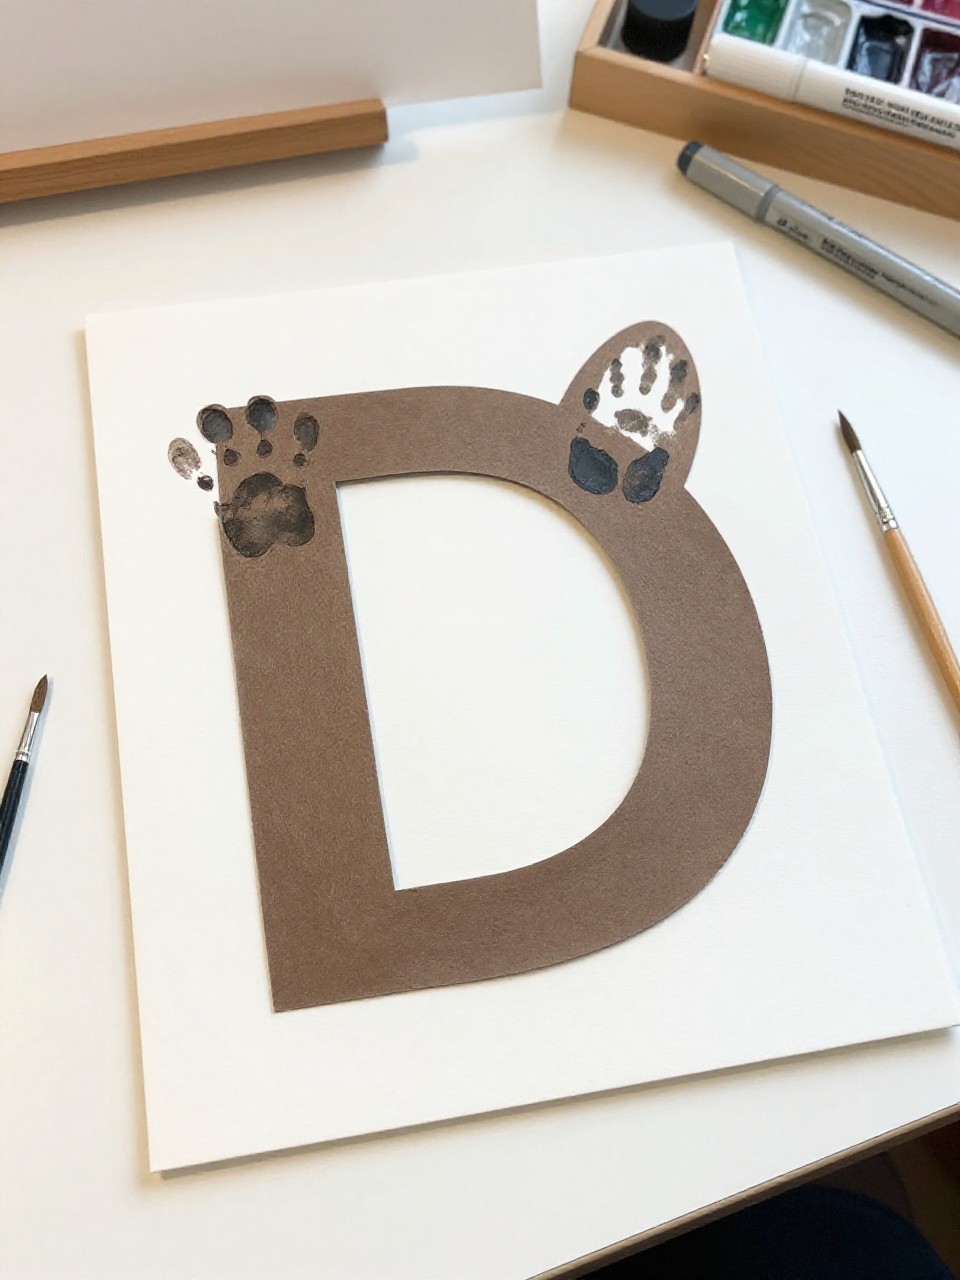
This project looks like the letter D with a friendly dog face and a handprint ear. Kids enjoy turning their own handprint into a floppy ear and drawing a silly tongue or spots.
Materials Needed:
- White cardstock
- Brown and black construction paper
- Washable paint (for handprint)
- Markers
- Glue stick
How to make it:
- 1. Cut a large D from brown paper and glue it onto cardstock.
- 2. Paint one hand and stamp a handprint; cut it out to use as the dog’s ear.
- 3. Add a circle nose, googly or drawn eyes, and a red paper tongue; glue on the handprint ear.
- 4. Outline details with marker and write “D is for Dog” at the bottom.
3. Popsicle Stick D Dragon
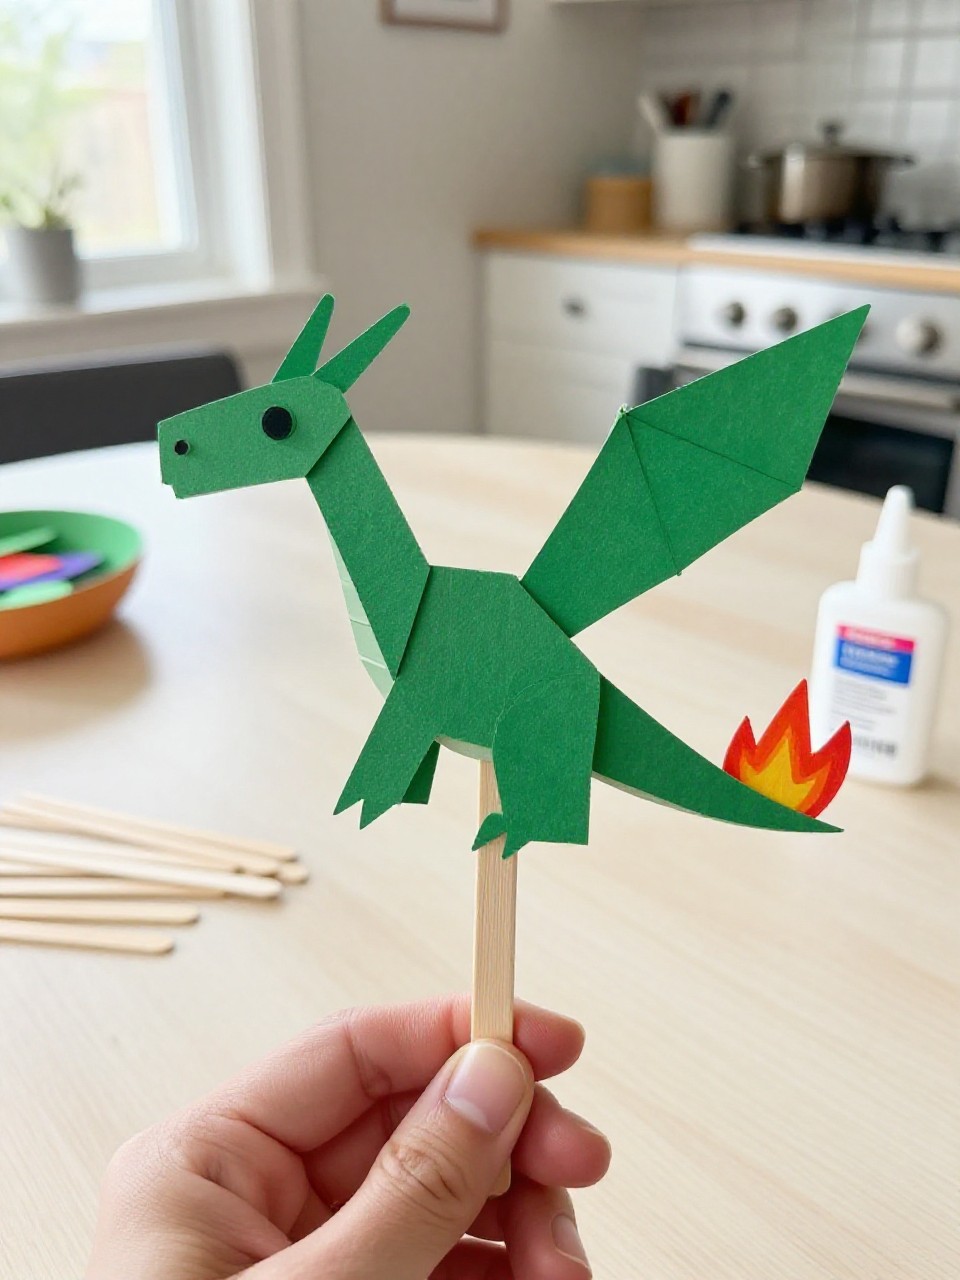
This looks like a letter D made from popsicle sticks, with paper wings, spikes, and a cute dragon face. Kids love the fantasy theme and choosing wild colors for scales and fire.
Materials Needed:
- Popsicle sticks
- Green paint or markers
- Cardstock (green, red, yellow)
- Googly eyes
- Glue
How to make it:
- 1. Glue popsicle sticks into a D outline (one curved side built from shorter angled sticks).
- 2. Paint or color the sticks green and let dry.
- 3. Cut and glue on paper wings, spikes, and a small red-yellow “flame.”
- 4. Add googly eyes and hang with string or tape.
4. Dot Sticker D Collage
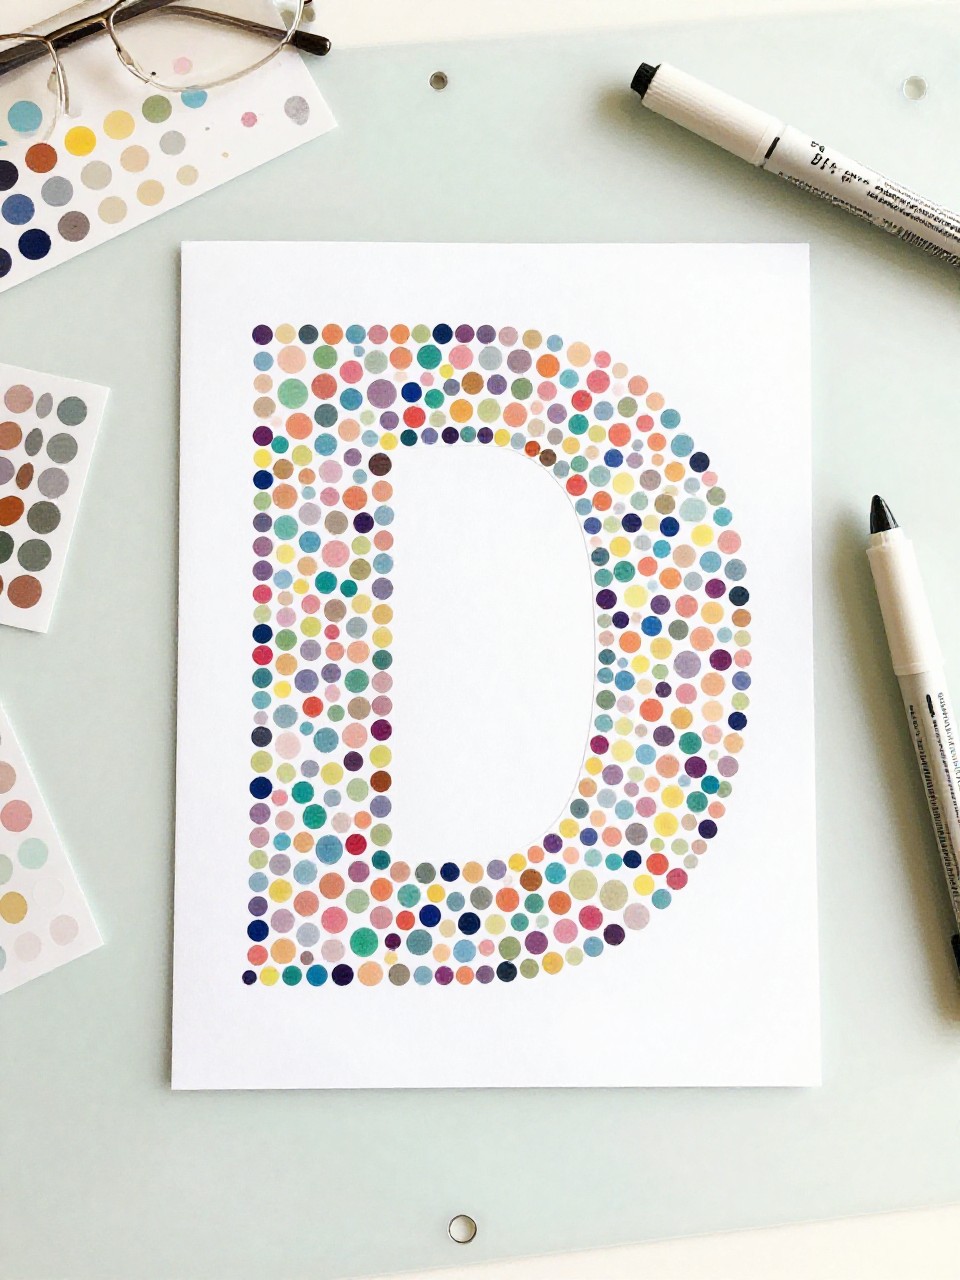
This craft shows a bold letter D filled edge to edge with colorful dot stickers. Kids love peeling and sticking, which is perfect for fine motor practice and satisfying patterns.
Materials Needed:
- Printable or hand-drawn large D outline on cardstock
- Assorted round dot stickers
- Crayon or marker (optional for outline)
- Ruler (optional)
How to make it:
- 1. Draw or print a large D outline on sturdy paper.
- 2. Fill the inside of the D completely with dot stickers in any pattern.
- 3. Trace the outline thicker with marker for extra pop.
- 4. Display on a wall or in a learning binder.
5. D is for Dolphin Paper Puppet
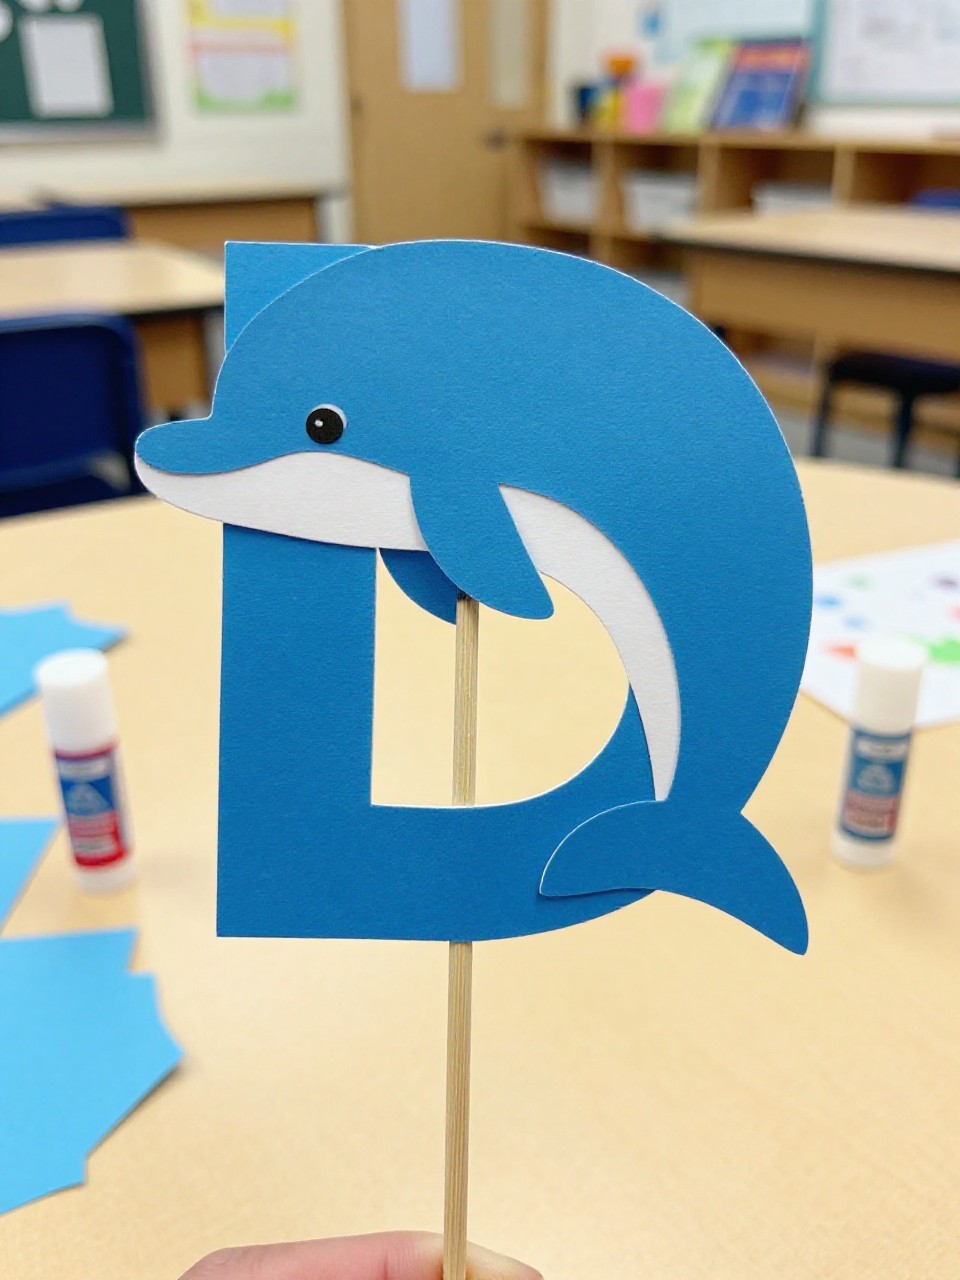
This looks like the letter D wearing a dolphin costume, with a curved dorsal fin and a friendly smile. Kids enjoy making the mouth open and close like a simple puppet for storytelling.
Materials Needed:
- Light blue cardstock
- White paper scraps
- Black marker
- Glue stick
- Craft stick (for handle)
How to make it:
- 1. Cut a large D from blue cardstock.
- 2. Add a fin, flipper, and white belly shapes; glue them on.
- 3. Draw an eye and smile; add small splash details if you like.
- 4. Glue a craft stick to the back to hold and “swim” the dolphin.
6. Dinosaur Footprint D Stamping Art
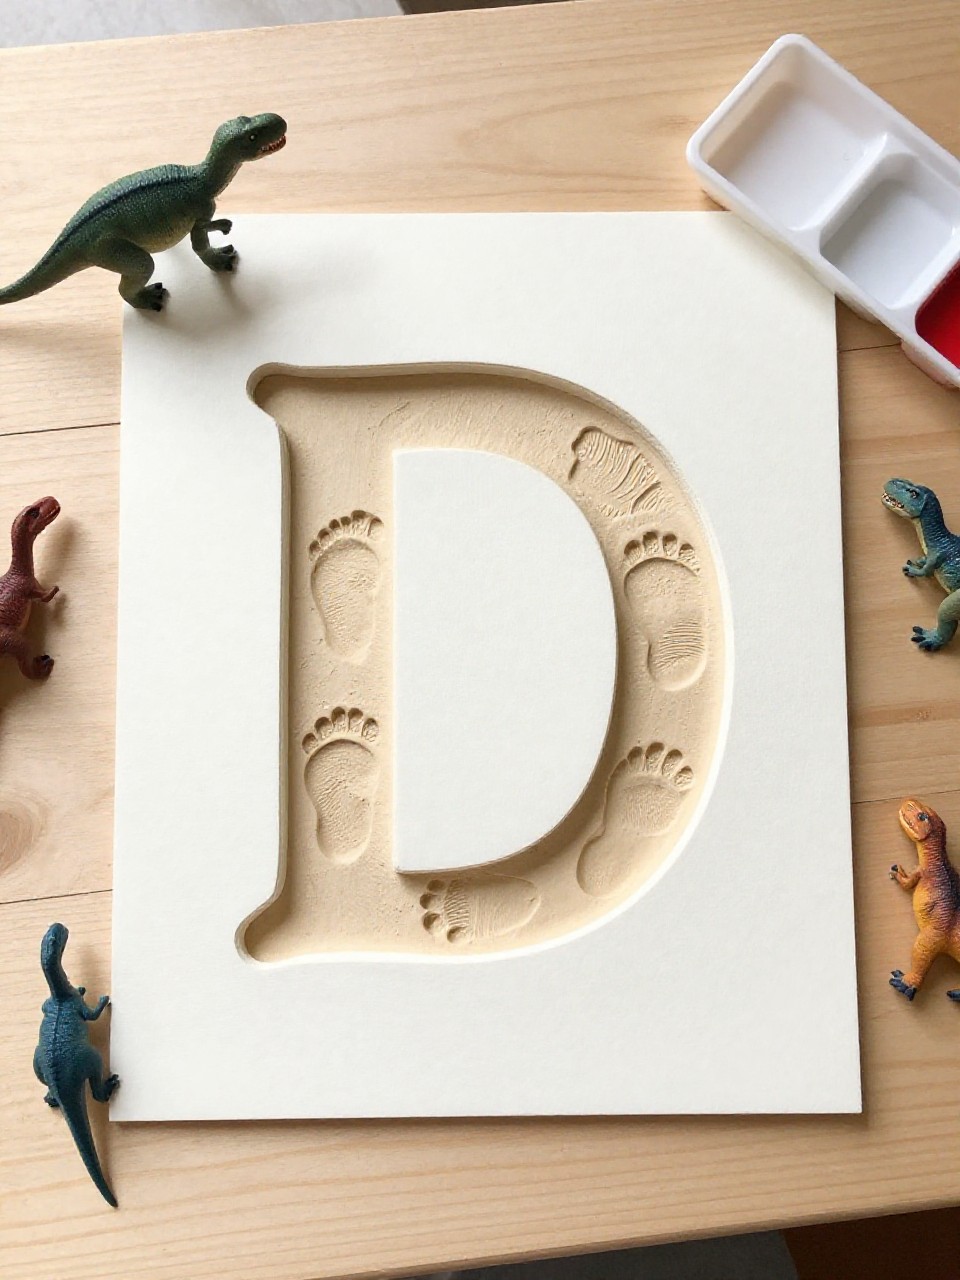
This artwork features a big painted D with mini dinosaur footprints stomping across it. Kids love stamping with toy dino feet or carved sponges to make tracks.
Materials Needed:
- White cardstock
- Green or brown paint
- Small dinosaur toys or sponge stamps
- Paint tray
- Marker
How to make it:
- 1. Draw or paint a large D on the paper.
- 2. Dip toy dino feet or sponge shapes into paint.
- 3. Stamp footprints across and around the D to make a lively scene.
- 4. Label it “D is for Dinosaur” and let it dry flat.
7. Cardboard Tube D Drum
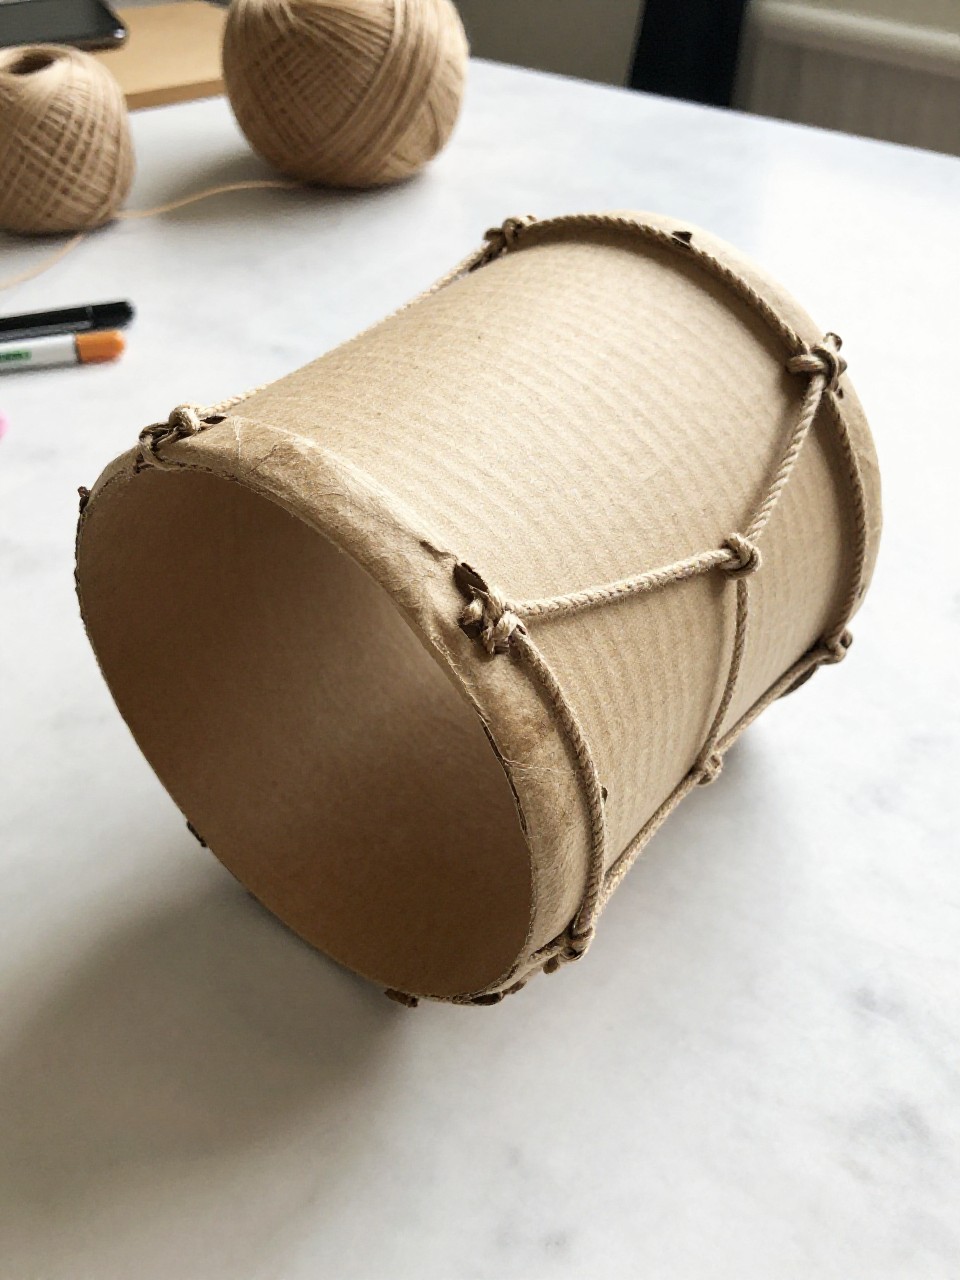
This looks like a mini hand drum shaped like the letter D, made from a cut cardboard tube with paper heads and yarn. Kids enjoy tapping rhythms, and it’s sturdy enough for gentle play.
Materials Needed:
- Cardboard paper towel tube
- Construction paper
- Rubber bands or tape
- Yarn or ribbon
- Markers or paint
How to make it:
- 1. Cut a tall D shape from the tube by slicing a flat on one side; cover the tube in colored paper.
- 2. Cap both open ends with paper circles and secure with rubber bands or tape.
- 3. Wrap yarn around as “drum laces” and decorate with D patterns.
- 4. Tap with fingers and march around to test the beat.
8. Paper Plate D Duck
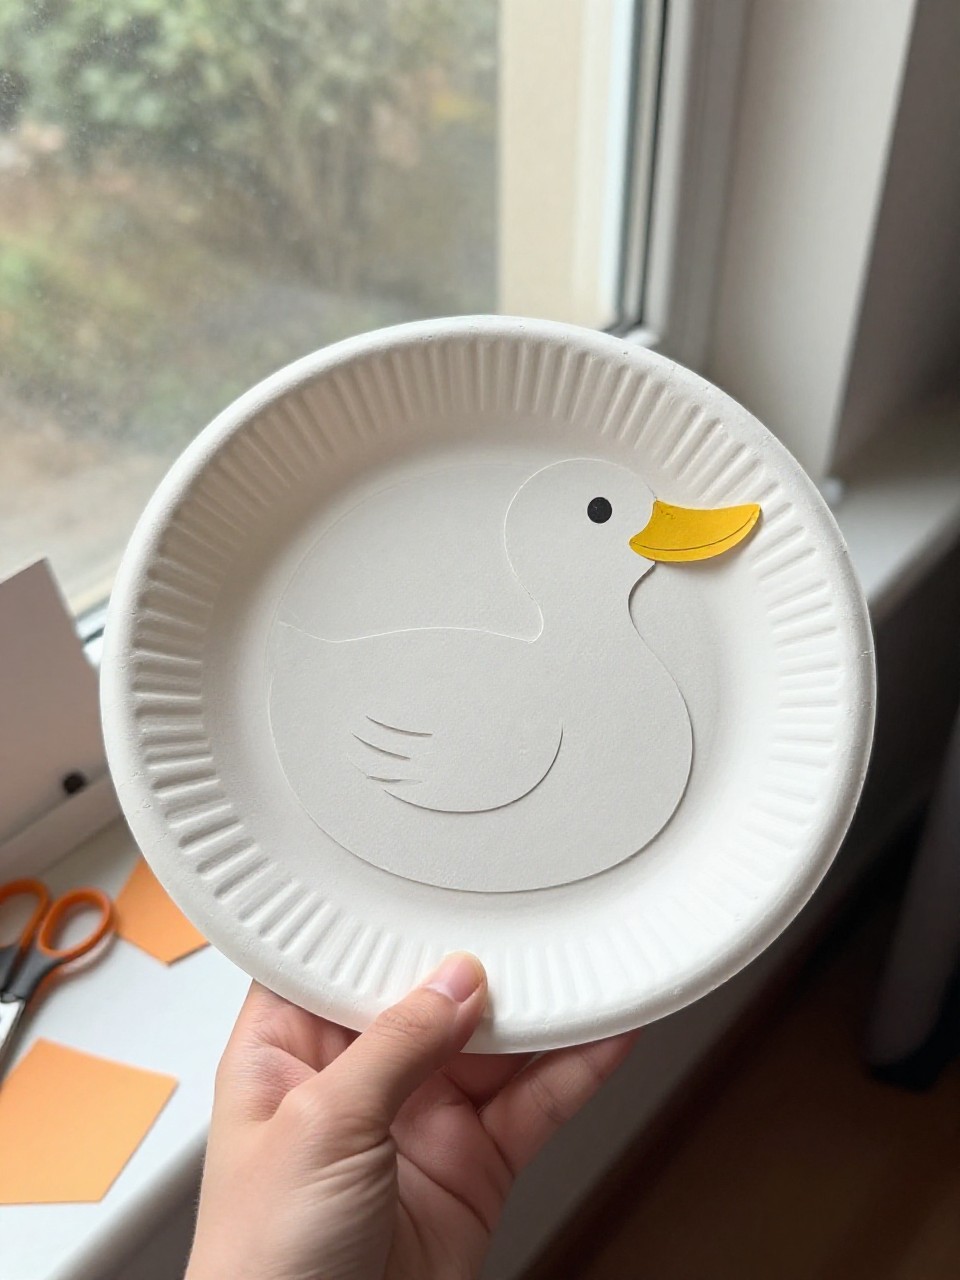
This is a cheerful duck where the plate forms the round belly and a bold D makes the neck and head. Kids like adding a bright beak, googly eyes, and feather details.
Materials Needed:
- Paper plate
- Yellow construction paper
- Orange paper (beak and feet)
- Googly eyes
- Glue stick
How to make it:
- 1. Paint or color the plate yellow and cut a large D from yellow paper.
- 2. Glue the D to the plate edge to become the duck’s neck and head.
- 3. Add an orange beak, webbed feet, and a googly eye.
- 4. Fluff with a few cut-paper “feathers” and display.
9. Felt D Doughnut Keychain (No-Sew Option)
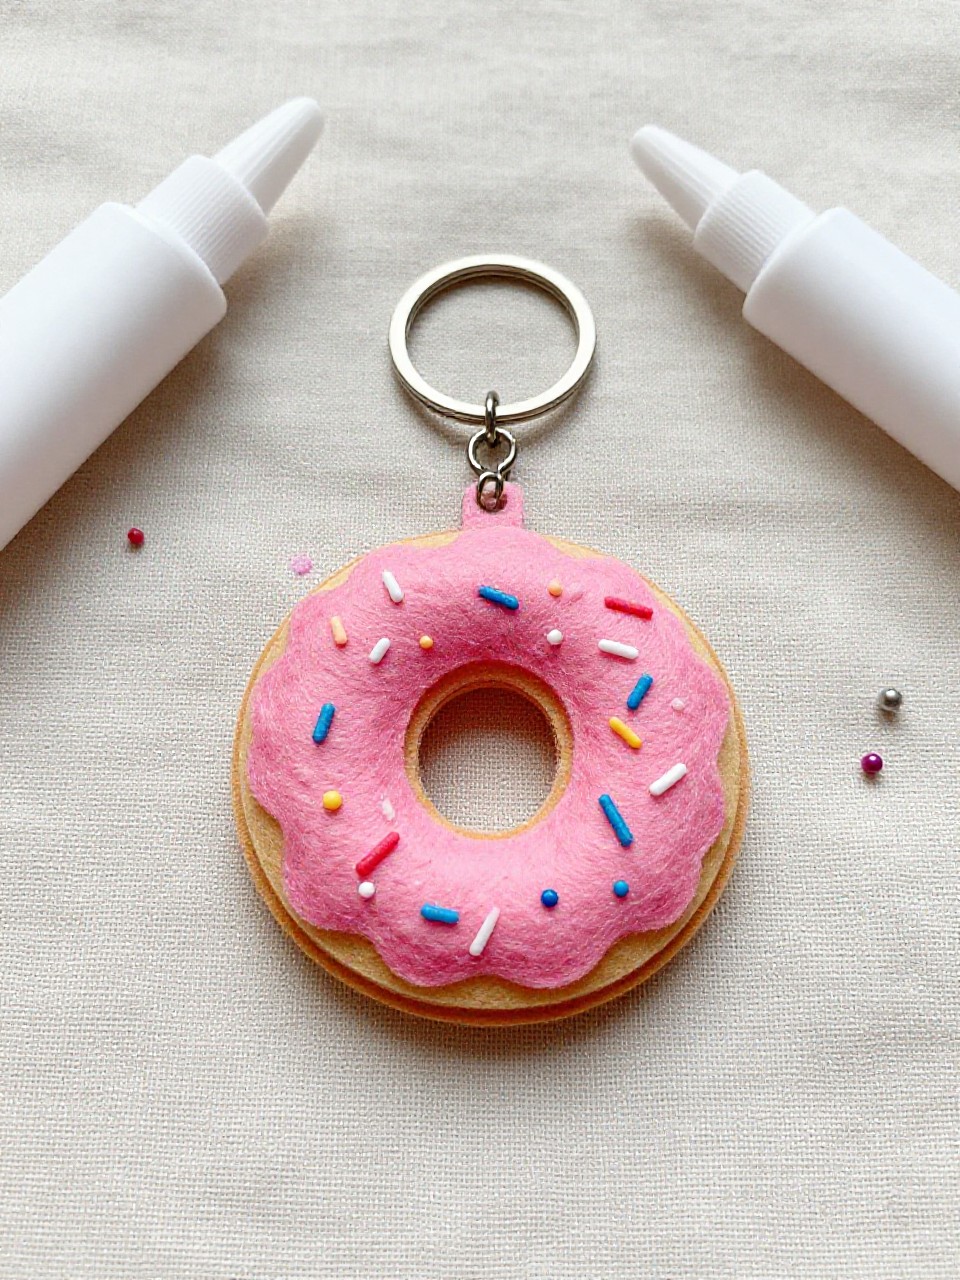
This mini D-shaped doughnut charm uses felt and glue instead of sewing, with sprinkle beads for detail. Kids enjoy making tiny treats they can clip to a backpack.
Materials Needed:
- Brown and pink felt
- Fabric glue
- Small seed beads or paper sprinkles
- Key ring or clip
- Scissors
How to make it:
- 1. Cut two matching D shapes from brown felt and a smaller pink “frosting” D top.
- 2. Glue frosting onto one D and add beads or paper sprinkles.
- 3. Glue the two D pieces together at the edges, sandwiching the key ring loop.
- 4. Let dry completely before clipping to a zipper.
10. Rainbow Dot-Painted Letter D
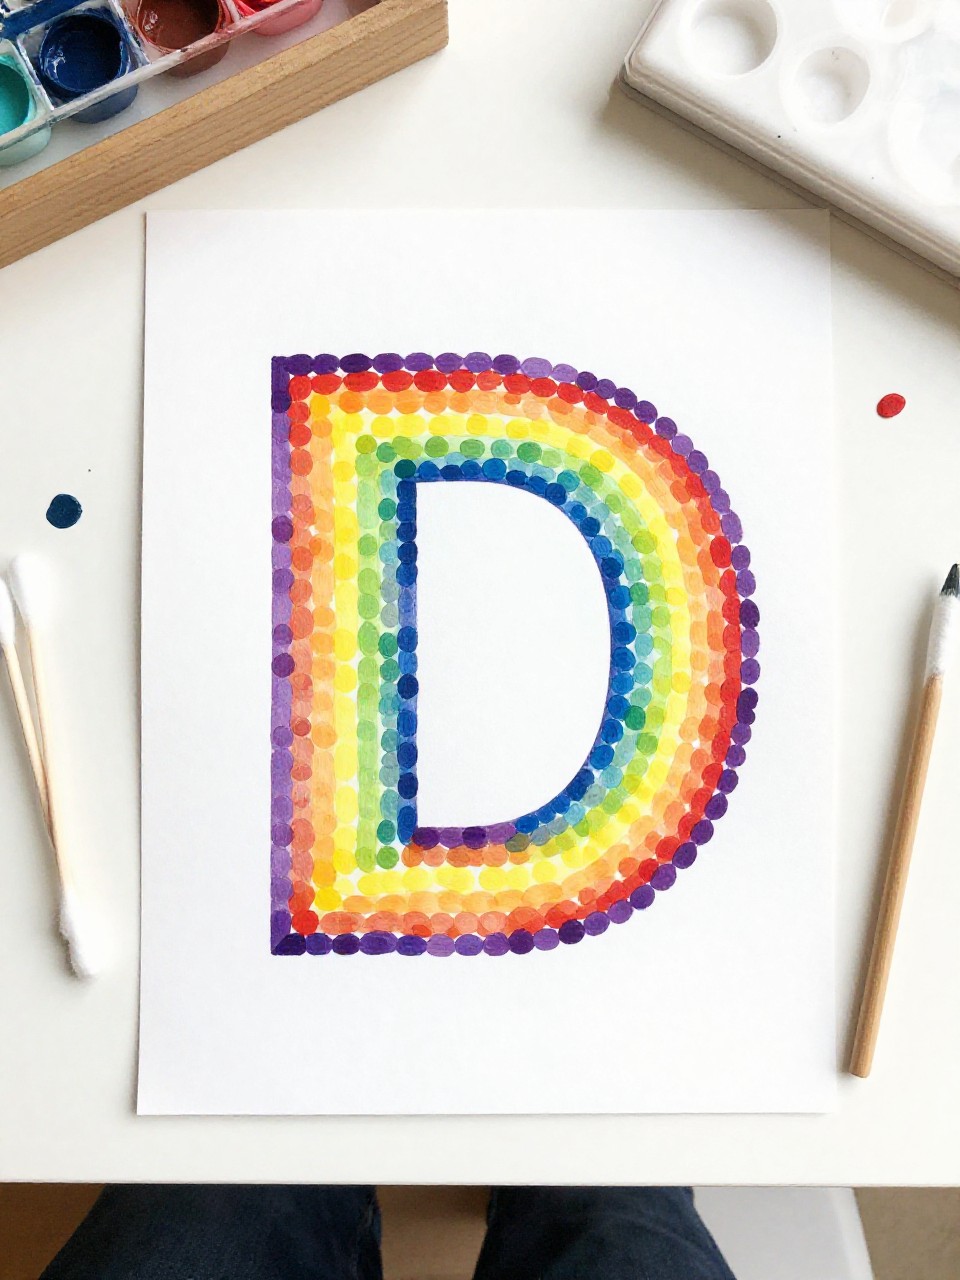
This project shows a large D filled with rainbow dots made using cotton swabs. Kids love the gentle stamping motion and seeing a bright gradient appear.
Materials Needed:
- Cardstock with a big D outline
- Washable paints in rainbow colors
- Cotton swabs
- Paper plate palette
- Apron or smock
How to make it:
- 1. Set out paint dabs on a palette and place the D outline on the table.
- 2. Use cotton swabs to dot paint from red to purple inside the D.
- 3. Add a second layer of dots to fill gaps and brighten the colors.
- 4. Let dry and hang near a window.
11. D is for Dinosaur Clothespin Chomp
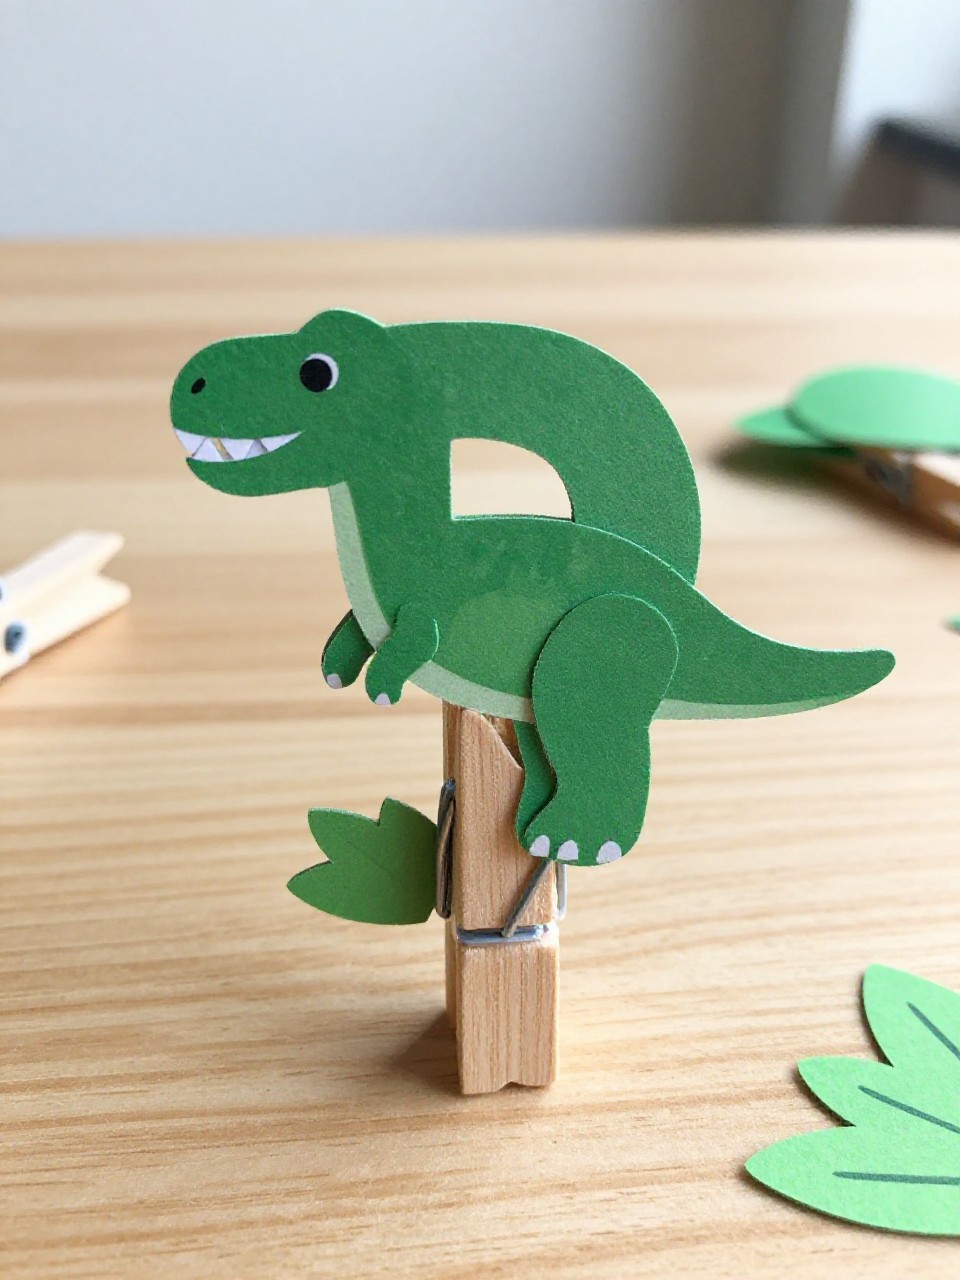
This craft looks like a D-shaped dinosaur head clipped to a clothespin so it can “chomp.” Kids enjoy opening and closing the mouth to pretend snack on paper leaves.
Materials Needed:
- Green cardstock
- Wooden clothespin
- Markers
- Glue
- Small paper leaves
How to make it:
- 1. Cut a D that fits the clothespin and a matching jaw piece for the opening side.
- 2. Glue the top of the D to the top clothespin jaw and the jaw piece to the bottom.
- 3. Draw teeth, nostrils, and spots with markers.
- 4. Feed it paper leaves and store on a book edge.
12. Bubble Wrap Printed D Duck Pond
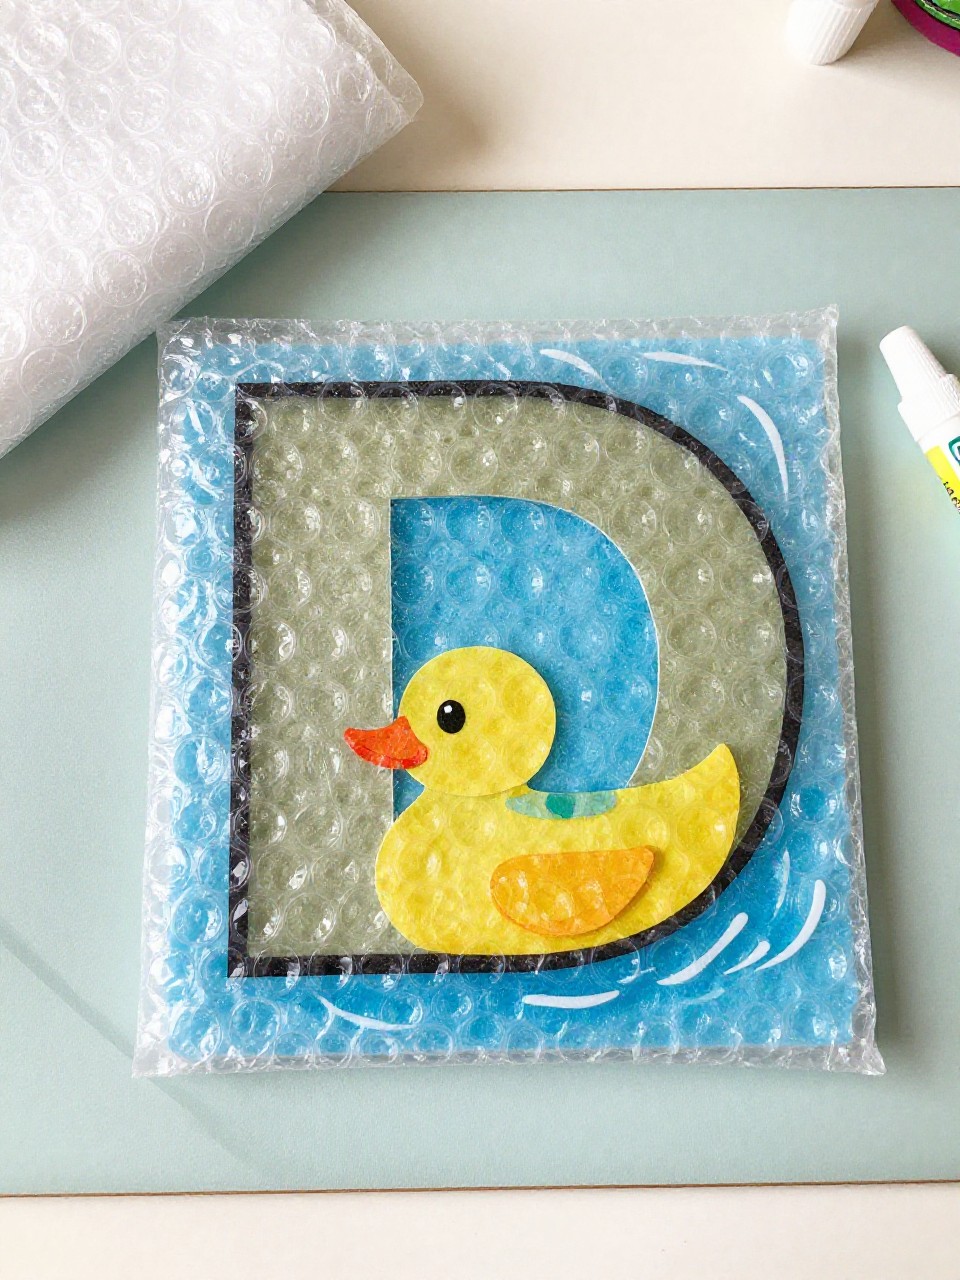
This artwork features a big D next to a bubbly blue pond made with bubble wrap prints, plus tiny ducklings. Kids love the texture and popping look of the water.
Materials Needed:
- White cardstock
- Blue paint
- Bubble wrap scrap
- Yellow paper
- Glue stick and marker
How to make it:
- 1. Draw a large D and cut out small duck shapes from yellow paper.
- 2. Paint bubble wrap blue, flip, and press onto the paper to make a pond beside or inside the D.
- 3. Glue on ducklings and add beaks and eyes with marker.
- 4. Title it “D is for Duck” and let dry.
13. Yarn-Wrapped D Door Hanger
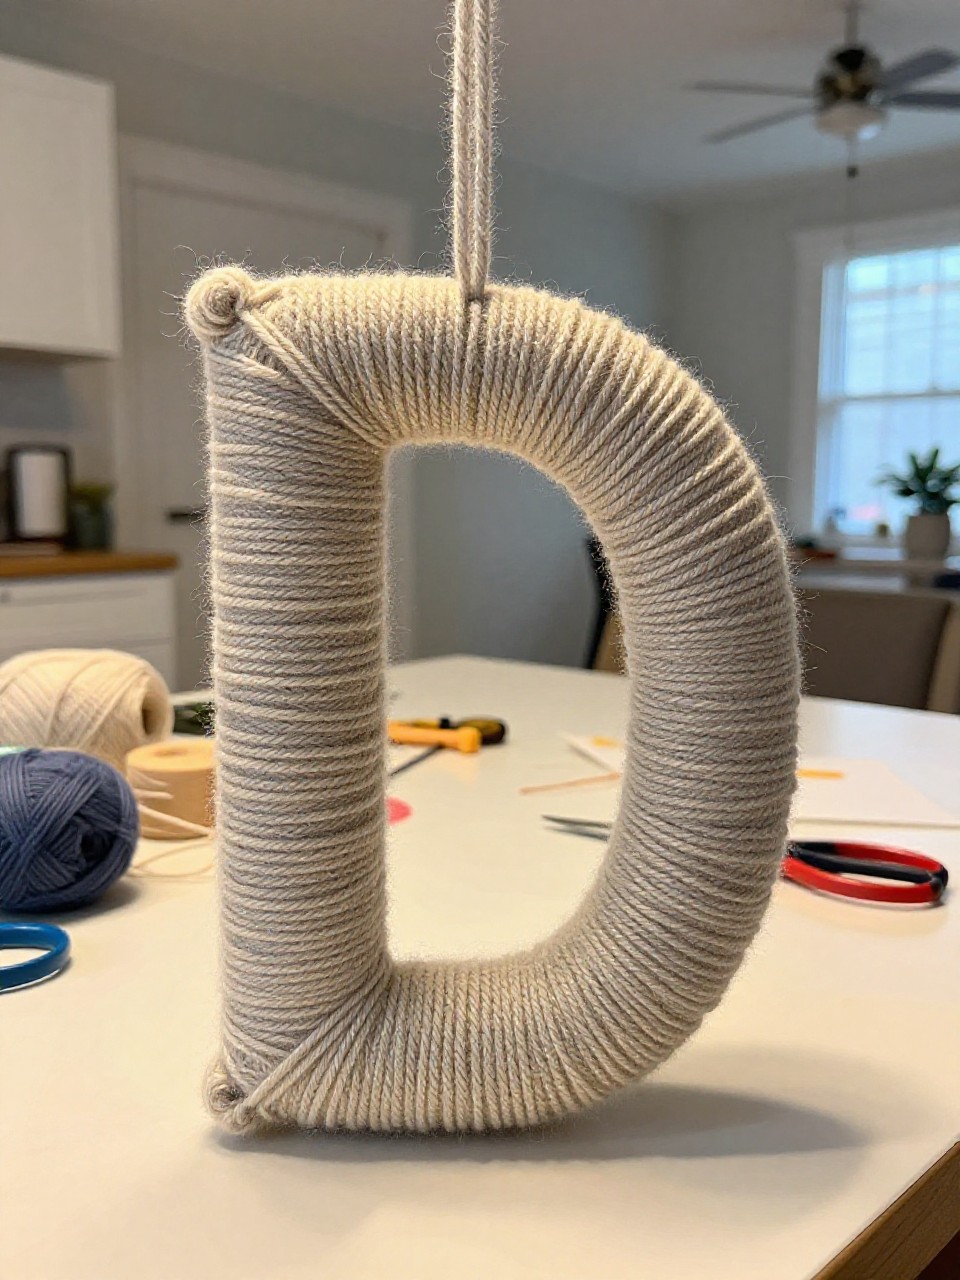
This looks like a chunky cardboard D fully wrapped in soft yarn, with a small ribbon loop to hang on a bedroom door. Kids enjoy the soothing wrap-and-tuck motion and picking their favorite colors.
Materials Needed:
- Cardboard D (cut from a box)
- Yarn (one to three colors)
- Tape or glue
- Ribbon
- Stickers or felt shapes (optional)
How to make it:
- 1. Cut a sturdy D from cardboard and tape a yarn end to the back.
- 2. Wrap yarn around and around, covering the whole D evenly.
- 3. Tie off in back; add stickers or felt shapes for decoration.
- 4. Knot a ribbon loop at the top to hang on a doorknob.
14. Paper Mosaic D Desert Scene
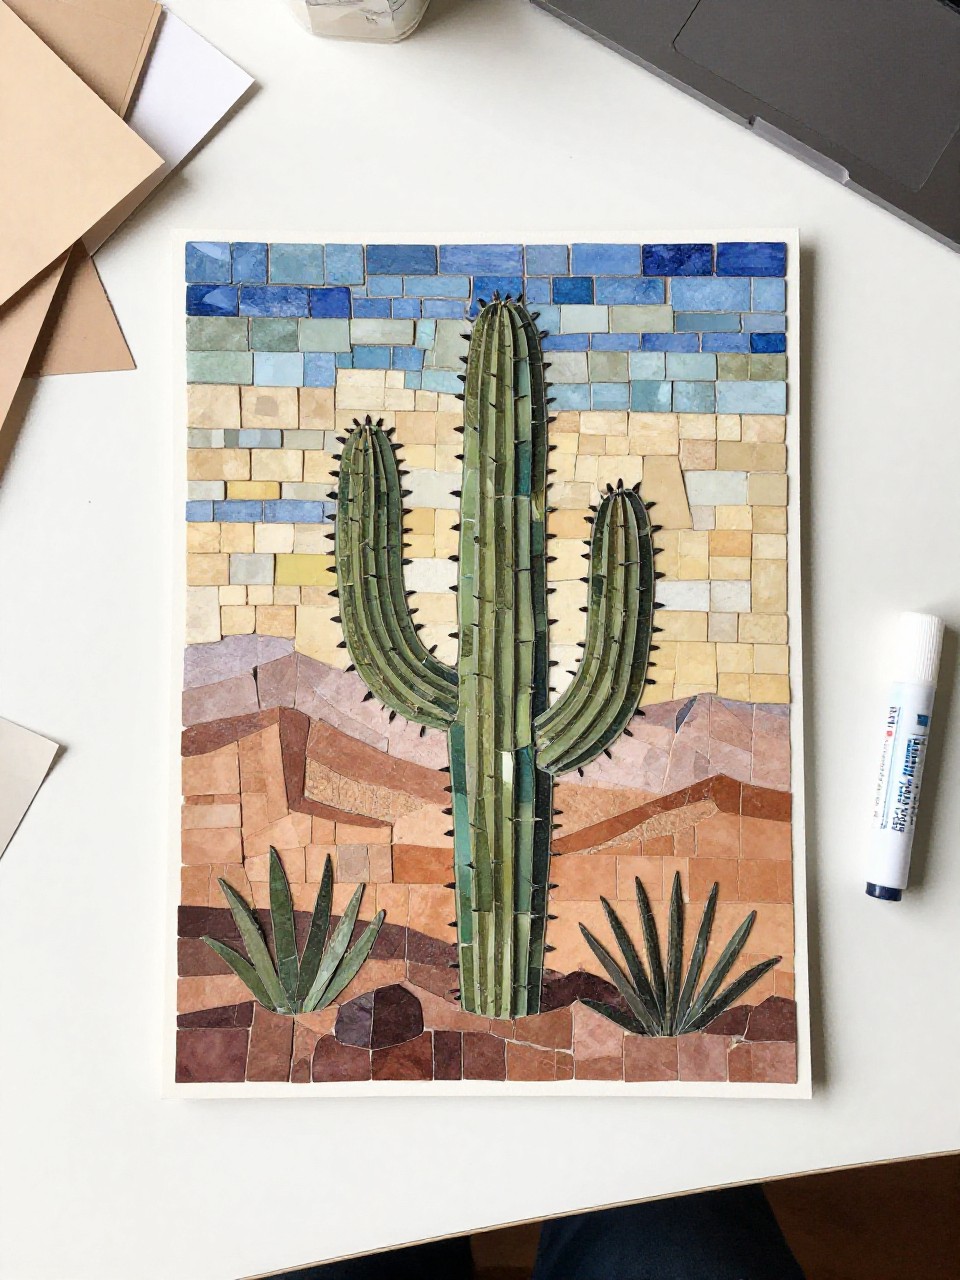
This piece shows a tall D filled with a desert mosaic—sandy tones, a cactus silhouette, and a setting sun—all inside the D shape. Kids enjoy choosing tiny paper tiles and seeing the picture appear.
Materials Needed:
- Cardstock with large D outline
- Assorted tan, orange, and green paper scraps
- Glue stick
- Pencil
- Black marker
How to make it:
- 1. Sketch a simple cactus and sun within the D outline.
- 2. Tear or cut paper into small squares and glue them to fill the D by color sections.
- 3. Outline the cactus and sun with black marker to define shapes.
- 4. Press under a book to dry flat and frame.
15. “D is for Dragonfly” Coffee Filter Suncatcher
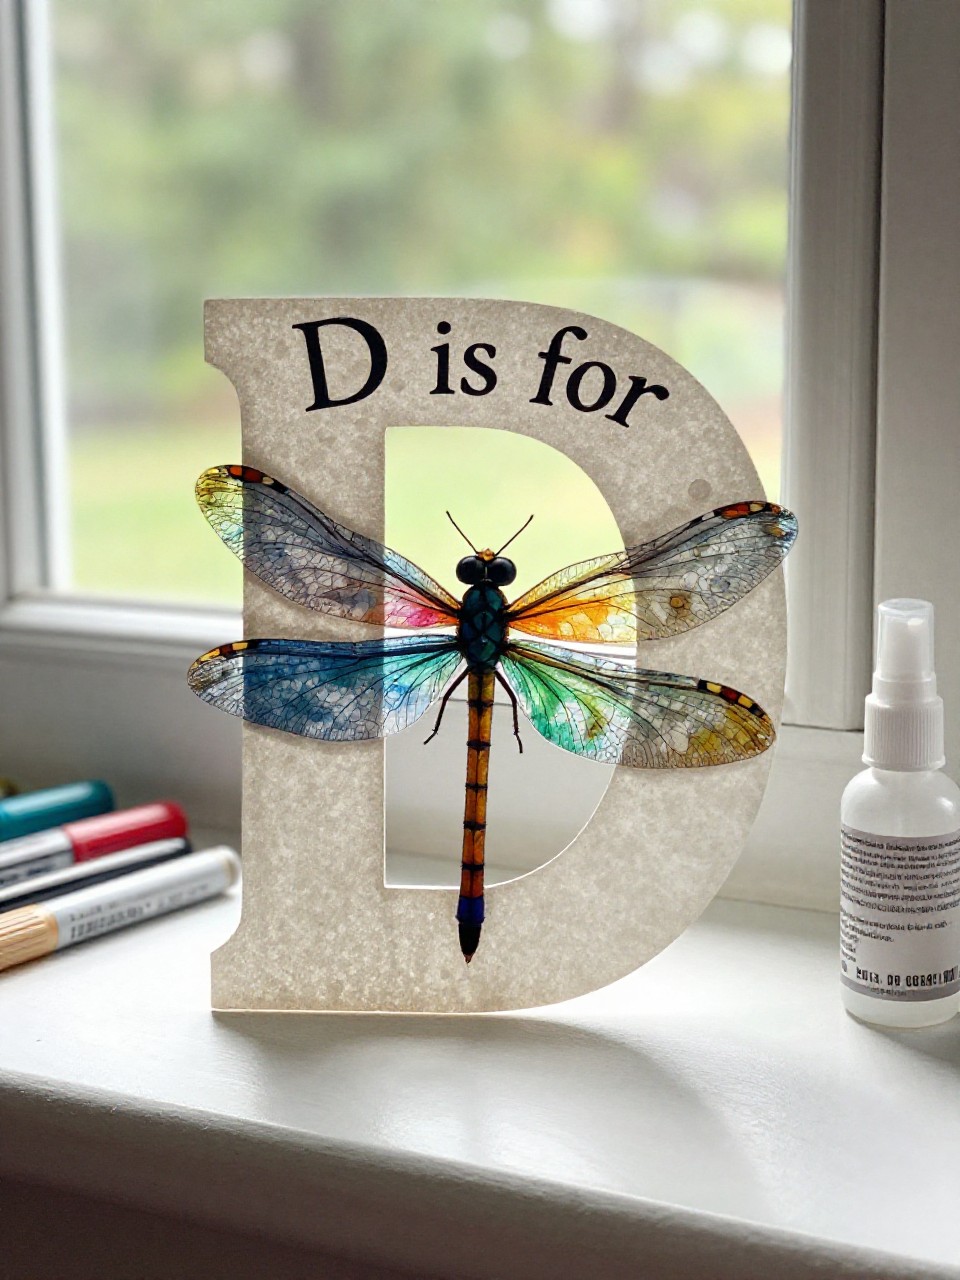
This looks like a translucent D with a bright tie-dye dragonfly resting across it, made with a coffee filter and washable markers. Kids love spraying water to blend colors and taping it to a sunny window.
Materials Needed:
- White cardstock (for big D)
- Coffee filter
- Washable markers
- Spray bottle with water
- Clear tape and scissors
How to make it:
- 1. Cut a large D from cardstock; set aside.
- 2. Color a coffee filter with markers, then lightly mist with water to blend; let dry.
- 3. Cut the filter into dragonfly wings and a thin body; tape onto the D.
- 4. Stick the suncatcher to a window and watch the colors glow.