Table of Contents Show
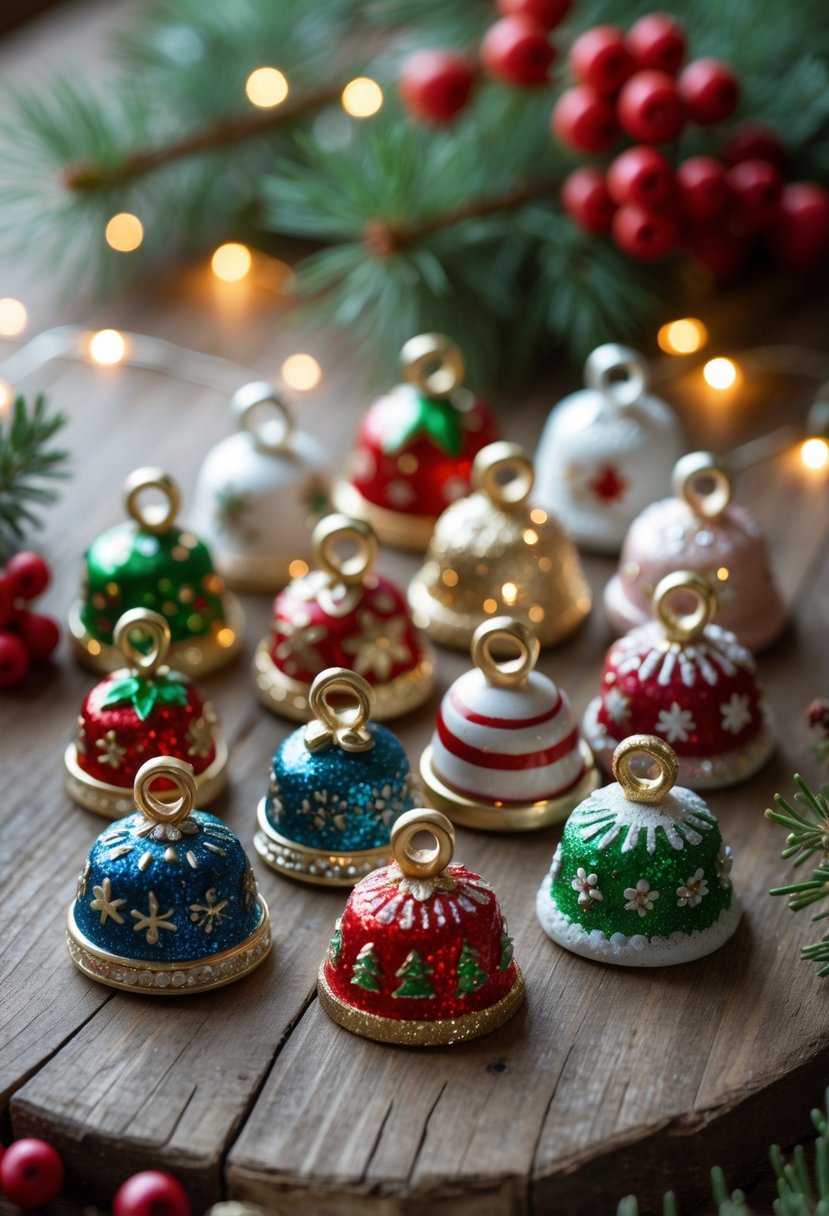
Glittered clay bell charms are a delightful DIY project that combines the joy of crafting with a touch of festive sparkle. Made from air-dry or polymer clay, these little bells are sturdy, customizable, and perfect for hanging on your Christmas tree, adding to gift wraps, or using as part of a garland.

With their shimmering glitter finish and bright holiday colors, they look magical whether displayed individually or in a cluster.
This craft is simple, relaxing, and fun for both adults and kids. You can shape each bell by hand, decorate it with glitter or paint, and even add tiny designs or embellishments for a personalized touch.
How to Make Glittered Clay Bell Charms
The result is a set of miniature ornaments that glisten beautifully under Christmas lights.
For People Who Love to Make Things ✂️
Materials
- Air-dry clay or polymer clay
- Rolling pin or smooth glass bottle
- Small bell mold or round cutter (optional)
- Acrylic paint (red, green, white, gold, blue, etc.)
- Fine glitter (assorted colors)
- Craft glue or Mod Podge
- Small paintbrushes
- Ribbon or metallic string for hanging
- Needle or skewer (for making holes)
Shop the materials


The steps

Step 1: Prepare and Shape the Clay
Start by kneading the clay until it’s soft and pliable. Roll it out to about ¼-inch thickness using a rolling pin or bottle. Cut out small circular shapes or use a mold to form dome-shaped bells.
If working by hand, gently shape each piece into a small hollow bell form, smoothing the surface as you go.
Step 2: Add Hanging Holes
Before the clay dries, use a skewer or needle to make a small hole at the top of each bell. This hole will be used later for hanging your charms.
Ensure the hole is large enough for your ribbon or string to pass through.
Step 3: Let the Clay Dry
Place your shaped bells on parchment paper or a tray and allow them to air dry completely for 24–48 hours (or bake according to package instructions if using polymer clay).
Once dry, lightly sand any rough edges for a smooth, clean finish.
Step 4: Paint and Decorate
Paint each bell with bright holiday colors using acrylic paints. You can use classic designs like red and white stripes, green trees, or gold stars. Once the paint is dry, brush on a thin layer of craft glue or Mod Podge and sprinkle fine glitter evenly over the surface.
For a neater look, glitter only specific sections like the top rim or patterns. Shake off the excess and let them dry thoroughly.
Step 5: Add Ribbon and Finishing Touches
Thread a small piece of ribbon or metallic string through the hole and tie it into a loop for hanging. If you’d like, you can add tiny embellishments such as beads or sequins for extra sparkle.
Once finished, your glittered clay bell charms are ready to adorn your tree, gifts, or festive centerpieces.
These little bells catch the light beautifully and add a handmade, whimsical touch to your holiday decor.