
Table of Contents Show
You want crafts that look wow but don’t leave you drowning in glitter and glue, right? Preschoolers love flowers because they’re bright, simple shapes that feel happy. These projects are quick wins: big textures, bold colors, and satisfyingly squishy steps that little hands can manage.

Most use things you already have. Try one during a rainy afternoon or set up a tiny “flower studio” at the kitchen table—these easy ideas will make your kid feel like a real artist without a big mess.
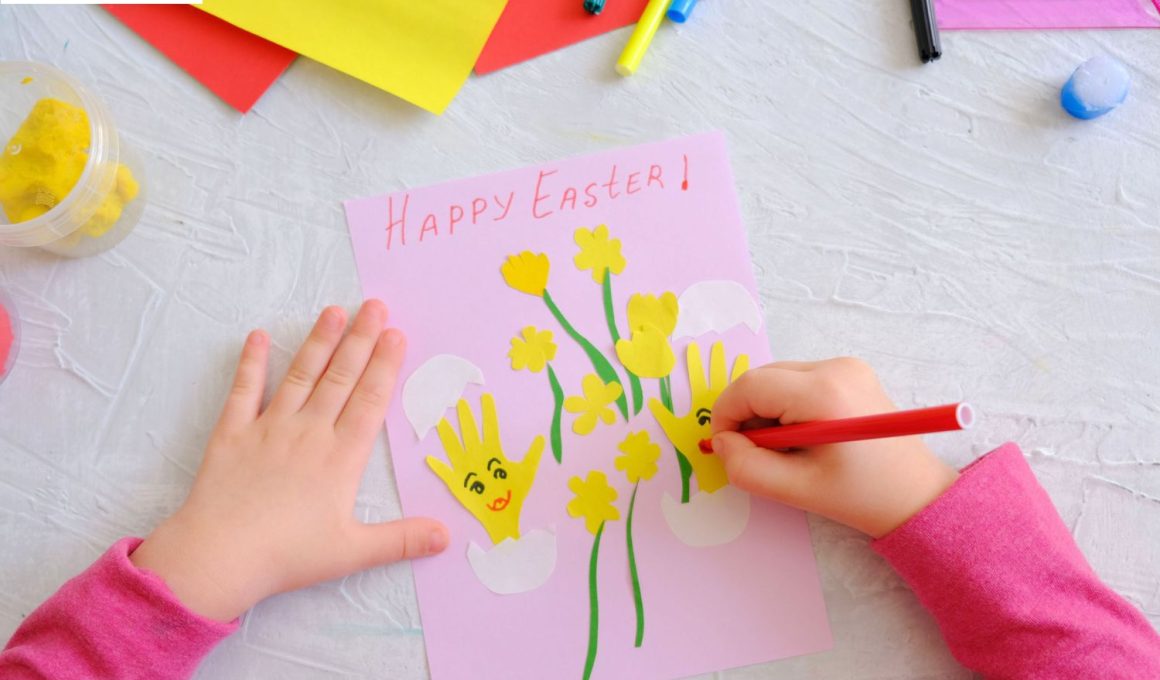
1. Puffy Cloud Petal Flowers

Soft, chunky petals that look like little clouds make this craft feel extra cozy. Kids press and squish cotton balls into petals, then add a bright button center for a pop of color.
Materials Needed:
- Cotton balls
- Cardstock
- Glue stick
- Buttons
How to make it:
For People Who Love to Make Things ✂️
- 1. Draw a simple flower shape on cardstock.
- 2. Pull cotton balls apart slightly and glue onto each petal outline.
- 3. Add a button to the center with glue.
- 4. Draw a green stem and leaves with marker.
2. Painted Bubble Wrap Petal Print
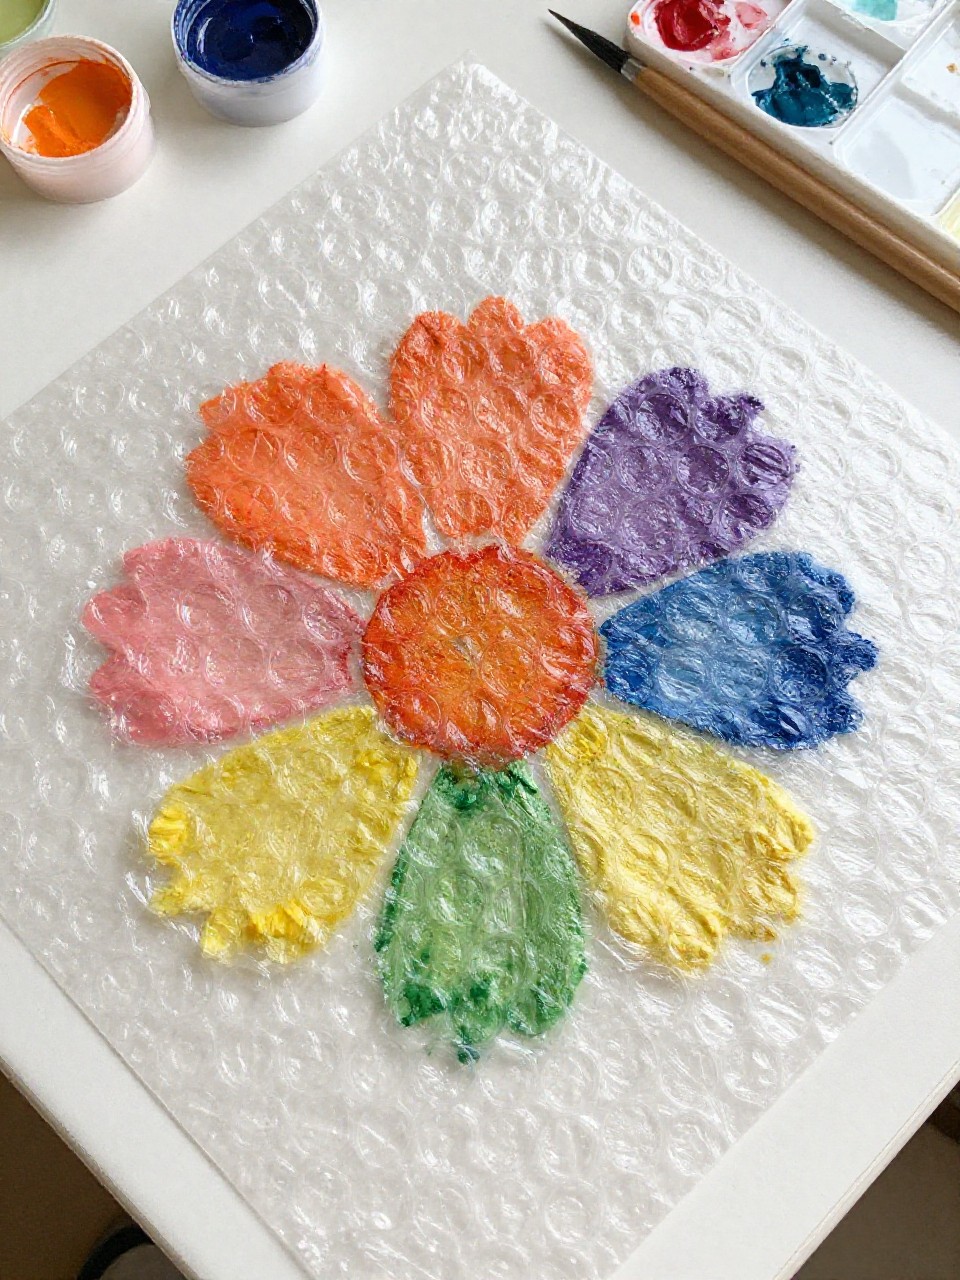
This makes crisp, bumpy petals that look fancy but are just stamp prints. The bubble texture gives a cool honeycomb effect in seconds.
Materials Needed:
- Bubble wrap
- Washable paint
- Cardstock
- Glue stick
How to make it:
- 1. Cut bubble wrap into petal shapes.
- 2. Brush paint onto the bumpy side.
- 3. Press onto cardstock to make a ring of petals.
- 4. Paint or glue a circle in the center and add a stem.
3. Tissue Paper Crinkle Blooms

These flowers look like fluffy garden roses, but they’re just crinkled tissue pinched in the middle. The ruffles feel fun to scrunch.
Materials Needed:
- Tissue paper squares
- Pipe cleaners
- Child-safe scissors
- Glue (optional)
How to make it:
- 1. Stack 4–5 tissue squares.
- 2. Pinch the center and twist a pipe cleaner around to form a stem.
- 3. Gently crinkle and fluff the layers into a bloom.
- 4. Trim edges into waves or points if you like.
4. Sticky Contact Paper Flower Garden

A no-mess collage that looks like stained glass. Kids press shapes onto sticky paper and watch a glowing garden appear.
Materials Needed:
- Clear contact paper
- Tissue paper scraps
- Green yarn or paper strips
- Washi tape
How to make it:
- 1. Tape contact paper (sticky side up) to the table.
- 2. Press tissue paper circles and ovals to make flowers.
- 3. Add green yarn or paper for stems and leaves.
- 4. Seal with another sheet of contact paper and tape to a window.
5. Paper Plate Sunburst Daisy

A scalloped rim becomes perfect daisy petals. The big round center and bright ring of paint make it feel sunny and bold.
Materials Needed:
- Paper plate
- Yellow paint
- Green straw or craft stick
- Glue
How to make it:
- 1. Cut slits around the plate rim to make petals.
- 2. Bend petals slightly forward with fingers.
- 3. Paint the center yellow and let dry.
- 4. Glue a straw or stick as a stem on the back.
6. Pasta Petal Picture Frame
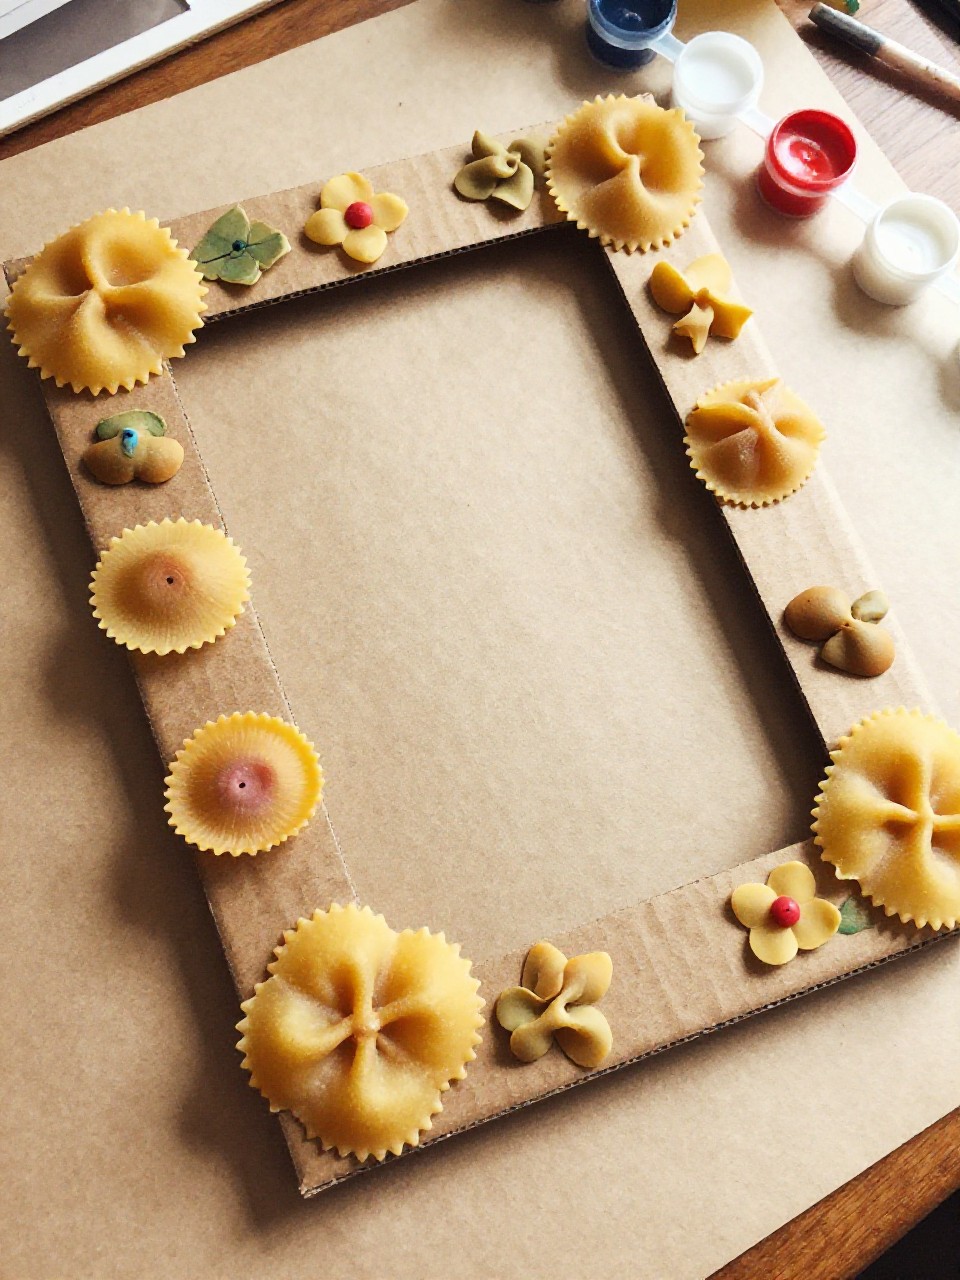
This turns dry pasta into sculpted petals that you can keep. Spray or brush paint gives it a finished, giftable look.
Materials Needed:
- Uncooked pasta (bowties, wheels)
- Cardboard frame base
- Acrylic or washable paint
- Glue
How to make it:
- 1. Glue pasta around the frame to make flower shapes (wheels as centers, bowties as petals).
- 2. Let dry fully.
- 3. Paint the pasta flowers in bright colors.
- 4. Add a photo or drawing inside the frame.
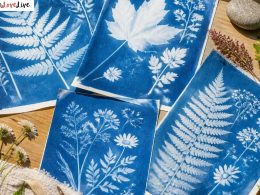
7. Nature Print Clay Tiles

Leaves turn into detailed imprints that look fancy and earthy. Kids love the reveal when they peel the leaf away.
Materials Needed:
- Air-dry clay
- Leaves and small flowers
- Rolling pin
- Ribbon (optional)
How to make it:
- 1. Roll clay to about 1/4-inch thick.
- 2. Press leaves or small flowers into the clay and roll gently.
- 3. Peel off botanicals to see the print; poke a hole for hanging if desired.
- 4. Let dry and add a ribbon.
8. Cupcake Liner Layered Blossoms

Cupcake liners become ruffled petals in seconds. Stacking sizes and colors makes them look like peonies.
Materials Needed:
- Cupcake liners (mini and standard)
- Glue stick
- Buttons or pom-poms
- Green paper
How to make it:
- 1. Flatten two cupcake liners and glue them offset.
- 2. Add a mini liner on top.
- 3. Glue a button or pom-pom in the center.
- 4. Glue onto green paper and draw stems and leaves.
9. Fork-Printed Chrysanthemums

A simple fork makes spiky, fancy-looking petals. The repeat prints create a full, fluffy bloom.
Materials Needed:
- Plastic or metal fork
- Washable paint
- Cardstock
- Marker
How to make it:
- 1. Dip the fork tips into paint.
- 2. Stamp around a small circle area, turning the paper to make petals.
- 3. Layer a second color for depth.
- 4. Draw a stem and leaves with marker.
10. Felt Sticker Bouquet

Pre-cut felt stickers feel soft and forgiving, perfect for toddlers. The finished bouquet looks tidy and ready to display.
Materials Needed:
- Felt flower stickers
- Construction paper
- Ribbon
- Crayons or markers
How to make it:
- 1. Draw a bunch of stems on paper.
- 2. Stick felt flowers at the top of each stem.
- 3. Tie a ribbon bow and glue it at the base of the stems.
- 4. Add doodles like leaves or hearts.
11. Straw Stamp Tulips
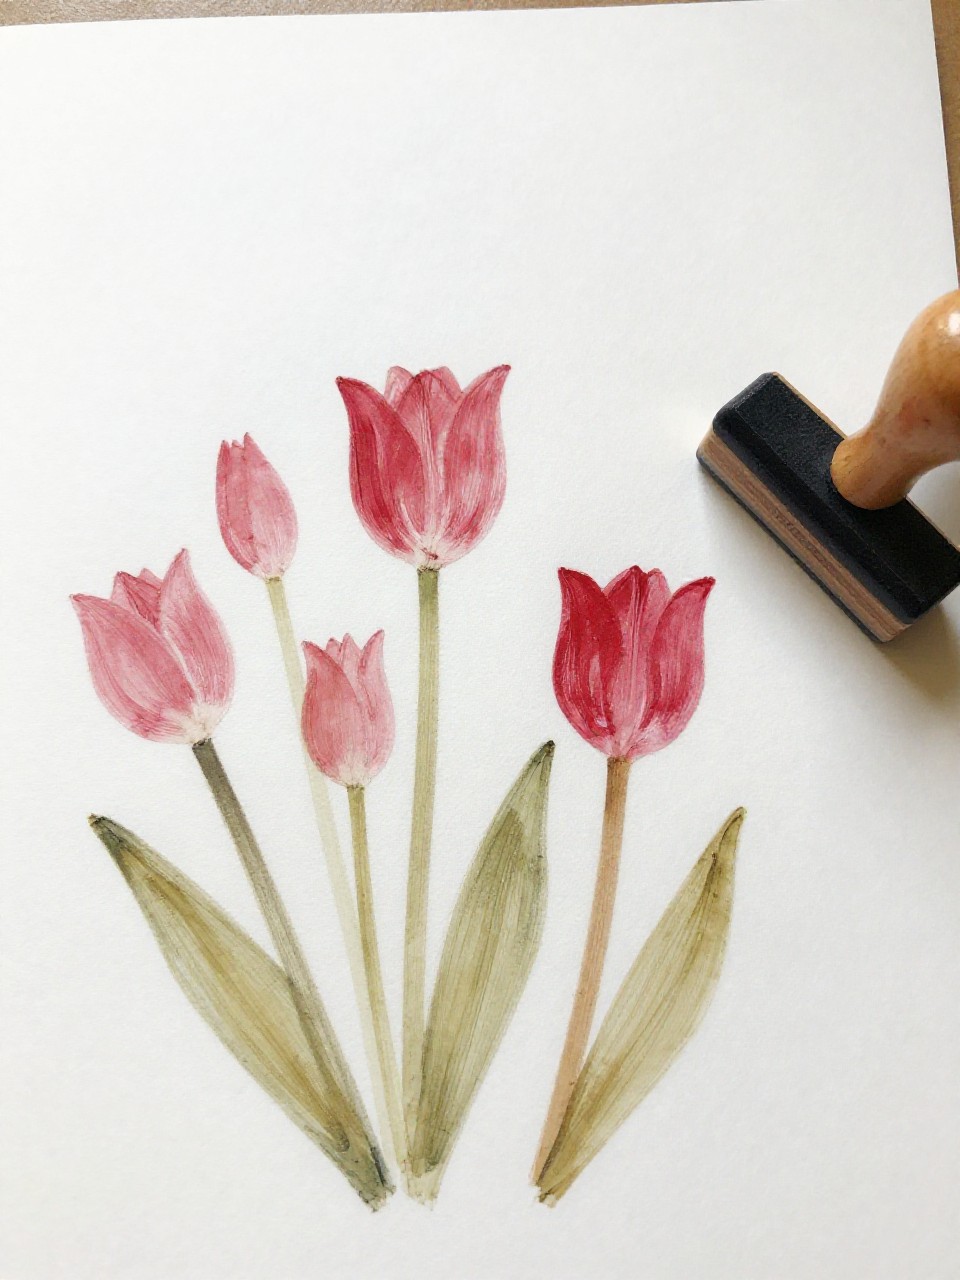
Cut straws become cute tulip stamps that make crisp, modern shapes. Line them up for a mini garden.
Materials Needed:
- Plastic straws
- Tape
- Washable paint
- Cardstock
How to make it:
- 1. Pinch one end of a straw into a tulip shape and tape to hold.
- 2. Dip the shaped end into paint.
- 3. Stamp tulip heads across the page.
- 4. Paint or draw green stems and leaves.
12. Rainbow Collage Petal Wheel
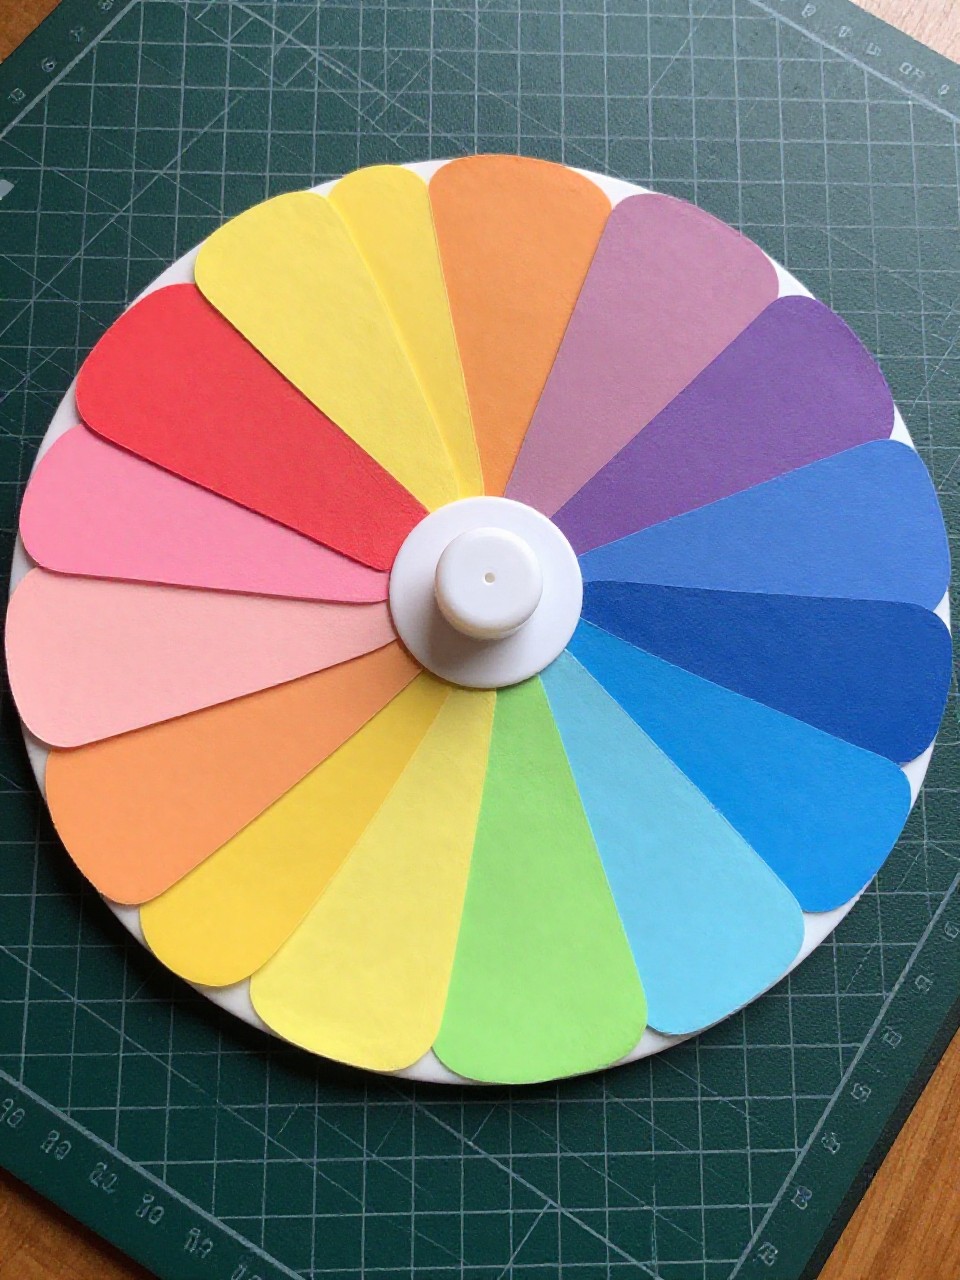
A color-matching project that doubles as art. The wheel layout looks neat and gallery-ready.
Materials Needed:
- Cardboard circle
- Colored paper scraps
- Glue stick
- Bottle cap or paper circle (center)
How to make it:
- 1. Draw light lines to divide the circle into pie slices.
- 2. Glue color-matched scraps in each slice like petals.
- 3. Add a bottle cap or circle to the center.
- 4. Punch a hole and hang, if you like.
13. Fingerprint Meadow
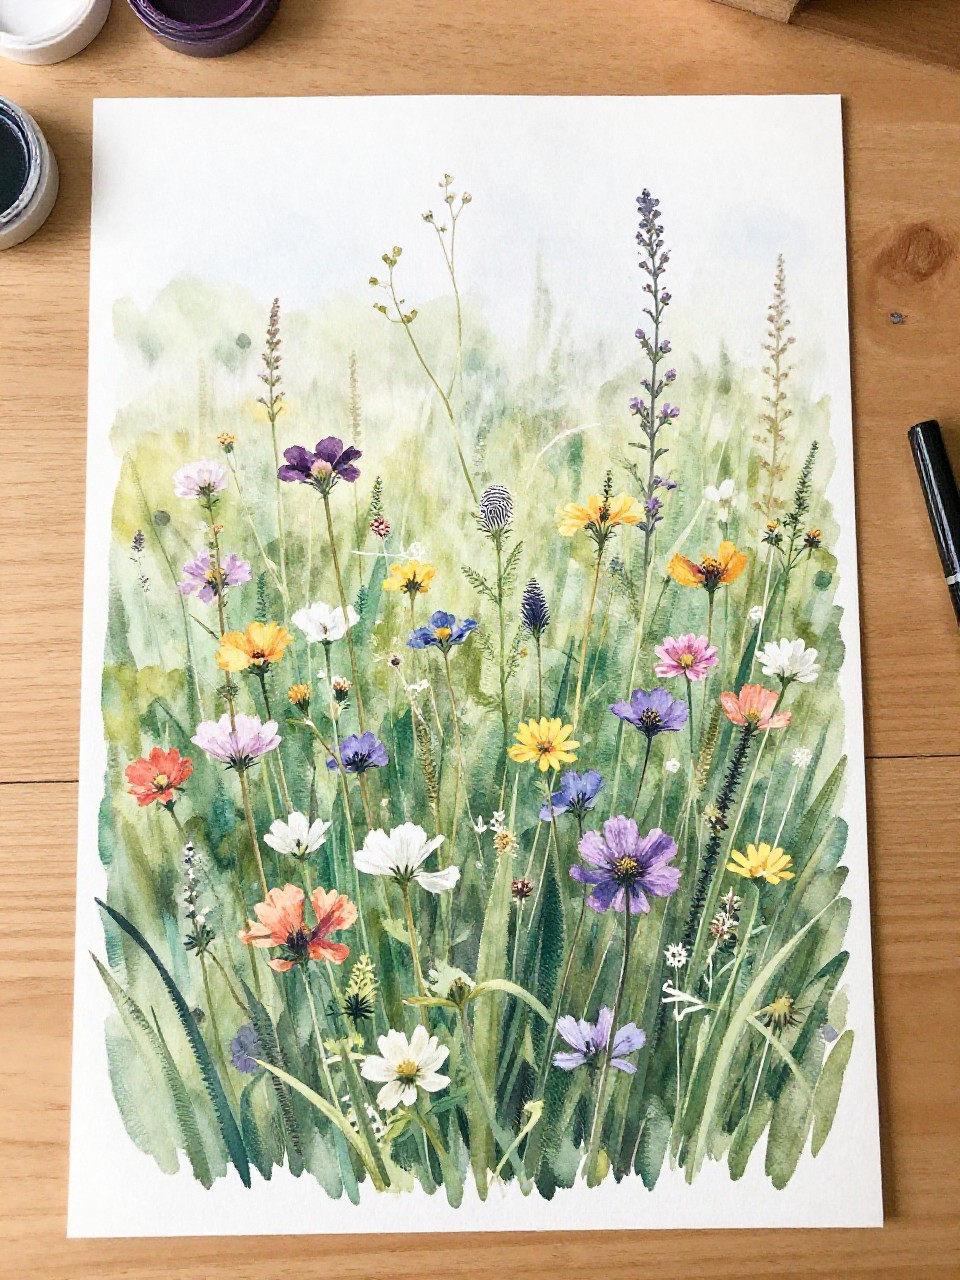
Tiny fingerprints become a whole field of wildflowers. It’s quick, sweet, and perfect for gifting.
Materials Needed:
- Washable stamp pads or paint
- White cardstock
- Fine-tip marker
How to make it:
- 1. Draw simple stems and grass with marker.
- 2. Press fingertips into ink/paint and dot at stem tops.
- 3. Add a second color to some dots for centers.
- 4. Write a short message at the bottom.
14. Magazine Mosaic Petal Pots
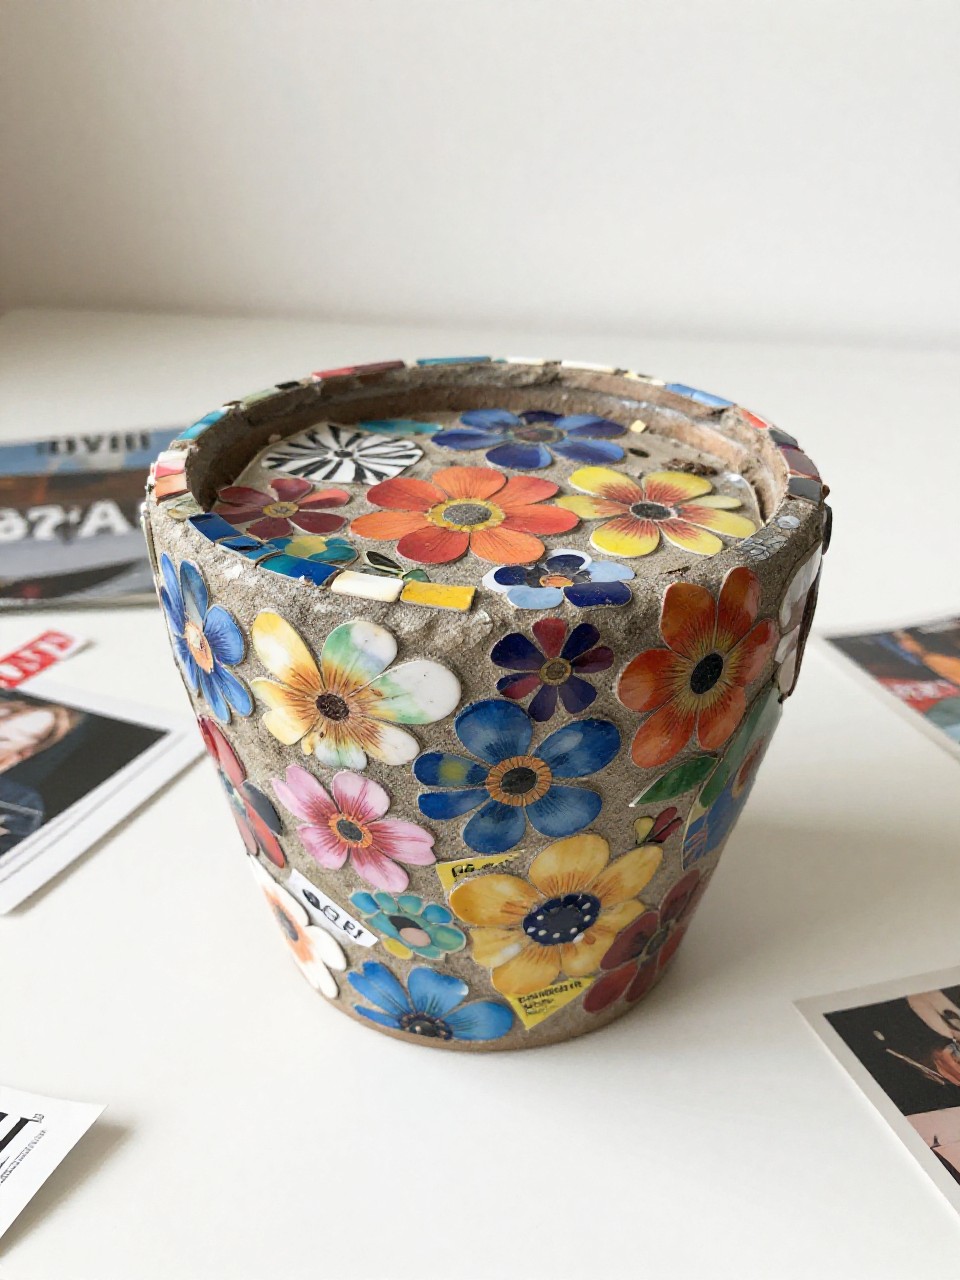
Recycled magazines turn into shiny, modern petals. The little paper tiles catch light and look like stained glass.
Materials Needed:
- Old magazines
- Glue stick
- Small paper cup or mini pot
- Scissors
How to make it:
- 1. Cut magazine pages into small squares or petal ovals.
- 2. Glue them around the cup or pot in flower shapes.
- 3. Overlap slightly to cover the surface.
- 4. Let dry and use as a pencil cup.
15. Pom-Pom Poppy Stems

Soft pom-poms make bold poppy centers with playful texture. The skinny felt leaves keep it simple and chic.
Materials Needed:
- Pom-poms (red, orange, or any)
- Green pipe cleaners
- Felt scraps
- Glue
How to make it:
- 1. Twist a pipe cleaner into a stem shape.
- 2. Glue a pom-pom at the top for the bloom.
- 3. Cut simple felt leaves and glue to the stem.
- 4. Arrange a bunch in a jar.
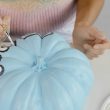
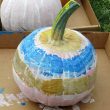
16. Watercolor Coffee Filter Petals
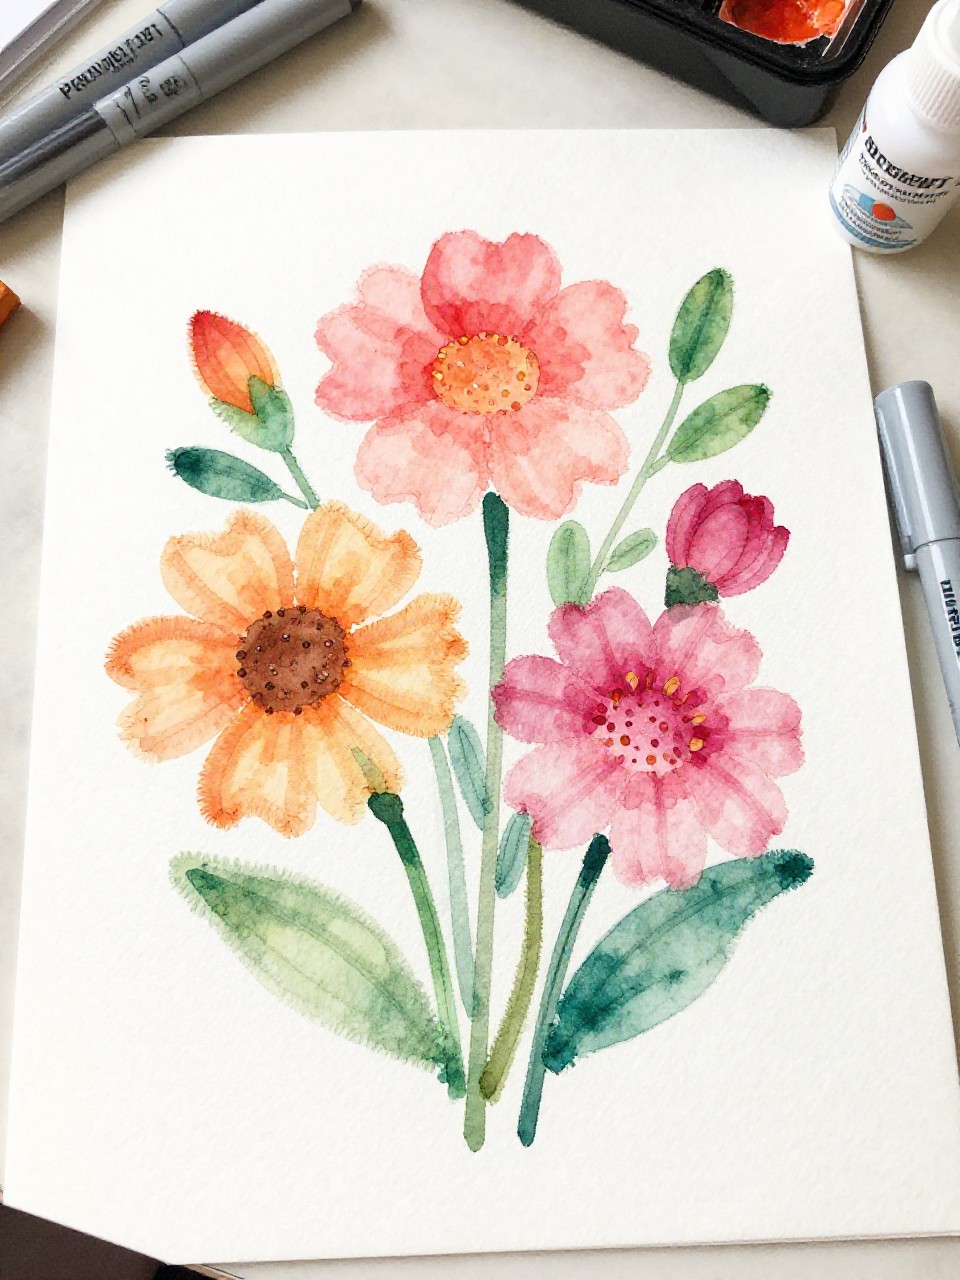
Coffee filters make dreamy, blended petals that dry into soft, ruffled flowers. The color blooms feel magical to watch.
Materials Needed:
- Coffee filters
- Washable markers
- Spray bottle with water
- Pipe cleaners
How to make it:
- 1. Color the coffee filter with markers in patches.
- 2. Lightly mist with water to blend.
- 3. Let dry, then pinch center and twist a pipe cleaner stem.
- 4. Fluff the edges into petals.
17. Cardboard Ring Sunflowers
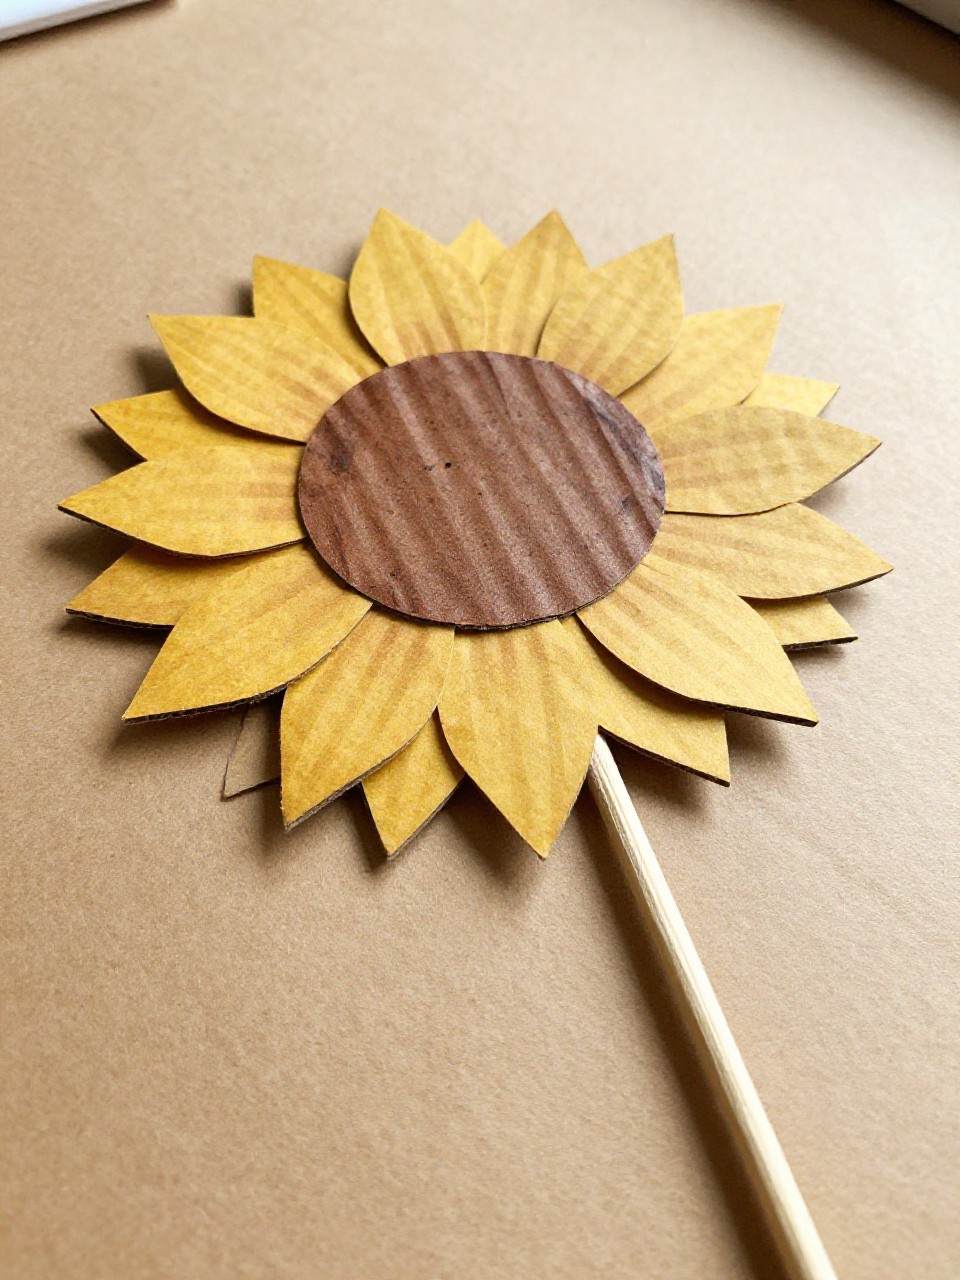
Corrugated cardboard turns into sturdy, rustic sunflowers. The ridged texture makes each petal look sculpted.
Materials Needed:
- Cardboard box scraps
- Yellow and brown paint
- Glue
- Craft stick
How to make it:
- 1. Cut a cardboard ring for petals and a circle for the center.
- 2. Snip the ring into petal tabs and bend forward.
- 3. Paint petals yellow and the center brown; let dry.
- 4. Glue the center on and attach a craft stick stem.