


Table of Contents Show
Spring is when we all crave a fresh start—but decor can get pricey fast. If you want that bright, cheerful look without spending much, these Dollar Tree crafts are your sweet spot. Each project looks store-bought but uses simple steps even beginners can do in under an afternoon.

Grab a basket, hit the aisles, and make your home feel like spring—on a real-life budget.
1. Pressed Flower Frame Duo
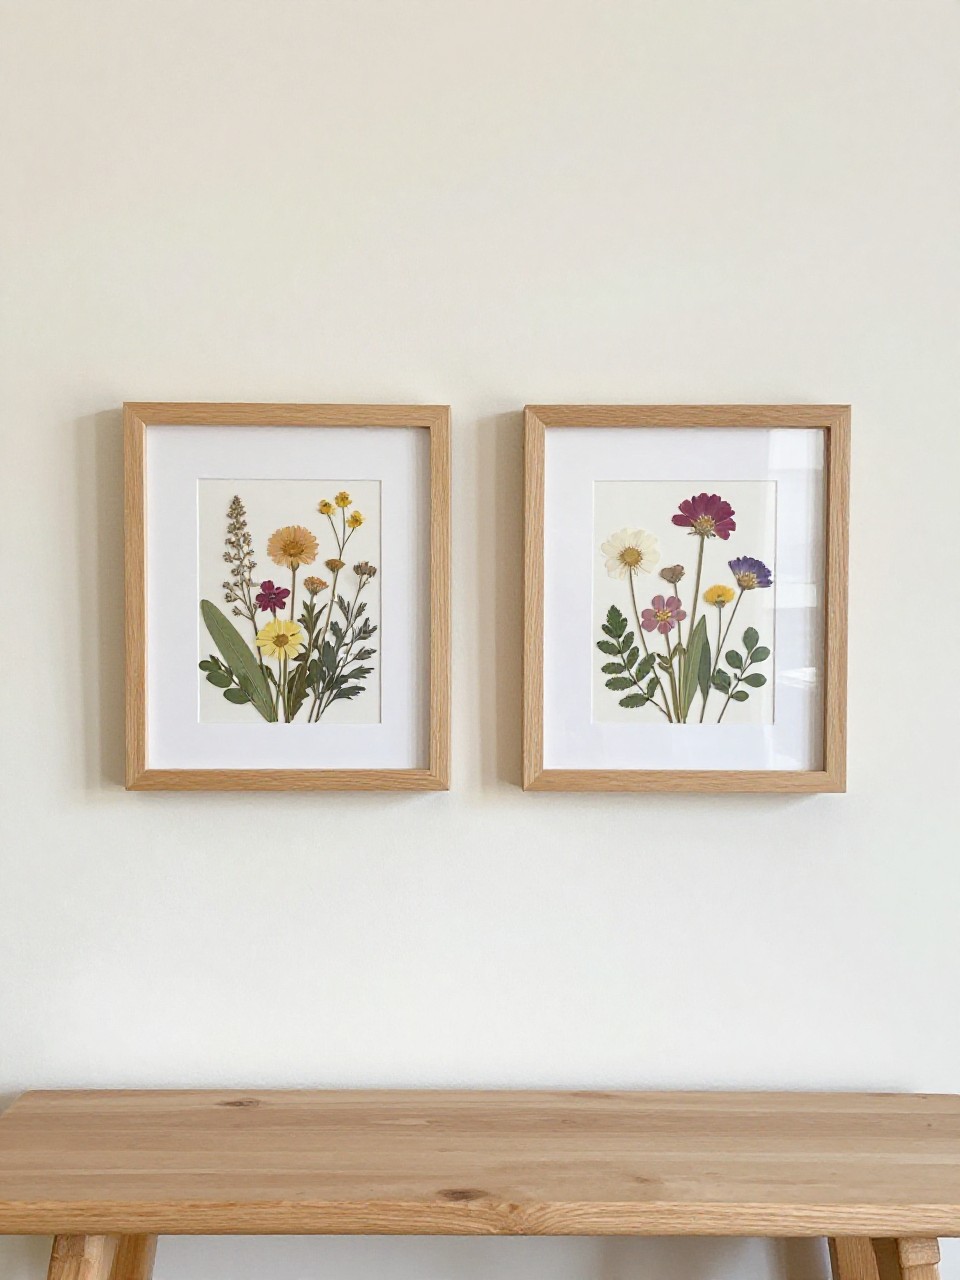
Create airy, botanical wall art that feels like a boutique find. Clear frames and faux florals mimic pressed flowers without the hassle, letting your walls breathe with spring.
Materials Needed:
- Two Dollar Tree floating frames
- Faux floral stems or floral stickers
- Clear tape or glue dots
How to make it:
- 1. Pop open the frames and clean the glass.
- 2. Trim tiny blooms and leaves from faux stems.
- 3. Arrange pieces flat between the glass layers until you love the layout.
- 4. Secure with tiny glue dots and close the frames tight.
2. Textured Baking-Soda Clay Vase
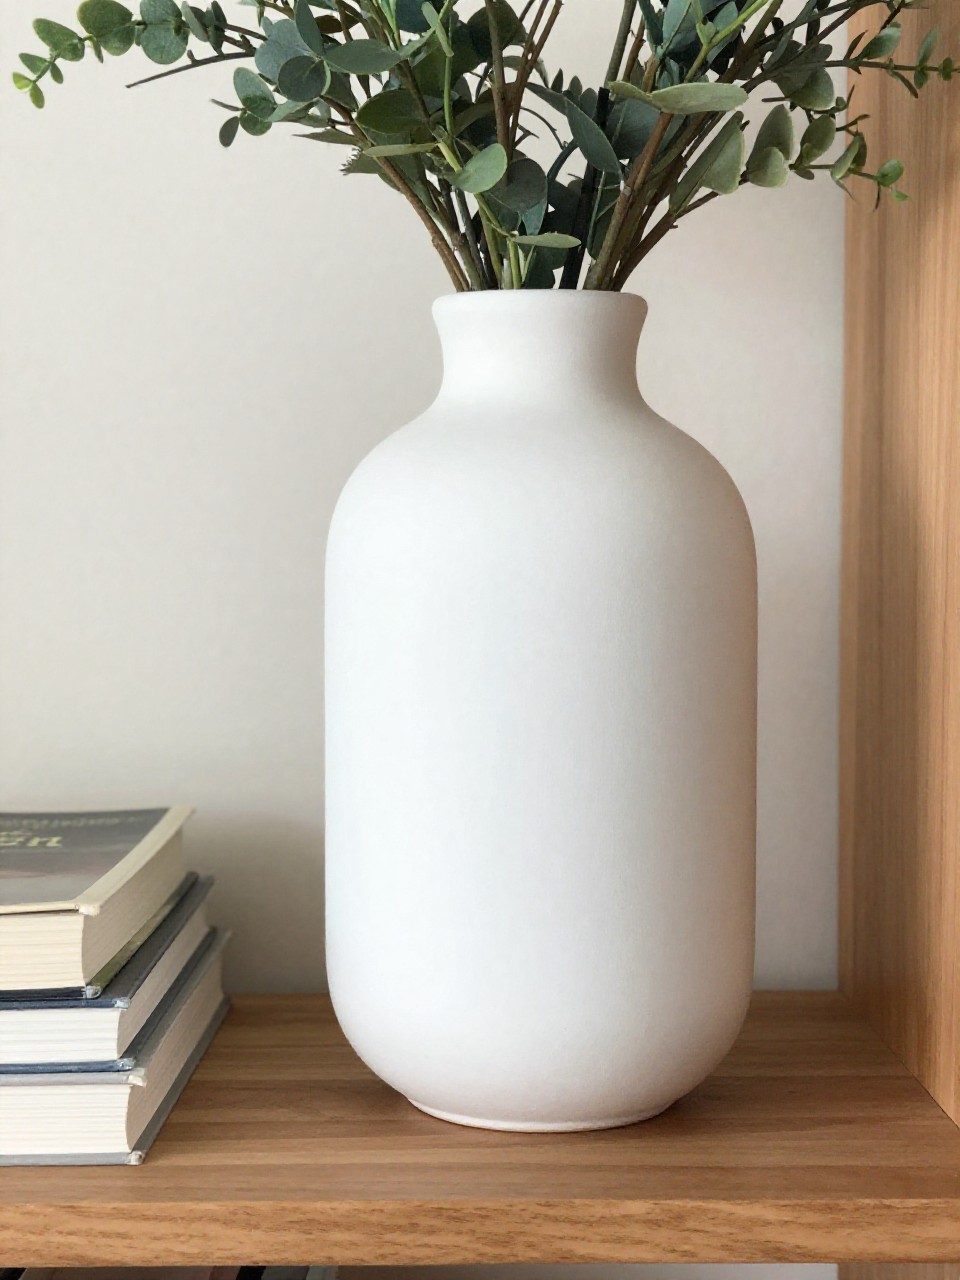
Turn a basic glass vase into a matte, stone-look piece. The chalky texture feels high-end and pairs beautifully with soft spring stems.
Materials Needed:
- Glass vase or bottle
- White acrylic paint + baking soda
- Foam brush
How to make it:
- 1. Mix 2 parts acrylic paint with 1 part baking soda to create a thick, gritty paint.
- 2. Brush the mixture over the vase in vertical strokes.
- 3. Let dry, then add a second coat for full coverage.
- 4. Lightly dab extra texture in spots and let cure overnight.
3. Moss-Covered Bunny Silhouette

This wall piece gives cozy cottage vibes without being cutesy. The soft moss and clean silhouette make it perfect for an entryway or kitchen nook.
Materials Needed:
- Foam board or canvas panel
- Sheet moss or moss squares
- Craft knife + hot glue
How to make it:
- 1. Sketch or trace a simple bunny silhouette onto foam board.
- 2. Cut out the shape carefully with a craft knife.
- 3. Glue moss pieces tightly across the surface, tucking edges neatly.
- 4. Press flat under a book for 10 minutes to secure.
4. Painted Terracotta Herb Markers
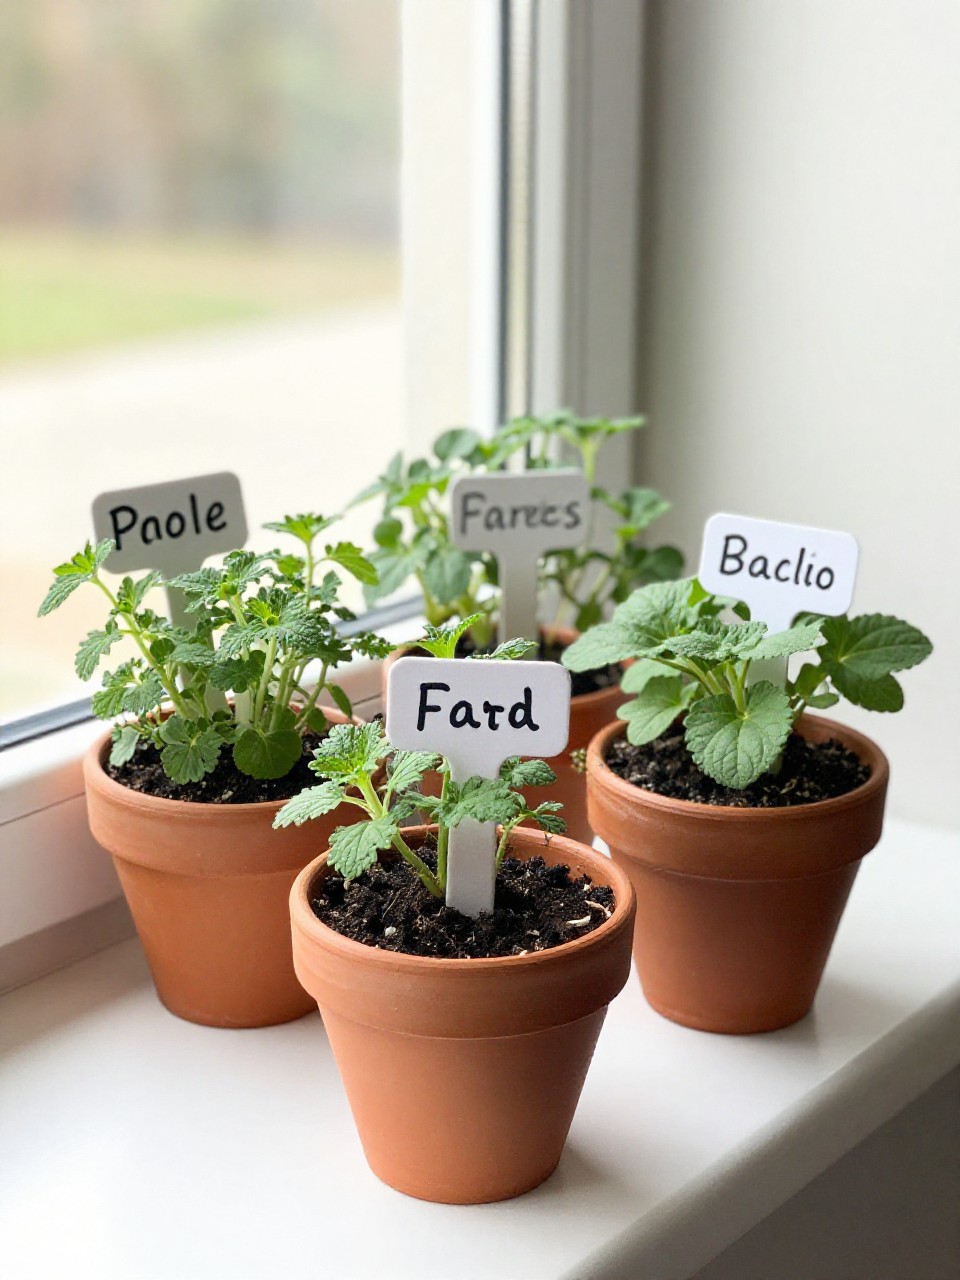
Upgrade plain terracotta saucers into chic herb markers for planters. The creamy paint and handwritten labels look designer and make your windowsill garden pop.
Materials Needed:
- Mini terracotta saucers
- White acrylic paint + fine-tip paint pen
- Wooden skewers
How to make it:
- 1. Paint the tops of the saucers white; let dry.
- 2. Write herb names with a paint pen: Basil, Mint, Rosemary, etc.
- 3. Glue a skewer to the back of each saucer.
- 4. Place markers into soil near each plant.
5. Faux Stained-Glass Suncatchers
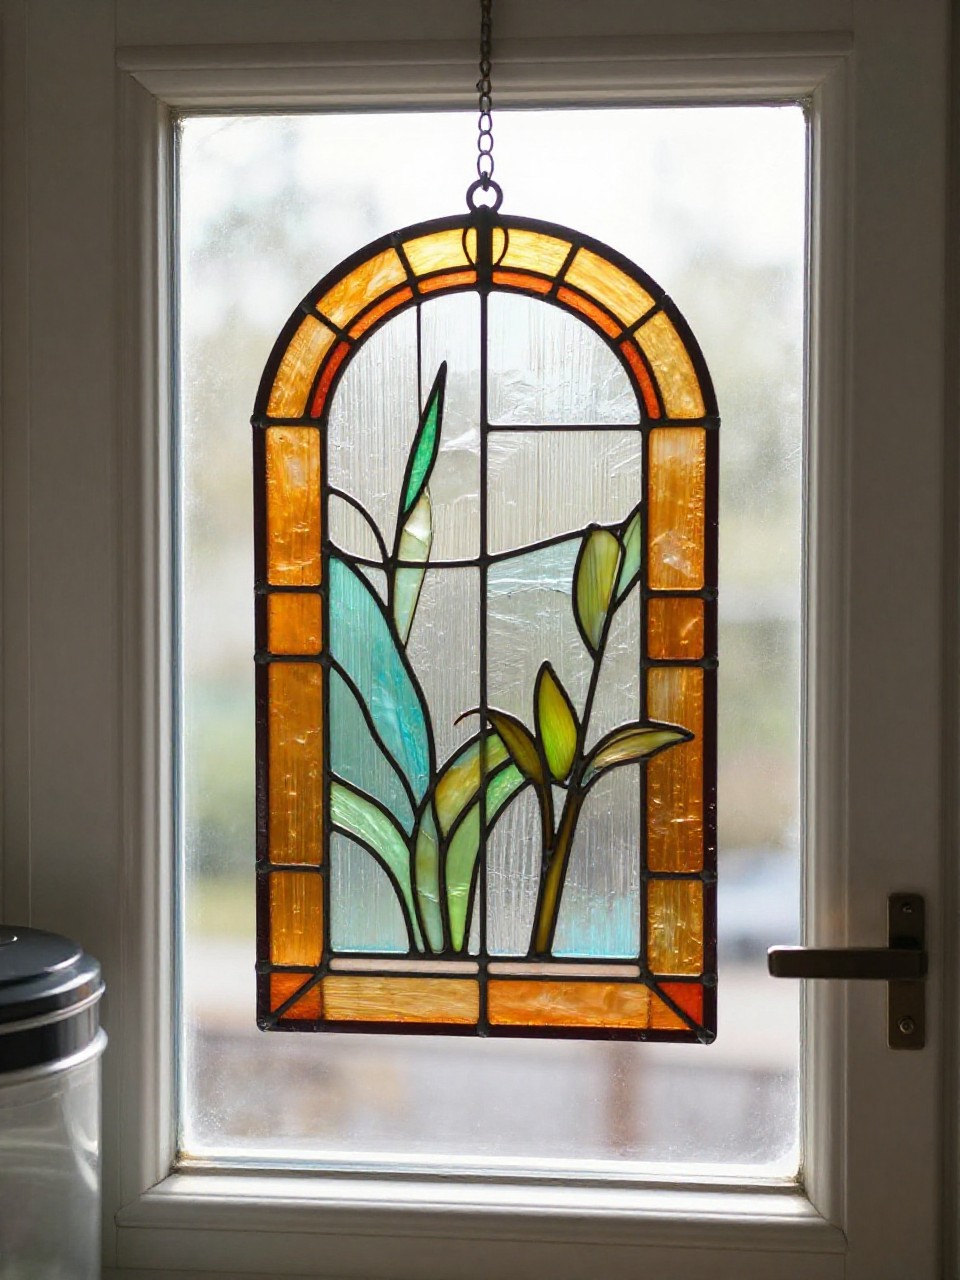
Catch the light with vivid “glass” made from clear report covers and markers. When the sun hits, your window turns into a soft rainbow.
Materials Needed:
- Clear plastic report covers or laminating sheets
- Black permanent marker + colorful markers
- Suction cup hooks or tape
How to make it:
- 1. Draw a simple floral or geometric design with a black marker to form “lead” lines.
- 2. Fill sections with bright marker colors.
- 3. Cut out the shape neatly.
- 4. Hang in a sunny window with suction hooks or clear tape.
6. Gingham-Wrapped Candle Trio
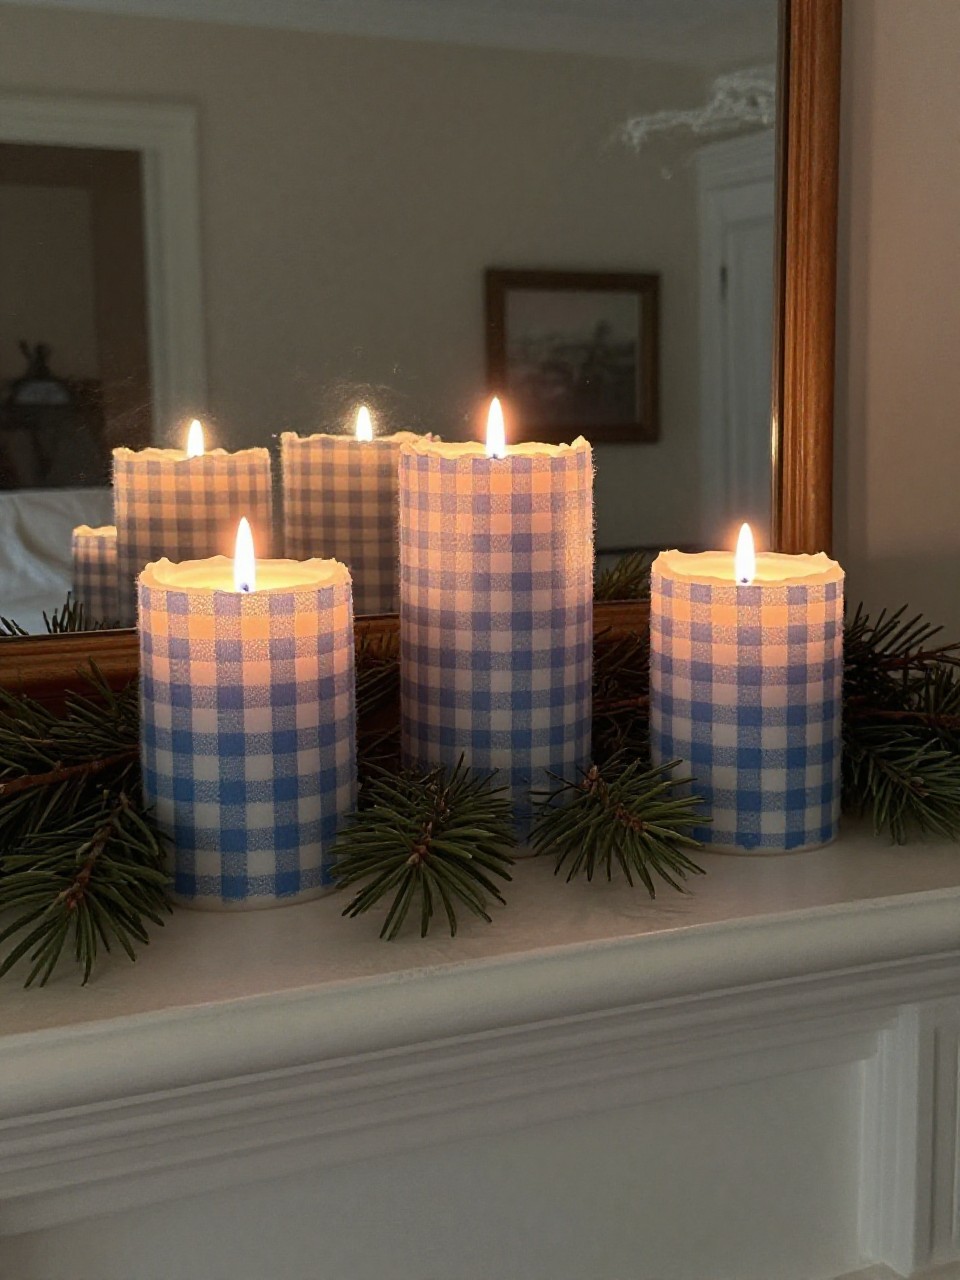
Dress up plain candles with a soft gingham wrap for a cozy spring mantle. The pattern looks polished but takes minutes.
Materials Needed:
- Pillar candles or jars
- Gingham ribbon or fabric
- Double-sided tape
How to make it:
- 1. Measure ribbon around each candle and cut to size.
- 2. Add double-sided tape to the back of the ribbon.
- 3. Wrap snugly around the candle (below flame line).
- 4. Tie a small bow or leave clean for a modern look.
7. Spring-Fling Doormat Stencil
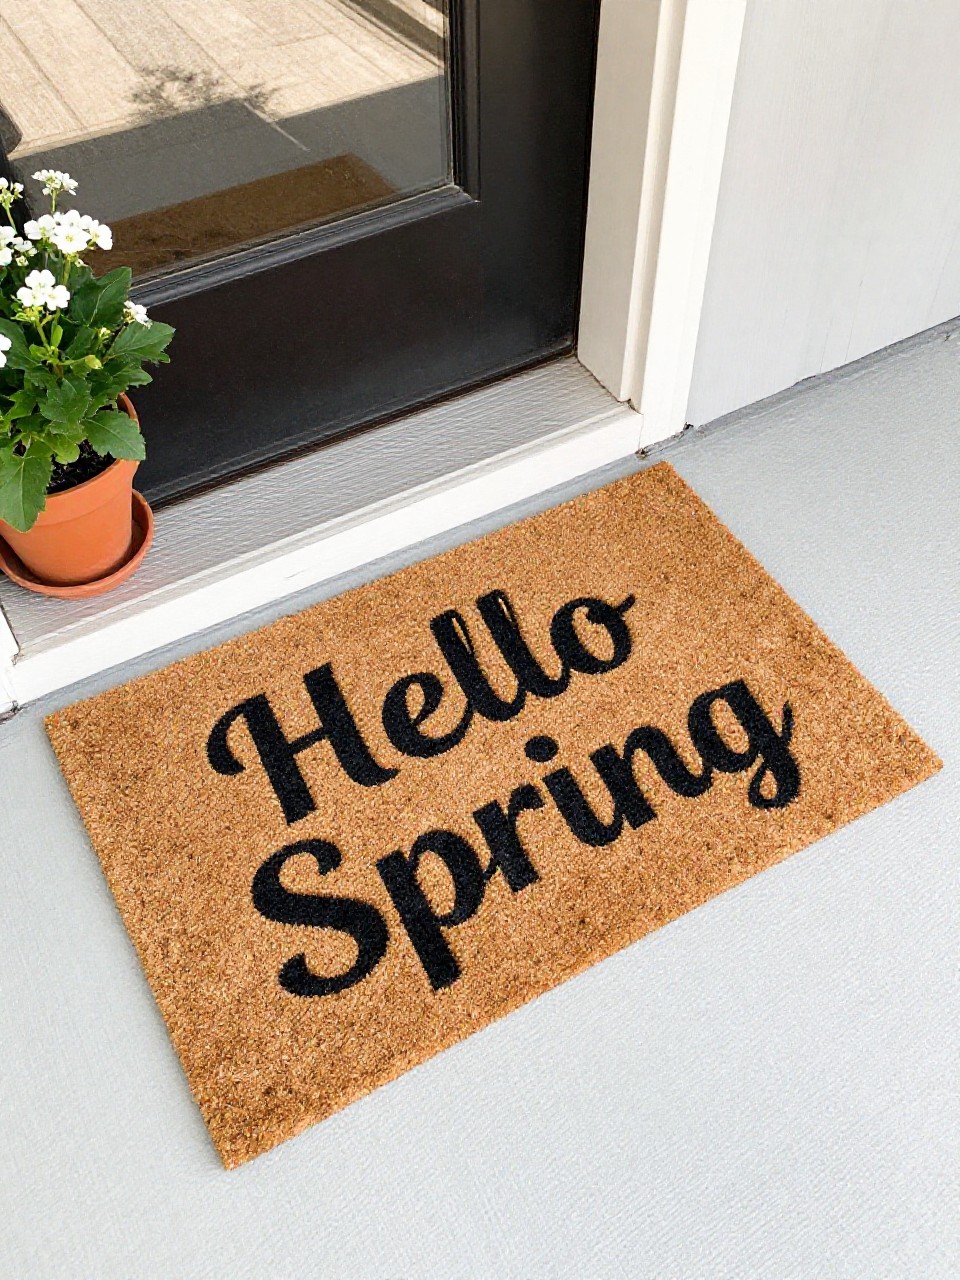
Make a fresh doormat with a crisp, cheeky spring phrase. The bold letters and clean edges scream custom-made.
Materials Needed:
- Coir doormat
- Adhesive letter stencils
- Outdoor acrylic paint + stencil brush
How to make it:
- 1. Place stencils to spell your phrase: “Hello Spring,” “Bloom,” or “Sunny Days.”
- 2. Pounce paint straight down with a stencil brush for crisp edges.
- 3. Carefully lift stencils; fill gaps if needed.
- 4. Let dry 24 hours before use.
8. Botanical Book-Page Garland
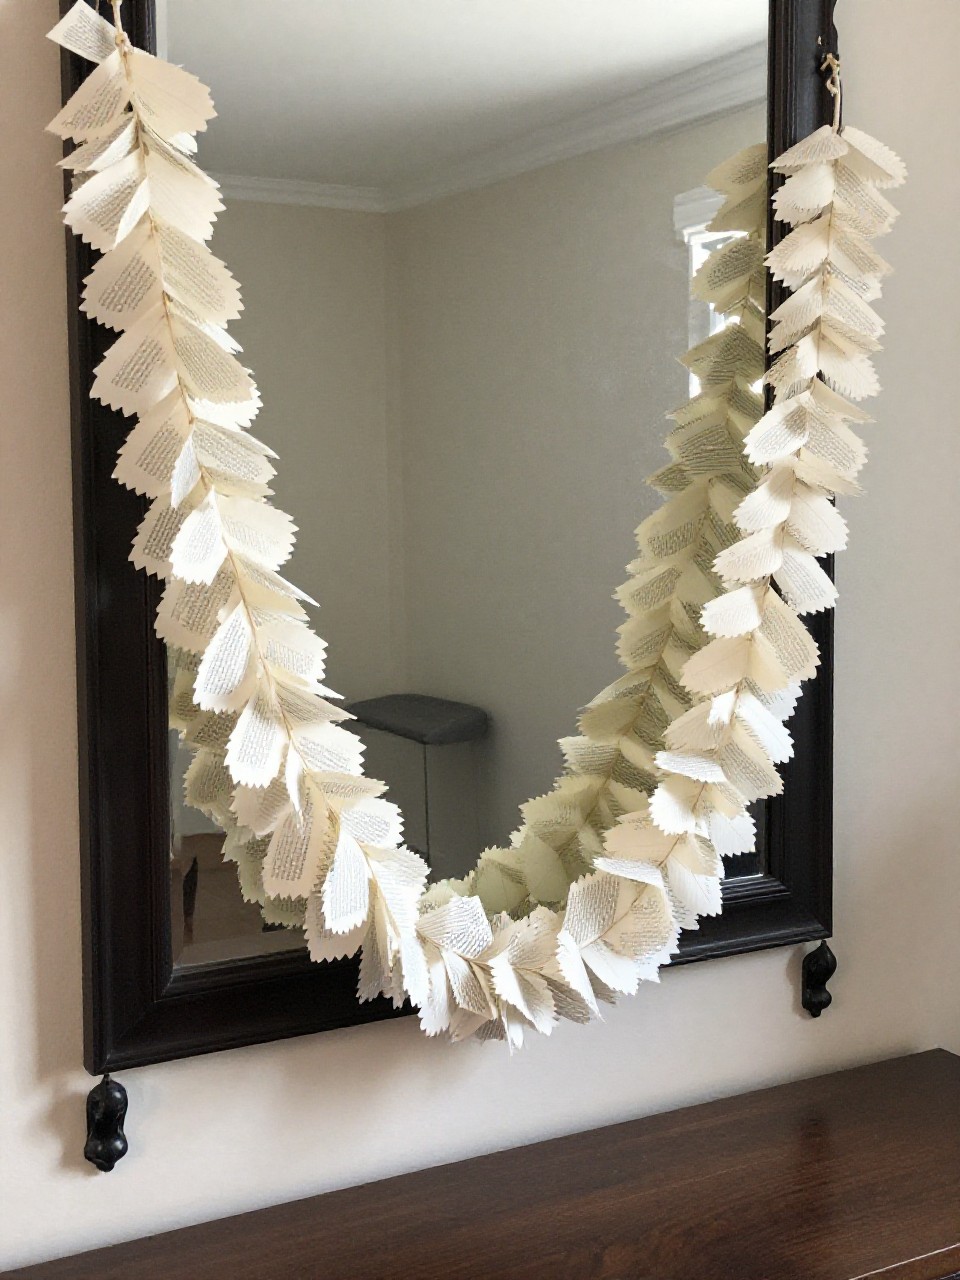
Turn old book pages into soft, fluttery leaves. Strung across a mantel or mirror, it feels timeless and light.
Materials Needed:
- Old paperback or book pages
- Jute twine
- Glue stick
How to make it:
- 1. Cut leaf shapes from book pages in varied sizes.
- 2. Fold each leaf down the center for a vein effect.
- 3. Glue the base of each leaf onto a length of twine.
- 4. Hang and fluff the leaves for dimension.
9. Speckled Faux Stone Eggs
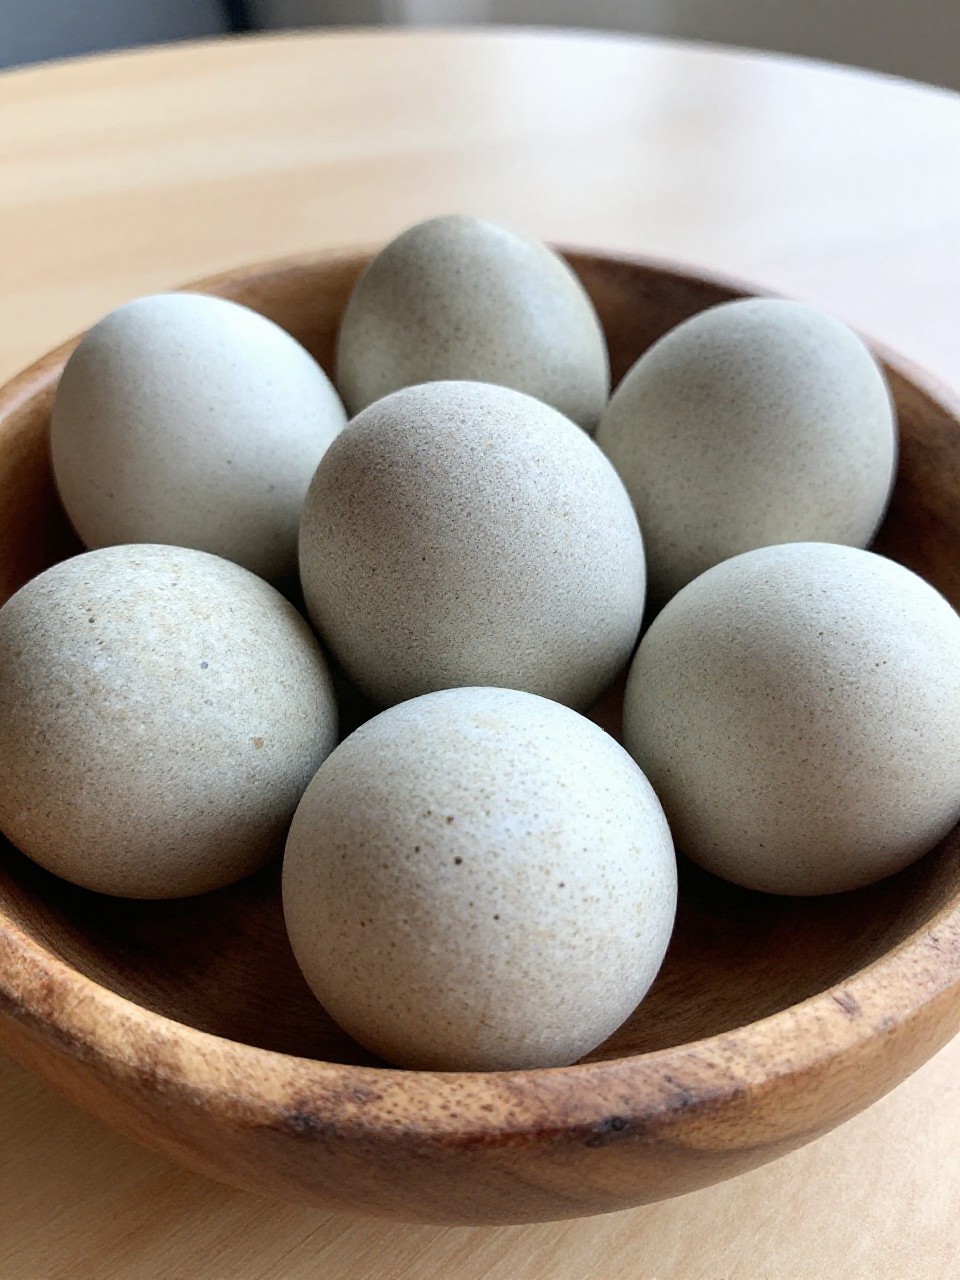
Get that pottery-shop look with simple paint layers. The tiny speckles make each egg feel gorgeously imperfect.
Materials Needed:
- Plastic craft eggs
- Matte acrylic paint (cream/gray)
- Old toothbrush + black paint
How to make it:
- 1. Paint eggs in soft neutral shades; let dry.
- 2. Thin black paint with a touch of water.
- 3. Flick paint from a toothbrush onto eggs for speckles.
- 4. Seal with a light matte spray if desired.
10. Rattan-Look Basket Upgrade
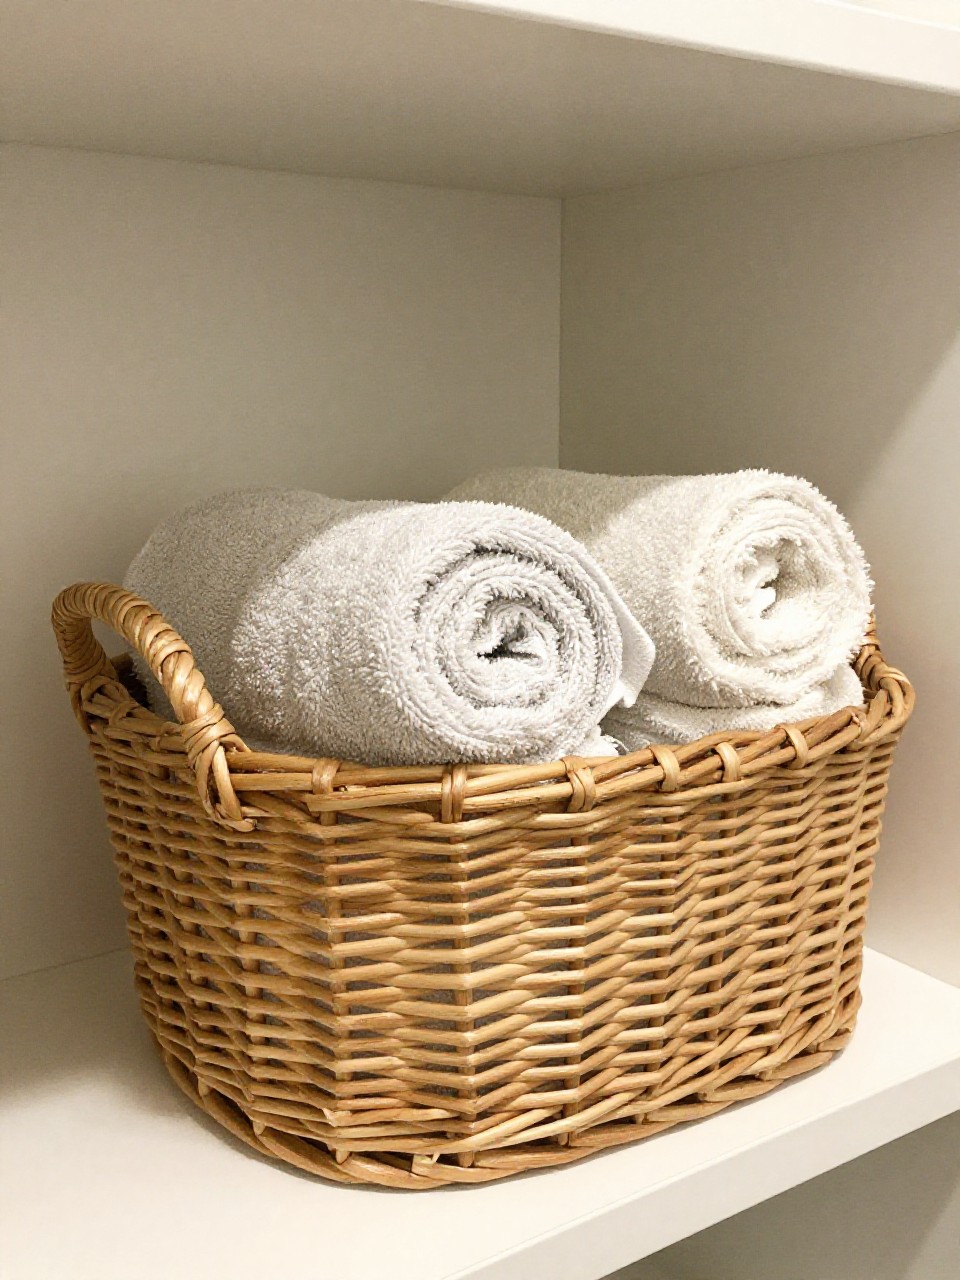
Fake the rattan trend with hot glue “weave” lines and paint. The texture and warm tone elevate any Dollar Tree basket.
Materials Needed:
- Plastic bin or basket
- Hot glue gun + glue sticks
- Tan and caramel acrylic paints
How to make it:
- 1. Run neat horizontal hot glue lines around the basket to mimic weave.
- 2. Add a few vertical lines to break it up.
- 3. Paint the whole basket tan; dry.
- 4. Dry-brush caramel on raised glue lines for depth.
11. Mini Hanging Greenhouse
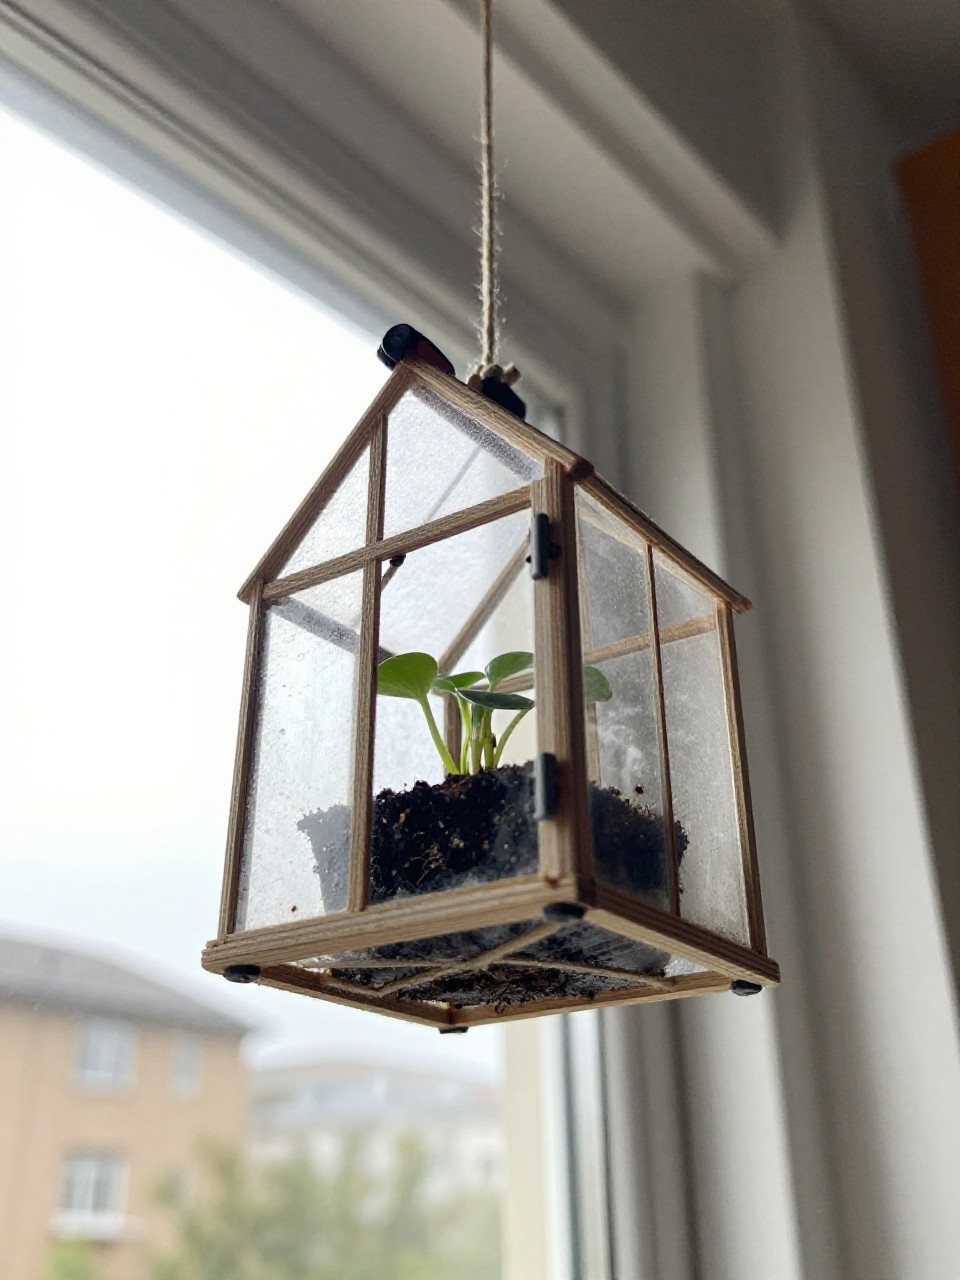
A sweet little air-plant “greenhouse” made from clear frames feels whimsical and fresh. Hang it in a bright spot and watch it glow.
Materials Needed:
- Four clear Dollar Tree photo frames (same size)
- Hot glue or super glue
- Twine + small faux plants or air plants
How to make it:
- 1. Remove frame backs and glue frames together to form a cube (glass facing out).
- 2. Leave the top open; reinforce seams with extra glue.
- 3. Tie twine around two opposite corners to create a hanger.
- 4. Place a small faux plant or air plant inside.
12. Lemon Slice Wood Bead Garland
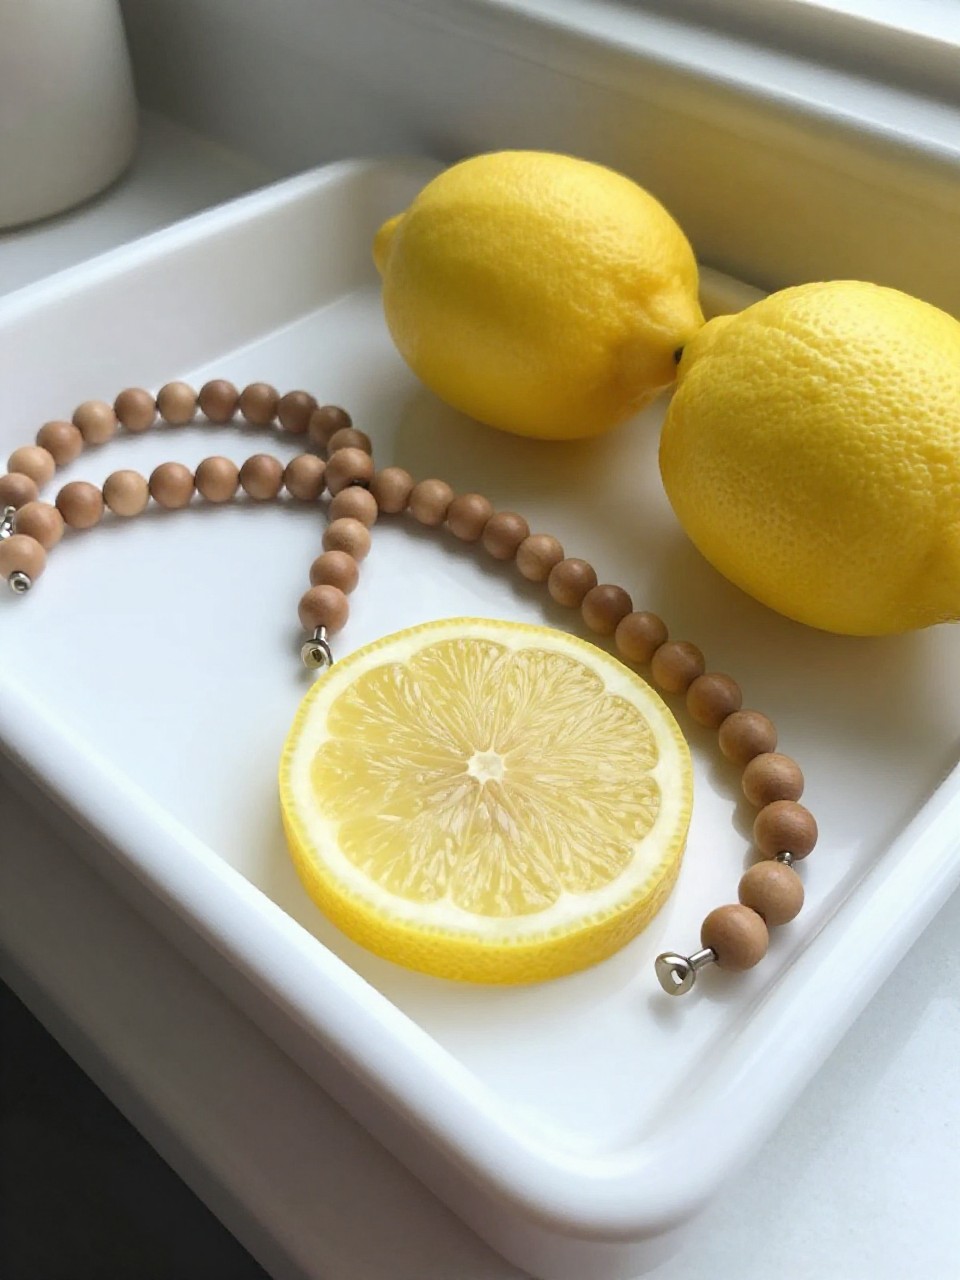
Cheery lemon slices meet natural wood beads for a happy pop of color. Drape it over a tray or tiered stand for instant sunshine.
Materials Needed:
- Wood beads
- Yellow and white paint
- Cardstock + twine
How to make it:
- 1. Paint half your beads yellow, leave others natural.
- 2. Cut small cardstock circles; paint as lemon slices.
- 3. Thread beads onto twine, tying a lemon slice tag at each end.
- 4. Knot securely and trim.
13. Fabric-Wrapped Hoop Wreath
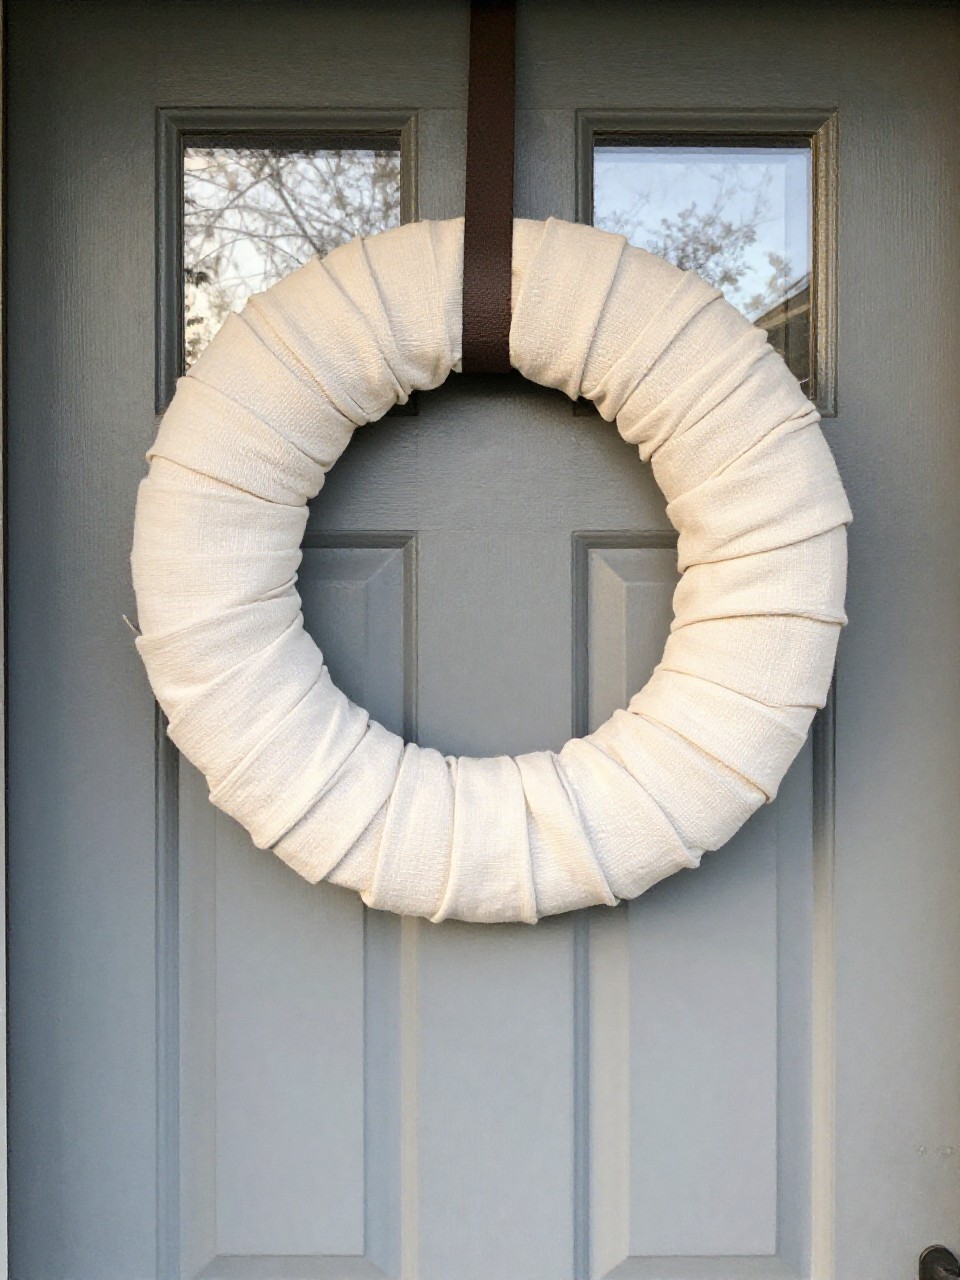
This wreath looks boutique but takes 15 minutes. The fabric wrap keeps it minimal while a spray of greenery adds life.
Materials Needed:
- Metal hoop
- Scraps of light floral fabric
- Faux eucalyptus sprig + floral wire
How to make it:
- 1. Tear fabric into 1-inch strips for a soft edge.
- 2. Wrap strips around half the hoop, securing ends with hot glue.
- 3. Wire a small eucalyptus sprig where fabric meets metal.
- 4. Add a simple ribbon loop for hanging.
14. Painted Tile Coasters with Botanical Stamps

These look like artisan tiles with delicate plant prints. The matte finish keeps them classy and usable.
Materials Needed:
- Plain ceramic tiles
- Acrylic paint + foam brush
- Rubber stamp (botanical) + ink or paint
How to make it:
- 1. Paint tiles in a soft pastel or cream; let dry.
- 2. Lightly coat the stamp with paint and press onto tile.
- 3. Touch up details with a fine brush if needed.
- 4. Seal with clear spray; add felt pads under corners.
15. Frosted Floral Mason Jars
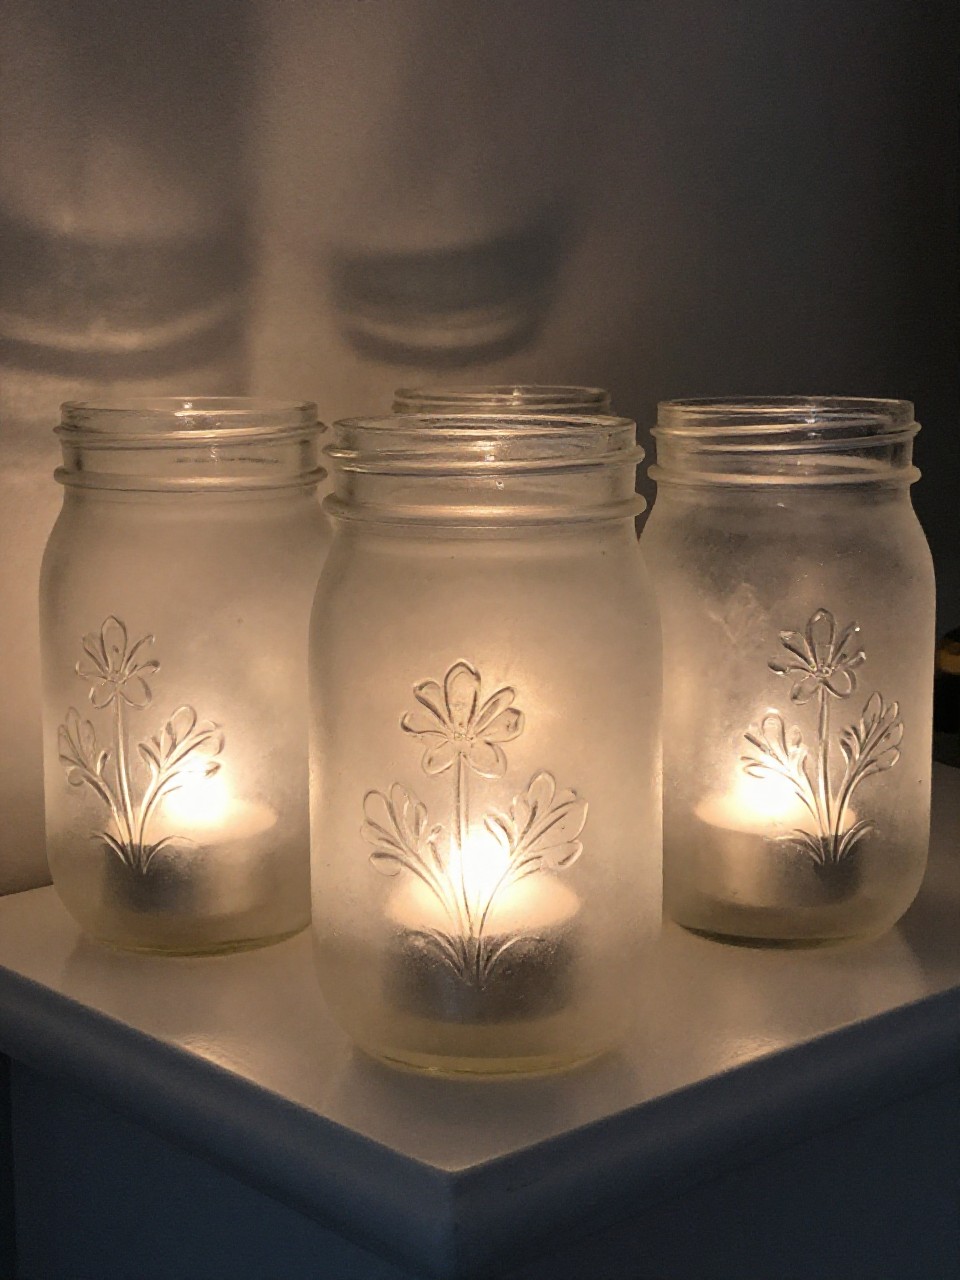
Soft frosted jars glow like spring lanterns. A tiny floral decal peeking through keeps it sweet and subtle.
Materials Needed:
- Mason jars
- Frosted glass spray or matte Mod Podge
- Floral stickers or cut vinyl
How to make it:
- 1. Apply floral stickers where you want the clear peek-through.
- 2. Spray or brush the jar with frosted finish; let dry.
- 3. Peel stickers to reveal the clear design.
- 4. Add a tealight or fresh stems.
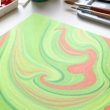
16. Layered Paper Wildflower Art
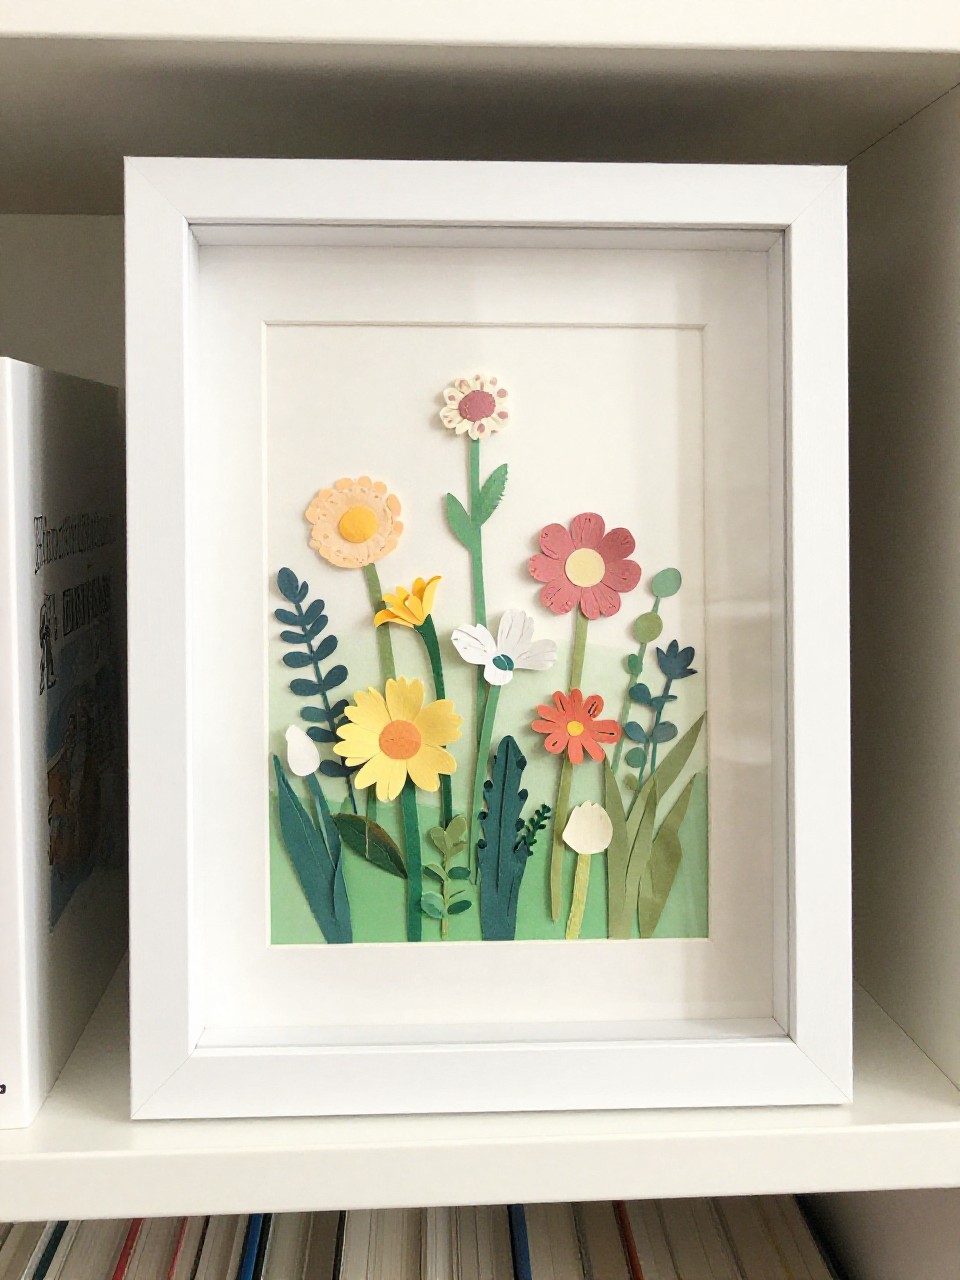
Build dreamy depth with hand-cut paper petals. The shadows make it look 3D and gallery-ready.
Materials Needed:
- Colored cardstock
- Scissors + glue stick
- Shadow box frame
How to make it:
- 1. Cut simple petal and leaf shapes from cardstock.
- 2. Layer petals slightly offset, gluing only at the base.
- 3. Arrange blooms on a plain background with leaves peeking.
- 4. Place in a shadow box to protect and add dimension.