


Table of Contents Show
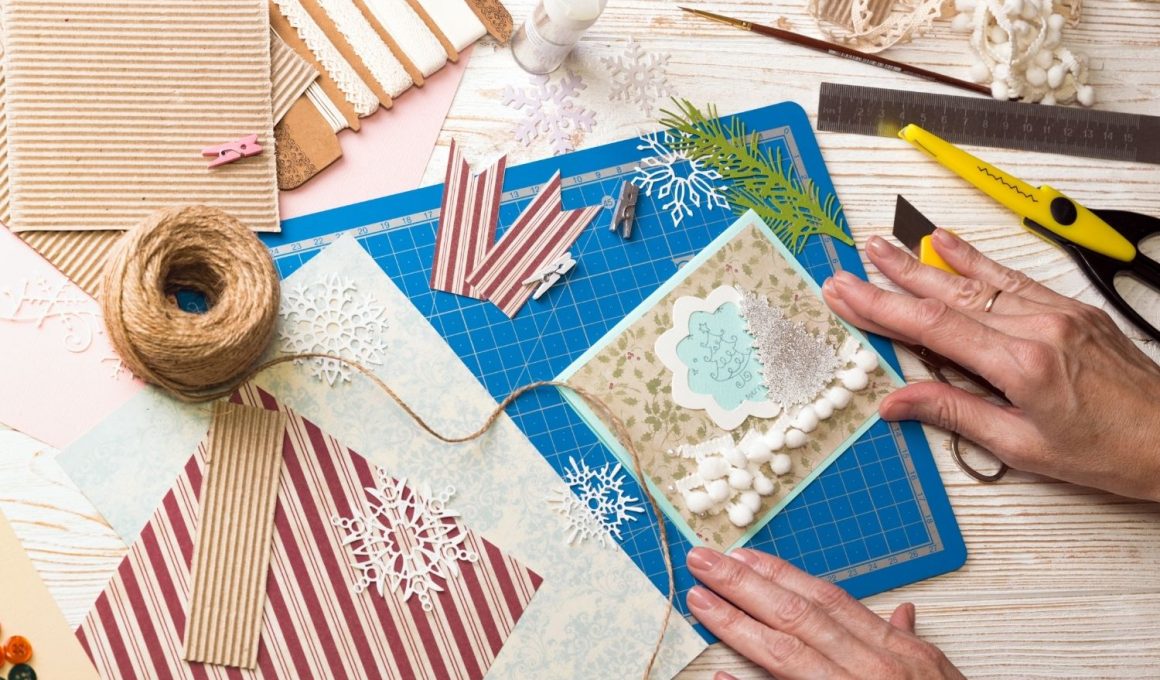
Keeping kids busy, planning a classroom center, or just wanting a calm rainy-day project? Scrapbook paper is perfect because it’s colorful, sturdy, and easy to cut, and you can find it in so many patterns. Below are simple, cheerful crafts that turn leftover sheets into things you’ll actually enjoy using or displaying.
You’ll find quick wins and slightly longer makes, all beginner friendly.
Let’s jump into these scrapbook paper ideas you’ll want to try.
1. Patchwork Paper Picture Frames
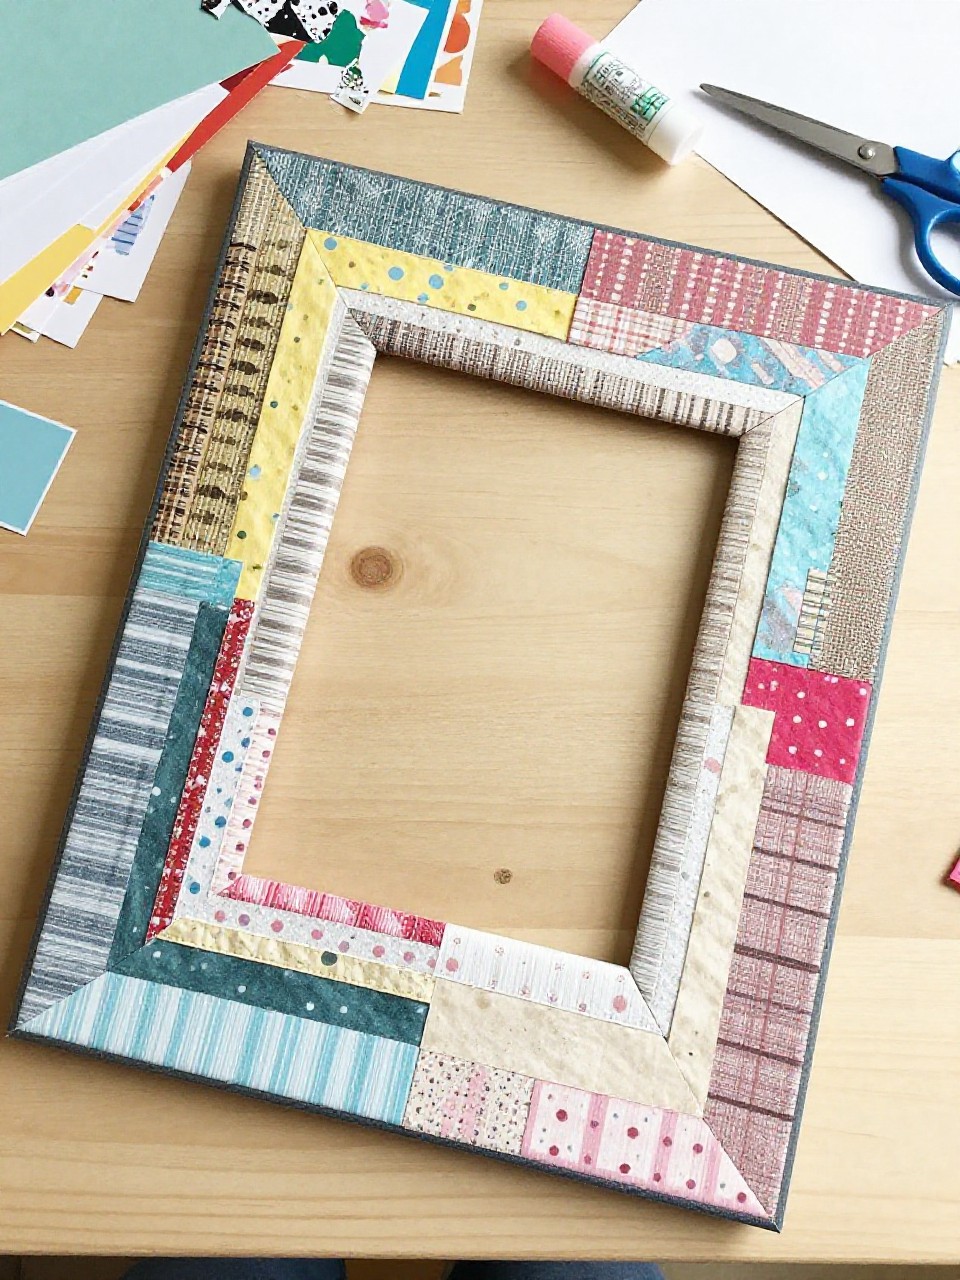
These frames look like mosaic tiles made from tiny squares of mixed scrapbook paper glued around a cardboard window. Kids love choosing patterns and building a colorful border that makes any photo pop, and it’s easy to scale for any age.
Materials Needed:
For People Who Love to Make Things ✂️
- Scrapbook paper in mixed patterns (cut into 1-inch squares)
- Cardboard or empty cereal box
- Glue stick
- Scissors or craft knife (adult help)
- Clear tape or optional ribbon for hanging
How to make it:
- Cut a frame shape from cardboard with an inner window for the photo.
- Glue paper squares around the frame, overlapping slightly for a patchwork look.
- Add extra details with thin strips or washi-tape accents.
- Tape a photo to the back, let dry, and display or hang with ribbon.
2. Layered Scrapbook Paper Bookmarks
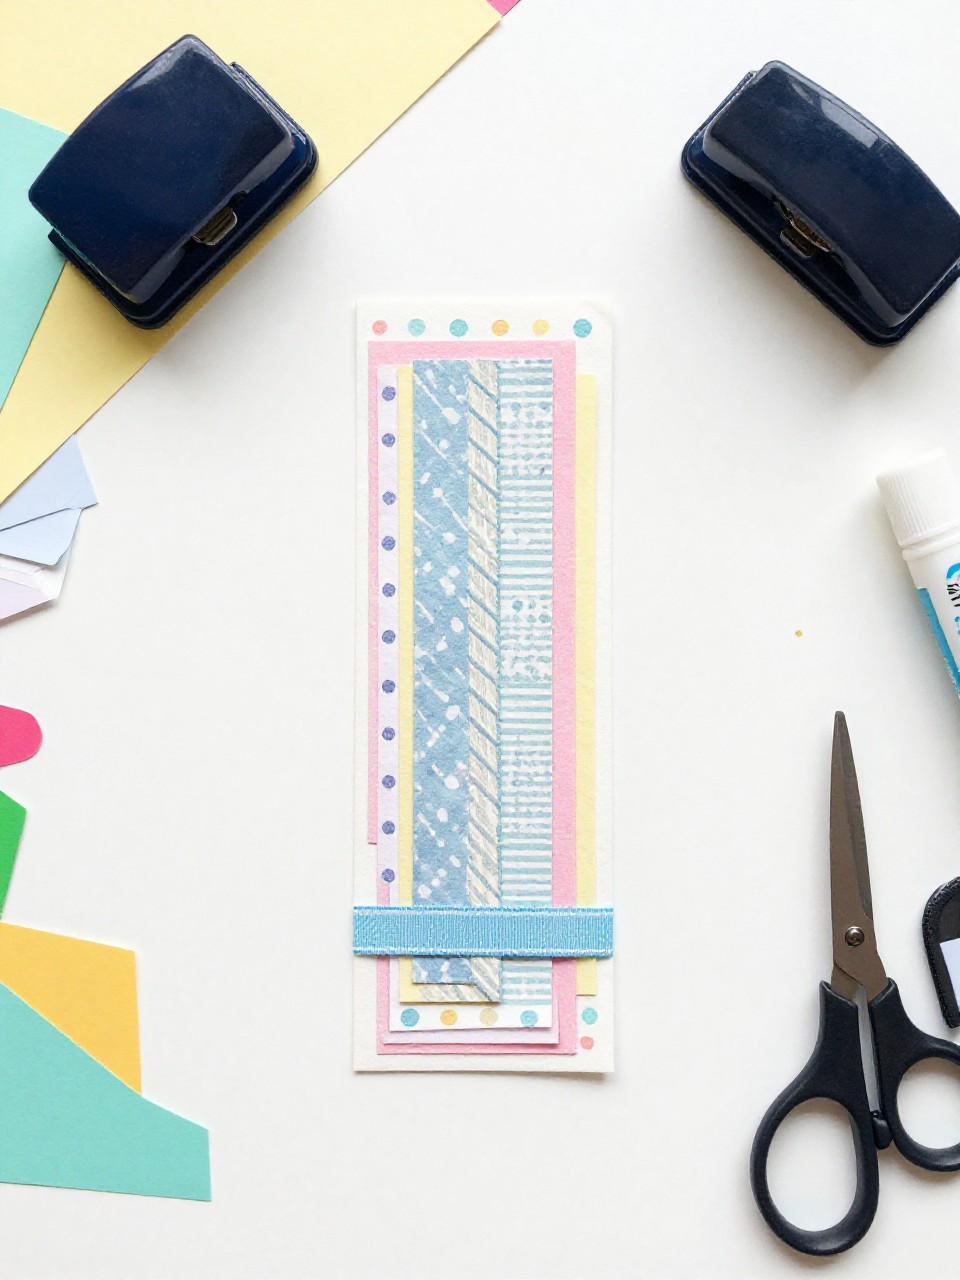
These slim bookmarks have stacked paper layers with a bold top pattern and a contrasting strip or tab. They’re quick to make and fun to trade, and kids enjoy picking patterns that match their favorite books.
Materials Needed:
- Scrapbook paper (2–3 coordinating designs)
- Glue stick or double-sided tape
- Hole punch (optional)
- Ribbon or twine (optional)
- Corner rounder (optional)
How to make it:
- Cut a base strip about 2 x 6 inches from sturdy scrapbook paper.
- Add a smaller strip on top, centered, and glue down.
- Round corners and punch a hole; add ribbon if you like.
- Press flat under a book for 10 minutes to set.
3. Scrapbook Paper Garland Pennants
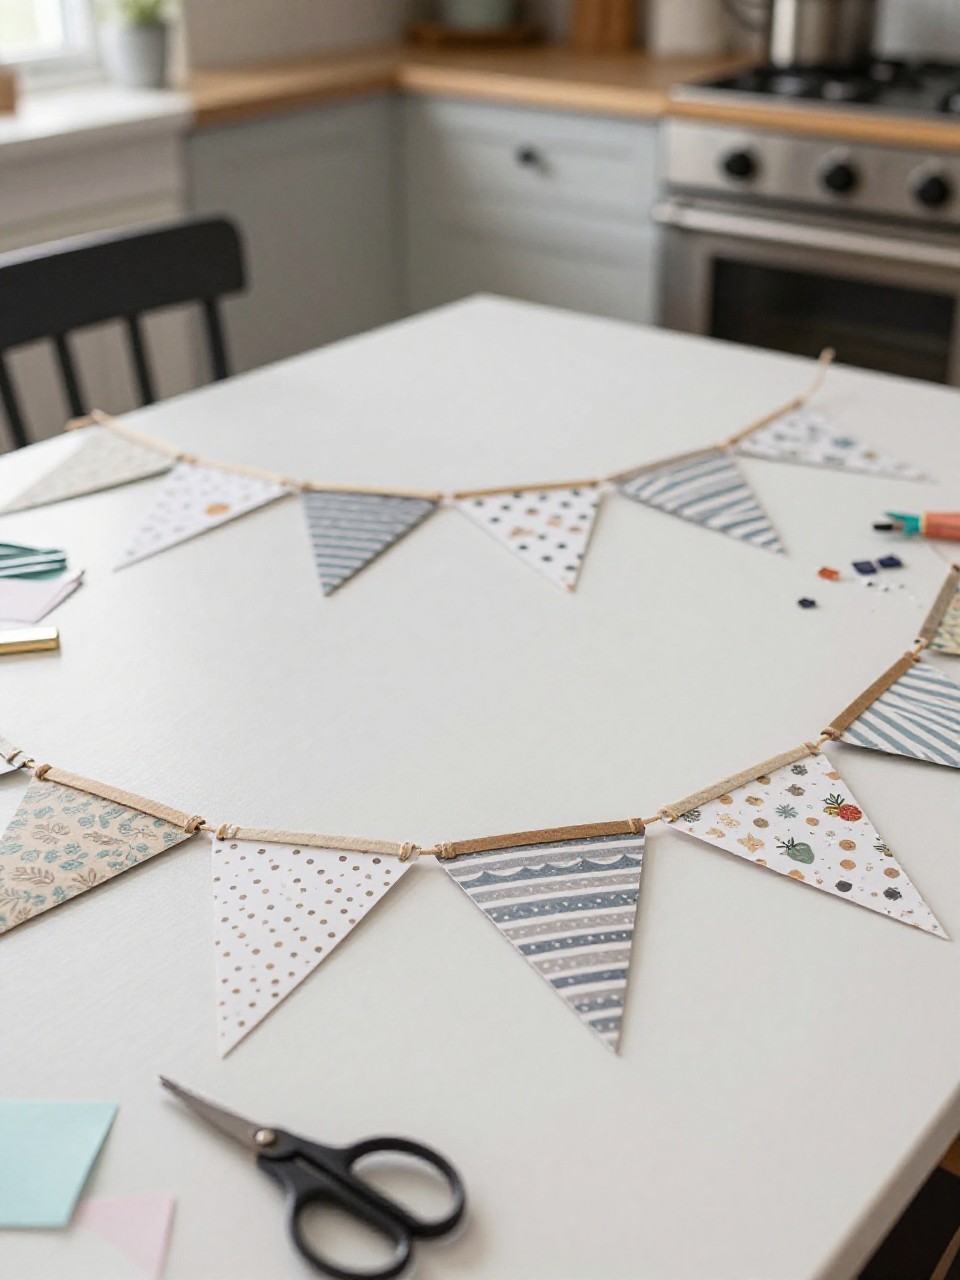
This garland features triangle or flag-shaped pennants strung along twine, each cut from different patterned papers. It’s satisfying because you see a room transform fast, and kids love arranging colors into a fun sequence.
Materials Needed:
- Assorted scrapbook paper
- Twine or string
- Hole punch or tape
- Scissors
- Stickers or letter cutouts (optional)
How to make it:
- Cut triangles or flag shapes about 4–5 inches wide from scrapbook paper.
- Punch two holes at the top of each or fold a flap to tape around twine.
- Decorate with stickers, letters, or shapes.
- String the pennants, space evenly, and hang across a wall or doorway.
4. Mosaic Scrapbook Paper Collage Animals
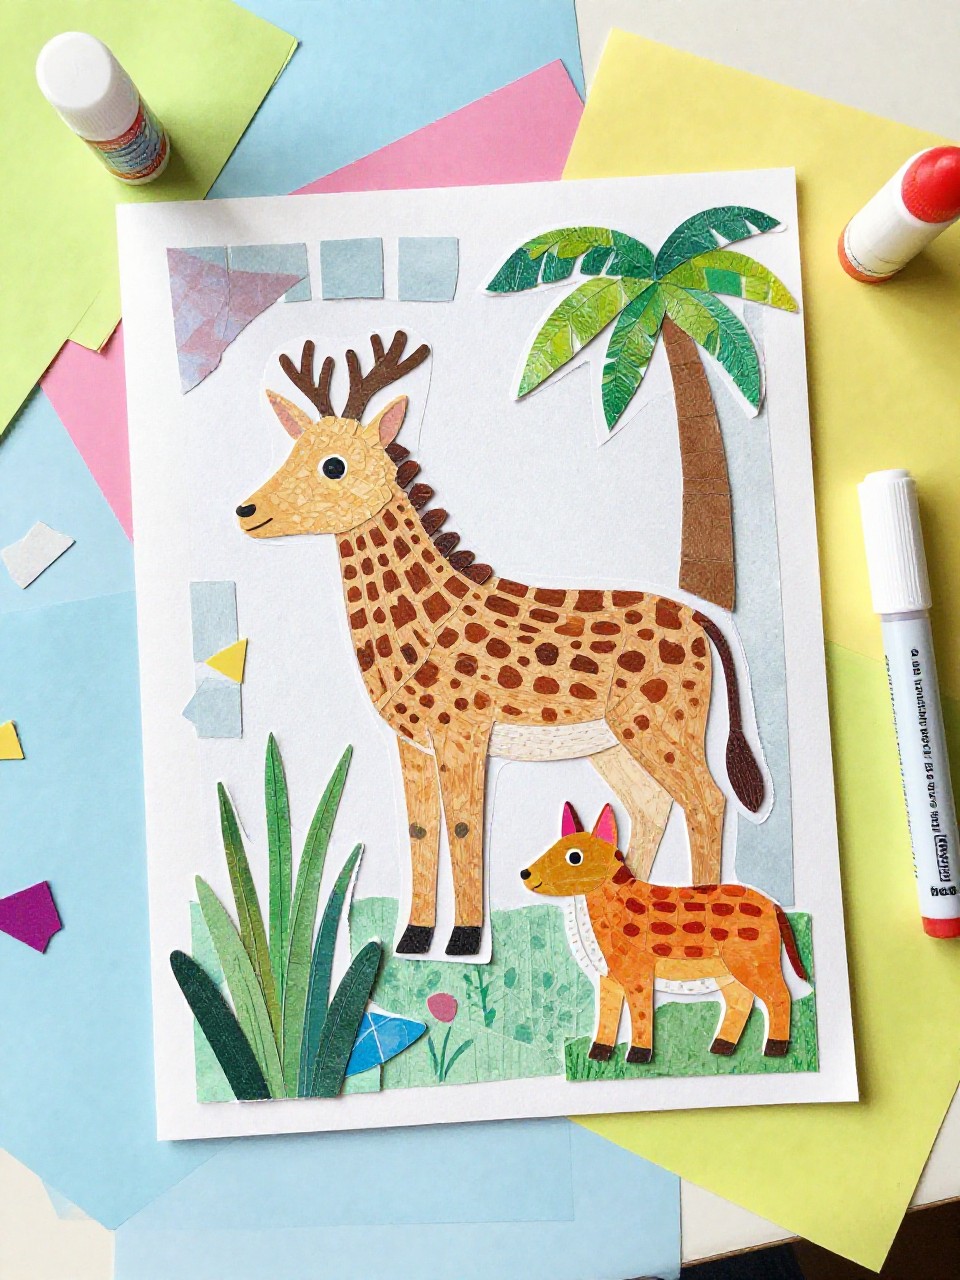
These animal pictures are made by gluing small paper bits inside a simple animal outline, creating a tiled mosaic look. Kids enjoy picking textures and building colorful fur, feathers, or scales with zero drawing pressure.
Materials Needed:
- Scrapbook paper scraps in varied colors
- White cardstock or construction paper
- Pencil and black marker
- Glue stick
- Optional googly eyes
How to make it:
- Draw a big outline of a favorite animal on cardstock and trace with marker.
- Tear or cut scrapbook paper into small pieces.
- Fill the animal shape with glued pieces, leaving small gaps for mosaic style.
- Add an eye, outline details, and let dry flat before displaying.
5. Paper Quilt Wall Art
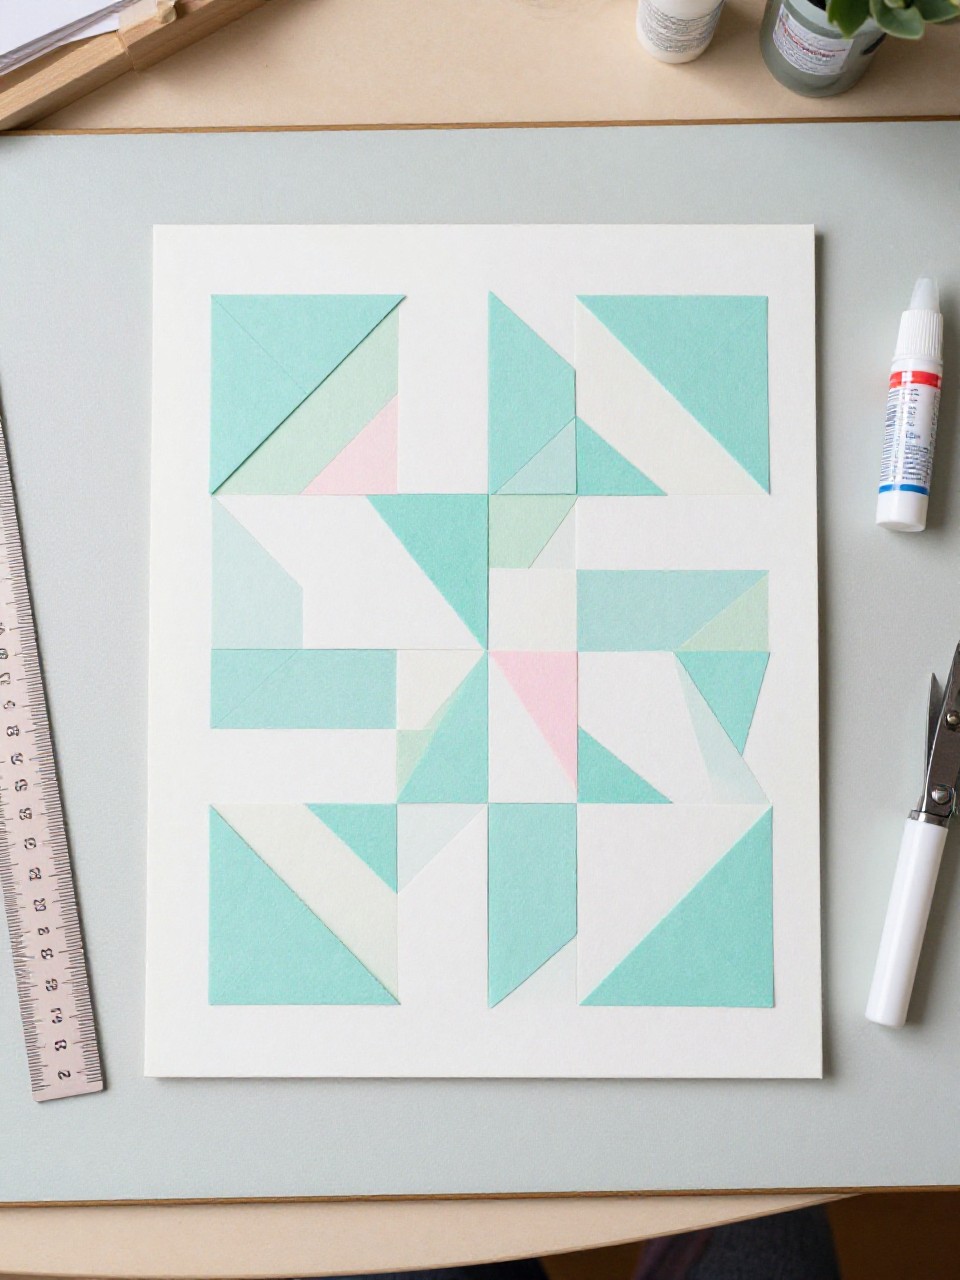
This square wall art looks like a quilt block made from triangles and diamonds of patterned scrapbook paper arranged in a repeating design. It’s relaxing like a puzzle and makes striking decor without sewing.
Materials Needed:
- Coordinating scrapbook paper (3–5 patterns)
- Ruler and pencil
- Scissors or paper trimmer
- Glue stick
- Cardstock backing
How to make it:
- Cut equal-size squares, then cut them diagonally into triangles.
- Plan a simple quilt pattern on cardstock (pinwheel, star, or checker).
- Glue pieces edge-to-edge for crisp seams.
- Press under books to set, then frame or hang with tape.
6. Scrapbook Paper Envelopes with Stickers
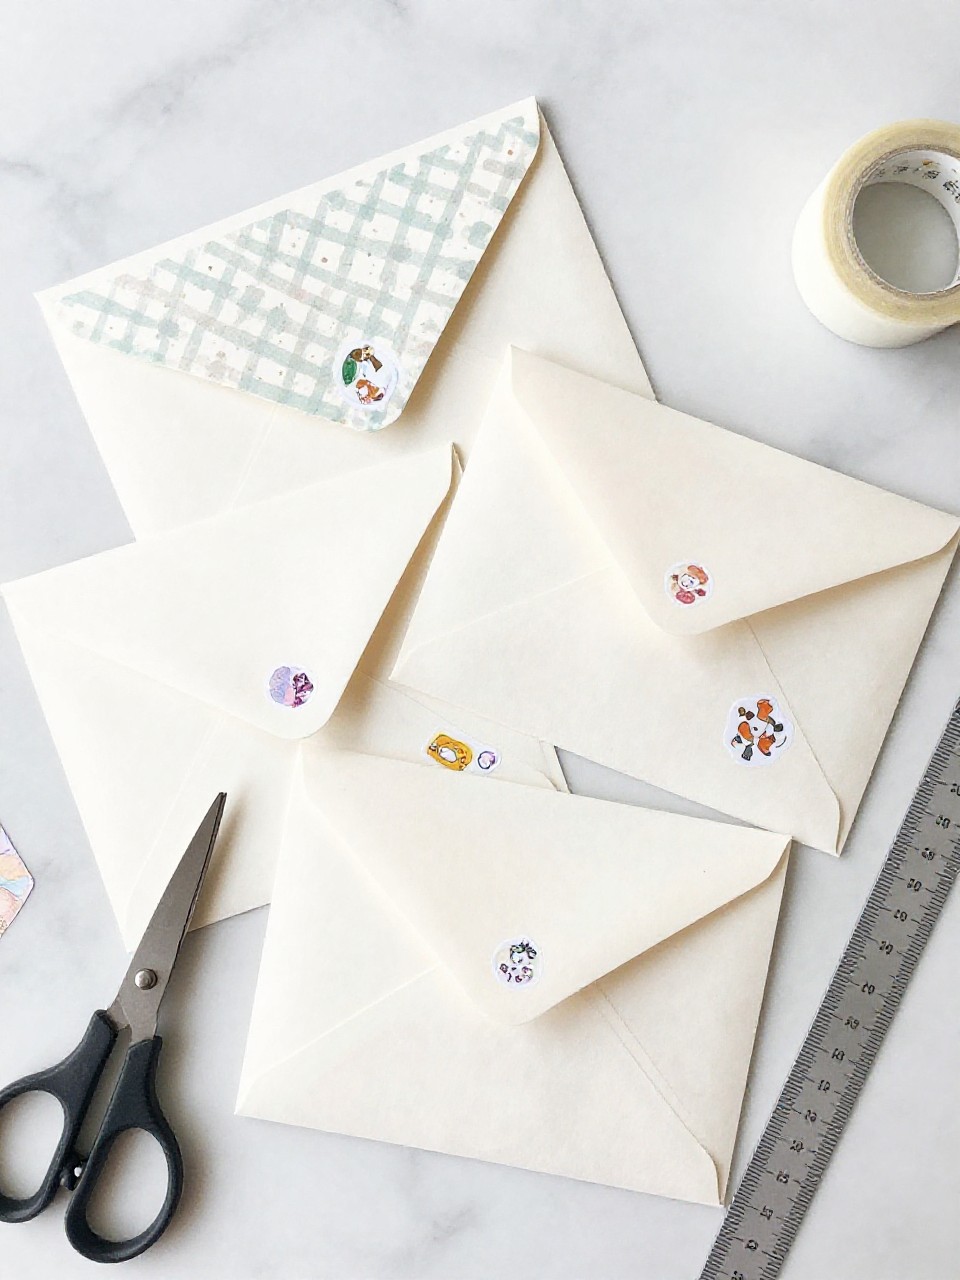
These patterned mini envelopes fold from a single sheet and look charming with matching sticker seals. Kids enjoy sending secret notes, and making sets teaches simple measuring and folding.
Materials Needed:
- Double-sided scrapbook paper (or single-sided)
- Glue stick or double-sided tape
- Circle stickers or washi tape
- Ruler and pencil
- Template (optional)
How to make it:
- Cut paper into a 6–7 inch square; lightly mark center.
- Fold side flaps to center, then bottom flap up; glue edges.
- Fold the top flap down to close; add a sticker seal.
- Make a few in coordinating patterns and stack as a gift.
7. Patterned Paper Flower Bouquet
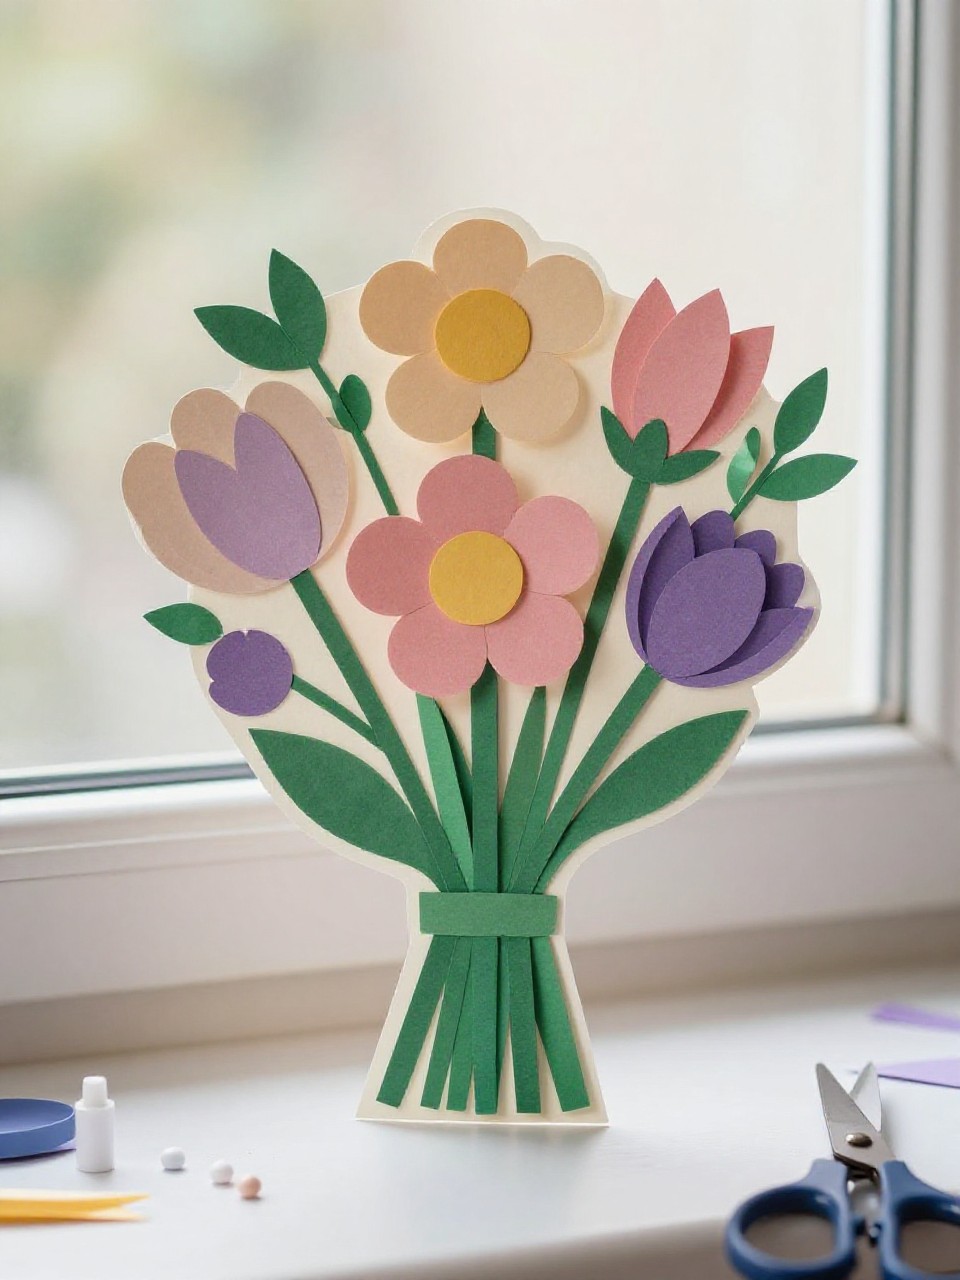
These layered flowers have curled petals cut from bright scrapbook paper, gathered into a paper-stem bouquet. Kids enjoy shaping petals and mixing prints, and the result looks cheerful on any desk.
Materials Needed:
- Scrapbook paper (florals, brights, or pastels)
- Green paper or paper straws for stems
- Glue dots or tacky glue
- Buttons or paper circles for centers
- Pencil and scissors
How to make it:
- Cut several flower shapes in different sizes; stack largest to smallest.
- Glue layers at the centers; curl petals slightly with a pencil.
- Add a button or paper circle center and attach to a stem.
- Arrange a small bouquet in a jar or tie with ribbon.
8. Scrapbook Paper Corner Book Hugger
This is a folded corner bookmark shaped like an animal or emoji, with scrapbook paper patterns giving it personality. Kids love sliding it onto pages and customizing ears, eyes, and expressions.
Materials Needed:
- Scrapbook paper (one main sheet plus small scraps)
- Glue stick
- Black marker
- Scissors
- Googly eyes (optional)
How to make it:
- Cut a 5-inch square; fold into a corner pocket triangle (origami “hugger”).
- Glue edges where needed to keep the pocket closed.
- Add ears, hair, or emoji features from scraps; draw details.
- Let dry and test on a favorite book corner.
9. Geometric Scrapbook Paper Coasters
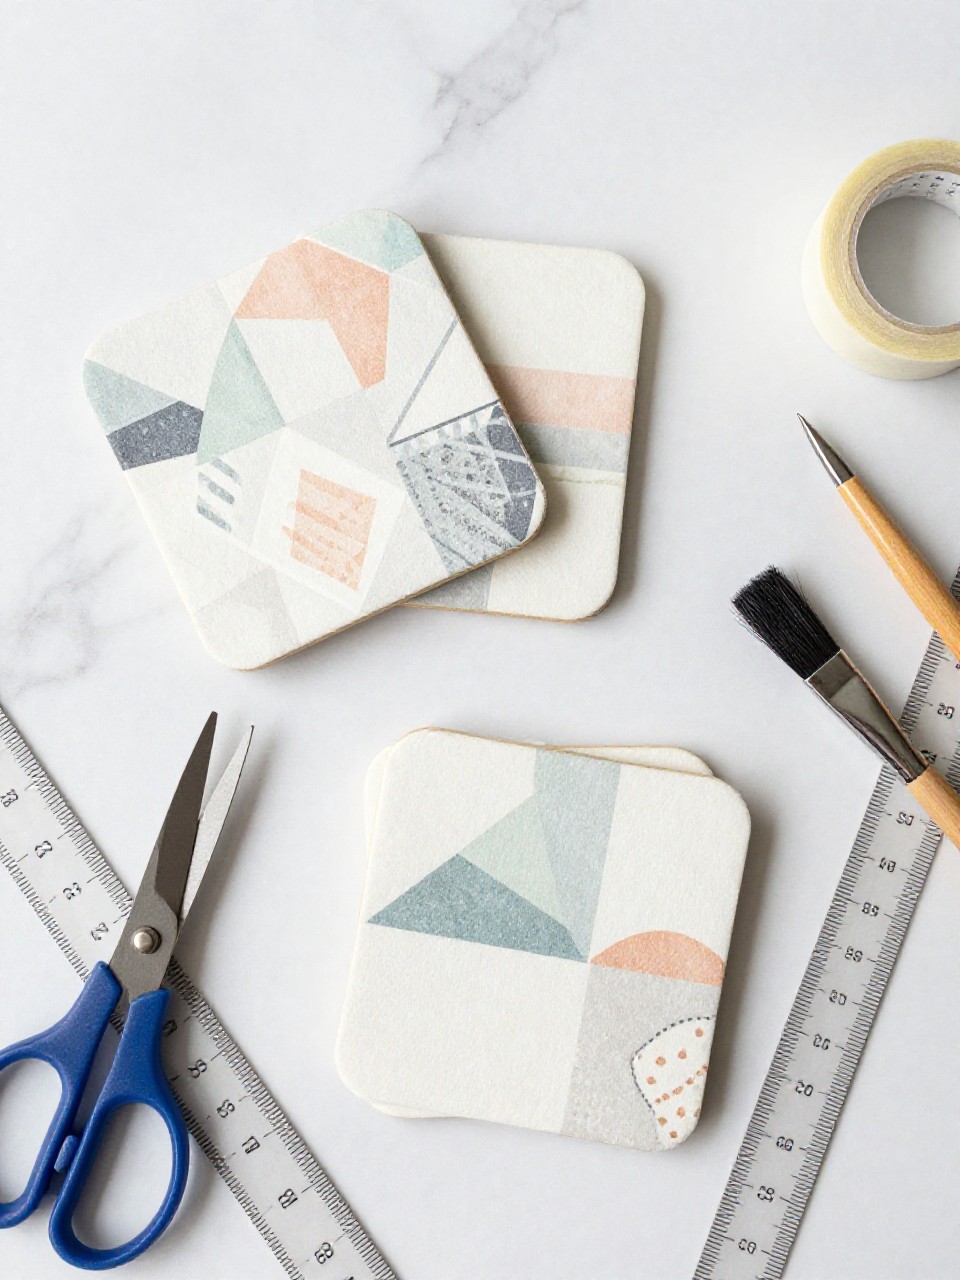
These coasters are sturdy squares covered in geometric paper pieces sealed with clear tape or Mod Podge. It’s satisfying to create a useful set that looks store-bought.
Materials Needed:
- Thick cardboard or chipboard squares (4 x 4 inches)
- Scrapbook paper (geometric or solid colors)
- Glue stick
- Clear packing tape or Mod Podge and brush
- Scissors and ruler
How to make it:
- Cover each board with a solid paper base; glue and trim edges.
- Add triangles or stripes on top to make patterns.
- Seal with clear packing tape wrapped neatly, or brush on Mod Podge.
- Let dry and stack with a ribbon for gifting.
10. Paper Patch Butterfly Suncatchers
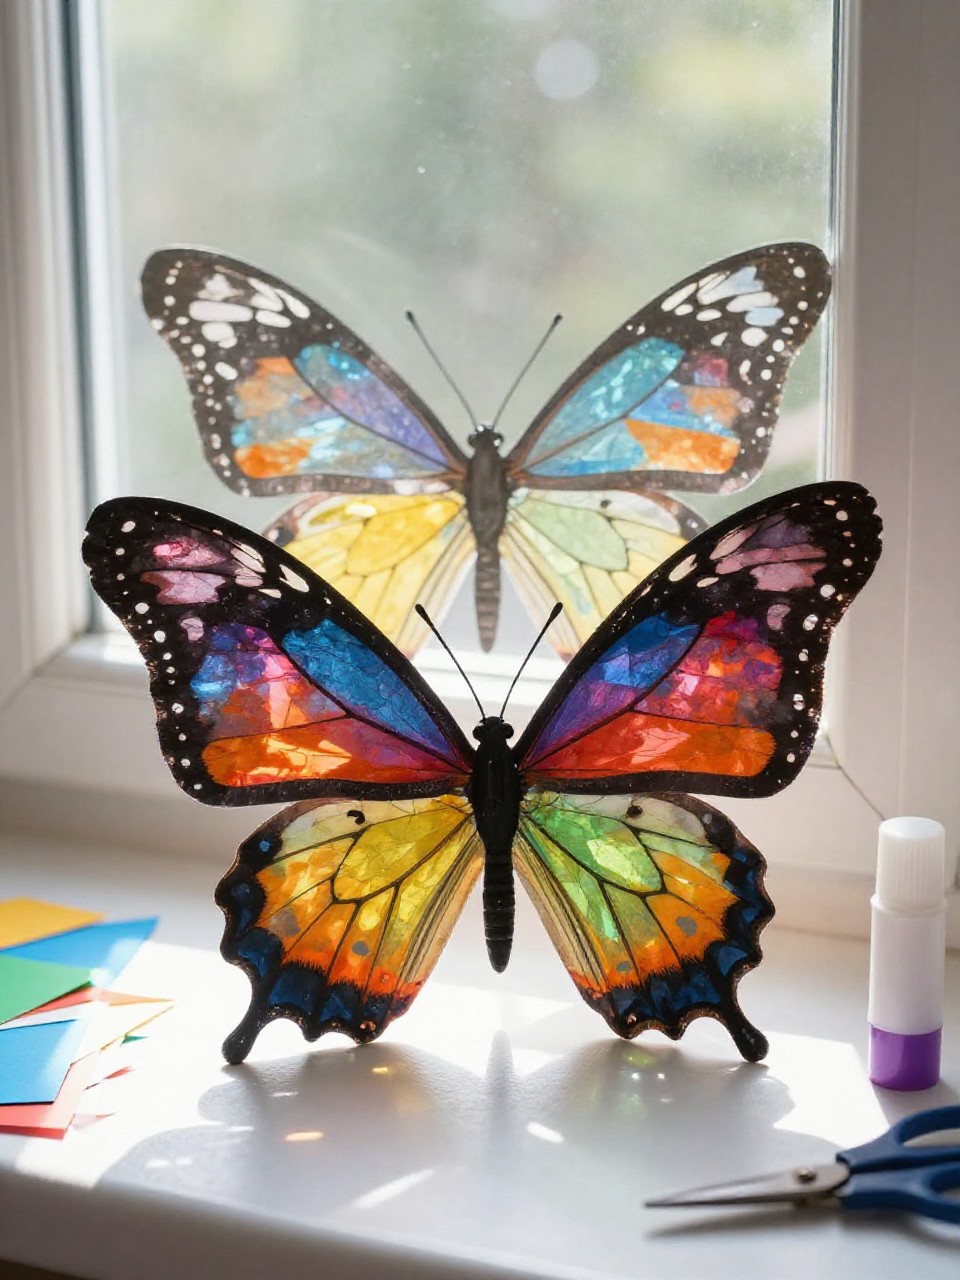
These butterflies have wings filled with small scrapbook paper “patches” arranged like stained glass. Kids enjoy choosing light, bright patterns that glow nicely on a window.
Materials Needed:
- Black cardstock (for outline)
- Scrapbook paper scraps
- Scissors
- Glue stick
- String or clear tape for hanging
How to make it:
- Cut a large butterfly outline with open wing spaces from black cardstock.
- Glue small scrapbook paper pieces behind the openings.
- Trim extra paper and add body and antenna details.
- Tape to a sunny window or hang with string.
11. Layered Scrapbook Paper Gift Tags
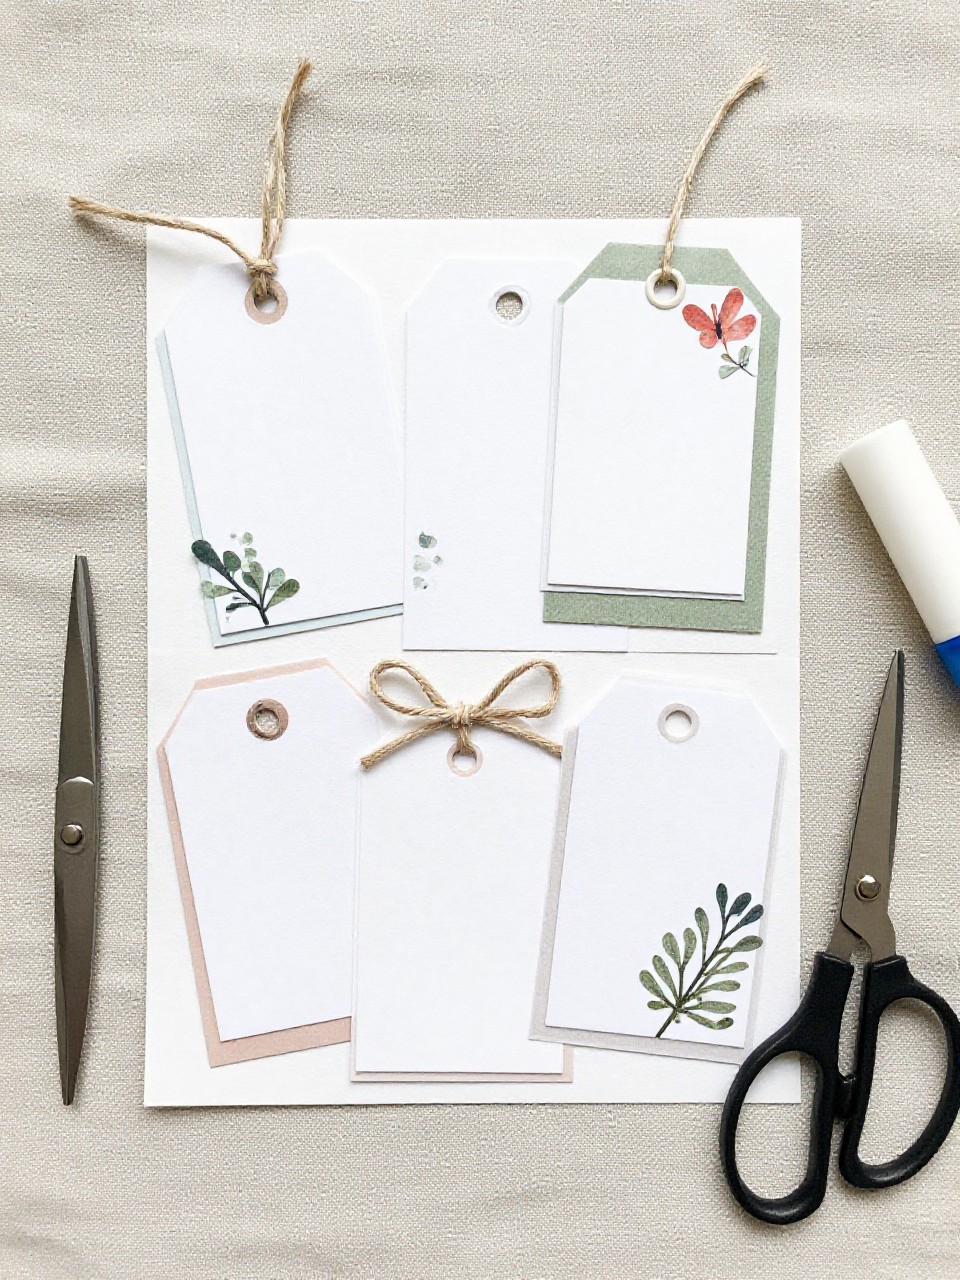
These chunky tags feature a solid base with a smaller patterned layer and a tiny shape on top. It’s a quick make that turns any gift into something special.
Materials Needed:
- Scrapbook paper (solids and patterns)
- Hole punch
- Twine or ribbon
- Scissors or tag punch
- Glue stick
How to make it:
- Cut tag shapes from sturdy paper; punch a hole at the top.
- Add a smaller rectangle or banner on top; glue.
- Glue a tiny heart, star, or leaf cutout for a 3D look.
- Thread twine and let dry under a book to flatten.
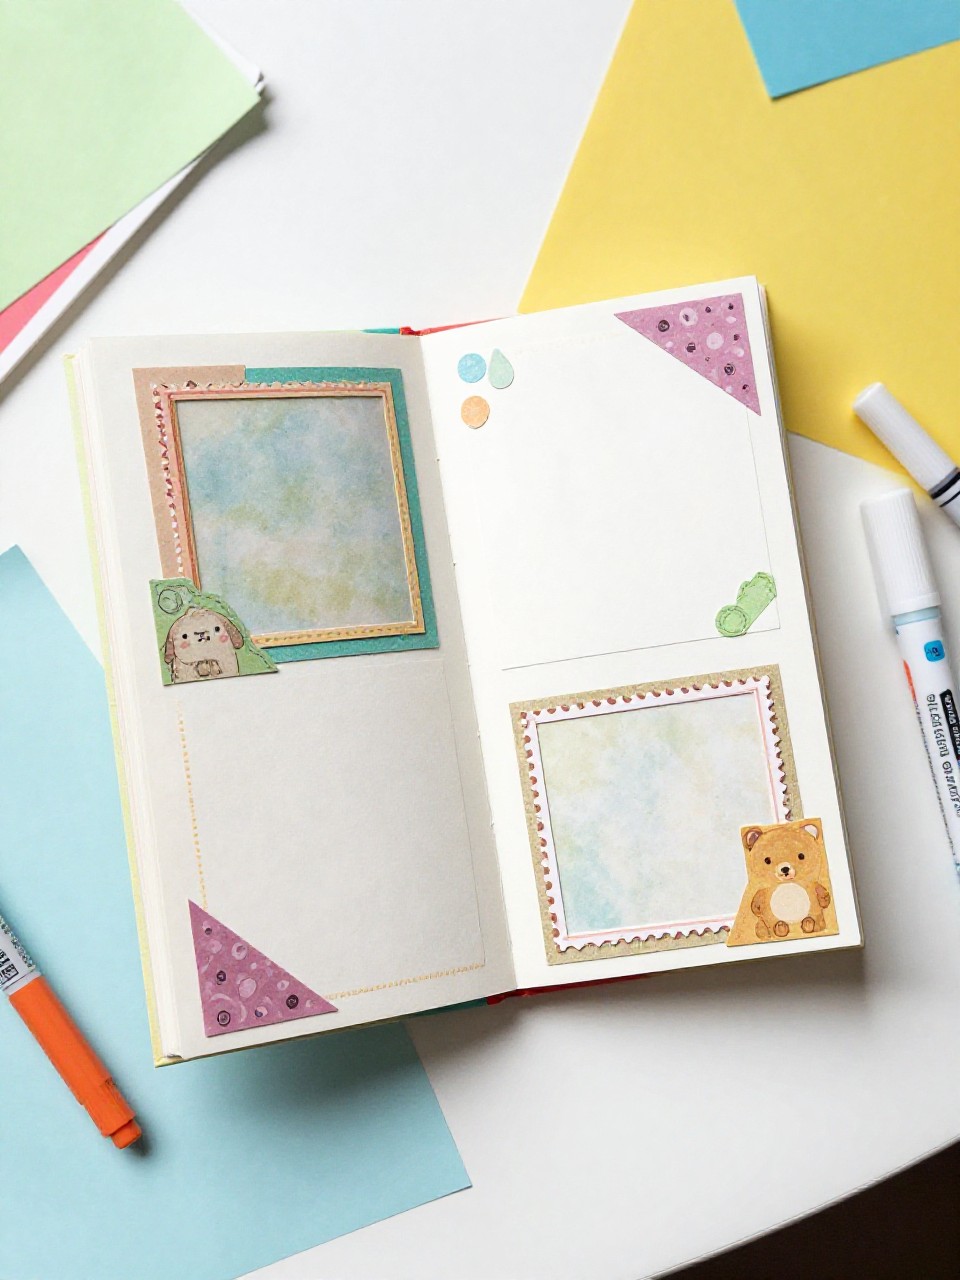
12. Scrapbook Paper Organizer Pockets
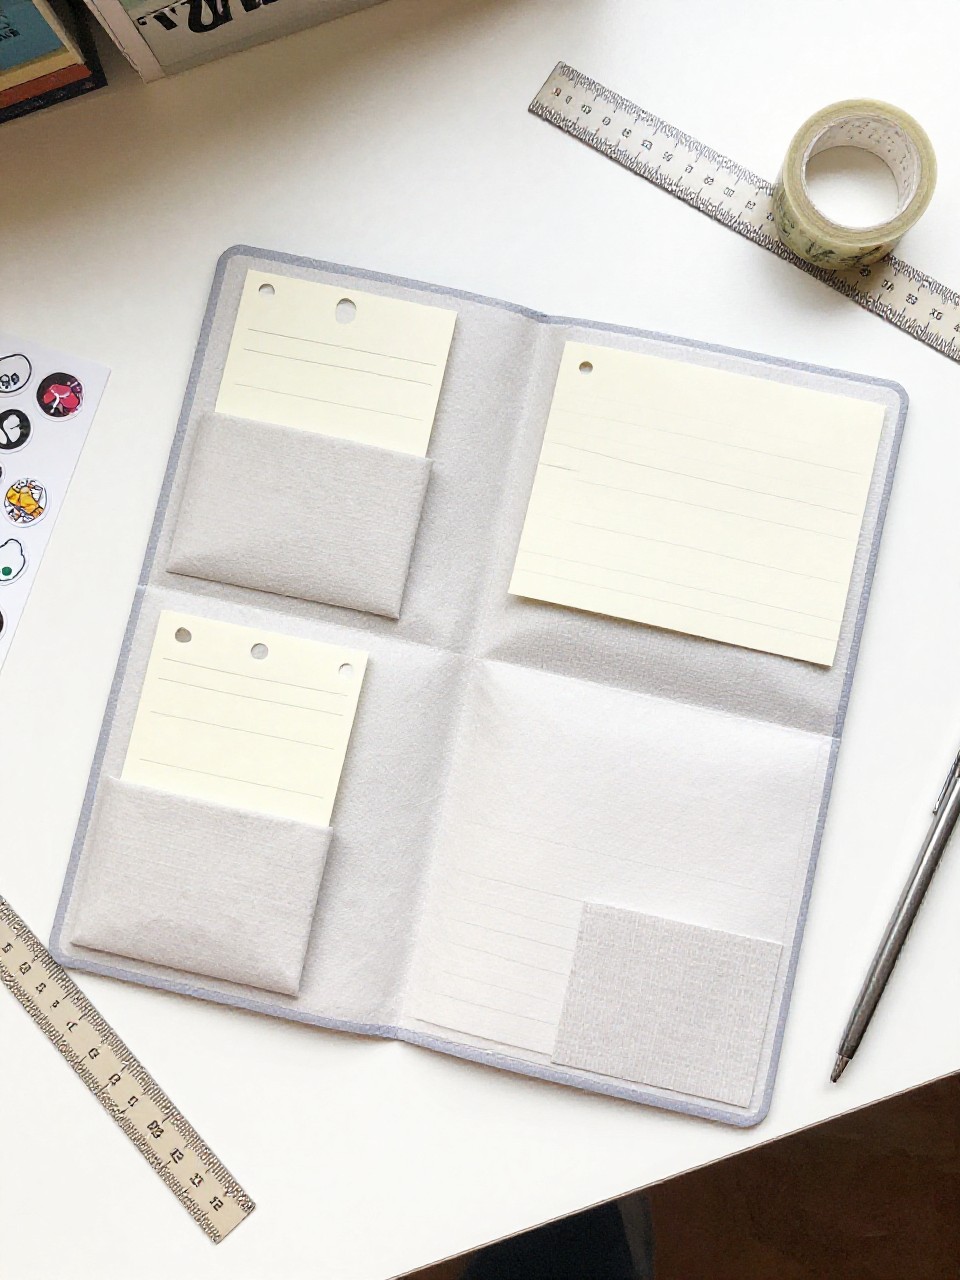
These pockets stick inside notebooks or on the wall and hold notes, stickers, or task cards. Kids like customizing a study space, and teachers can label pockets by subject.
Materials Needed:
- Sturdy scrapbook paper
- Ruler and pencil
- Double-sided tape or glue
- Stickers or labels (optional)
- Scissors
How to make it:
- Cut a rectangle for the back and a slightly shorter one for the pocket front.
- Fold side and bottom tabs on the pocket front.
- Tape or glue tabs to the back piece to form a pocket.
- Label and attach to a notebook page or bulletin board.
13. Confetti Scrapbook Paper Cards
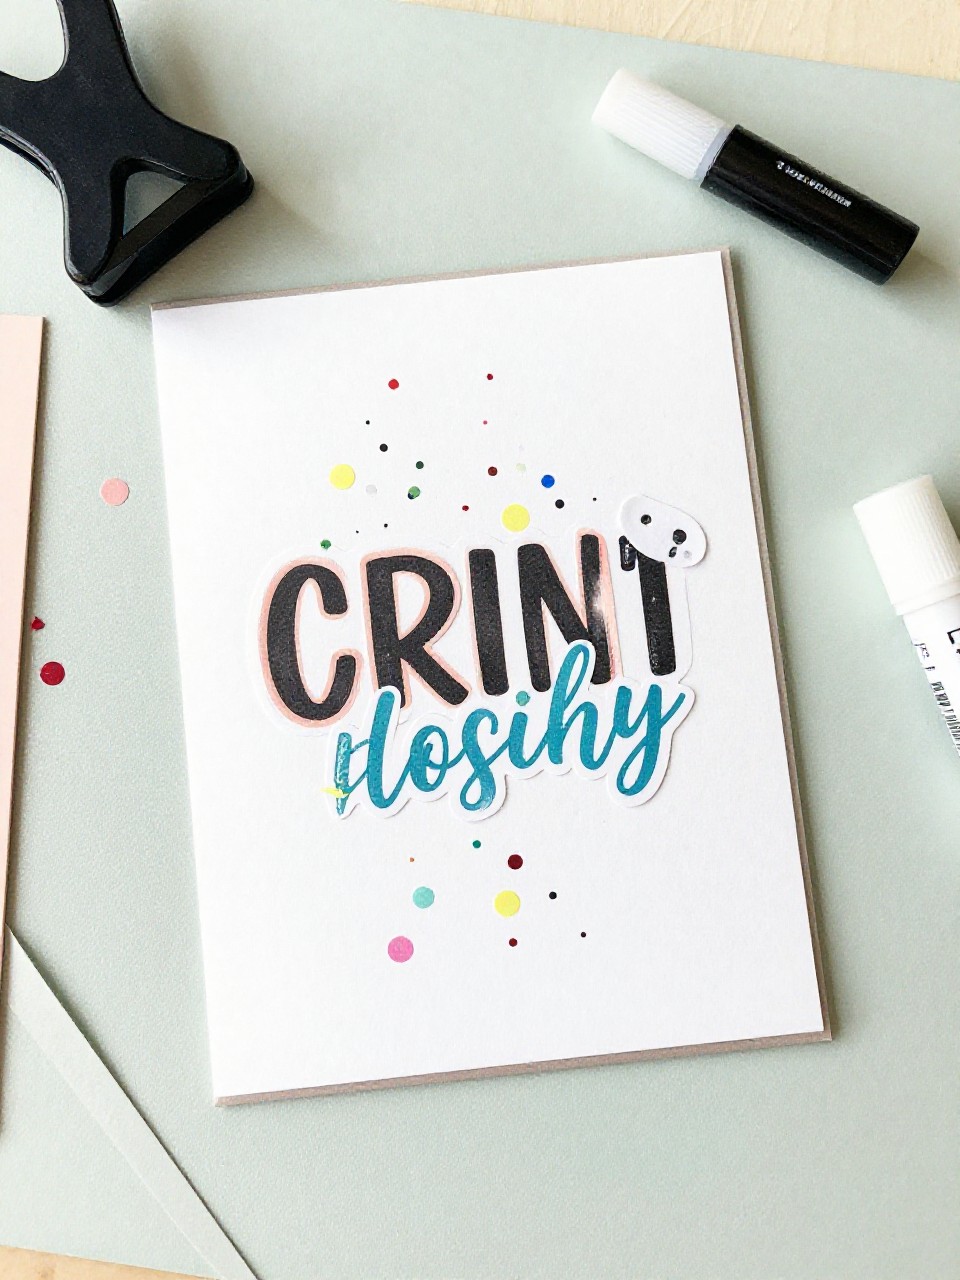
These cards are sprinkled with tiny punched paper confetti and a bold word across the front. Kids love the sprinkle-and-glue step and making quick cards for any occasion.
Materials Needed:
- Blank cards or folded cardstock
- Scrapbook paper scraps
- Craft punch or hole punch
- Glue stick
- Alphabet stickers or marker
How to make it:
- Punch lots of tiny circles or shapes from scraps.
- Spread glue in a band or corner and sprinkle confetti; press lightly.
- Add a large word like “HI,” “YAY,” or “THANKS.”
- Let dry flat and pair with a handmade envelope.
14. Patterned Paper Photo Corners Collage
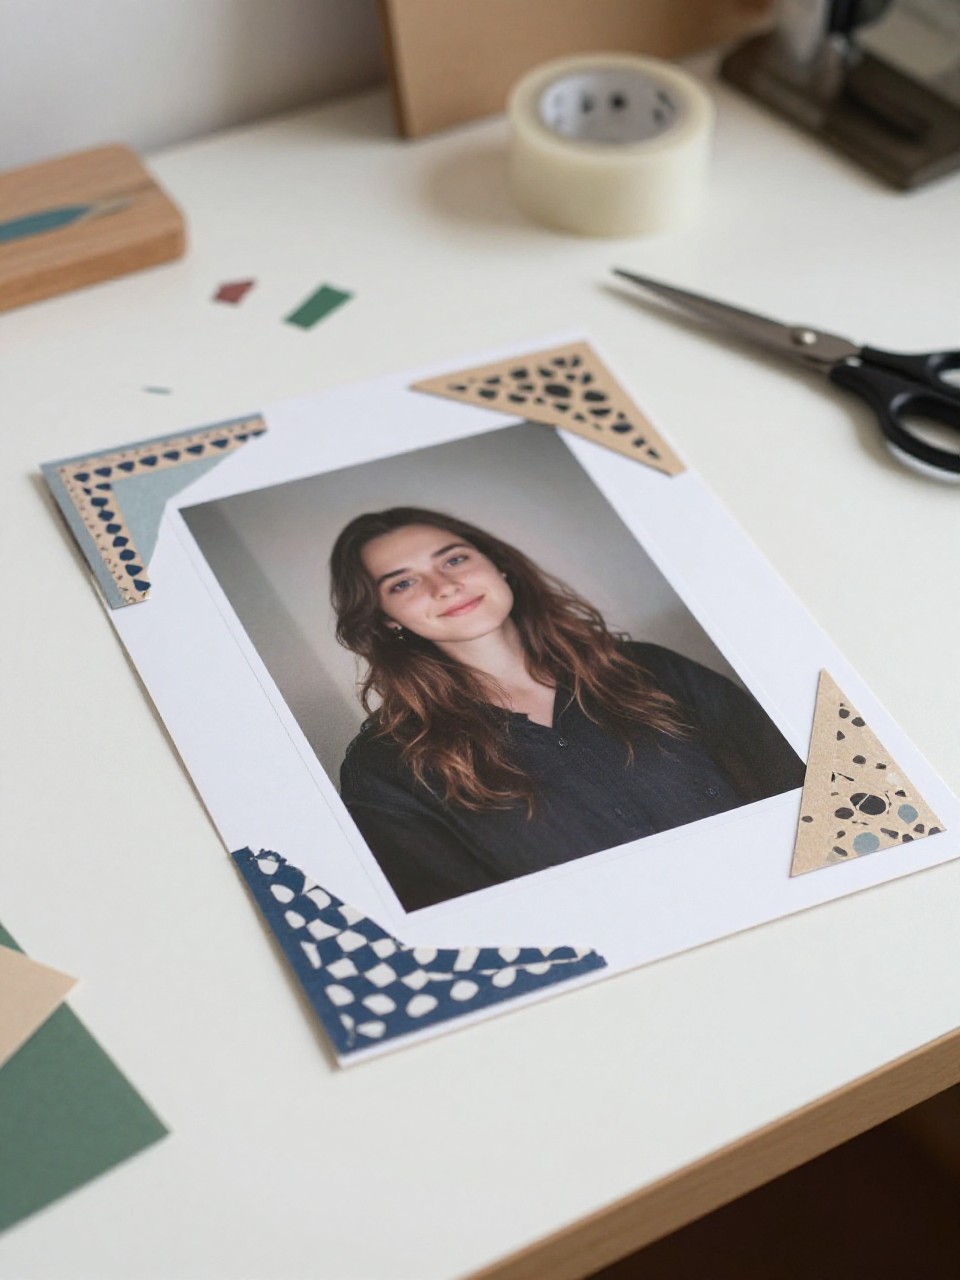
This collage frames a photo with decorative paper corners, arrows, and tabs arranged on a larger backing. It feels like building a mini scrapbook page, great for memory-keeping without a whole album.
Materials Needed:
- Scrapbook paper (coordinating pack works best)
- One printed photo
- Glue stick or double-sided tape
- Scissors
- Ruler and corner rounder (optional)
How to make it:
- Mount the photo on a solid paper mat slightly larger than the photo.
- Cut triangles for photo corners, arrows, and label tabs from patterns.
- Arrange around the photo and glue firmly.
- Round the backing corners and display in a frame or binder.
15. Scrapbook Paper Woven Placemat
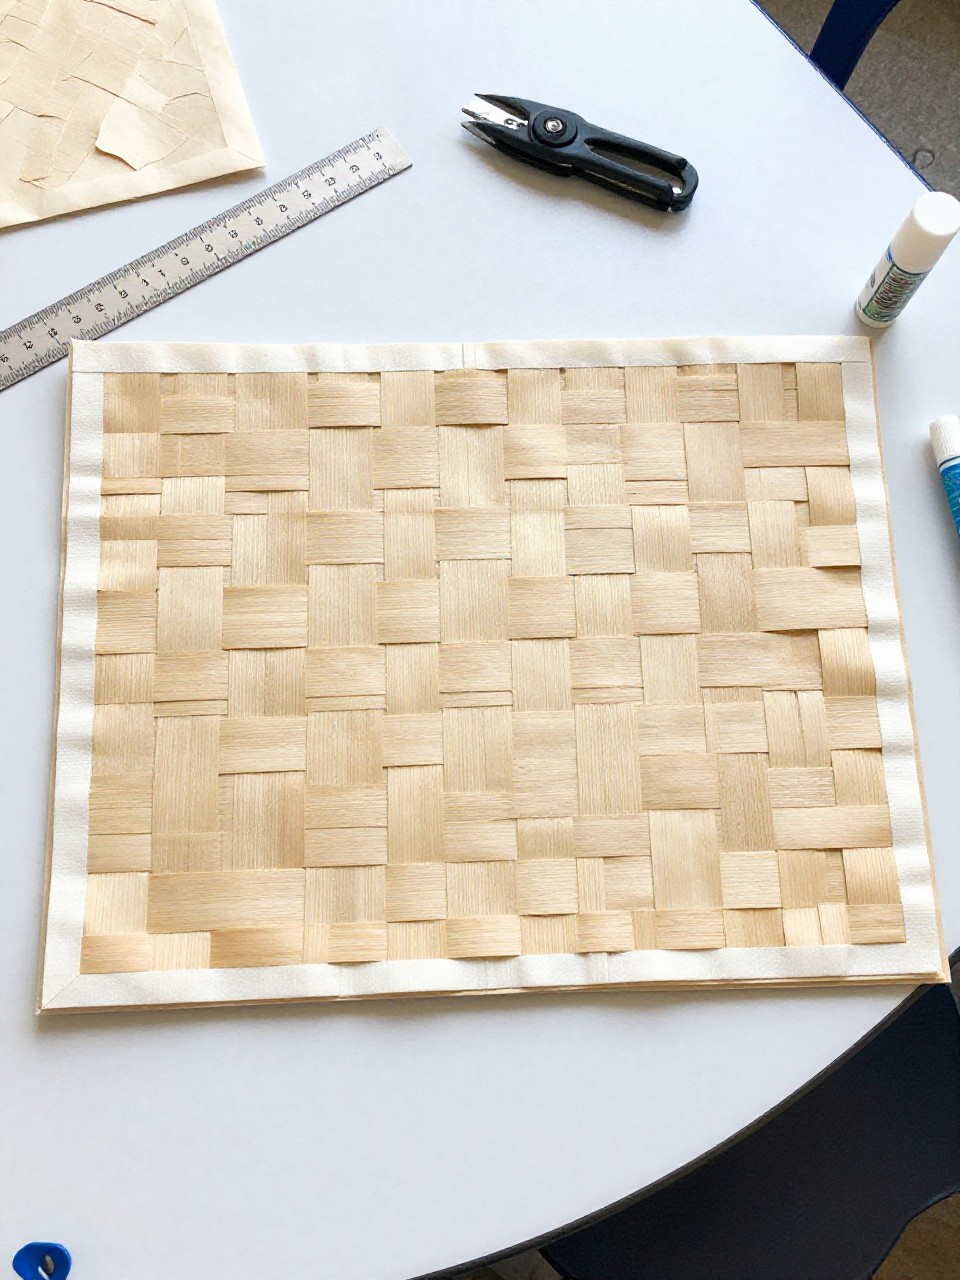
This placemat looks like a colorful basket weave made from thick paper strips in two or three patterns. Kids enjoy the over-under weaving rhythm and seeing the design appear row by row.
Materials Needed:
- Heavy scrapbook paper sheets
- Ruler and pencil
- Scissors or paper trimmer
- Glue stick or tape
- Clear contact paper (optional for durability)
How to make it:
- Cut one sheet into vertical slits, stopping 1 inch from the top edge to make a loom.
- Cut another sheet into 1-inch strips; weave over-under across the loom.
- Push rows snugly and glue strip ends on the back.
- Seal with clear contact paper for wipeable placemats.