


Table of Contents Show
Rhinestones can turn ordinary items into sparkling masterpieces with just a few simple steps. These small, shiny gems work well on almost any surface and cost very little to buy.
Adding rhinestones to your crafts gives you an easy way to make custom accessories, home decor, and gifts that look expensive but cost much less.
From phone cases to shoes, rhinestones can make any project shine. I’ll show you how to work with different materials like fabric, glass, and paper using basic tools you likely already have at home. These projects are beginner-friendly and take just a few hours to finish.
1. DIY Rhinestone Headbands

I love making rhinestone headbands because they’re so easy and add instant sparkle to any outfit. They cost almost nothing to make and look amazing.
Grab a plain headband, rhinestone trim, and strong craft glue. I usually go for fabric-covered headbands since the glue grabs better.
Measure your rhinestone trim against the headband and cut it to fit just right across the top where you want it to shine most.
Run a thin line of glue along the headband, then press the rhinestone trim down, starting at one end and working across. Hold each section for about 10 seconds so it sticks. Leave the headband to dry for at least 30 minutes before wearing.
2. Rhinestone Embellished Phone Cases

I always have fun making rhinestone phone cases—they’re simple and give my phone a little personality. Plus, I can swap them out whenever I want.
I like to start with a clear phone case so the rhinestones really pop.
You’ll need rhinestones in a few sizes, tweezers, and a good adhesive like gem glue. Sometimes I just use old jewelry instead of buying new stones.
I lay out my design first, starting with the bigger stones as the main points and filling in with smaller ones.
Tweezers help me pick up each rhinestone. I dab a little glue on the case, press the stone down, and hold for a couple seconds.
I work in small sections—otherwise, the glue dries before I finish. It keeps the design tidy and the rhinestones secure.
3. Rhinestone Stickers for Paper Crafts

Rhinestone stickers make paper crafts a breeze. You’ll find these at most craft stores—some come in lines, others in shapes.
They’re perfect for jazzing up greeting cards. I just peel the backing and stick them onto cardstock. Birthday cards suddenly look fancy.
Scrapbook pages pop with rhinestone stickers. I like to frame photos or run them along borders—no glue mess to worry about.
Even plain bookmarks look special with a few rhinestones. I stick them to cardstock bookmarks, and the sparkle catches the light while I read.
Gift tags? Just add a few rhinestone stickers to kraft tags and suddenly your gift looks way more luxe.
4. DIY Rhinestone Gift Wrap

Plain gift wrap gets old fast. I like to jazz up presents with rhinestones—it’s easy and makes them feel extra special.
Brown paper works well, but honestly, any color wrapping paper will do.
Pick rhinestones in a few sizes. Small ones are great for details, big ones for bold designs.
Try simple patterns like hearts or stars, or just scatter them randomly. Let the rhinestones dry all the way before you pass the gift along.
5. Rhinestone Curtain Decorations

Rhinestone curtains totally change a room’s vibe. Bigger rhinestones work best—tiny ones just get lost in the fabric.
I pick a plain curtain, usually white or cream, and lay it flat to plan my design. Simple waves or lines look great.
I use fabric glue for each rhinestone, pressing for about 10 seconds so it sticks. Once it’s dry, I hang the curtains and let the sunlight do the rest. The sparkle is so satisfying.
6. Rhinestone Clips and Hair Accessories

Making sparkly hair accessories is just plain fun. They give any hairstyle a little something extra.
For basic clips, I grab plain metal ones, dab on jewelry glue, and press rhinestones right on. They’re dry in about 10 minutes.
With claw clips, I like to cover them in rows of rhinestones—starting at the bottom and letting each row dry before adding another.
Barrettes are perfect for patterns. I sketch a quick design, then glue on rhinestones in different colors. It takes some patience, but the results are worth it. Plus, they make awesome gifts.
7. Rhinestone Mason Jar Vases
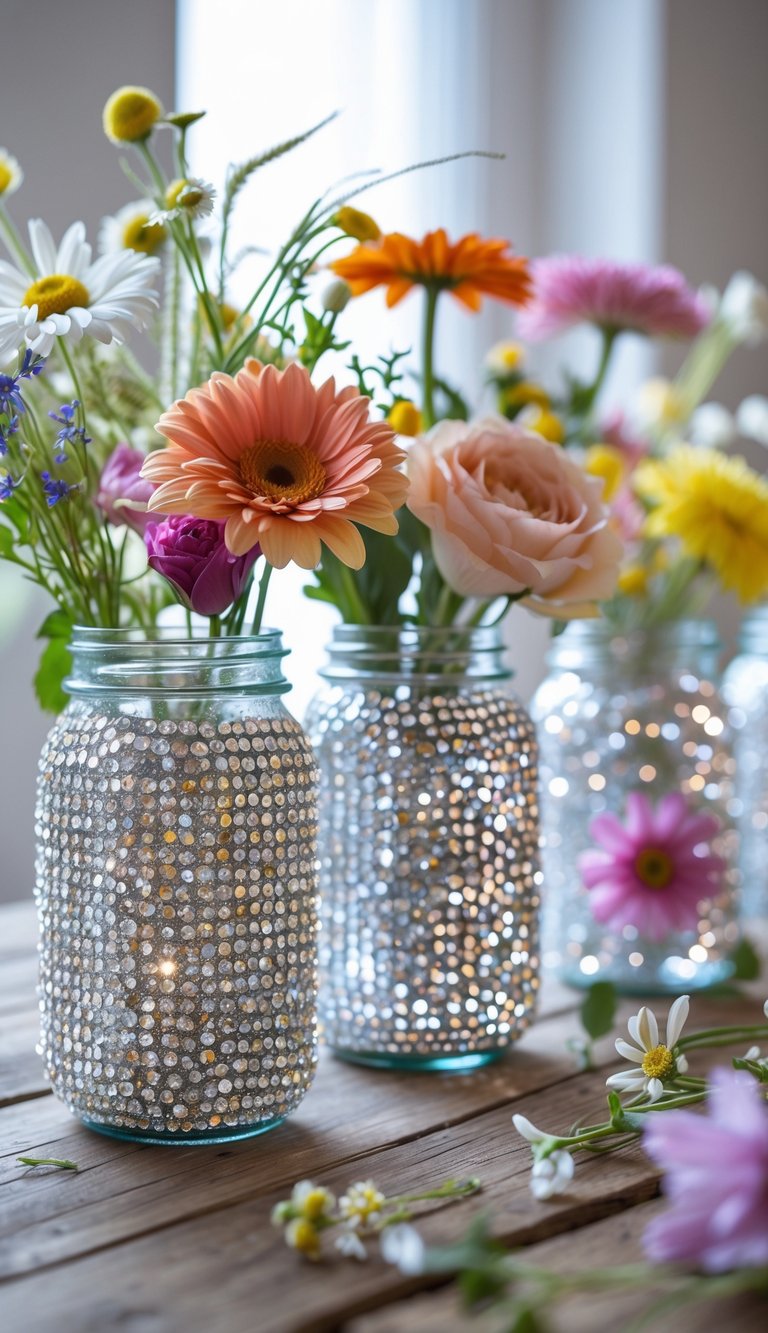
Mason jar vases with rhinestones? Yes, please. They brighten up any room and catch the light in the prettiest way.
I start with clean jars, then add craft glue in small areas around the jar. I press rhinestones in while the glue’s wet, working in rows to keep things even.
Clear rhinestones look classic, but colored ones are fun for a theme. Let the glue dry before you add flowers or water—trust me on that.
8. Rhinestone-Accented Tote Bags
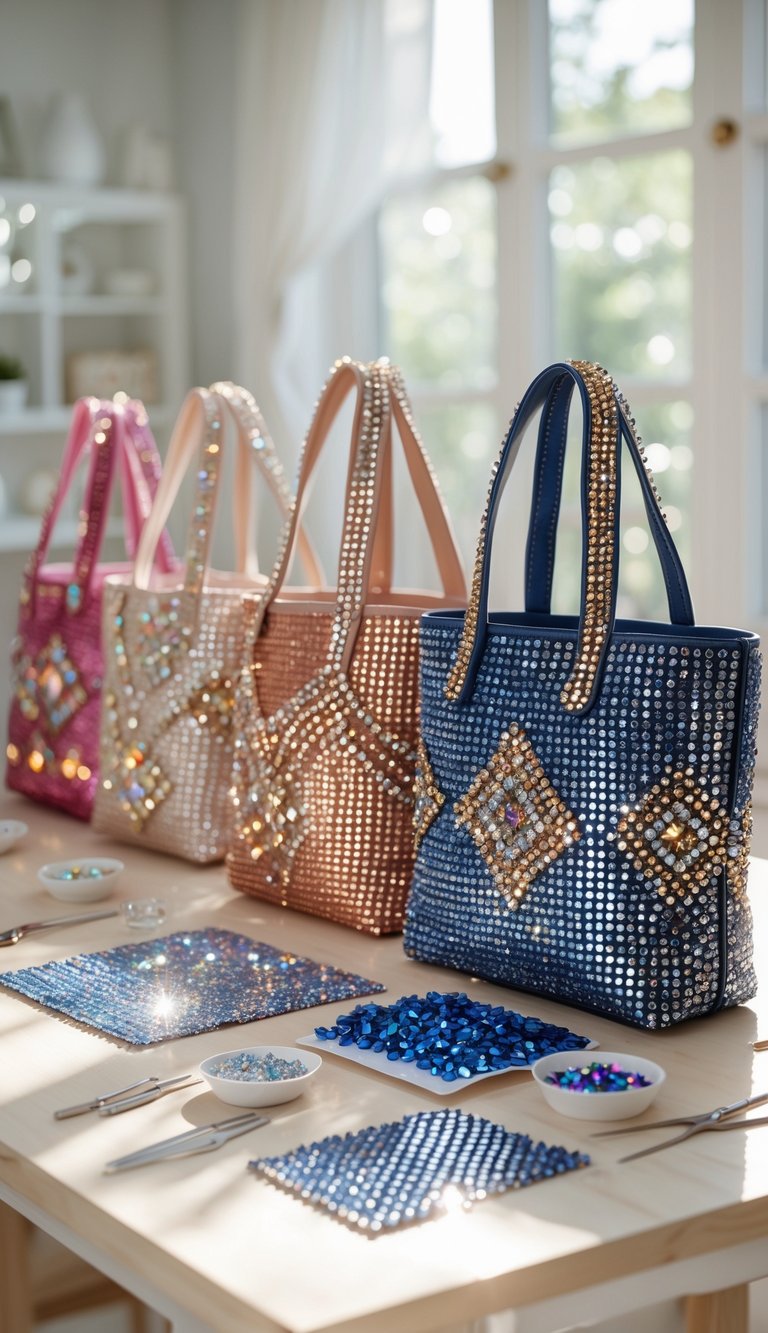
I love rhinestone tote bags—they’re easy to make and always get compliments. Any canvas tote will work.
Pick a design. For beginners, I’d say stick to flowers or geometric shapes.
Clean the tote first, then sketch your pattern lightly in pencil.
Apply fabric glue to small spots and press rhinestones on one by one. Take your time so they stay straight. Let it dry fully before you use the bag.
9. DIY Rhinestone Shoes

Adding rhinestones to shoes is such a satisfying upgrade. Sneakers, heels, flip-flops—they all work.
You’ll need rhinestones, a strong glue like E6000 or Gem-Tac, and tweezers. Clean the shoes first, then dot on glue where you want the sparkle. Place each rhinestone with tweezers and press gently. Let them dry all the way before you wear them out.
10. Rhinestone-Encrusted Sunglasses
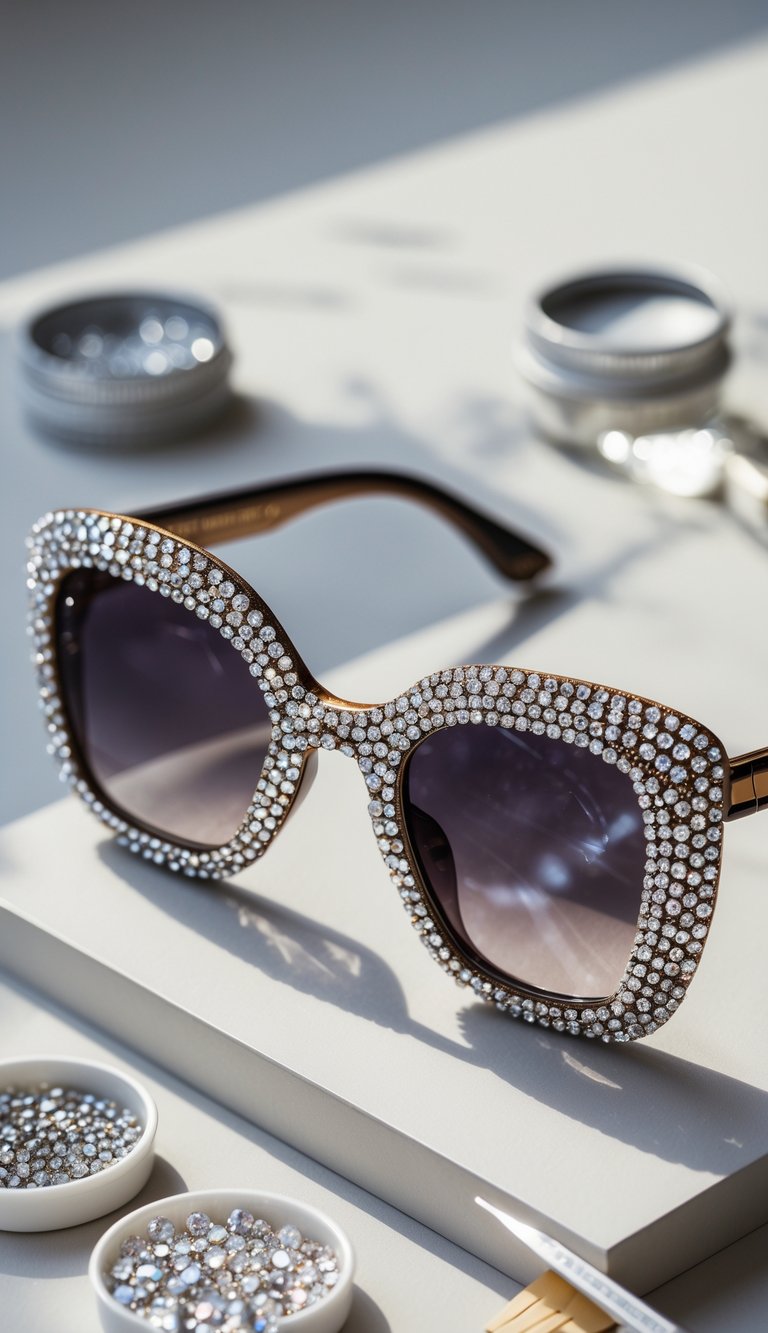
Sparkly sunglasses? So easy. Grab plastic frame sunglasses, rhinestones, and strong glue.
I clean the frames first, then lay out my rhinestones to see what looks good before gluing. Using a toothpick, I dab on glue, press each rhinestone, and hold for a few seconds. The result is always a conversation starter.
11. Rhinestone-Framed Photo Displays

Photo frames just look better with rhinestones. They turn boring frames into something you actually want to put on display.
Start with a clean wooden or plastic frame. Make sure it’s dry before you start adding rhinestones.
Dot craft glue along the edges and press rhinestones in place one by one. Tweezers help with precision and keep your fingers from getting sticky.
If you want something even easier, try rhinestone sticker sheets—just cut to size, peel, and stick.
Mix up rhinestone colors for a rainbow look, or go with silver, gold, or clear for something more classic. Let the glue dry for a full day before you handle the frame so you don’t lose any sparkle.
12. Rhinestone-Decorated Notebooks

Honestly, I get a kick out of making plain notebooks sparkle with rhinestones. Suddenly, boring school supplies become a little more fun—maybe even a bit glamorous.
I usually grab a plain notebook with a smooth cover. Wipe it down with a damp cloth, let it dry—don’t skip that part or the glue gets weird.
Before I commit, I lay out my rhinestones on the cover to see how the pattern will look. No glue yet—just moving them around until I’m happy.
I stick each stone on with craft glue or rhinestone adhesive, pressing down for a few seconds so they stay put. It’s a bit fiddly, but oddly satisfying.
Whenever I want straight lines, I cheat and use a ruler as a guide. I dab little dots of glue along the ruler and press rhinestones into place one by one.
Then I just leave the notebook alone for at least an hour. If I mess with it too soon, I end up chasing runaway rhinestones across my desk.
13. Rhinestone Jewelry Making
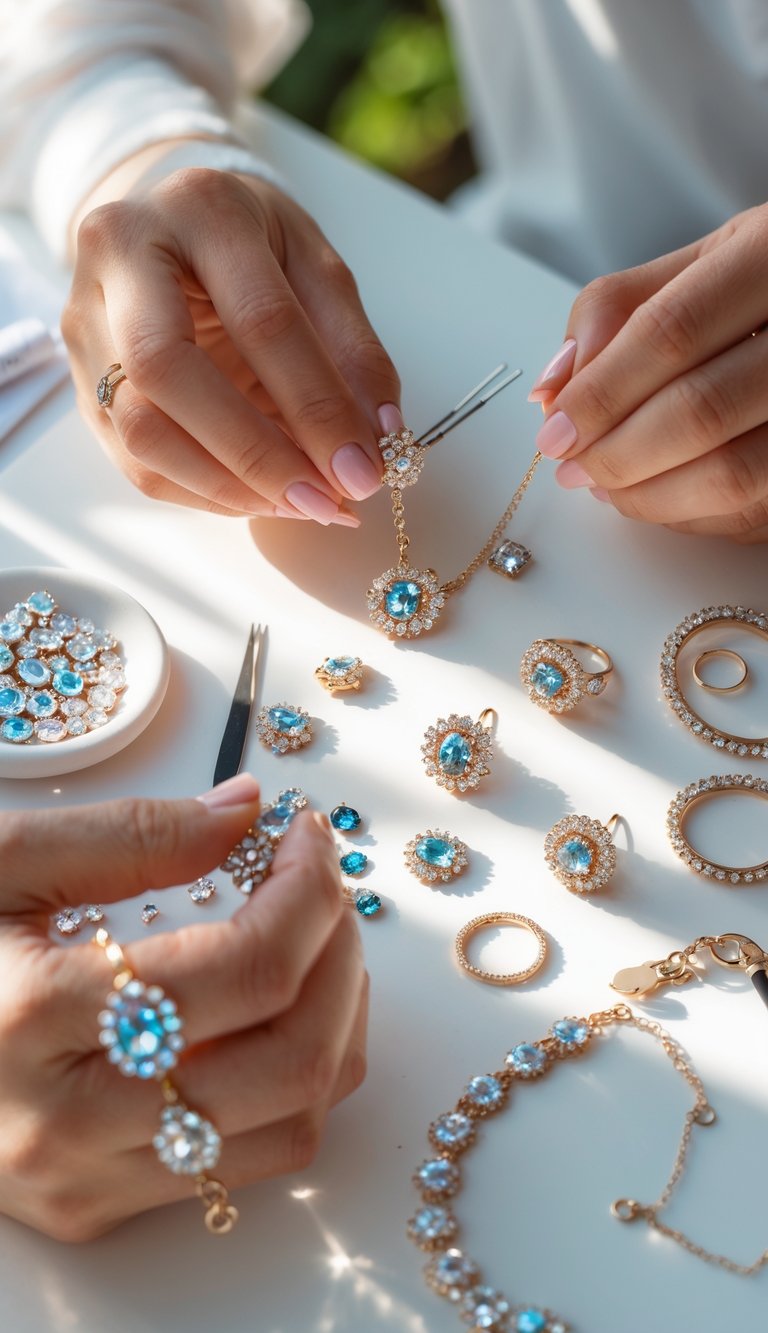
I’ve gotten hooked on making my own rhinestone jewelry—it saves money, and honestly, it’s just fun to have pieces no one else does. Earrings, bracelets, necklaces—you don’t need much to get started.
For earrings, I grab some earring hooks and glue rhinestones right on. It’s easy to pick shapes and colors that fit my mood or outfit.
When I make bracelets, I use memory wire and rhinestone beads. The wire keeps its shape, so every bracelet fits just right—no measuring or fussing.
Necklaces are a bit more work. I’ll glue rhinestones onto a fabric or metal backing—black makes the rhinestones stand out and look fancy, if you ask me.
You really only need the basics: rhinestones, jewelry wire, earring hooks, and some strong glue. Most craft stores have all of it, though sometimes I end up ordering online if I want something weirdly specific.
14. Rhinestone Nail Art Designs

I can’t resist adding some sparkle to my nails with rhinestones. Even a basic manicure feels special with a little bling.
I start with clean, dry nails and slap on my base color. It’s tempting to rush, but I let it dry all the way before moving on.
Then I use nail glue or a clear top coat to stick on tiny rhinestones. Tweezers or a dotting tool make it way easier—otherwise, I just end up dropping them everywhere.
Sometimes I’ll just put a single rhinestone on each ring finger. It’s understated, but still catches the light.
For a little flower, I arrange five small rhinestones in a circle and pop a different color in the center. Not hard, but it looks pretty cute.
If I’m feeling extra, I’ll line up rhinestones along the nail tip for a twist on a French manicure. You can match them all or mix up the colors—depends on the mood.
Always finish with a clear top coat. Otherwise, those rhinestones won’t last, and you’ll find them in the weirdest places later.
15. DIY Rhinestone Costume Trims

Rhinestone trim? It instantly gives costumes that pro-level sparkle. I’ve used this trick on dance costumes, theater looks, and even a few party outfits—works like a charm every time.
First, grab your measuring tape and figure out exactly where you want the trim. Snip your rhinestone trim to size, and maybe add an extra inch just in case you need a little wiggle room.
Squeeze a thin line of fabric glue along the edge or seam. Then, starting at one end, press the rhinestone trim down and keep going along the line—don’t rush it. Let it dry all the way before you even think about wearing it. Trust me, patience pays off here.