


Table of Contents Show
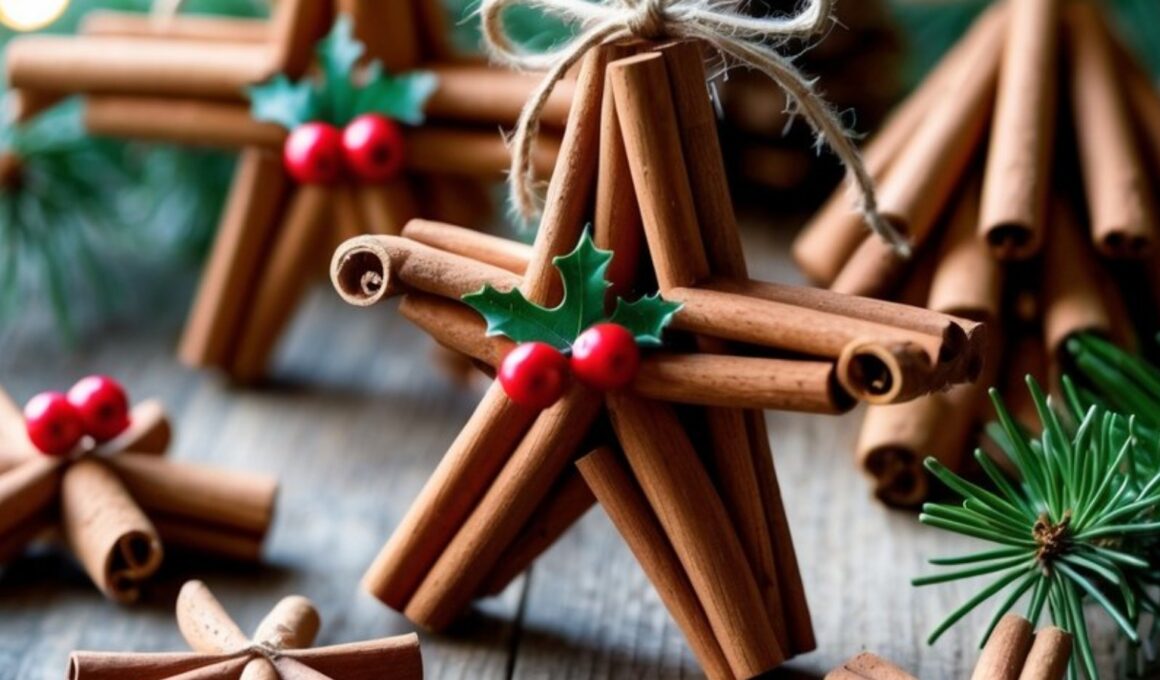
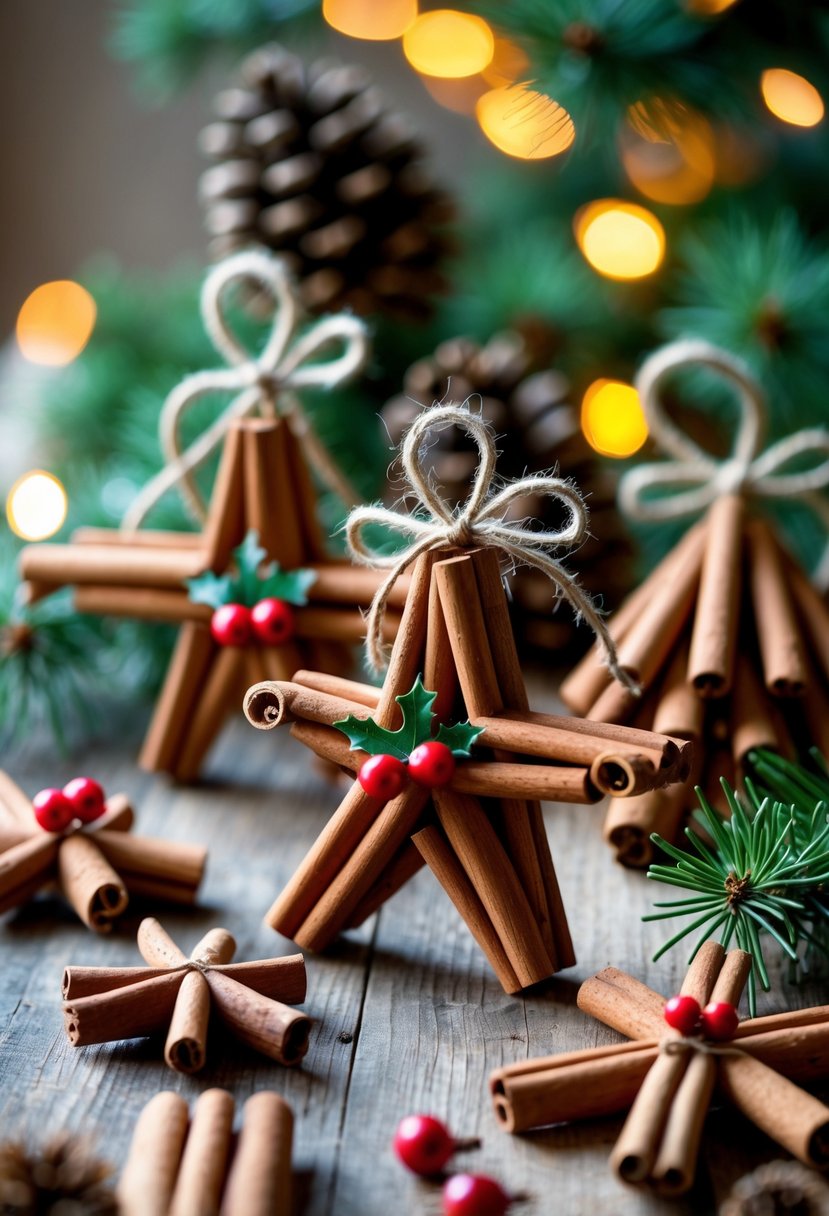
These cinnamon stick ornaments bring warmth, charm, and the cozy scent of the holidays right into your home. They’re a beautiful, natural decoration that’s easy to make and perfect for adding a rustic touch to your Christmas tree or gift wrapping.
With just a few materials, you can create simple stars or crosses that fill your space with the classic aroma of cinnamon all season long.
Each ornament looks unique, and you can customize them with berries, greenery, or ribbons to match your holiday theme.
How to Make Cinnamon Stick Christmas Ornaments
This craft is also a great way to spend time with family — especially with kids who love hands-on projects.
For People Who Love to Make Things ✂️
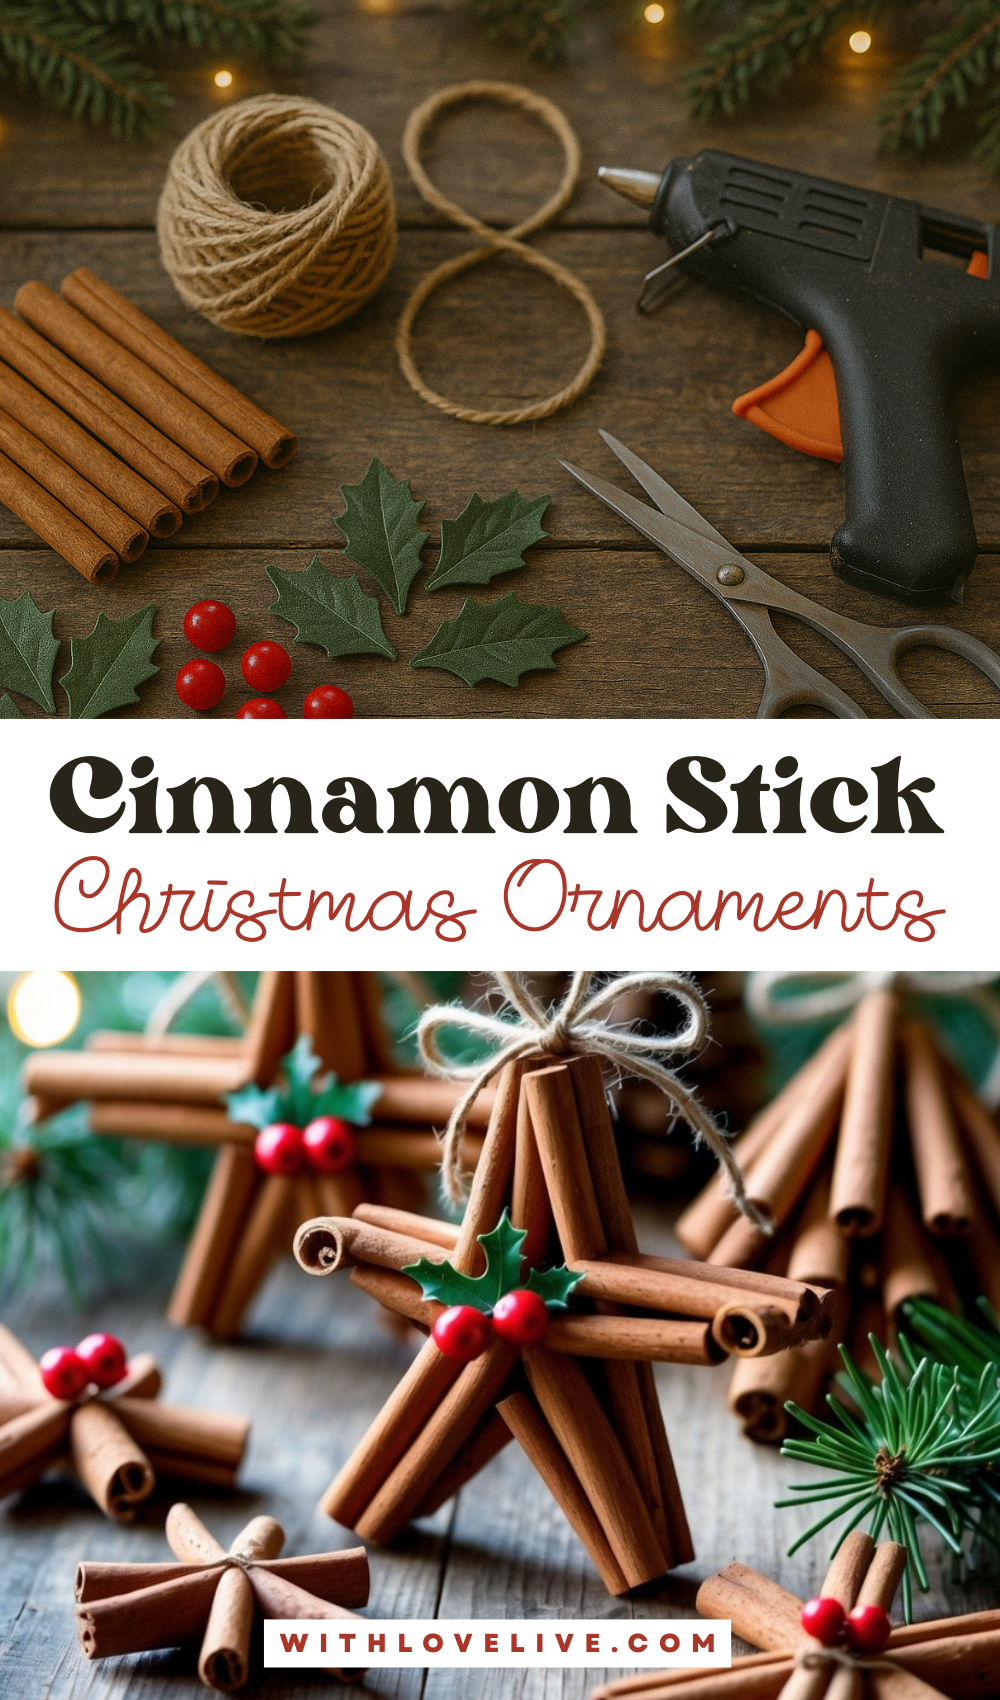
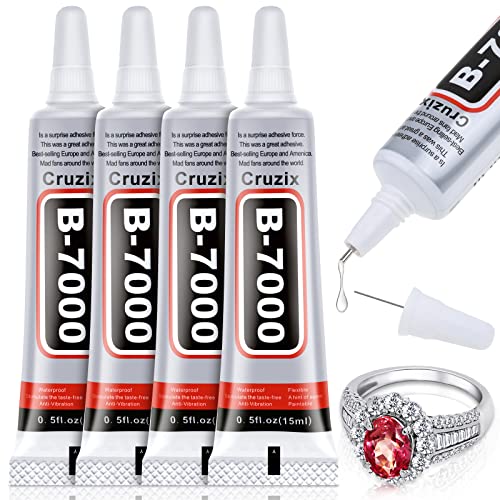
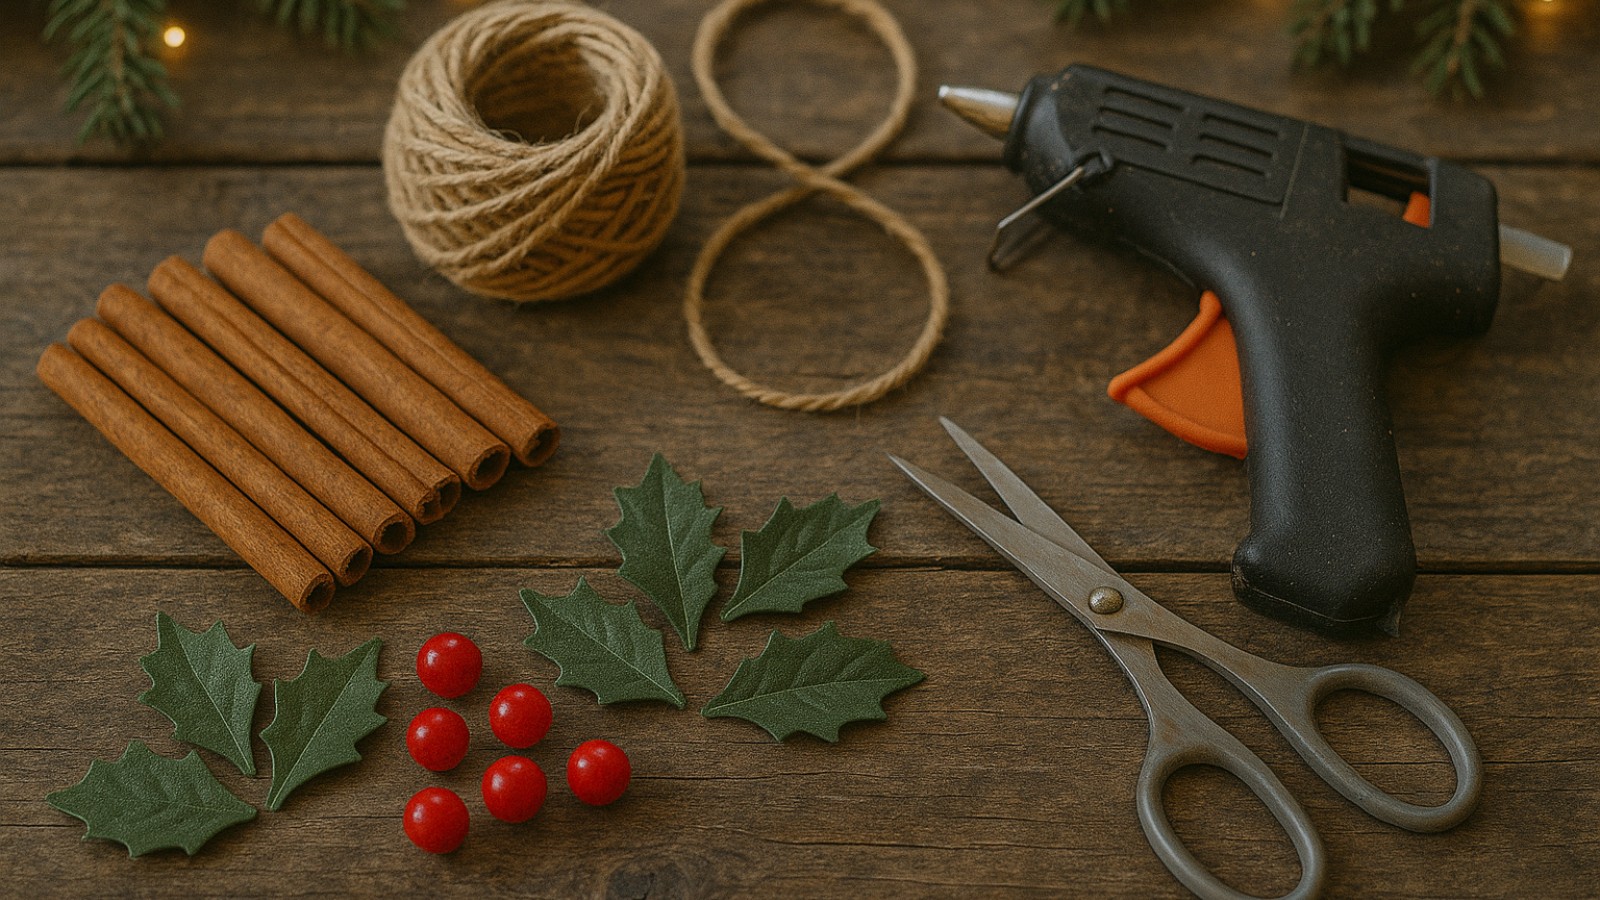
Materials
- Cinnamon sticks (4 to 5 inches long, similar thickness)
- Hot glue gun and glue sticks, or strong craft glue
- Twine or thin jute string
- Small faux holly leaves or red berries (optional)
- Scissors
- Ruler and pencil (optional for measuring and marking)
Shop the materials


The steps
Step 1: Sort and Test the Shape
Lay out your cinnamon sticks on a flat table and sort them by length and thickness so each ornament looks balanced. For a star, choose five sticks.
Place one stick as the base, then build a simple 5-point star by crossing sticks to form a triangle and an inverted triangle.
Do this without glue first. Nudge the sticks until the points feel even and the center looks neat. If any stick is much longer, trim a sliver from the end with sturdy scissors or swap it for a better match.
Step 2: Glue the First Triangle
Lift only the pieces that touch for the first triangle. Add a small bead of hot glue where two sticks cross, then press them together for 8 to 10 seconds so the glue grabs before you let go.
Work around the triangle one joint at a time. If using craft glue, keep light clips or a book nearby to hold pieces flat while they set.
Wipe away any squeeze-out with a toothpick before it hardens so the joints stay tidy.
Step 3: Complete the Star and Reinforce Joints
Set the second triangle on top of the first to form the star. Glue each crossing point the same way, pressing and holding so the layers bond well.
Flip the star over and add tiny dots of glue on the back where sticks meet. This hidden reinforcement keeps the ornament sturdy without changing the look from the front. If a point looks uneven, slide it gently while the glue is still warm and pliable.
Step 4: Add Decoration and Hanger
Cut a 6 to 7 inch length of twine. Tie the ends together to make a loop. Test where the star hangs level by placing the loop at different points, then glue the knot to the top back point. Press and hold until secure.
Add small details like two red berries and a holly leaf near the top point or at the center. A tiny bow of twine also looks nice. Keep decorations small so the cinnamon sticks remain the focus.
Step 5: Cure, Clean Up, and Store
Let the ornament rest flat for 15 to 20 minutes so every joint sets.
Check for glue strings and pull them away once cool. Give the ornament a gentle shake to be sure the hanger is solid. Hang on the tree or tie to a wrapped gift.
If you are making a batch, store finished pieces in a shallow box lined with tissue paper and keep them dry so the sticks hold their scent longer.