Table of Contents Show
I love making cards that aren’t just flat rectangles. Fancy fold cards bring a bit of flair and dimension to your greetings, and honestly, they make your handmade cards feel more special than the usual kind.
Here are 17 DIY fancy fold card tutorials that’ll walk you through different folding techniques so you can create something beautiful for any occasion.
Whether you’re a beginner or you’ve dabbled in card making before, these ideas can help you branch out and experiment.
1. Diamond Flip Fold Card
Prefer an ad-free experience? 😅
Get the Fancy Fold Card Tutorials in a clean, distraction-free PDF you can enjoy without pop-ups or interruptions. Easy to read, easy to follow, and yours to keep.
For People Who Love to Make Things ✂️
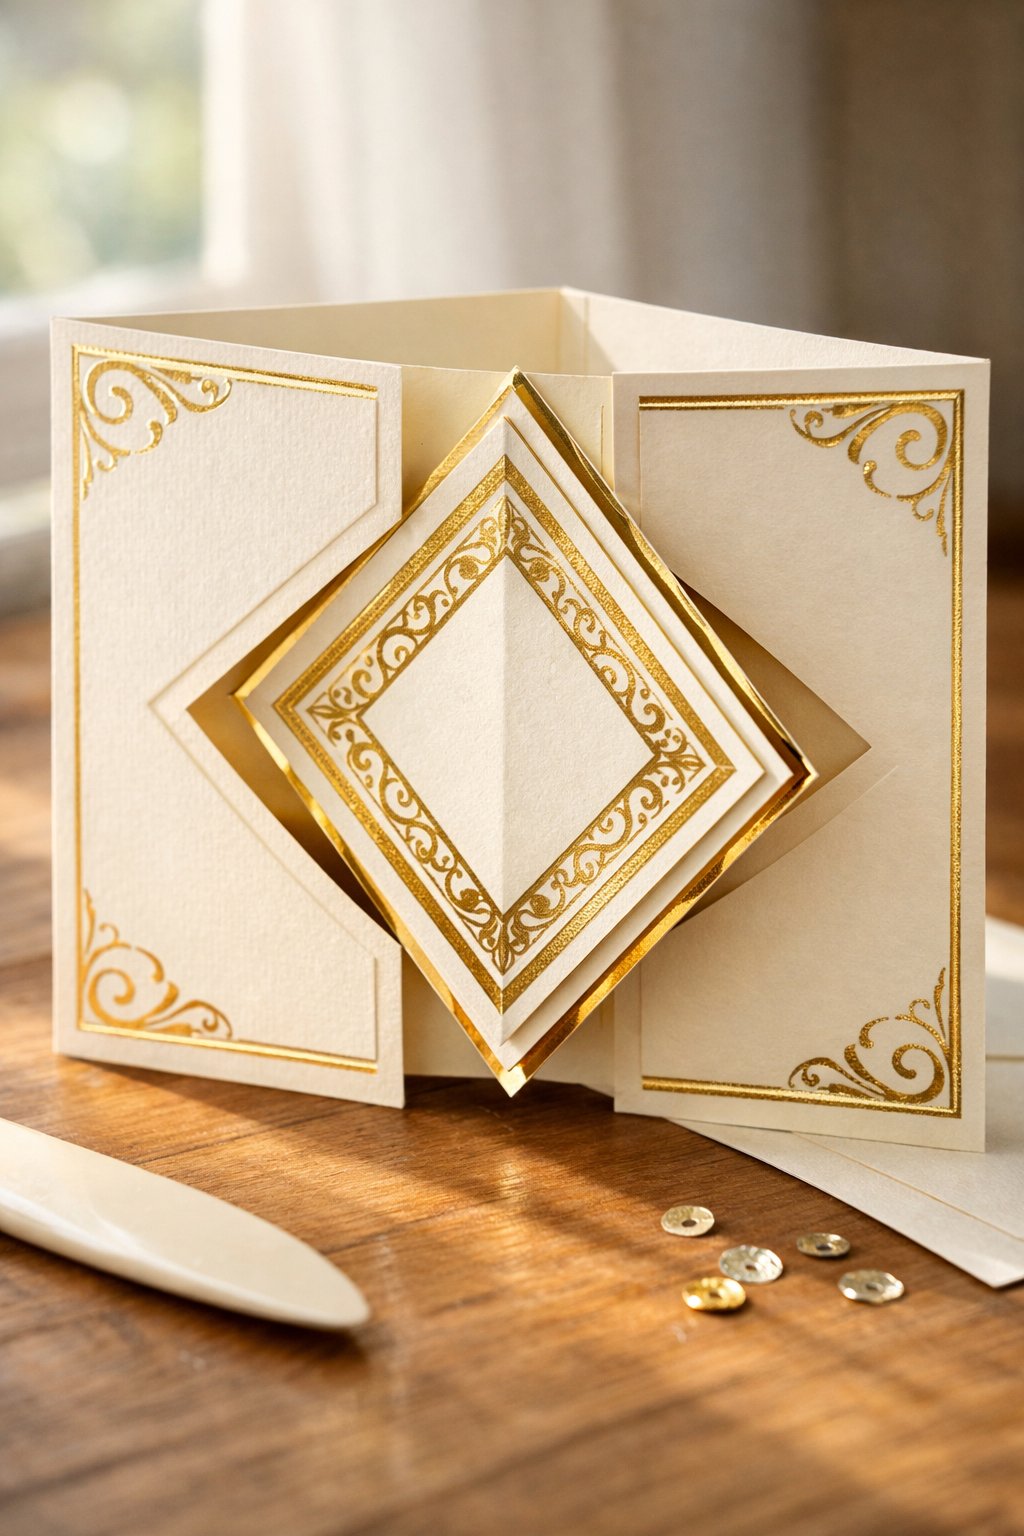
The Diamond Flip card is a showstopper that adds a dynamic, kinetic element to your paper crafting. When the recipient opens the card, a central diamond-shaped panel flips over to reveal a hidden message or image on the other side.
It looks incredibly complex but relies on a clever series of interlocking cuts. It’s perfect for milestone birthdays or “big reveal” announcements where you want the design to do the talking.
Materials needed
- A4 Cardstock (250gsm+)
- Patterned scrapbooking paper
- Paper trimmer with scoring blade
- Strong double-sided adhesive
- Bone folder for crisp creases.
Shop the materials


Steps to make
- Burnish every fold with a bone folder to ensure the card sits flat when closed.
- Start with a standard rectangular card base and mark the center point on the front flap.
- Use a craft knife or trimmer to cut two parallel vertical lines, stopping at the “diamond” height.
- Score diagonally between the ends of your cuts to create the diamond’s “hinge” points.
- Carefully push the diamond section forward while folding the card base backward to “train” the flip mechanism.
- Decorate the diamond panels with contrasting patterns so the “flip” effect is visually striking.
2. Double Z-Fold Card

Want a printable version you can keep by your craft table? 🖨️
This PDF lets you print the tutorials and follow along while you create. No scrolling, no screens, just clear steps you can reuse anytime.
The Double Z-Fold is a variation of the classic Z-fold that adds a secondary, smaller Z-strip across the front. This creates a “bridge” or a stage-like effect, allowing you to layer elements like flowers, characters, or sentiments across multiple planes.
When standing, it occupies significant space, making it a beautiful display piece for a mantel or desk. It’s a favorite for wedding invitations due to its elegant, structural silhouette.
Materials needed
- 12″ x 12″ Cardstock
- Coordinating decorative paper (DSP)
- Stamps or die-cut sentiments
- Paper trimmer and scoring tool
- Liquid glue for precision.
Shop the materials


Steps to make
- Decorate each of the six available panels to create a continuous or multi-layered scene.
- Score your main card base at the 1/4 and 1/2 marks of its total length to create the primary “Z” shape.
- Cut a secondary, thinner strip of cardstock and score it at the same intervals, but fold it in the opposite direction.
- Adhere the left end of the small strip to the far-left panel of the base.
- Adhere the right end of the small strip to the far-right panel of the base.
- Test the mechanism by collapsing the card flat; the two “Zs” should nestle against each other perfectly.
3. Pop-Out Swing Card
Everything in one easy download
Instead of jumping between pages, get all the Fancy Fold Card tutorials neatly organized in one PDF for quick reference and stress-free crafting.
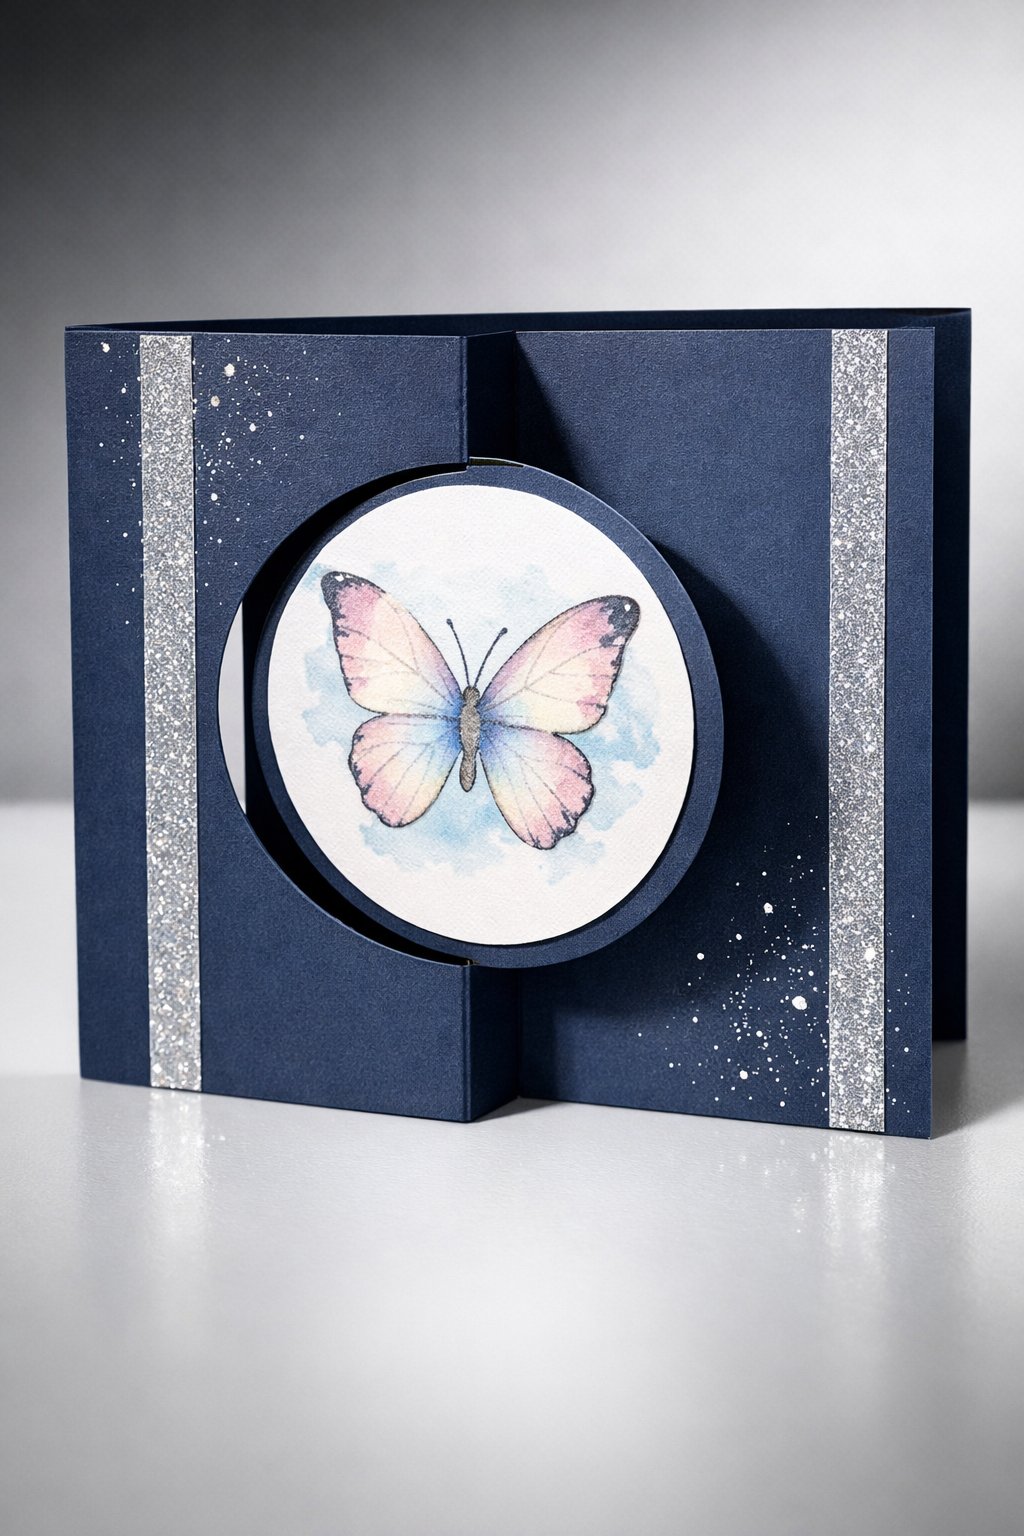
The Swing Card (or Flip-Flop card) uses a partial die-cut or hand-cut shape that stays attached at two points, allowing it to pivot as the card opens. It’s an interactive experience that invites the recipient to play with the moving part.
It’s particularly effective with symmetrical shapes like circles, squares, or hearts. This fold eliminates the need for a separate “inside” message, as the swinging panel serves as both the front and the interior focal point.
Materials needed
- Standard card base
- Circle or Square metal dies (optional)
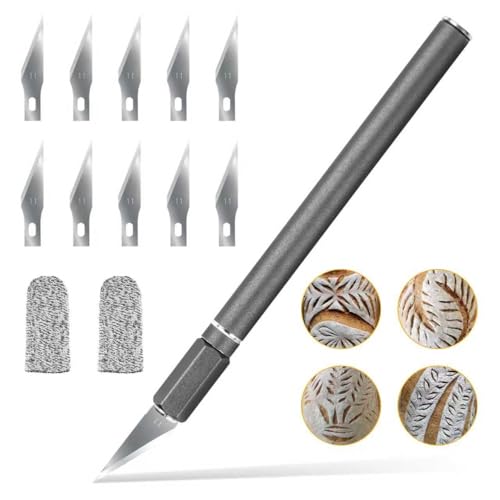
- Cutting mat and swivel craft knife
- Washi tape for masking
- Inks and blending brushes
Shop the materials


Steps to make
- Decorate both sides of the swinging panel to ensure the card looks finished from every angle.
- Place your chosen shape die in the center of the card front, but only run it halfway through your die-cutting machine (partial die-cutting).
- If cutting by hand, cut the top and bottom of your shape, leaving the sides connected to the card base.
- Score a vertical line from the top of your cut to the top of the card, and the same for the bottom.
- Fold the card in half, allowing the “swing” piece to stay flat while the rest of the card moves.
- Burnish the score lines heavily so the swing mechanism moves freely without catching.
4. Triple Cube Pop-Up Card
Learn these folds once and reuse them again and again 👋
This PDF gives you repeatable card designs you can customize for birthdays, holidays, and special moments all year long.
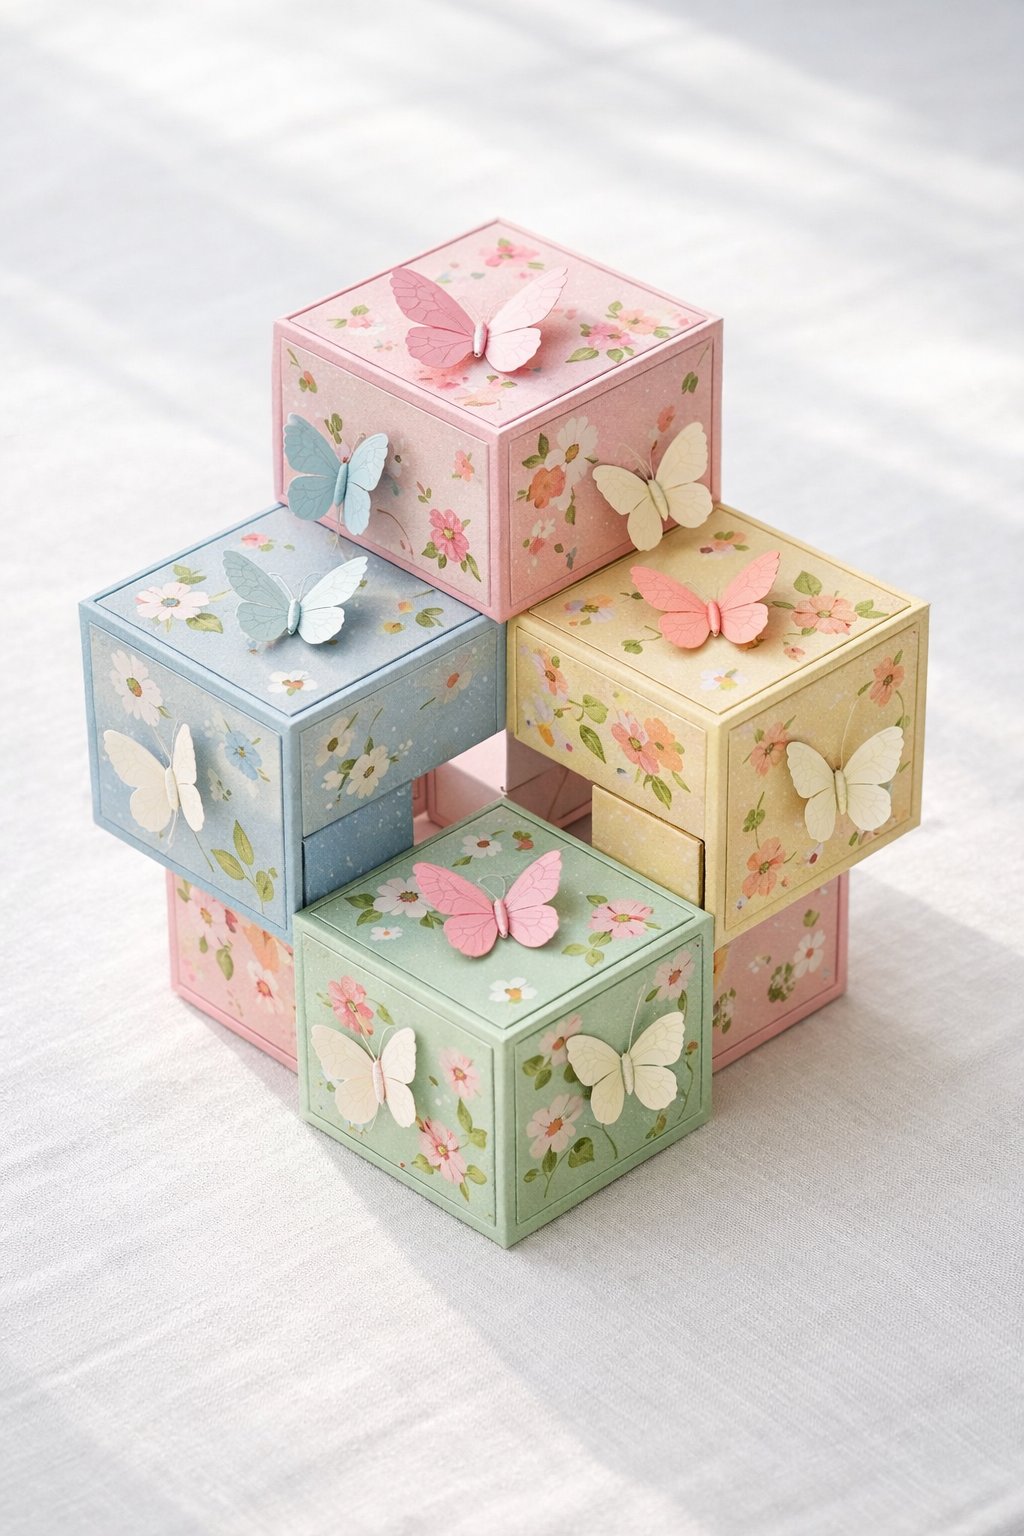
This is a dimensional masterpiece that collapses completely flat for mailing but pops up into three interconnected cubes when pulled out of the envelope.
It’s an architectural marvel in the card-making world, offering 18 different surfaces for decoration. It is perfect for “Year in Review” cards or milestone birthdays where you want to display multiple photos or messages.
Materials needed
- Six pieces of 3.5″ x 7″ cardstock
- Strong adhesive tape (red line tape)
- Decorative patterned paper
- Bone folder
- Ruler and pencil.
Shop the materials


Steps to make
- Decorate the exterior panels while flat, then pop it open to add internal 3D elements.
- Score all six pieces of cardstock at 1.75″, 3.5″, and 5.25″ to create four equal squares on each strip.
- Fold each strip into a square “tube” and secure the ends with strong adhesive.
- Lay two cubes side-by-side and glue a third cube on top, spanning the seam between the bottom two.
- Repeat the process for the back side to create a balanced, interlocking “bridge.”
- Ensure the cubes are aligned perfectly so they can collapse flat in both directions.
5. Gatefold Star Card
Want this as a printable, ad-free PDF? 😇
You can download the full Fancy Fold Card Tutorials for $3.99 and support our work at the same time.
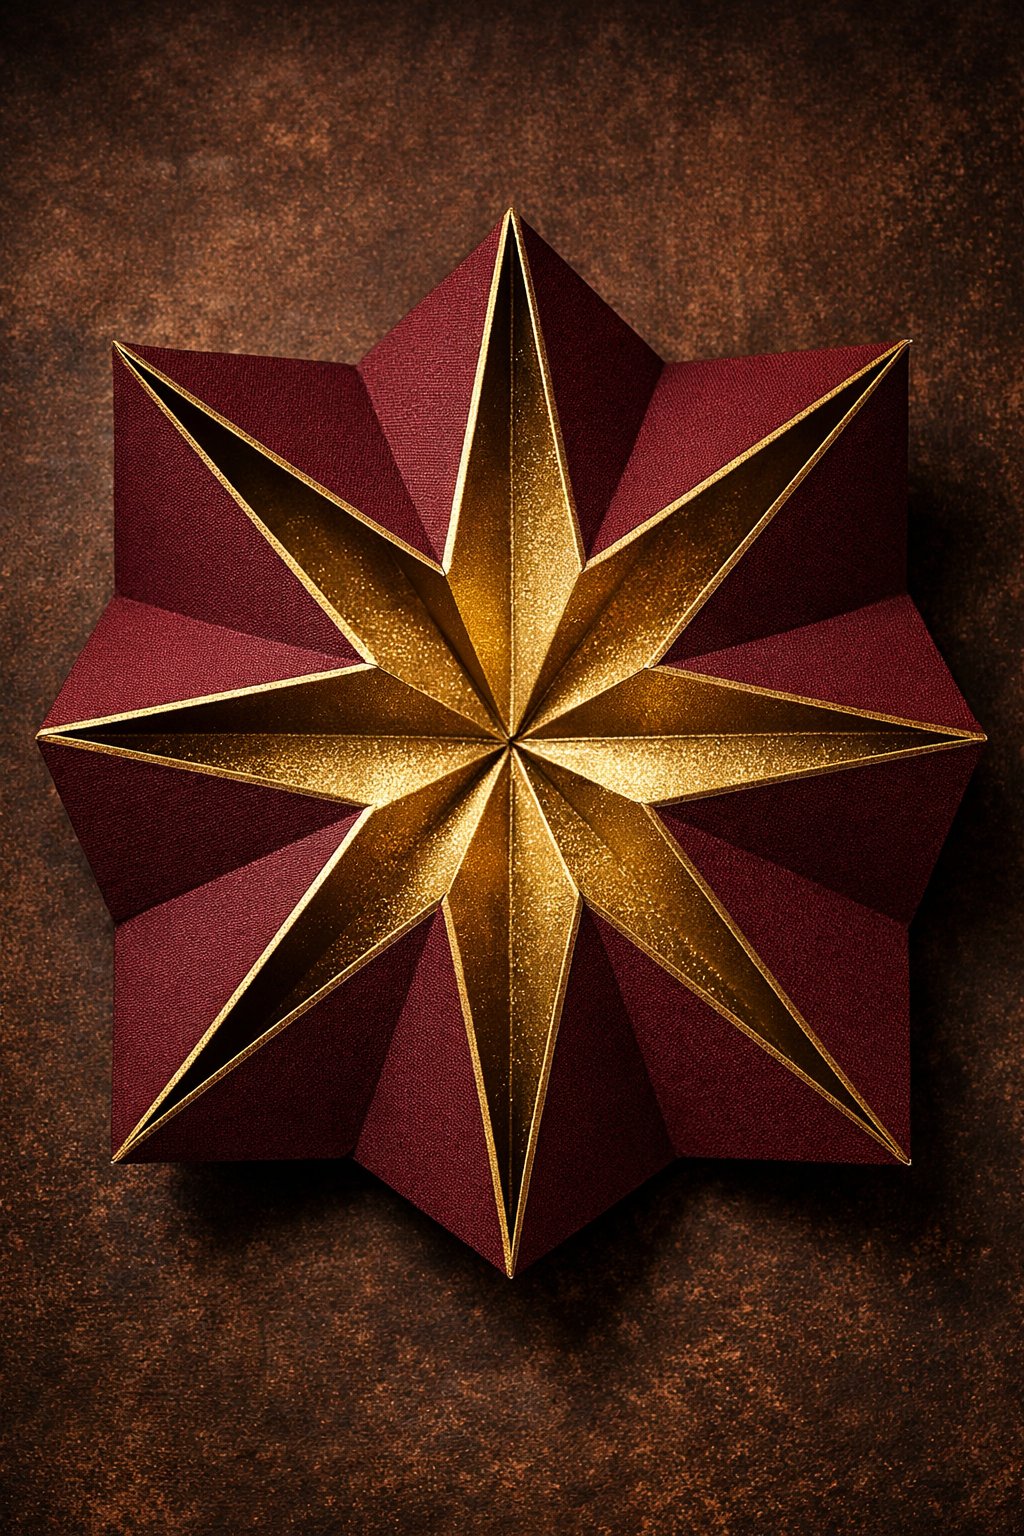
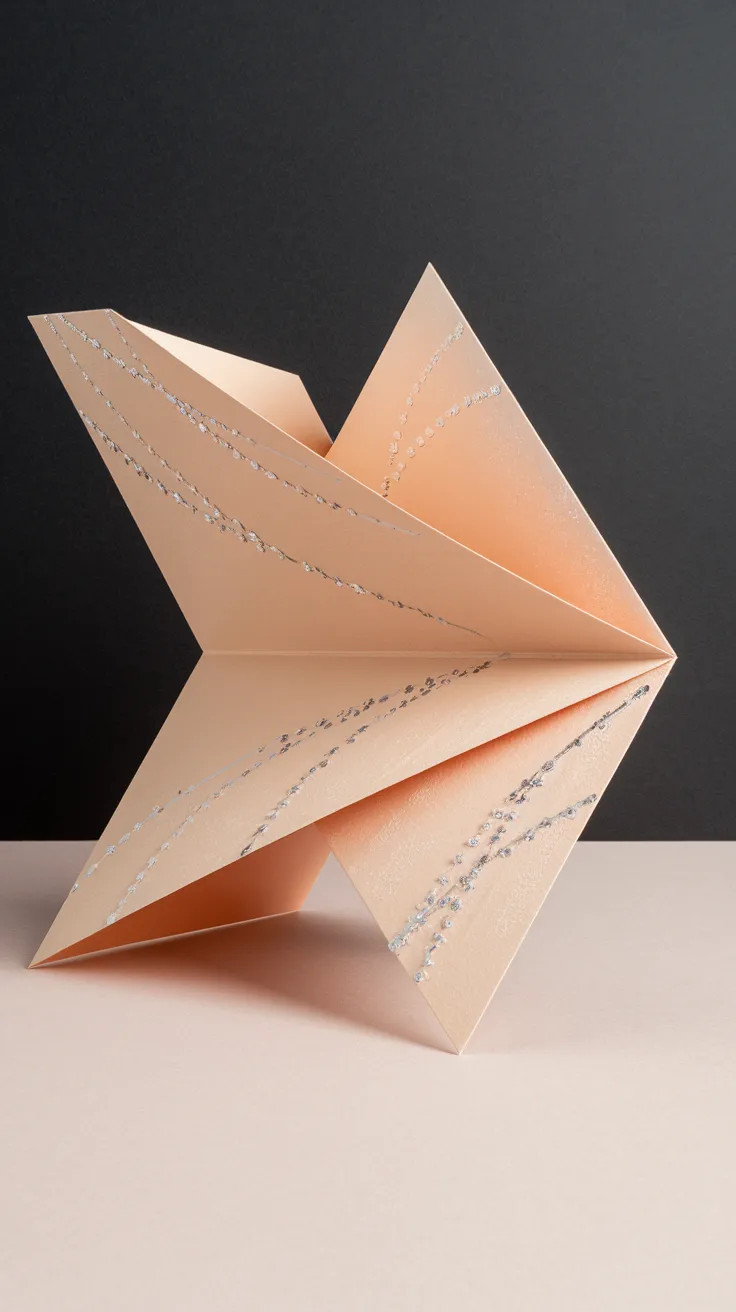
The Gatefold Star card adds a dramatic geometric twist to the standard gatefold. When opened, the interior panels expand outward to form a star-like silhouette. It is an excellent choice for holiday cards or invitations where you want to create a sense of “unwrapping” a gift.
The structure provides a beautiful framed area in the center for your main sentiment.
Materials needed
- 12″ x 12″ cardstock
- Scoring board
- Contrasting decorative paper
- Ribbon for closure
- Corner rounder punch.
Shop the materials


Steps to make
- Use a ribbon or a “belly band” to keep the star points tucked neatly together for mailing.
- Score your cardstock at 2″, 4″, 8″, and 10″ along one side.
- Turn the cardstock 90 degrees and score at the 2″ and 10″ marks.
- Create diagonal score lines in the outer corner squares to allow them to “tuck” inward.
- Fold the outer panels toward the center (gatefold style) while pushing the diagonal folds in.
- Burnish all folds so the “star” points stay crisp when the card is pulled open.
6. Shutter Fold Card

Want this as a printable, ad-free PDF? 😇
You can download the full Fancy Fold Card Tutorials for $3.99 and support our work at the same time.
Inspired by a camera lens, the Shutter Fold card features an interlocking paper mechanism that “opens” as you pull the sides of the card. It provides a tactile, interactive experience that never fails to impress.
It’s a brilliant way to hide a surprise photo or a hidden message that only appears when the recipient engages with the card.
Materials needed
- Heavy cardstock for the base
- Two “shutter” panels (stiff paper works best)
- Circle die or punch
- Pencil and ruler
- Low-profile foam tape
Shop the materials


Steps to make
- Decorate the front so the “shutter” looks integrated into the overall design.
- Create a standard gatefold base and punch a large circle through the center where the flaps meet.
- Cut two rectangular shutter panels that are slightly wider than half of your circle.
- Mark a “guide” line on the shutter panels to ensure they overlap perfectly when closed.
- Adhere the shutter panels to the inside of the gatefold flaps using a “hinge” fold.
- Test the slide movement; the panels should meet in the center of the circle without catching.
7. Step Fold Card (Side Step)
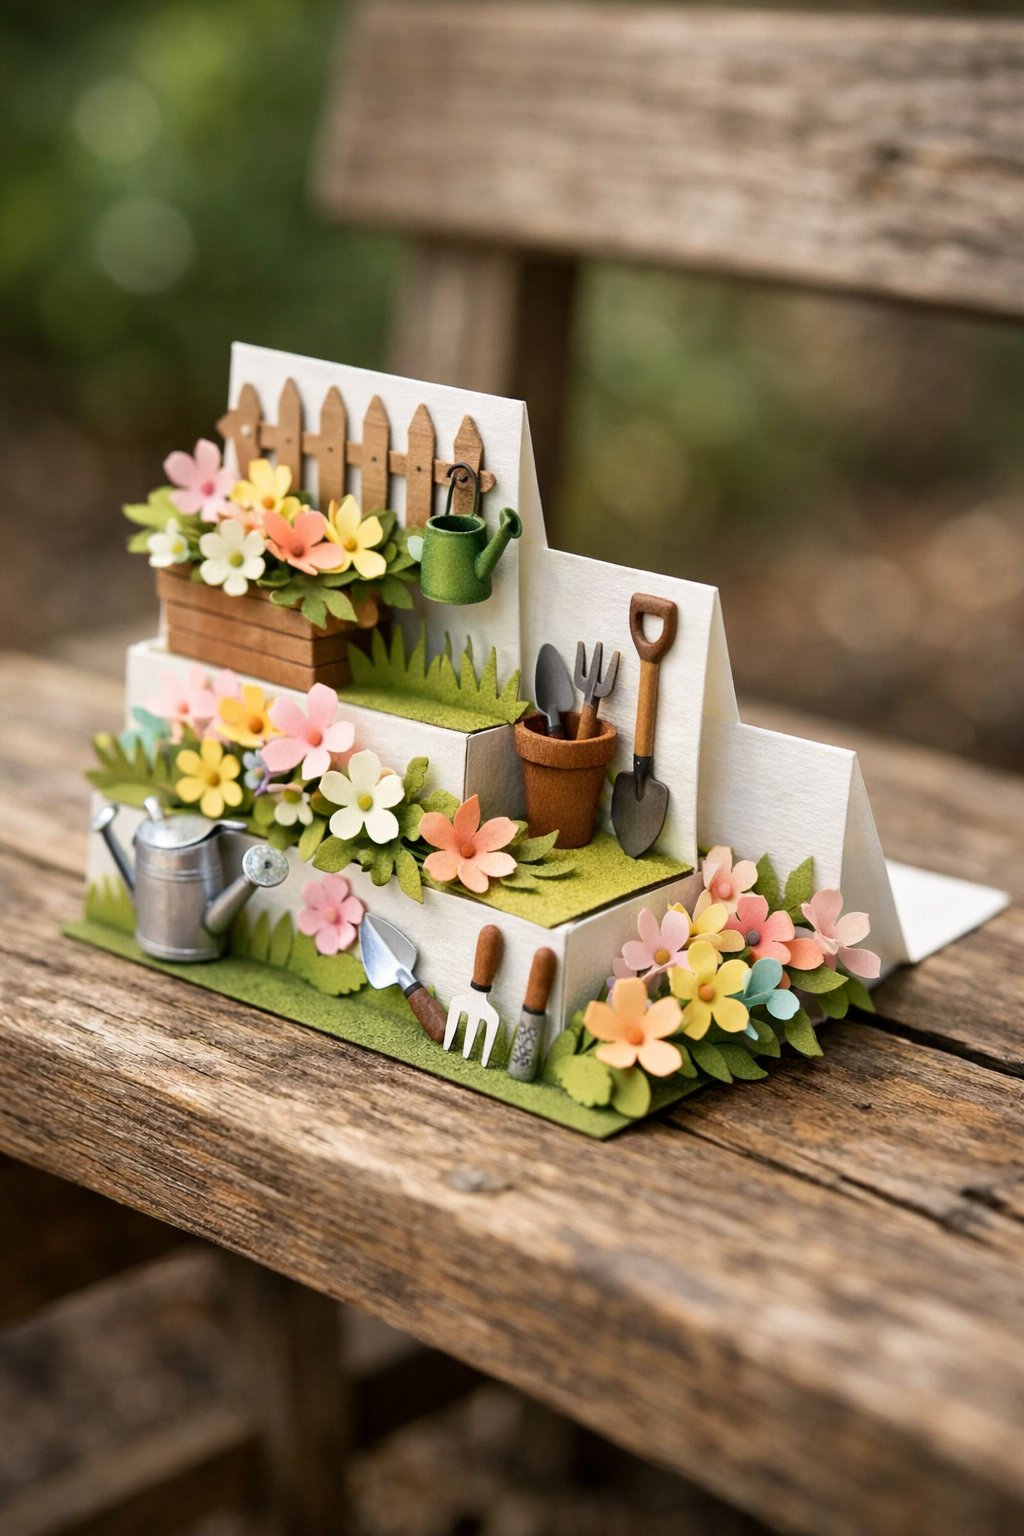
The Side Step card divides the card front into two sections: one flat vertical panel and a series of “stairs” or steps. This creates multiple levels of depth, making it ideal for creating scenes like gardens, cityscapes, or underwater worlds.
It stands up beautifully on a mantle and provides a unique “staircase” visual that traditional cards lack.
Materials needed
- 5.5″ x 8.5″ Cardstock
- Craft knife and metal ruler
- Scoring tool
- Small die-cuts for layering
- Glue pen.
Shop the materials


Steps to make
- Decorate each flat “step” with elements that get progressively smaller to enhance the perspective.
- Place your cardstock horizontally and make a single cut from the 1″ mark to the 6.5″ mark, parallel to the long edge.
- On one side of the cut, score at the 4.25″ mark (the standard fold).
- On the other side of the cut, score at 1″, 2″, 3.25″, 4.5″, and 6.5″ to create the steps.
- Accordion-fold the stepped side (mountain and valley folds) to create the staircase effect.
- Keep the other side of the cut as a flat, tall “backboard” for your main image.
8. Twisted Gatefold Card
Want this as a printable, ad-free PDF? 😇
You can download the full Fancy Fold Card Tutorials for $3.99 and support our work at the same time.
A modern evolution of the classic gatefold, the Twisted Gatefold uses diagonal score lines to create panels that lean into each other.
When closed, it forms a standard rectangle, but as it opens, the panels “twist” outward in a sophisticated motion. It’s an elegant choice for wedding programs or high-end corporate thank-you notes.
Materials needed
- 10″ x 5″ Cardstock
- Scoring board
- Triangle-cut decorative paper
- Strong adhesive
- Bone folder.
Shop the materials


Steps to make
- Cut your patterned paper into triangles to fit the new slanted panels perfectly.
- Score the cardstock vertically at 2.5″ and 7.5″ to create your basic gatefold sections.
- Create diagonal score lines from the top-left corner of the outer panels to the bottom-inner score point.
- Mirror this on the right side to create symmetrical “twists.”
- Fold the diagonal lines so the corners tuck behind or forward, depending on your preferred look.
- Use the bone folder to ensure the “twist” doesn’t add too much bulk to the center.
9. Waterfall Card

Want this as a printable, ad-free PDF? 😇
You can download the full Fancy Fold Card Tutorials for $3.99 and support our work at the same time.
The Waterfall card is the ultimate interactive card. By pulling a small tab at the bottom, a series of panels flip over one by one in a cascading “waterfall” motion.
It is perfect for storytelling, showing a sequence of photos, or revealing a multi-part message. It is a favorite for children’s cards because of its mechanical, toy-like feel.
Materials needed
- Card base
- Long “pull” strip of cardstock
- 4-5 small square decorative panels
- Brads or strong double-sided tape
- Eyelet and ribbon for the pull tab
Shop the materials


Steps to make
- Add a ribbon to the bottom of the strip to encourage the recipient to “Pull Here.”
- Cut a pull-strip and score it at 2″, 2.75″, 3.5″, and 4.25″.
- Fold the score lines toward you to create a “rolling” hinge.
- Adhere your decorative panels to each 0.75″ section, starting from the bottom.
- Attach the pull-strip to the card base using a “bridge” strip that allows the tail to slide underneath.
- Ensure the top panel is the only one fixed to the bridge, allowing the others to flip freely.
10. Impossible Fold Card
Want this as a printable, ad-free PDF? 😇
You can download the full Fancy Fold Card Tutorials for $3.99 and support our work at the same time.
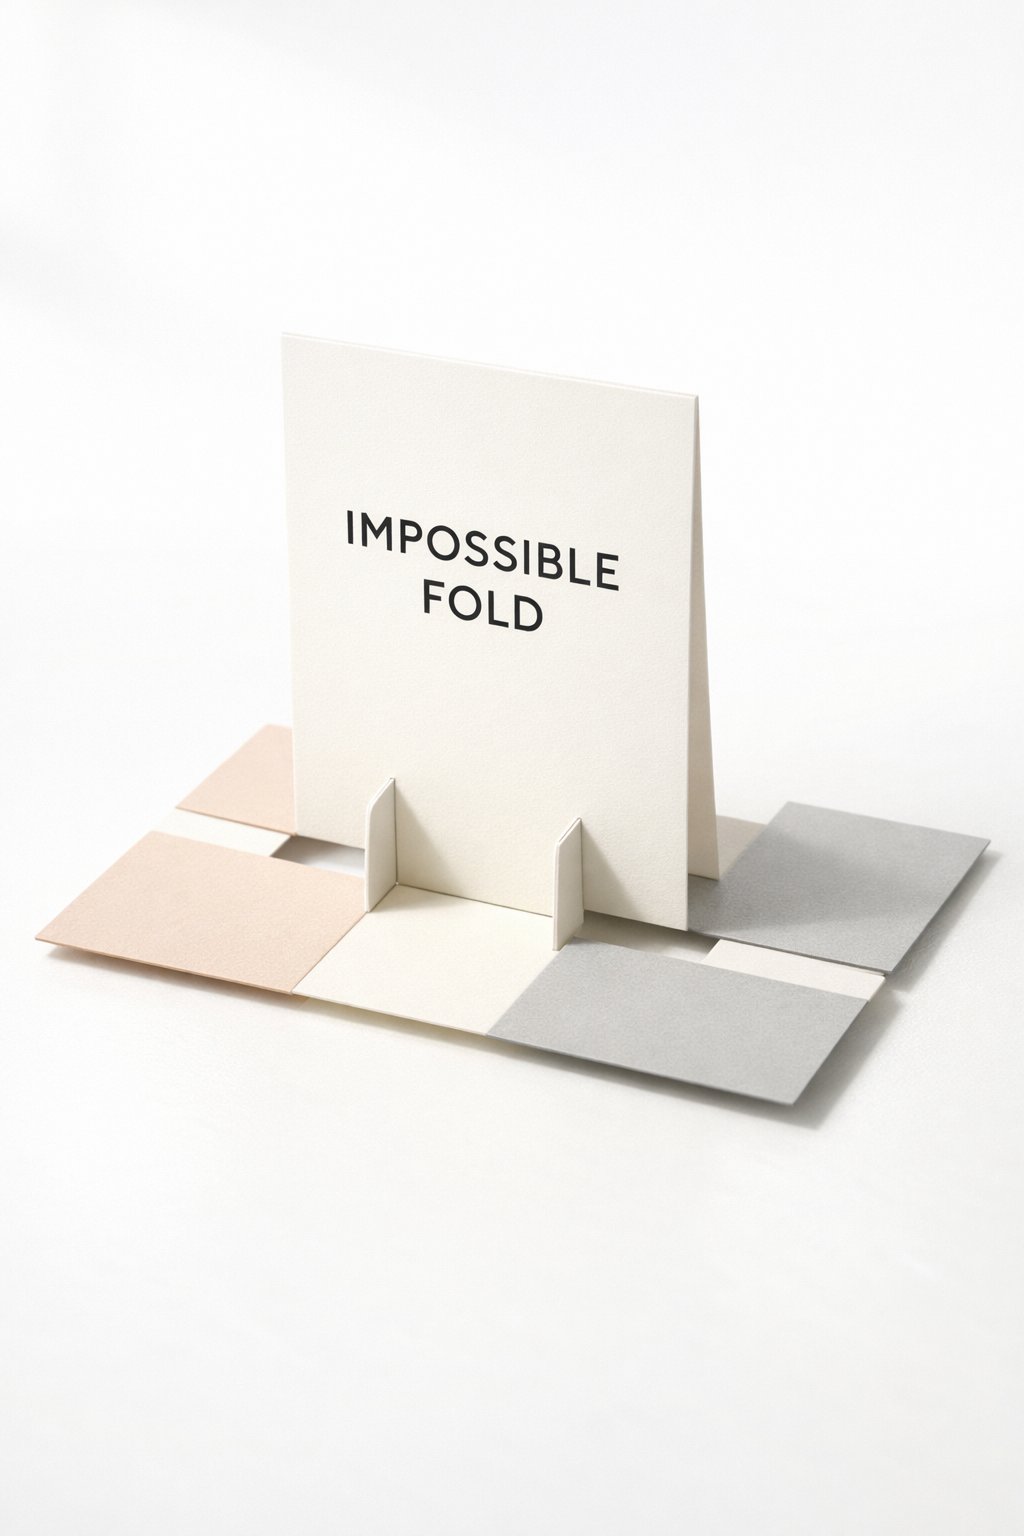
Aptly named, this card looks like a puzzle. It’s made from a single piece of cardstock with a few strategic cuts and one “flip” that turns the paper into a 3D standing display.
It leaves recipients wondering how it was constructed without any glue involved in the main mechanism. It’s a great “brain teaser” card for fellow crafters.
Materials needed
- 4.25″ x 5.5″ Cardstock
- Paper trimmer
- No glue required for the mechanism!
- Contrasting paper for decoration.
Shop the materials


Steps to make
- Decorate the vertical “window” and the flat “floor” to create a 3D vignette.
- Cut your cardstock exactly in half lengthwise, but stop the cut 1 inch from the end.
- Flip one side of the cut over 180 degrees.
- This “twist” creates a vertical panel while the other half stays horizontal.
- Score the horizontal half at the midpoint to allow it to stand as a base.
- The vertical panel will now sit upright, supported by the weight of the base.
11. Endless/Never-Ending Fold Card
Want this as a printable, ad-free PDF? 😇
You can download the full Fancy Fold Card Tutorials for $3.99 and support our work at the same time.
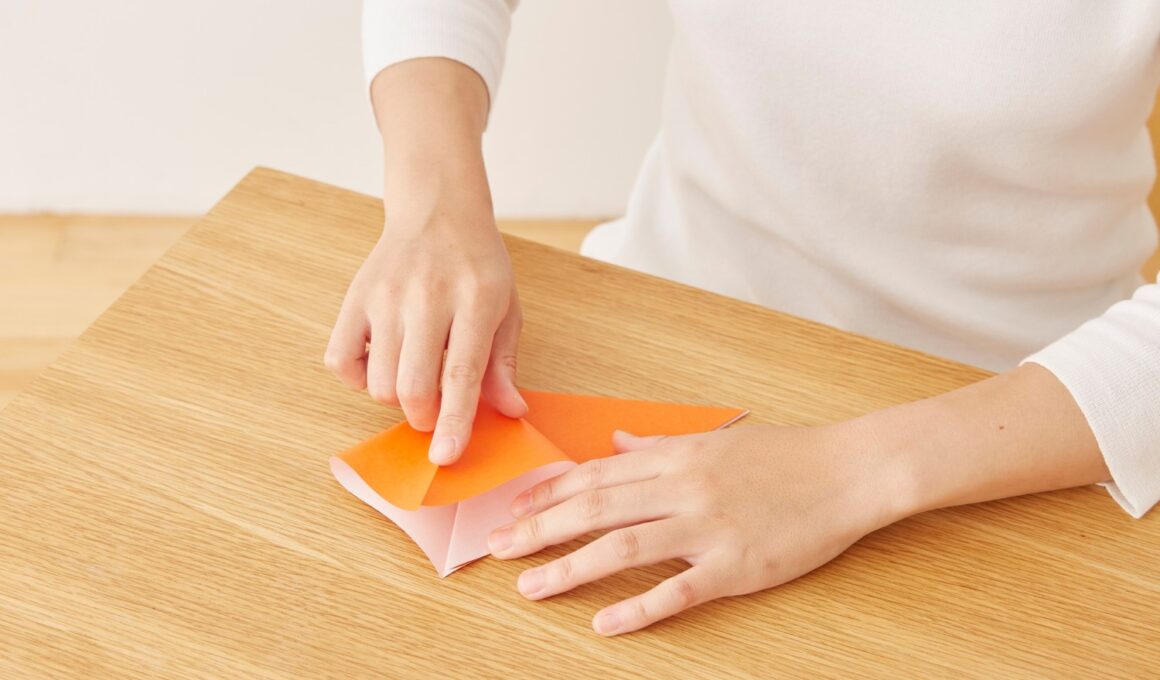
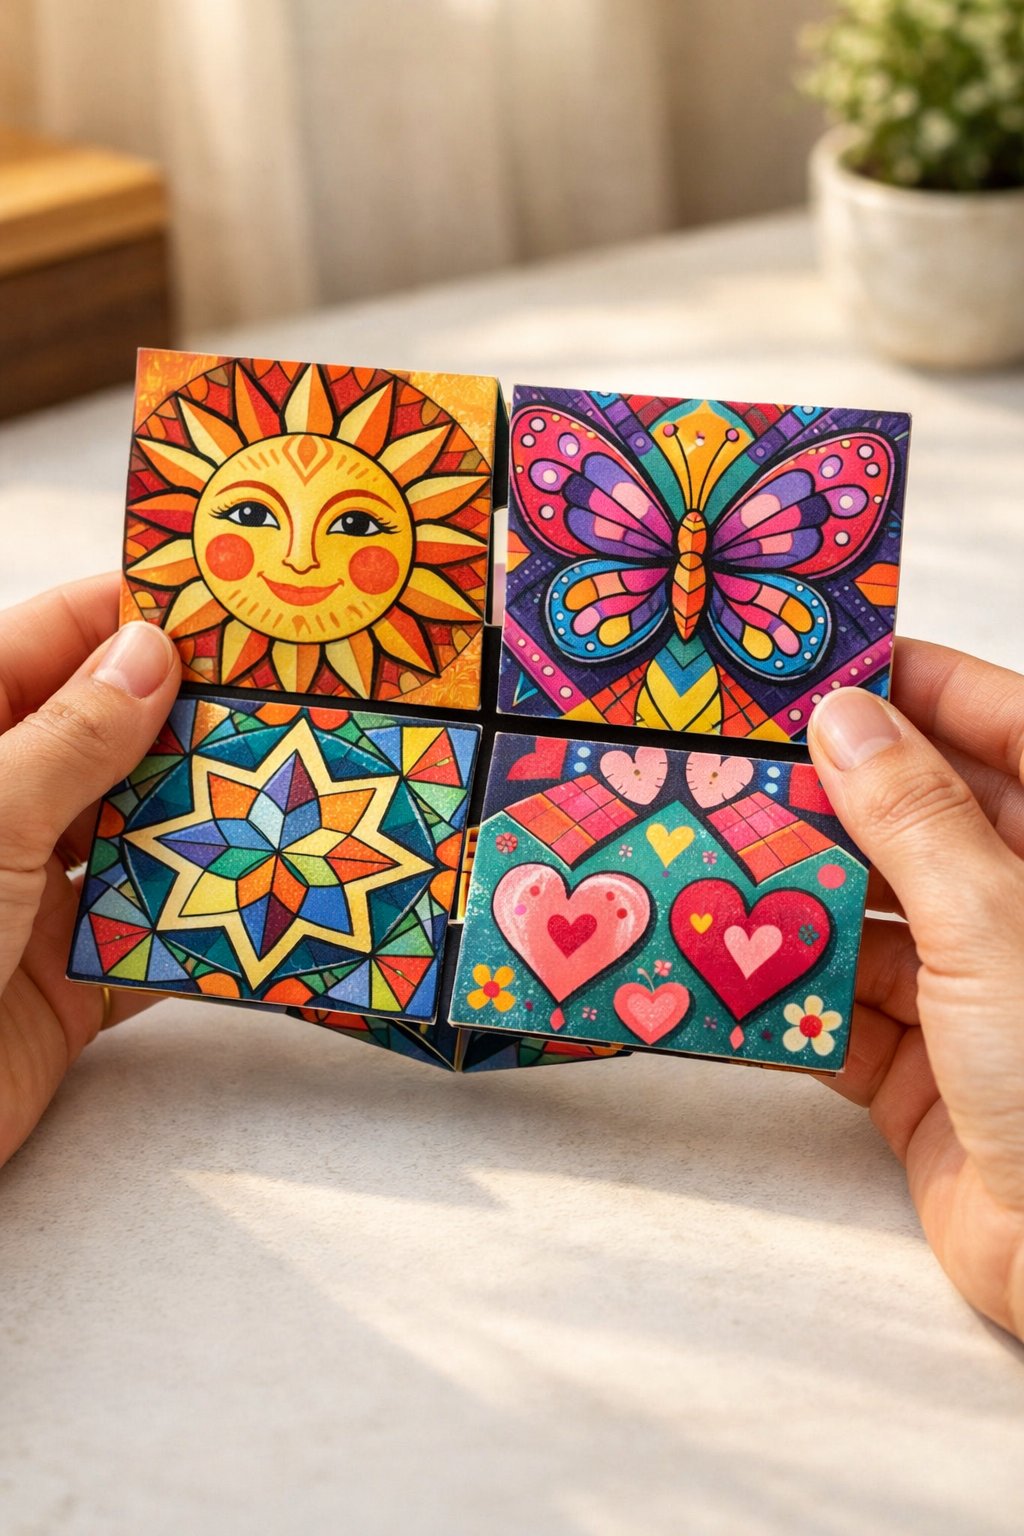
A realistic “in-progress” shot of a Never-Ending card. The card is shown in a mid-fold state, revealing four different patterned surfaces. The lighting is crisp, and the background is a workspace with a cutting mat and ruler.
Materials needed
- Four pieces of cardstock (same size)
- Very strong adhesive (tape runner or glue)
- Precision ruler
- Pencil.
Shop the materials
Steps to make
- Score each of the four cardstock pieces in half both vertically and horizontally.
- Glue the four pieces together only at the outer four corners in a specific rotating pattern.
- Allow the glue to dry completely before attempting the first fold to prevent tearing.
- Fold the card horizontally to find the second “face,” then vertically for the third.
- “Train” the folds by going through the cycle multiple times until the paper moves smoothly.
- Decorate each of the four “stages” with themes that transition into one another.
12. Arrow Fold Card
Want this as a printable, ad-free PDF? 😇
You can download the full Fancy Fold Card Tutorials for $3.99 and support our work at the same time.
The Arrow Fold creates a sophisticated, pointed front that resembles an envelope flap but with more architectural depth. It’s a sleek, modern take on card shapes that feels much more “boutique” than a standard rectangle.
It’s particularly effective for cards that require a “latch” or a focal point right in the center of the point.
Materials needed
- Standard A2 card base
- Scoring tool
- Ruler
- Embellishment for the “point” (button, seal, or sticker).
Shop the materials


Steps to make
- Use a “belly band” or a focal embellishment to keep the arrow point securely closed.
- Find the center point of the bottom edge of your card front.
- Score diagonally from the top corners of the card front down to that center bottom point.
- Fold the resulting “wings” backward or tuck them inward to create the arrow shape.
- Burnish the diagonal folds heavily to keep the arrow point sharp.
- Decorate the triangular panels with contrasting patterns to emphasize the geometric shape.
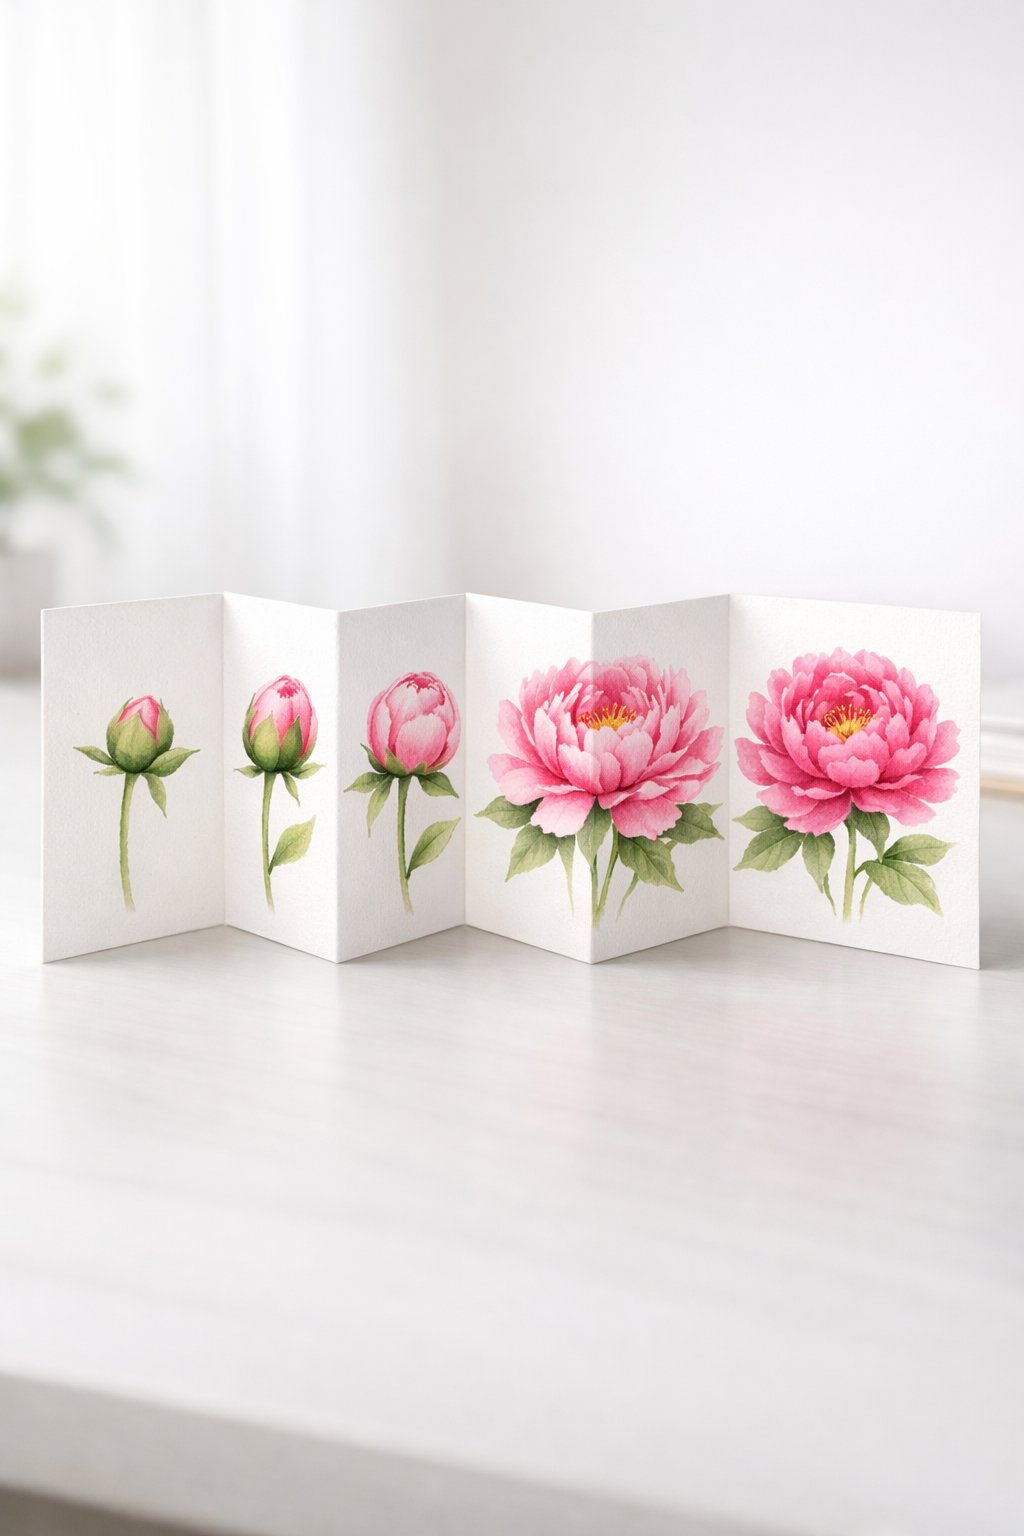
13. Accordion Z-Fold Card
Want this as a printable, ad-free PDF? 😇
You can download the full Fancy Fold Card Tutorials for $3.99 and support our work at the same time.
This is an extension of the Z-fold but with more panels, allowing the card to stretch out like a musical accordion. It’s the ultimate “display” card because it can stand on its own in a long, zig-zagging line.
It’s ideal for panoramas, timelines, or group cards where many people need to sign different sections.
Materials needed
- Long strip of cardstock (e.g., 12″ x 4″)
- Scoring board
- Coordinated paper pack
- Ribbon for binding (optional).
Steps to make
- Use lightweight decorations to ensure the “accordion” doesn’t become too bulky to close.
- Take a long strip of cardstock and score it at equal intervals (e.g., every 3 inches).
- Fold the card in alternating directions: one “mountain” fold, then one “valley” fold.
- Ensure the end panels are the same size so the card folds into a neat square.
- Decorate each panel as an individual canvas or as one continuous scene.
- If the card is very long, add a ribbon “wrap” to keep it from springing open in the mail.
14. Box in a Card (Diorama Fold)
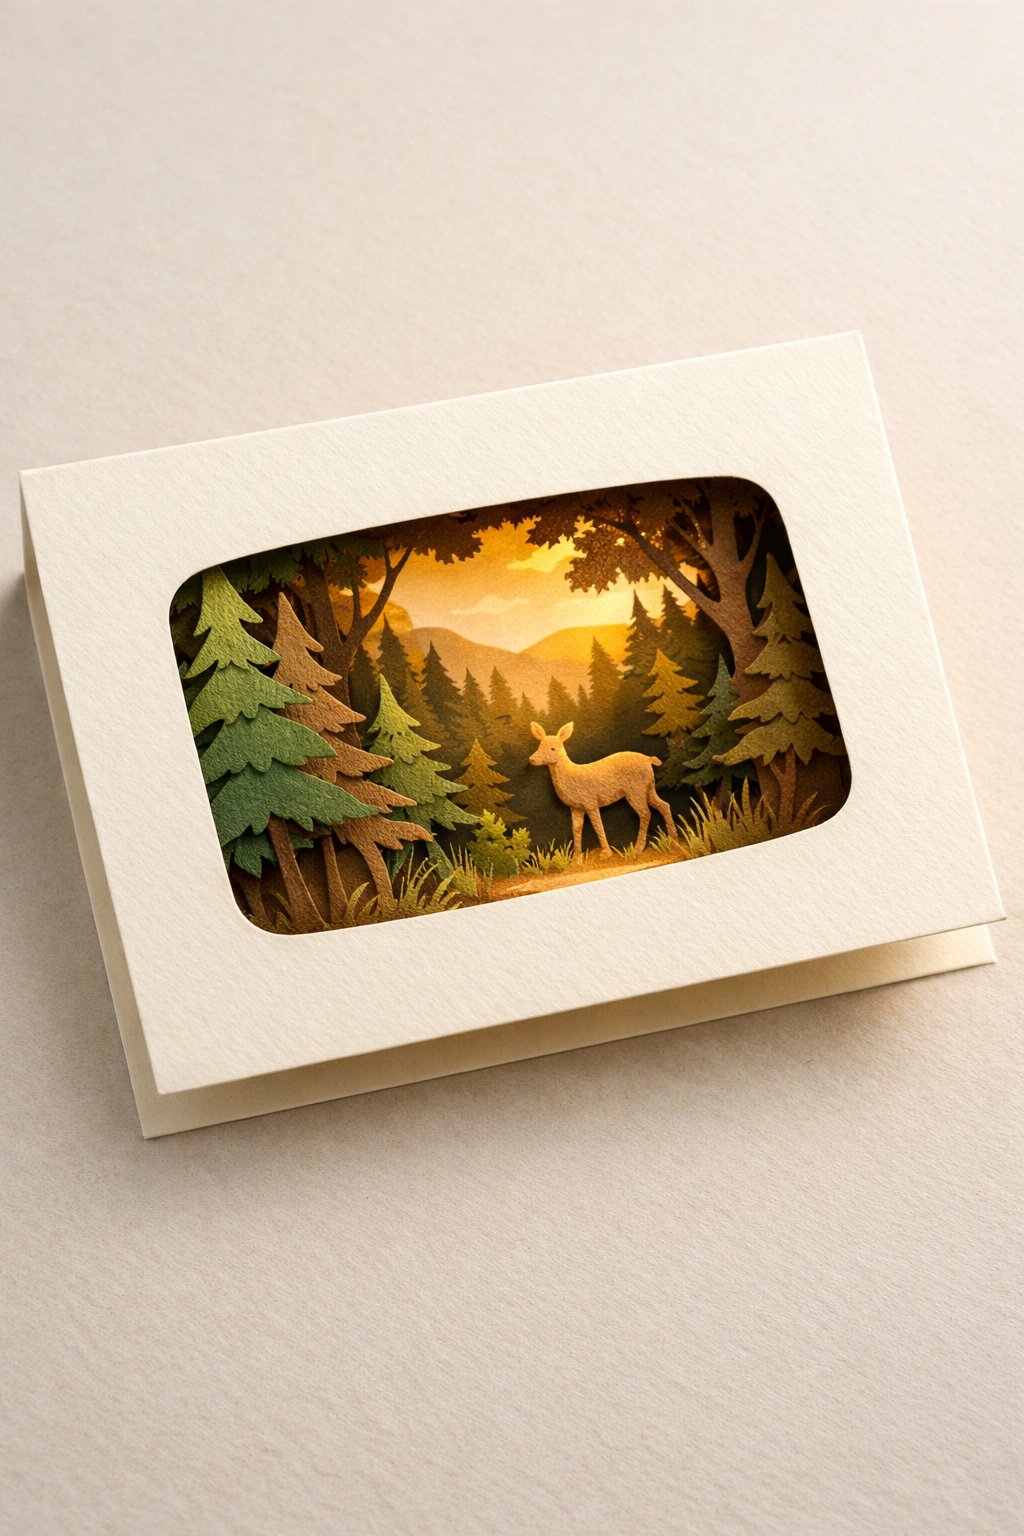
The Diorama card (or Box in a Card) features a cut-out window on the front and a recessed “box” inside.
This creates a literal stage for 3D elements, giving the card incredible depth. It feels more like a piece of home decor than a piece of mail. It is a fantastic choice for holiday scenes or “new home” cards.
Materials needed
- Two pieces of cardstock
- Window die or craft knife
- Foam tape for extra depth
- Acetate (optional, for a “glass” window effect).
Shop the materials


Steps to make
- Ensure the “box” is shallow enough (usually 1/4 inch) so the card can still fold flat.
- Cut a large window out of your front card panel.
- Score a second piece of cardstock with two “tabs” on the ends to create a shallow box shape.
- Glue the tabs of the box piece to the inside of the front panel, behind the window.
- Adhere your 3D elements inside the “box” before sealing the final side.
- For extra flair, add a piece of clear acetate over the window to act as “glass.”
15. Joy Fold Card

Want this as a printable, ad-free PDF? 😇
You can download the full Fancy Fold Card Tutorials for $3.99 and support our work at the same time.
The Joy Fold is a “card within a card.” It uses a small, secondary card attached to a larger, uniquely folded base. This creates layers of opening—first the large flaps, then the smaller internal card.
It’s a playful and sophisticated way to add more space for writing without making the card feel cluttered.
Materials needed
- One large card base (5.5″ x 8.5″)
- One small card base (3″ x 4″)
- Contrasting patterned paper
- Strong adhesive.
Shop the materials


Steps to make
- Decorate the overlapping panels to create a cohesive design across both cards.
- Fold the large cardstock base so the front flap is only half the width of the back.
- Fold the smaller cardstock in half to create a mini-card.
- Adhere the back of the small card to the inside center of the large base.
- The small card should open in the opposite direction of the large flap for visual interest.
- Use the large flap to “tuck” under the edge of the small card to keep it closed.
16. Triangle Flip Fold Card

Similar to the Diamond Flip, this version uses a triangular centerpiece. It has a sharp, modern geometric look and a very satisfying “flip” action.
It’s a great way to use up triangular paper scraps and looks particularly high-end when paired with minimalist, monochromatic designs.
Materials needed
- A2 Card base
- Ruler and pencil
- Craft knife
- Scoring tool
- Thin double-sided tape
Steps to make
- On the front of the card, mark the midpoint of the top edge and the two bottom corners of a central square.
- Cut two diagonal lines from the top midpoint to the bottom corners of your square.
- Score the “base” of the triangle (the horizontal line) to create the hinge.
- Gently fold the triangle forward while folding the rest of the card base backward.
- This creates a “mountain” fold that makes the triangle stand out when the card is opened.
- Decorate the triangle and the “revealed” space behind it with high-contrast colors.
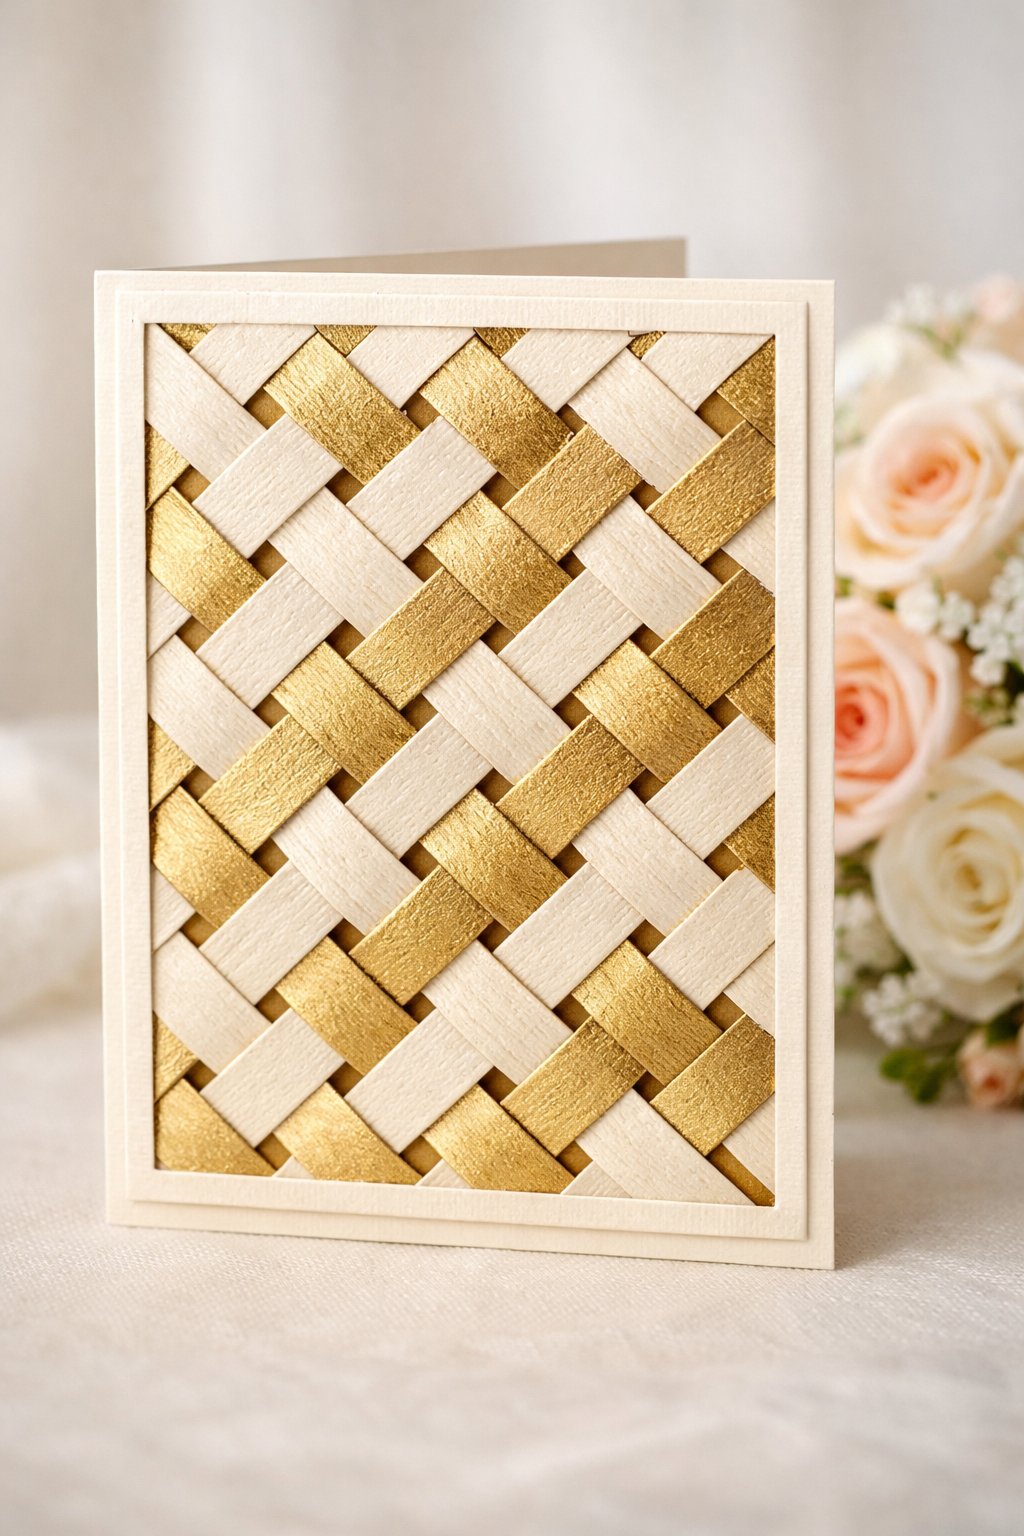
17. Lattice Fold Card
Want this as a printable, ad-free PDF? 😇
You can download the full Fancy Fold Card Tutorials for $3.99 and support our work at the same time.
The Lattice Fold replaces a solid card front with an intricate, woven “lattice” of paper strips. It is incredibly delicate and beautiful, allowing the recipient to peek at the interior of the card through the gaps.
It’s widely used for wedding and anniversary cards due to its “woven together” symbolism.
Materials needed
- Card base
- 1/2 inch strips of cardstock (contrasting colors)
- Precision glue pen
- Tweezers (for placement)
- Paper trimmer.
Shop the materials


Steps to make
- Hide the “messy” glued ends by adding a second decorative frame over the top.
- Cut the front panel out of a standard card, leaving only a 1/2 inch “frame” around the edges.
- Cut several strips of cardstock to match the width and height of the frame.
- Glue the vertical strips to the top and bottom of the frame, spacing them evenly.
- Weave the horizontal strips over and under the vertical ones.
- Secure the ends of the horizontal strips to the side “frame” with tiny dots of glue.