


Table of Contents Show
I enjoy finding simple ways to celebrate the fall season, and crafting is one of my favorite methods. Making DIY fall crafts is a great way to add seasonal touches to your home while spending quality time with family or friends.
These 18 easy fall crafts offer projects that both adults and kids can enjoy, making them perfect for sharing creativity and fun.

Whether you’re looking to decorate or just enjoy a hands-on activity, these crafts are designed to be accessible and enjoyable for everyone.
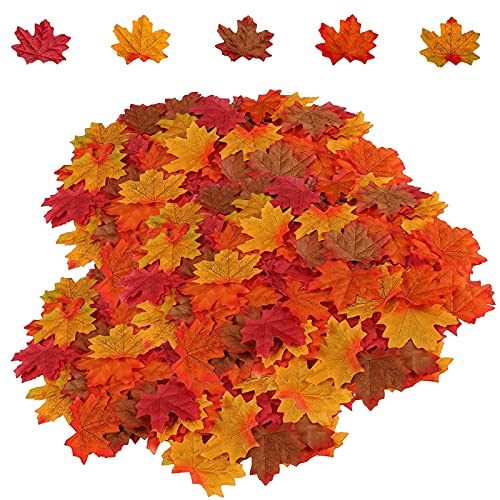
1. Paper leaf garlands

I make paper leaf garlands by cutting fall shapes from colorful craft paper. It’s simple and works well for both kids and adults. Hanging them brings a nice autumn look to any room.
How to Make Paper Leaf Garlands
Materials Needed
- Colored craft paper (reds, oranges, yellows, and browns)
- Scissors
- Pencil
- Hole punch (or needle and thread)
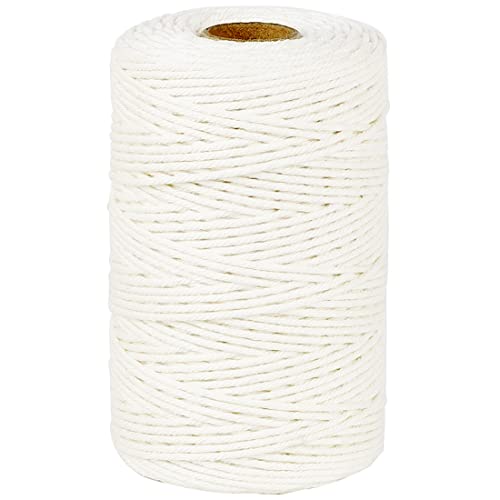
- Twine or string
Shop Featured Items


The Steps
- Step 1: Draw and Cut Out Leaves
Sketch simple leaf shapes on colored paper, or use a printed template. Cut out as many as you need to make your garland as long as you want. - Step 2: Add Leaf Details (Optional)
Use a pencil or marker to draw veins on the leaves to give them a more realistic look. Kids love this step! - Step 3: Punch Holes or Thread Through
Punch a small hole near the top of each leaf. If you don’t have a hole punch, thread a needle through gently to create a small opening. - Step 4: String the Leaves
Thread twine or string through each leaf, spacing them evenly. You can knot the twine slightly after each leaf to keep them in place. - Step 5: Hang and Enjoy
Hang your garland across a wall, window, or mantel. It instantly adds
a warm, festive touch to your space.
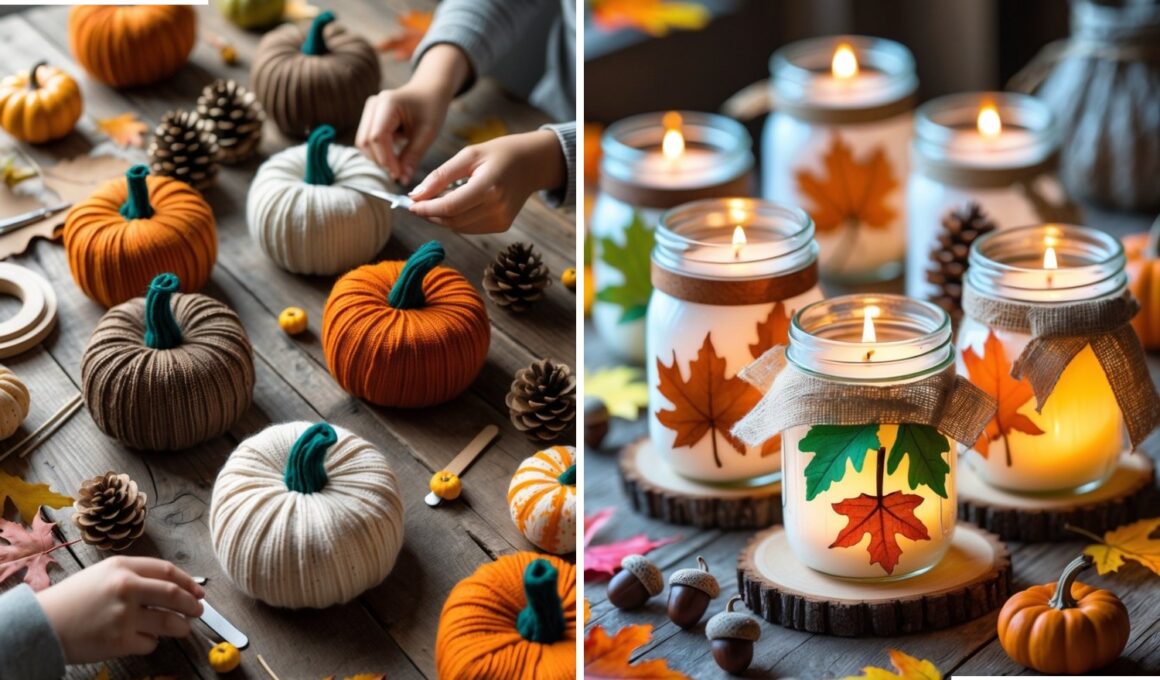
2. Sock pumpkins

I like making sock pumpkins because they are quick and easy. You just need old socks, stuffing, and a bit of twine or thread. No sewing is required, which makes the craft simple for both kids and adults.
How to Make Sock Pumpkins
Materials Needed:
- Old or mismatched socks (solid or patterned)
- Scissors
- Rubber bands or string
- Polyfill or rice (for stuffing)
- Green felt or fabric for the stem
- Hot glue gun
Shop Featured Items


The steps
- Step 1: Cut the Sock
Cut your sock right above the heel so you’re left with the footless tube part. This will be your pumpkin base. - Step 2: Fill the Sock
Stuff the sock with polyfill for a soft pumpkin or use rice for a heavier, more natural shape. Adjust the amount depending on how plump you want it. - Step 3: Seal the Top
Gather the open end and secure it tightly with a rubber band or piece of string. Tuck the extra fabric inside to create a smooth top. - Step 4: Create Pumpkin Sections
To give your pumpkin realistic ridges, wrap string or yarn around the stuffed sock several times, pulling gently to form sections. Tie off the string at the bottom. - Step 5: Add the Stem
Cut a small piece of green felt or fabric, roll it into a stem, and glue it to the top. You can also add fabric leaves or a cinnamon stick for a rustic touch.
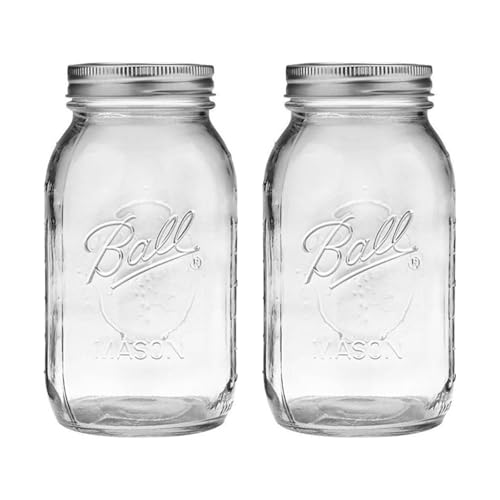
3. Mason jar candle holders

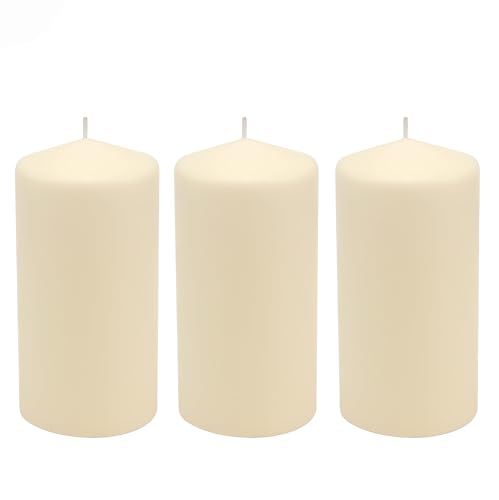
I like making mason jar candle holders because they are simple and use few materials. You just need a jar, a candle, and some fall decorations like leaves or burlap. They add a cozy touch to any room during autumn. These holders are quick to make and look nice on shelves or tables.
How to Make Mason Jar Candle Holders
Materials Needed:
- Clean mason jars
- Mod Podge or clear-drying glue
- Paintbrush or sponge brush
- Faux or real fall leaves
- Burlap ribbon or twine
- Tea lights or LED candles
Shop Featured Items

The steps
- Step 1: Prepare Your Jars
Wash and dry your mason jars thoroughly to ensure they’re clean and free from dust or oils. - Step 2: Add the Leaves
Using a brush, apply a thin layer of Mod Podge on one side of the jar. Gently press a leaf onto the glue, smoothing out wrinkles with your fingers. Apply another thin coat of Mod Podge over the leaf to seal it in place. Repeat with more leaves if desired. - Step 3: Decorate the Rim
Once the glue is dry, tie burlap ribbon or twine around the rim of the jar for a rustic touch. You can even add small acorns, wooden buttons, or tags for a little extra charm. - Step 4: Add the Candle
Place a tea light or LED candle inside each jar. LED candles are safer, especially if you plan to use them around kids or pets. - Step 5: Display and Enjoy
Set your candle holders on a wooden tray, shelf, or dining table. When lit, the glow through the leaves creates a soft autumn ambiance that’s warm and inviting.
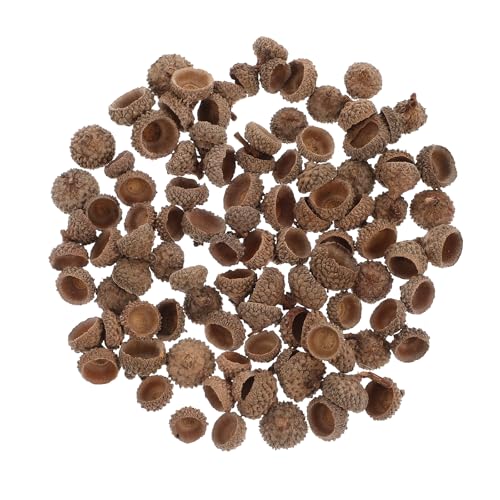
4. Acorn cap necklaces

I like making acorn cap necklaces because they are simple and natural. You just need acorn caps, a small marble or bead, and some string. They work well as gifts or a small craft project for fall.
How to Make Acorn Cap Necklaces
Materials Needed:
- Real acorn caps (cleaned and dried)
- Small wooden beads, clay beads, or marble-size acorns
- Eye screw hooks (small jewelry size)
- Chain or cord necklace
- Strong craft glue (like E6000) or hot glue gun
- Drill or push pin (optional, for pilot holes)
Shop Featured Items


The steps
- Step 1: Prepare the Acorn Caps
Begin by collecting acorn caps and cleaning them with a damp cloth. Let them dry completely — this helps prevent cracking or mold later on. - Step 2: Attach the Bead Base
Choose small wooden or clay beads that fit snugly under the acorn cap. Apply a small amount of glue inside the cap, then press the bead in firmly. Allow it to dry fully before moving on. This creates the rounded “nut” shape for your pendant. - Step 3: Add the Hook
Once the glue has dried, gently twist a small eye screw into the top of the acorn cap. If the cap is thick, use a push pin or tiny drill bit to make a pilot hole first. Add a dab of glue to secure it. - Step 4: Attach the Chain or Cord
Thread your necklace chain or cord through the eye hook. You can use a leather cord for a rustic style or a delicate gold chain for a more polished look. - Step 5: Let Everything Set
Ensure all glue and components are fully dry and secure before wearing or gifting your necklace.
5. Painted pine cones

I find painted pine cones an easy way to add color to fall decorations. You just need paint and pine cones. It’s a simple craft that works well for both kids and adults.
How to Make Painted Pine Cones
Materials Needed:
- Clean, dry pine cones
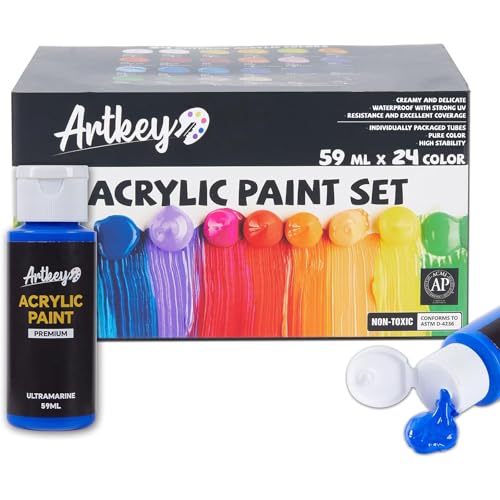
- Acrylic paint or craft paint
- Paintbrushes (various sizes)
- Paper plates or newspaper (to protect your workspace)
- Optional: glitter, white paint for snow effect, or clear sealer spray
Shop Featured Items

The steps
- Step 1: Prepare the Pine Cones
If your pine cones were collected outdoors, bake them on a foil-lined tray at 200°F (90°C) for about 20 minutes to remove moisture or bugs. Let them cool completely before painting. - Step 2: Set Up Your Work Area
Lay out paper or a craft mat to keep your surface clean. Pour small amounts of paint onto a plate for easy dipping. - Step 3: Paint the Pine Cones
Use a paintbrush to coat the tips of each scale for a light, frosted effect, or paint the entire pine cone for a bolder color. Mix fall tones like red, orange, gold, and yellow for a warm seasonal palette. - Step 4: Add Decorative Touches (Optional)
While the paint is still tacky, sprinkle a little glitter on top for shimmer or dab on white paint to mimic snow — perfect for winter decor. - Step 5: Let Them Dry
Place painted pine cones on wax paper and let them dry completely. Once dry, you can spray them with a clear sealer to preserve the finish.
6. Foam pumpkin centerpiece

I like making foam pumpkin centerpieces because they are quick and simple. You can decorate a foam pumpkin with paint, fabric, or natural items like leaves. This craft adds a cozy touch to any fall table or room without much effort.
How to Make a Foam Pumpkin Centerpiece
Materials Needed:
- One large foam or faux pumpkin
- Faux fall leaves, pinecones, and small flowers
- Hot glue gun and glue sticks
- Wooden base or tray
- Acrylic paint (optional, for shading or stem color)
- Scissors or craft knife
Shop Featured Items


The steps
- Step 1: Prepare Your Pumpkin
- If you’re starting with a plain foam pumpkin, clean the surface with a soft cloth to remove dust. You can lightly paint the stem green or brown for a natural finish, then let it dry before decorating.
- Step 2: Arrange the Base
Place your pumpkin on a wooden slice, tray, or any sturdy base. This will serve as the foundation of your centerpiece and make it easier to move and display later. - Step 3: Add Leaves and Pinecones
Begin by gluing faux fall leaves around the base of the pumpkin. Layer them to create fullness and variety. Add pinecones between the leaves to bring a natural, rustic touch. - Step 4: Add Flowers and Accents
Glue small faux flowers like sunflowers or mums between the leaves and pinecones. You can also include acorns, mini pumpkins, or berries for extra texture and color. - Step 5: Finishing Touches
Once everything is glued in place, inspect your arrangement for balance and adjust where needed. For a final flourish, lightly dust the pumpkin with gold or copper paint to highlight details.
7. Pressed leaf bookmarks

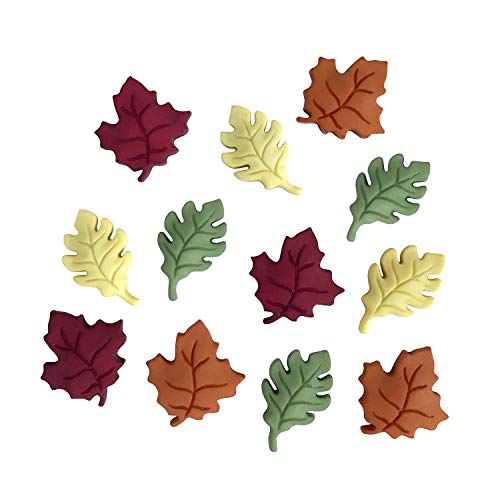
I like making pressed leaf bookmarks because they are simple and use natural materials. First, I collect colorful fall leaves and press them flat. Then, I glue the dried leaves onto cardstock to create a unique bookmark.
How to Make Pressed Leaf Bookmarks
- Dried and pressed fall leaves
- Blank cardstock or recycled paper
- Clear-drying glue or Mod Podge
- Paintbrush or sponge brush
- Hole punch and twine or ribbon
- Scissors
- Optional: Laminating sheets for protection
Shop Featured Items


The steps
- Step 1: Press and Prepare the Leaves
Collect colorful fall leaves and flatten them between sheets of parchment paper inside a heavy book. Leave them for at least 5–7 days until completely dry and crisp. - Step 2: Cut Your Bookmark Base
Cut your cardstock or recycled paper into rectangles, about 2″ x 6″ in size. You can use pages from an old book for a rustic touch, as shown in the photo. - Step 3: Arrange the Leaves
Lay out your dried leaves on the paper before gluing to plan the design. Once you’re happy with the placement, apply a thin layer of glue and gently press each leaf down. Smooth carefully to avoid tearing. - Step 4: Seal and Protect
After the glue dries, brush a light coat of Mod Podge over the top to seal the leaf. For extra durability, laminate the bookmark or cover it with a clear adhesive sheet. - Step 5: Add a Finishing Touch
Punch a small hole at the top and thread a piece of twine or ribbon through it. Tie a simple knot to secure.
8. Twig photo frames

I like making twig photo frames because they are simple and use natural materials. You just need twigs, glue, and a cardboard or foam base. This craft works well for both adults and kids.
How to Make Twig Photo Frames
Materials Needed:
- Small twigs or branches (similar length and thickness)
- Cardboard or recycled picture frame base
- Hot glue gun and glue sticks
- Scissors or pruning shears
- Twine or jute string
- Fall embellishments (pinecones, faux leaves, acorns, etc.)
Shop Featured Items


The steps
- Step 1: Prepare the Frame Base
Cut a piece of cardboard to the desired size of your frame. Leave an open space in the center slightly smaller than your photo. You can trace a ready-made frame if you prefer a template. - Step 2: Trim the Twigs
Cut the twigs to match the edges of your frame base. Try to keep the lengths even so the frame looks balanced. You’ll need four twigs for each frame — two for the top and bottom, and two for the sides. - Step 3: Assemble the Frame
Lay out the twigs in a square or rectangular shape on your cardboard base. Glue them in place one at a time using a hot glue gun. Press gently and allow each twig to set before adding the next. - Step 4: Add Natural Decorations
Once the twigs are secure, decorate the corners with small pinecones, dried leaves, or mini acorns. These natural touches add warmth and texture to your rustic frame. - Step 5: Attach Twine for Hanging
Cut a piece of twine long enough to hang your frame and glue each end to the back. Let it dry completely before displaying your finished piece.
9. Watercolor fall leaf art

I enjoy making watercolor fall leaf art because it is simple and relaxing. You only need basic supplies like paper, watercolors, and a brush. This craft works well for both adults and kids.
How to Make Watercolor Fall Leaf Art
Materials Needed:
- Watercolor paints (red, orange, yellow, and brown shades)
- Watercolor paper or thick white cardstock
- Paintbrushes (small and medium round brushes work best)
- Real or faux fall leaves (for tracing or inspiration)
- Pencil
- Small cups of water and paper towels
Shop Featured Items


The steps
- Step 1: Gather and Trace Your Leaves
Choose a few leaves with interesting shapes and trace their outlines lightly onto your watercolor paper using a pencil. You can also freehand your designs if you prefer a looser style. - Step 2: Prepare Your Paints
Mix your watercolor paints with a little water to create soft, blendable tones. Test your colors on a scrap sheet first — autumn shades like burnt orange, mustard yellow, and crimson work beautifully together. - Step 3: Paint the Leaves
Begin by brushing a light wash of your base color over the leaf shape. While the paint is still damp, blend in a second color around the edges or along the veins to create a natural gradient. Experiment with layering and soft transitions to mimic real fall leaves. - Step 4: Add Detail
Once the base layer dries, use a fine brush to add veins or darker edges for definition. Don’t worry about perfection — the charm lies in the fluid, organic feel of watercolor. - Step 5: Let It Dry and Display
Allow your painting to dry completely before framing or using it for cards, wall décor, or journal inserts.
10. Crochet mini pumpkins

I enjoy making crochet mini pumpkins because they are simple and quick to create. You only need basic stitches like single crochet and slip stitch. They add a cozy, seasonal touch to any room or project.
How to Make Crochet Mini Pumpkins
Materials Needed:
- Medium-weight yarn (orange, cream, and brown tones)
- Green yarn for stems
- Crochet hook (size H/5 mm or similar)
- Yarn needle
- Scissors
- Fiberfill or cotton stuffing
Shop Featured Items


The steps
- Step 1: Crochet the Pumpkin Body
Start by chaining enough stitches to form the desired width of your pumpkin (typically 20–25). Work rows of single or half-double crochet until the piece forms a long rectangle. The texture will run vertically on your pumpkin, giving it a natural ribbed look. - Step 2: Form the Shape
Once the piece reaches the right length, fold it in half so the short edges meet. Stitch the ends together using a yarn needle to form a tube. - Step 3: Close the Bottom
Weave your yarn through one open edge of the tube and pull tight to close the bottom. Secure it with a few stitches so the stuffing won’t escape. - Step 4: Add Stuffing and Close the Top
Fill your pumpkin evenly with fiberfill until it feels firm but soft. Then weave the yarn through the top edge and pull tight to close. Knot securely and hide the yarn end inside. - Step 5: Create the Stem
Using green yarn, crochet a short chain (around 6–8 stitches) and work single crochets back along the chain to form a sturdy stem. Sew it to the top of your pumpkin, twisting slightly to make it look realistic. - Step 6: Shape Your Pumpkin
For that signature segmented look, thread a long piece of yarn through the center and wrap it around the pumpkin several times, pulling gently to create ridges. Tie it off at the bottom.
11. Fabric scrap wreaths

I like using fabric scraps to make wreaths for fall. They are simple and don’t need sewing. I just twist a wire hanger into a circle and tie fabric pieces around it. This craft uses leftover fabric and looks great on doors. It’s quick and works for both kids and adults.
How to Make Fabric Scrap Wreaths
Materials Needed:
- Foam or straw wreath form
- Fabric scraps in assorted colors and patterns
- Scissors
- Hot glue gun and glue sticks
- Ribbon or twine for hanging
Shop Featured Items


The steps
- Step 1: Prepare the Fabric Strips
Cut your fabric scraps into long strips about 2–3 inches wide. You can mix solid colors with patterned pieces to create a layered, textured look that feels warm and inviting. - Step 2: Wrap the Wreath Form
Start by securing the end of a fabric strip to the wreath form with a dab of hot glue. Wrap the fabric tightly around the wreath, slightly overlapping each section so no gaps show. When you reach the end of a strip, glue it down and start the next one until the entire wreath is covered. - Step 3: Add Color and Contrast
Alternate between different fabric colors or textures as you wrap. For example, combine burlap with cotton or flannel for a rustic mix. Don’t worry about perfection — the charm comes from the handmade, slightly uneven layers. - Step 4: Secure and Trim
Once you’ve covered the wreath, glue down the final strip neatly at the back. Use scissors to trim any loose threads or uneven edges. - Step 5: Add Embellishments
You can glue on small extras like felt leaves, fabric flowers, or buttons to match the season. A burlap bow or twine loop at the top makes it easy to hang your wreath.
12. Salt-dough leaf magnets

I enjoy making salt dough leaf magnets because they are simple and fun. I press real leaves into the dough to create detailed shapes. After baking, I paint and attach magnets to the back for decoration or gifts.
How to Make Salt Dough Leaf Magnets
Materials Needed:
- 2 cups all-purpose flour
- 1 cup salt
- 1 cup warm water
- Rolling pin
- Leaf cookie cutters (or real leaves for tracing)
- Acrylic paints in fall colors (red, orange, yellow, and brown)
- Paintbrushes
- Magnets and strong craft glue
- Parchment paper and a baking sheet
Shop Featured Items


The steps
- Step 1: Make the Salt Dough
In a mixing bowl, combine flour and salt. Gradually add warm water while stirring until the dough forms. Knead it for a few minutes until smooth and pliable — similar to clay. - Step 2: Roll and Cut the Leaves
Roll the dough out on a lightly floured surface to about ¼ inch thick. Use leaf-shaped cookie cutters to cut out your shapes. If you don’t have cutters, you can trace around real leaves using a small knife or sculpting tool for a rustic touch. - Step 3: Add Texture
Press real leaves gently onto each cutout to imprint their veins for a natural, detailed look. Carefully peel the leaves off before baking. - Step 4: Bake the Shapes
Place your leaves on a parchment-lined baking sheet and bake at 200°F (93°C) for 2–3 hours, or until fully hardened. Let them cool completely before painting. - Step 5: Paint Your Leaves
Once cooled, use acrylic paint to decorate your leaves in warm autumn colors. You can blend shades to mimic real foliage — start light and layer deeper tones for a beautiful gradient effect. - Step 6: Attach the Magnets
After the paint dries, glue small magnets to the back of each leaf using a strong craft adhesive. Let them dry completely before using.
13. Pumpkin seed mosaics

I like using pumpkin seeds to make mosaics in the fall. They are easy to handle and create clear patterns. Plus, if you carved a pumpkin, you already have plenty of seeds to use. This craft is simple for both adults and kids to enjoy.
How to Make Pumpkin Seed Mosaics
Materials Needed:
- Pumpkin seeds (cleaned and dried)
- Acrylic paints (orange, green, yellow, and brown)
- Small paintbrushes
- Thick cardstock or canvas board
- Pencil for sketching
- Craft glue
- Clear sealant spray (optional)
Shop Featured Items


The steps
- Step 1: Prepare and Paint the Seeds
Lay your pumpkin seeds flat on parchment paper and paint them in fall shades. Use orange for the pumpkin, green for leaves and vines, and brown or yellow for accents. Let them dry completely before assembling. - Step 2: Sketch Your Design
Lightly sketch a simple pumpkin shape on your cardstock or canvas. You can also outline leaves or other fall motifs around it to create a full seasonal scene. - Step 3: Glue the Seeds in Place
Working section by section, apply glue and press your painted seeds onto the design. Arrange them tightly together to form colorful, textured patterns. Use smaller seeds or beans to fill detailed areas and add contrast. - Step 4: Add Details and Layers
Once the main pumpkin is filled in, use differently colored seeds to add highlights and shadows for depth. Layering darker tones toward the edges helps the shape stand out more vividly. - Step 5: Let It Dry and Seal
Allow the mosaic to dry for several hours. If you want extra durability and shine, spray a thin coat of clear sealant over the surface once everything is set.
14. Twine-wrapped bottles

I find twine-wrapped bottles easy and cheap to make. All you need is a bottle, twine, and glue. They work well as vases or simple decorations for fall or any season.
How to Make Twine-Wrapped Bottles
- Empty glass bottles (wine, soda, or juice bottles)
- Jute twine or natural cord
- Hot glue gun and glue sticks
- Scissors
- Decorative elements (dried leaves, mini pinecones, or faux flowers)
Shop Featured Items


The steps
- Step 1: Clean and Prep the Bottles
Remove any labels and residue from the bottles by soaking them in warm, soapy water. Let them dry completely before starting. Clean glass ensures your twine sticks securely. - Step 2: Start Wrapping the Twine
Apply a dab of hot glue near the bottom of the bottle and press one end of the twine firmly into place. Begin wrapping the twine tightly around the bottle, keeping each row close together. Add small dots of glue every few turns to keep it secure. - Step 3: Cover Desired Areas
You can wrap the entire bottle or just the center section for a balanced look. Mixing different twine colors or textures adds more visual interest and can match your fall décor. - Step 4: Add Finishing Touches
Once you’ve covered the desired portion, trim the twine and glue the end down neatly. Then decorate the bottle with autumn embellishments — glue on dried leaves, acorns, pinecones, or small faux flowers for a rustic touch. - Step 5: Display Your Bottles
Arrange your twine-wrapped bottles in groups of three or more for a cozy table centerpiece, windowsill display, or mantel accent. Add a single flower stem, branch, or candle inside for extra charm.
15. Felt autumn leaf pins

I like making felt autumn leaf pins because they are simple and quick. You only need felt, scissors, and pin-backs. These pins add a nice fall touch to jackets, bags, or hats.
How to Make Felt Autumn Leaf Pins
Materials Needed:
- Felt sheets in fall colors (orange, yellow, red, and brown)
- Embroidery thread in coordinating or contrasting colors
- Embroidery needle
- Small safety pins or brooch backs
- Scissors
- Leaf template (optional)
Shop Featured Items


The steps
- Step 1: Cut Out the Felt Leaves
Trace your leaf shapes onto the felt using a template or freehand draw them for a natural, varied look. Cut each one carefully with sharp scissors — mix different sizes and colors for variety. - Step 2: Stitch the Leaf Veins
Thread your needle with embroidery thread and stitch simple vein patterns onto each leaf. Use running stitches or backstitches for clean lines. Contrasting colors like gold or yellow thread stand out beautifully against darker felt. - Step 3: Attach the Pin Backs
Once your stitching is complete, flip each leaf over and glue or sew a small safety pin or brooch back near the top. Ensure it’s centered and secure for easy pinning. - Step 4: Add Optional Details
If you’d like, add tiny buttons or beads for texture, or layer smaller leaves on top of larger ones for a 3D effect. - Step 5: Display or Gift Them
Your felt leaf pins are ready to wear! Pin them on jackets, scarves, or tote bags, or use them as cute autumn gifts for friends and family.
16. Handprint turkey crafts

I find handprint turkey crafts simple and fun for both adults and kids. They use just basic supplies like paper and paint. These crafts are great for creating keepsakes or gifts for Thanksgiving.
How to Make Handprint Turkey Crafts
Materials Needed:
- Construction paper in fall colors (red, orange, yellow, brown)
- Scissors
- Glue stick
- Googly eyes or paper cutouts
- Pencil
- Markers or crayons
Shop Featured Items

The steps
- Step 1: Trace Your Handprints
Start by tracing your hand on different sheets of colored paper. These handprints will form the turkey’s feathers. Mix warm tones like red, orange, and yellow for a classic fall look. Cut out each handprint carefully. - Step 2: Create the Turkey’s Body
Cut out a large oval or circle from brown paper for the turkey’s body, and a smaller one for the head. Glue the head on top of the body so it overlaps slightly. - Step 3: Assemble the Feathers
Arrange the colorful handprints in a fan shape behind the turkey’s body. Glue them down securely, layering them so the feathers peek out evenly from behind. - Step 4: Add the Face and Details
Glue on googly eyes or draw eyes with markers. Add a small yellow triangle for the beak and a red teardrop shape for the wattle. Use crayons or markers to add wings, feet, or extra feather details. - Step 5: Personalize and Display
Once your turkey is complete, write your name or a thankful message on it. Let kids use their creativity—add glitter, stickers, or fun patterns if they like. Hang it on the fridge, use it for table décor, or make a family “thankful wall.”
17. Button wreaths

I like making button wreaths because they are simple and creative. You just need a base ring and a collection of buttons in fall colors. Glue the buttons around the ring, layering them for a full look. This craft works well for both adults and kids. It adds a nice fall touch to any room.
How to Make Button Wreaths
Materials Needed:
- Assorted buttons in fall colors (orange, yellow, red, and brown)
- Foam or cardboard wreath form
- Hot glue gun and glue sticks
- Ribbon for hanging
- Scissors
Shop Featured Items


The steps
- Step 1: Prepare Your Wreath Base
Start by cutting out a circular wreath shape from cardboard or using a foam wreath form. If you’re using cardboard, make sure the circle is sturdy and wide enough to hold multiple layers of buttons. - Step 2: Sort and Plan Your Buttons
Lay out your buttons by color and size. Mixing large and small buttons gives your wreath more texture and visual depth. Try arranging them on the form before gluing to plan your color pattern. - Step 3: Begin Gluing the Buttons
Using your hot glue gun, start attaching the buttons around the wreath form. Work in small sections and overlap the buttons slightly to cover the surface completely. Continue until the entire wreath is filled. - Step 4: Add a Second Layer (Optional)
For a fuller, more detailed look, glue a second layer of smaller buttons over the first one. This adds richness and helps fill in any gaps. - Step 5: Attach a Ribbon and Hang
Cut a piece of ribbon and glue or tie it to the back of the wreath for hanging. Choose a coordinating ribbon color, like gold, red, or burlap, to match the fall theme.
18. Wooden slice coasters

I find wooden slice coasters easy and fun to make. They protect furniture and add a simple, natural touch to any room. You can decorate them with paint, wood burning, or fall-themed patterns to match the season.
How to Make Wooden Slice Coasters
Materials Needed:
- Natural wood slices (4–5 inches in diameter)
- Sandpaper (fine-grit)
- Paintbrushes
- Acrylic paint or wood stain
- Clear varnish or sealant
- Optional: stencils, painter’s tape, or woodburning tool
Shop Featured Items


The steps
- Step 1: Prepare the Wood Slices
Start by lightly sanding each wood slice to remove any rough edges or uneven surfaces. Wipe away any dust with a dry cloth before painting or staining. - Step 2: Add Paint or Stain
If you want a rustic look, apply wood stain to highlight the natural grain. For a more creative twist, paint patterns or designs—like fall leaves, pumpkins, or monograms—using acrylic paint. Let each slice dry completely. - Step 3: Personalize Your Design
Use stencils or freehand designs to decorate your coasters. You can also use a woodburning tool to etch initials or outlines for a farmhouse touch. - Step 4: Seal the Surface
Apply a coat of clear varnish or sealant to protect your coasters from moisture and heat. Let them dry thoroughly before stacking or using them. - Step 5: Display or Gift Them
Once dry, tie your coasters together with twine or ribbon. They make charming fall gifts or cozy additions to your coffee table décor.