


Table of Contents Show
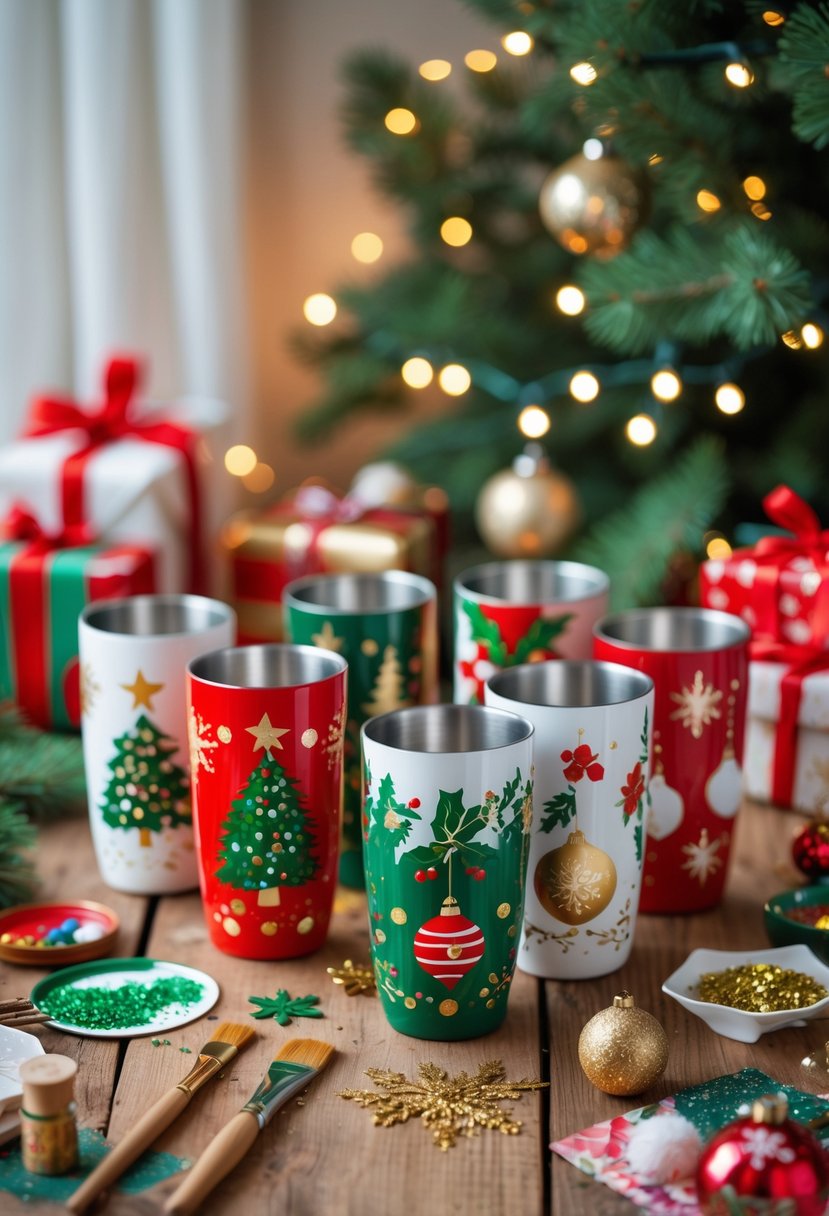
These Hand-Painted Christmas Tumblers are the perfect blend of creativity and festive charm. They make thoughtful handmade gifts, holiday table decorations, or even fun personalized drinkware for family gatherings. Once sealed properly, these designs will last for many holiday seasons to come.
Painting your own tumblers lets you bring a touch of Christmas cheer to your everyday mugs or stainless-steel cups while showing off your artistic side.
Whether you paint classic Christmas trees, ornaments, or holly sprigs, these tumblers instantly brighten your drinkware collection.
How to Make Hand-Painted Christmas Tumblers
This craft is simple enough for beginners yet beautiful enough to look store-bought when done. It’s a great project for an afternoon of holiday fun with friends, kids, or coworkers.
For People Who Love to Make Things ✂️
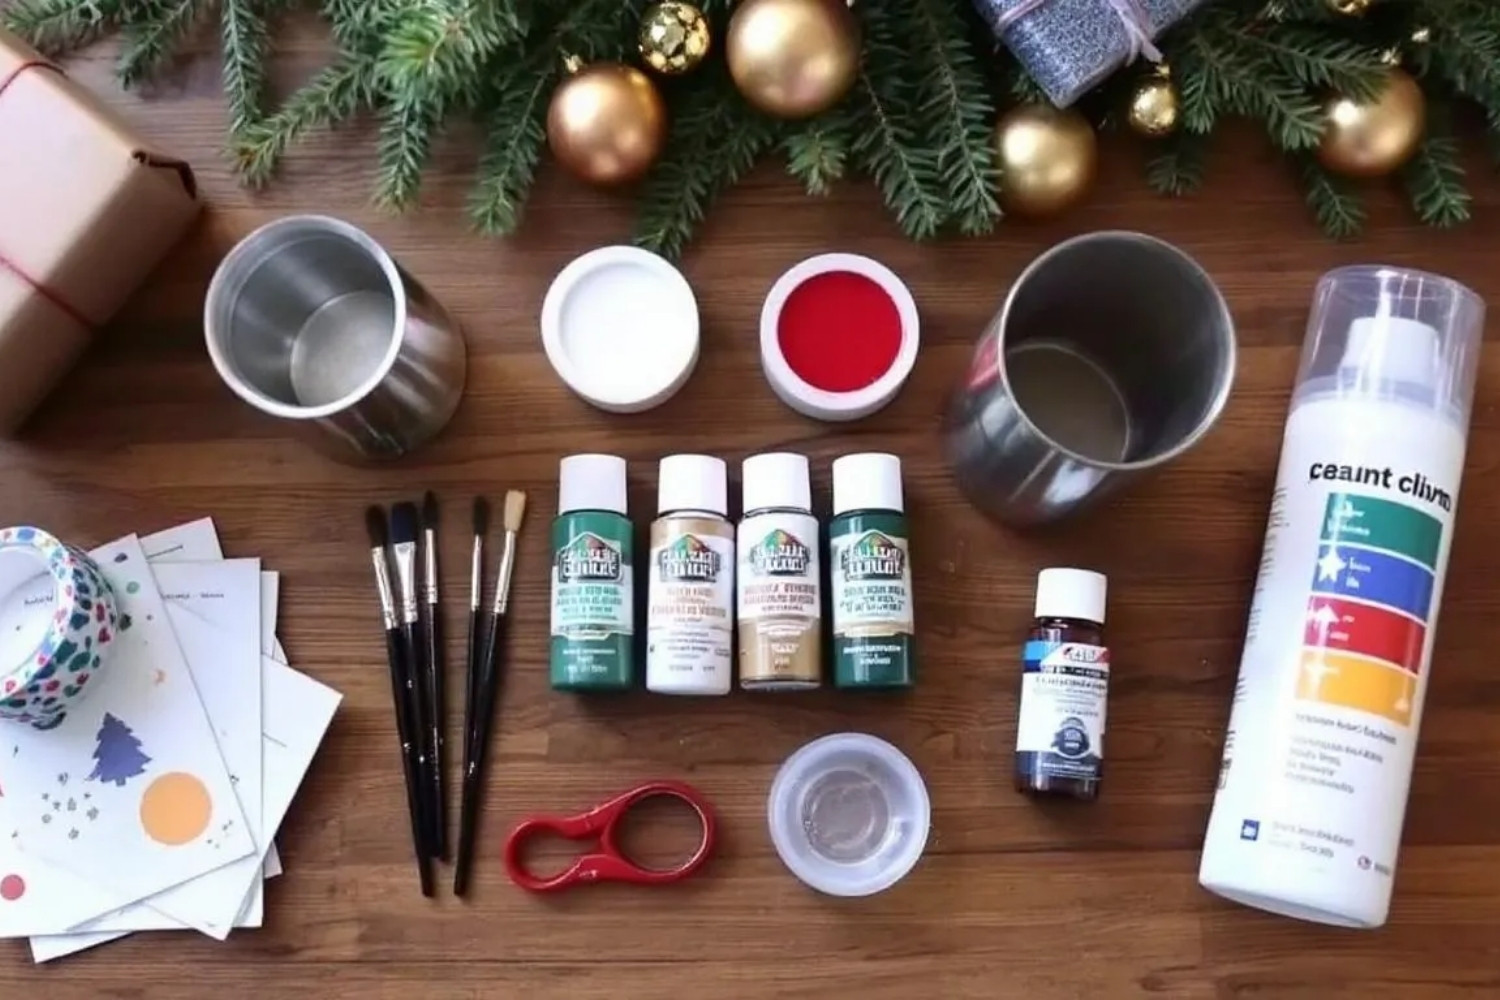
Materials
- Stainless steel or ceramic tumblers (clean and dry)
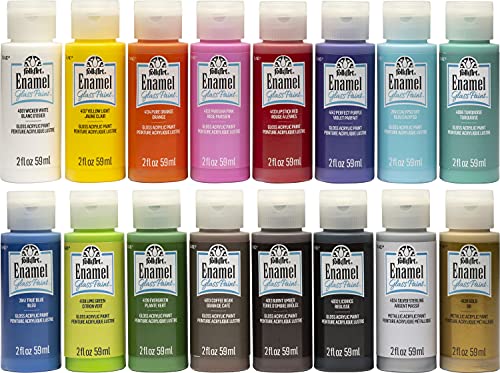
- Acrylic or enamel paint (red, green, white, gold, and festive colors)
- Paintbrushes (fine and medium tips)
- Painter’s tape or stencils (optional)
- Paint palette or disposable plate
- Paper towels and rubbing alcohol (for cleaning the surface)
- Sealant spray or dishwasher-safe Mod Podge
- Glitter paint or embellishments (optional)
- Pencil or chalk for sketching designs
Shop the materials


The steps
Step 1: Clean and Prep the Tumblers
Before painting, wipe down each tumbler with rubbing alcohol to remove any oils or residue. This step ensures your paint adheres properly and doesn’t chip off later. Allow it to air dry completely.
Pro Tip: If your design includes sharp lines or color blocks, use painter’s tape to mark off the areas before painting.
Step 2: Sketch or Stencil Your Design
Lightly draw your Christmas design using a pencil or chalk. Simple shapes like trees, ornaments, snowflakes, or holly leaves work beautifully. If freehand drawing isn’t your thing, use stencils for clean, even outlines.
Step 3: Paint the Base Colors
Start by painting your larger shapes — Christmas trees, ornaments, or holly leaves — with your base colors. Use medium brushes for filling in shapes and fine-tipped brushes for edges. Work in thin layers, letting each coat dry before adding another to prevent streaks.
Creative Twist: Mix a little glitter paint into your base layer for a festive shimmer that catches the light beautifully.
Step 4: Add the Details
Once the base is dry, it’s time for the fun part — the little touches! Add gold stars, ornaments, ribbons, or snowflake accents using metallic or white paint. Outline your design for definition and add highlights or small dots for sparkle.
Parent tip: If crafting with kids, assign them easier elements like polka dots or snowflakes while adults handle the finer designs.
Step 5: Dry and Seal
Let the tumblers dry completely — at least 24 hours. Once dry, apply a clear sealant spray or dishwasher-safe Mod Podge to protect the paint and make it last longer. Avoid applying too thickly to prevent streaks.
Step 6: Cure and Display
If you’re using enamel paint, follow the manufacturer’s instructions for curing — usually baking at a low temperature to harden the paint. After sealing, allow the tumblers to rest for 48–72 hours before using.
Now your hand-painted tumblers are ready to shine! Use them for serving holiday drinks, gifting to loved ones, or adding a custom touch to your Christmas table.
Each cup becomes a one-of-a-kind keepsake that spreads a little handmade joy every time it’s used.


