Table of Contents Show
Autumn is a great time to get creative and bring a cozy feeling to your home. I enjoy using this season to try new crafts that capture the colors and spirit of fall. Crafting can make the cool afternoons more fun and give you something to share with family or friends.

If you’re looking for simple and meaningful ways to enjoy the season, these 12 autumn craft ideas are worth trying.
Each project can add warmth and style to your space without requiring a lot of skill or materials. I’ve chosen ideas that are easy to follow and perfect for anyone who wants to welcome fall with hands-on creativity.
Pine Cone Owl Decorations
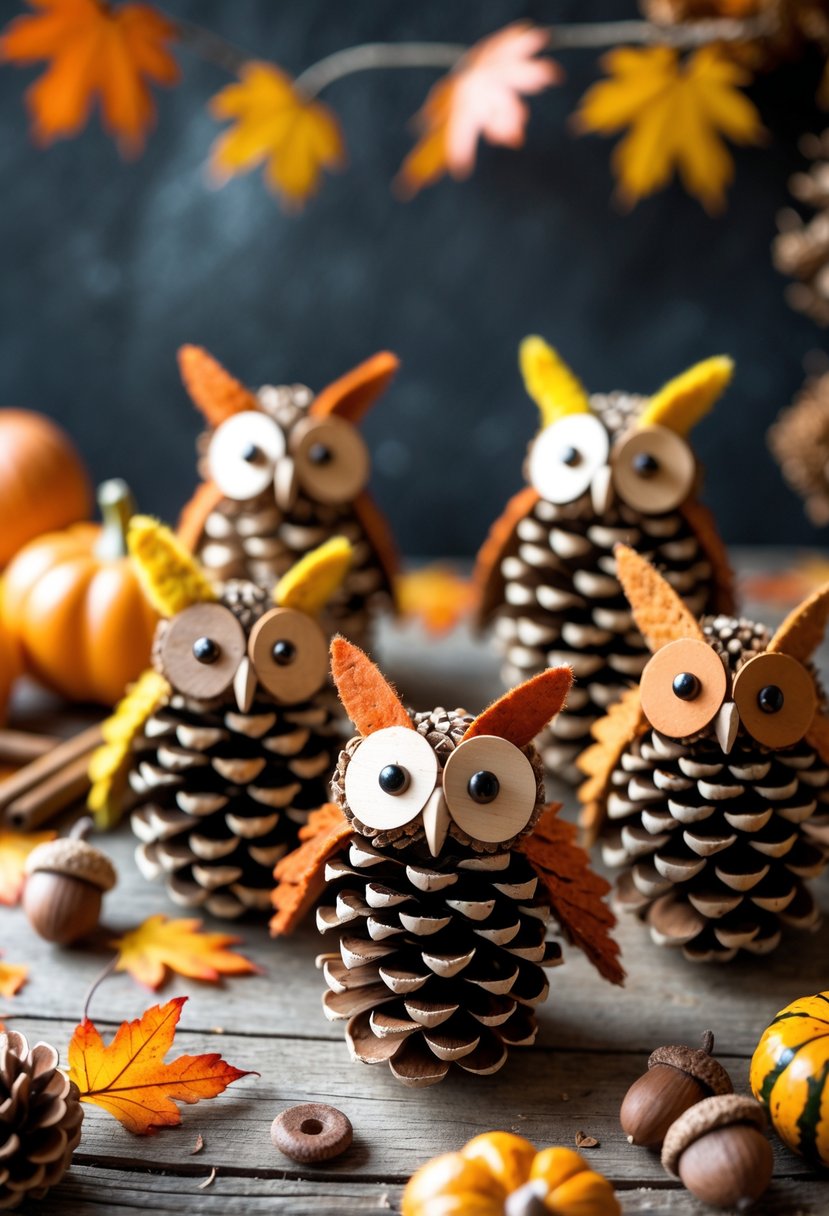
I enjoy making pine cone owls because they use simple, natural materials. You only need pine cones, glue, and small items like felt or acorn tops for eyes and beaks.
These little owls add a cozy, autumn feel to any room. They are easy to make and fun for all ages.
For People Who Love to Make Things ✂️
How to Make Pine Cone Owl Decorations
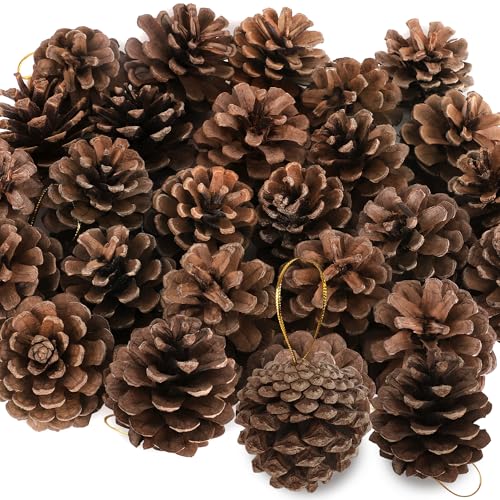
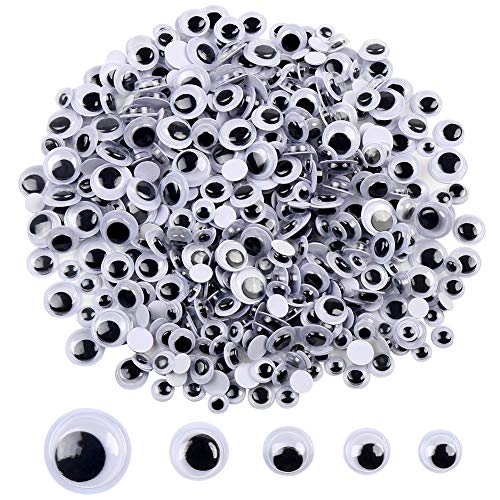
Materials Needed:
- Pine cones (medium-sized)
- Felt sheets in fall colors (orange, yellow, brown)
- Googly eyes or wooden craft eyes
- Hot glue gun or craft glue
- Small beads or black buttons (for pupils)
- Scissors
Shop the materials


The steps
- Step 1: Choose and Prepare Pine Cones
Pick pine cones that stand upright easily. If needed, trim the bottom or glue a small wooden slice to the base for stability. Brush off any dirt or loose bits before decorating. - Step 2: Cut the Felt Pieces
Cut two small triangles for the owl’s ears, two wing shapes for the sides, and a small diamond shape for the beak. Choose warm fall tones like burnt orange, golden yellow, or brown for a cozy seasonal look. - Step 3: Make the Eyes
Glue two large googly eyes or wooden circles near the top of the pine cone. For extra detail, add tiny beads or black buttons in the center to create realistic pupils. - Step 4: Attach the Ears, Wings, and Beak
Glue the felt ears to the top of the pine cone and the wings to each side. Fold the diamond-shaped beak in half and glue it just below the eyes. Adjust the placement to give each owl its own expression. - Step 5: Add Final Touches
Once everything is dry, you can perch your owl on a branch, display it on a mantel, or use it as a centerpiece. Make a small family of owls with different colors for extra charm!
Pumpkin Mason Jar Lanterns
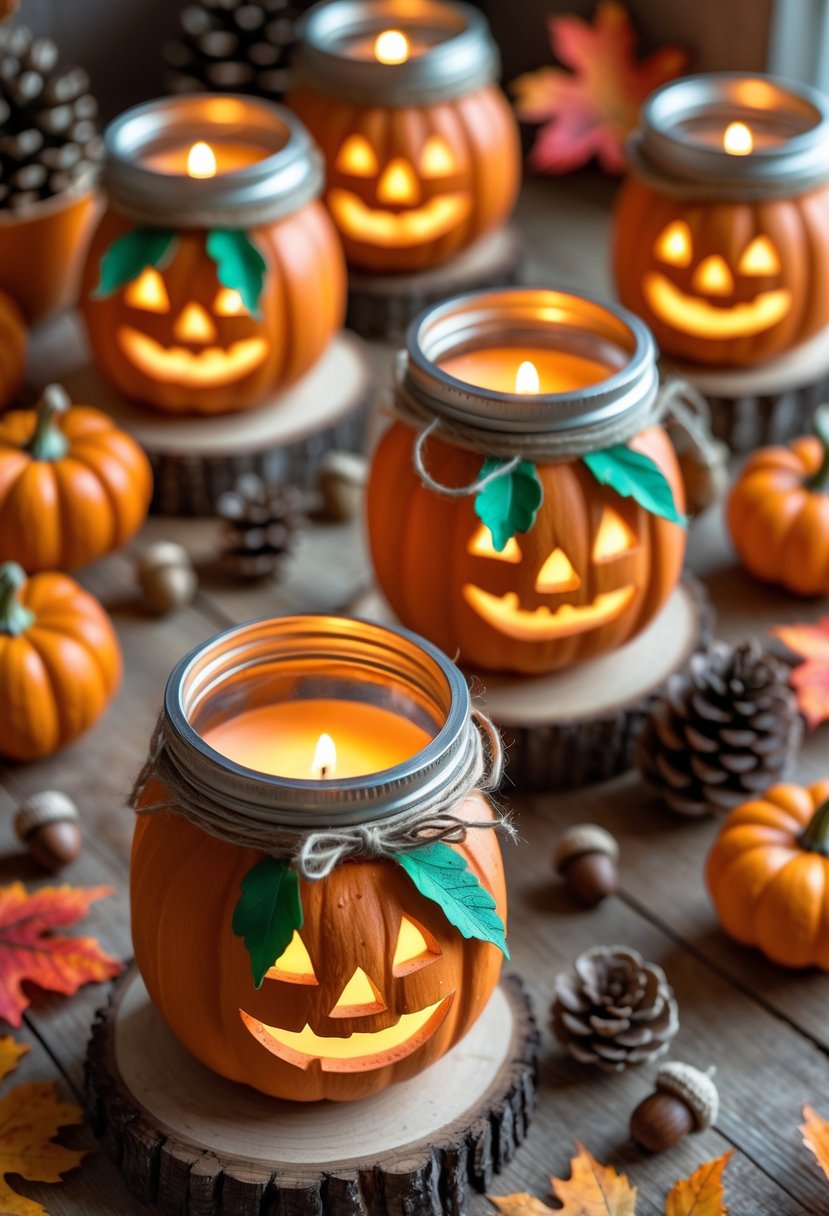
I enjoy making pumpkin mason jar lanterns each fall. They are simple to create using basic paint and a few supplies. These lanterns add a soft, warm glow that fits any autumn decor.
How to Make Pumpkin Mason Jar Lanterns
Materials Needed:
- Mason jars (any size)
- Orange acrylic paint or spray paint
- Black paint or vinyl for the face
- Paintbrushes or sponge brushes
- Tea lights or LED candles
- Twine or raffia
- Green felt or faux leaves (optional)
Shop the materials


The steps
- Step 1: Prepare and Paint the Jars
Clean your mason jars thoroughly and let them dry. Then, apply an even coat of orange paint on the outside of each jar. For a smoother look, use spray paint; for a rustic, hand-painted finish, use a brush. Let them dry completely before adding any details. - Step 2: Create the Pumpkin Faces
Using black acrylic paint or adhesive vinyl, paint or stick on classic jack-o’-lantern faces—triangles for eyes and nose, and a wide smile. You can get creative here: make spooky, silly, or cheerful expressions to give each lantern personality. - Step 3: Add Finishing Touches
Once the paint is dry, wrap twine or raffia around the top rim of the jar. Glue on green felt leaves or faux greenery for a fun pumpkin “stem” effect. These small details make your lanterns extra festive. - Step 4: Add Light
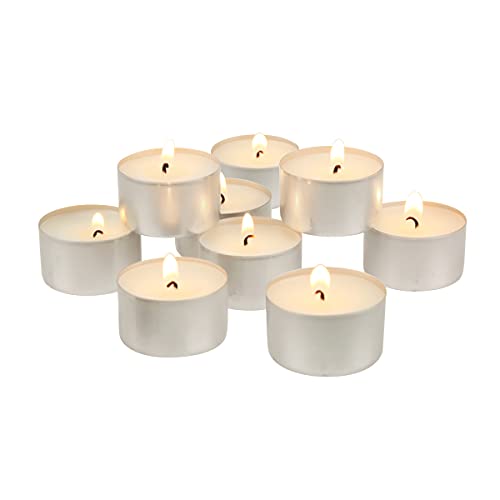
Place a tea light or LED candle inside each jar. LED candles are a safe, long-lasting option—especially if you plan to display the lanterns indoors or around kids. - Step 5: Display and Enjoy
Arrange your glowing pumpkin lanterns on tables, windowsills, or your front porch. They’re perfect for cozy fall nights or as Halloween décor that’s both cheerful and inviting.
Cinnamon Stick Candle Holders
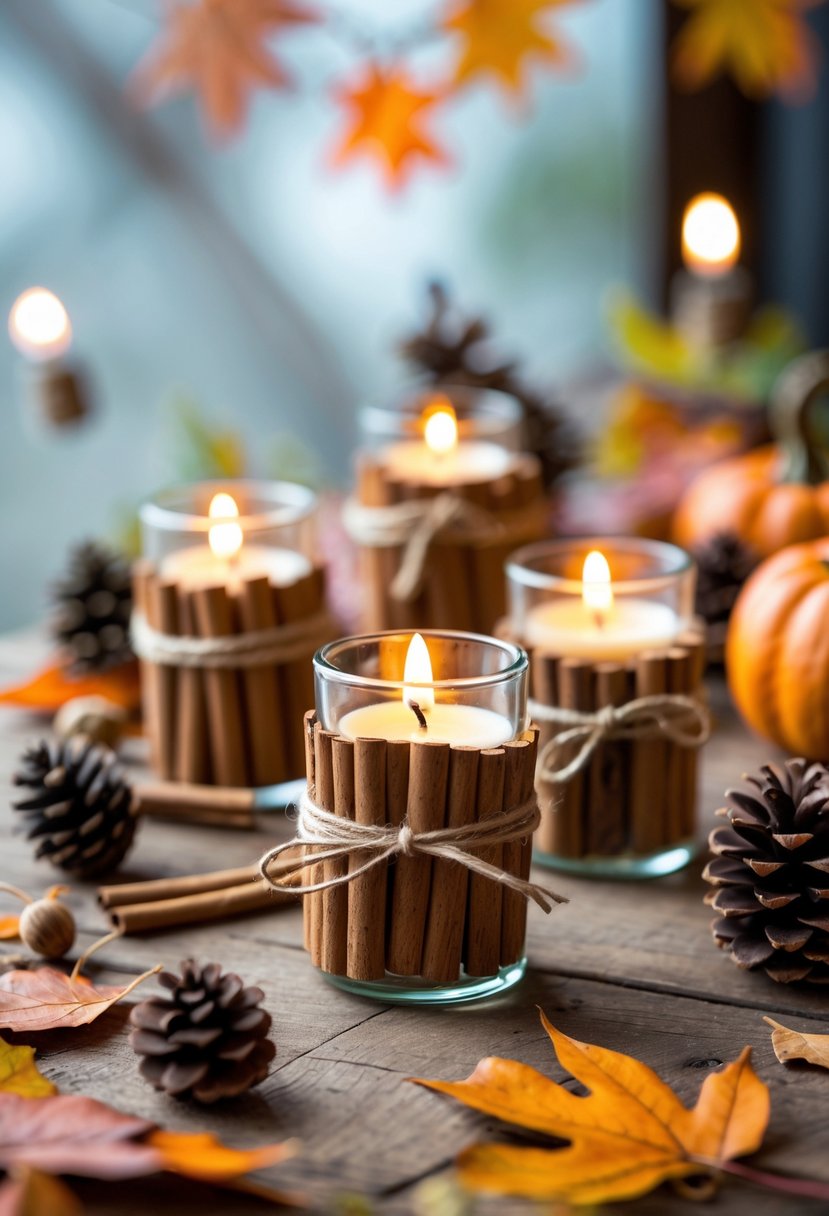
I like making cinnamon stick candle holders because they are simple and smell nice. You just need cinnamon sticks, a candle, and something like a rubber band or glue to hold the sticks in place.
These holders add a cozy, natural touch to any room. They work well with glass candles and take less than 20 minutes to make.
How to Make Cinnamon Stick Candle Holders
Materials Needed:
- Glass candle holders or small jars
- Cinnamon sticks (about the height of your candle holders)
- Hot glue gun or strong craft glue
- Twine or raffia ribbon
- Tea light or votive candles
Shop the materials


The steps
- Step 1: Prepare the Candle Holders
Start by cleaning your glass holders so the glue adheres well. Choose jars that are smooth and slightly thick, as they’ll hold heat better and provide a sturdy base for the cinnamon sticks. - Step 2: Attach the Cinnamon Sticks
Line up your cinnamon sticks vertically around the jar. Glue each one individually, making sure they’re evenly spaced and snug against each other. Continue until the entire jar is surrounded by cinnamon sticks. - Step 3: Add the Twine or Ribbon
Once the glue has dried, wrap a piece of twine or raffia around the middle of the holder and tie it into a bow. This simple touch gives your candle a cozy, rustic charm that fits perfectly with fall décor. - Step 4: Insert the Candle
Place your tea light or votive candle inside the holder. When lit, the warmth of the flame will gently heat the cinnamon sticks, releasing a soft, natural fragrance throughout your space. - Step 5: Display Your Handiwork
Arrange your cinnamon stick candles on a dining table, windowsill, or mantel. Th
Autumn Leaf Wreath
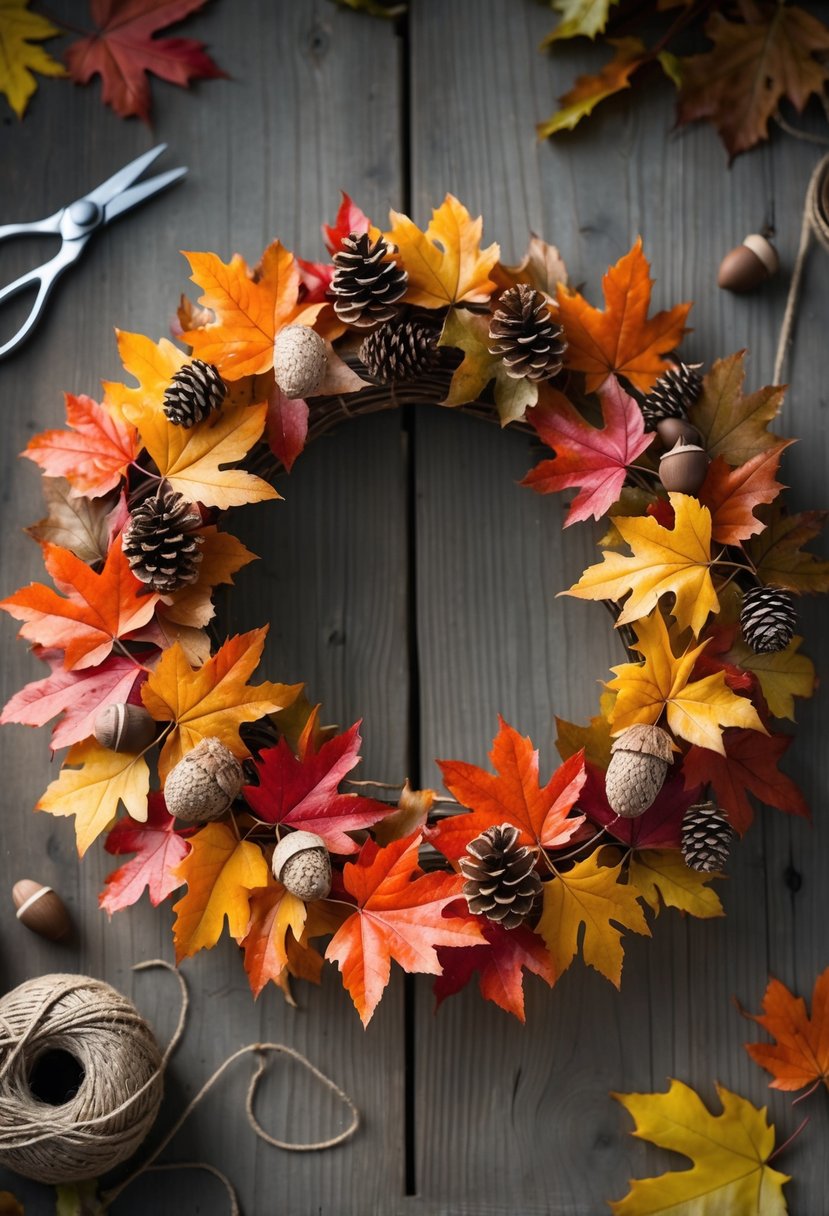
I love making autumn leaf wreaths because they bring a simple, natural touch to any door. Using real or artificial leaves gives me options for a long-lasting decoration. I usually choose a mix of colors like red, orange, and yellow. It is easy to arrange them on a round base to create a warm autumn look.
How to Make an Autumn Leaf Wreath
Materials Needed:
- Grapevine or foam wreath base
- Faux autumn leaves (in red, orange, yellow, and brown)
- Pinecones and acorns
- Hot glue gun or floral wire
- Twine or ribbon for hanging
- Scissors
Shop the materials


The steps
- Step 1: Prepare Your Wreath Base
Start with a plain grapevine or foam wreath base. If it’s a grapevine base, gently shake off any loose twigs. Foam bases can be wrapped in burlap or ribbon to give them a natural look before decorating. - Step 2: Arrange the Leaves
Lay out your faux leaves around the wreath before gluing. Mix different sizes and colors for a full, layered effect. Once you’re happy with the arrangement, glue or wire them securely in place, overlapping them slightly for a natural flow. - Step 3: Add Pinecones and Acorns
Attach pinecones and acorns evenly around the wreath to add depth and texture. Focus on grouping them in clusters or spacing them symmetrically for a balanced look. - Step 4: Fill in Any Gaps
After your main decorations are secure, step back and check for any bare spots. Add a few more leaves or small twigs to fill in and give the wreath a lush, finished appearance. - Step 5: Add a Hanging Loop
Cut a piece of twine or ribbon, make a loop, and glue or tie it to the back of the wreath. This will make hanging easy whether it’s on your door, window, or mantel.
Pressed Leaf Bookmarks
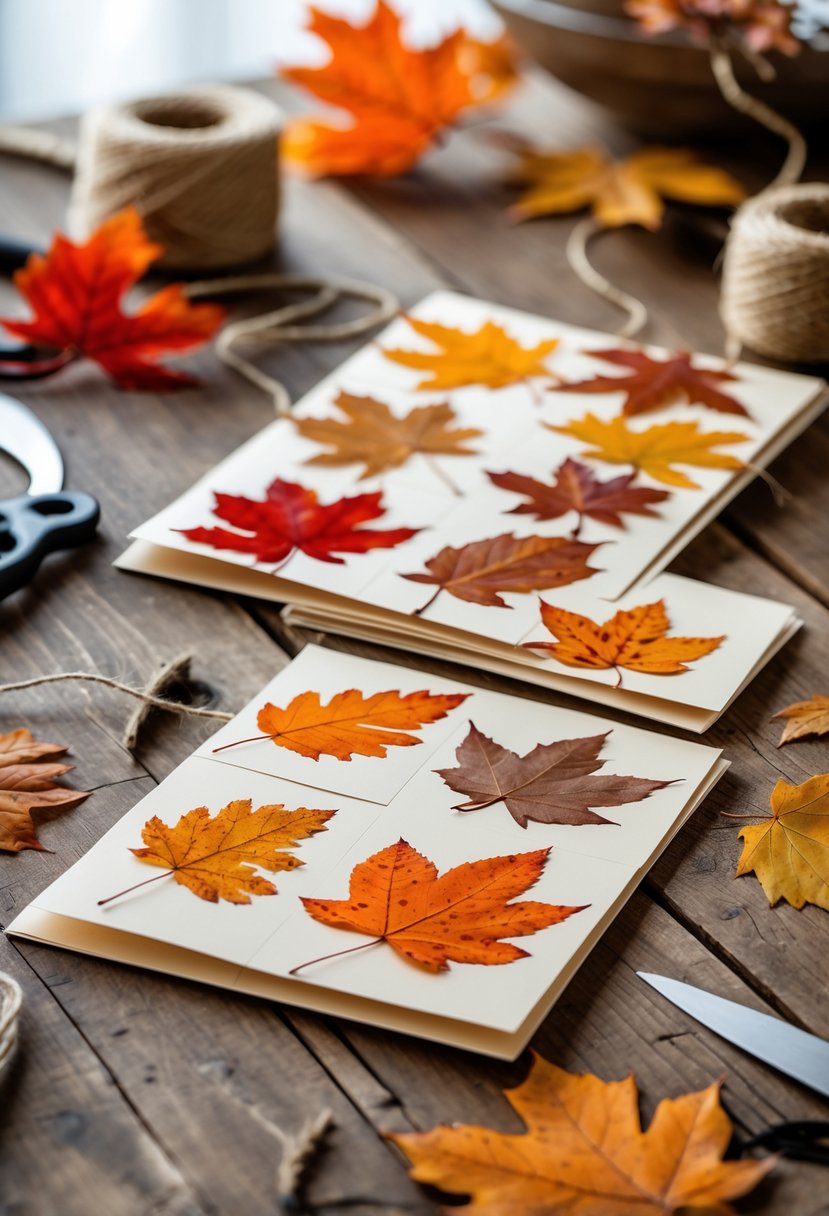
I enjoy making pressed leaf bookmarks every fall. It’s simple to press colorful leaves and use them to create bookmarks. These bookmarks keep the beauty of autumn leaves for a long time. I find them both practical and a nice way to remember the season.
How to Make Pressed Leaf Bookmarks
Materials Needed:
- Autumn leaves (freshly picked and flat)
- Heavy books or a flower press
- Parchment paper or wax paper
- Bookmark-sized cardstock or thick paper
- Clear contact paper or laminating sheets
- Scissors and glue
- Hole punch (optional)
- Ribbon or twine for decoration
Shop the materials


The steps
- Step 1: Collect and Prepare Leaves
Choose leaves that are colorful, flat, and free from moisture or tears. Wipe off any dirt or dust before pressing. Pick a mix of shades—reds, oranges, yellows, and browns—for a beautiful autumn palette. - Step 2: Press the Leaves
Place each leaf between two sheets of parchment or wax paper. Slide them inside a heavy book or a flower press and let them sit for about a week. This removes moisture and keeps them crisp and flat for your bookmarks. - Step 3: Create the Bookmark Base
Cut rectangles of cardstock to your preferred size (about 2×6 inches works best). Arrange your pressed leaves on top and glue them in place. Mix and match leaf shapes to create unique designs for each bookmark. - Step 4: Laminate or Cover
Once the glue dries, seal your bookmark using clear contact paper or a laminating sheet. This protects the leaves and gives the bookmark a polished, lasting finish. Trim the edges neatly. - Step 5: Add Finishing Touches
Use a hole punch at the top and tie a ribbon or twine through the hole for a charming touch. You can even write a small quote or “Happy Fall” message at the back for gifting.
Maple Leaf Wall Art
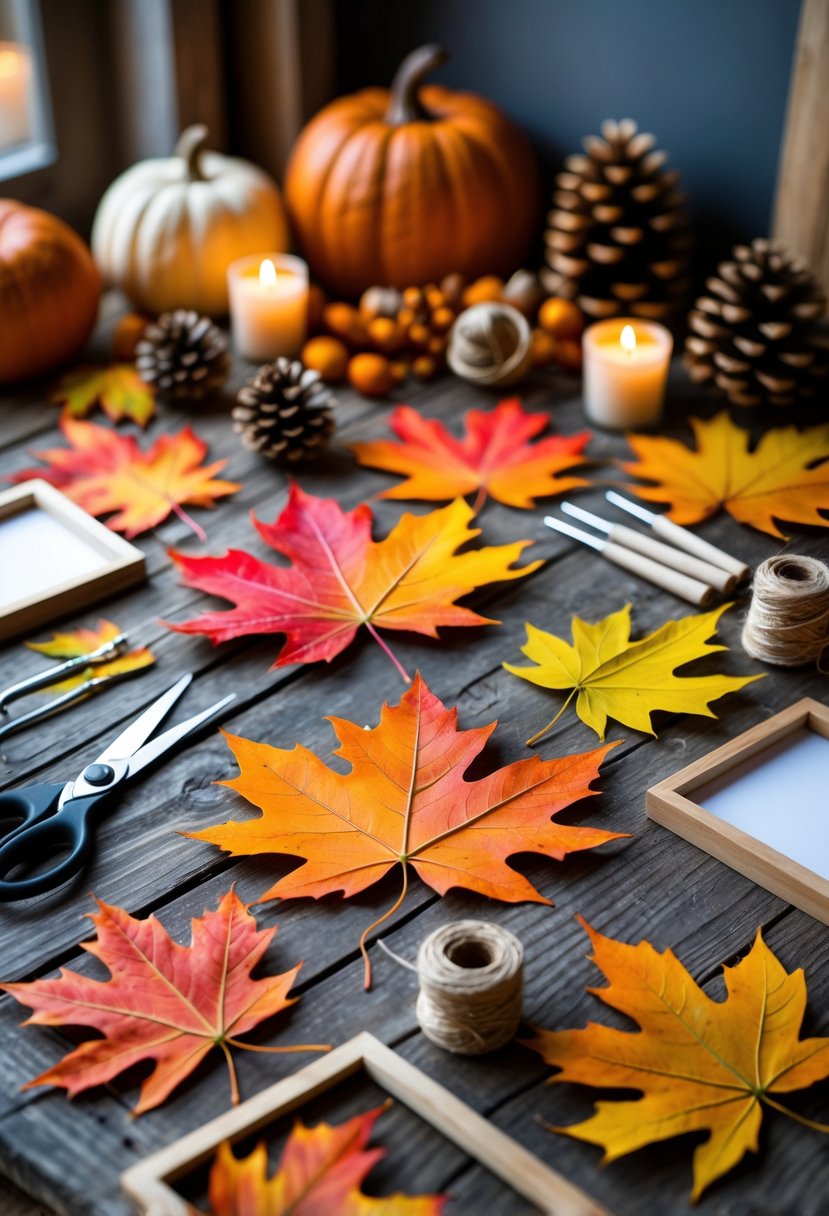
I enjoy making maple leaf wall art because it is simple and looks great. You can use real leaves or create painted designs. Hanging these pieces adds a warm, natural touch to any room during autumn. It’s a craft that works well for all ages.
How to Make Maple Leaf Wall Art
Materials Needed:
- Real or faux maple leaves (in a mix of fall colors)
- Picture frame or shadow box
- White or neutral background paper
- Glue or double-sided tape
- Scissors
- Optional: twine, small pinecones, or mini acorns for decoration
Shop the materials


The steps
- Step 1: Choose and Prepare Your Leaves
Pick your favorite maple leaves in different autumn shades—reds, yellows, and oranges work beautifully together. If using real leaves, press them flat for a few days between parchment paper and heavy books to remove moisture. - Step 2: Prepare the Frame
Remove the back panel of your picture frame and use it as a guide to cut your background paper to size. Choose a light or neutral background that helps the leaf colors stand out. - Step 3: Arrange Your Leaves
Lay the pressed or faux leaves on the background paper. Play around with the arrangement before gluing them down—try a pattern, a cascading effect, or even a centered leaf design. - Step 4: Attach the Leaves
Once you’re happy with your layout, use a thin layer of glue or double-sided tape to secure the leaves. If you’d like a more three-dimensional look, use foam adhesive dots to lift a few leaves slightly off the paper. - Step 5: Add Finishing Touches
After the leaves are set, decorate the frame or the corners of the background with small natural elements like pinecones, twine bows, or mini acorns for a rustic finish. - Step 6: Frame and Display
Carefully place your design back into the frame and close it securely. Hang it on the wall or place it on a mantel or shelf—it’s a simple yet eye-catching way to bring fall indoors.
Acorn Garland
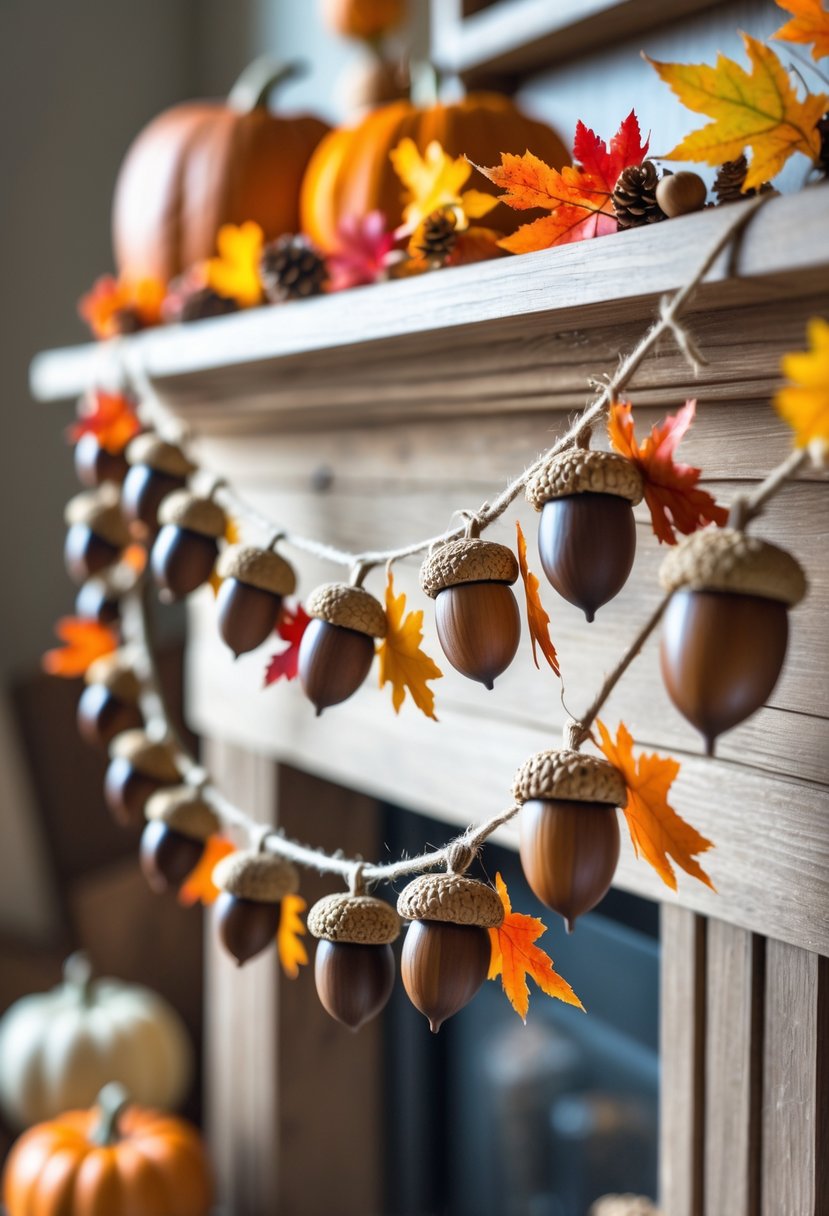
I enjoy making acorn garlands each fall. They are simple to create using twine and dried acorns. This craft adds a natural, rustic touch to my home decor. It also lets me bring a bit of the outdoors inside during autumn.
How to Make an Acorn Garland
Materials Needed:
- Faux or real acorns (clean and dry if real)
- Twine or jute string
- Hot glue gun and glue sticks
- Faux autumn leaves
- Scissors
- Small pinecones or wooden beads (optional)
Shop the materials


The steps
- Step 1: Prepare the Acorns
If you’re using real acorns, make sure they’re clean and dry. You can bake them in the oven at a low temperature (around 200°F for 15–20 minutes) to remove any moisture or tiny pests. Faux acorns work just as well and are ready to use right away. - Step 2: Cut the Twine
Decide how long you want your garland to be—typically 4–6 feet is perfect for mantels or doorways. Cut your twine accordingly and leave a few extra inches on both ends for hanging. - Step 3: Arrange Your Decorations
Lay the twine on a flat surface and arrange your acorns and leaves along it before gluing. Alternate between acorns, leaves, and optional pinecones or beads to create a balanced, natural look. - Step 4: Attach the Acorns
Use your hot glue gun to attach each acorn cap to the twine. Press gently and hold for a few seconds to secure. Space them evenly—about 3–4 inches apart. - Step 5: Add the Leaves
Glue the faux leaves between the acorns for a pop of fall color. Mix warm shades of orange, red, and yellow to make your garland come alive. - Step 6: Hang and Enjoy
Once the glue is dry, hang your garland on the mantel, staircase railing, or across a window. The mix of textures and colors adds a cozy, rustic charm to any fall space.
Rustic Twig Picture Frames
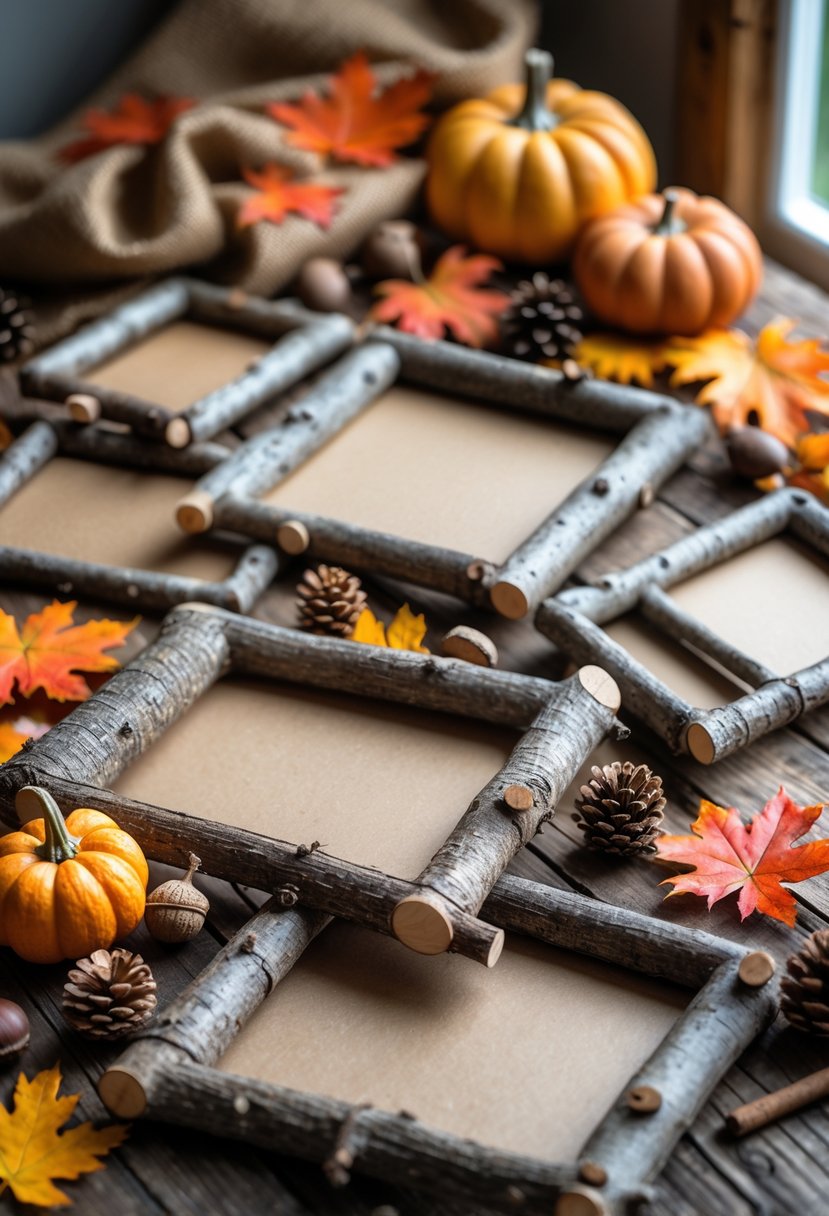
I like making rustic twig picture frames because they are simple and use natural materials. Collect twigs from outside and glue them around a basic wood frame. It takes about 15 minutes and costs almost nothing.
You can add small flowers or paint the frame to match your home. These frames give photos a warm, cozy feel, perfect for autumn decor.
How to Make Rustic Twig Picture Frames
Materials Needed:
- Small twigs or branches (similar in thickness)
- Plain photo frame (wood or cardboard base)
- Hot glue gun and glue sticks
- Pruning shears or scissors
- Optional: twine, mini pinecones, acorns, or faux leaves for decoration
Shop the materials


The steps
- Step 1: Gather and Trim Your Twigs
Collect twigs from your yard or a nearby park. Look for straight, sturdy branches and trim them with pruning shears so they fit around your frame. Try to match the sizes and thicknesses for a balanced look. - Step 2: Prepare the Frame Base
Use a simple wooden or cardboard photo frame as your base. If it’s glossy, lightly sand it so the glue adheres better. Make sure the surface is clean and dry. - Step 3: Arrange the Twigs
Lay out the twigs around the frame before gluing to visualize the pattern. You can align them horizontally, vertically, or even layer them diagonally for a more natural, rustic appearance. - Step 4: Glue the Twigs in Place
Use your hot glue gun to attach each twig securely along the frame edges. Hold each piece for a few seconds to ensure it sets properly. Continue until the entire border is covered. - Step 5: Add Rustic Touches
Once your twigs are attached, decorate the corners with small pinecones, acorns, or faux autumn leaves. You can also wrap a piece of twine around the corners for added charm. - Step 6: Insert Your Photo and Display
- After the glue has fully dried, insert your favorite fall photo or artwork. Display your finished frame on a mantel, desk, or wall for a cozy, handmade touch.
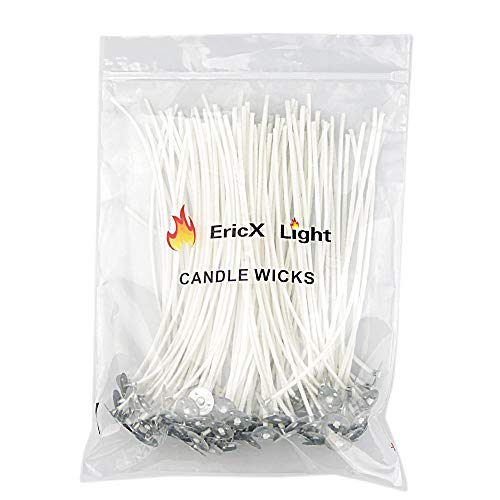
DIY Pine Cone Fire Starters
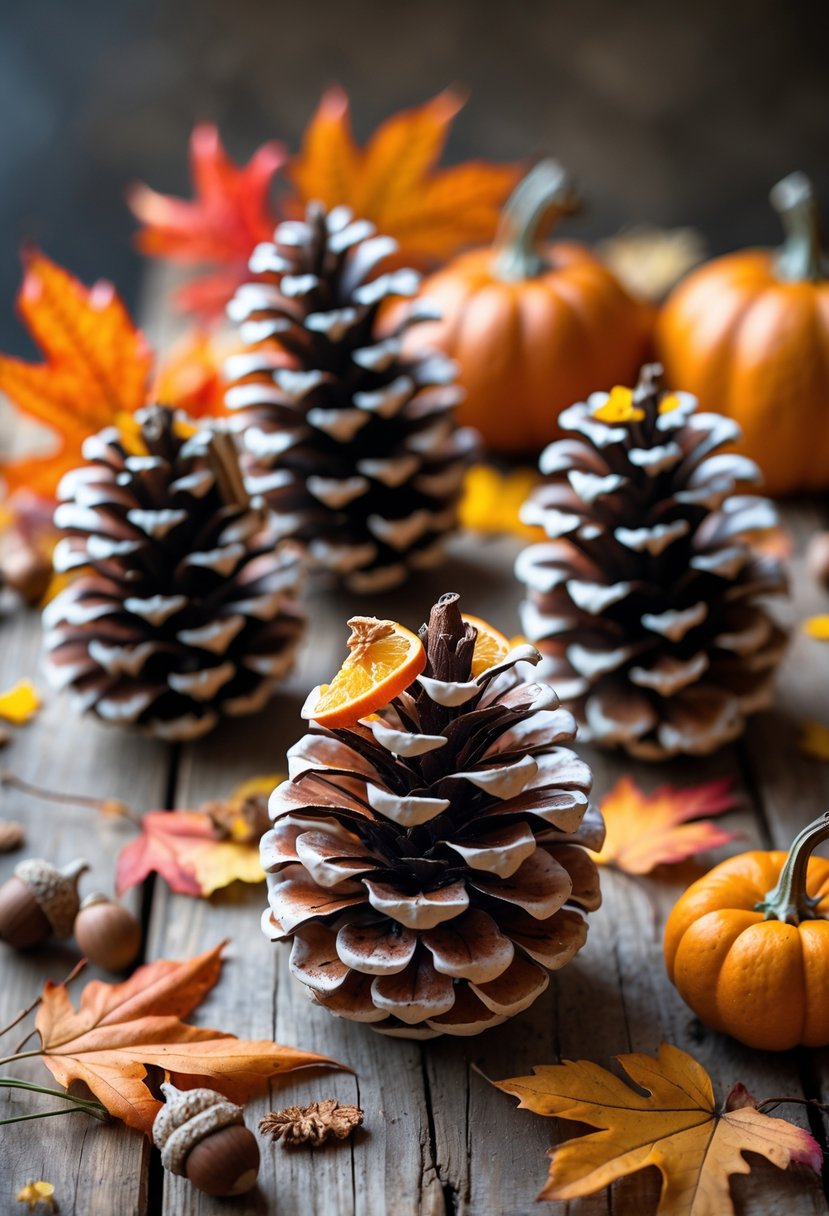
I like making pine cone fire starters because they are simple and useful. You only need pine cones, wax, and some string. They help start fires quickly in fireplaces or outdoor pits. I add scents like cinnamon or pine for a natural fragrance.
Making a batch takes about 30 minutes. They also make nice, inexpensive gifts during the fall season.
How to Make DIY Pine Cone Fire Starters
Materials Needed:
- Large, clean pinecones
- Wax (beeswax, soy wax, or old candle remnants)
- Double boiler or heat-safe bowl and pot
- Wick or cotton twine pieces (about 4–6 inches long)
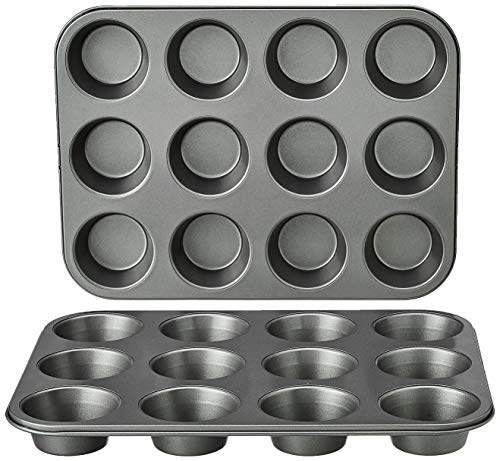
- Muffin tin or parchment paper
- Optional: essential oils (cinnamon, pine, or clove for scent)
- Optional: dried orange slices, cinnamon sticks, or star anise for decoration
Shop the materials


The steps
- Step 1: Prepare the Pinecones
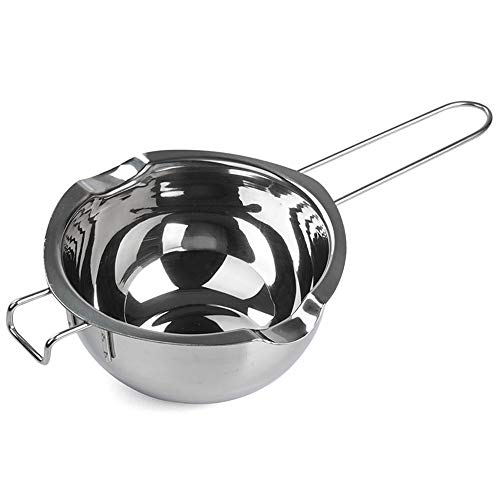
Start by cleaning your pinecones. Shake off dirt and debris, then bake them at 200°F (93°C) for about 20 minutes to kill any bugs and help them fully open up. Let them cool before using. - Step 2: Melt the Wax
In a double boiler, melt your wax slowly over low heat. If you’d like scented fire starters, add a few drops of essential oil once the wax is fully melted. - Step 3: Add the Wicks
Tie a piece of wick or cotton twine around the top of each pinecone, leaving a few inches of wick hanging out. This will act as your lighting point when you use them in the fireplace or firepit. - Step 4: Dip the Pinecones
Hold each pinecone by the wick and dip it into the melted wax. Let the excess drip off, then place it on parchment paper or in a muffin tin to dry. For a thicker coating, repeat the dipping process once the first layer hardens. - Step 5: Add Decorative Touches
Before the final layer of wax hardens, gently press a few decorative pieces like dried orange slices or a small cinnamon stick onto the pinecone. It adds a festive touch and releases a lovely scent when burned. - Step 6: Let Them Set
Allow the pinecones to harden completely — this usually takes about an hour. Once solid, they’re ready to use or gift. - Step 7: Use or Gift
To use, simply place one under your kindling and light the wick. The wax helps the fire catch easily, while the natural materials make it burn cleanly. Bundle a few together with twine and gift them for the holidays
Fabric Scrap Pumpkins
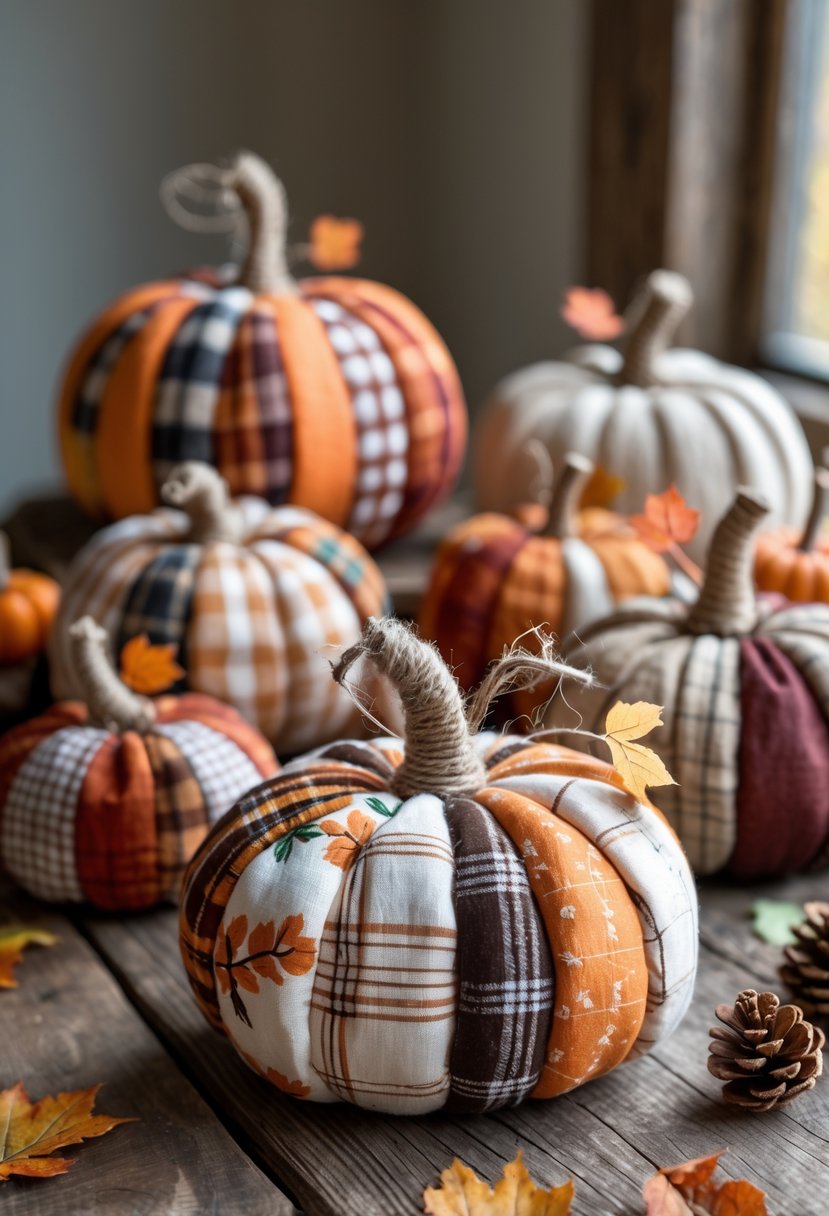
I like making fabric scrap pumpkins because they use leftover cloth and are simple to create. You only need small fabric pieces and some basic supplies. They add a cozy feel to my fall decor without costing much or needing advanced skills.
How to Make Fabric Scrap Pumpkins
Materials Needed:
- Fabric scraps in fall colors or patterns (flannel, plaid, or cotton)
- Scissors
- Needle and thread or a hot glue gun
- Fiberfill or cotton stuffing
- Small sticks or twine for stems
- Optional: jute, buttons, or faux leaves for decoration
Shop the materials


The steps
- Step 1: Choose and Cut Your Fabric
Pick out your favorite fall fabrics — flannel or plaid works beautifully for a cozy look. Cut the fabric into a rectangle; a good size to start is about 10×18 inches for a medium pumpkin. - Step 2: Stitch the Edges
Fold the fabric in half lengthwise with the patterned sides facing each other. Stitch or glue the short edges together to form a tube. Once done, flip it right side out so the pattern is visible. - Step 3: Close the Bottom
Gather one end of the tube and stitch or glue it tightly shut. If you’re sewing, run a running stitch around the bottom edge and pull it tight. Secure it with a knot or extra glue. - Step 4: Stuff the Pumpkin
Fill the fabric tube with fiberfill or cotton stuffing until it’s plump and full. You can adjust the firmness depending on how soft or firm you want the pumpkin to be. - Step 5: Shape the Pumpkin
To create pumpkin “ridges,” thread a long piece of yarn or twine through the bottom center, wrap it around the outside, and pull tightly back through the bottom again. Repeat this about six times evenly around the pumpkin, tying off at the bottom. - Step 6: Add the Stem
Insert a small stick, cinnamon stick, or rolled piece of burlap into the top as the stem. Secure it with glue. You can also wrap the base with jute for extra texture. - Step 7: Decorate
Add finishing touches like faux leaves, small pinecones, or buttons around the stem. Arrange your pumpkins in clusters for a cozy fall display on your mantel, table, or windowsill.
Hot Chocolate Gift Jars
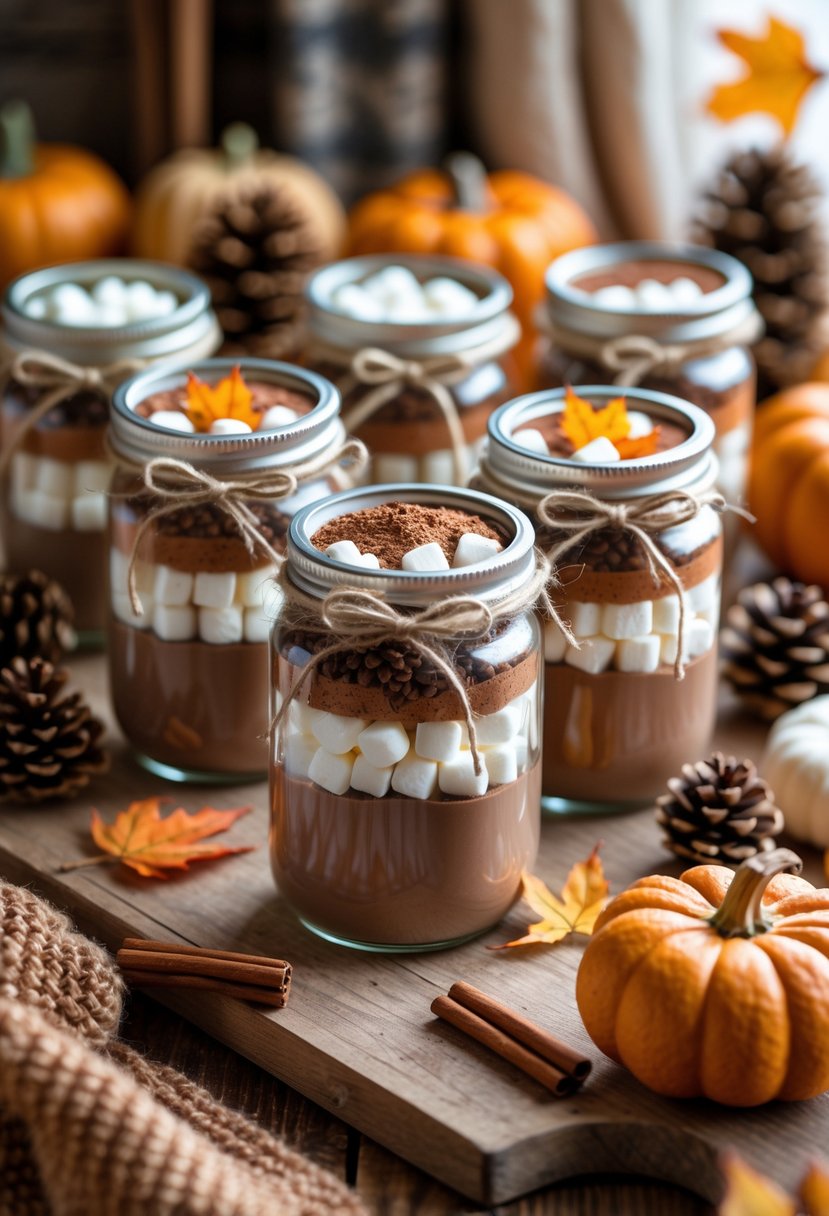
I like making hot chocolate gift jars for autumn. They are simple to prepare and perfect for sharing. I layer ingredients like cocoa, sugar, and mini marshmallows in a jar. Adding a ribbon or tag makes it look nice.
These jars are practical and warm up anyone on a chilly day. They also make thoughtful presents that anyone can enjoy.
How to Make Hot Chocolate Gift Jars
Materials Needed:
- Mason jars with lids (8–12 oz size)
- Hot cocoa mix (store-bought or homemade)
- Mini marshmallows
- Chocolate chips or chunks
- Crushed peppermint or mini candy canes (optional)
- Ribbon or twine
- Tags for instructions or notes
- Small decorative items (pinecones, cinnamon sticks, or faux leaves)
Shop the materials
The steps
- Step 1: Prepare Your Cocoa Mix
Start with your favorite hot cocoa mix. You can use store-bought or make your own by mixing sugar, cocoa powder, and a pinch of salt. This will be the base layer for your jar. - Step 2: Layer the Ingredients
In each mason jar, spoon in the ingredients in layers:
Bottom layer: Hot cocoa mix (about ½ cup).
Middle layer: Chocolate chips, chunks, or crushed peppermint.
Top layer: A generous scoop of mini marshmallows.
Smooth out each layer with the back of a spoon before adding the next one for clean, even lines. - Step 3: Add a Festive Touch
Close the jar tightly and wrap twine or ribbon around the lid. Add a cinnamon stick or tiny pinecone for a cozy fall or winter touch. You can also tie a gift tag that says “Warm Wishes” or “Just Add Hot Milk.” - Step 4: Attach Brewing Instructions
Include a small tag with simple directions, such as: “To make: Mix contents of jar with 1 cup of hot milk. Stir until smooth and enjoy!”
You can print or handwrite the tag for a personal touch. - Step 5: Decorate and Display
For a fall-inspired look, tuck in small faux leaves or a mini pumpkin beside the jar. These make lovely gifts for teachers, neighbors, or holiday guests.
Hand-painted Pumpkin Stones
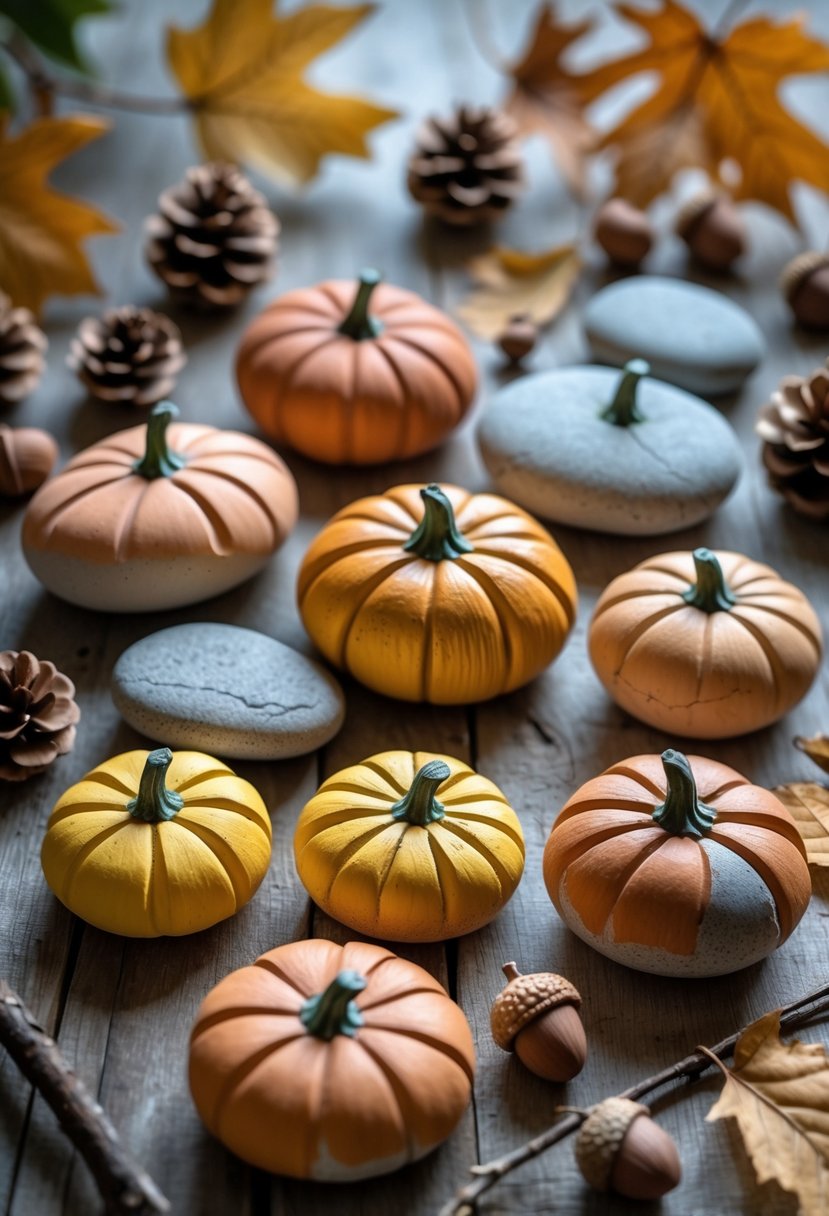
I enjoy turning simple stones into hand-painted pumpkins. It’s an easy craft that adds charm to any autumn display. I use bright orange paint and add green stems with a brush. These stones work well as decorations or small gifts.
How to Make Hand-Painted Pumpkin Stones
Materials Needed:
- Smooth, flat stones (medium to small size)
- Acrylic paint in orange, yellow, white, and green shades
- Paintbrushes (medium and fine-tipped)
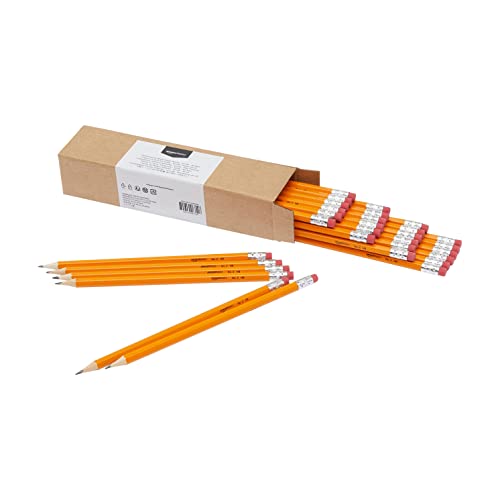
- Pencil (for sketching lines)
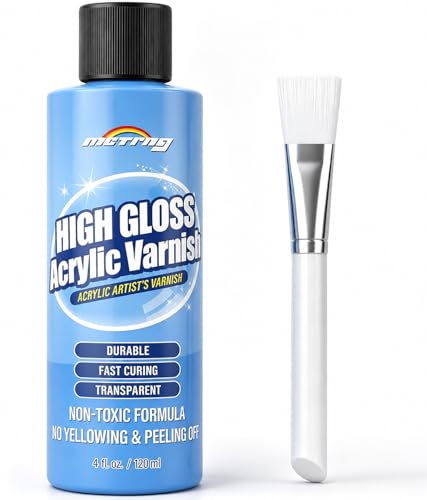
- Sealer or clear varnish (optional for shine and protection)
- Palette or disposable plate for mixing paint
Shop the materials


The steps
- Step 1: Choose and Clean Your Stones
Gather smooth stones that are rounded or slightly oval-shaped — these will mimic real pumpkins best. Wash them with warm, soapy water to remove dirt and let them dry completely before painting. - Step 2: Sketch the Pumpkin Shape
Use a pencil to lightly draw vertical curved lines from the top to the bottom of the stone, resembling pumpkin ridges. Don’t worry about perfection — natural variations look charming. - Step 3: Paint the Base Color
Paint the entire stone with your base color — classic orange, golden yellow, or creamy white all work beautifully. Allow it to dry, then apply a second coat for a smooth, even finish. - Step 4: Add Pumpkin Details
Using a darker shade of your base color, trace over the ridges to add depth and dimension. Blend lightly with a dry brush for a more natural look. Paint a small green or brown stem at the top center of each stone. - Step 5: Optional Highlights
To make your pumpkins pop, use a lighter shade or a bit of white paint to add subtle highlights along the curves. This gives them a realistic, three-dimensional appearance. - Step 6: Seal the Paint
Once the paint is completely dry, brush on a thin coat of sealer or clear varnish. This step helps protect your designs and gives them a nice finished sheen. - Step 7: Display Your Pumpkins
Arrange your painted pumpkin stones in bowls, line them along window sills, or scatter them across a fall table centerpiece. They make wonderful handmade gifts and cozy seasonal décor!