





Table of Contents Show
A fall wreath can make your front door feel warmer before you change anything else around the porch. The best designs do not need expensive supplies or complicated techniques to look beautiful.
With ribbon, dried stems, fabric, wood, and a few seasonal details, you can create a wreath that feels polished and personal.
These easy DIY fall wreath ideas include rustic, modern, colorful, and neutral options for many different home styles.
1. Amber Bead and Eucalyptus Hoop Wreath
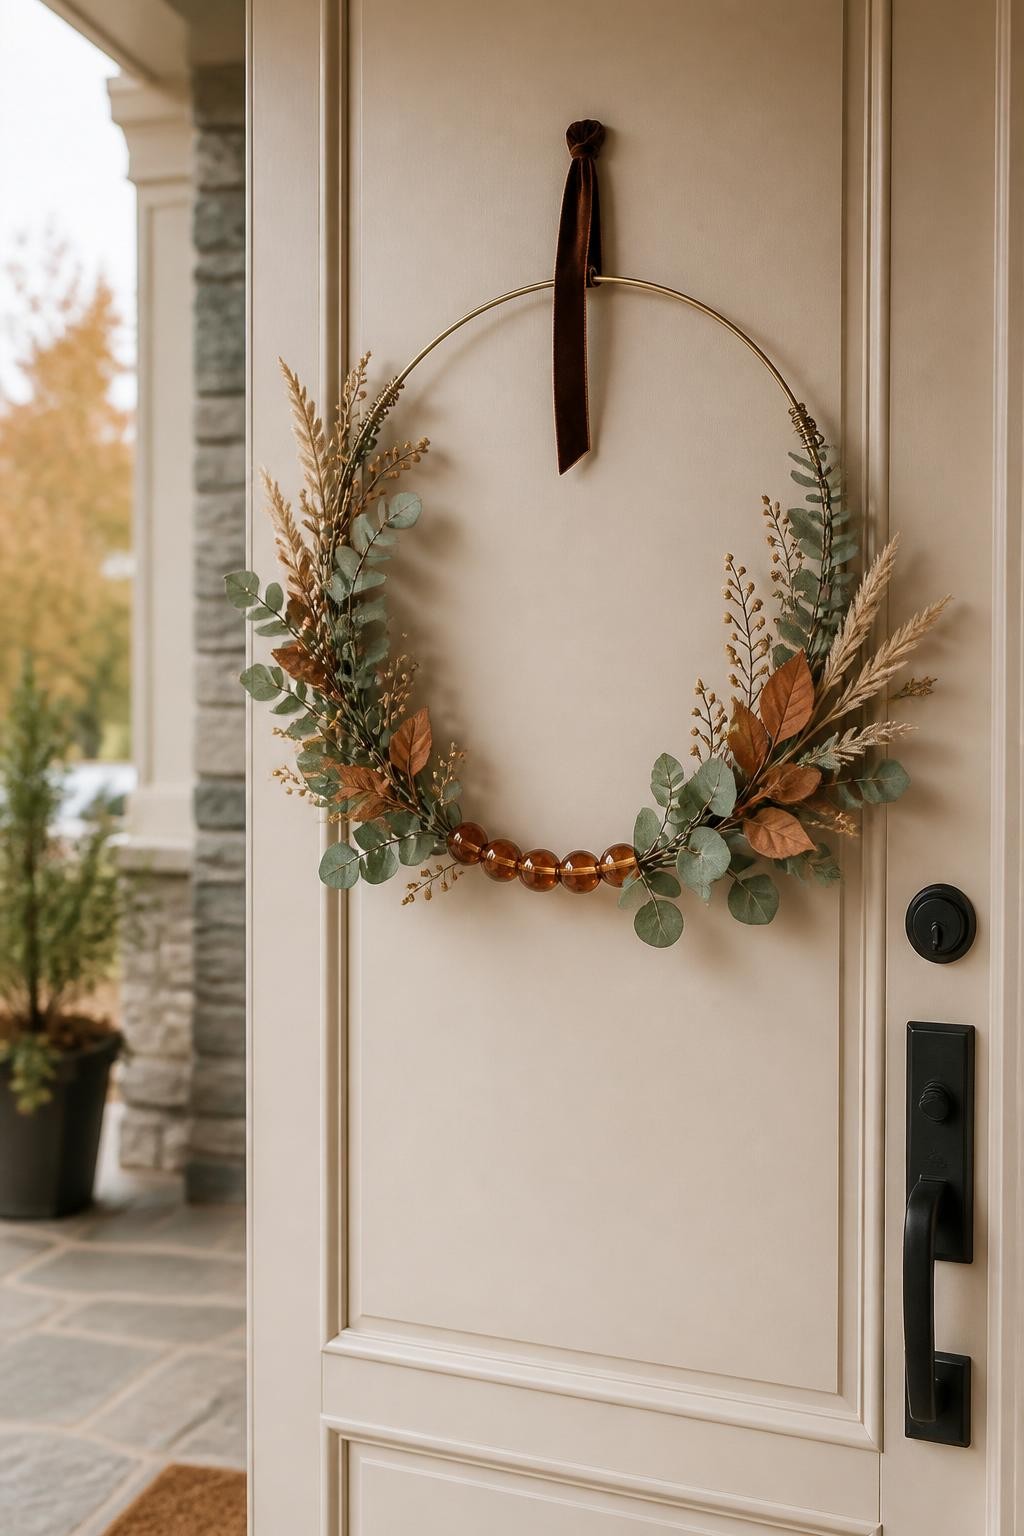
Amber-colored beads catch the light and give this wreath a warm glow without needing bright orange decorations. Their smooth surface also creates an interesting contrast against soft eucalyptus leaves and wispy dried grass.
Keep the greenery gathered along the lower section of the hoop so the design remains light and modern. Acrylic beads are easier to use than glass because they weigh less and are safer for a door that opens often.

For People Who Love to Make Things ✂️
Materials needed:
- Brass or gold metal hoop
- Large amber acrylic beads
- Thin craft wire
- Artificial eucalyptus stems
- Muted rust leaf picks
- Beige dried grasses
- Small caramel berry stems
- Brown velvet ribbon
- Floral wire
- Wire cutters
How to make it:
- Cut a length of craft wire slightly longer than the lower curve of the hoop.
- Thread the amber beads onto the wire.
- Wrap both ends of the wire securely around the metal hoop.
- Arrange eucalyptus and rust leaves behind the beads.
- Add the dried grasses so they extend gently beyond the greenery.
- Fill small gaps with berry stems.
- Secure everything with floral wire.
- Tie velvet ribbon at the top for hanging.
2. Plaid Scarf-Wrapped Wreath
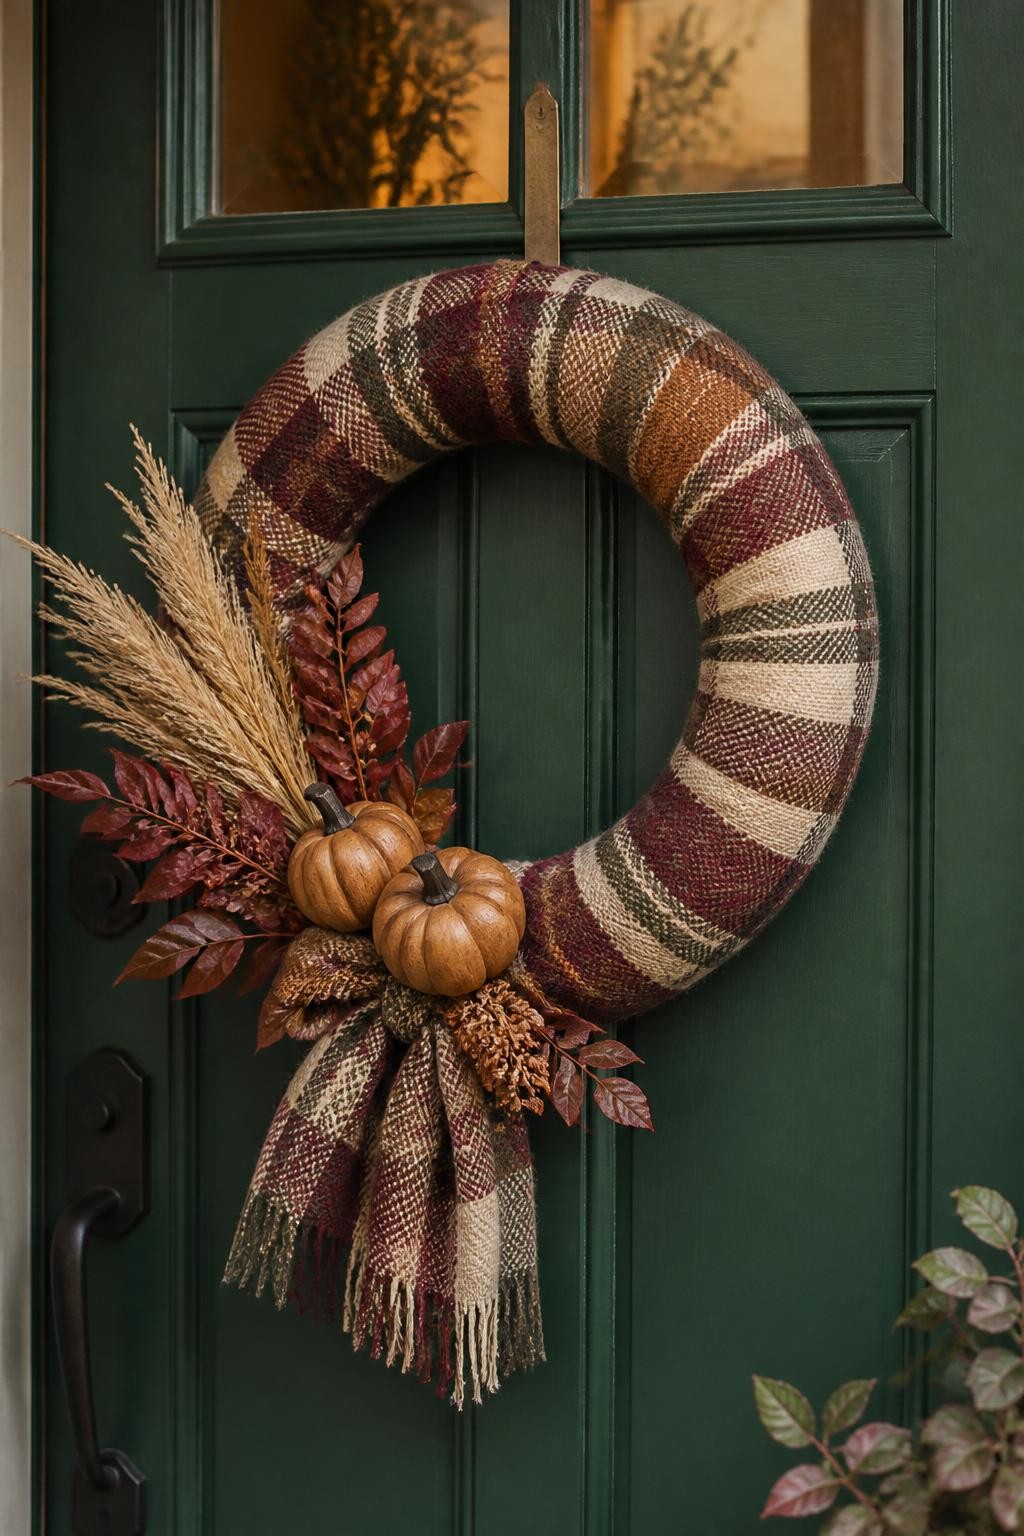
An old plaid scarf can cover a plain wreath base in just a few minutes. The fabric adds color and texture while hiding the foam underneath, so you do not need to fill the wreath with many decorations.
Choose a scarf with a soft fall palette rather than a bright holiday plaid. Small wooden pumpkins and dried grass are enough to finish the design without making it look crowded.
Materials needed:
- Foam wreath base
- Plaid scarf
- Straight pins
- Two small wooden pumpkins
- Dried beige grass
- Burgundy artificial leaves
- Floral wire
- Hot glue gun
- Scissors
How to make it:
- Place one end of the scarf against the back of the foam wreath.
- Secure it with several straight pins.
- Wrap the scarf around the wreath, overlapping each section slightly.
- Pin the final end at the back.
- Leave a short scarf tail hanging near the lower side.
- Glue the wooden pumpkins beside the fabric tail.
- Tuck dried grass and burgundy leaves behind the pumpkins.
- Secure loose stems with floral wire.
3. Ombre Clothespin Sunburst Wreath
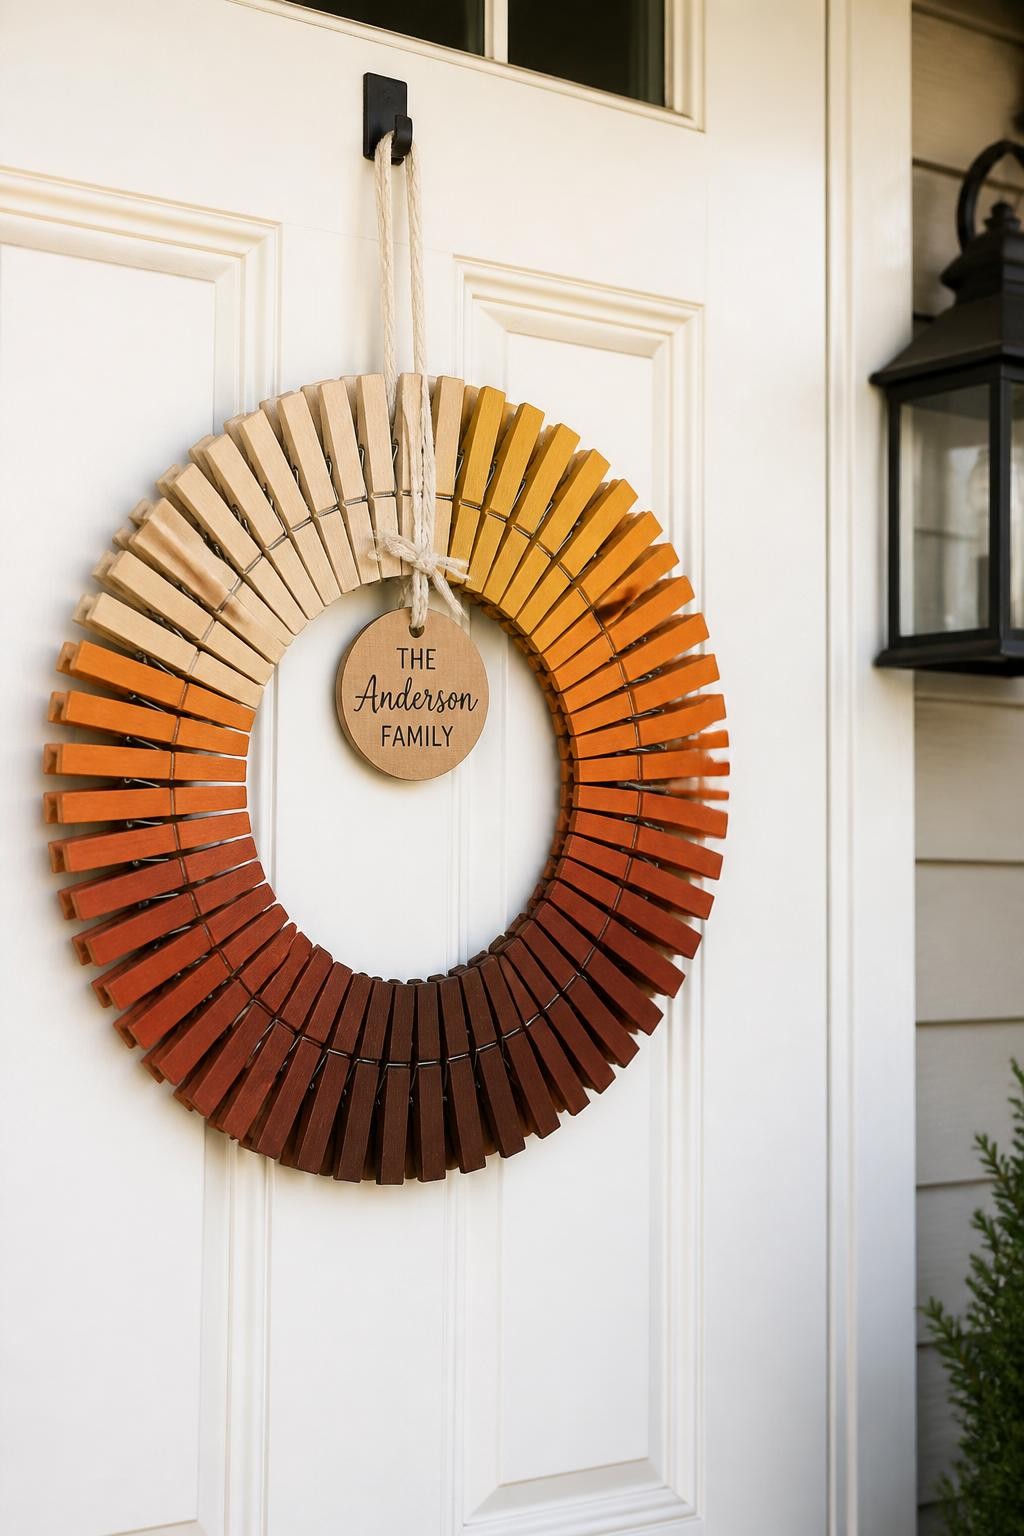
Wooden clothespins create a surprisingly bold wreath when they are clipped tightly around a wire ring. Painting them in gradually deepening fall shades creates a sunburst effect that looks detailed even though the project is simple.
This is also an easy wreath to customize. You can keep the colors muted for a modern door or use brighter oranges and yellows for a cheerful classroom or family porch.
Materials needed:
- Flat wire wreath ring
- Wooden clothespins
- Craft paint in six fall shades
- Paintbrushes
- Small wooden tag
- Cream twine
- Clear matte sealant
- Hot glue gun
How to make it:
- Divide the clothespins into six equal groups.
- Paint each group a different fall color.
- Let the clothespins dry completely.
- Clip them around the wire ring with the handles pointing outward.
- Arrange the colors from lightest to darkest.
- Add a small dot of glue beneath each clothespin if the door is exposed to wind.
- Write a short fall message on the wooden tag.
- Tie the tag to the bottom of the wreath with twine.
4. Pinecone Flower Garden Wreath
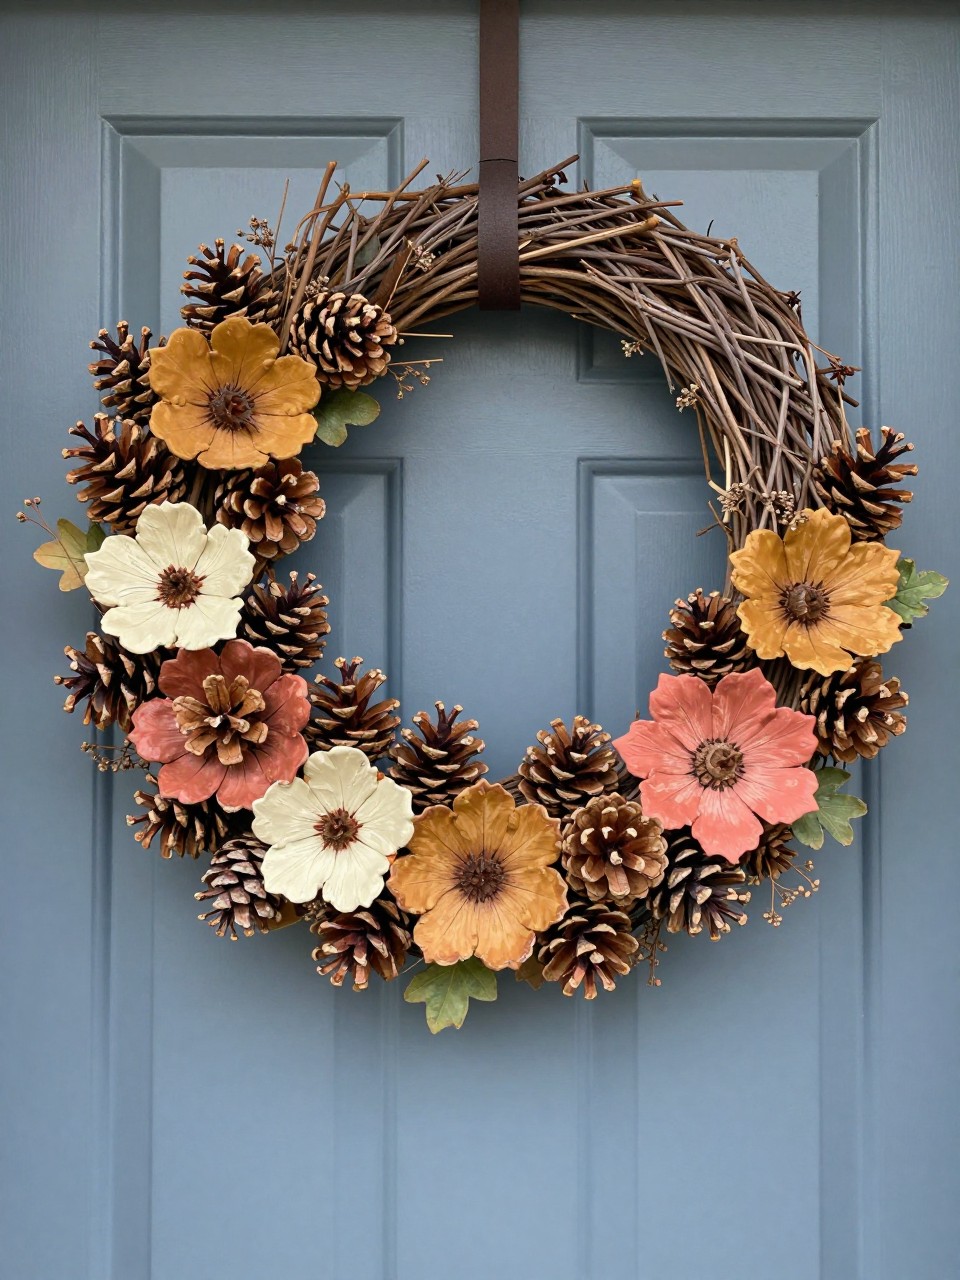
Cut pinecones look like layered flowers when you view them from the base. A few coats of muted craft paint can turn them into a long-lasting floral wreath that works throughout the fall season.
Use only the lower half of the grapevine base to keep the project manageable. Mixing painted pinecone flowers with natural brown ones gives the arrangement more depth and prevents the colors from looking too flat.
Materials needed:
- Grapevine wreath base
- Medium pinecones
- Heavy-duty pruning shears
- Craft paint in muted fall colors
- Small paintbrushes
- Artificial green leaves
- Dried seed stems
- Hot glue gun
- Floral wire
How to make it:
- Cut through each pinecone to separate the wider base section.
- Brush away loose pieces.
- Paint the cut pinecone sections in several fall colors.
- Leave a few pieces unpainted.
- Arrange the largest pinecone flowers near the lower center of the wreath.
- Add smaller flowers around the edges.
- Tuck leaves and seed stems between them.
- Secure each piece with hot glue and floral wire where needed.
5. Rust Tassel and Rope Wreath
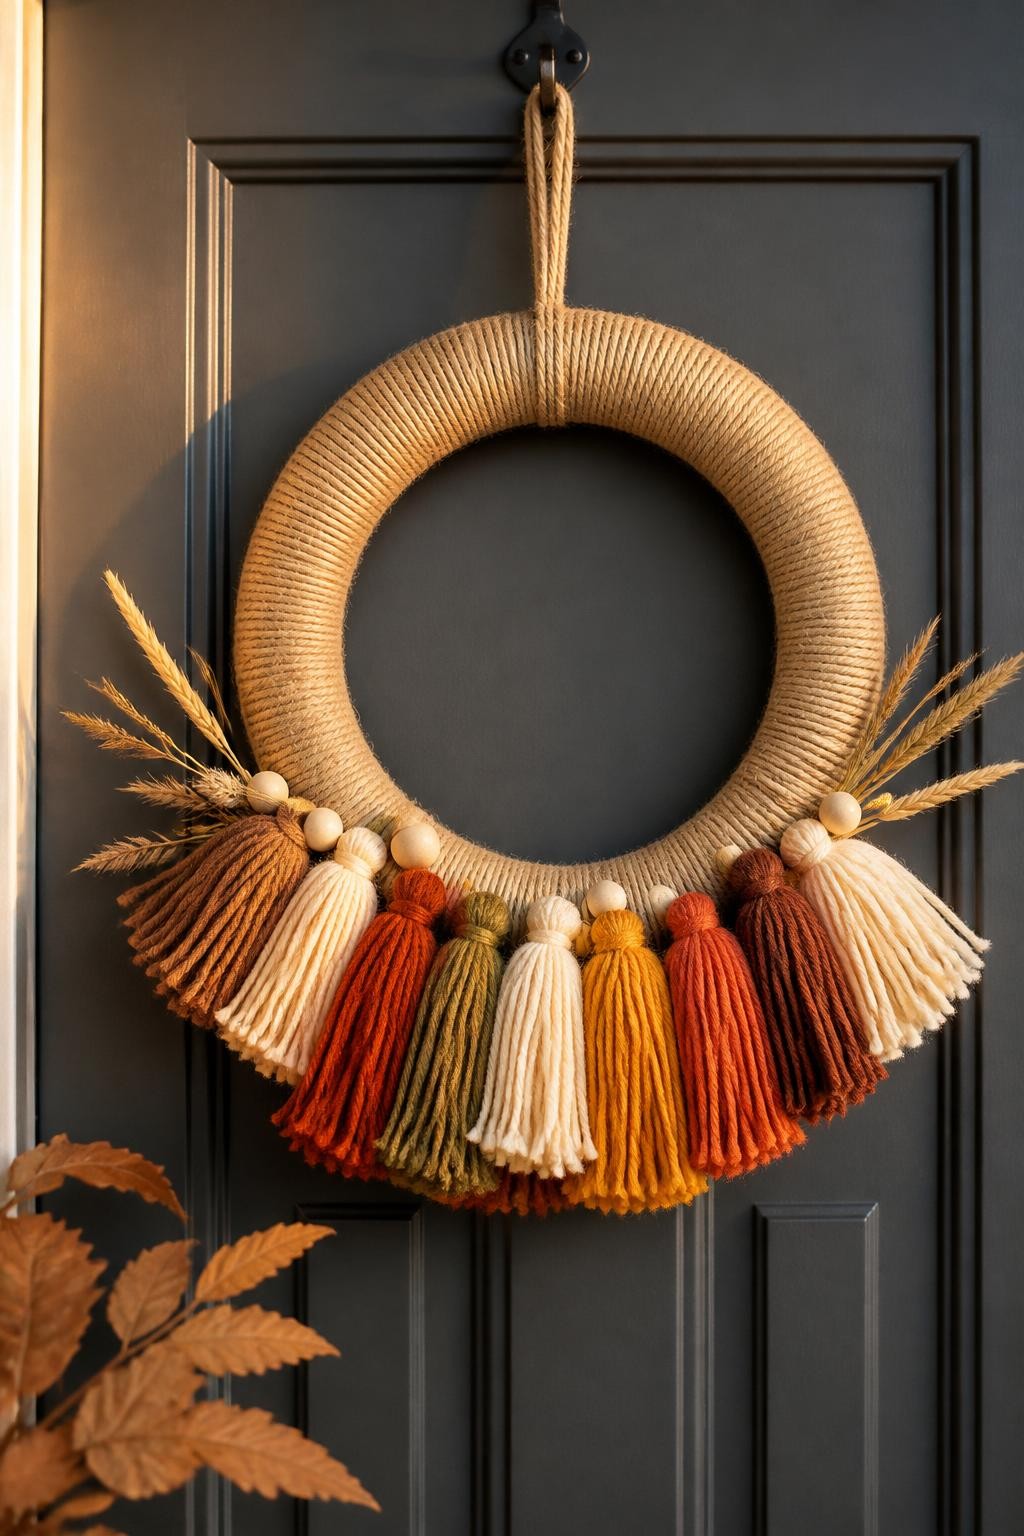
Tassels add movement and softness to a front-door wreath without requiring flowers or leaves. Wrapping the base in jute rope gives the wreath a clean background and keeps the overall design warm and natural.
Make the tassels in several lengths so they form a gentle downward curve. The finished wreath suits bohemian, modern farmhouse, and neutral porch decor.
Materials needed:
- Foam or straw wreath base
- Jute rope
- Yarn in five fall colors
- Small wooden beads
- Dried grass stems
- Cardboard rectangle
- Scissors
- Hot glue gun
- Floral wire
How to make it:
- Glue one end of the rope to the back of the wreath.
- Wrap the rope tightly around the base until it is fully covered.
- Make tassels by wrapping yarn around a small cardboard rectangle.
- Tie the top of each tassel and cut the lower loops.
- Trim the tassels into several different lengths.
- Attach them along the lower edge of the wreath.
- Add wooden beads between a few tassels.
- Tuck dried grass stems behind the arrangement.
6. Autumn Hydrangea and Pampas Wreath
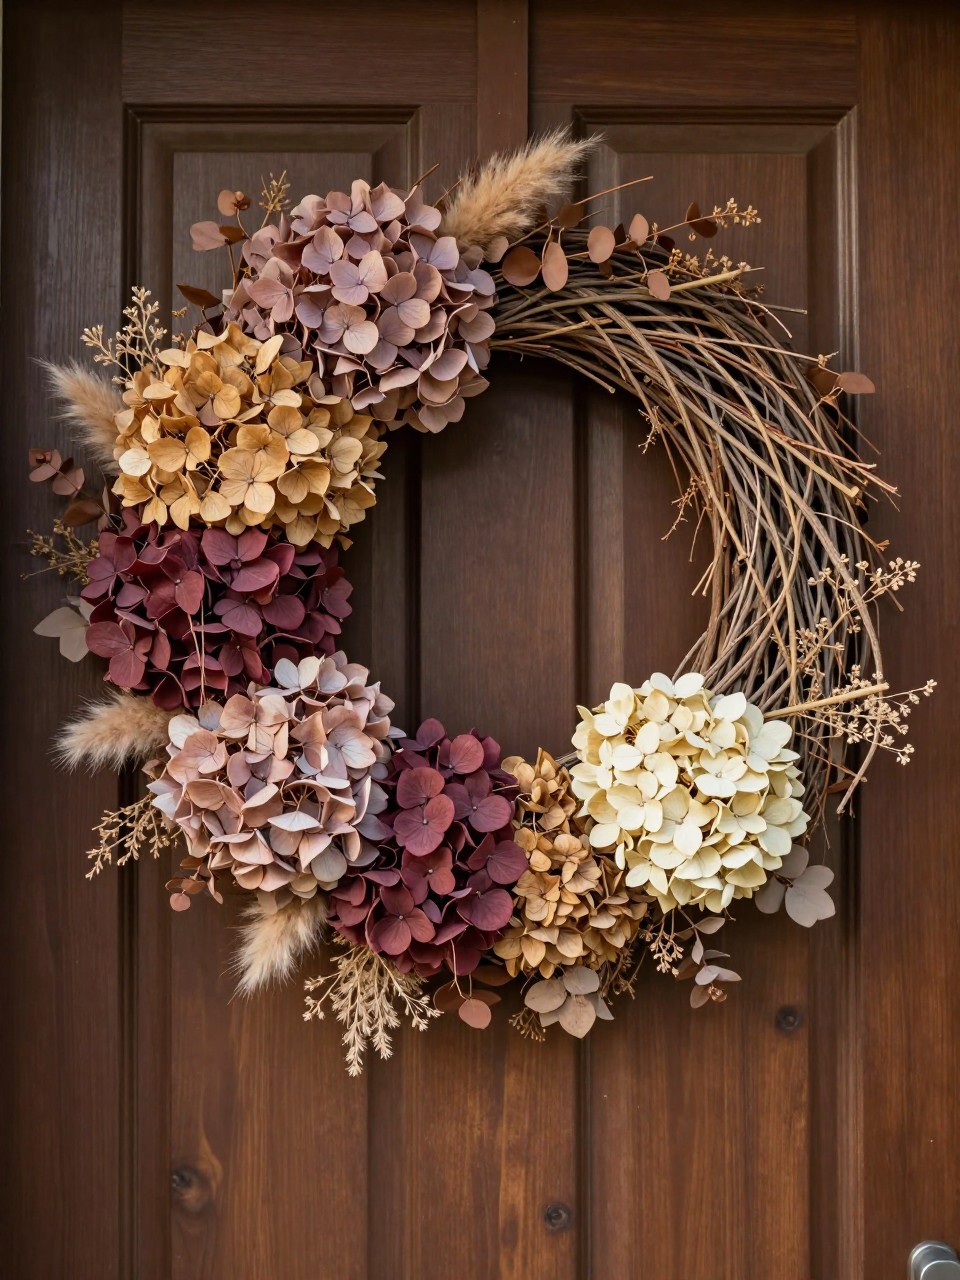
Muted hydrangeas make a fall wreath feel full without needing dozens of separate stems. Their faded colors work especially well with pampas grass and brown eucalyptus.
Use artificial dried-look hydrangeas if your front door is exposed to moisture. They hold their shape better than real blooms and can be stored for another season.
Materials needed:
- Grapevine wreath base
- Artificial dried-look hydrangeas
- Short pampas grass stems
- Brown eucalyptus
- Beige seed sprays
- Floral wire
- Floral tape
- Wire cutters
- Hot glue gun
How to make it:
- Cut the hydrangea stems into smaller clusters.
- Place the largest cluster near one lower side of the wreath.
- Add smaller hydrangeas above and below it.
- Tuck pampas grass behind the flowers.
- Fill open spaces with eucalyptus and seed sprays.
- Wrap the stems with floral wire.
- Add small dots of hot glue to prevent heavier flowers from moving.
- Fluff the petals gently before hanging the wreath.
7. Wooden Spoon Harvest Wreath
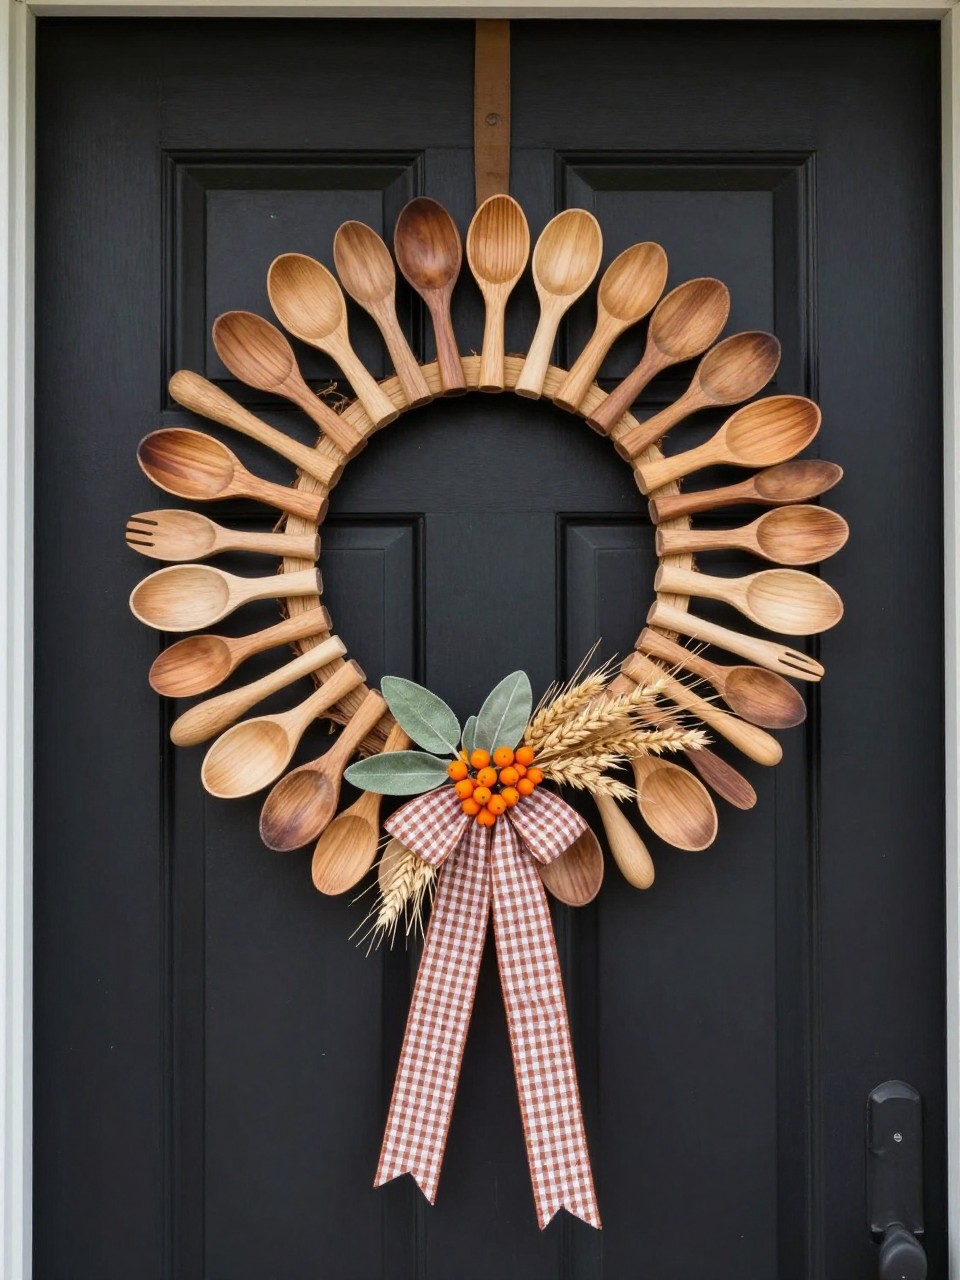
Small wooden spoons create a warm harvest-inspired wreath that feels especially suitable for a kitchen door or covered porch. Their rounded ends form a neat sunburst pattern without needing complicated cutting or shaping.
Use lightweight craft spoons instead of full-size kitchen utensils. A small bundle of greenery at the bottom softens the wooden structure while keeping the unusual design visible.
Materials needed:
- Flat wooden wreath ring
- Small wooden craft spoons
- Strong wood glue
- Hot glue gun
- Sage leaf stems
- Dried grass
- Small orange berries
- Rust gingham ribbon
- Picture hanging wire
How to make it:
- Lay the wooden ring flat on a protected surface.
- Arrange the spoons around it before adding glue.
- Keep the spacing as even as possible.
- Glue the spoon handles to the ring.
- Allow the glue to dry fully.
- Attach sage leaves and dried grass along the bottom.
- Add orange berries over the greenery.
- Finish with a small gingham bow.
8. Faux Leather Leaf Ring Wreath
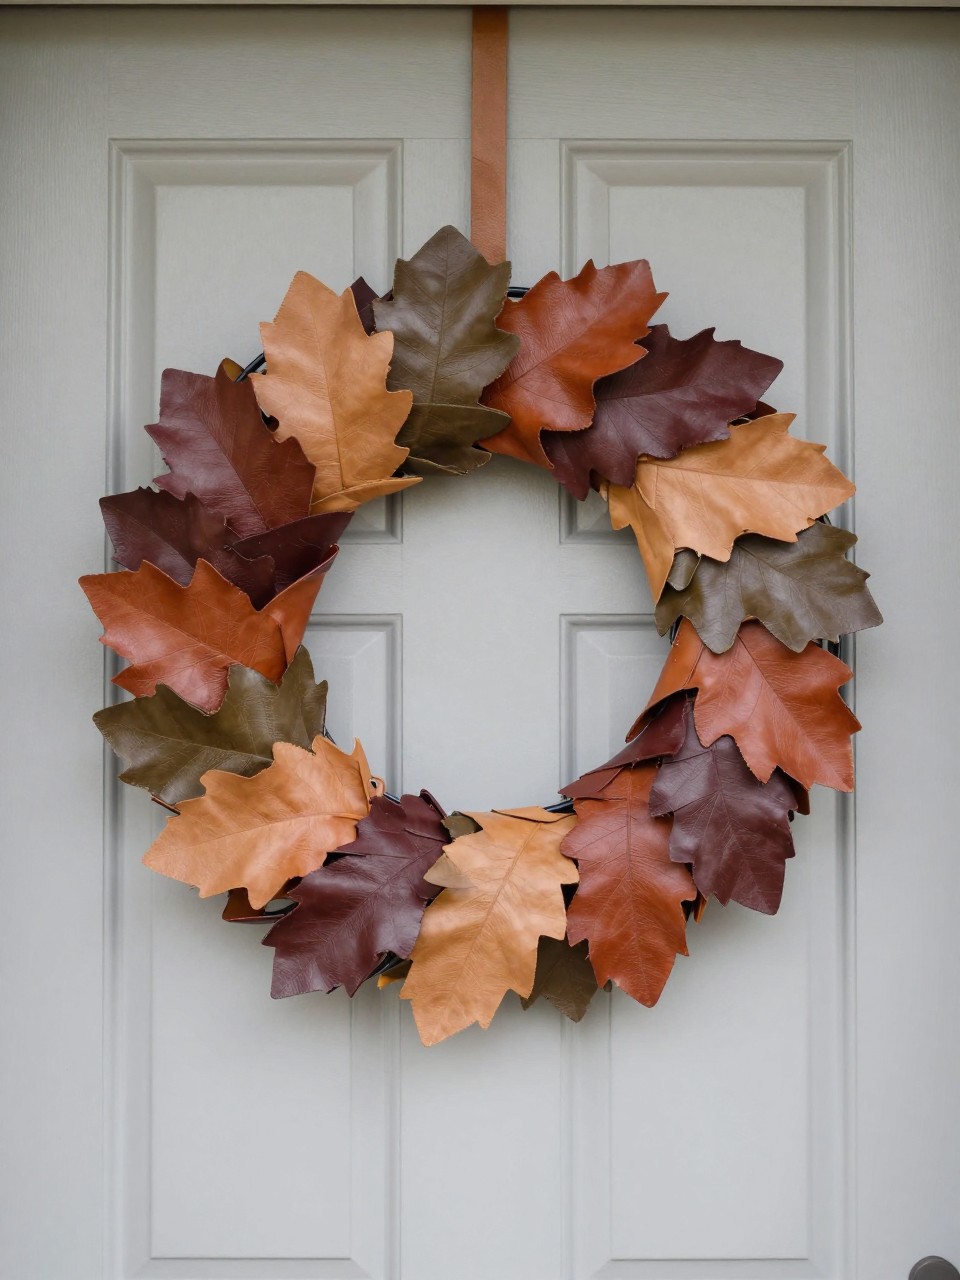
Faux leather gives a wreath a polished finish while remaining easy to cut and shape. The material also holds up better than paper on a front door and does not shed like dried leaves.
Choose several related colors and keep the leaf shapes simple. Folding each leaf lightly down the center adds dimension without requiring any sewing.
Materials needed:
- Black metal hoop
- Faux leather sheets in fall colors
- Leaf template
- Fabric scissors
- Pencil
- Hot glue gun
- Small binder clips
- Tan leather cord
How to make it:
- Trace the leaf template onto the back of the faux leather.
- Cut leaves in two or three sizes.
- Fold each leaf gently down the center.
- Hold the crease with a binder clip for a few minutes.
- Arrange the leaves along one side of the hoop.
- Glue the largest leaves first.
- Fill spaces with smaller leaves in contrasting colors.
- Attach leather cord at the top for hanging.
9. Pumpkin Spice Mug Wreath
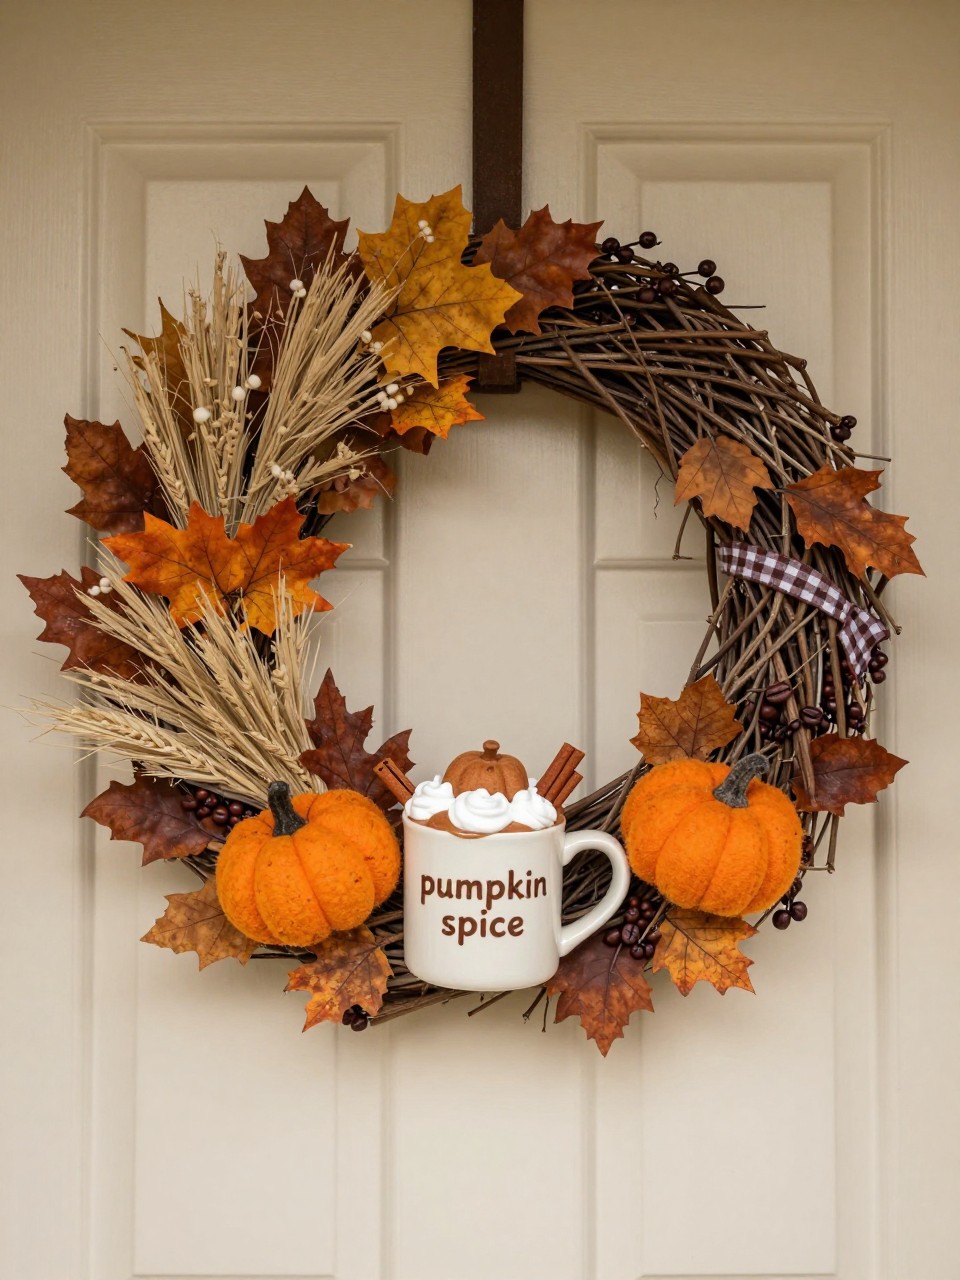
This wreath turns a favorite fall drink into a cheerful front-door decoration. A lightweight plastic or foam mug is much safer than real ceramic and can be painted to look just as convincing.
Keep the surrounding leaves and berries in warm coffee-inspired shades. This helps the playful centerpiece feel coordinated rather than overly novelty-based.
Materials needed:
- Grapevine wreath
- Lightweight plastic mug
- Cream and brown craft paint
- Letter stencil or paint marker
- Faux whipped cream decoration
- Mini cinnamon sticks
- Small felt pumpkin
- Rust leaves
- Beige grass
- Brown berry stems
- Checkered ribbon
- Floral wire
- Hot glue gun
How to make it:
- Paint the mug a warm cream color.
- Add the words “pumpkin spice” with a stencil or paint marker.
- Glue faux whipped cream inside the top of the mug.
- Add mini cinnamon sticks and a felt pumpkin.
- Wire the mug firmly to the lower part of the wreath.
- Arrange rust leaves and grasses around both sides.
- Add brown berry stems to fill gaps.
- Tie a small checkered ribbon near the mug handle.
10. Wood Slice and Moss Ring Wreath
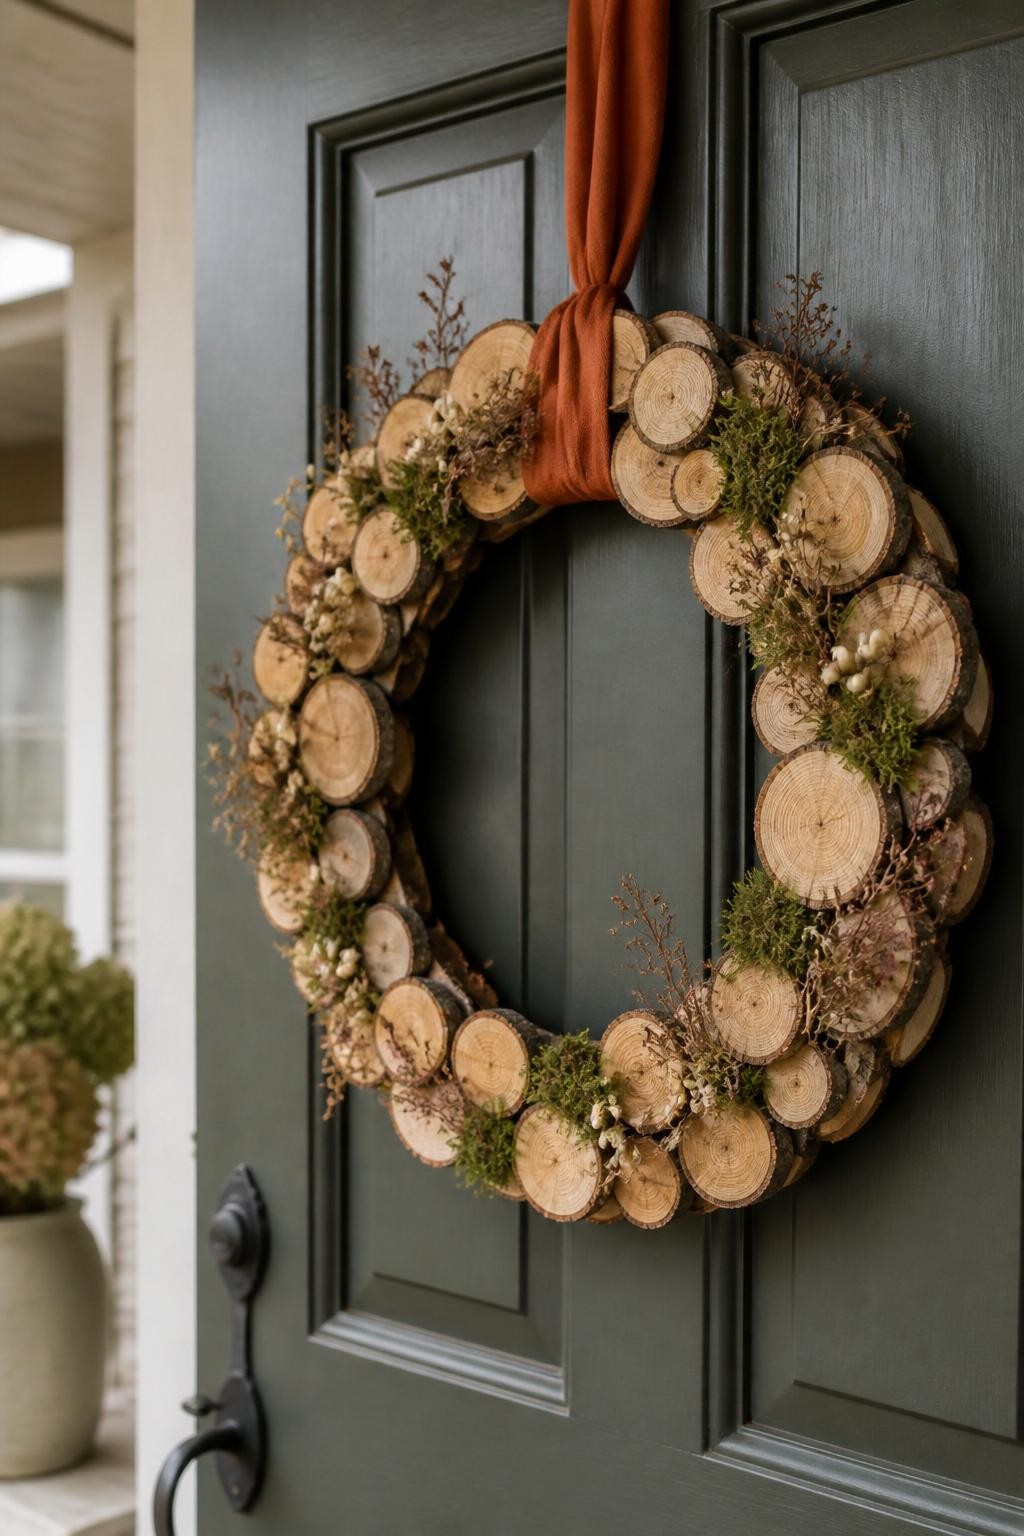
Small wood slices give this wreath a natural woodland appearance without requiring advanced tools. The circles create a strong textured base, while moss and tiny berries soften the hard edges.
Choose lightweight slices in different sizes and overlap them slightly. This hides the wreath base and creates a more natural finish than placing them in one perfect row.
Materials needed:
- Flat wooden or sturdy cardboard wreath ring
- Small lightweight wood slices
- Preserved moss
- Cream berry stems
- Thin dried twigs
- Burnt-orange linen ribbon
- Strong craft glue
- Hot glue gun
- Clear matte sealant
How to make it:
- Arrange the wood slices around the wreath ring.
- Mix large and small slices to reduce visible gaps.
- Glue the first layer securely.
- Add a second overlapping layer where needed.
- Press preserved moss into the smaller spaces.
- Tuck twigs and cream berries around one lower section.
- Apply a light matte sealant to the wood.
- Add linen ribbon at the top.
11. Copper Mesh Maple Leaf Wreath
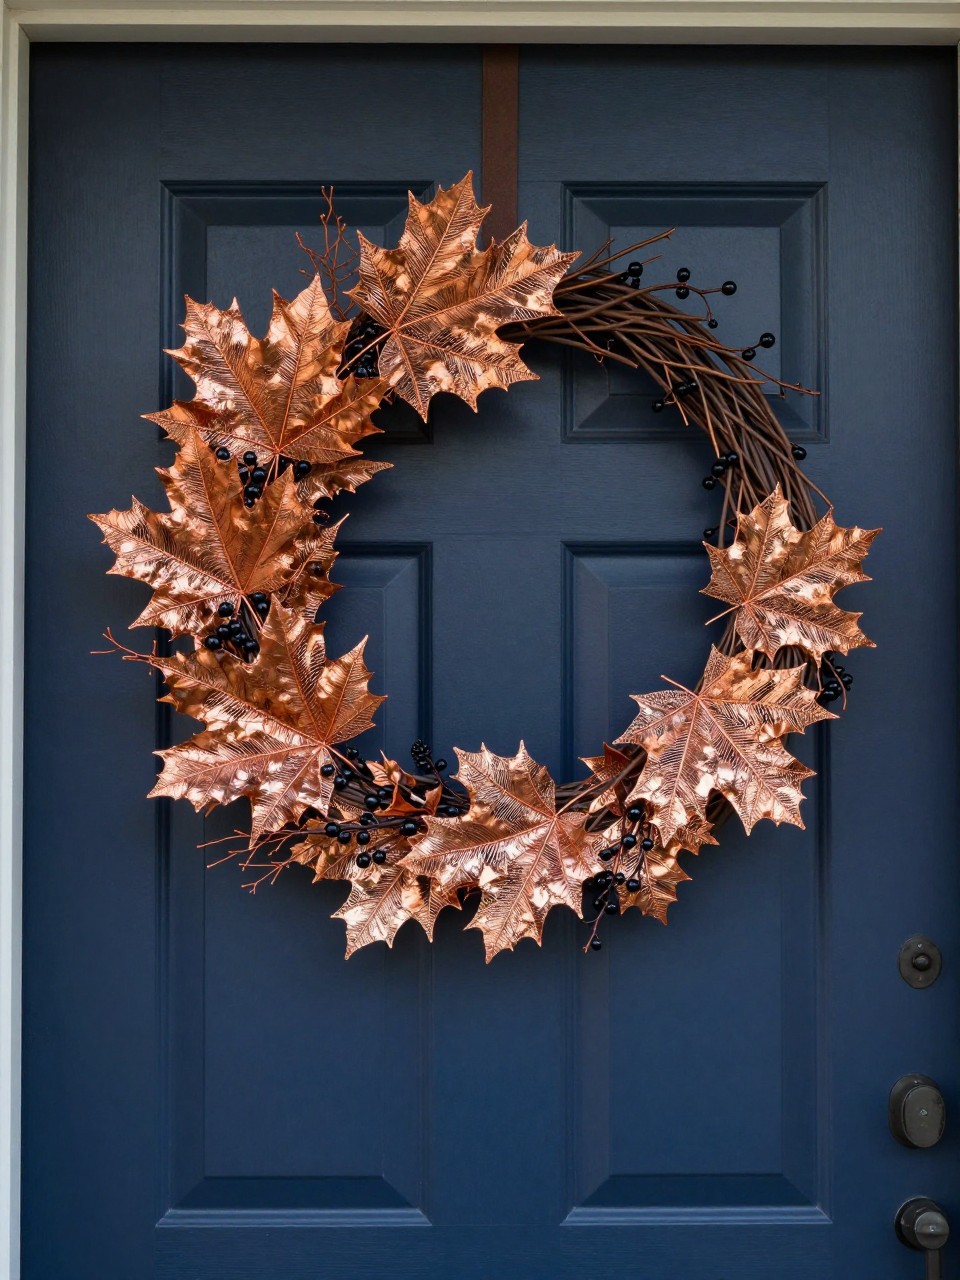
Copper craft mesh is easy to cut, bend, and shape into lightweight leaves. It reflects the light beautifully and gives a simple wreath a modern fall finish.
Use a leaf template to keep the shapes consistent, then bend the edges slightly so they do not appear flat. Dark branches and black berries provide enough contrast to make the copper stand out.
Materials needed:
- Thin metal wreath frame
- Copper-colored craft mesh
- Maple leaf template
- Heavy scissors
- Thin copper wire
- Dark decorative branches
- Matte black berry stems
- Work gloves
- Wire cutters
How to make it:
- Trace maple leaves onto the copper mesh.
- Wear gloves while cutting to protect your hands.
- Cut out the leaves in two sizes.
- Bend the edges and center of each leaf gently.
- Attach the leaves to the lower half of the frame with copper wire.
- Overlap them so the wire connections are hidden.
- Add dark branches behind the leaves.
- Finish with a few black berry stems.
12. Gingham Ribbon Loop Wreath
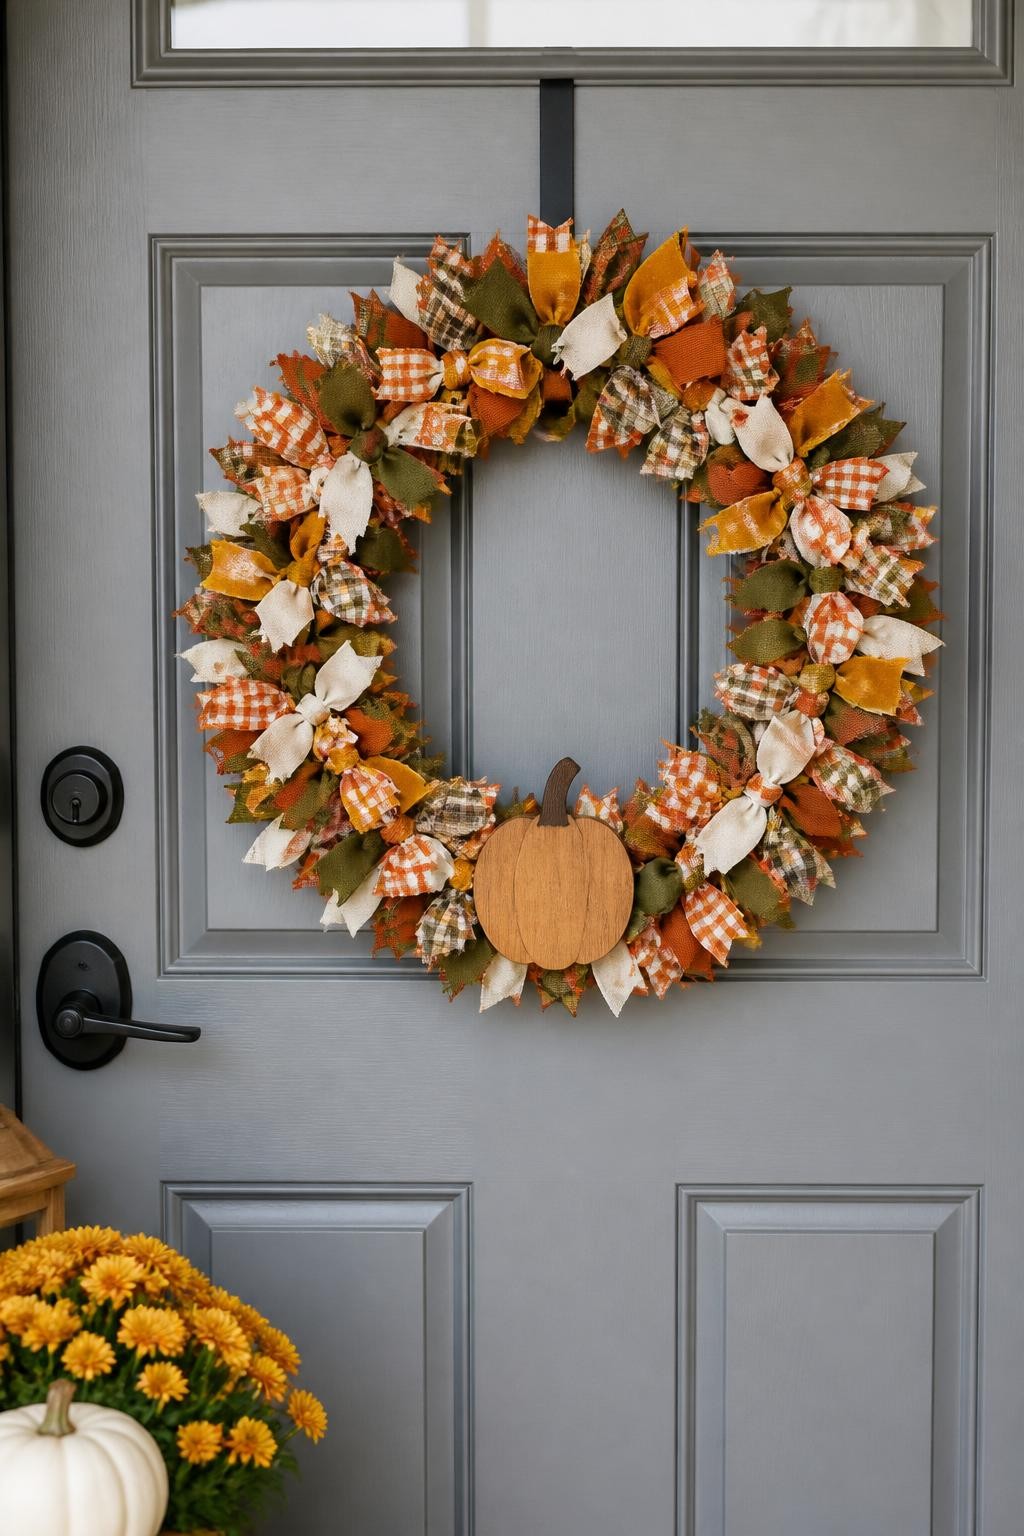
Ribbon loops make a full wreath without requiring flowers, wire cutters, or complicated arranging. Combining different textures gives the design more depth than using one type of ribbon.
Choose ribbons with small patterns and related colors so the wreath stays coordinated. The project takes a little time, but every step is easy and can be completed while watching television or listening to music.
Materials needed:
- Wire wreath frame
- Rust gingham ribbon
- Mustard velvet ribbon
- Cream linen ribbon
- Olive cotton ribbon
- Brown plaid ribbon
- Muted orange grosgrain ribbon
- Small wooden pumpkin
- Scissors
- Hot glue gun
How to make it:
- Cut all the ribbons into equal short lengths.
- Fold each piece into a loop.
- Tie or wire the loops around the wreath frame.
- Push each loop close to the previous one.
- Alternate colors and textures as you work.
- Turn the wreath over and trim any long ends.
- Glue a small wooden pumpkin to the lower center.
- Add a strong ribbon loop at the back for hanging.
13. Harvest Market Sign Wreath
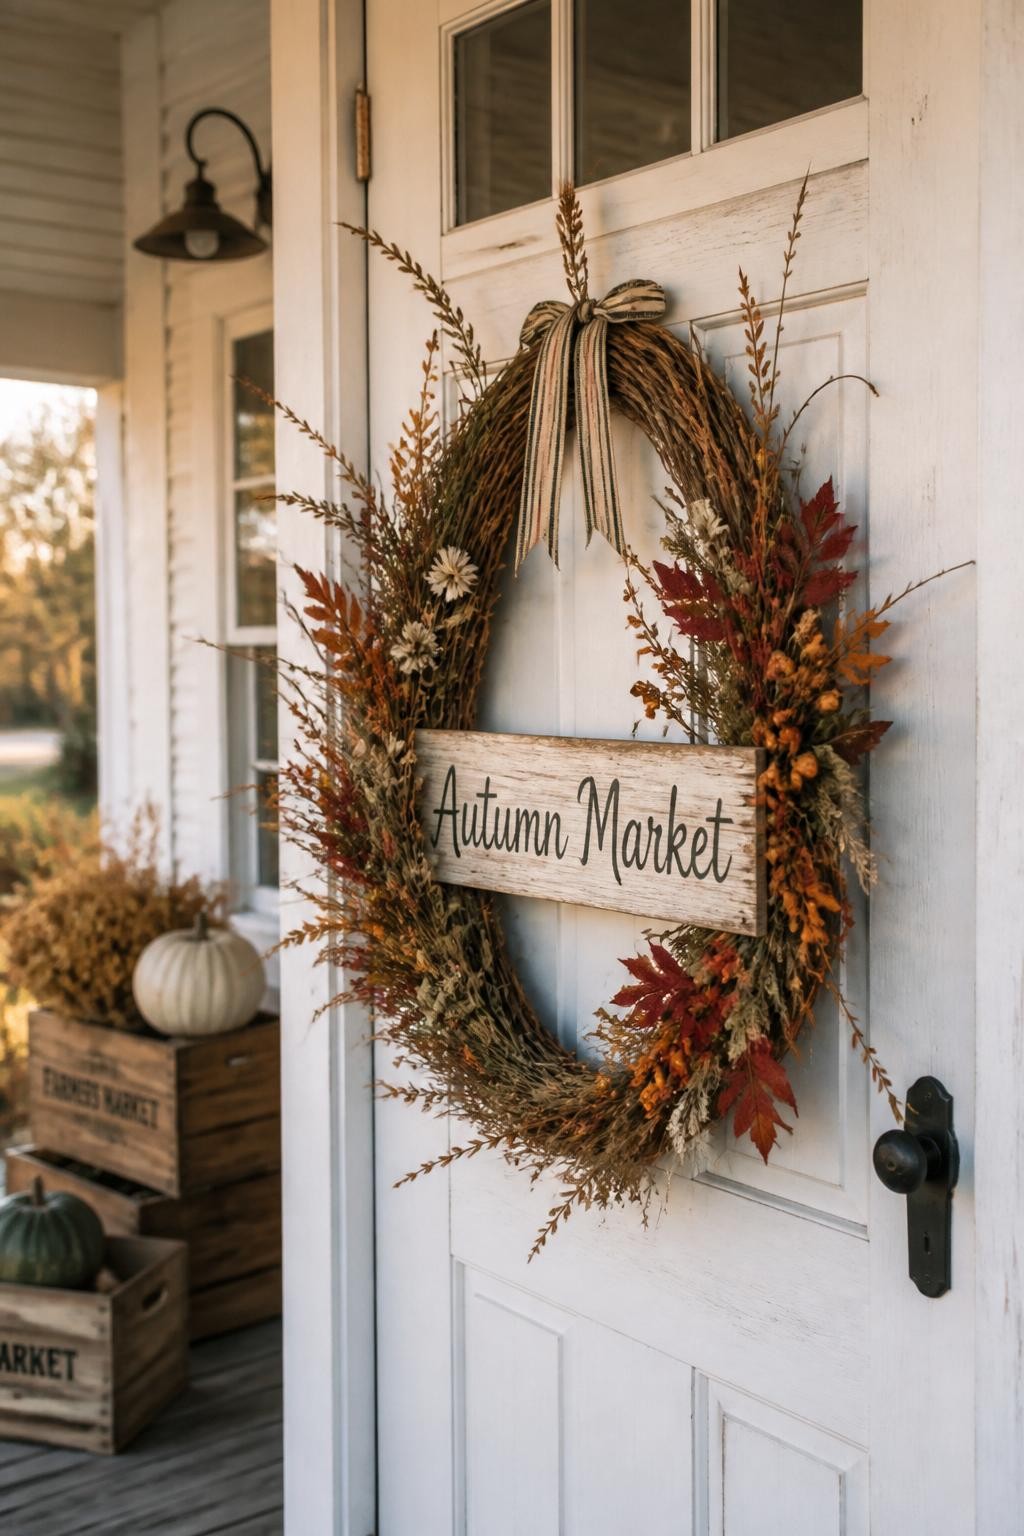
A small market-style sign gives this wreath a welcoming farmhouse look without needing a large bow. An oval wreath base helps the sign sit naturally across the center and makes the shape feel different from a standard round design.
Keep the lettering simple and slightly weathered. A few loose stems around the outer edges will make the wreath look relaxed rather than overly arranged.
Materials needed:
- Oval grapevine wreath
- Small unfinished wooden sign
- Cream and brown paint
- Letter stencil
- Orange berry stems
- Green seed pods
- Tan grasses
- Dark red leaves
- Small cream flowers
- Narrow striped ribbon
- Floral wire
- Hot glue gun
How to make it:
- Paint the wooden sign a soft cream color.
- Add “Autumn Market” using a stencil and brown paint.
- Lightly sand the edges for a weathered finish.
- Wire the sign across the middle of the oval wreath.
- Arrange leaves and grasses around both ends of the sign.
- Add berries, seed pods, and cream flowers.
- Secure every stem with floral wire.
- Finish with a small striped ribbon near one lower corner.
14. Felt Acorn Garland Wreath
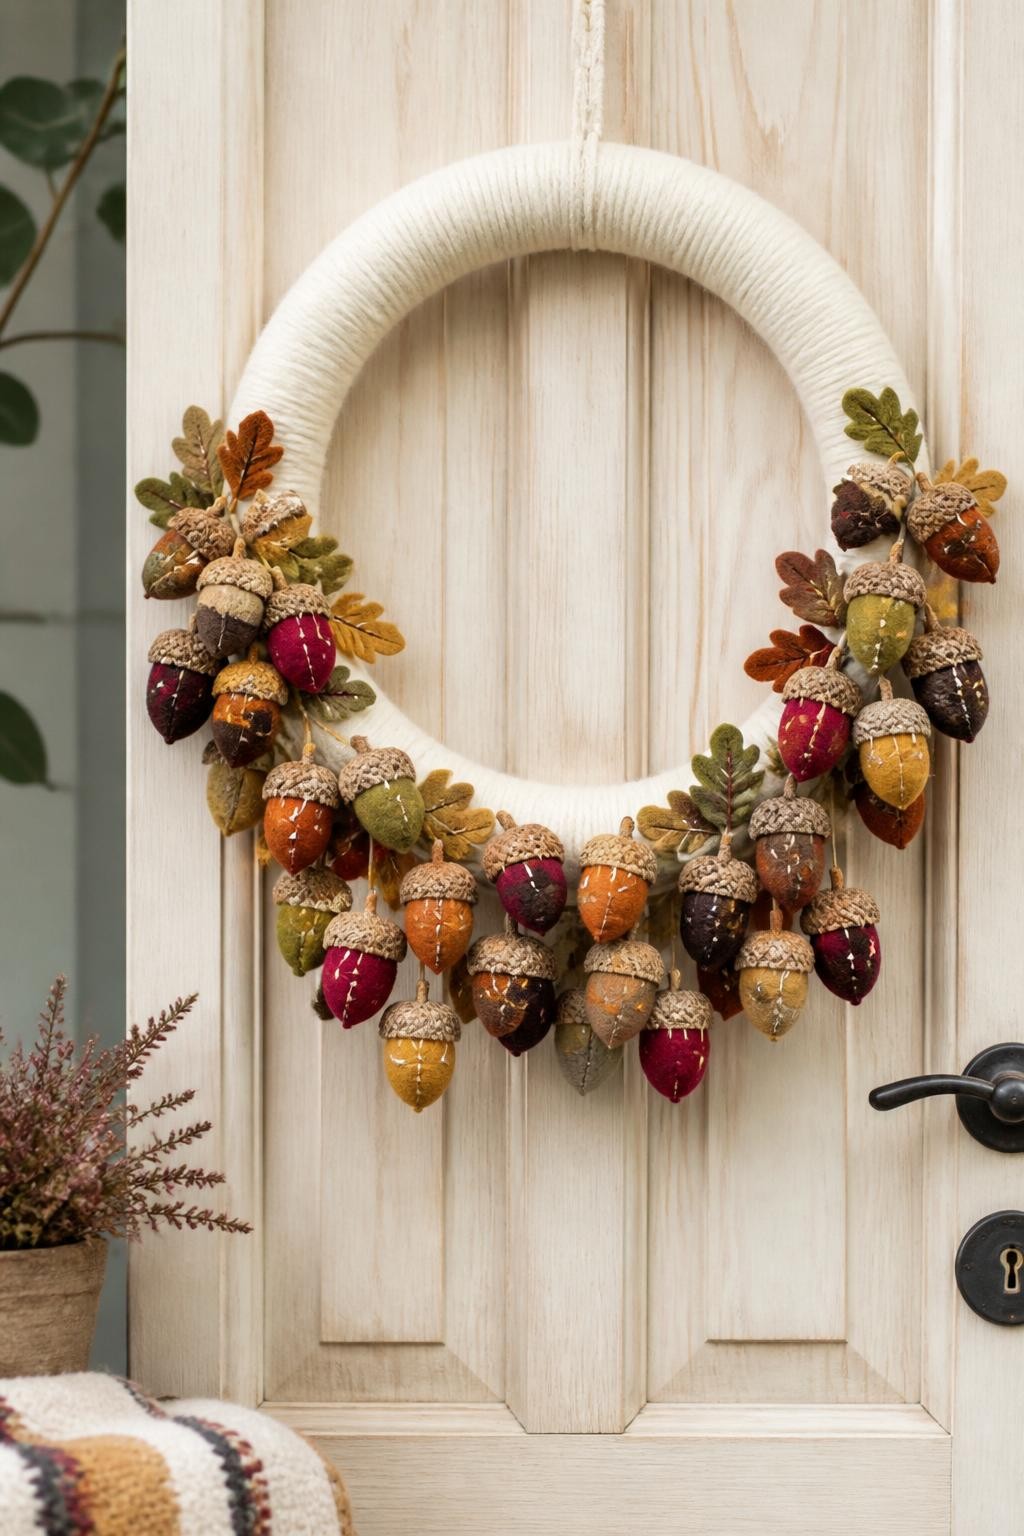
Felt acorns bring color and texture to a wreath while remaining light enough for almost any door. Natural acorn caps make the handmade pieces look more realistic and provide a useful way to use caps collected outdoors.
Instead of gluing each acorn separately, string them into a garland first. The garland is quicker to attach and can be moved until the spacing looks right.
Materials needed:
- Foam wreath base
- Cream wool yarn
- Wool felt in fall colors
- Natural acorn caps
- Felt oak leaf template
- Embroidery thread
- Sewing needle
- Twine
- Hot glue gun
- Scissors
How to make it:
- Wrap the wreath base tightly with cream yarn.
- Cut small oval acorn shapes from the felt.
- Roll or stitch each shape into a rounded acorn body.
- Glue a natural acorn cap to the top.
- Thread the felt acorns onto twine.
- Add small felt oak leaves between them.
- Drape the garland around the lower half of the wreath.
- Secure the twine at the back with glue.
15. Cane Webbing and Dried Floral Wreath
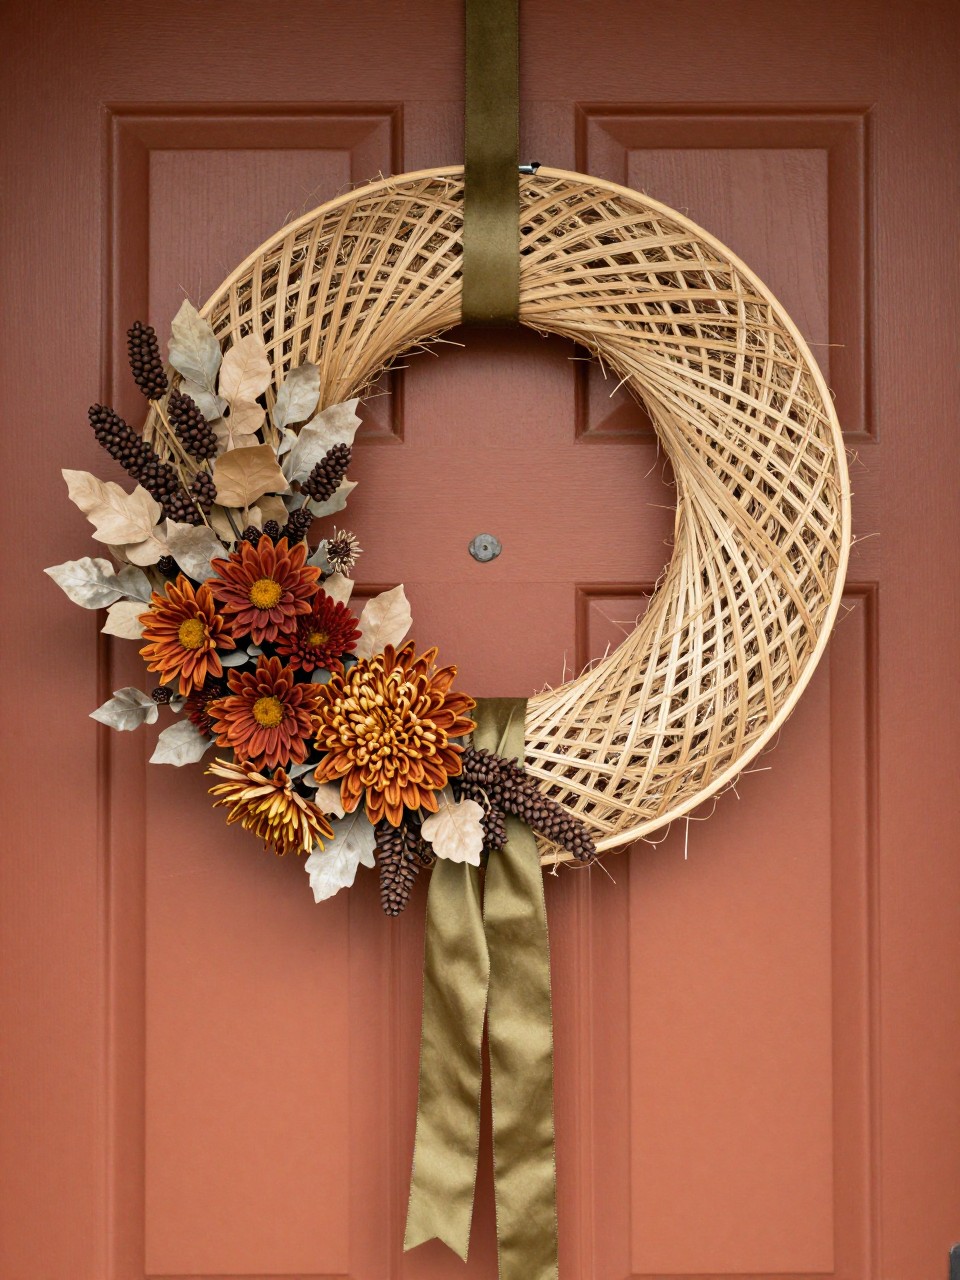
Cane webbing gives this wreath a warm vintage appearance while keeping the center light and open. The woven pattern adds enough detail that only a small floral arrangement is needed.
Use an embroidery hoop to hold the cane securely. A compact cluster of flowers in one corner keeps the design balanced and prevents the webbing from being hidden.
Materials needed:
- Large wooden embroidery hoop
- Cane webbing sheet
- Scissors
- Strong craft glue
- Rust-colored artificial flowers
- Beige leaves
- Dark seed pods
- Olive ribbon
- Floral wire
- Wire cutters
How to make it:
- Soak the cane webbing briefly if it feels too stiff.
- Dry it lightly with a towel.
- Stretch the webbing across the inner embroidery hoop.
- Place the outer hoop over it and tighten securely.
- Trim the extra cane from the back.
- Arrange flowers and leaves along one lower corner.
- Add seed pods for darker contrast.
- Finish with a narrow olive ribbon.
16. Layered Cardboard Pumpkin Wreath
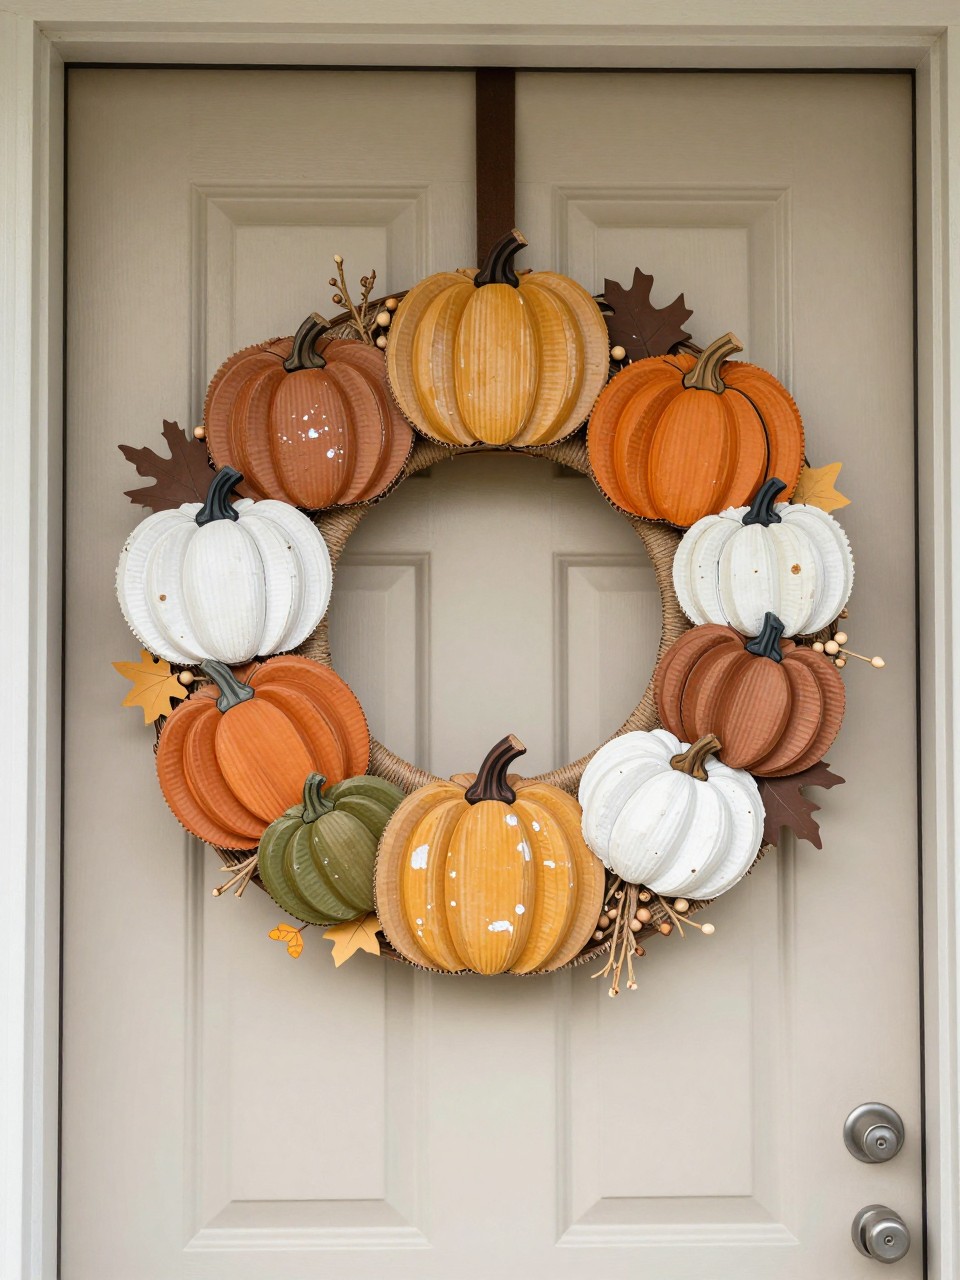
Corrugated cardboard can be turned into lightweight dimensional pumpkins with only paint and glue. Layering several cutouts makes each pumpkin appear thicker and more finished than a single flat shape.
This is an affordable choice for renters, classrooms, or anyone who wants a wreath that is easy to hang. A clear sealant will help protect the painted surface when the wreath is used on a covered front door.
Materials needed:
- Clean corrugated cardboard
- Round cardboard wreath base
- Pumpkin templates in several sizes
- Craft paint in fall colors
- Paintbrushes
- Jute string
- Thin green or brown paper
- Small wooden beads
- Strong craft glue
- Clear matte sealant
- Scissors or craft knife
How to make it:
- Trace pumpkin shapes onto the cardboard.
- Cut two or three matching pieces for each pumpkin.
- Glue the matching layers together.
- Paint the pumpkins in several muted fall colors.
- Wrap short cardboard stems with jute string.
- Arrange the pumpkins around the wreath base.
- Glue the largest shapes first, then fill gaps with smaller ones.
- Add curled paper vines and wooden beads.
- Seal the finished wreath with a light matte coating.