


Table of Contents Show
Here are some easy, cute purse ideas you can make at home or in the classroom. If you’re trying to keep kids busy, plan a rainy-day project, or add a hands-on activity to a lesson, these simple crafts help a lot. Each purse is small, fun to decorate, and teaches basic making skills like cutting, folding, and gluing.
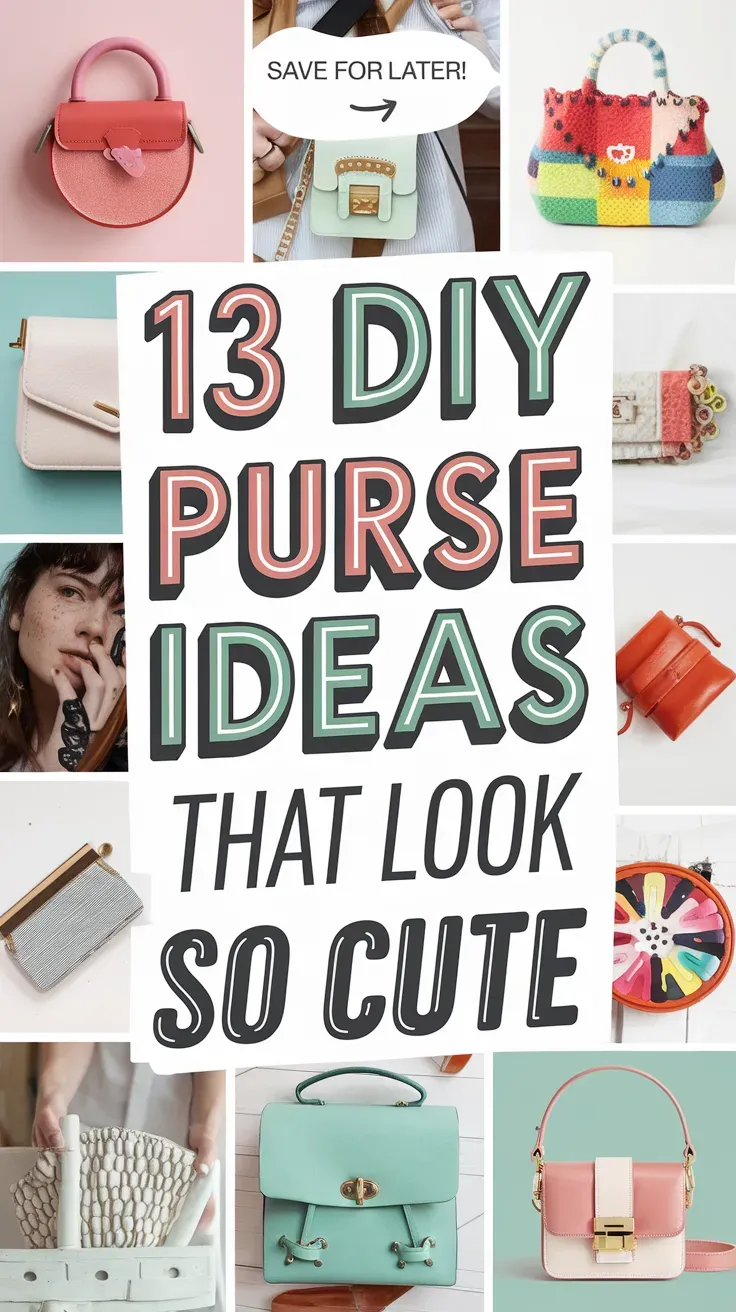
Pick one that fits your supplies, and let’s jump into creative purse-making that looks adorable and feels doable.
1. Paper Plate Rainbow Purse
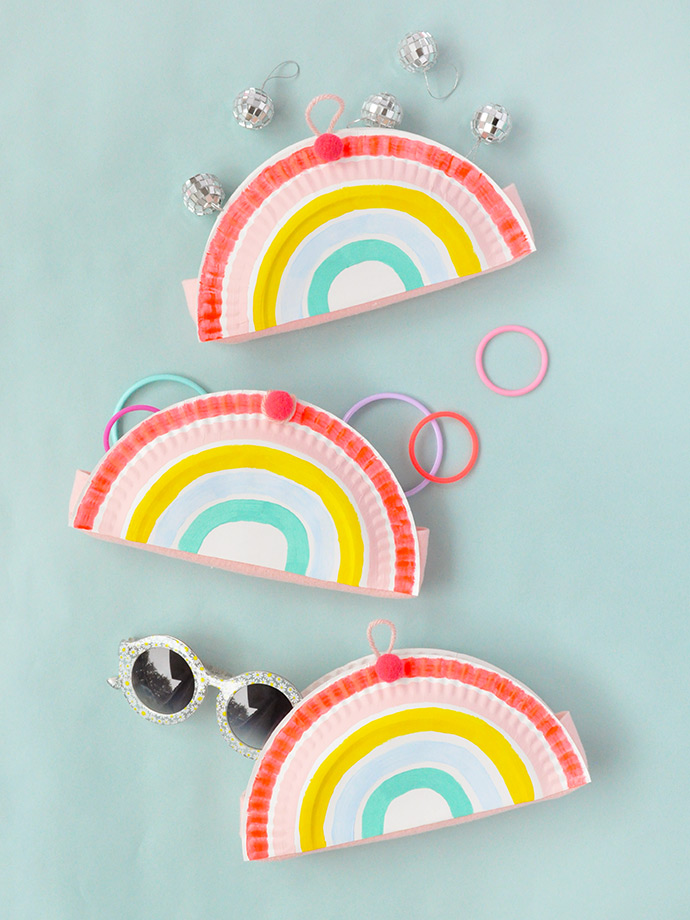
This purse looks like a half-circle rainbow with a little flap and a yarn strap. It’s bright, cheerful, and quick to paint, so kids enjoy choosing colors and seeing a plain plate turn into a real carry bag.
Materials Needed:
- Sturdy paper plate (plain white)
- Paints or markers (rainbow colors)
- Yarn or ribbon for strap
- Hole punch
- Glue stick and tape
How to make it:
For People Who Love to Make Things ✂️
- Fold the paper plate in half to make a half-circle; crease well.
- Punch two holes near the fold edges and tie yarn through for a strap.
- Paint rainbow stripes on the outside; add clouds or stickers.
- Let dry, glue the sides to form a pocket, and wear your mini rainbow.
2. Felt Heart Mini Purse
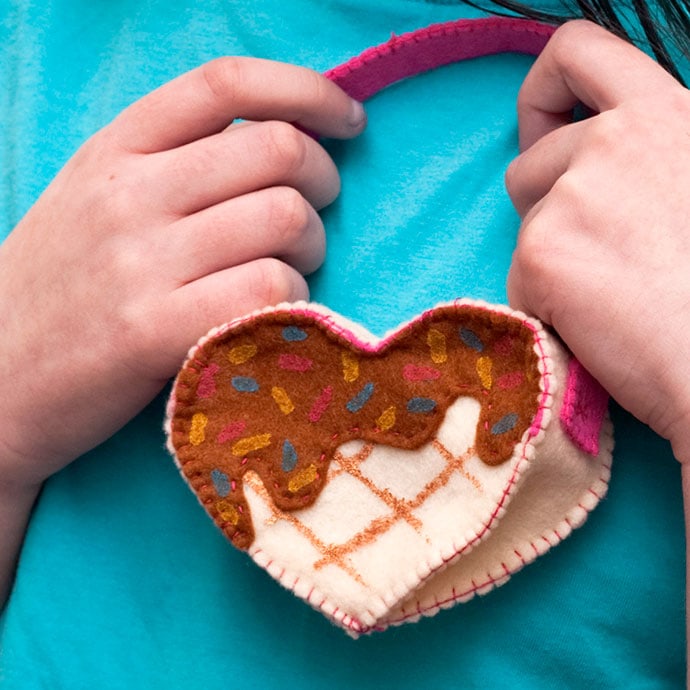
This sweet purse is shaped like a big puffy heart with a simple flap. Kids love choosing felt colors and stitching or gluing the edges, and it looks cute for pretend play or tiny treasures.
Materials Needed:
- Craft felt sheets (two matching colors)
- Embroidery thread or tacky glue
- Plastic yarn needle (if sewing)
- Ribbon for strap
- Self-adhesive Velcro dot (for closure)
How to make it:
- Cut two matching heart shapes from felt; cut a small heart flap if desired.
- Stitch or glue the edges, leaving the top open.
- Attach ribbon straps to the inside; add a Velcro dot under the flap.
- Decorate with felt dots or buttons, and let glue dry fully.
3. No-Sew T-Shirt Tote Purse

This purse turns an old T-shirt into a soft, slouchy tote with a fringed bottom. It’s satisfying because there’s no sewing, just cutting and tying knots, and it feels like real upcycling.
Materials Needed:
- Old T-shirt (adult size works best)
- Fabric scissors
- Ruler or chalk for marking
- Beads (optional for fringe)
- Safety pin (optional for threading)
How to make it:
- Cut off sleeves and a wider neck to make handles.
- Cut fringe along the bottom hem through both layers.
- Tie pairs of front and back fringe together; double-knot for strength.
- Add beads to some fringe, stretch the handles, and go.
4. Cereal Box Clutch Purse
This clutch looks like a slim, rectangular purse with a fold-over top, made from a colorful cereal box. Kids enjoy turning packaging into fashion, and the glossy print makes it instantly cute.
Materials Needed:
- Empty cereal box
- Clear packing tape or contact paper
- Velcro dot or button and loop
- Washi tape for edges
- Scissors and glue
How to make it:
- Cut the box into a flat rectangle; fold into thirds to make a clutch with flap.
- Reinforce inside and outside with clear tape or contact paper.
- Seal side edges with washi tape; add a Velcro dot under the flap.
- Decorate with stickers, then press folds firmly.
5. Paper Cup Party Purse
This tiny purse uses two paper cups to make a round, lidded bag with a ribbon handle. It’s playful, quick to assemble, and perfect for party favors or pretend coins.
Materials Needed:
- Two matching paper cups
- Ribbon for handle
- Hole punch
- Paint, stickers, or patterned paper
- Hot glue (adult help) or strong tacky glue
How to make it:
- Trim cup rims so one slides slightly into the other for a lid.
- Punch two holes opposite each other on one cup; knot ribbon ends inside for a handle.
- Decorate cups with paint or paper wraps.
- Glue the bottom edges together lightly so they hinge; let dry.
6. Denim Pocket Crossbody Purse
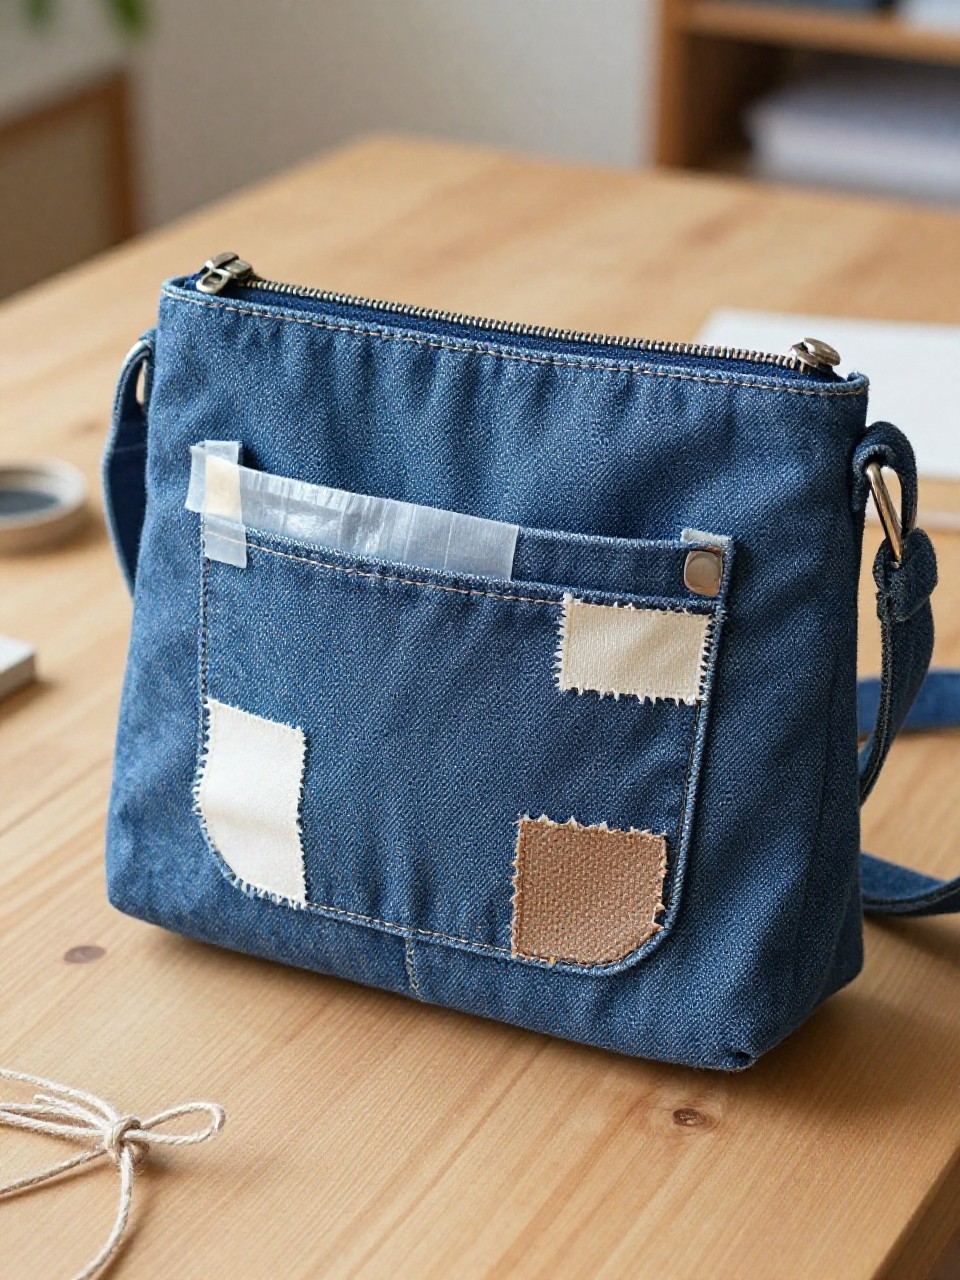
This purse is made from a cut-off jean pocket, keeping the original stitching and look. Kids like it because it feels like a real store-bought mini bag, but it’s super simple.
Materials Needed:
- Old jeans pocket (cut out around seams)
- Fabric glue or basic hand-sewing kit
- Twine or strap cord
- Patch or iron-on (optional)
- Button or snap (optional)
How to make it:
- Cut a second piece of denim for the back; glue or stitch around sides and bottom.
- Tuck raw edges in and secure with glue; let set.
- Attach twine or cord to top corners as a strap.
- Add patches or a button closure; dry before wearing.
7. Duct Tape Checkerboard Purse
This purse has a bold checkerboard pattern made from strips of colorful duct tape. Kids enjoy peeling, sticking, and weaving tape, and the result is sturdy and shiny.
Materials Needed:
- Two colors of duct tape
- Baking parchment or cutting mat
- Ruler and scissors
- Ribbon or chain for strap
- Velcro dot
How to make it:
- Make duct tape sheets by overlapping strips sticky-side down on parchment.
- Cut even strips; weave them into a checkerboard and tape edges to lock.
- Fold the sheet into a pouch; tape sides closed and add a flap.
- Stick on Velcro and attach strap with folded tape loops.
8. Craft Foam Flower Purse
This purse looks like a big daisy with a round center and petal edges, made from craft foam. It’s soft, colorful, and easy to cut, so beginners get a neat result fast.
Materials Needed:
- Craft foam sheets (two main colors)
- Tacky glue or low-temp hot glue
- Hole punch (for foam)
- Yarn or cord for strap
- Foam stickers or gems (optional)
How to make it:
- Cut two matching flower shapes; cut small circles to reinforce strap holes.
- Glue around petals, leaving a top opening; press to bond.
- Punch two holes at the top and tie on yarn strap.
- Add foam stickers or gems and let glue cure.
9. Envelope Glitter Clutch
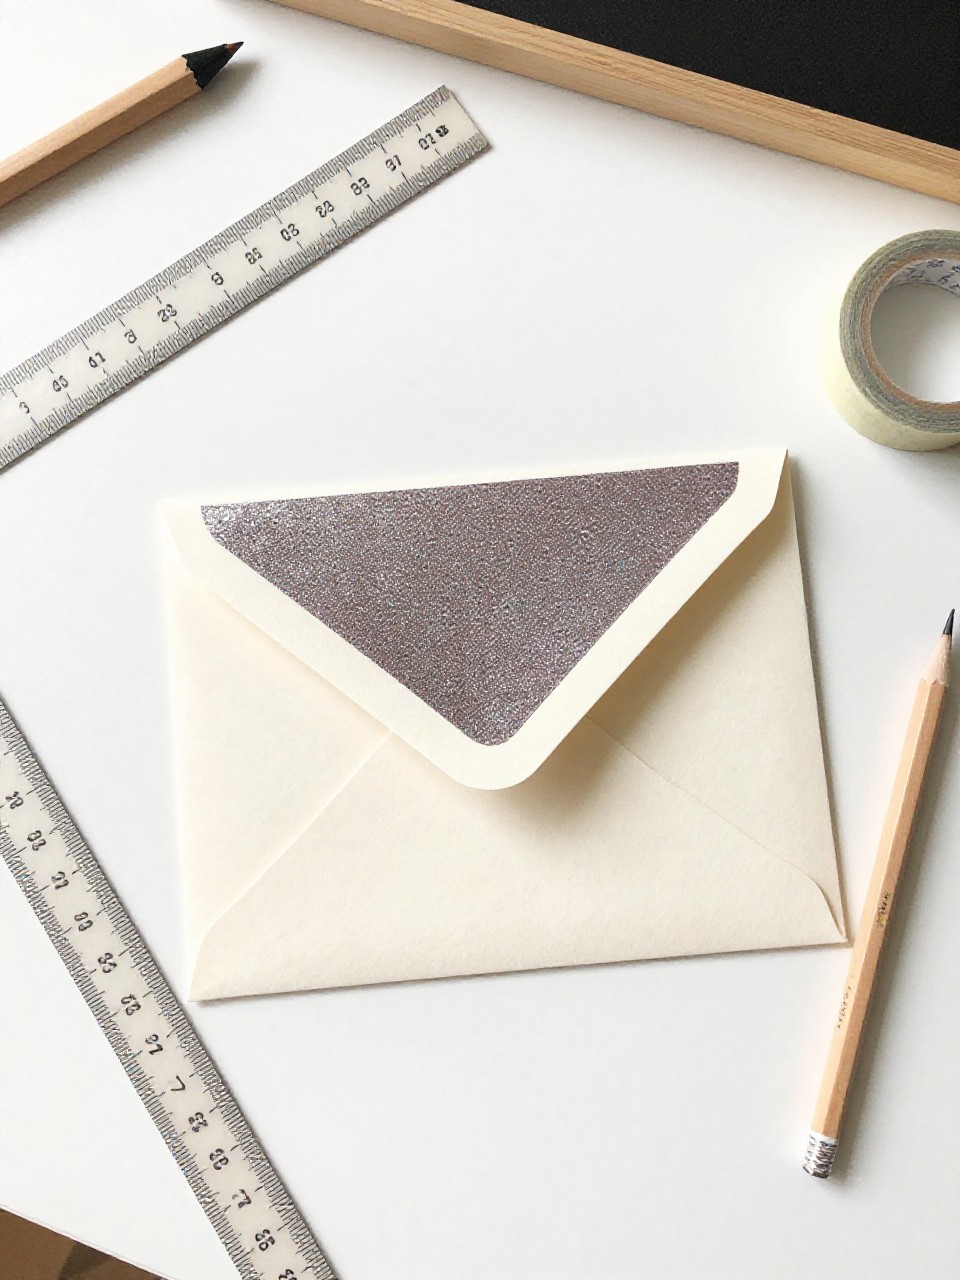
This clutch looks like a simple envelope with a pointed flap, sparkly and slim. Kids love the shimmer and fast results, perfect for dress-up or gifting.
Materials Needed:
- Heavy cardstock or glitter cardstock
- Glue stick or double-sided tape
- Velcro dot or sticker for closure
- Ruler and pencil
- Stickers or washi tape (optional)
How to make it:
- Cut a rectangle; mark and fold to create an envelope shape with a triangle flap.
- Seal side flaps with tape or glue.
- Attach a Velcro dot under the flap.
- Add washi borders or stickers, and press folds crisp.
10. Pom-Pom Party Purse
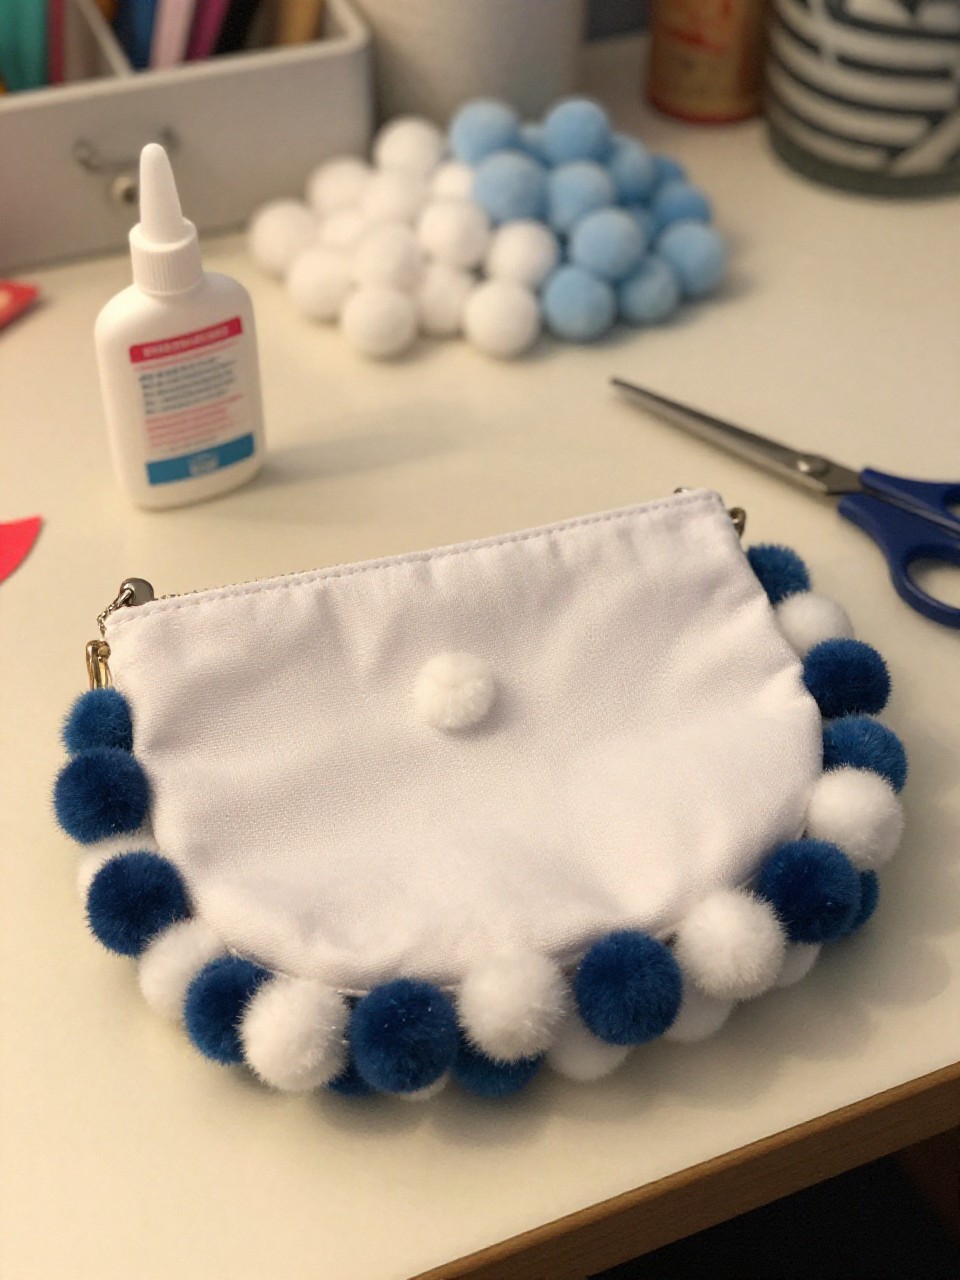
This purse is a soft pouch covered in colorful pom-poms, with a cheerful bouncy look. Kids enjoy the texture and pattern play, and it’s a simple glue-and-go project.
Materials Needed:
- Small canvas drawstring bag
- Assorted pom-poms
- Fabric glue
- Felt scraps (optional shapes)
- Glitter glue (optional)
How to make it:
- Lay the canvas bag flat and slide cardboard inside to prevent glue bleed.
- Glue pom-poms in rows or clusters on one or both sides.
- Add felt shapes or initials if you like.
- Let dry fully before filling and swinging.
11. Paper Weave Shoulder Purse
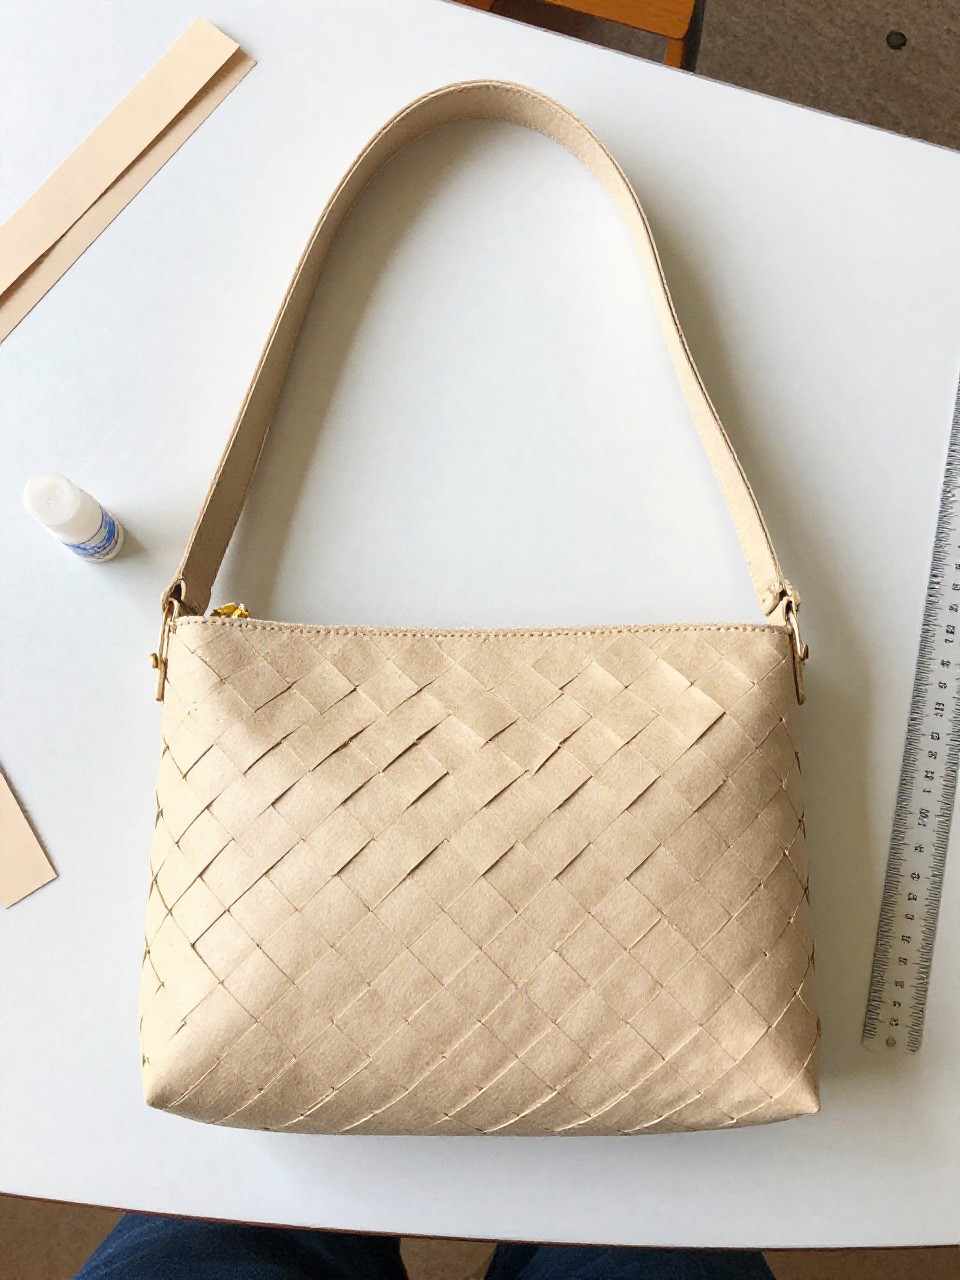
This purse has a woven basket look made from sturdy colored paper strips. Kids enjoy the weaving rhythm and seeing a flat set of strips turn into a real bag.
Materials Needed:
- Construction paper or cardstock (two colors)
- Ruler and scissors
- Glue stick or tape
- Hole punch
- Ribbon for strap
How to make it:
- Cut equal-width strips; weave them into a rectangle panel.
- Glue edges to secure; make a second plain panel for the back.
- Glue or tape sides and bottom to form a pouch; add a small flap if desired.
- Punch holes and tie on ribbon; let glue set.
12. Mason Jar Band Round Purse
This purse looks like a small round canteen, using two mason jar bands as a sturdy frame. Kids like how “real” and shiny it feels, and decorating the circle sides is fun.
Materials Needed:
- Two wide-mouth mason jar bands (rings)
- Cardboard circles (fit inside rings)
- Fabric scrap or felt
- Hot glue (adult help)
- Cord for strap
How to make it:
- Glue cardboard circles inside the bands to make two lids.
- Wrap each side with fabric or felt; glue edges neatly.
- Glue the two rings together, leaving a small top gap as an opening.
- Tie cord to opposite sides through small glued loops and decorate.
13. Sticker Sheet Clear Pouch Purse
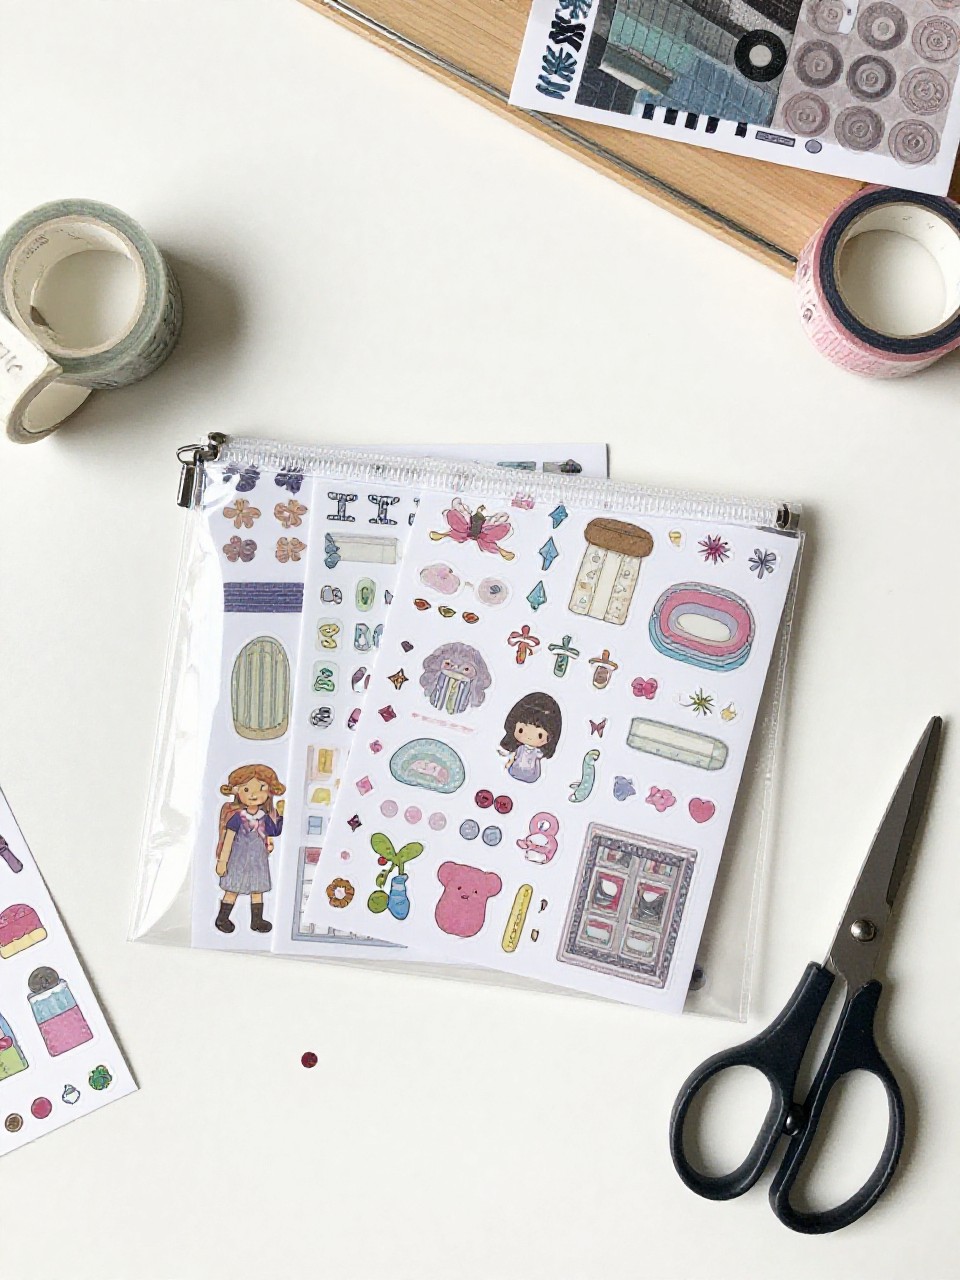
This purse is a see-through pouch sealed at the edges, filled with floating stickers or confetti. Kids love the peekaboo look and choosing a theme like stars, fruit, or animals.
Materials Needed:
- Clear sheet protectors or laminating pouches (no machine needed if self-seal)
- Washi tape or colorful duct tape
- Stickers and confetti
- Ribbon for strap
- Hole punch
How to make it:
- Cut two same-size clear rectangles.
- Place stickers and confetti between layers; tape around three sides to seal.
- Fold a small flap and tape for closure; reinforce edges.
- Punch holes at the top and tie on a ribbon strap.


