

Table of Contents Show
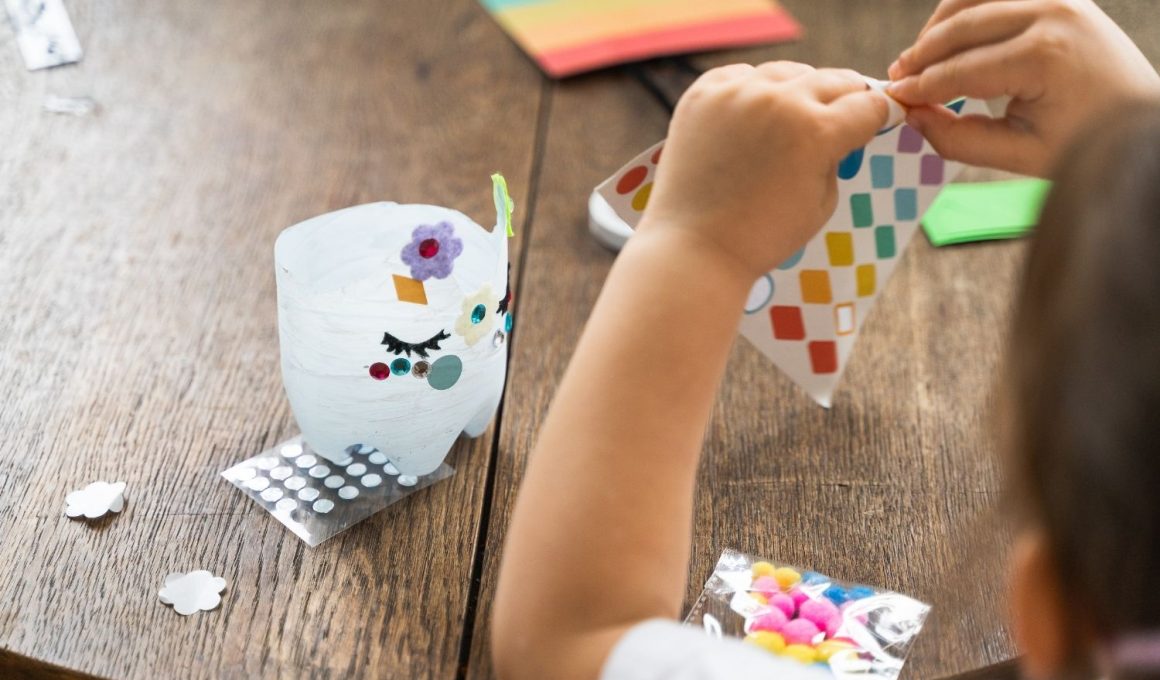
Keeping little hands busy can be tough, especially on rainy days or when you need a quick classroom activity. Recycled crafts are a simple way to use what you already have while teaching kids about reusing materials.
This list gives you fun, easy projects that turn bottles, boxes, and scraps into bright creations.
Pick a few favorites, gather your recyclables, and let’s jump into 15 playful recycled crafts for preschool kids.
1. Egg Carton Caterpillar
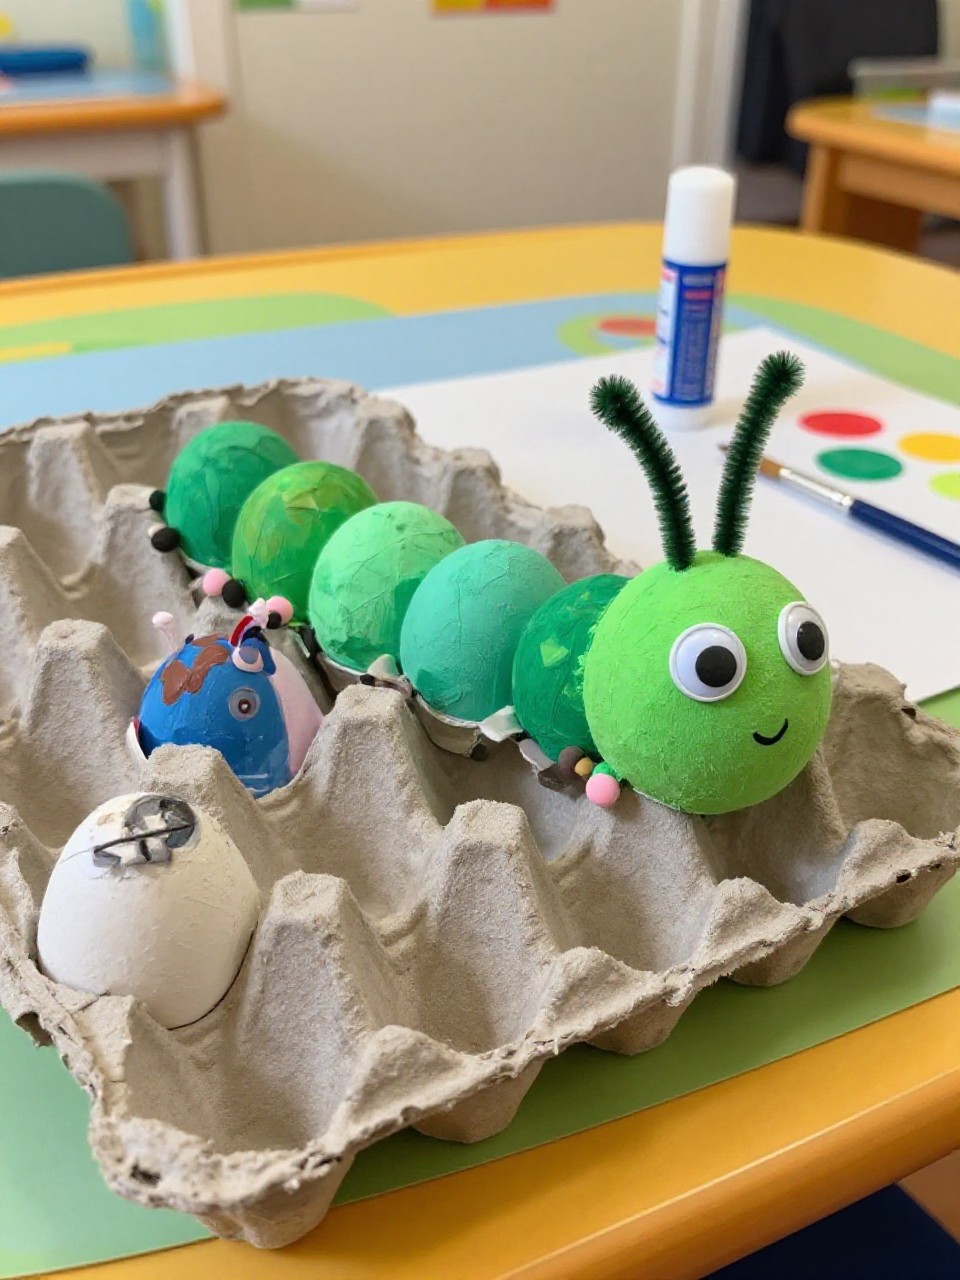
This craft becomes a bumpy, colorful caterpillar made from a cut egg carton, with pipe cleaner antennae and friendly eyes. Kids love painting each segment a different color, and the caterpillar shape is easy for small hands to decorate and play with.
Materials Needed:
For People Who Love to Make Things ✂️
- Cardboard egg carton (cut into a row of 4–6 cups)
- Child-safe paint and brushes
- Pipe cleaner (for antennae)
- Googly eyes or paper eyes
- School glue
How to make it:
- Cut a strip of connected egg cups from the carton and trim the edges flat.
- Poke a small hole for antennae in the front cup and thread a pipe cleaner through.
- Paint each cup and add eyes and a smile with markers or paint.
- Let dry completely, then bend the antennae and display your friendly caterpillar.
2. Toilet Paper Roll Binoculars
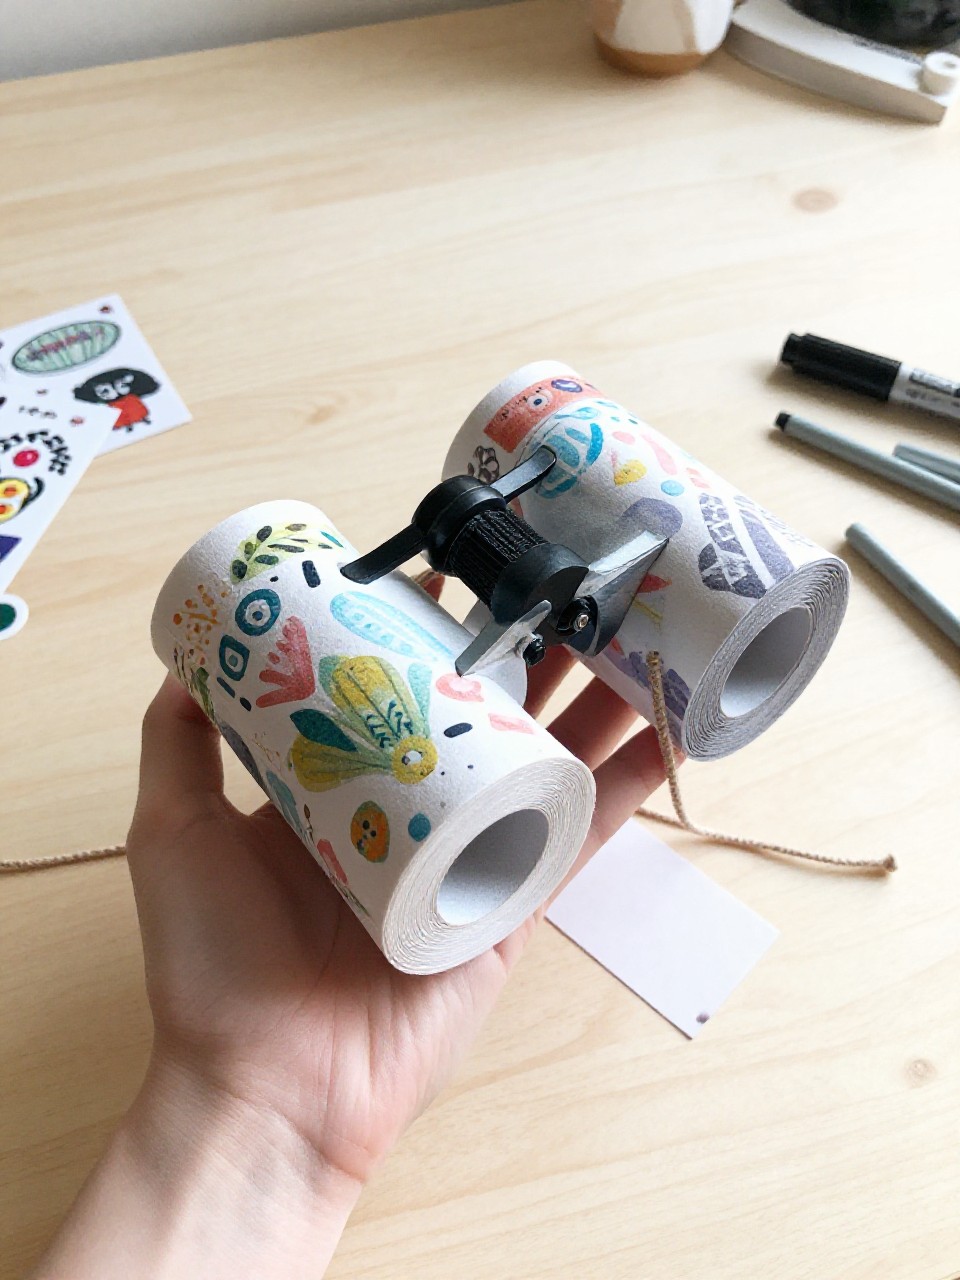
Two toilet paper rolls become pretend-play binoculars tied with string. Preschoolers enjoy decorating them and then using them for indoor “safaris” and outdoor nature walks.
Materials Needed:
- Two toilet paper rolls
- Tape or stapler
- Washable markers or paint
- Yarn or ribbon (neck strap)
- Stickers (optional)
How to make it:
- Tape or staple the two rolls side by side to form binoculars.
- Punch or poke two small holes and tie a yarn strap on each side.
- Decorate with markers, paint, and stickers.
- Let dry, then go on a pretend adventure around the house or yard.
3. Cereal Box Shape Puzzle
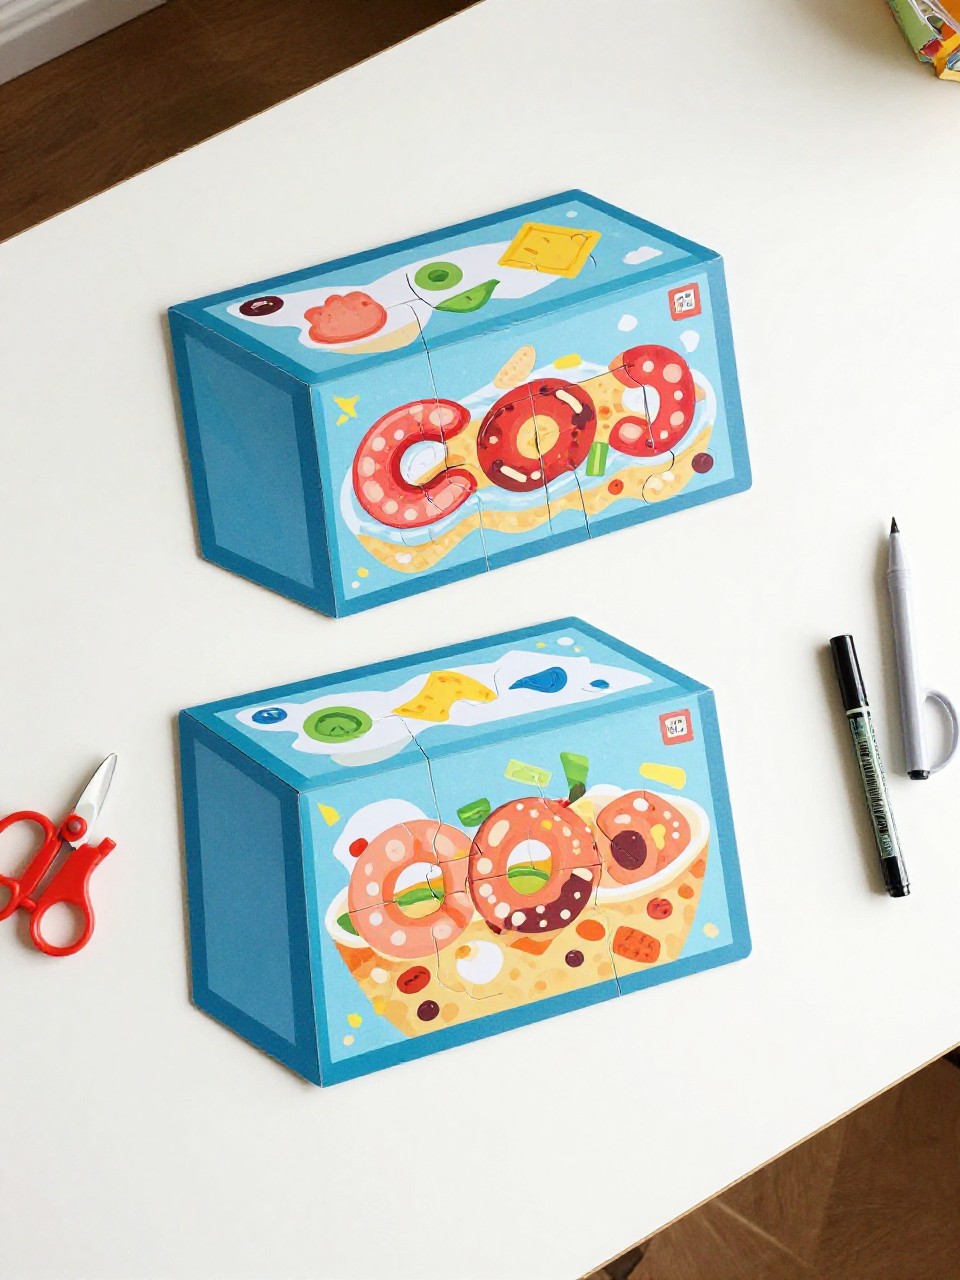
A flattened cereal box turns into a chunky puzzle with simple shapes kids can match. Cutting bright box graphics into big circles, triangles, and squares makes it fun and easy for preschoolers to solve.
Materials Needed:
- Empty cereal box (clean and flattened)
- Child-safe scissors (adult cuts)
- Marker for tracing shapes
- Zip bag or envelope for storage
How to make it:
- Open the cereal box and cut off the front panel.
- Draw large basic shapes and cut them out; trace the outlines onto the back panel as a matching board.
- Let kids color the back board if desired.
- Store pieces in a bag and match shapes to their outlines for play.
4. Plastic Bottle Shaker
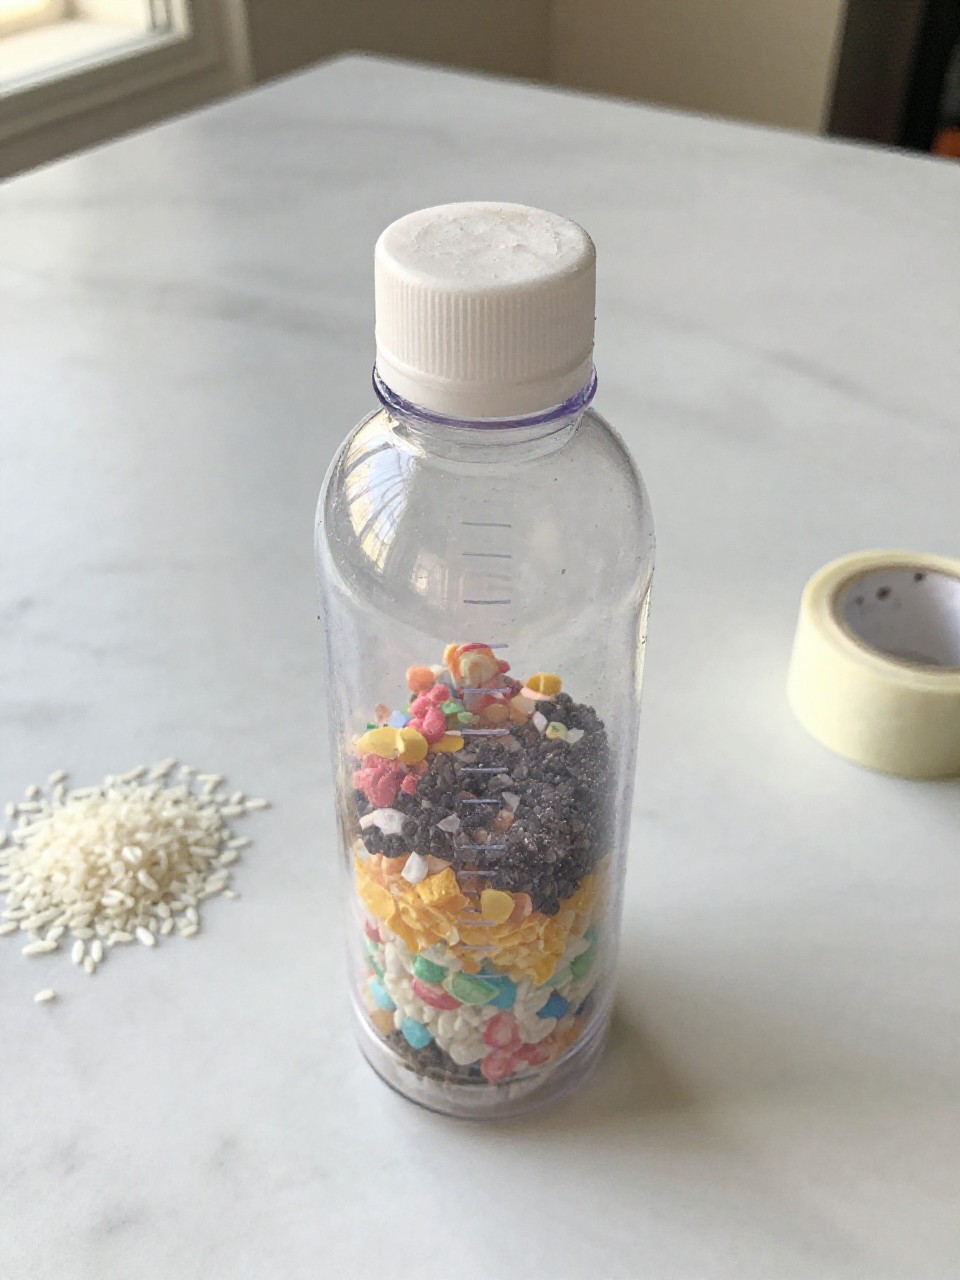
A small plastic bottle filled with clean, recycled bits becomes a bright musical shaker. Kids love the sound and seeing the colorful pieces move when they shake to a beat.
Materials Needed:
- Clean plastic bottle with cap (8–12 oz)
- Dried beans, rice, or clean plastic lid confetti
- Tape to secure cap
- Stickers or washi tape (optional)
How to make it:
- Fill the bottle one-third with rice, beans, or small plastic pieces.
- Screw the cap on tightly and wrap tape around the cap for safety.
- Decorate the outside with stickers or washi tape.
- Shake to make music and dance along.
5. Magazine Collage Rainbow

Old magazine pages are torn into color strips and glued into a bold rainbow. Kids enjoy hunting for colors, tearing paper, and seeing the arc fill up with bright textures.
Materials Needed:
- Old magazines or catalogs
- Construction paper base
- Glue stick
- Pencil for light rainbow outline
How to make it:
- Lightly draw a rainbow outline on construction paper.
- Tear magazine pages into small pieces sorted by color.
- Glue pieces onto each arc, overlapping for a full, textured look.
- Let dry and hang up the cheerful rainbow.
6. Milk Jug Garden Scoop
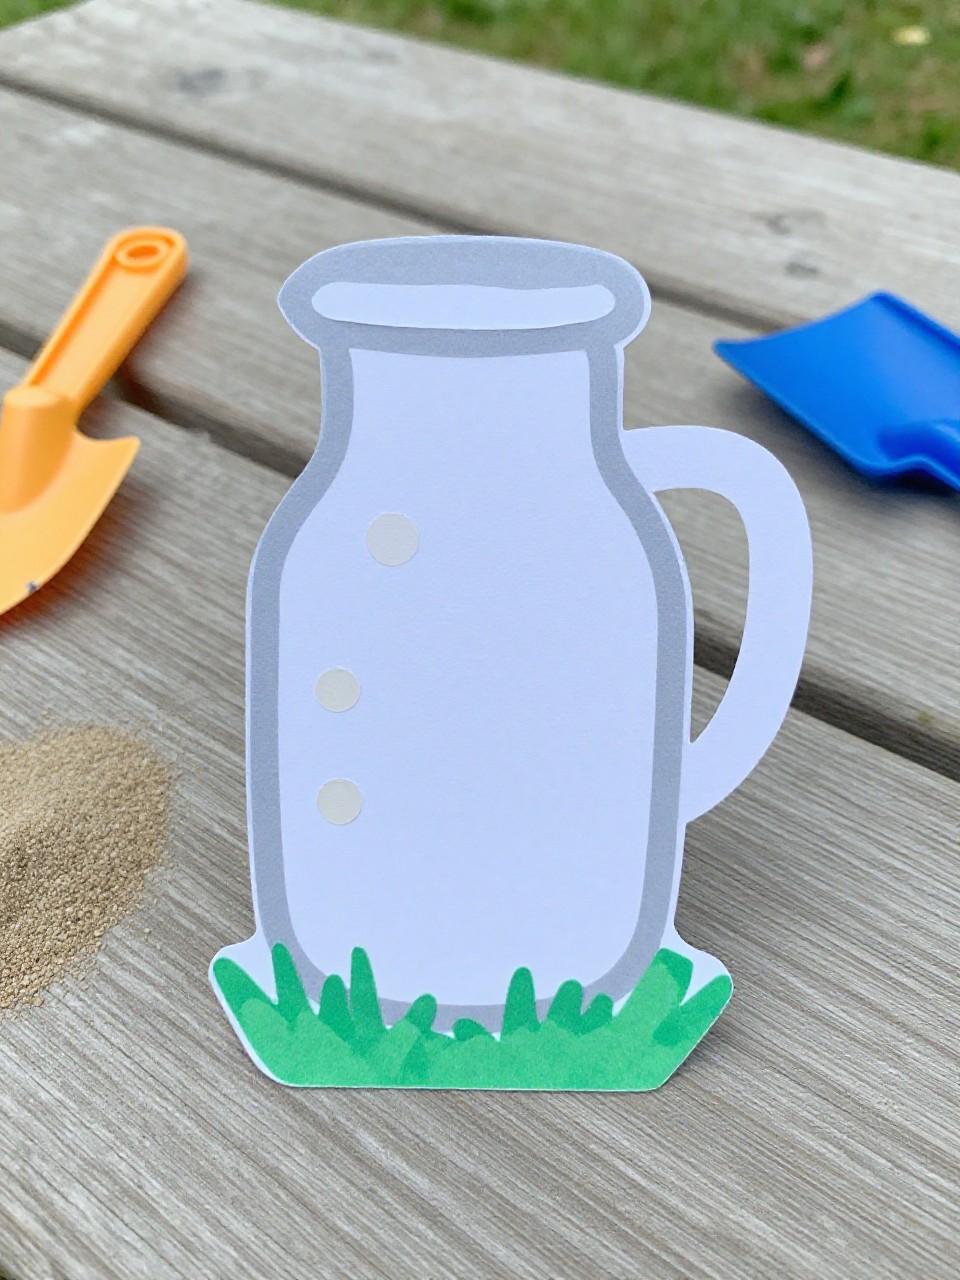
A rinsed milk jug becomes a simple sand or garden scoop with a cut-out opening. Kids like using their own tool for sandbox play or water pouring.
Materials Needed:
- Clean plastic milk jug with cap
- Permanent marker (adult use)
- Scissors or craft knife (adult use)
- Stickers (optional)
How to make it:
- Mark a scoop shape on the side opposite the handle.
- Adult cuts along the line to make the scoop opening.
- Let kids add stickers or draw simple designs.
- Rinse and use for sand, water, or sensory bins.
7. Cardboard Tube Rainstick
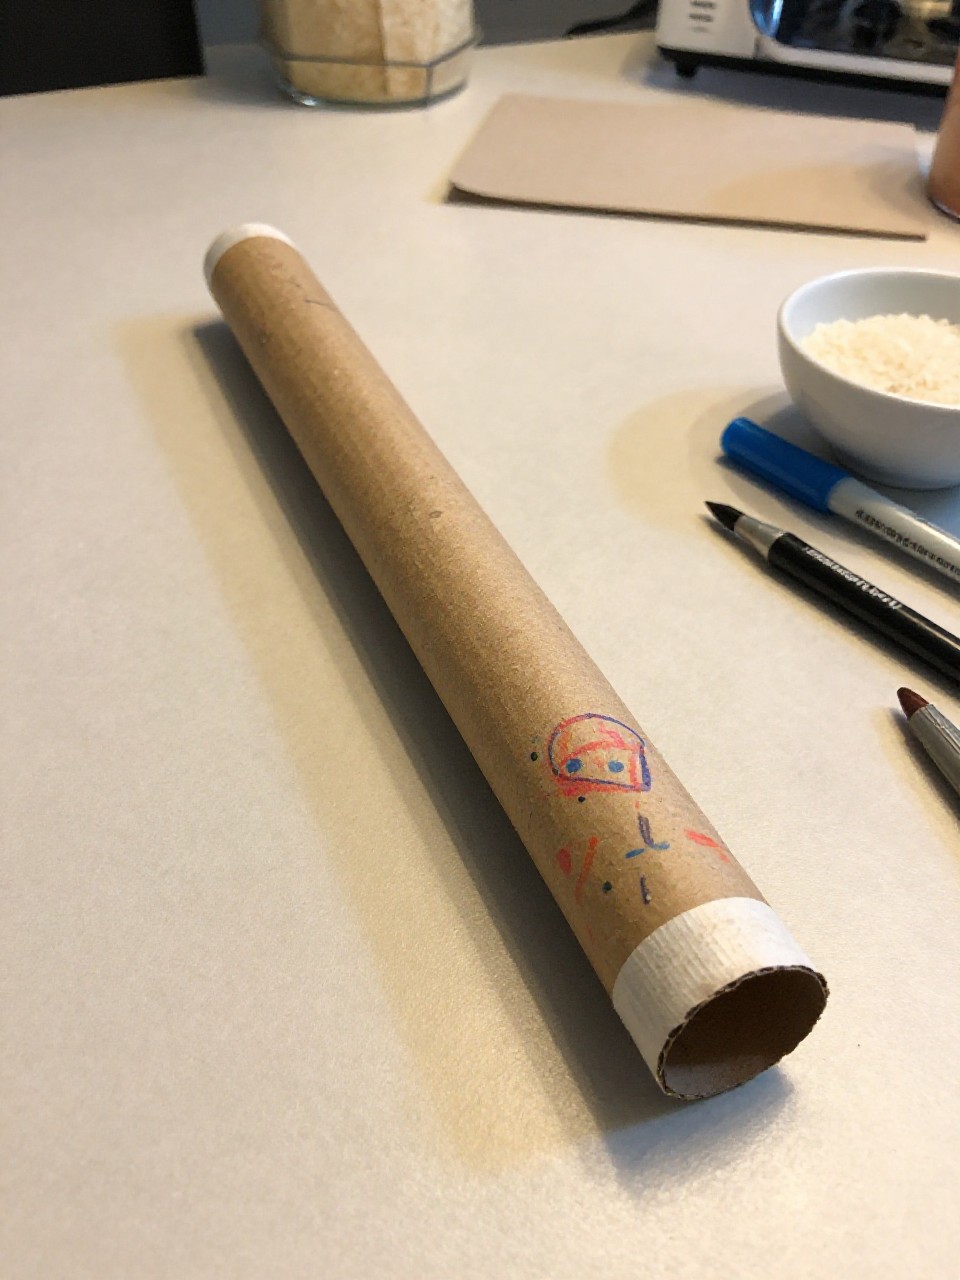
A long paper towel tube filled with foil spiral and rice makes a gentle rain sound. Preschoolers love tipping it back and forth and decorating the outside with patterns.
Materials Needed:
- Paper towel tube
- Aluminum foil
- Rice or small beans
- Tape and paper to cap ends
- Markers or paint
How to make it:
- Twist aluminum foil into a long coil and insert into the tube.
- Pour in a small amount of rice.
- Cap both ends with paper circles and tape securely.
- Decorate the tube and enjoy the soft rain sounds.
8. Bottle Cap Stamped Flowers
Plastic bottle caps become easy stamps to print bright flower petals and centers. Kids love dipping caps in paint and pressing to make lots of blooms.
Materials Needed:
- Assorted plastic bottle caps
- Washable paint on a tray
- White or colored paper
- Markers for stems and leaves
How to make it:
- Pour paint onto a tray or plate.
- Dip bottle caps in paint and stamp circles for petals and centers.
- Draw stems and leaves with markers.
- Let dry and hang up the garden picture.
9. Cereal Box Animal Masks
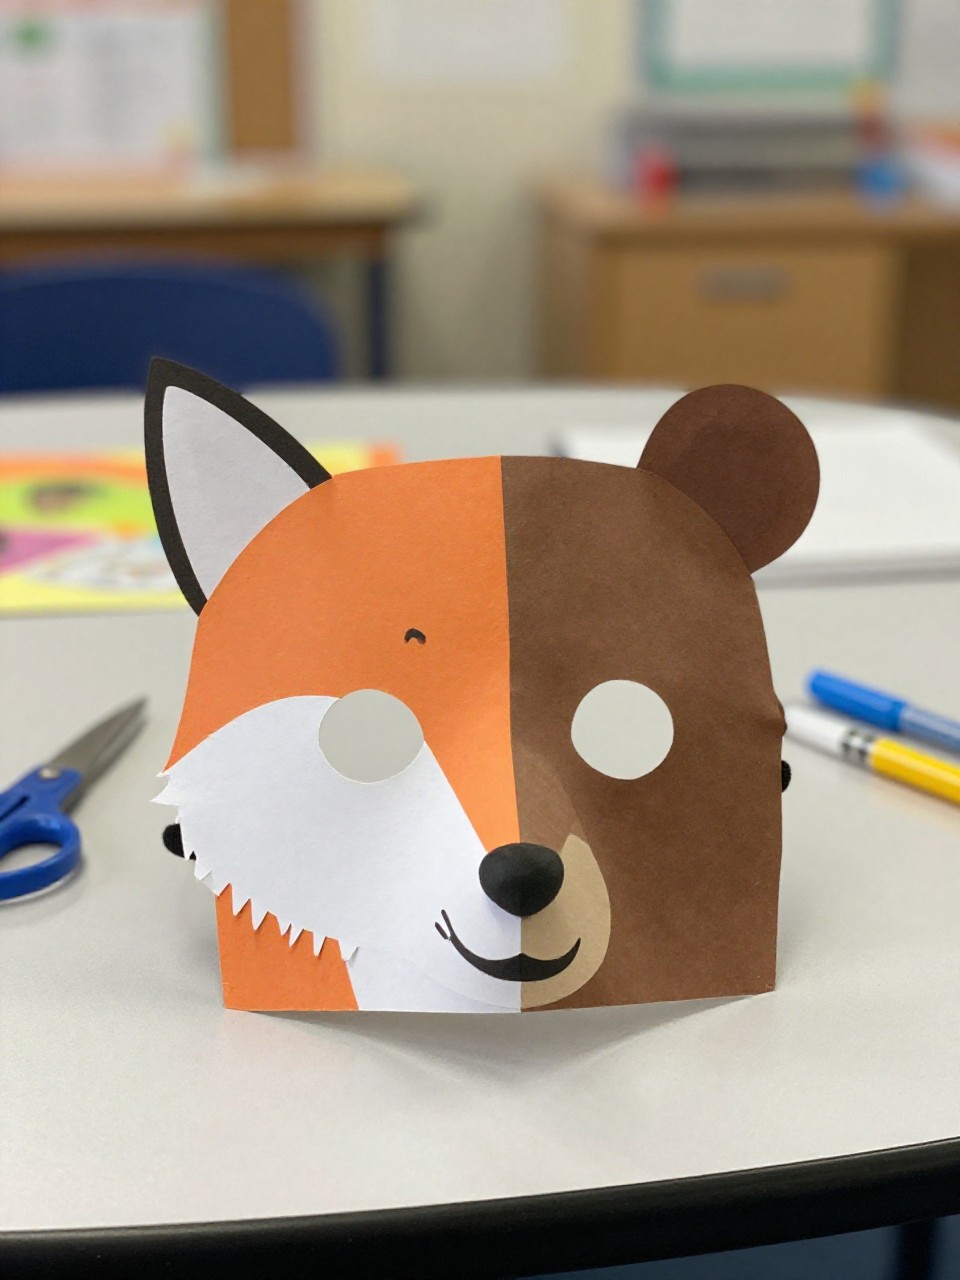
Cut cereal boxes into simple animal mask shapes like a cat, bear, or fox, and add elastic. Kids enjoy pretending and decorating their own animal faces.
Materials Needed:
- Empty cereal box
- Pencil and child-safe scissors (adult helps)
- Paint, crayons, or markers
- Elastic cord or ribbon
- Hole punch
How to make it:
- Draw a simple animal face on the box and cut it out, including eye holes.
- Punch holes on the sides and add elastic or ribbon.
- Decorate with paint or markers; add paper ears or whiskers if desired.
- Let dry and start a playful animal parade.
10. Lid Top Spinners
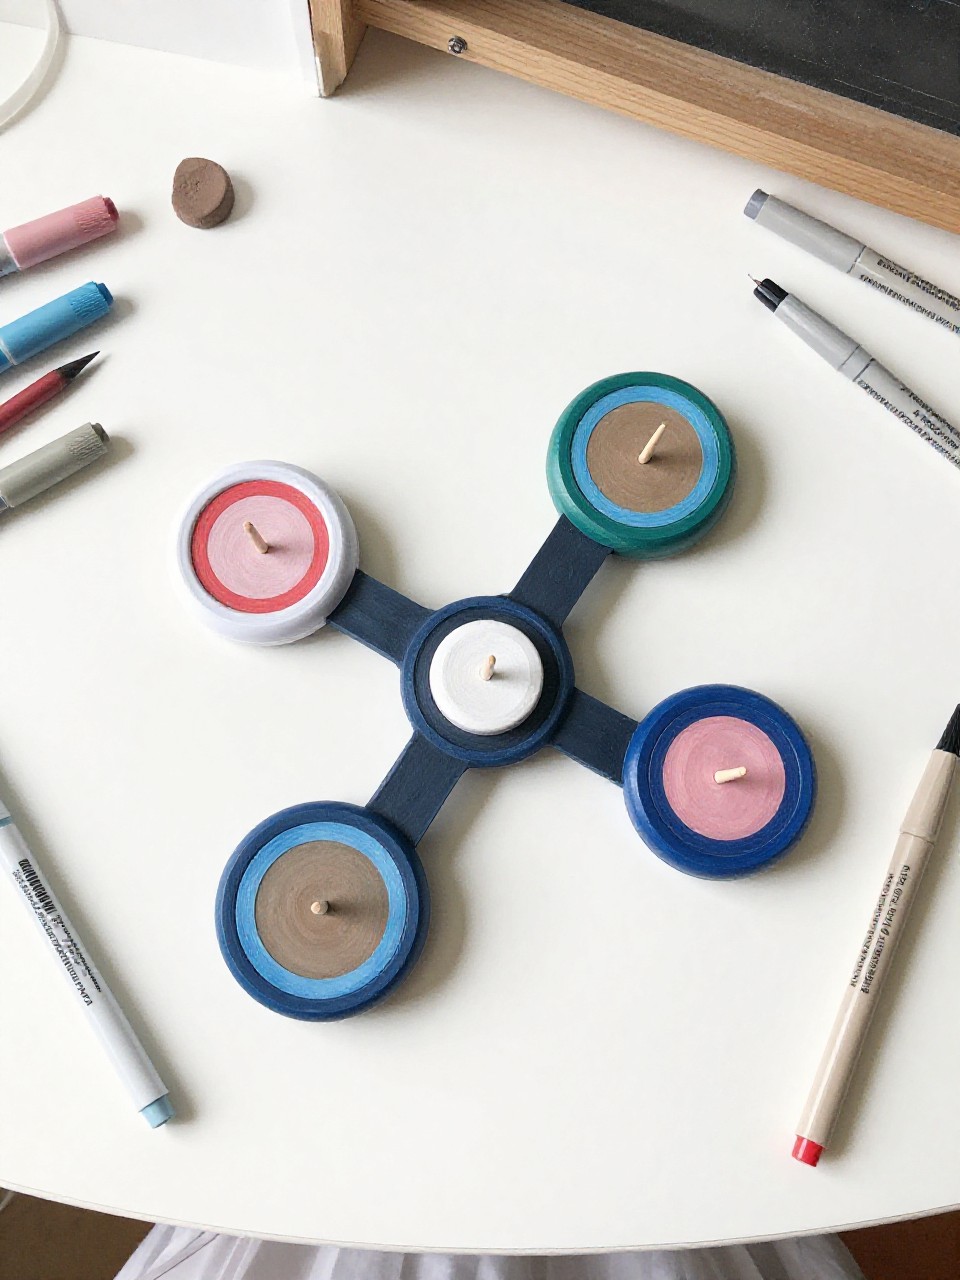
Recycled plastic lids with a toothpick or paperclip center spin into simple tops. Kids love testing colors and watching the spinner whirl.
Materials Needed:
- Round plastic lids (yogurt or juice)
- Toothpicks or large paperclips
- Modeling clay or sticky tack
- Markers for decorating
How to make it:
- Draw colorful patterns on the lid.
- Poke a small center hole (adult helps) and insert a toothpick; secure with clay underneath.
- Adjust so the stick is straight.
- Spin on a flat surface and try different designs.
11. Paper Roll Bird Feeder
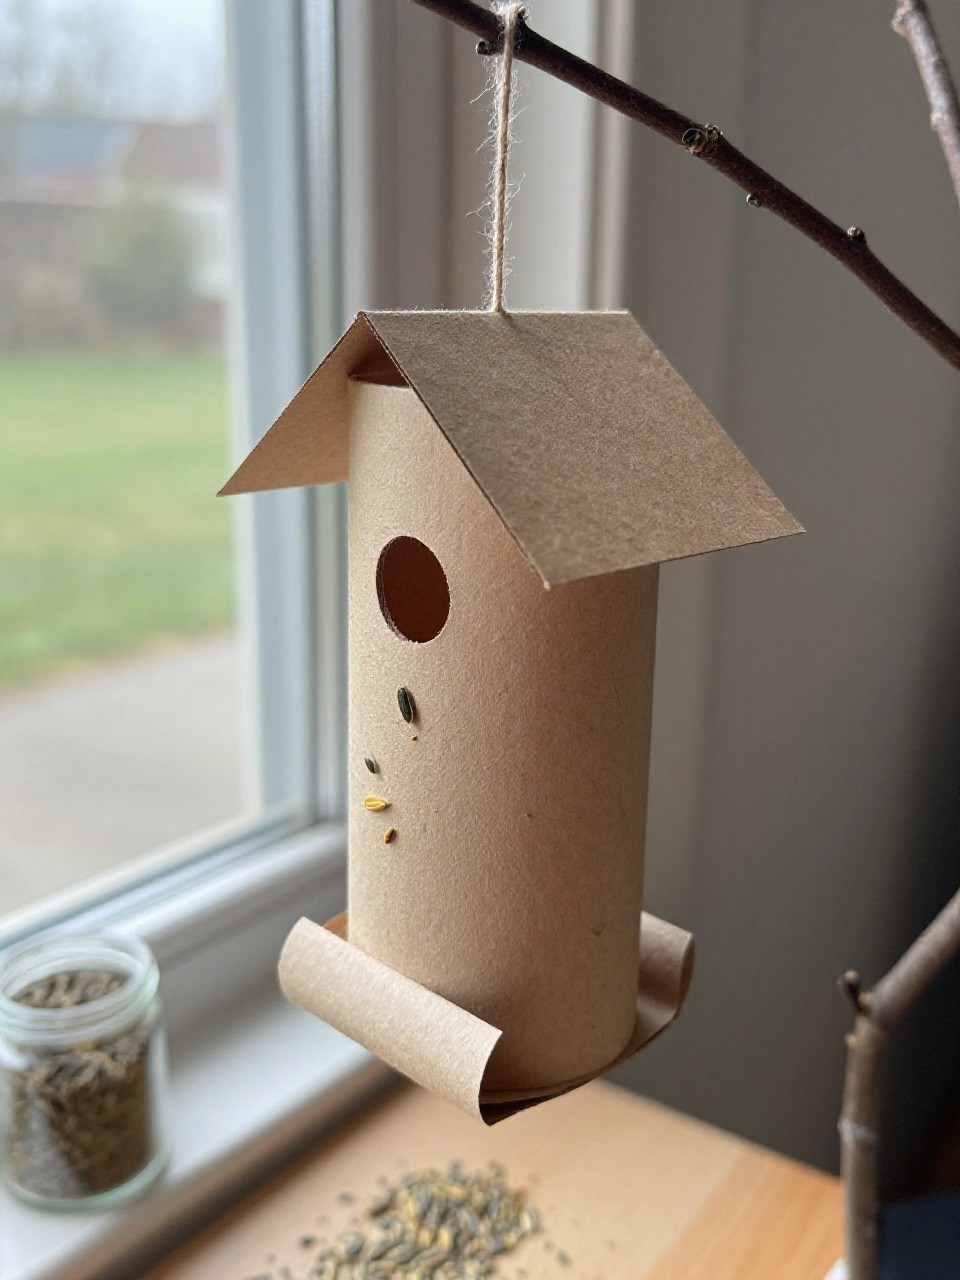
A toilet paper roll coated in seed becomes a simple backyard bird feeder. Kids enjoy rolling it in seeds and then watching birds visit.
Materials Needed:
- Toilet paper roll
- Sunflower seed or bird seed mix
- Peanut butter or sunflower butter
- String or yarn
How to make it:
- Spread a thin layer of nut or seed butter over the roll.
- Roll the sticky tube in a tray of bird seed.
- Thread yarn through the roll for hanging.
- Hang outside on a branch and observe birds together.
12. Junk Mail Bead Necklace
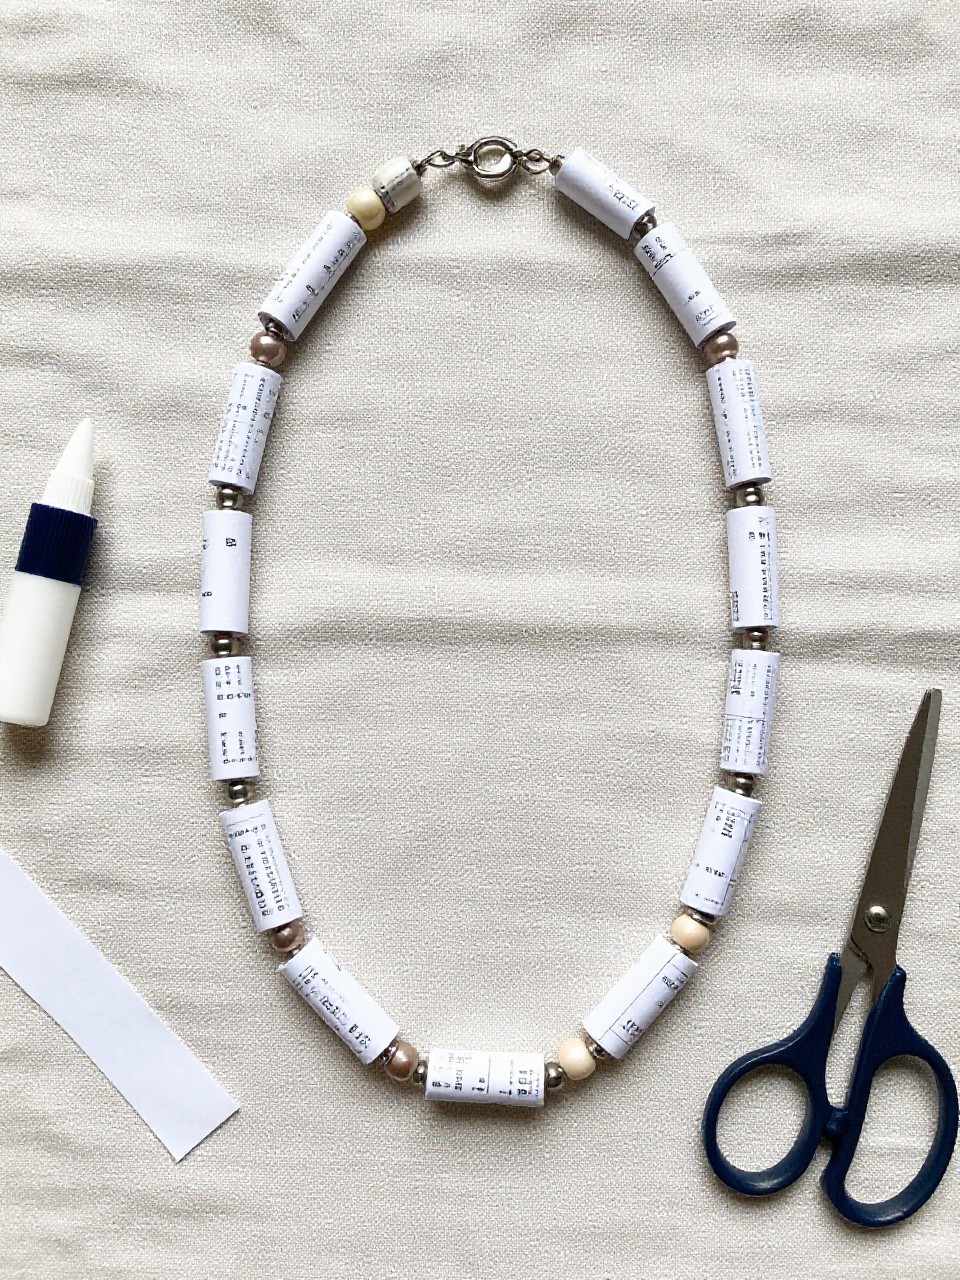
Colorful strips from junk mail are rolled into chunky paper beads for a necklace. Kids like choosing colors and stringing their own jewelry.
Materials Needed:
- Junk mail or catalog pages
- Glue stick
- Drinking straw or thin pencil (rolling form)
- Yarn or shoelace
- Tape (optional)
How to make it:
- Cut long skinny triangles from colorful pages.
- Roll each triangle around a straw, gluing as you roll; slide off to make beads.
- Let beads dry and make a small pile.
- String beads onto yarn and tie to fit.
13. Shoe Box Puppet Theater

A shoe box becomes a tiny stage with a cut-out window and paper curtain. Kids love putting on shows with finger puppets or paper characters.
Materials Needed:
- Empty shoe box
- Craft knife or scissors (adult)
- Construction paper for curtains
- Markers and stickers
- Tape or glue
How to make it:
- Cut a large window in the box lid or one long side.
- Add paper curtains and decorate the stage with markers and stickers.
- Draw and cut simple paper puppets; tape to craft sticks if desired.
- Set the box upright and start the show.
14. Tin Can Pencil Holder

A clean, label-free can becomes a bright desk organizer wrapped in art. Kids enjoy painting or gluing magazine strips to make a custom holder.
Materials Needed:
- Clean tin can with smooth rim (check for safety)
- Paint or colored paper strips
- Glue or double-sided tape
- Stickers (optional)
How to make it:
- Make sure the can’s rim is safe; cover with tape if needed.
- Paint the can or glue on paper strips around the outside.
- Add stickers or doodles for extra flair.
- Let dry and fill with crayons and markers.
15. Cardboard City Blocks
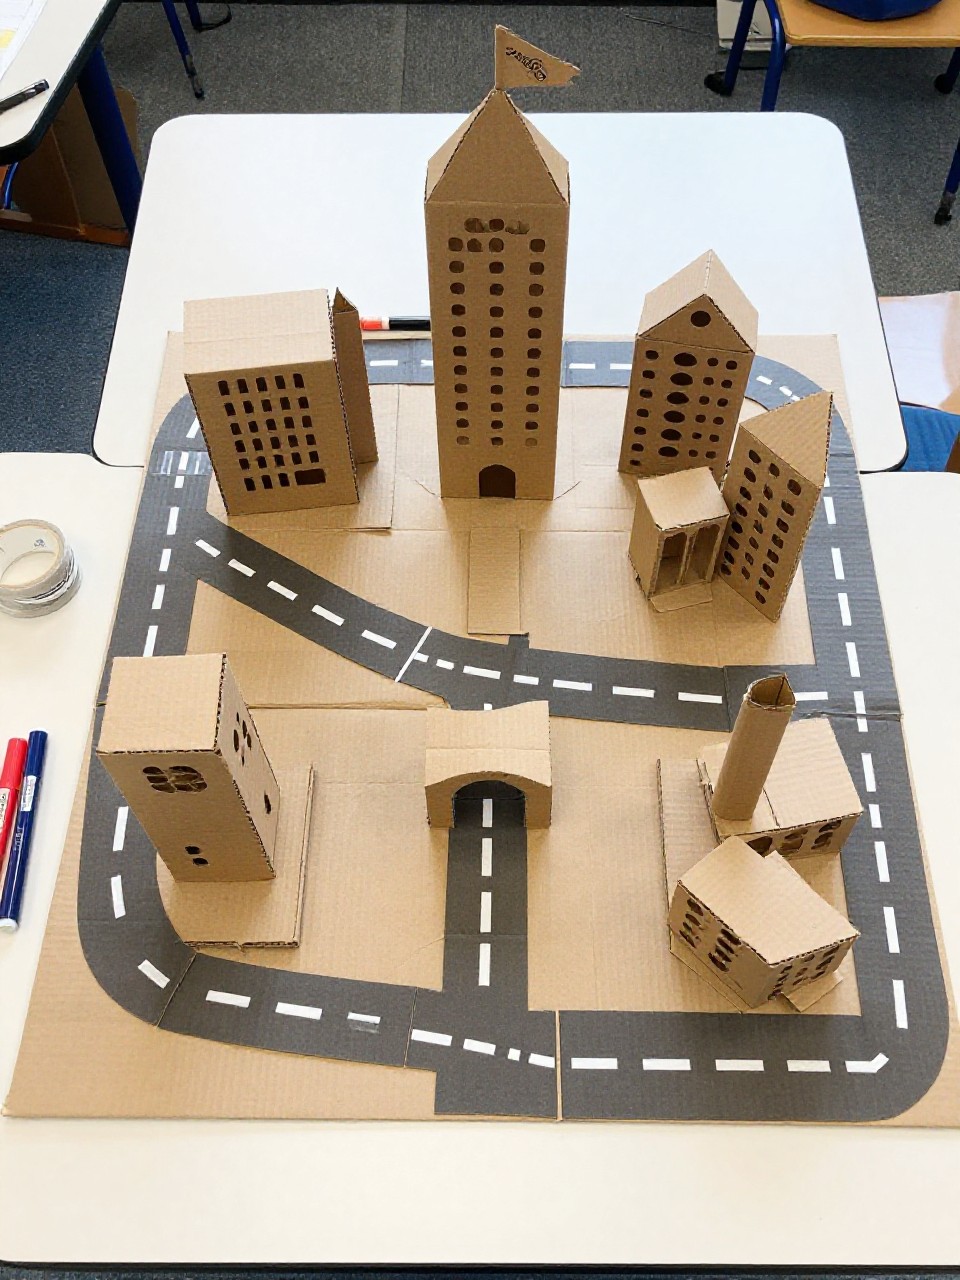
Cut rectangles from shipping boxes to build simple, stackable “city” blocks. Kids love drawing windows, doors, and roads, then stacking and arranging their own little town.
Materials Needed:
- Cardboard from shipping boxes
- Box cutter or scissors (adult)
- Markers or crayons
- Tape (optional for stacking)
How to make it:
- Cut various rectangles and squares of cardboard.
- Draw building fronts with windows, doors, and signs.
- Create road strips from thinner cardboard and color lane lines.
- Stand up the buildings and make a changing city scene.