


Table of Contents Show
Want a fun, relaxing way to make something you use every day feel more “you”? Painting a phone case can be tricky at first because the surface is small and curved, and it’s easy to overthink the design.
This list will give you simple, beginner-friendly ideas that still look bold and eye-catching.
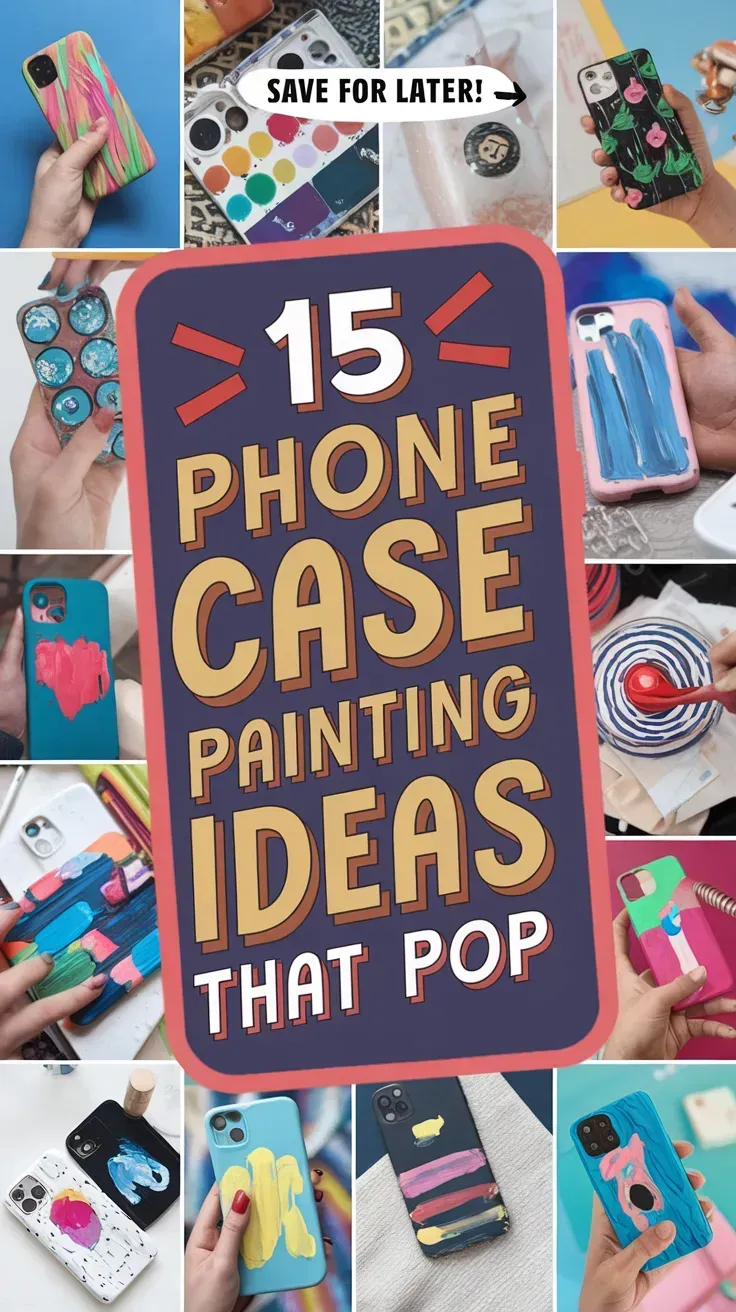
Grab a plain case, a few paints, and let’s jump into 15 phone case painting ideas that pop.
1. Sunset Gradient Phone Case
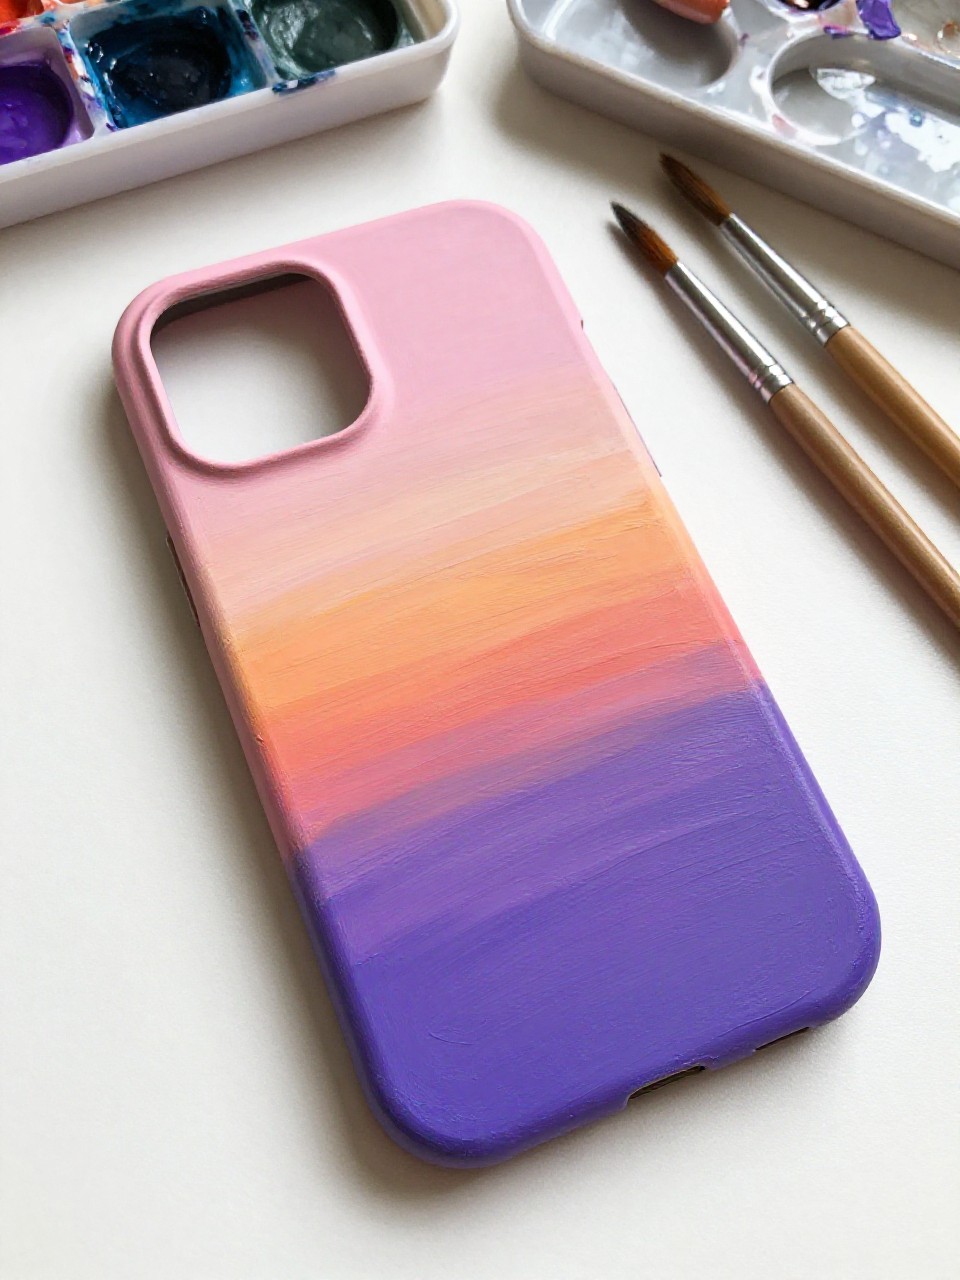
A smooth ombré phone case fades from warm pink to orange to deep purple, like a tiny sunset you can carry around. This one is calming to paint because you’re mostly blending colors, not drawing perfect shapes. It’s great for beginners who want big impact with simple strokes.
Materials Needed:
For People Who Love to Make Things ✂️
- Plain phone case (smooth plastic or silicone)
- Acrylic paint
- Paintbrushes in multiple sizes
- Palette or paint tray
- Optional clear sealer or varnish
Steps to Make:
- Clean the phone case with a damp cloth and let it dry fully.
- Paint horizontal bands of pink, orange, and purple while the paint is still wet.
- Blend where the colors meet using a clean, slightly damp brush.
- Add a thin line of darker purple at the bottom for extra depth.
- Let it dry completely, then seal with a clear coat if you want extra protection.
2. Daisy Sprinkle Phone Case
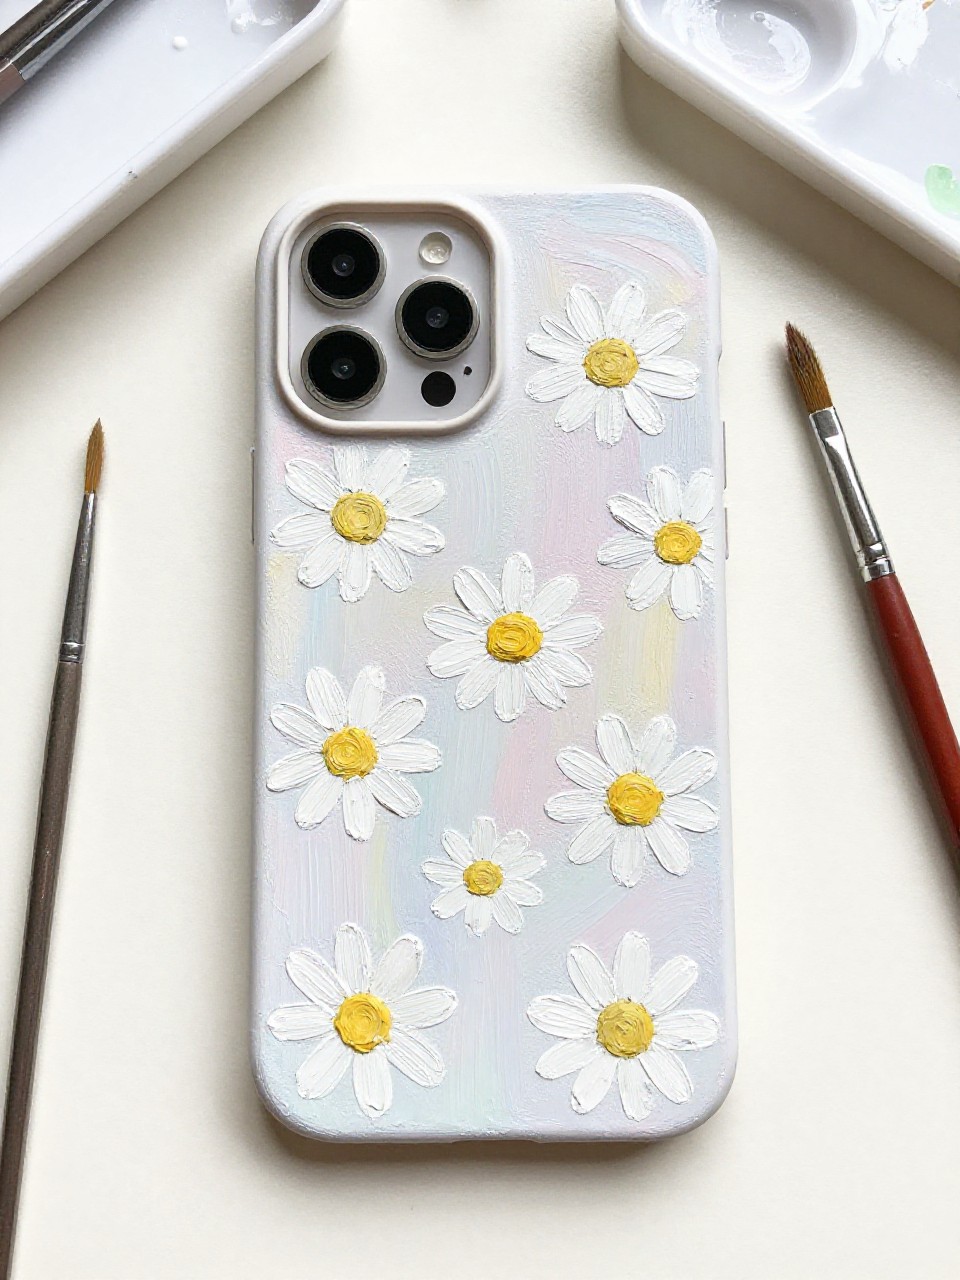
This phone case has a cheerful scatter of white daisies with sunny yellow centers across a soft pastel background. It’s satisfying because each flower is just a few simple strokes, so you can relax and repeat the pattern. It’s perfect if you want something cute without needing advanced drawing skills.
Materials Needed:
- Plain phone case (smooth plastic or silicone)
- Acrylic paint
- Paintbrushes in multiple sizes
- Palette or paint tray
- Optional sealer or varnish
Steps to Make:
- Wipe the case clean and tape off the camera opening if needed.
- Paint a light pastel base color and let it dry.
- Use a small brush to paint simple white petals in little clusters.
- Dot yellow centers and add a tiny green leaf here and there.
- Dry fully, then seal lightly so the daisies don’t scratch off easily.
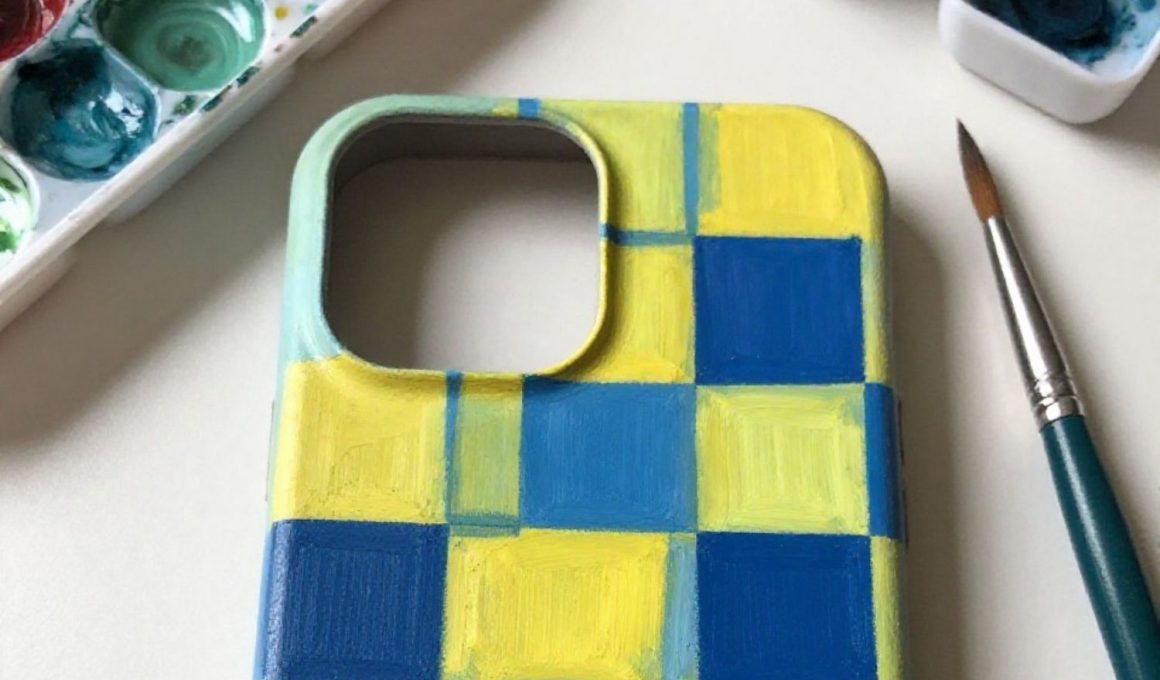
3. Bold Checkerboard Pop Phone Case

A high-contrast checkerboard phone case uses two bright colors that instantly stand out in photos. This is a great beginner project because straight lines don’t have to be perfect to look cool, and the repeating squares feel meditative to paint. Pick colors that match your style—neon or classic black and white.
Materials Needed:
- Plain phone case (smooth plastic)
- Acrylic paint
- Paintbrushes in multiple sizes
- Palette or paint tray
- Painter’s tape
- Optional sealer or varnish
Steps to Make:
- Clean the case and let it dry so tape sticks well.
- Lightly sketch a grid with pencil or place thin tape strips to guide squares.
- Paint every other square with your first color and let it dry.
- Fill the remaining squares with your second color, touching up edges as needed.
- Remove tape carefully and seal once everything is fully dry.
4. Tiny Fruit Market Phone Case
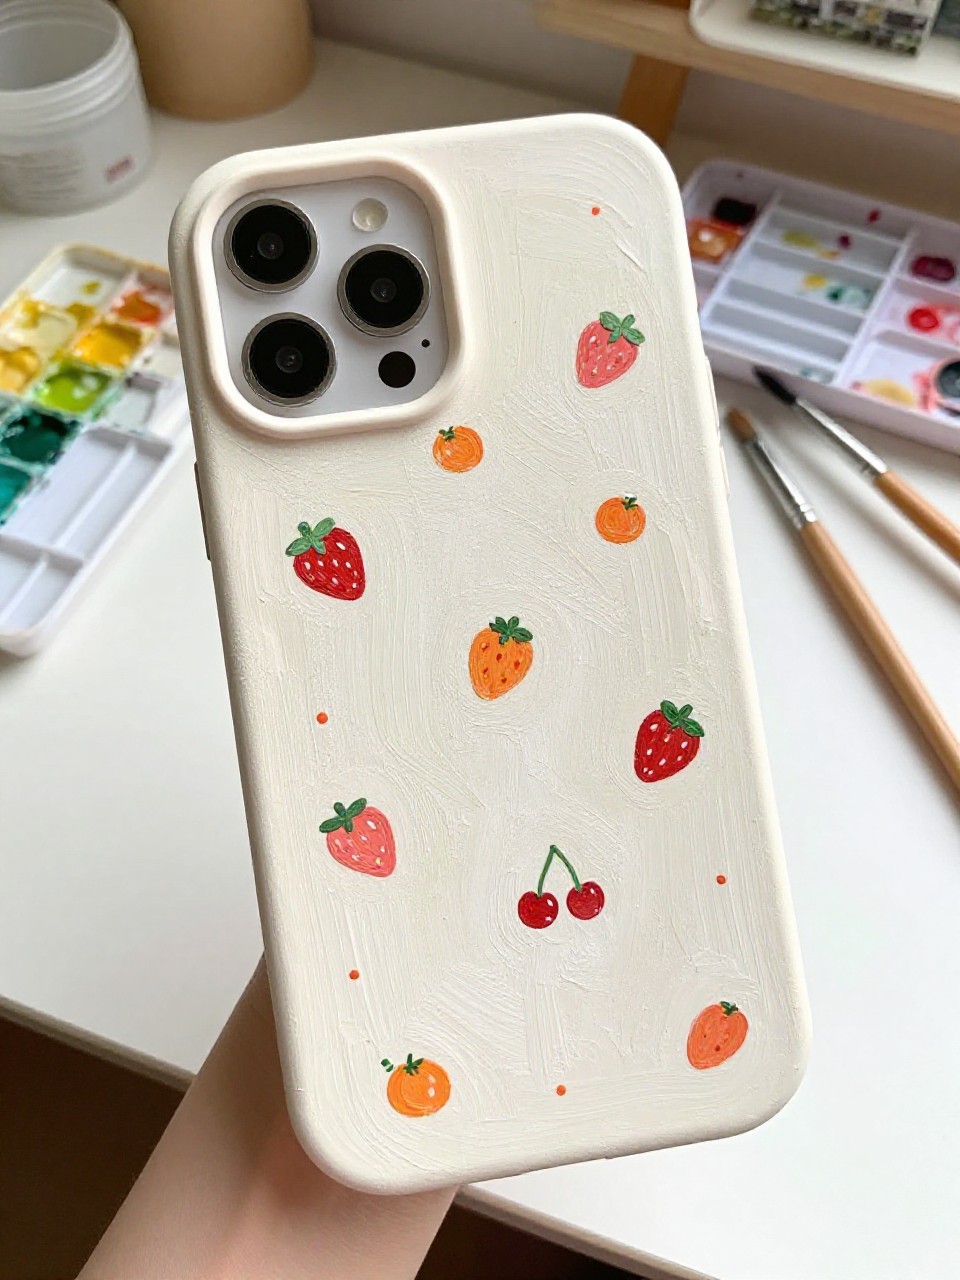
This phone case looks like a playful mini fruit stand, with little strawberries, oranges, and cherries painted all over. It’s relaxing because each fruit is a small, simple shape, and you can space them out however you like. It’s a sweet choice for beginners who want something bright and happy.
Materials Needed:
- Plain phone case (smooth plastic or silicone)
- Acrylic paint
- Paintbrushes in multiple sizes
- Palette or paint tray
- Optional sealer or varnish
Steps to Make:
- Clean the phone case and paint a light base color (like cream or sky blue).
- Sketch tiny fruit shapes lightly so spacing feels balanced.
- Paint the fruit bodies first (red berries, orange circles, cherry pairs).
- Add small details like seeds, stems, and tiny highlights with a fine brush.
- Let dry fully, then seal to keep the small details from rubbing off.
5. Starry Night Scribble Phone Case
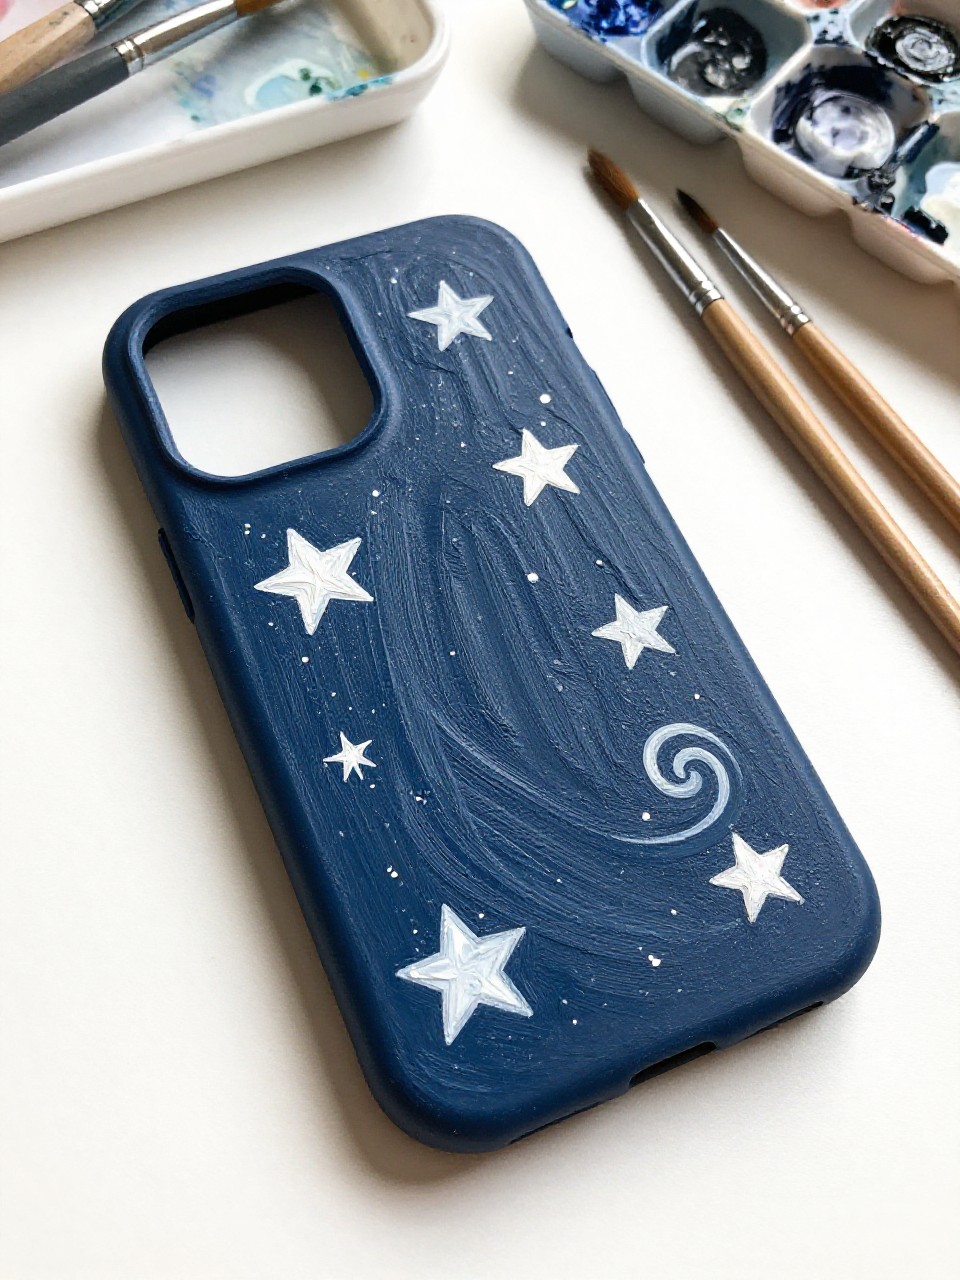
A deep navy phone case is dotted with stars, swirls, and little sparkles that feel dreamy and bold. This is a fun project if you like loose, sketchy lines because the charm comes from the hand-drawn look. It’s also a great way to practice layering light paint over dark paint.
Materials Needed:
- Plain phone case (smooth plastic)
- Acrylic paint
- Paintbrushes in multiple sizes
- Palette or paint tray
- White paint pen (optional)
- Optional sealer or varnish
Steps to Make:
- Wipe the case clean and paint it navy or dark blue as a base.
- Once dry, add scattered white dots of different sizes for stars.
- Paint a few loose swirls and curved lines to suggest “space” movement.
- Add tiny cross-shaped sparkles or a thin crescent moon for extra pop.
- Dry completely and seal, especially if you used thick white paint layers.
6. Wavy Retro Stripes Phone Case
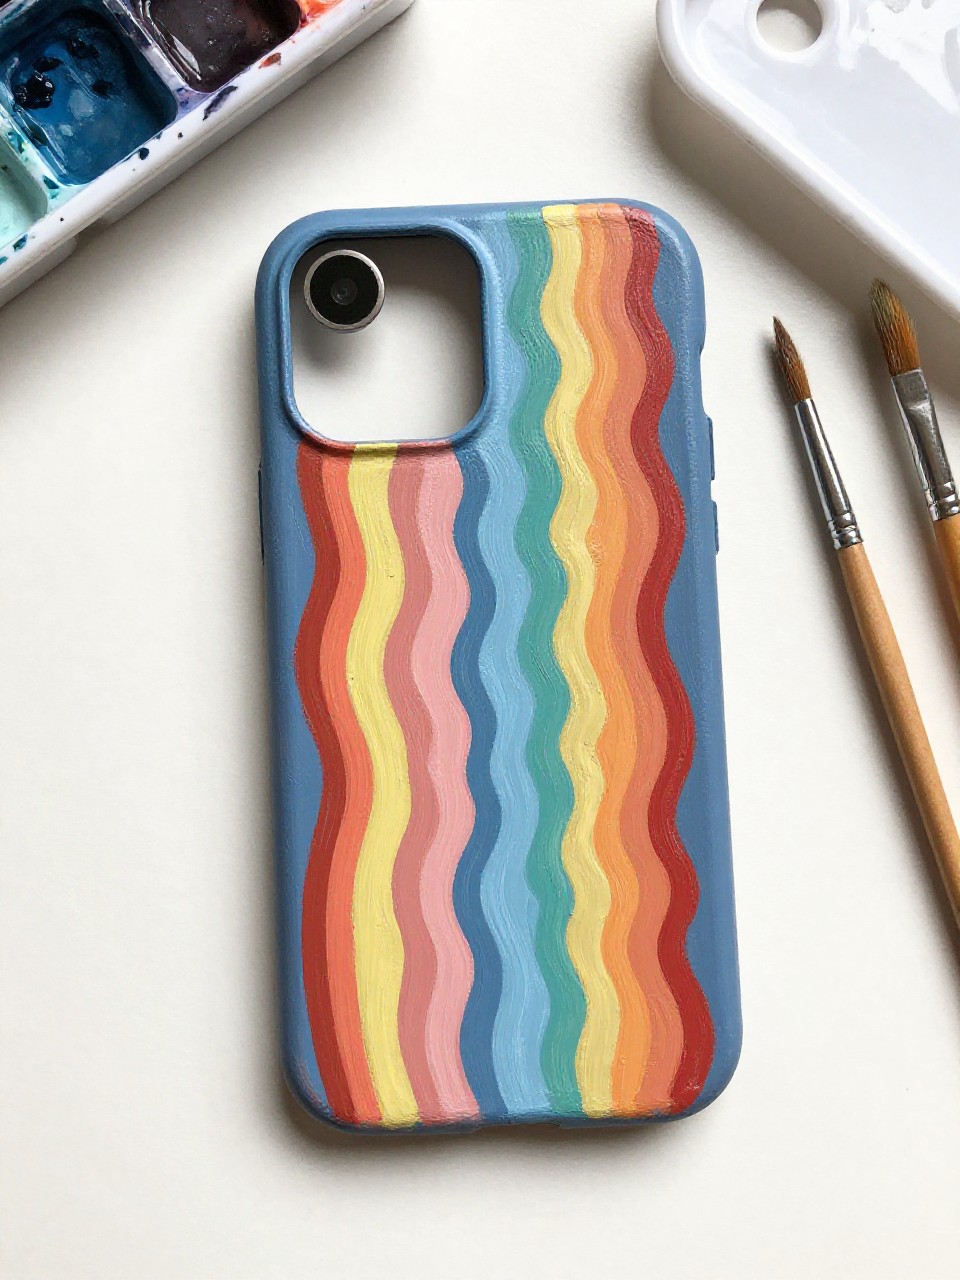
This phone case has curvy, retro waves in 3–4 colors that flow naturally along the case’s shape. It’s satisfying because you can’t “mess it up”—the waves look better when they’re a little imperfect and hand-done. If you want a fun 70s vibe, this is an easy win.
Materials Needed:
- Plain phone case (smooth plastic or silicone)
- Acrylic paint
- Paintbrushes in multiple sizes
- Palette or paint tray
- Pencil (optional)
- Optional sealer or varnish
Steps to Make:
- Clean the case and decide on 3–4 colors that contrast well.
- Lightly sketch a few curvy wave lines that wrap from top to bottom.
- Paint the largest color sections first, following the curve of the case.
- Fill in the remaining wave sections and add thin accent lines if you want.
- Let it dry, then seal to keep the stripes looking fresh.
7. Minimal Mountain Silhouette Phone Case
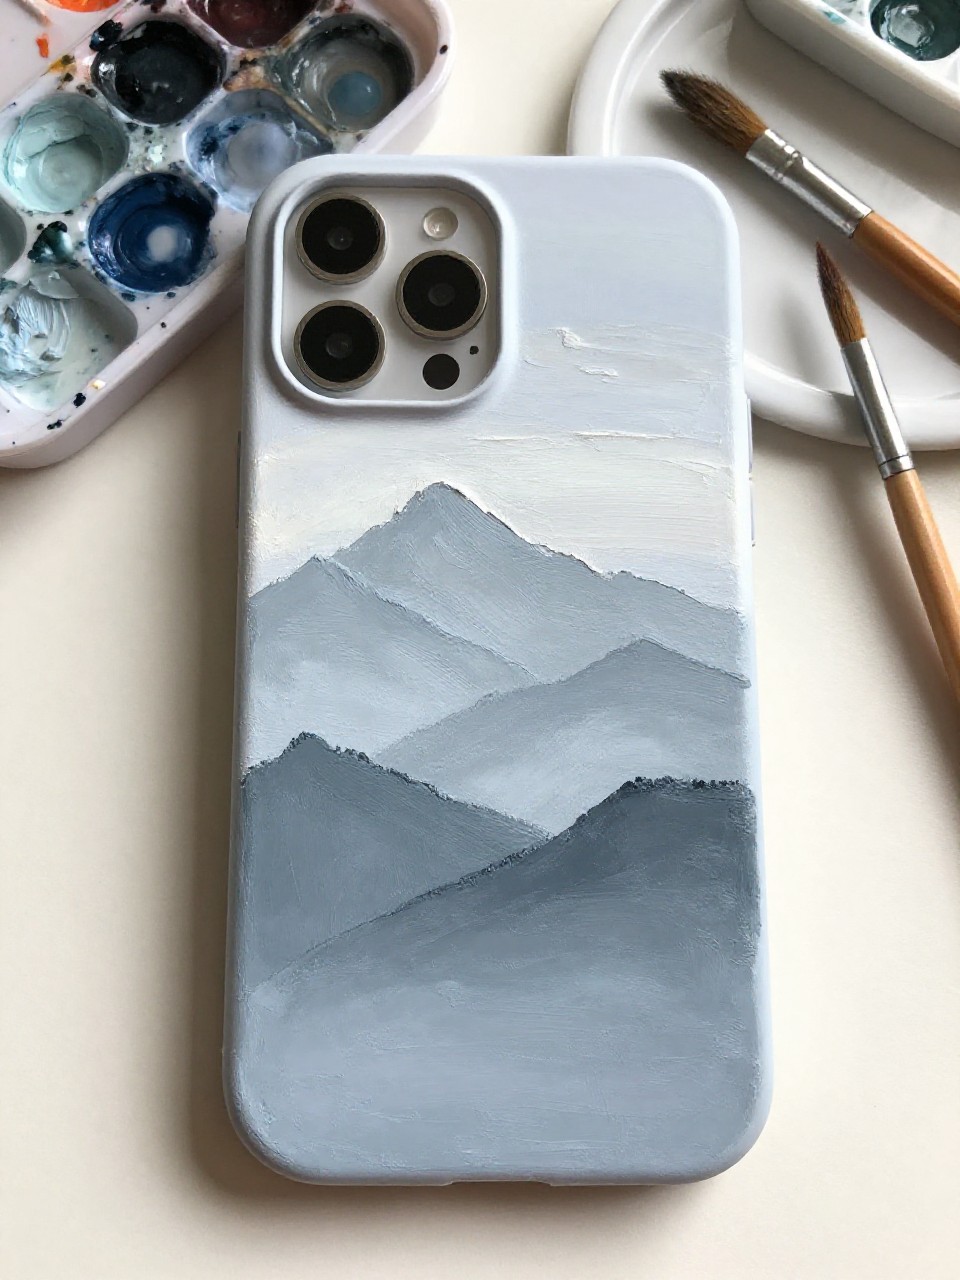
A calm landscape phone case shows simple mountain shapes in soft layers, with a pale sky behind them. This is great for beginners because mountains are just uneven triangles and gentle edges, and the layers hide small mistakes. It’s a peaceful design that still looks clean and modern.
Materials Needed:
- Plain phone case (smooth plastic)
- Acrylic paint
- Paintbrushes in multiple sizes
- Palette or paint tray
- Optional sealer or varnish
Steps to Make:
- Clean the case and paint a light sky color as the background.
- Paint a distant mountain layer in a very light gray-blue and let it dry.
- Add a darker mountain layer in front with a slightly jagged top edge.
- Touch in tiny snow caps or a thin sunrise line near the top.
- Dry fully and seal to protect the simple layered shapes.
8. Neon Drip Phone Case

This phone case looks like bright neon paint dripping down over a dark base, with thick, glossy-looking strokes. It’s fun because you can let gravity and brush movement create the drips, so it feels playful instead of strict. Beginners love it because it’s bold, fast, and hard to overwork.
Materials Needed:
- Plain phone case (smooth plastic)
- Acrylic paint (including neon colors)
- Paintbrushes in multiple sizes
- Palette or paint tray
- Optional sealer or varnish
Steps to Make:
- Clean the case and paint a black or deep-colored base coat; let dry.
- Load a medium brush with neon paint and paint a band along the top edge.
- Pull the paint downward in uneven lines to form drips of different lengths.
- Add a second neon color in a few spots, overlapping slightly for thicker texture.
- Dry completely and seal to help keep the raised drip texture from chipping.
9. Galaxy Splatter Phone Case
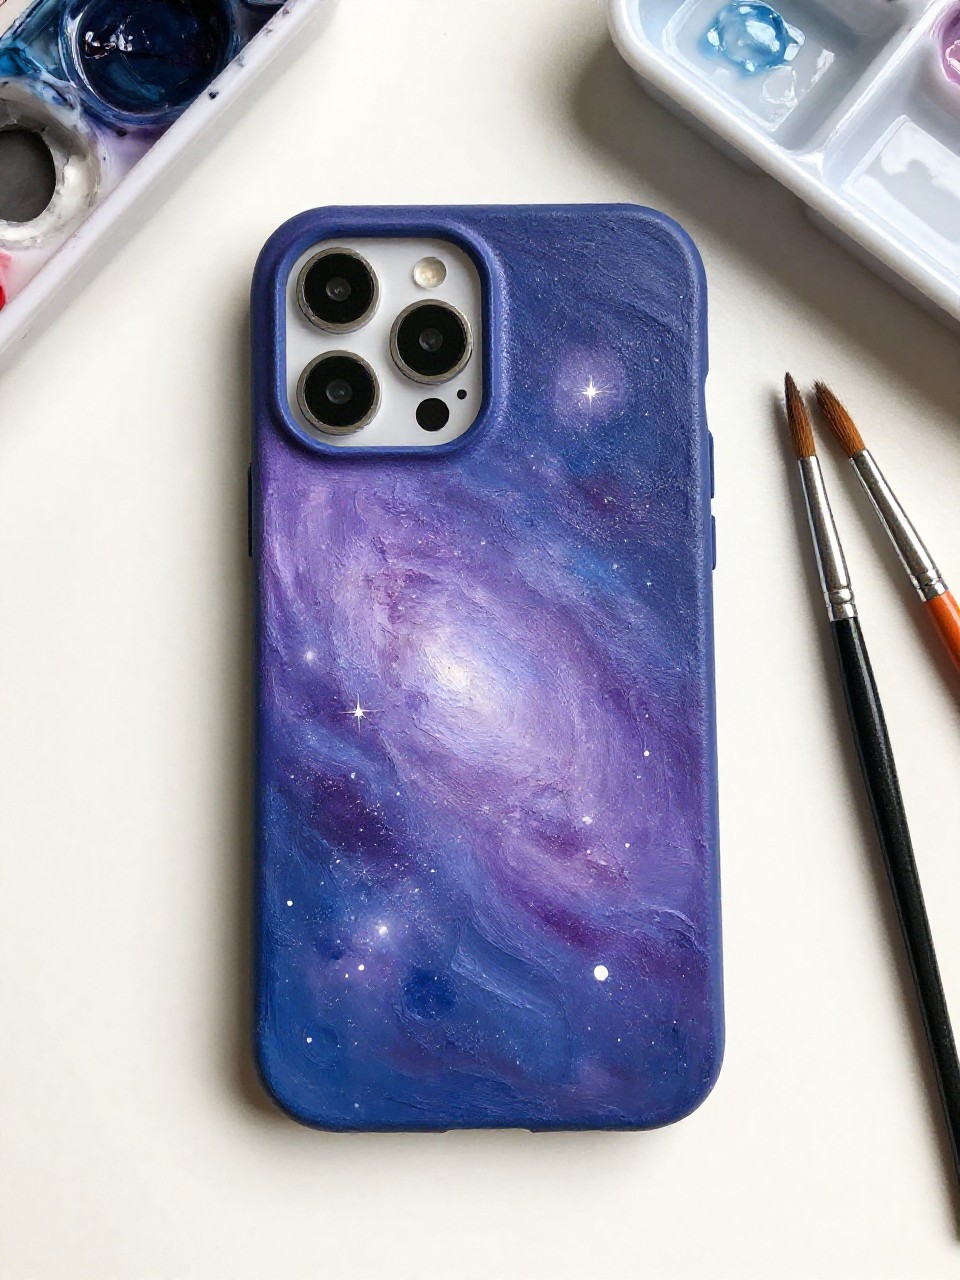
A galaxy phone case blends purples and blues with speckled white “stars” scattered across the surface. It’s satisfying because you can be messy on purpose, and the splatter effect makes it look detailed with very little effort. This is perfect for a stress-free painting session at your kitchen table.
Materials Needed:
- Plain phone case (smooth plastic)
- Acrylic paint
- Paintbrushes in multiple sizes
- Palette or paint tray
- Old toothbrush (for splatter)
- Optional sealer or varnish
Steps to Make:
- Clean the case and paint a blended base of purple and blue patches.
- Add deeper dark areas by dabbing in navy or black while layers are still slightly wet.
- Dip a toothbrush in watered-down white paint and flick tiny splatters for stars.
- Paint a few bigger star dots by hand and add soft white highlights around them.
- Dry fully and seal so the splatter doesn’t rub off with daily use.
10. Smiley Face Doodles Phone Case
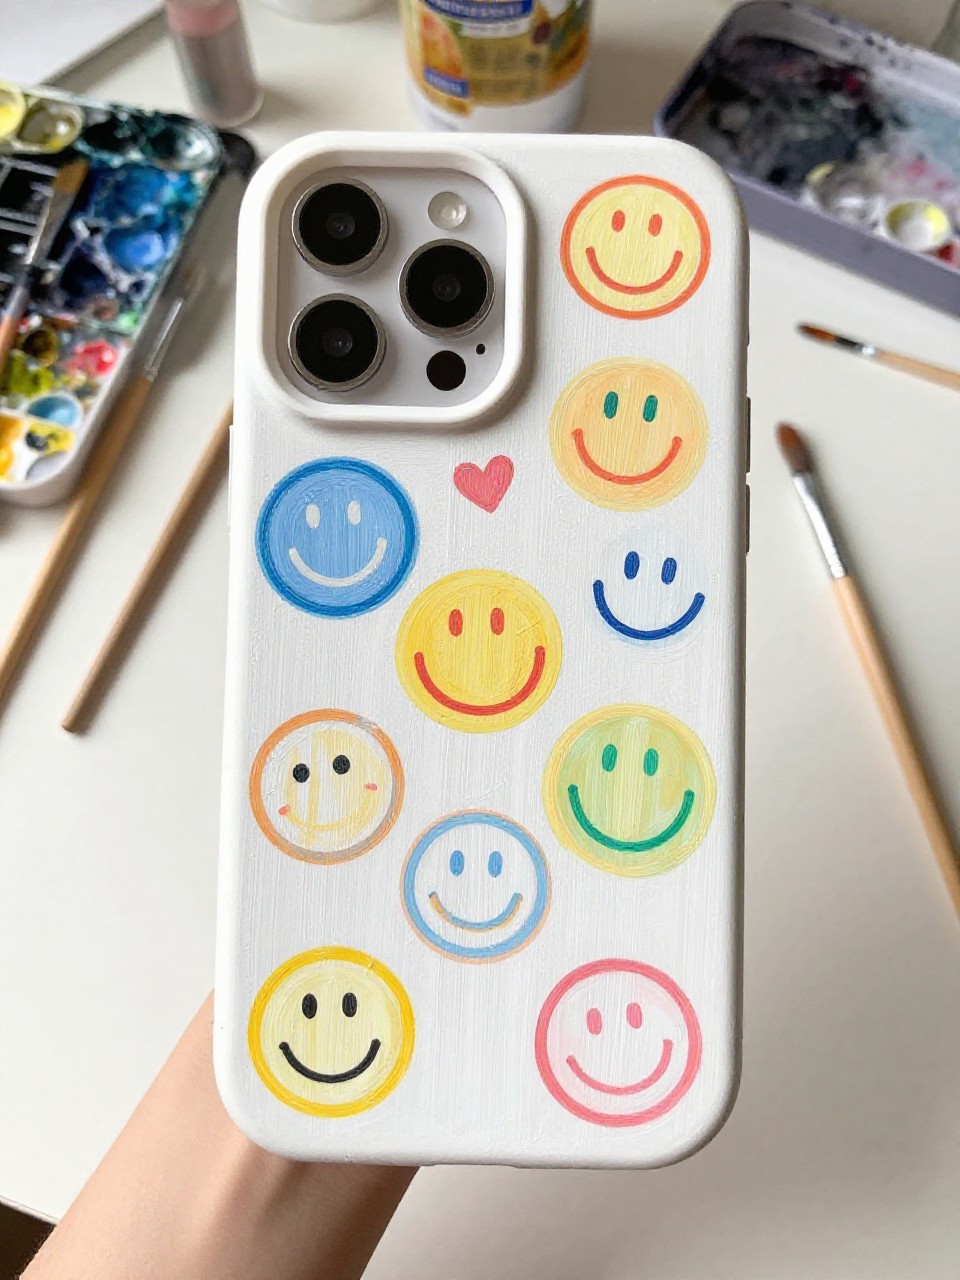
This phone case is covered in simple smiley faces, tiny hearts, and playful doodles that feel bright and friendly. It’s great for beginners because you can keep shapes simple and let the handmade lines show. If you want a happy design that “pops” without being fancy, this is it.
Materials Needed:
- Plain phone case (smooth plastic or silicone)
- Acrylic paint
- Paintbrushes in multiple sizes
- Palette or paint tray
- Black paint pen (optional)
- Optional sealer or varnish
Steps to Make:
- Wipe the case clean and paint a solid bright base color.
- Sketch or lightly place where you want each smiley so spacing feels even.
- Paint smiley circles and let them dry before adding faces.
- Add eyes, mouths, and tiny doodles with a fine brush or paint pen.
- Let everything dry and seal to protect the thin black lines.
11. Monochrome Line Art Face Phone Case
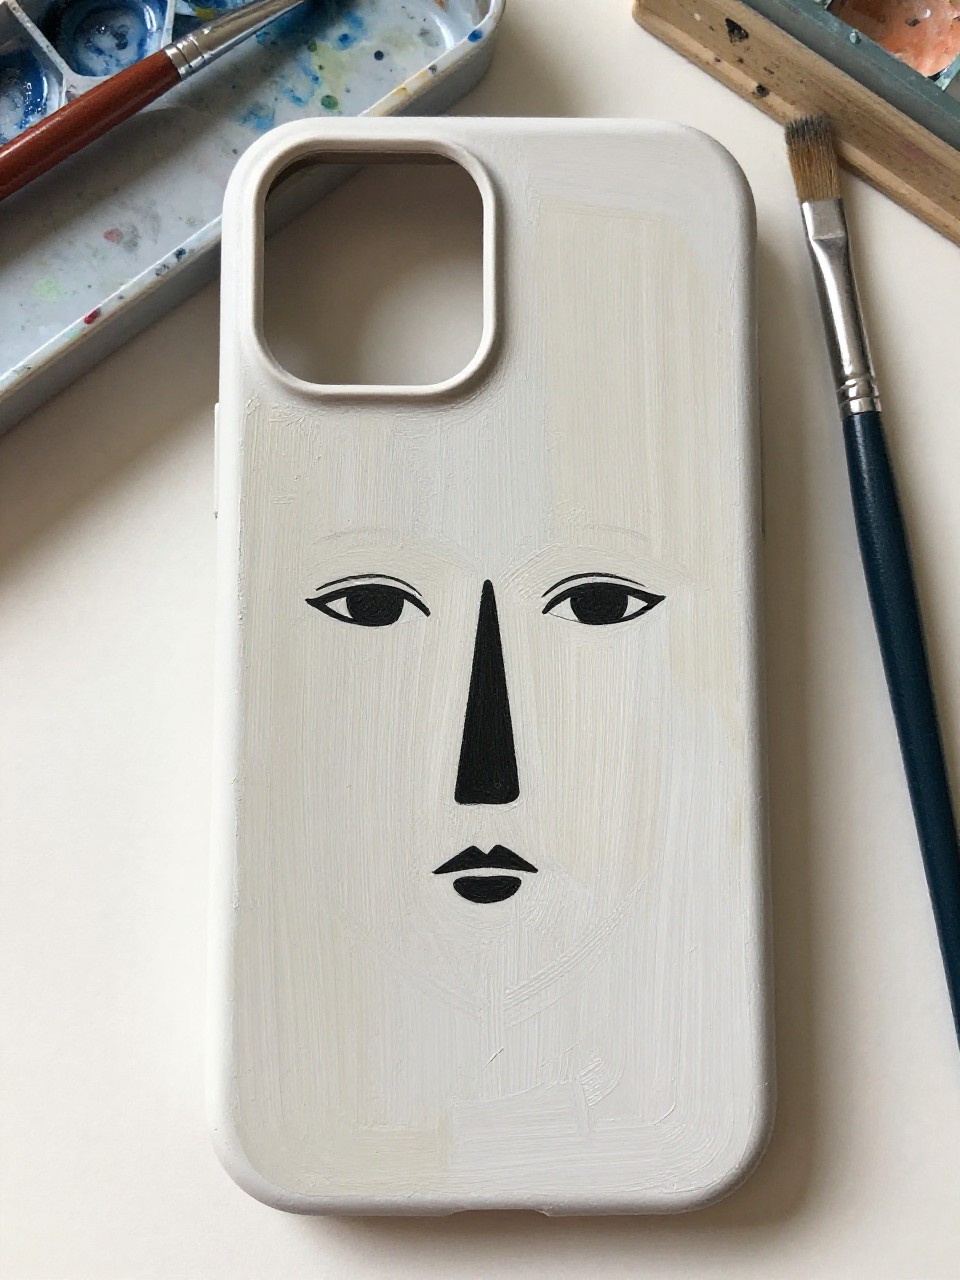
A clean phone case shows a simple one-line face drawing over a soft neutral background. It looks modern and artsy, but it’s very beginner-friendly because it’s just one continuous line and a few small details. This is a relaxing project if you enjoy slow, careful brushwork.
Materials Needed:
- Plain phone case (smooth plastic)
- Acrylic paint
- Paintbrushes in multiple sizes
- Palette or paint tray
- Fine liner brush
- Optional sealer or varnish
Steps to Make:
- Clean the case and paint a beige, blush, or light gray background; let dry.
- Plan the face placement with a faint pencil line so it fits the case well.
- Use a fine liner brush with black paint to draw one continuous face outline.
- Add a few extra strokes for hair, eyelids, or a tiny collar line.
- Dry completely and seal so the thin line art stays crisp longer.
12. Ocean Wave Tip Phone Case
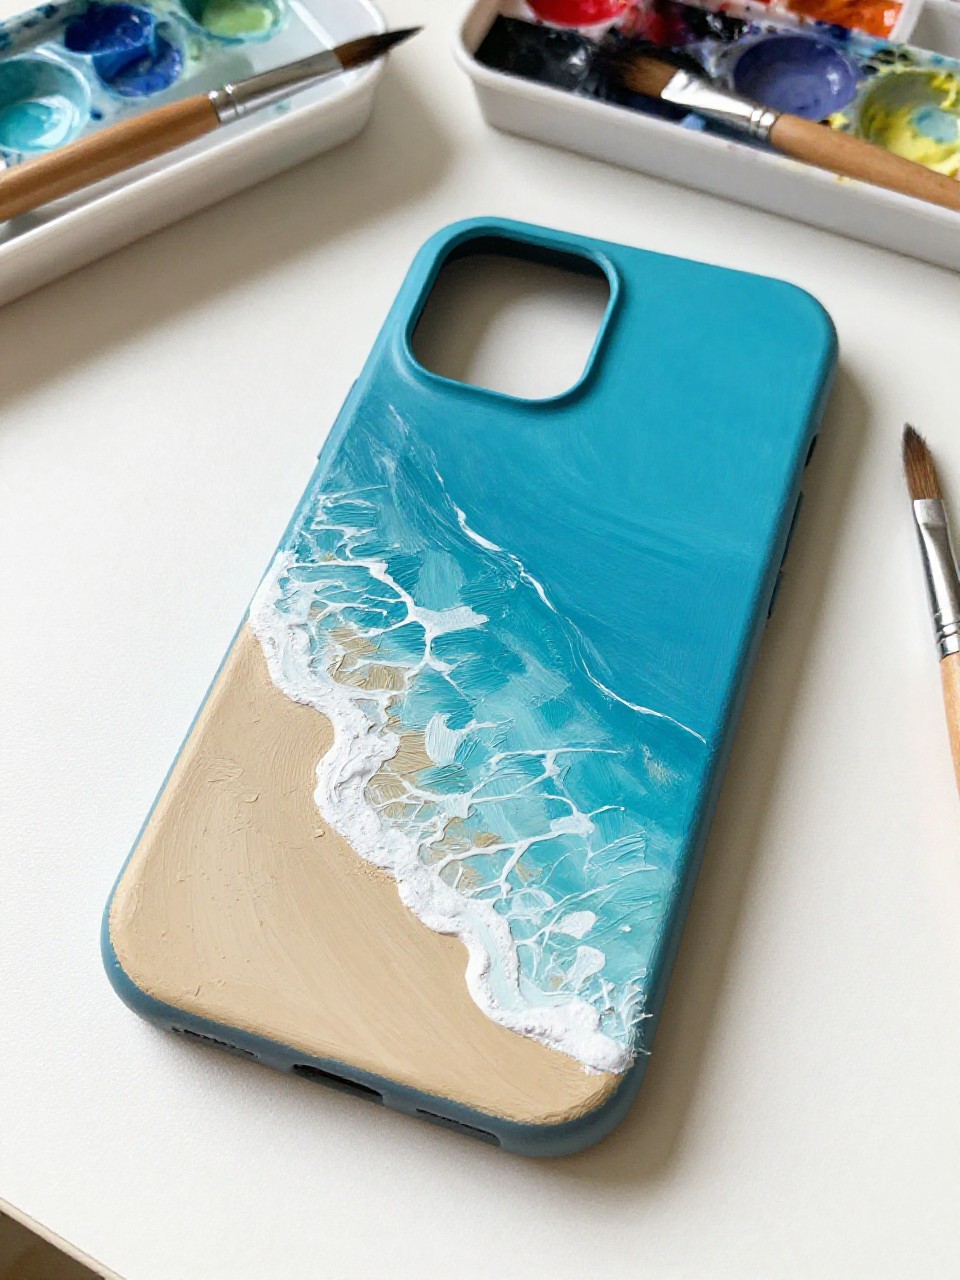
This phone case has a soft sandy base with blue-green waves curling up from one corner, like a tiny beach scene. It’s satisfying because you can blend the water colors in loose strokes and then add a few crisp white foam lines. Beginners can keep it simple and still get a beautiful result.
Materials Needed:
- Plain phone case (smooth plastic)
- Acrylic paint
- Paintbrushes in multiple sizes
- Palette or paint tray
- Optional sealer or varnish
Steps to Make:
- Clean the case and paint a pale sandy beige base coat; let dry.
- Block in the ocean area with turquoise and deeper blue near the edge.
- Blend the water colors where they meet so it looks like real depth.
- Add thin white foam lines and a few dots to suggest sea spray.
- Let dry fully and seal to protect the light sandy background from smudges.
13. Strawberry Milk Swirl Phone Case
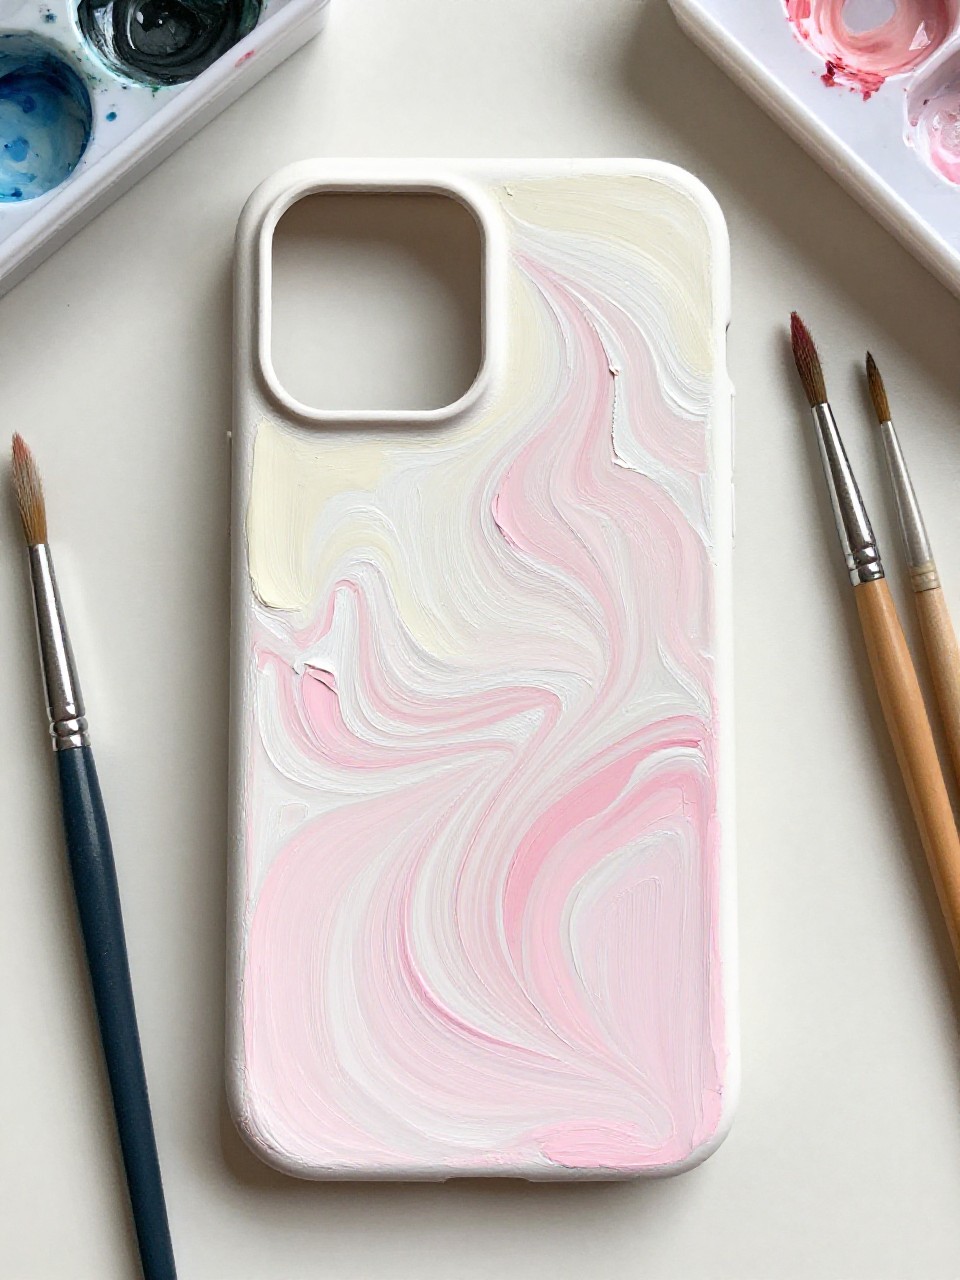
A cute phone case swirls pink and creamy white together like strawberry milk, with soft marbled movement across the surface. This one is relaxing because you’re letting the brush make smooth curves instead of trying to paint tiny details. It’s great for beginners who love gentle colors but still want a bold look.
Materials Needed:
- Plain phone case (smooth plastic or silicone)
- Acrylic paint
- Paintbrushes in multiple sizes
- Palette or paint tray
- Optional sealer or varnish
Steps to Make:
- Clean the case and paint a thin creamy white base coat.
- While the base is slightly tacky, add ribbons of light pink in curved lines.
- Use a clean brush to gently pull the colors into soft swirls without overmixing.
- Add a few deeper pink streaks to create contrast and visible layers.
- Dry completely and seal so the marbled strokes stay bright and smooth.
14. Gold Star Confetti Phone Case
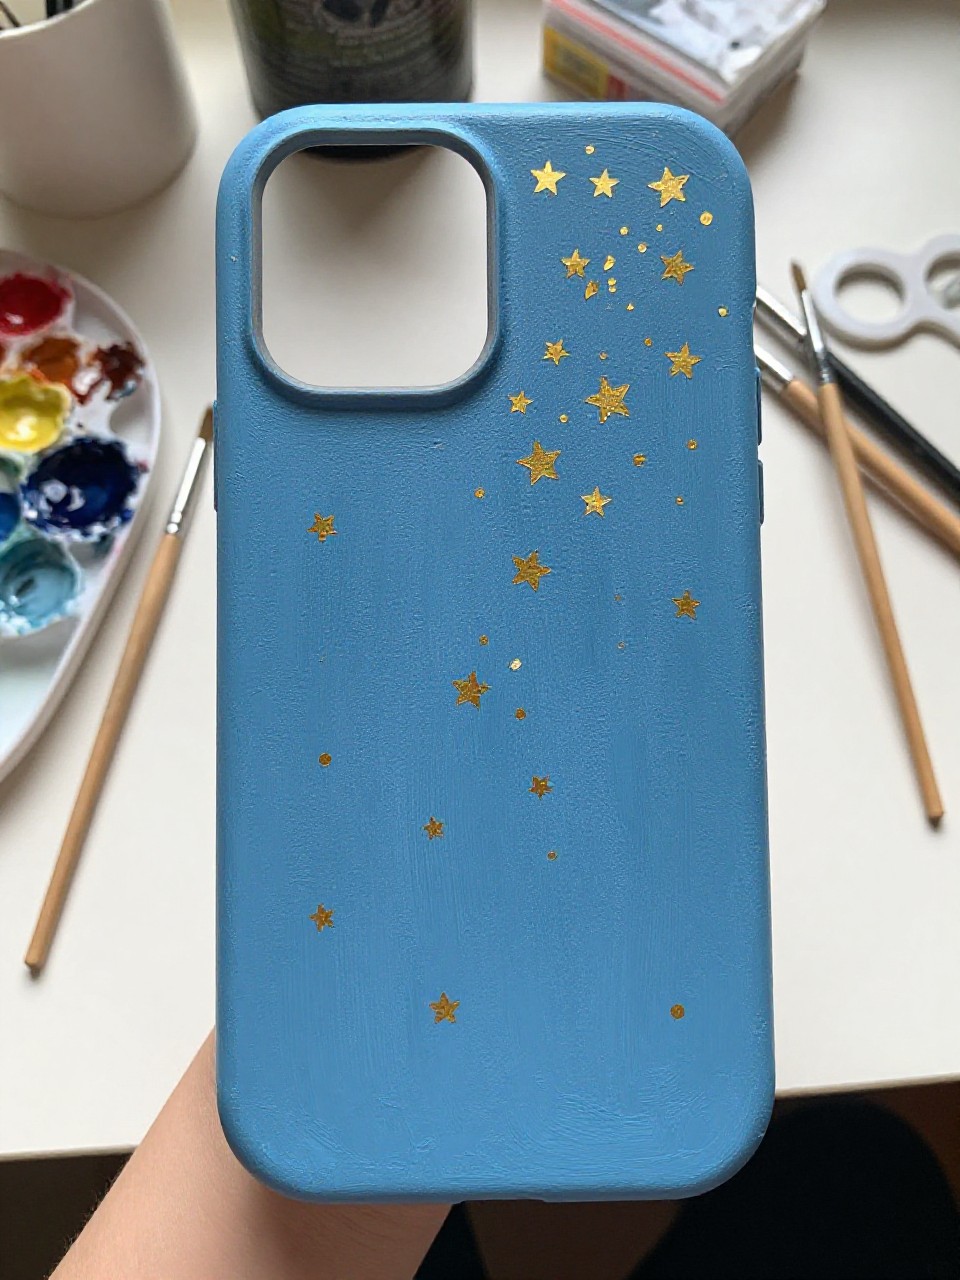
This phone case looks like a party: small gold stars and dots scattered across a bold solid background. It’s satisfying because you can paint the confetti one piece at a time while you listen to music or a podcast. It’s also easy to customize—add more stars near the corners or keep it airy and simple.
Materials Needed:
- Plain phone case (smooth plastic)
- Acrylic paint (including metallic gold)
- Paintbrushes in multiple sizes
- Palette or paint tray
- Optional sealer or varnish
Steps to Make:
- Clean the case and paint a solid base color like teal, navy, or coral.
- Once dry, use a small brush to paint tiny gold stars in different sizes.
- Fill empty spaces with gold dots and short dash marks for confetti.
- Add a few thicker gold areas where strokes overlap for a real painted look.
- Dry fully and seal to help metallic paint stay shiny and protected.
15. Cozy Plaid Sweater Phone Case
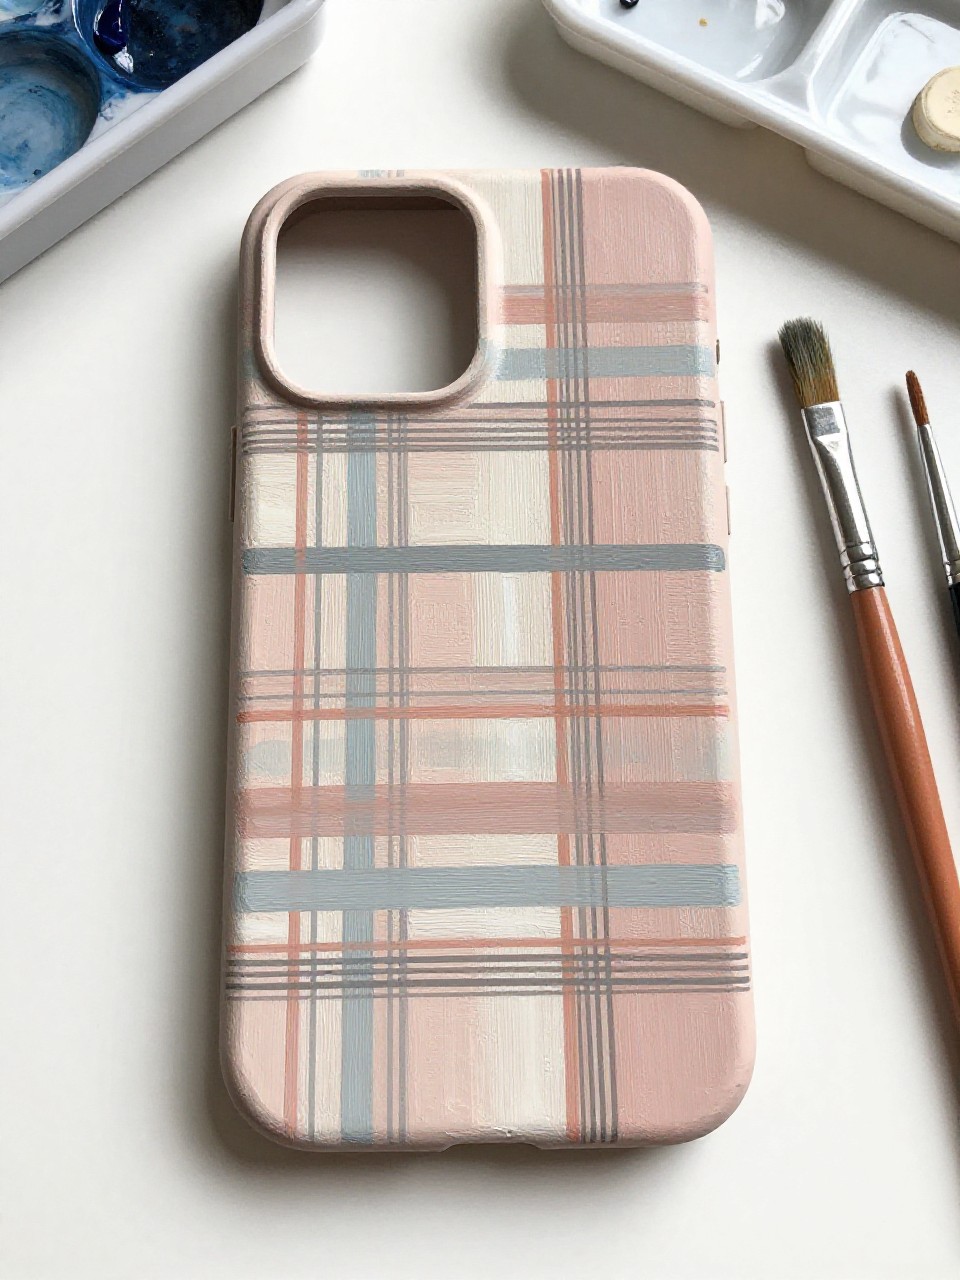
A warm plaid phone case uses crisscross lines and soft blocks of color, like a cozy flannel shirt wrapped around your phone. It’s relaxing to make because you build it layer by layer, and little wobbles just add charm. Beginners can keep the plaid simple with two colors and still get that “pop.”
Materials Needed:
- Plain phone case (smooth plastic)
- Acrylic paint
- Paintbrushes in multiple sizes
- Palette or paint tray
- Painter’s tape (optional)
- Optional sealer or varnish
Steps to Make:
- Clean the case and paint a light base color (like cream or pale gray).
- Paint wide horizontal bands in your main plaid color and let them dry.
- Add vertical bands that cross the first set, keeping spacing fairly even.
- Use a fine brush to add thin accent lines in a darker shade for depth.
- Dry completely and seal so the layered lines don’t wear down over time.