Table of Contents Show
Preschoolers love birds—the colors, the shapes, the tiny chirps. But many bird crafts online are either too messy or too complicated. This list is different: each project looks “wow” without tricky steps, special tools, or long drying times.

You’ll find playful textures, simple shapes, and clever shortcuts that help little hands feel proud fast. Most use recyclables and basics you already own. Pick a favorite, set out a small tray of supplies, and let the flock take flight.
1. Puffy Cloud Birds
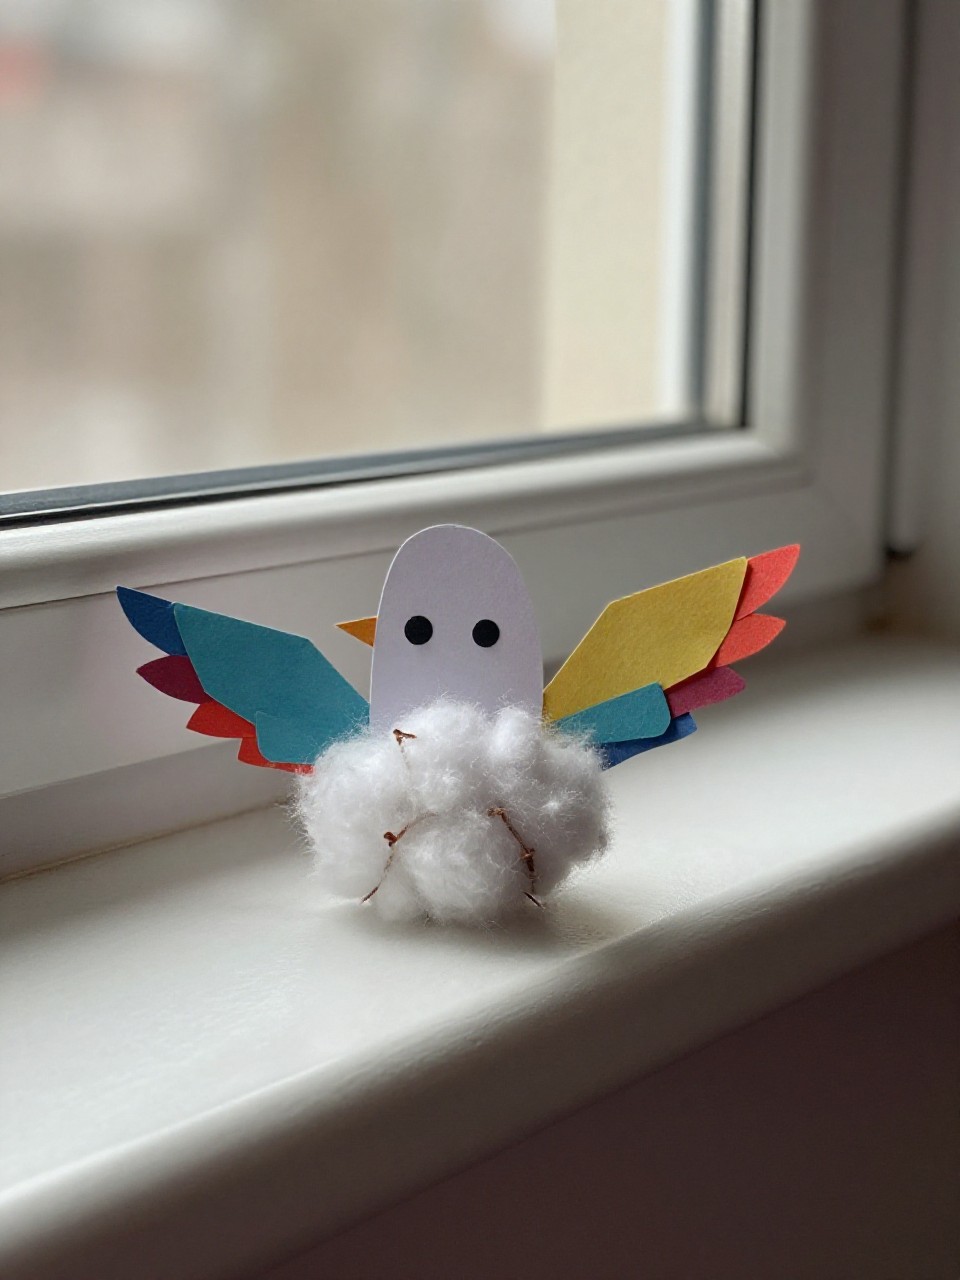
Soft, fluffy birds sit on cotton “cloud” bellies with bright paper wings. The mix of textures feels cozy and looks dreamy on a window ledge.
Materials Needed:
- Cotton balls
- Colored paper
- Glue stick
- Googly eyes
How to make it:
For People Who Love to Make Things ✂️
- 1. Cut a simple oval bird body from colored paper.
- 2. Glue cotton balls to the belly for puff.
- 3. Add paper wings, a tiny triangle beak, and googly eyes.
- 4. Let dry and display against a bright window.
2. Cupcake Liner Baby Birds
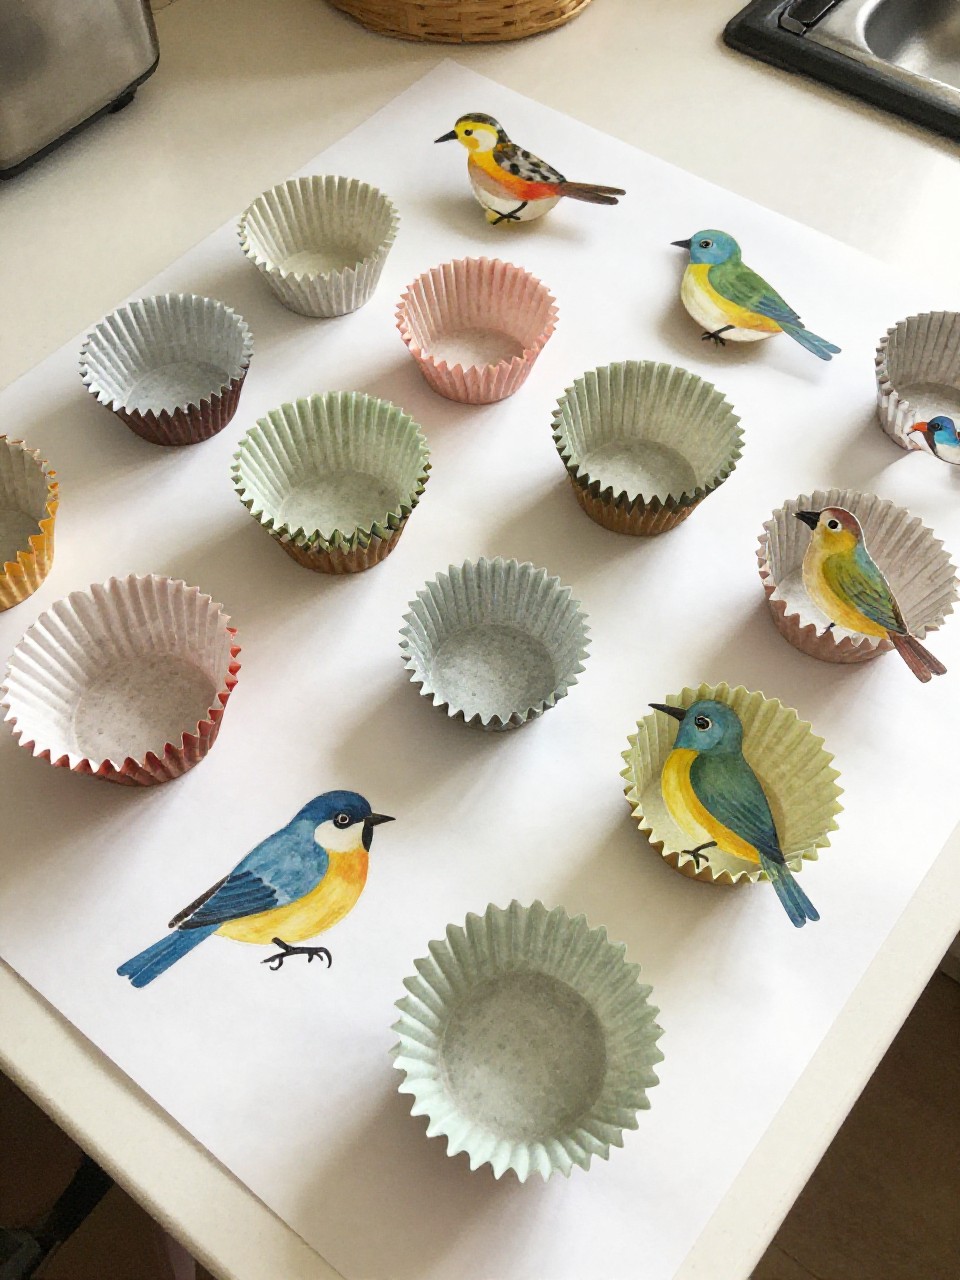
Ruffled cupcake liners make instant feathered bodies. Layered colors give a sweet “nestled” look that feels fancy with almost no effort.
Materials Needed:
- Cupcake liners (assorted colors)
- Glue stick
- Markers
- Mini orange paper triangles
How to make it:
- 1. Flatten a cupcake liner for the body and half a liner for the wing.
- 2. Glue the half-liner on top like a folded wing.
- 3. Add a tiny triangle beak and draw an eye and little feet.
- 4. Make a family by mixing different liner colors.
3. Feathered Fork-Paint Birds
A plastic fork makes easy “feather” textures that look painterly and artsy. Kids swipe paint to create soft, spiky bodies in minutes.
Materials Needed:
- Washable paint
- Plastic fork
- White cardstock
- Paper scraps for beak/eyes
How to make it:
- 1. Dip the fork in paint and drag it on cardstock to make an oval feathery patch.
- 2. Add a second color for layered feathers.
- 3. Glue on a paper beak and eyes.
- 4. Draw skinny legs underneath.
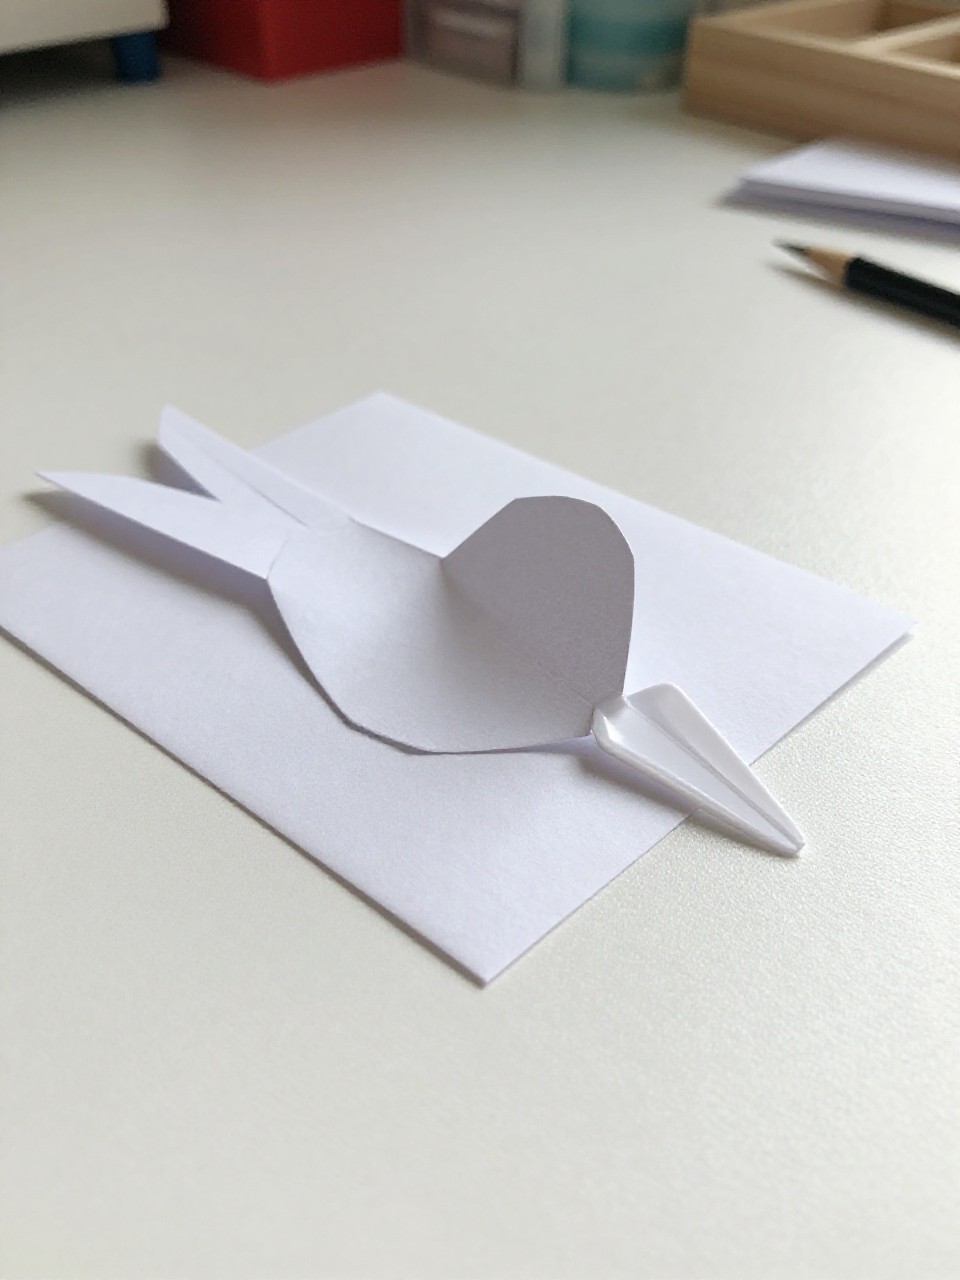
4. Paper Plate Peekaboo Birds

A folded paper plate becomes a bird’s “shell,” opening to show a baby bird inside. The surprise flap makes kids grin every time.
Materials Needed:
- Small paper plate
- Colored paper
- Glue stick
- Marker
How to make it:
- 1. Fold a paper plate in half to make a clamshell.
- 2. Cut a small oval chick from colored paper and glue it inside.
- 3. Add eyes, beak, and little wings to the chick.
- 4. Draw dots or simple patterns on the outside “shell.”
5. Handprint Wing Birds
Tiny hands become gentle wings. The finished birds look like they’re ready to hug, and they make sweet keepsakes.
Materials Needed:
- Colored cardstock
- Pencil and scissors
- Glue stick
- Googly eyes
How to make it:
- 1. Trace each hand on cardstock and cut out the handprints.
- 2. Cut a simple oval body in a contrasting color.
- 3. Glue the handprints on each side as wings.
- 4. Add eyes, a beak, and draw little feet.
6. Shape Collage Songbirds
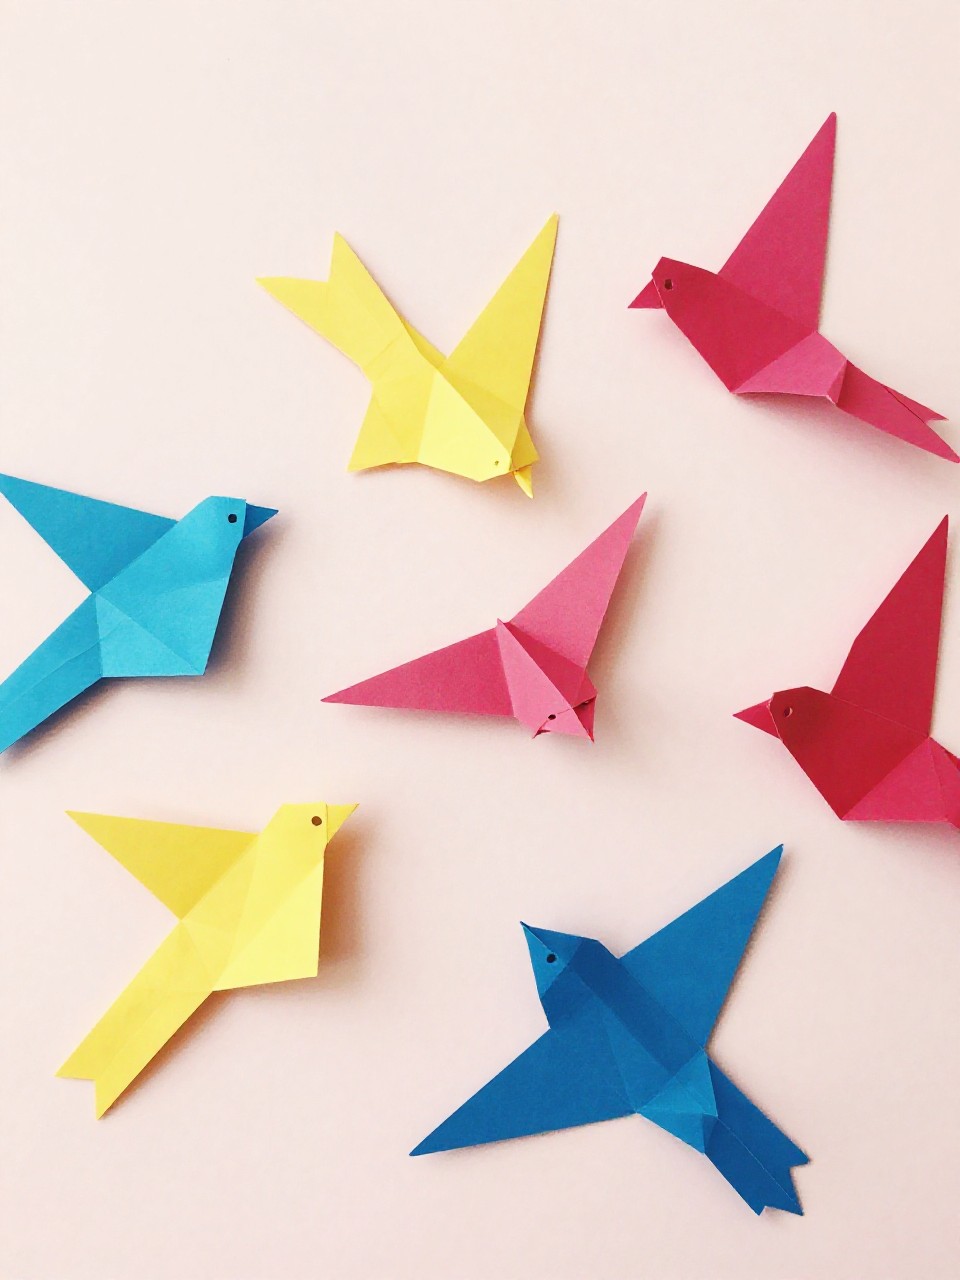
Circles, triangles, and ovals turn into sleek little birds. It’s part art, part puzzle, and it looks modern on the fridge.
Materials Needed:
- Assorted colored paper
- Glue stick
- Safety scissors
- Black marker
How to make it:
- 1. Cut simple shapes: ovals for bodies, circles for heads, triangles for beaks.
- 2. Arrange and glue them into bird forms on a background sheet.
- 3. Add tail triangles and tiny wing shapes.
- 4. Outline softly with marker and add legs.
7. Ribbon Tail Streamer Birds

These birds have long swishy tails that dance in a breeze. Hang them from a doorknob for daily fluttery joy.
Materials Needed:
- Toilet paper roll
- Colored ribbon or yarn
- Colored paper
- Tape
How to make it:
- 1. Wrap the tube in colored paper and tape the seam.
- 2. Tape ribbons inside one end so they trail like tails.
- 3. Add a paper head, beak, and simple wings.
- 4. Punch a hole on top and hang with yarn.
8. Bubble Wrap Feather Print Birds
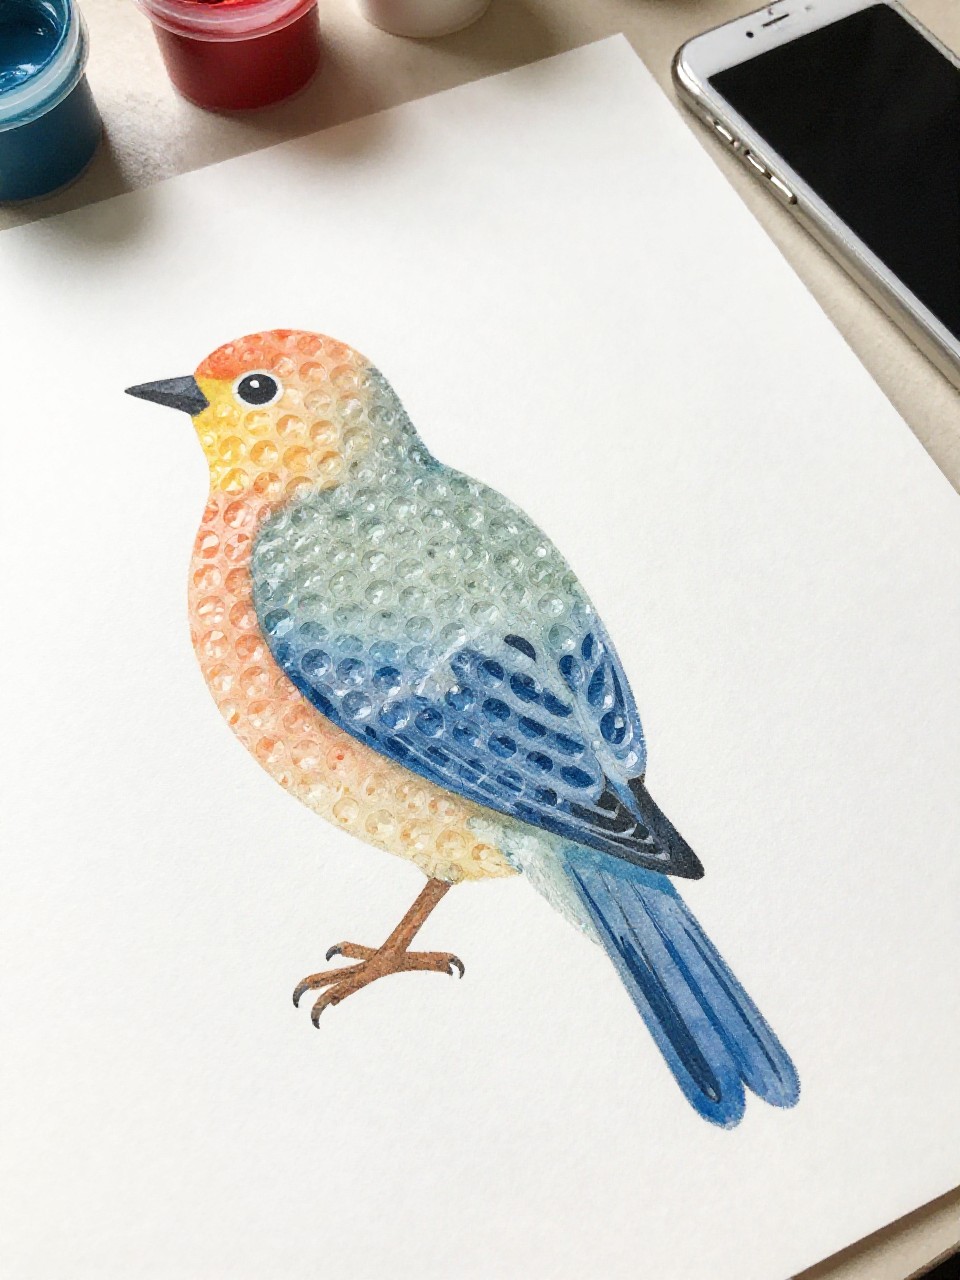
Bubble wrap makes instant feathery dots that kids love to stamp. The pattern looks detailed without any fussy work.
Materials Needed:
- Small piece of bubble wrap
- Washable paint
- White cardstock
- Paper scraps for beak/eyes
How to make it:
- 1. Paint the bumpy side of bubble wrap in a color.
- 2. Press it onto cardstock to print a big oval.
- 3. Repeat with a second color for depth.
- 4. Add a beak, eyes, and drawn legs.
9. Leafy Nest Birds

Real leaves become cozy nests for tiny paper chicks. The natural textures feel earthy and sweet.
- Dry leaves
- Glue stick
- Colored paper
- Marker
How to make it:
- 1. Glue a cluster of leaves in a half-circle to form a nest.
- 2. Cut small paper circles or ovals for chicks and tuck into the nest.
- 3. Add triangle beaks and dot eyes with marker.
- 4. Draw a branch or sky details if you like.
10. Spoon Beak Birds
Upside-down plastic spoons turn into glossy beaks, giving the birds a quirky 3D look. Simple shapes pop off the page.
Materials Needed:
- Plastic spoons
- Colored paper
- Glue dots or strong glue stick
- Markers
How to make it:
- 1. Cut an oval body and wings from colored paper.
- 2. Glue an upside-down spoon at the front for a shiny beak.
- 3. Draw eyes and legs around the spoon.
- 4. Add a paper feather on top for flair.
11. Soft Sock Nest with Pom-Pom Chicks
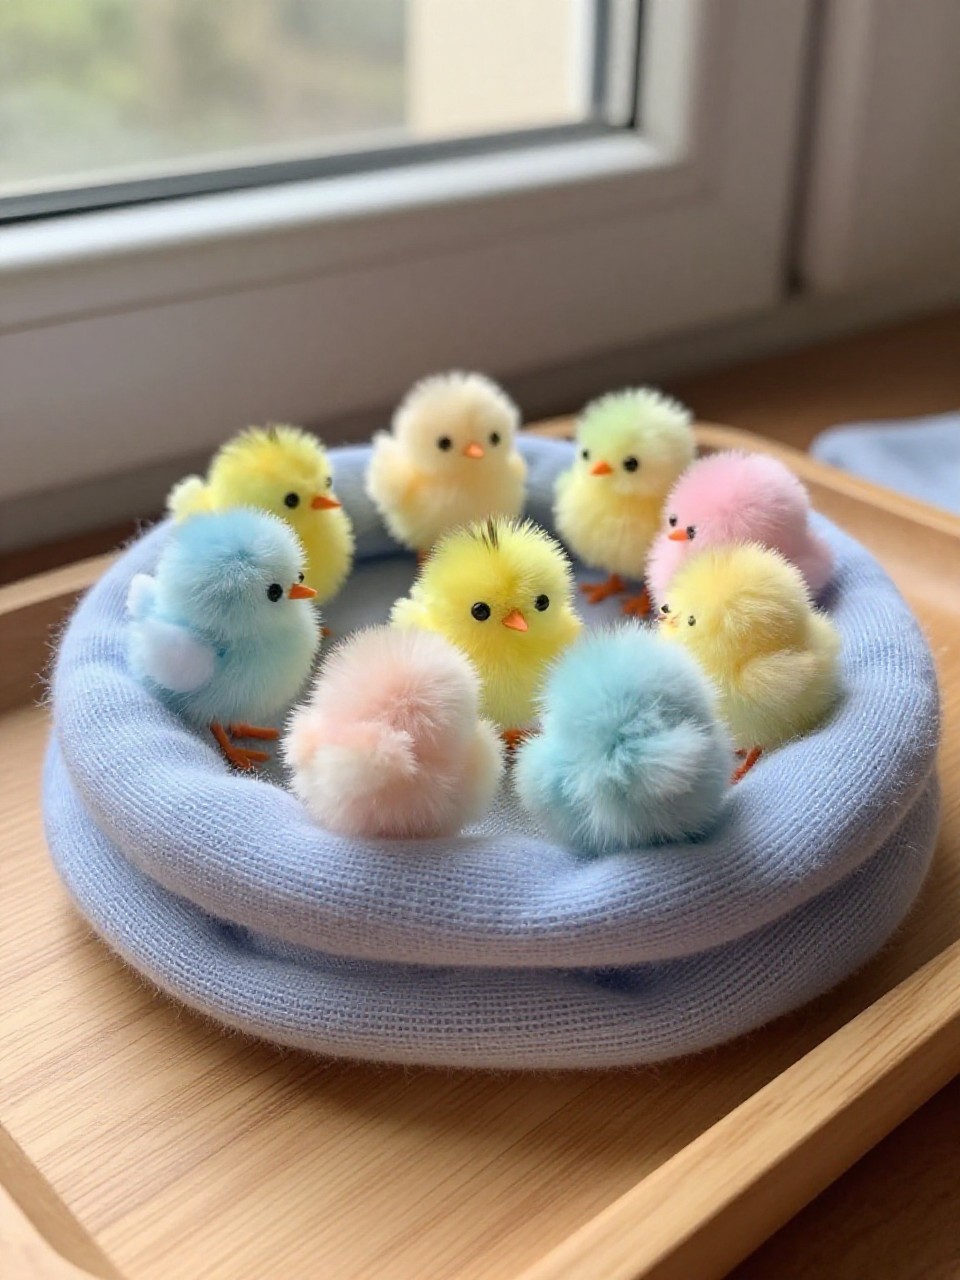
A single old sock becomes a tiny bird nest. Add pom-pom babies for instant cuteness and texture.
Materials Needed:
- Clean old sock
- Small pom-poms
- Glue
- Tiny paper triangles
How to make it:
- 1. Roll the sock into a donut and glue the end to hold the ring.
- 2. Place pom-poms inside as chicks.
- 3. Add tiny triangle beaks to the pom-poms.
- 4. Dot on eyes with marker or tiny stickers.
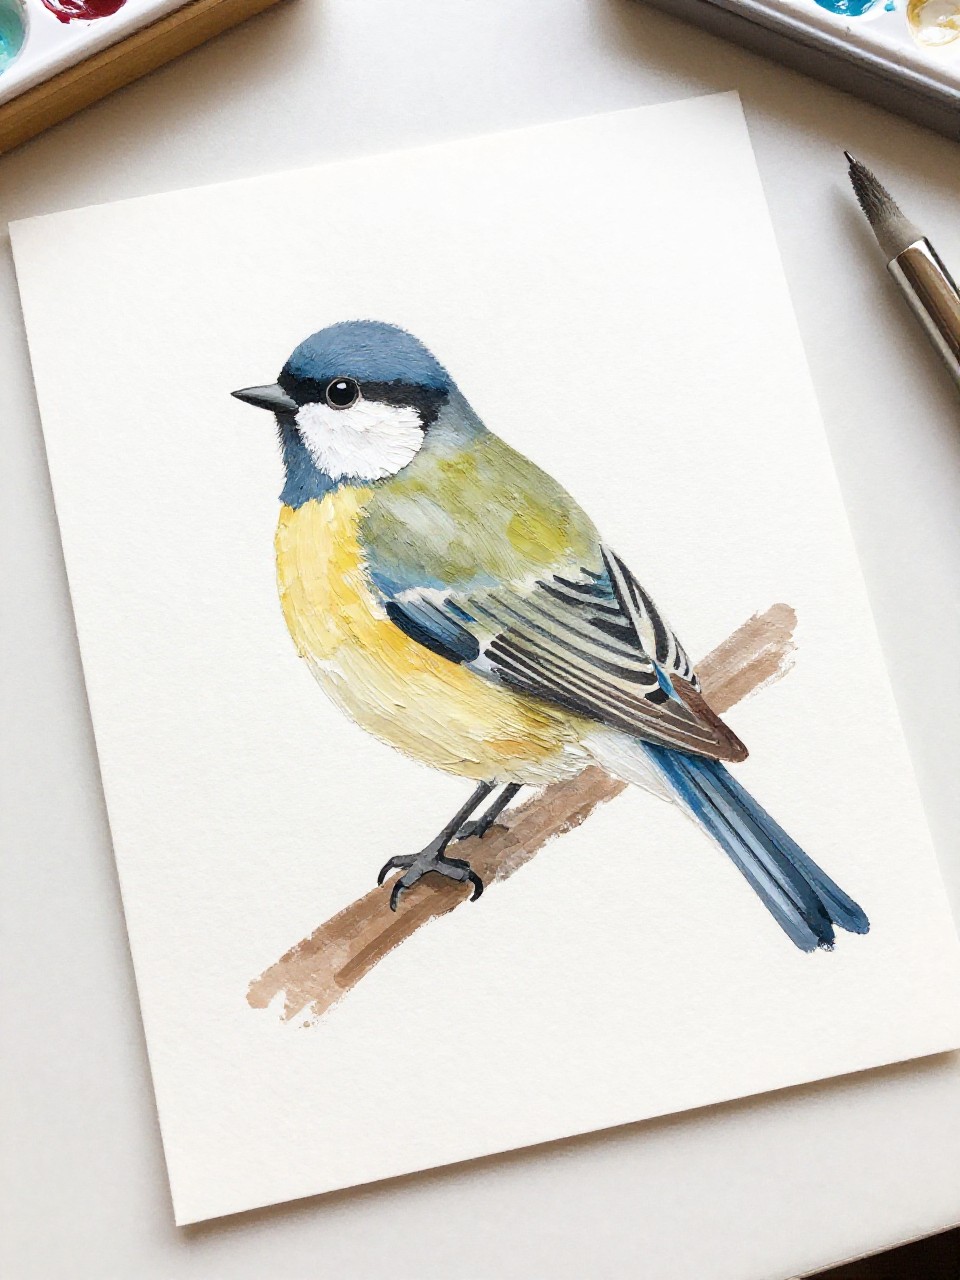
12. Watercolor Drip Hummingbirds
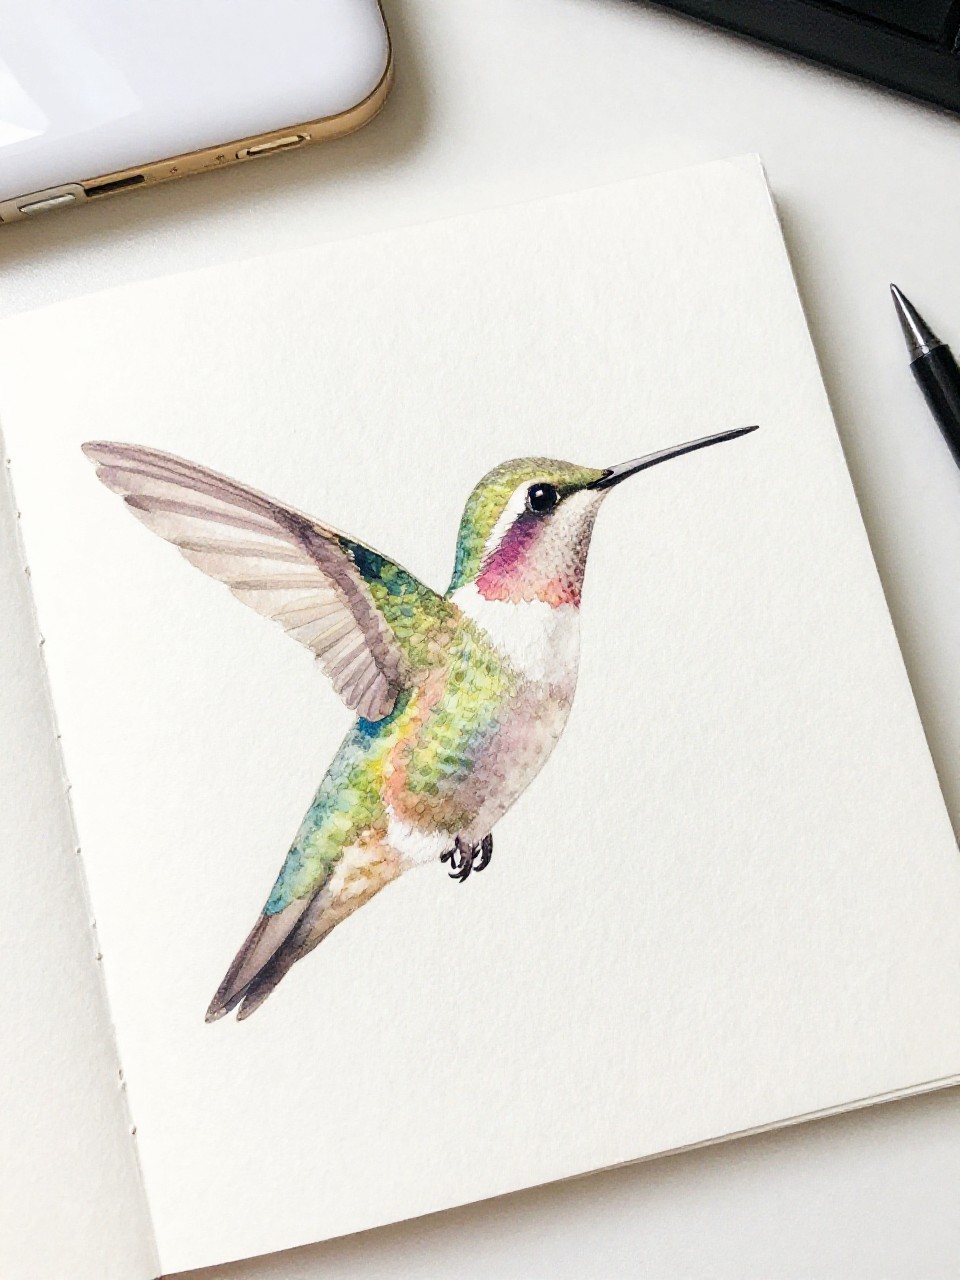
Loose watercolor drips become airy hummingbird bodies. The colors blend in magical ways that feel effortless.
Materials Needed:
- Watercolor paints
- Watercolor paper
- Small brush
- Black pen
How to make it:
- 1. Paint a watery teardrop shape and tilt the paper to let it drip.
- 2. Add a small head circle and a tiny wing wash.
- 3. When dry, draw a thin beak and delicate tail lines.
- 4. Add a dot eye and a soft outline if desired.
13. String-Wrapped Birds on a Branch
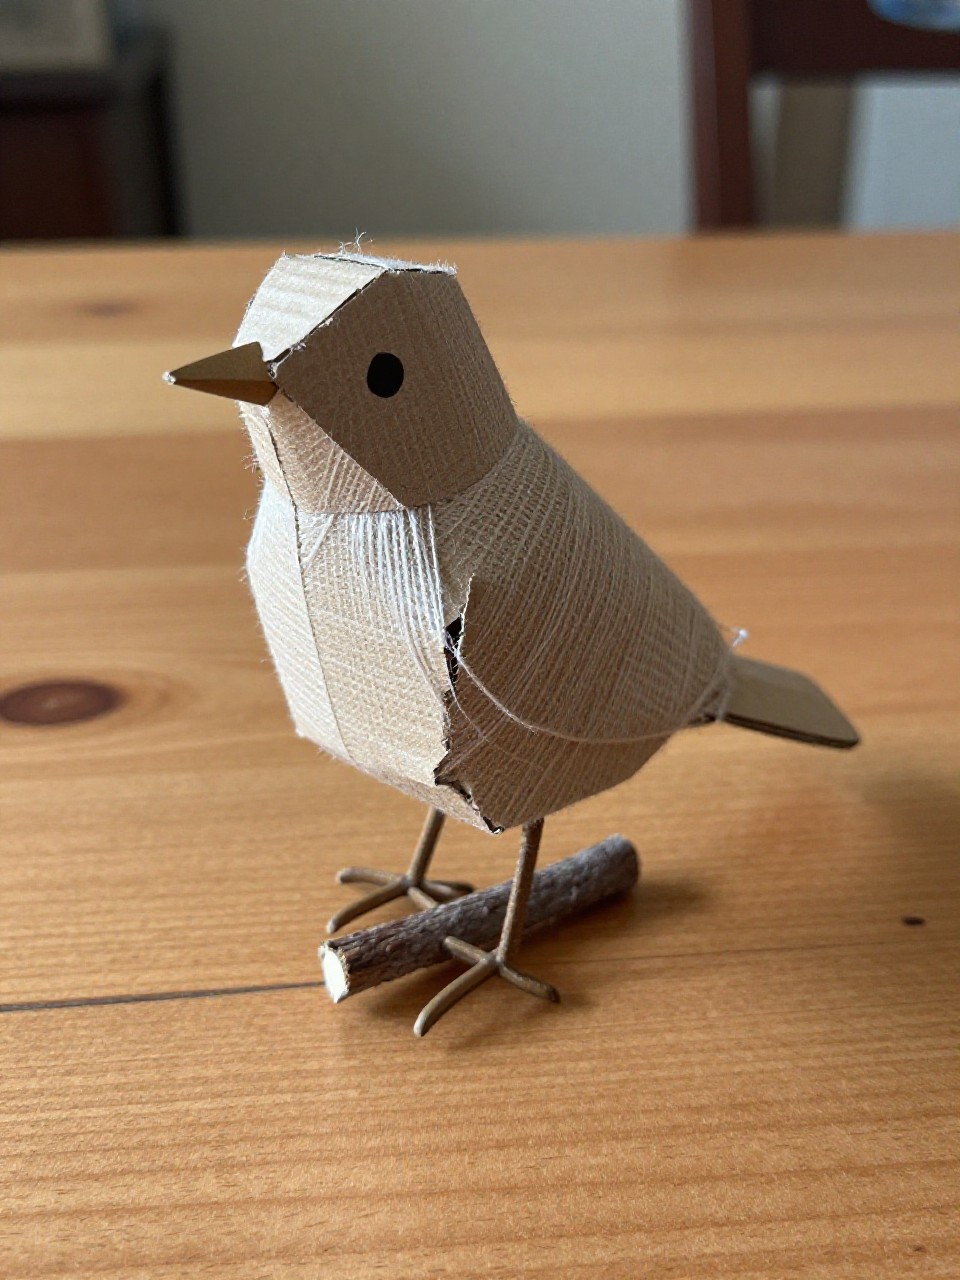
Wrap yarn around a cutout for a cozy, sweater-like bird. Perch them on a real stick for a woodland look.
Materials Needed:
- Cardboard
- Yarn or string
- Small stick
- Glue
How to make it:
- 1. Cut a simple bird silhouette from cardboard.
- 2. Wrap yarn around the body, leaving the beak area clear.
- 3. Glue the ends on the back and add a paper beak/eye.
- 4. Glue the bird to a stick “branch.”
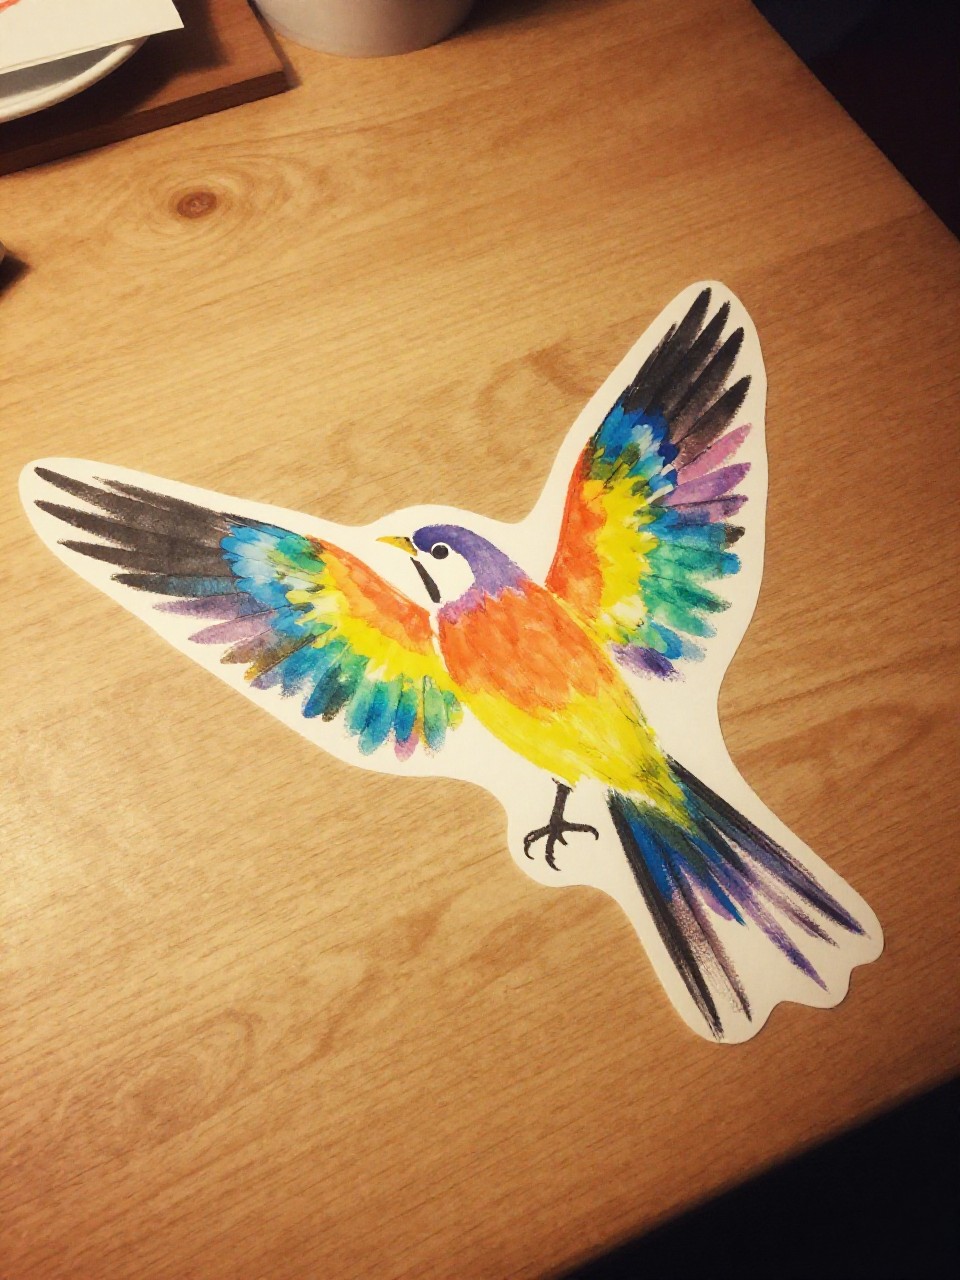
14. Rainbow Feather Fans
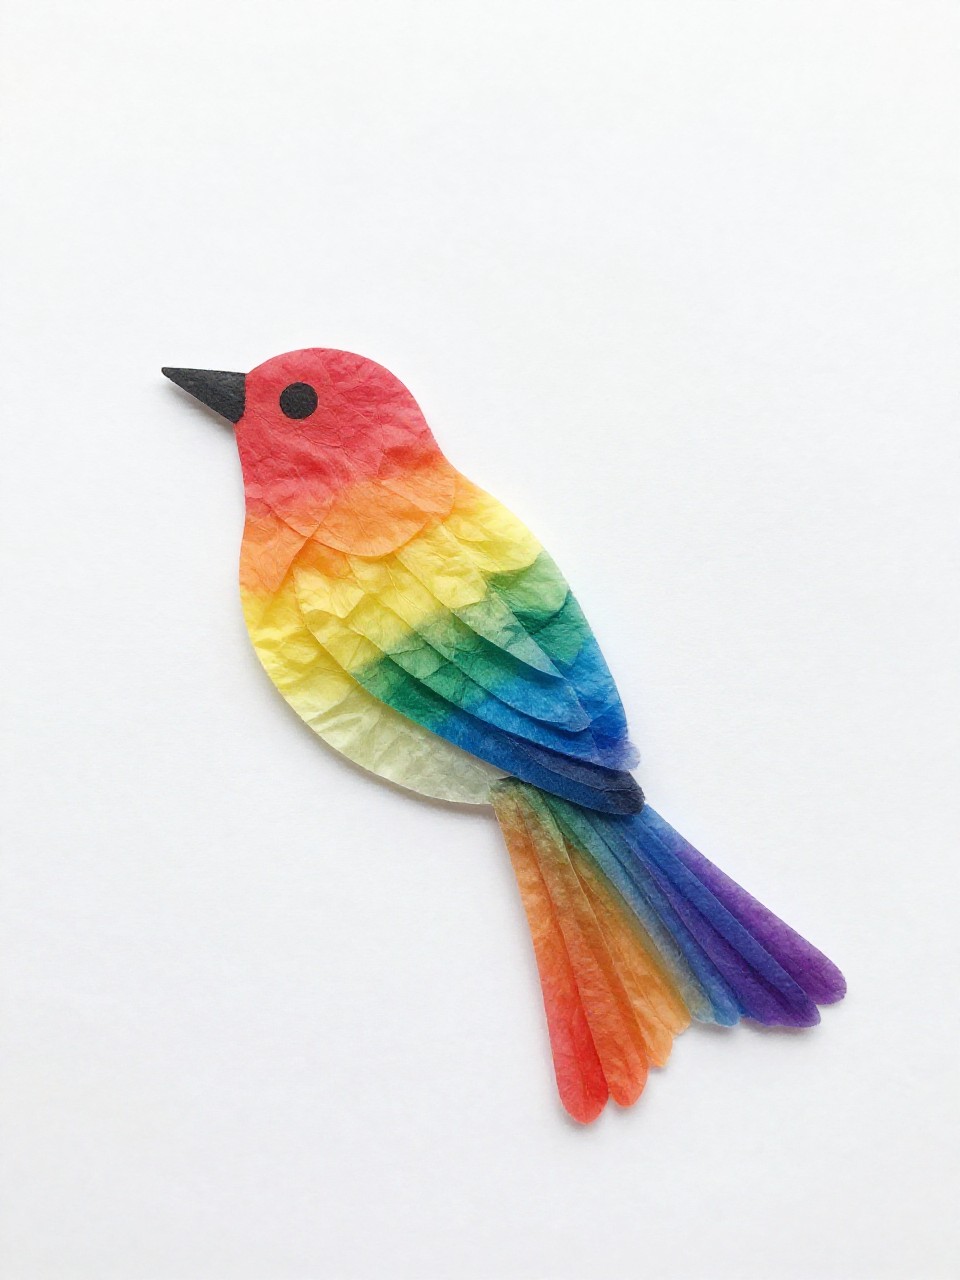
A semi-circle bird with a fan of rainbow “feathers” looks bright and happy. The spread-out tail makes a bold, sunny display.
Materials Needed:
- Coffee filter
- Washable markers
- Spray bottle with water
- Paper scraps
How to make it:
- 1. Color the coffee filter in rainbow bands.
- 2. Lightly mist with water to blend and let dry.
- 3. Fold into a semi-circle fan for the tail.
- 4. Add a small paper body, beak, and eye at the center.
15. Peek-Through Window Birds

Birds perch on a ring-shaped “window” cut from cardboard, so they look like they’re peeking in. It’s a fun frame for a sunny spot.
Materials Needed:
- Cardboard circle (ring cutout)
- Colored paper
- Glue stick
- String for hanging
How to make it:
- 1. Cut the center from a cardboard circle to make a ring.
- 2. Create a small paper bird with wings and a beak.
- 3. Glue the bird to the bottom edge of the ring like it’s perched.
- 4. Tie a string on top and hang in a window.