

Table of Contents Show
Summer Cricut projects are perfect for beginners because many of them use simple shapes, easy vinyl cuts, and items you can actually use right away. You can make custom cups, tote bags, labels, signs, shirts, party pieces, and small gifts without needing advanced design skills.
These ideas are simple enough to start with, but they still look cute and useful for the season. Most use basic vinyl, heat-transfer vinyl, cardstock, or simple blanks, so you can practice cutting, weeding, and applying designs while making something fun for summer.
1. Simple Summer Icon Tote Bag
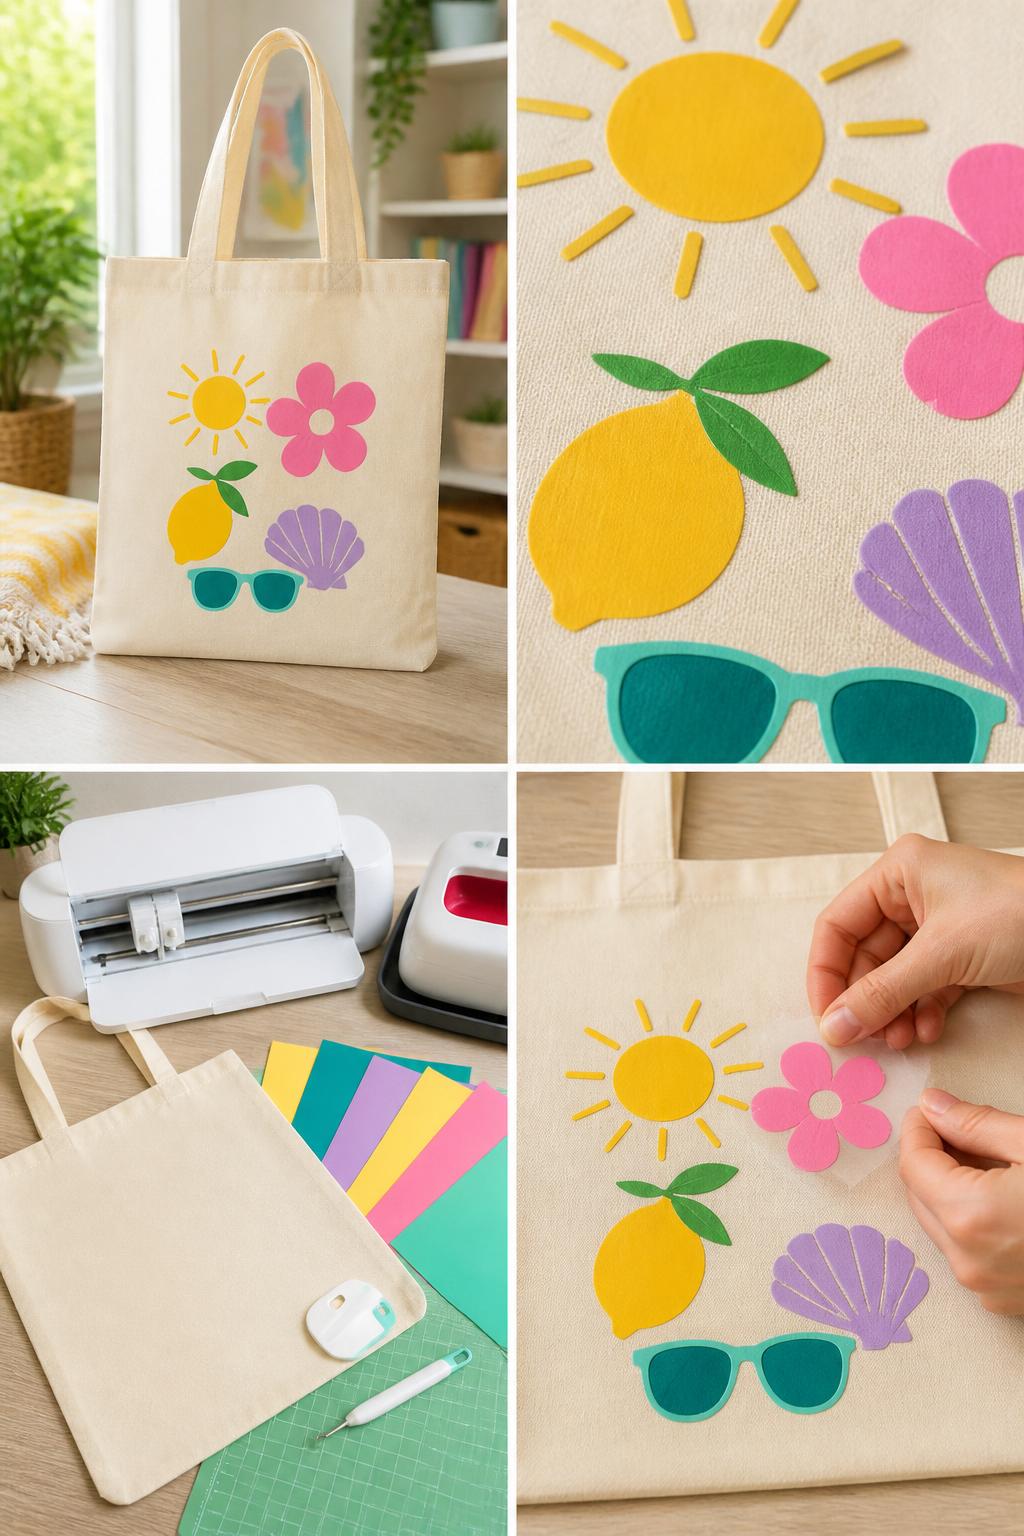
A summer icon tote is a great beginner project because the shapes are simple and easy to weed. You can use one large icon in the center or scatter a few small designs across the front of the bag.
This tote is useful for library trips, beach days, market runs, or carrying craft supplies. Heat-transfer vinyl works best for canvas totes and gives the design a clean, finished look.
Materials Needed:
For People Who Love to Make Things ✂️
- Plain canvas tote bag
- Heat-transfer vinyl
- Cricut machine
- Cutting mat
- Weeding tool
- Heat press or household iron
- Teflon sheet or parchment paper
Steps To Make:
- Choose simple summer icons in Cricut Design Space.
- Size the icons to fit the tote bag.
- Mirror the design before cutting heat-transfer vinyl.
- Cut and weed away the extra vinyl.
- Press the design onto the tote using the correct heat setting.
2. Personalized Cold Cup Decals
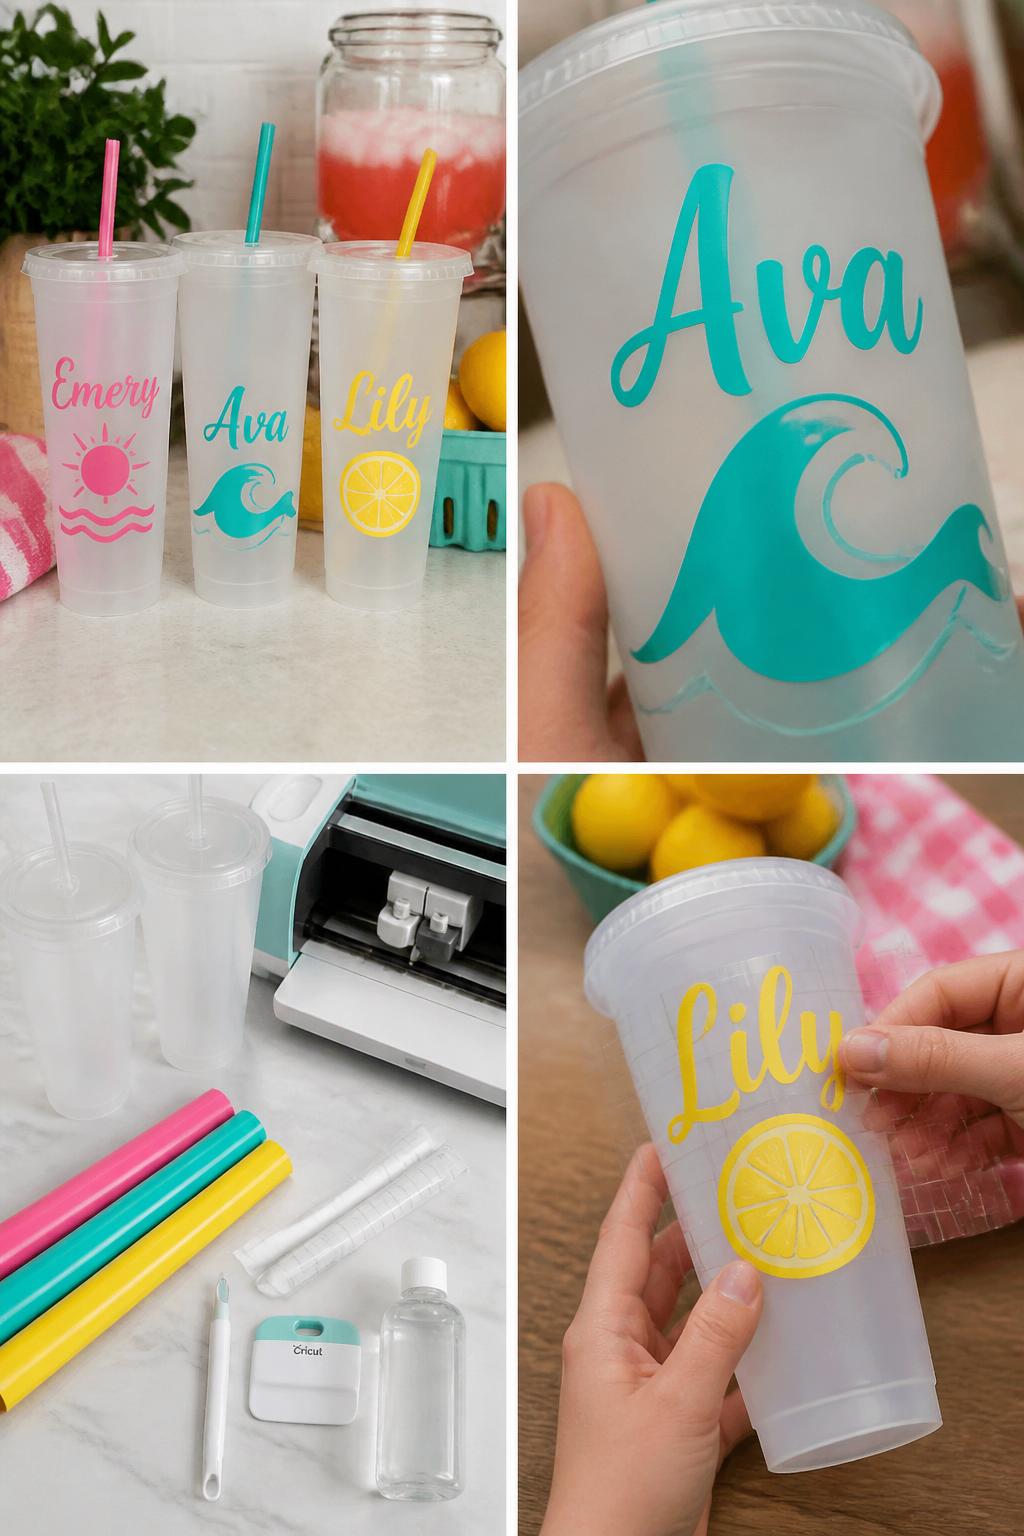
Personalized cold cups are easy, cute, and perfect for summer drinks. They are a good first Cricut project because names, initials, and simple icons are not too hard to cut or apply.
These cups work well for pool days, picnics, sleepovers, backyard parties, and everyday iced drinks. Use permanent vinyl so the design lasts longer on smooth plastic or acrylic surfaces.
Materials Needed:
- Blank cold cups
- Permanent adhesive vinyl
- Transfer tape
- Cricut machine
- Weeding tool
- Scraper tool
- Rubbing alcohol and cloth
Steps To Make:
- Clean the cup surface with rubbing alcohol and let it dry.
- Create a simple name, initial, or icon design.
- Cut the design from permanent vinyl.
- Weed away the extra vinyl.
- Use transfer tape to apply the design smoothly to the cup.
3. Easy Vinyl Beach Bucket Labels
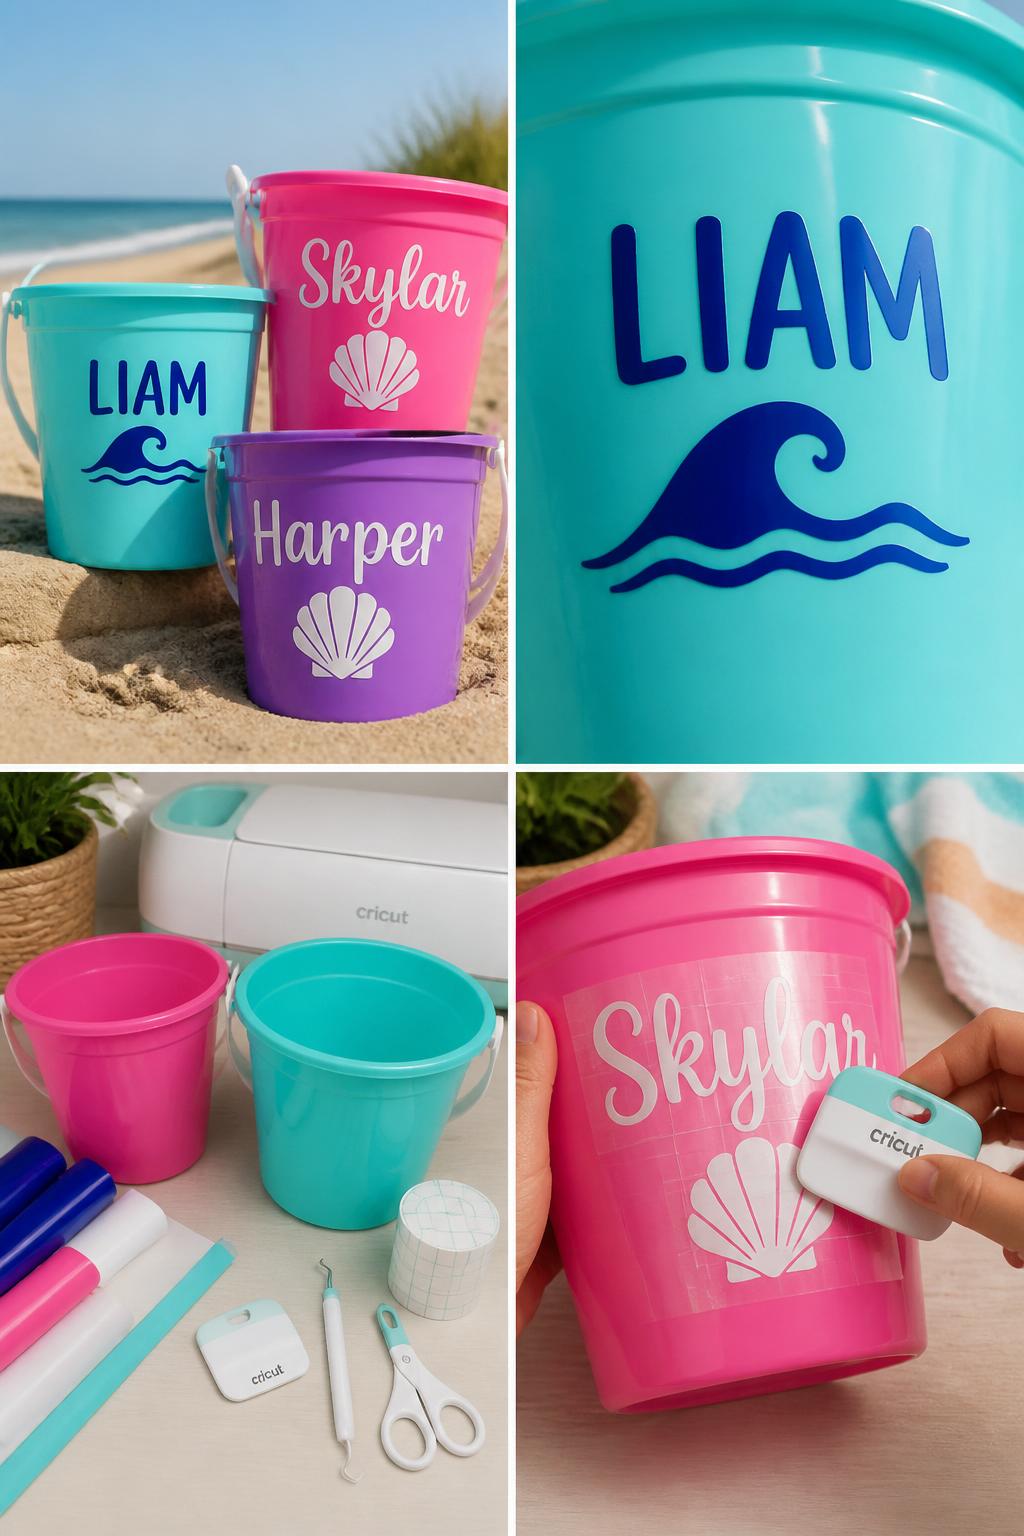
Beach bucket labels are a fun and useful Cricut project for beginners. They make it easy to personalize kids’ buckets, pool toys, or summer camp supplies with names or initials.
This project uses small vinyl designs, so it is a nice way to practice weeding and transfer tape. Keep the fonts bold and simple so the vinyl is easier to apply on curved plastic.
Materials Needed:
- Plastic beach buckets
- Permanent adhesive vinyl
- Transfer tape
- Cricut machine
- Weeding tool
- Scraper tool
- Rubbing alcohol and cloth
Steps To Make:
- Wipe the bucket area with rubbing alcohol.
- Create a simple name or icon design.
- Cut the design from permanent vinyl.
- Weed the extra vinyl and cover the design with transfer tape.
- Apply it to the bucket and smooth it down firmly.
4. Summer Cardstock Cupcake Toppers
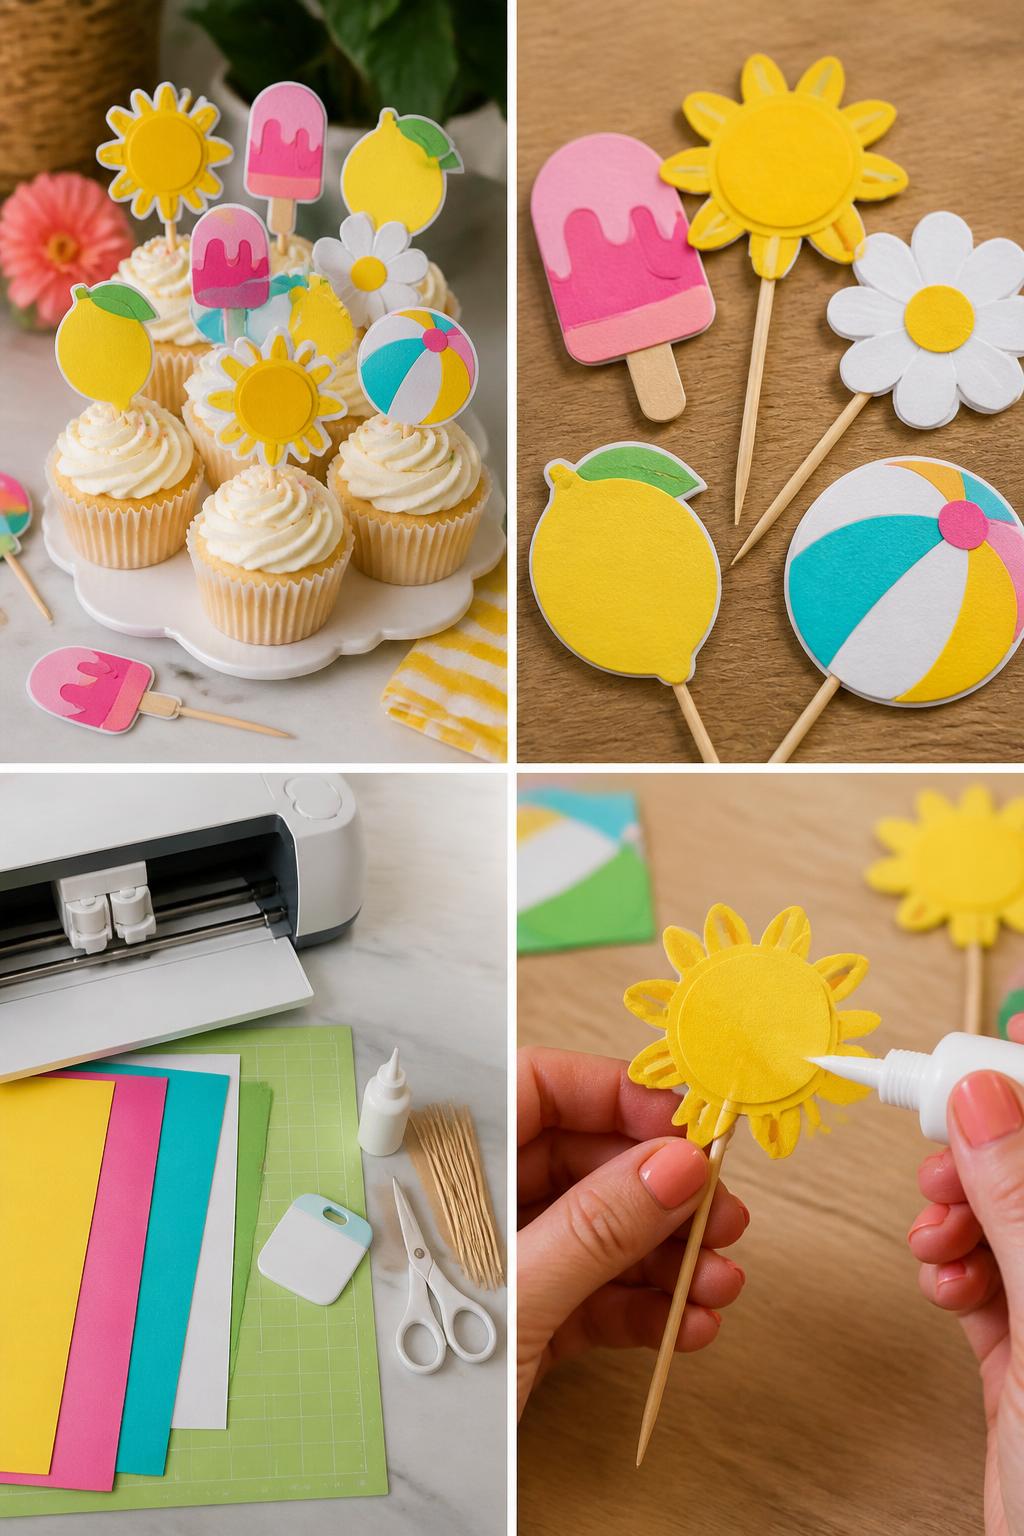
Cupcake toppers are one of the easiest Cricut projects for summer parties. They use cardstock, simple shapes, and basic glue, so there is no need to worry about vinyl placement.
This is a great project for birthdays, cookouts, baby showers, pool parties, or picnic desserts. Choose easy shapes like suns, lemons, flowers, popsicles, or beach balls.
Materials Needed:
- Colored cardstock
- Cricut machine
- LightGrip mat
- Glue or tape runner
- Toothpicks or small wooden picks
- Scraper tool
- Scissors
Steps To Make:
- Choose simple summer shapes in Design Space.
- Cut the shapes from colored cardstock.
- Layer pieces with glue if needed.
- Attach each shape to a toothpick or wooden pick.
- Let the toppers dry before placing them into cupcakes.
5. Beginner Summer T-Shirt
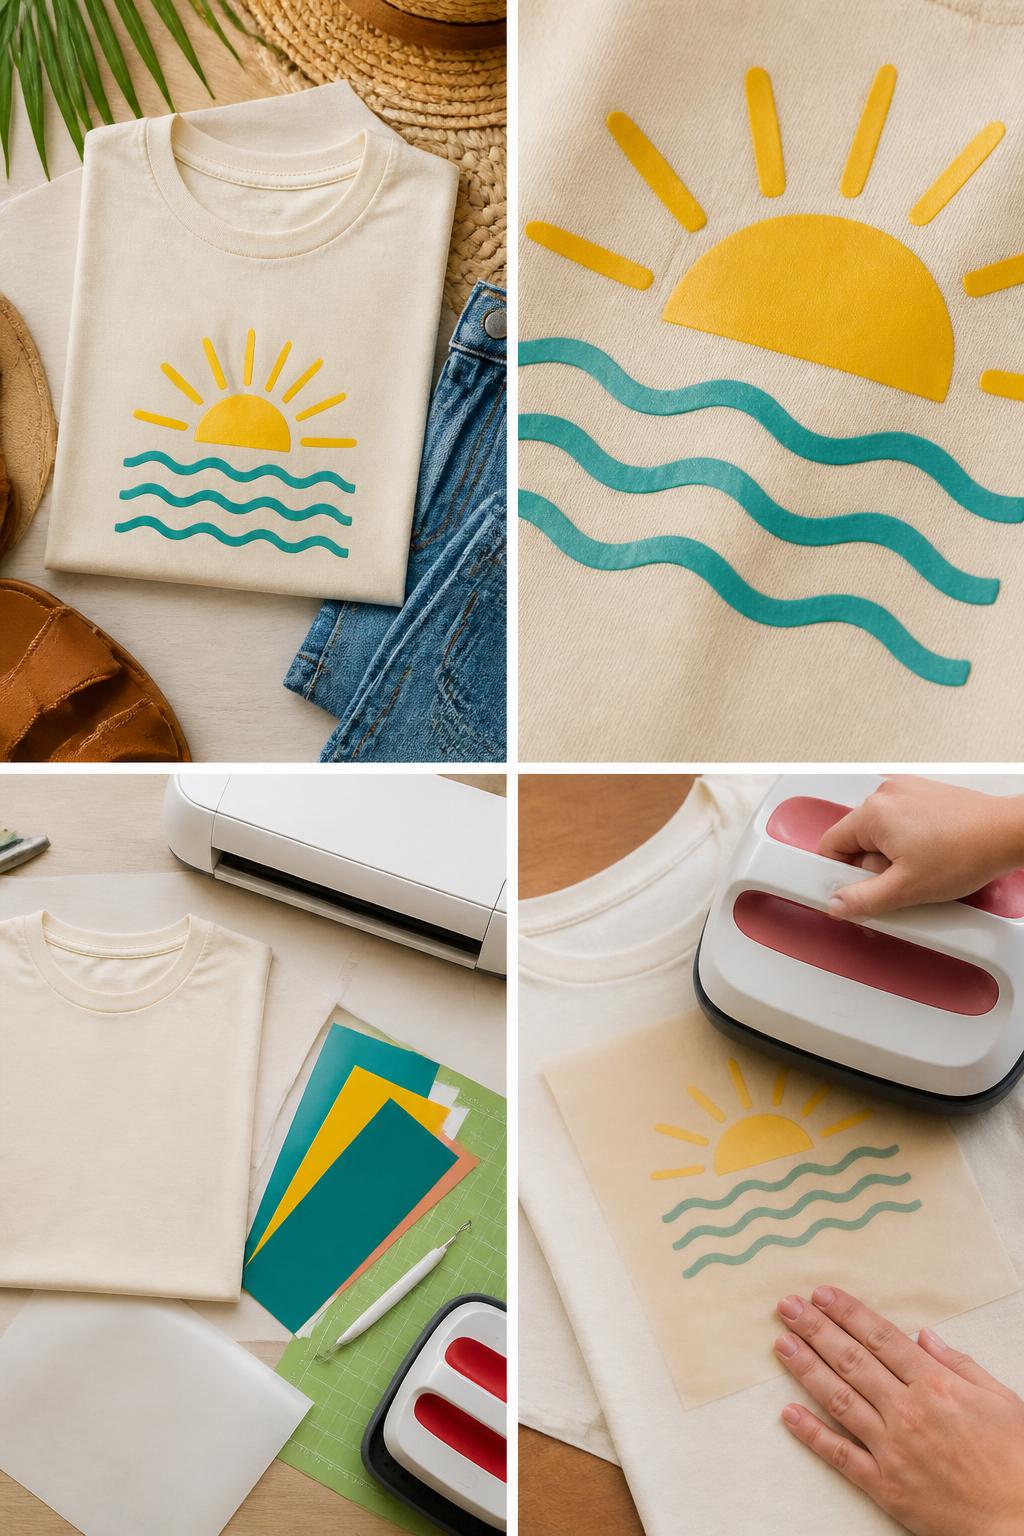
A simple summer T-shirt is a great way to learn heat-transfer vinyl. Start with one bold shape or a small icon design so the cutting and weeding stay easy.
This project is perfect for vacation shirts, camp shirts, family trips, or casual summer outfits. Cotton or cotton-blend shirts work well for beginner HTV projects.
Materials Needed:
- Blank cotton T-shirt
- Heat-transfer vinyl
- Cricut machine
- Cutting mat
- Weeding tool
- Heat press or iron
- Teflon sheet or parchment paper
Steps To Make:
- Choose a simple summer design.
- Size it to fit the shirt.
- Mirror the design before cutting HTV.
- Cut and weed the vinyl.
- Press the design onto the shirt using the right heat setting.
6. Porch Plant Marker Labels
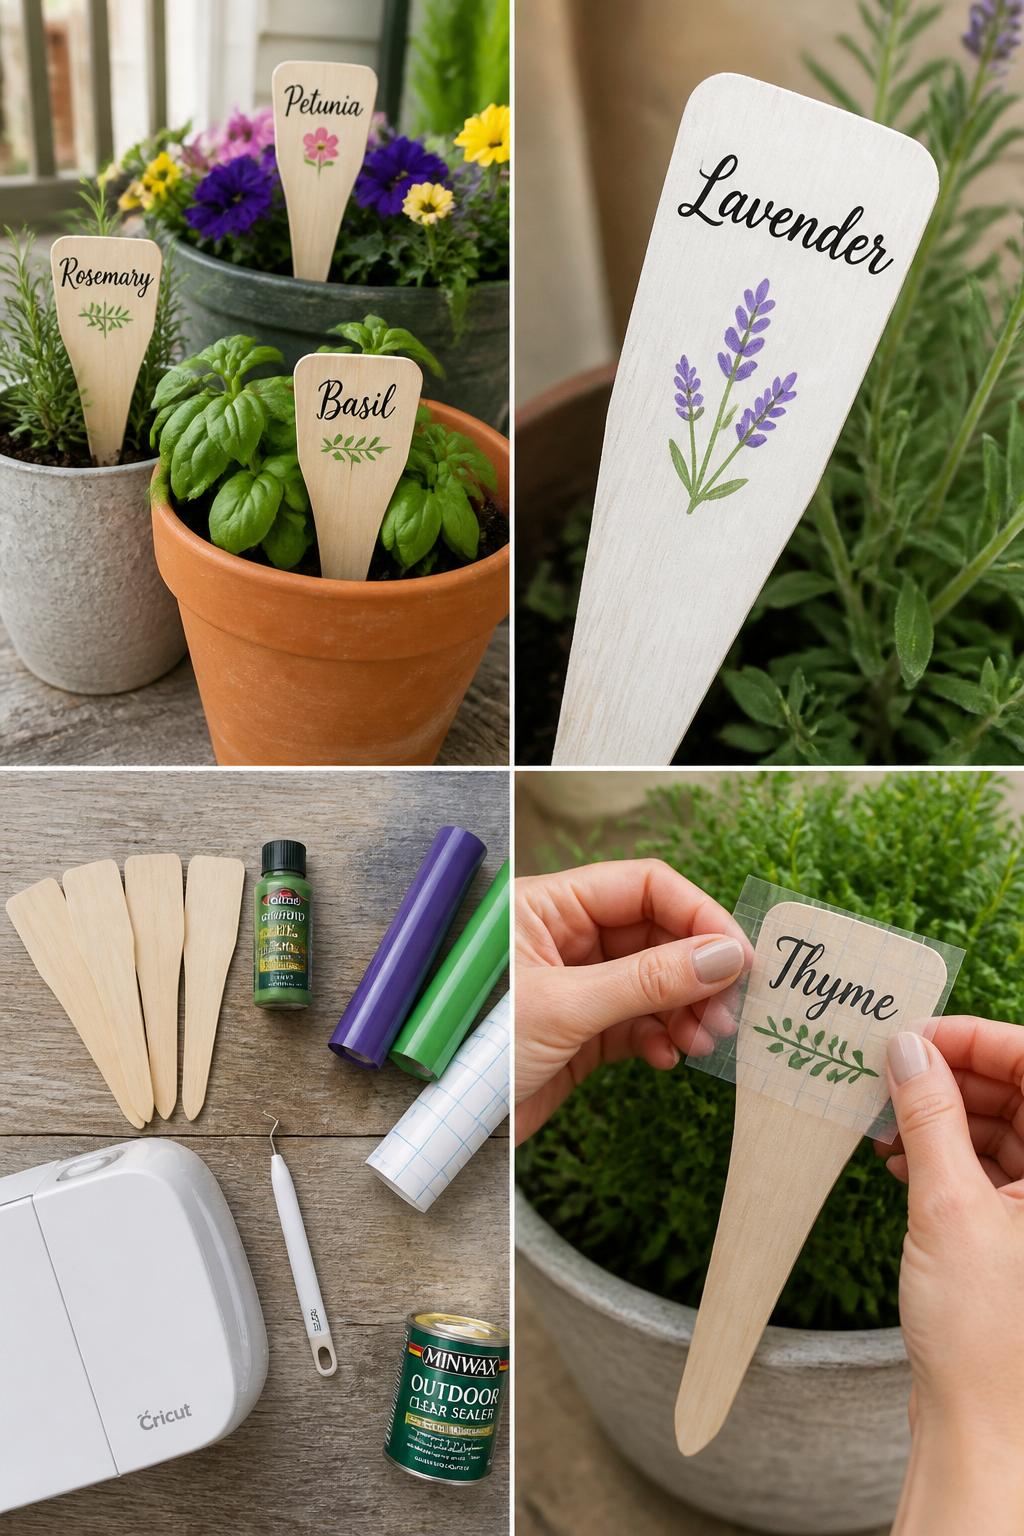
Plant marker labels are simple, useful, and perfect for summer gardens. You can label herbs, flowers, vegetables, or porch planters with clean vinyl names.
This is a beginner-friendly way to practice small vinyl decals. For outdoor use, paint the stakes first and seal them after applying the vinyl.
Materials Needed:
- Wooden plant stakes
- Outdoor paint
- Permanent vinyl
- Transfer tape
- Cricut machine
- Weeding tool
- Scraper tool
- Clear outdoor sealer
Steps To Make:
- Paint the plant stakes and let them dry.
- Create simple plant names in Design Space.
- Cut the labels from permanent vinyl.
- Apply the vinyl with transfer tape.
- Seal the markers before placing them outside.
7. Summer Sticker Sheet
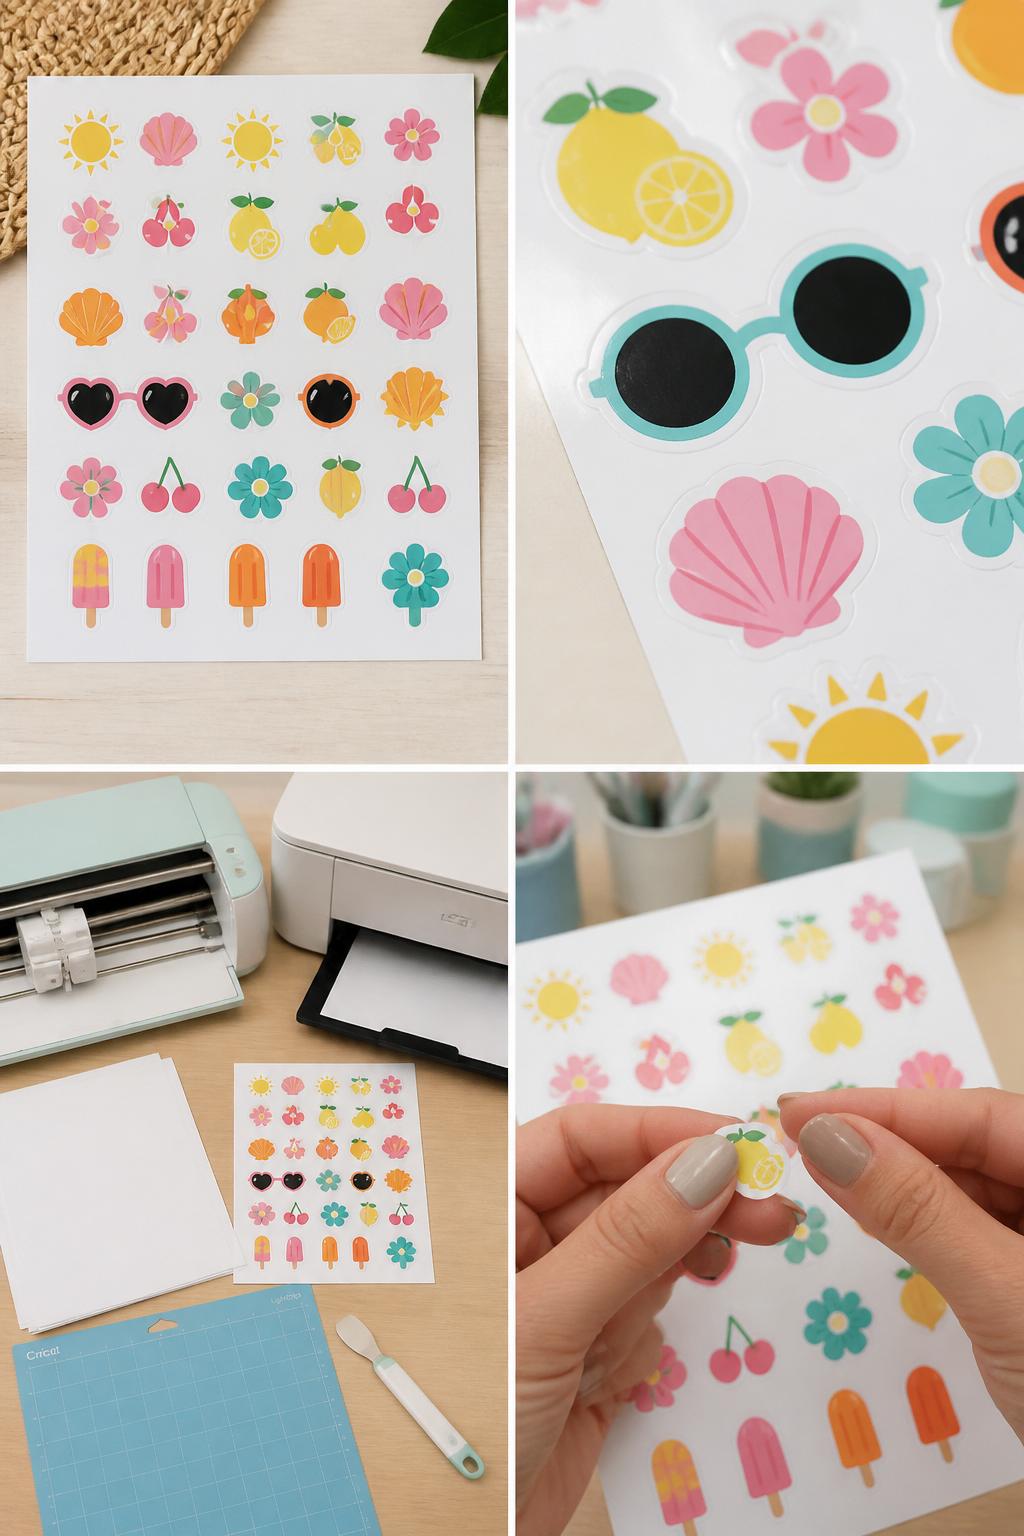
A summer sticker sheet is a fun beginner project if you want to try print-then-cut. You can make stickers for planners, notebooks, water bottles, party favors, or gift bags.
Start with simple summer icons so the sheet is easy to arrange. If the stickers will go on cups or bottles, use waterproof sticker paper or add a clear laminate layer.
Materials Needed:
- Printable sticker paper
- Printer
- Cricut machine
- LightGrip mat
- Scraper tool
- Summer sticker designs
- Clear laminate, optional
Steps To Make:
- Arrange your sticker designs in Design Space.
- Use the print-then-cut setting.
- Print the sticker sheet on printable sticker paper.
- Place the sheet on the mat and cut it with the Cricut.
- Peel the stickers and use them on clean, dry surfaces.
8. Easy Summer Door Hanger
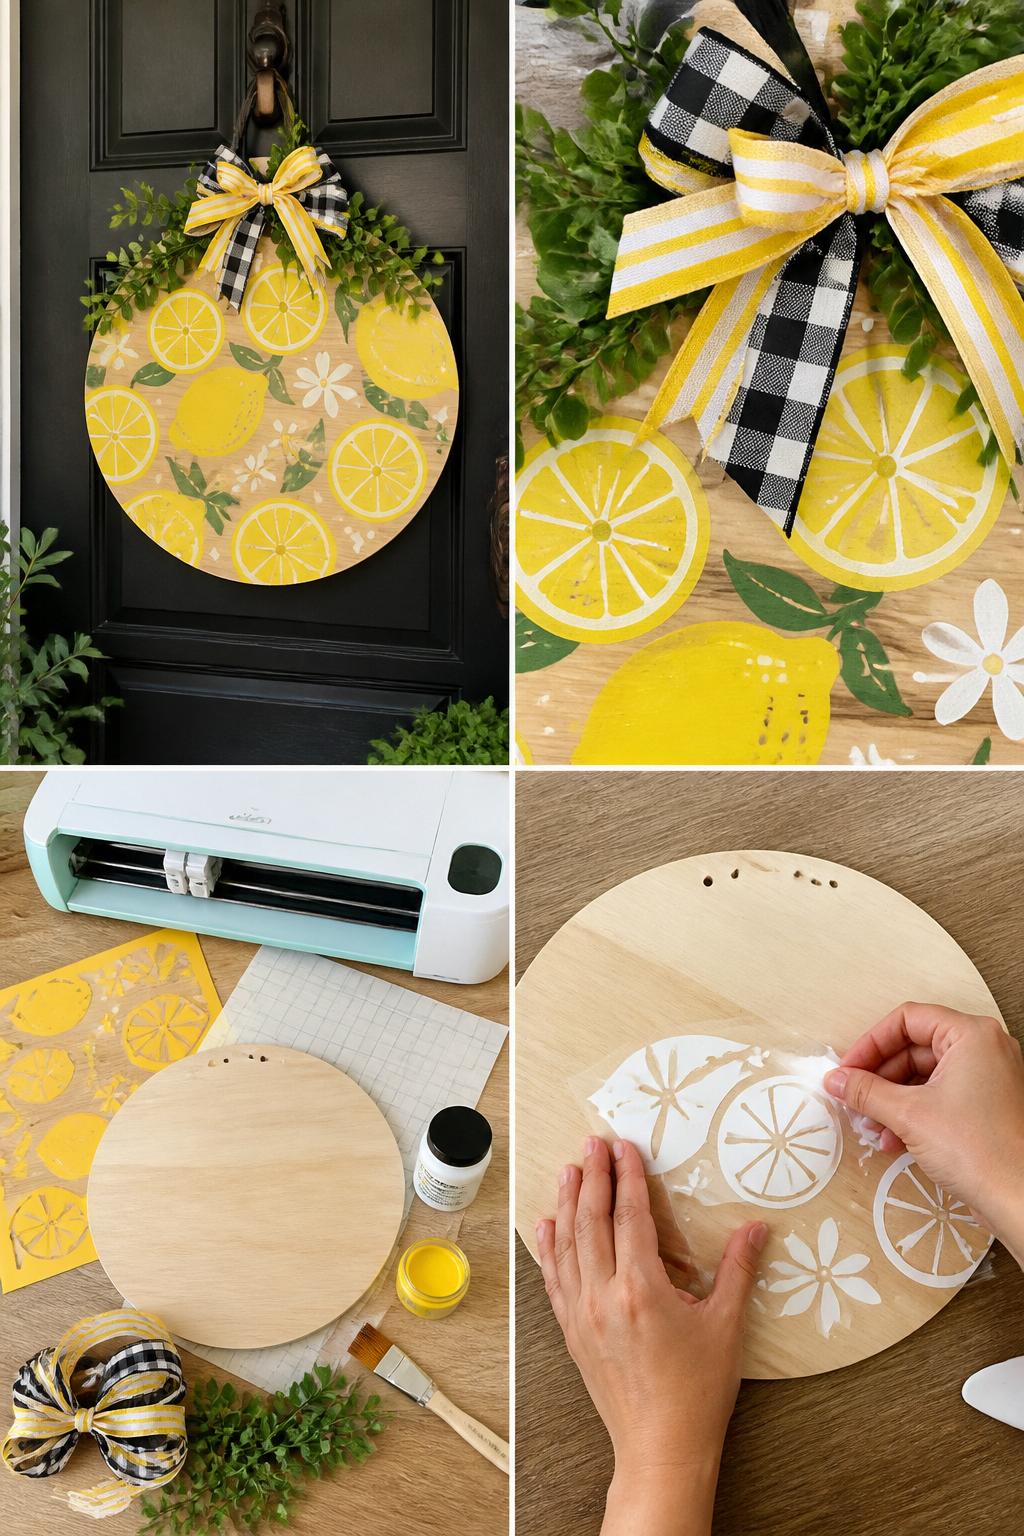
A summer door hanger is easier than a full porch sign but still makes a big impact. A round wood blank, stencil vinyl, paint, and ribbon can turn into cute seasonal door decor.
For beginners, keep the stencil design simple. Lemons, flowers, suns, waves, or small fruit shapes are easier to cut and paint than detailed lettering.
Materials Needed:
- Round wood blank
- Stencil vinyl
- Transfer tape
- Outdoor paint
- Paintbrush or foam brush
- Ribbon
- Cricut machine
- Clear sealer
Steps To Make:
- Sand and paint the round wood blank.
- Cut a simple stencil design from stencil vinyl.
- Apply the stencil to the wood using transfer tape.
- Paint over the stencil with light coats.
- Peel the stencil, add ribbon, and seal the hanger.
9. Personalized Picnic Napkin Rings
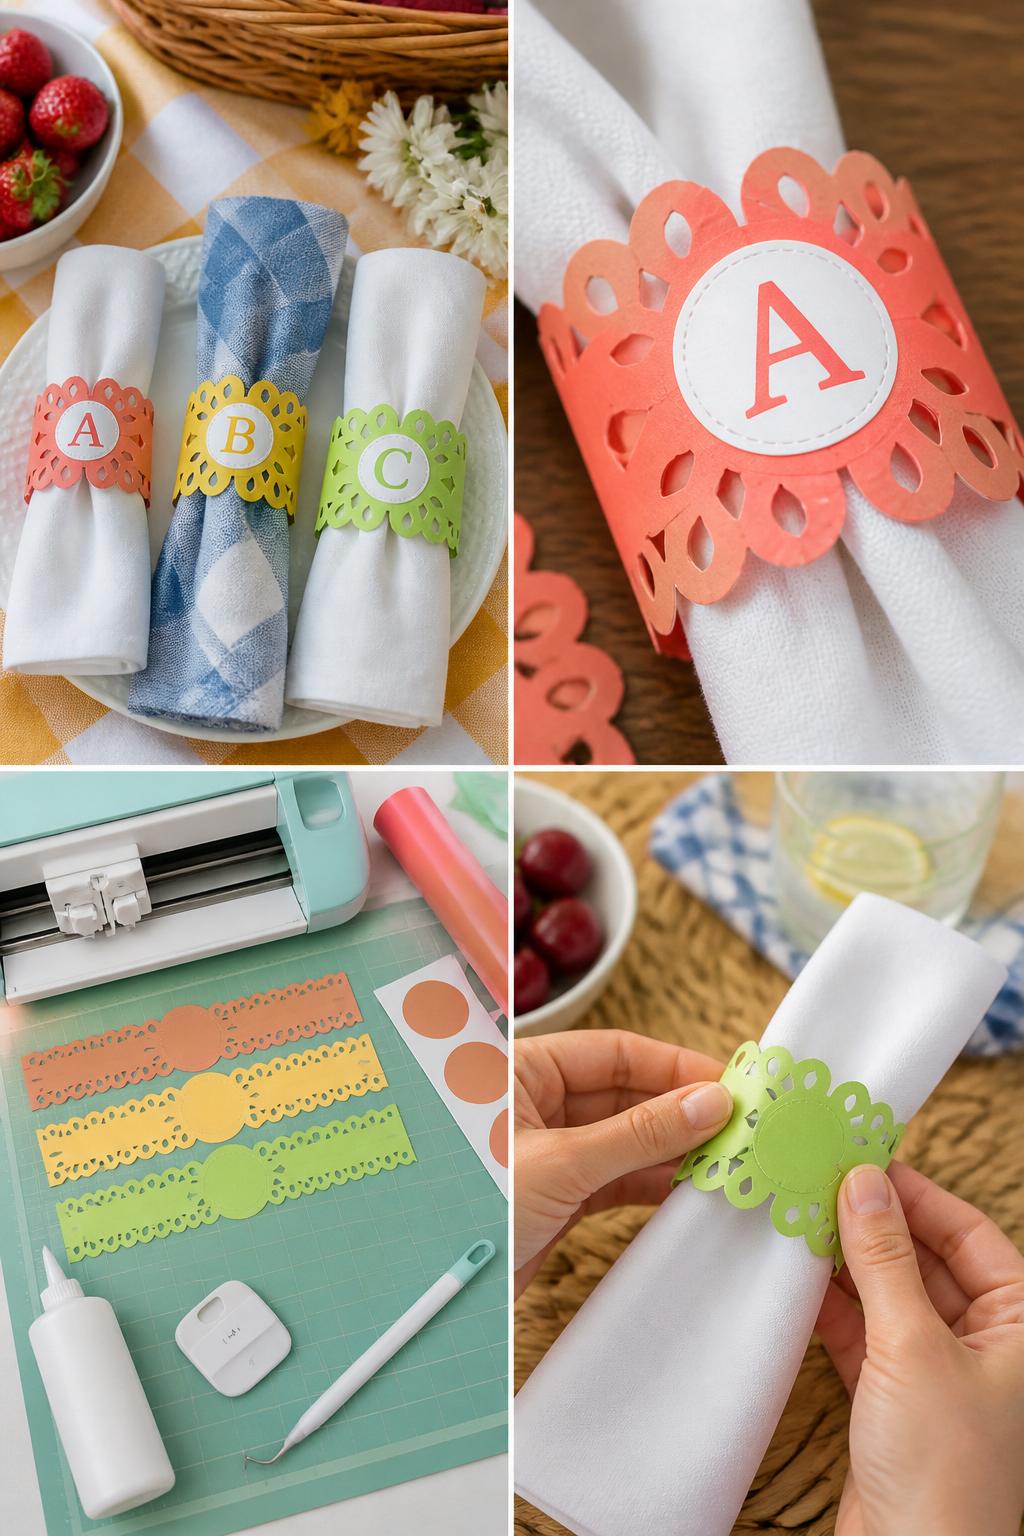
Picnic napkin rings are an easy Cricut project for outdoor meals and summer parties. They make a table look more styled without needing expensive supplies.
Use cardstock for the ring base and vinyl for initials or tiny icons. This is a nice project for practicing both cardstock cutting and small vinyl application.
Materials Needed:
- Colored cardstock
- Permanent vinyl
- Cricut machine
- Cutting mat
- Transfer tape
- Glue or tape runner
- Weeding tool
- Scraper
Steps To Make:
- Cut cardstock strips or napkin ring shapes with the Cricut.
- Cut small initials or icons from vinyl.
- Weed the vinyl designs carefully.
- Apply the vinyl to the cardstock rings.
- Wrap each ring around a napkin and glue the ends together.
10. Custom Travel Toiletry Bag
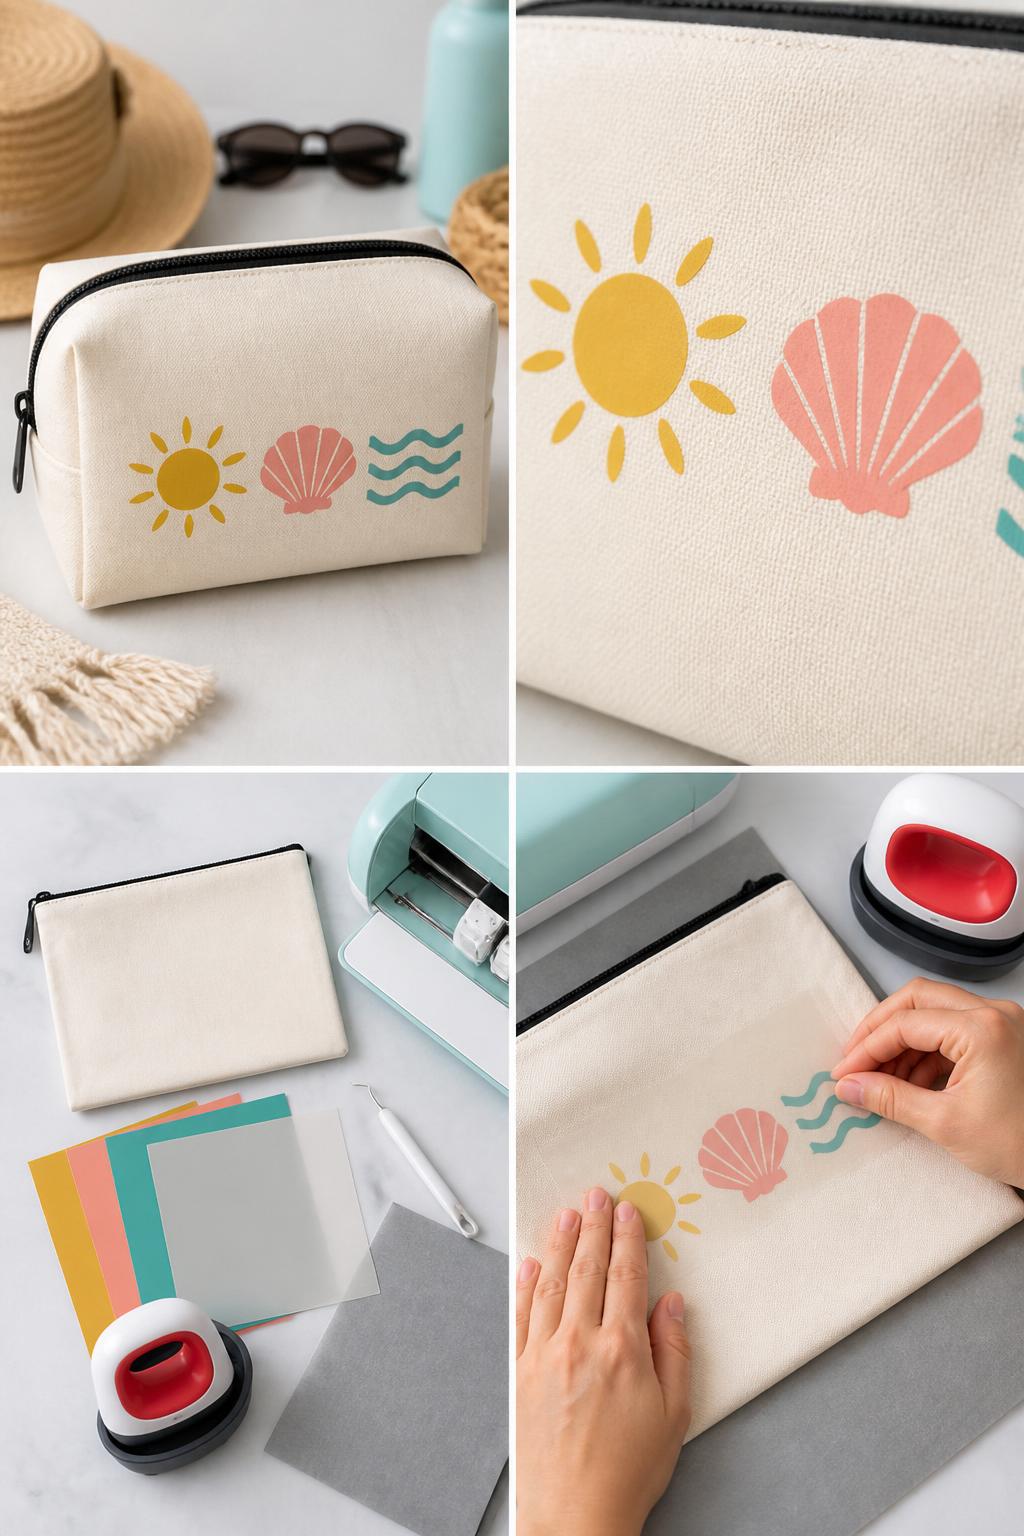
A custom toiletry bag is useful for summer travel, sleepovers, camp, and beach weekends. A simple vinyl design can make a plain pouch feel cute and personal.
This is a good beginner project because the surface is small. Use one icon, initials, or a simple border design so the vinyl is easy to place.
Materials Needed:
- Blank canvas toiletry pouch
- Heat-transfer vinyl
- Cricut machine
- Cutting mat
- Weeding tool
- Mini heat press or iron
- Teflon sheet or parchment paper
Steps To Make:
- Pick a small summer design that fits the pouch.
- Mirror the design before cutting HTV.
- Cut and weed the vinyl.
- Place the design on the pouch.
- Press with heat and peel the carrier sheet as directed.
11. Summer Gift Tags
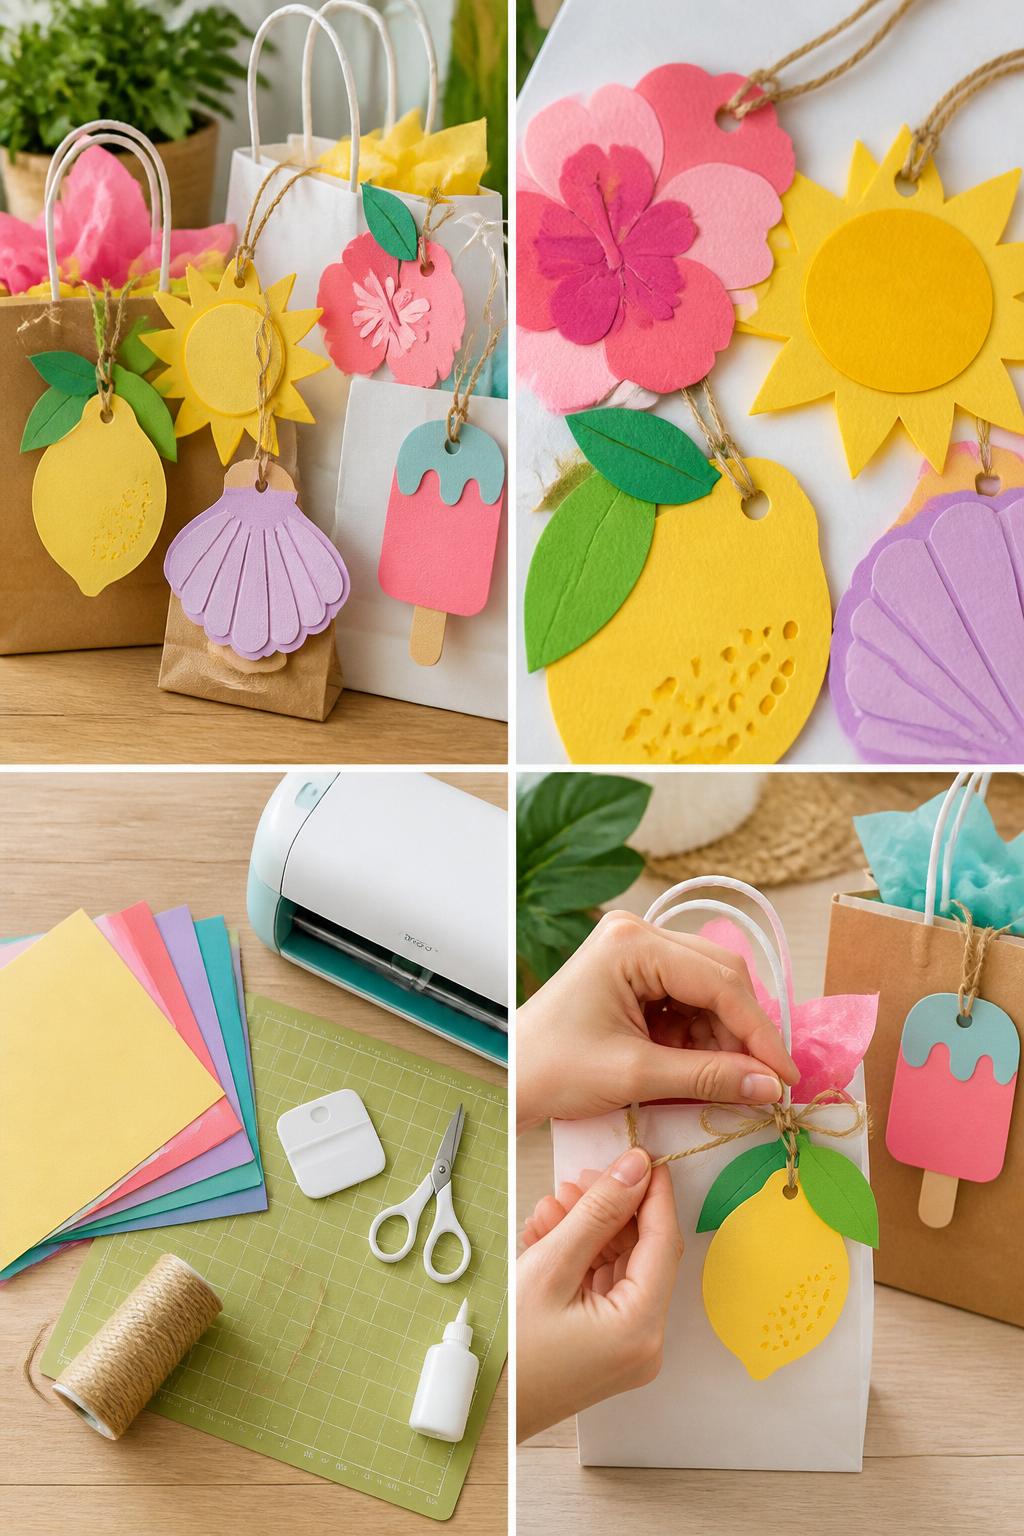
Summer gift tags are quick, cute, and perfect for party favors, teacher gifts, hostess gifts, and handmade treats. They are also a great way to practice cardstock cutting.
You can cut tags in simple summer shapes or layer small icons on top of a basic tag shape. Add twine or ribbon for a finished look.
Materials Needed:
- Colored cardstock
- Cricut machine
- LightGrip mat
- Glue or tape runner
- Twine or ribbon
- Scraper tool
- Scissors
Steps To Make:
- Choose simple tag shapes in Design Space.
- Cut the tags from cardstock.
- Add layered cardstock icons if desired.
- Punch or cut a small hole at the top.
- Tie the tags onto gift bags or wrapped treats.
12. Easy Vinyl Sunglasses Case
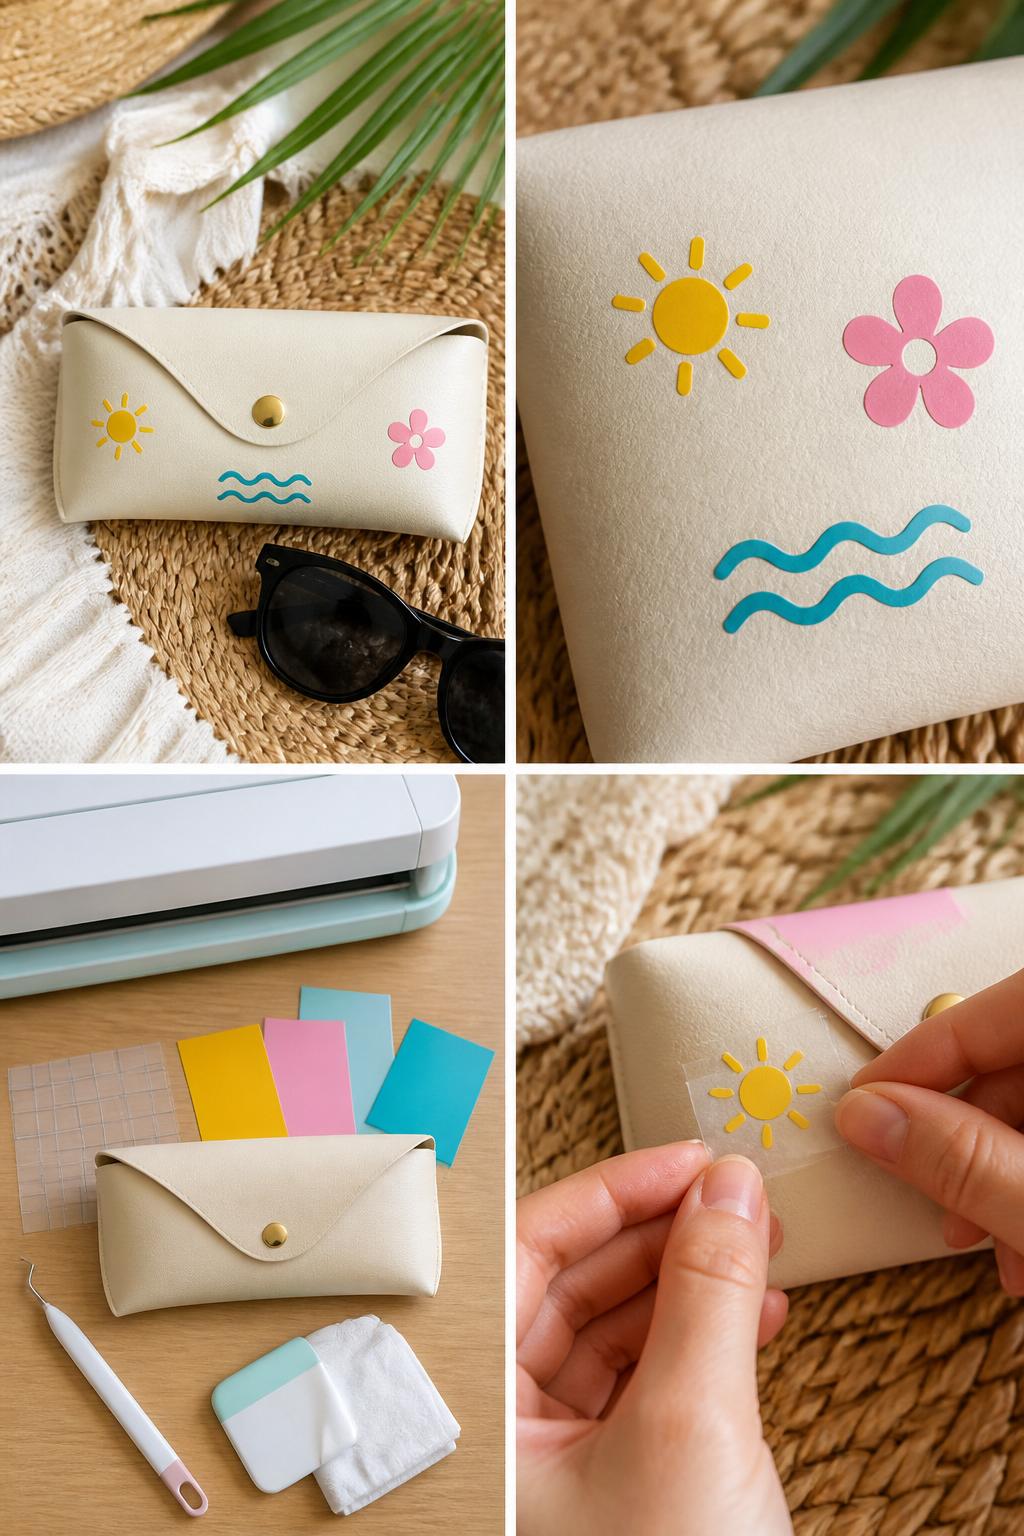
A vinyl sunglasses case is a small project that is easy to finish quickly. It is also useful because sunglasses are one of those things you carry all summer.
This project is best with simple decals and a smooth case surface. Small suns, flowers, shells, waves, or initials are easy designs for beginners to cut and apply.
Materials Needed:
- Plain sunglasses case
- Permanent adhesive vinyl
- Transfer tape
- Cricut machine
- Weeding tool
- Scraper tool
- Rubbing alcohol and cloth
Steps To Make:
- Clean the case surface and let it dry.
- Cut small summer decals from permanent vinyl.
- Weed the extra vinyl from each design.
- Use transfer tape to lift and place each decal.
- Smooth the vinyl firmly, then peel away the transfer tape.