

Table of Contents Show
Painting stars is one of those relaxing ideas that looks fancy, but it’s actually easy once you break it into simple shapes. If you’ve ever stared at a blank canvas and didn’t know what to paint, star patterns are a great place to start. They work for modern rooms, kids’ spaces, and cozy night-sky decor.
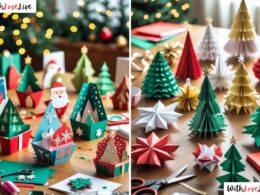
Here are 16 star pattern painting ideas that will help you make something bright, calming, and handmade.
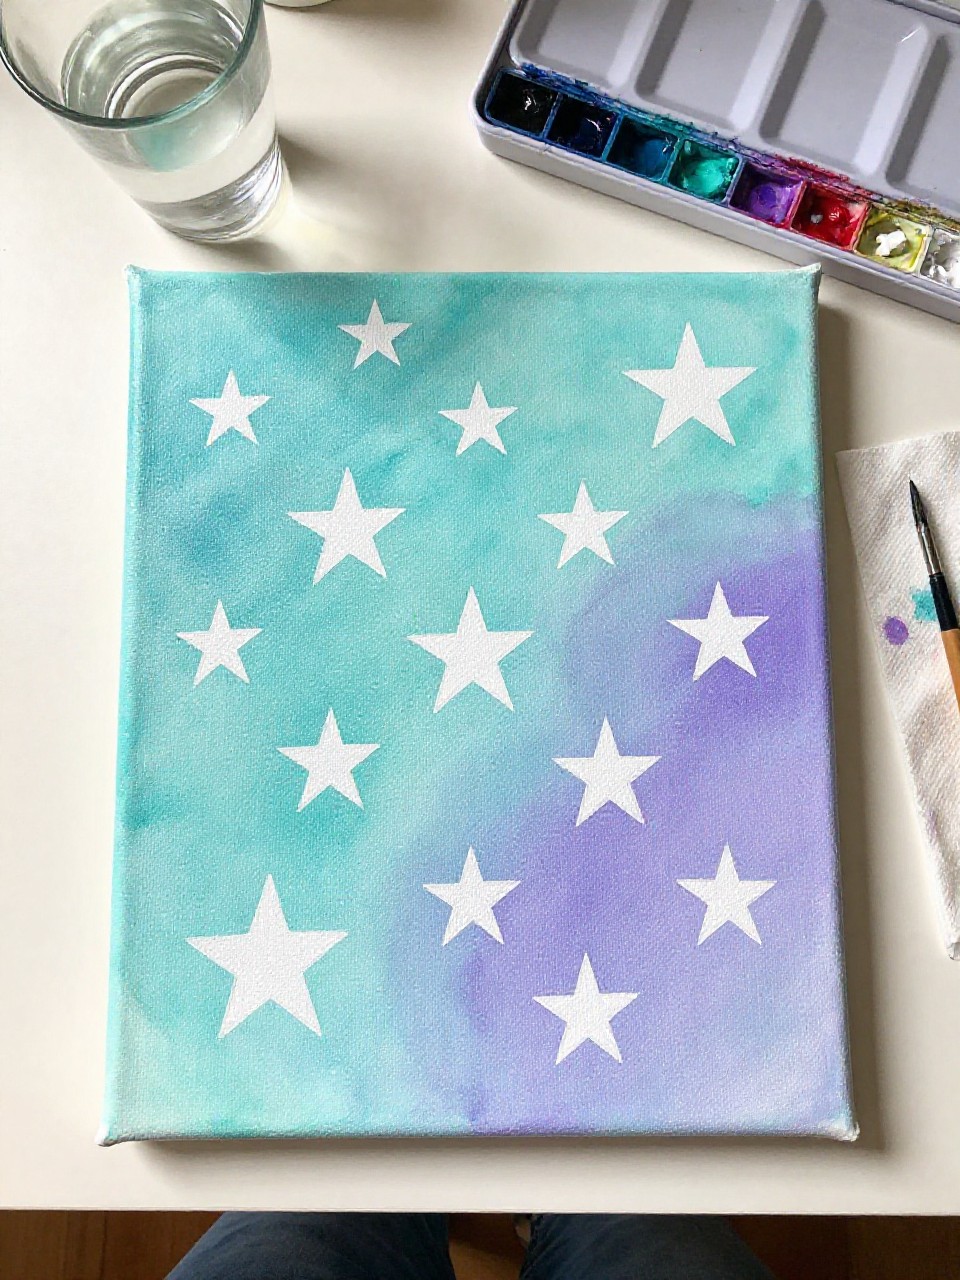
1. Midnight Ombre Star Canvas
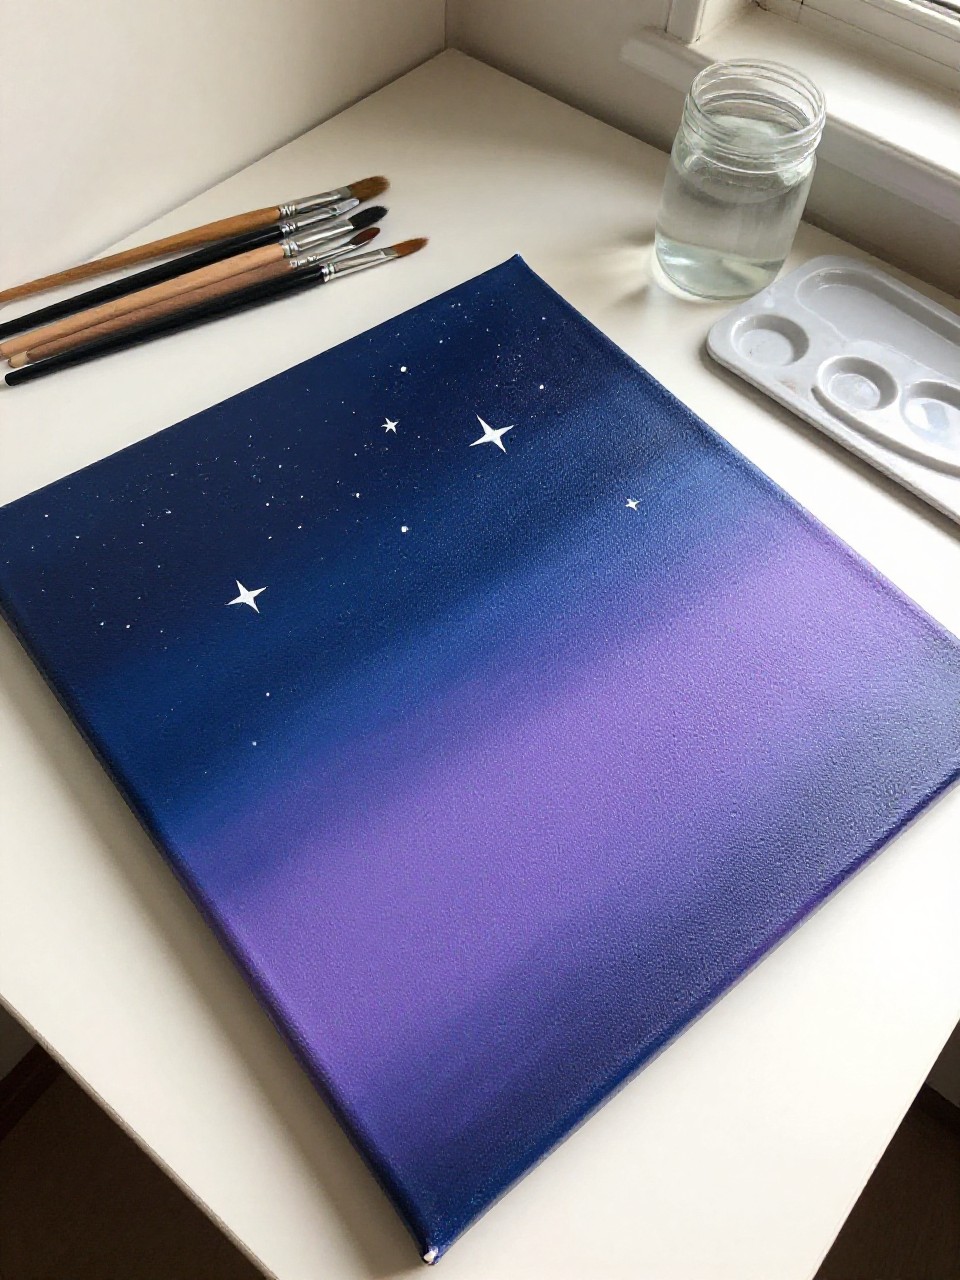
This canvas looks like a smooth night sky that fades from deep navy to soft purple, with bright white stars scattered across it. It’s satisfying because you get quick results with simple blending, and beginners can keep the stars loose and imperfect while it still looks magical.
Materials Needed:
- Stretched canvas
- Acrylic paint (navy, purple, black, white)
- Paintbrushes in multiple sizes
- Palette or paint tray
- Optional matte varnish
Steps to Make:
For People Who Love to Make Things ✂️
- Paint the whole canvas with a dark navy base and let it get slightly tacky.
- Blend purple into the navy from one corner using a wide brush and light strokes.
- Add a few darker areas with black to create depth in the “sky.”
- Dot and flick white paint to make small stars, then paint a few larger star shapes with a fine brush.
- Let it dry fully and seal with matte varnish for a soft, night-sky finish.
2. Minimal Black-and-White Star Grid Canvas
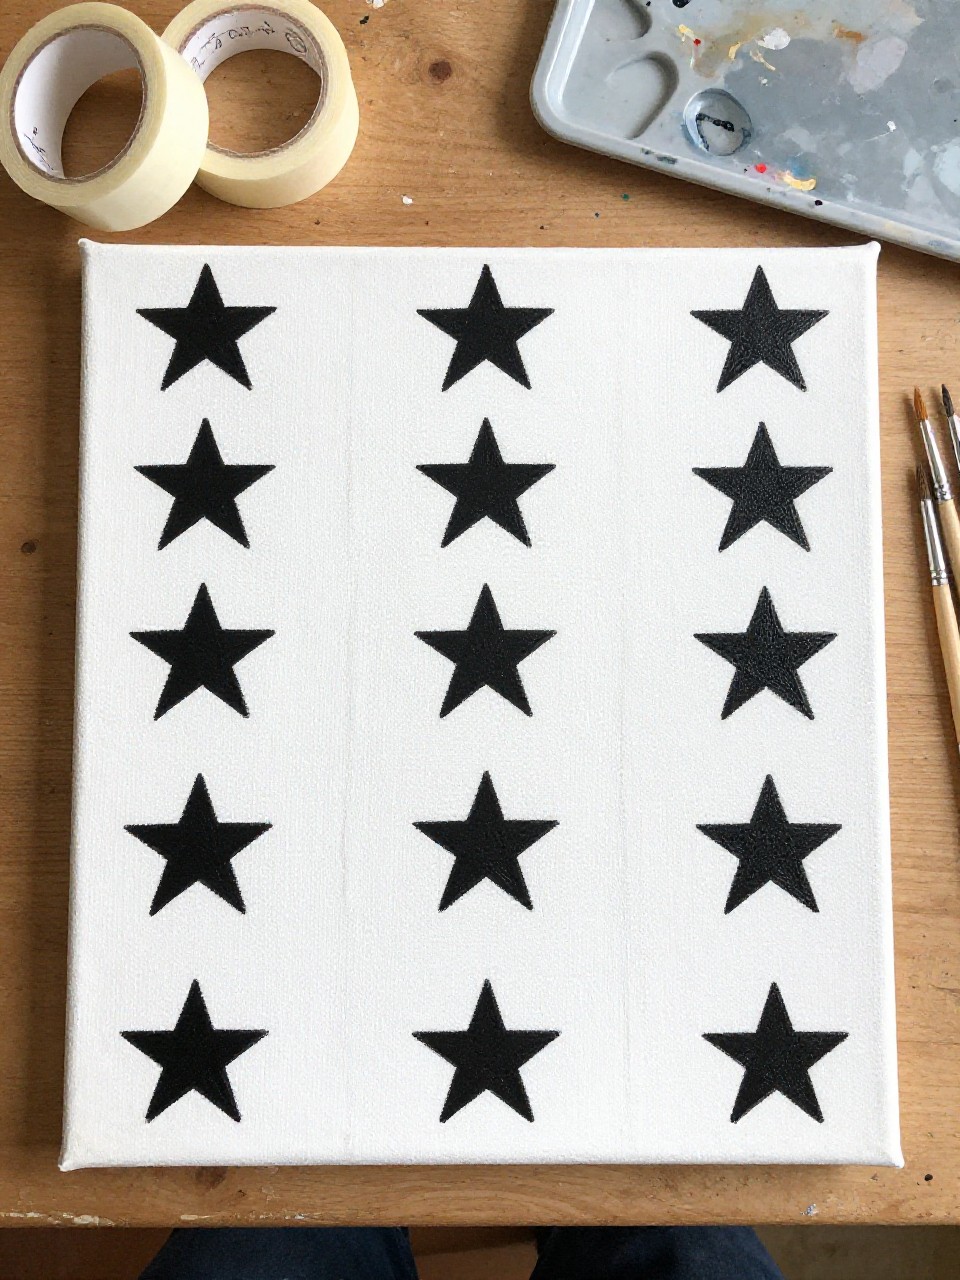
This piece shows a clean grid of simple stars, painted in black and white like modern wall art. It’s great for beginners because you can use painter’s tape for crisp rows, and the repeating pattern feels calming and organized while you paint.
Materials Needed:
- Stretched canvas
- Acrylic paint (black, white)
- Paintbrushes in multiple sizes
- Palette or paint tray
- Painter’s tape
- Optional satin varnish
Steps to Make:
- Lightly mark a grid with pencil, or lay painter’s tape to guide even rows.
- Paint the background white (or leave it white if the canvas is pre-primed).
- Use a small brush to paint simple five-point stars in alternating squares.
- Add tiny dots or short lines around a few stars for extra sparkle without clutter.
- Peel tape after the paint sets, then let dry and seal with satin varnish.
3. Gold Starburst Center Canvas
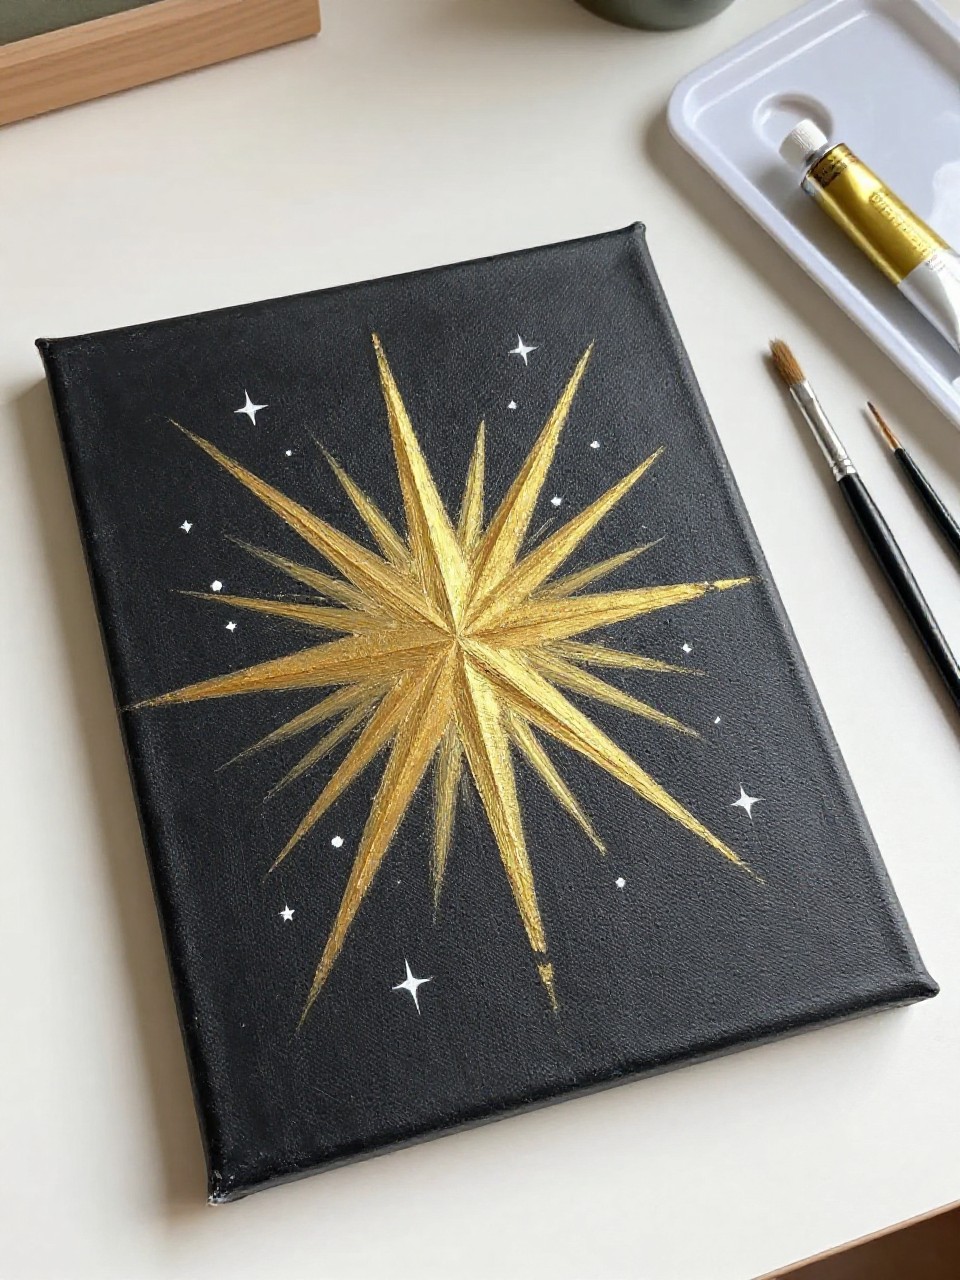
This canvas has one bold starburst in the center, with radiating lines and tiny stars sprinkled outward like a gentle explosion of light. It’s relaxing because you can paint slowly from the middle out, and it makes a strong statement even if your lines aren’t perfect.
Materials Needed:
- Stretched canvas
- Acrylic paint (charcoal, gold, white)
- Paintbrushes in multiple sizes
- Palette or paint tray
- Optional gloss varnish
Steps to Make:
- Paint the canvas a charcoal gray background and let it dry.
- Mark a small center point, then sketch light rays outward with a pencil.
- Paint the rays with gold, letting some strokes show texture and uneven edges.
- Add white star dots and a few small star shapes between rays to fill space.
- Dry completely and add gloss varnish so the gold catches the light.
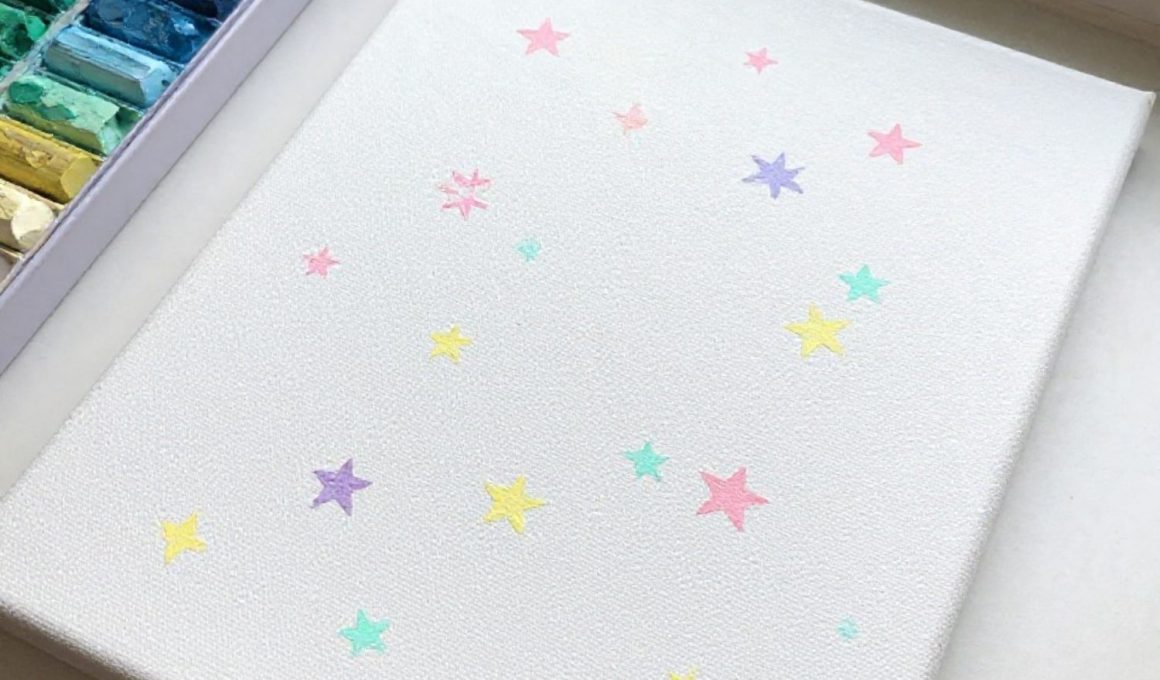
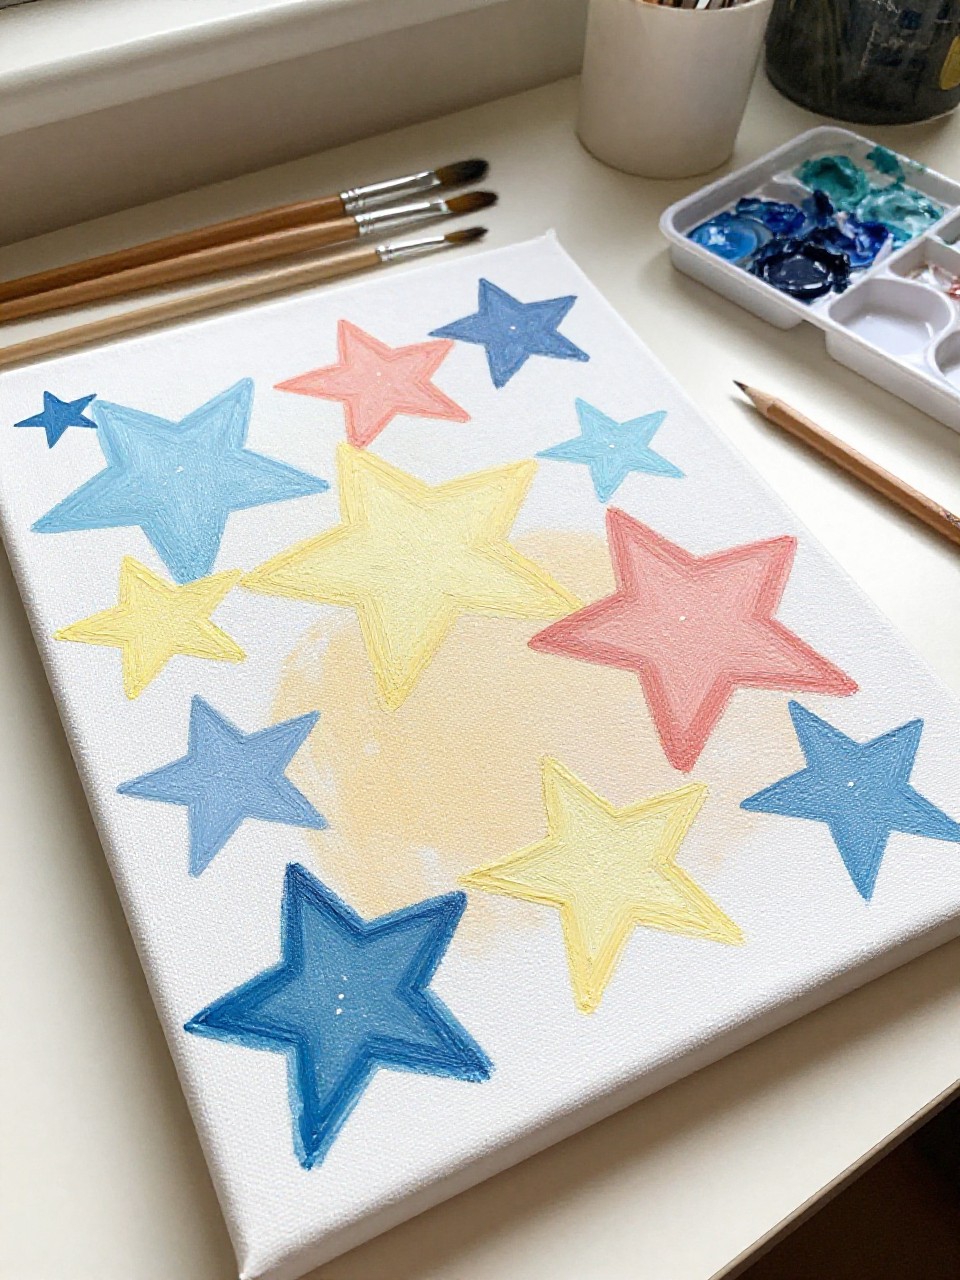
4. Pastel Star Confetti Canvas
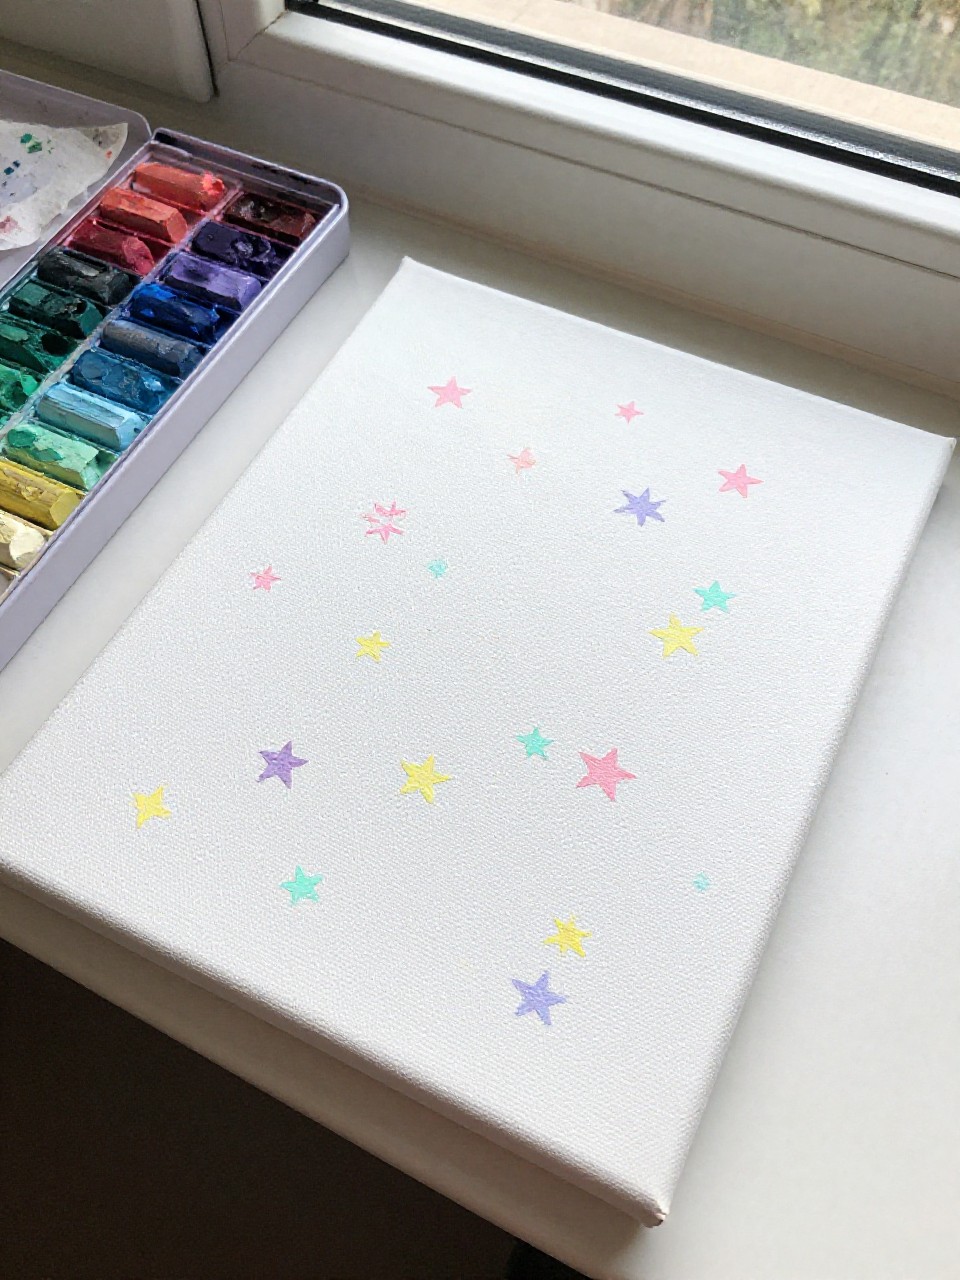
This painting looks like soft confetti made from tiny pastel stars floating across a light background. It’s perfect for beginners because each star is small and forgiving, and it’s a cheerful option for bedrooms, nurseries, or a craft room wall.
Materials Needed:
- Stretched canvas
- Acrylic paint (pastel pink, mint, lavender, pale yellow, white)
- Paintbrushes in multiple sizes
- Palette or paint tray
- Optional matte varnish
Steps to Make:
- Paint a pale base color across the canvas and let it dry.
- Lightly scatter star placements with a pencil so the pattern feels random but balanced.
- Paint small five-point stars in different pastel colors, varying size as you go.
- Layer a few stars on top of others with slightly thicker paint for a textured look.
- Let dry and seal with matte varnish for a soft, powdery finish.
5. Constellation Lines and Stars Canvas
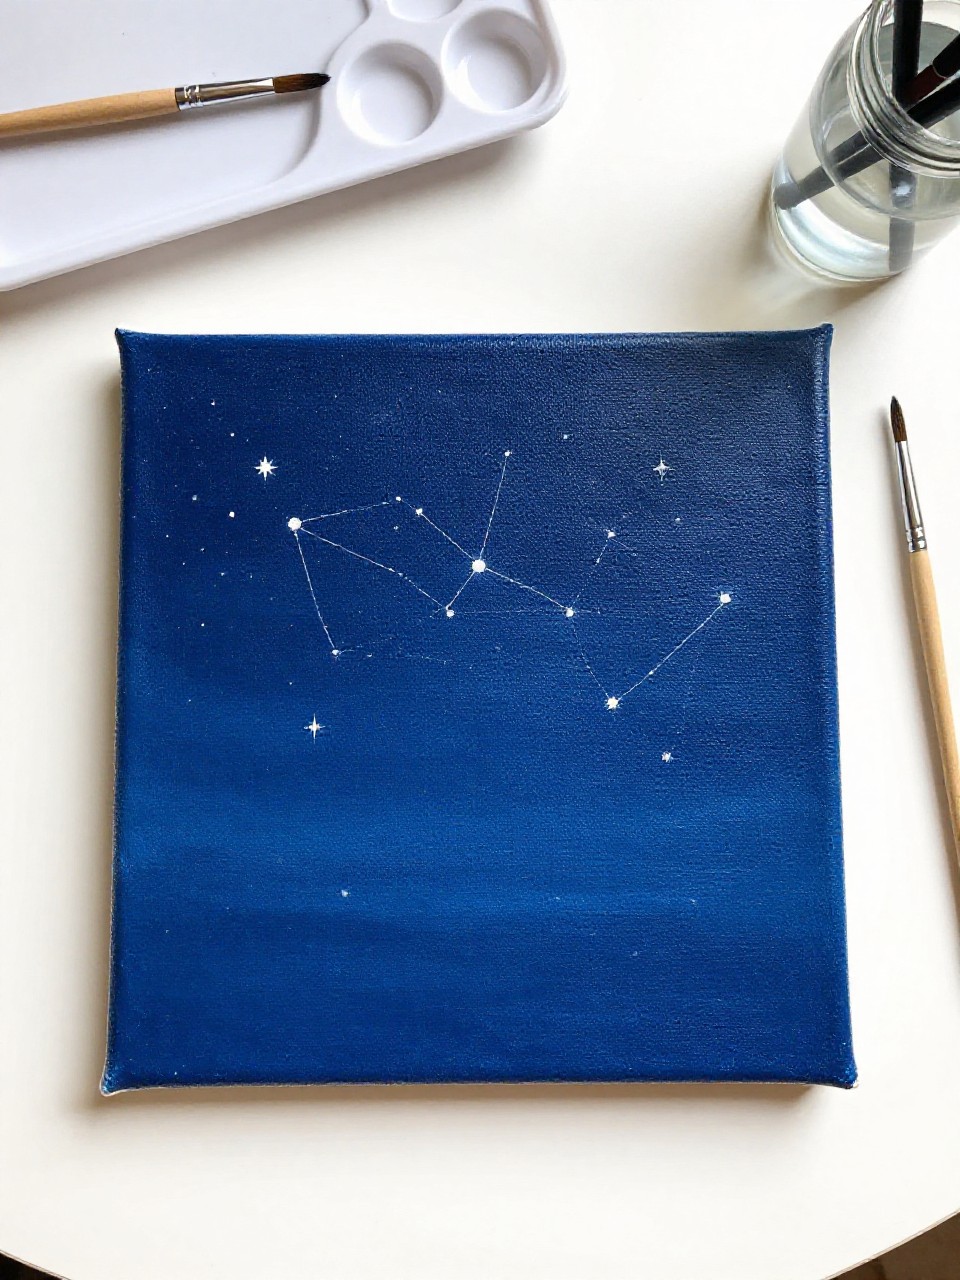
This canvas shows a few simple constellations made from dots and thin connecting lines, like a clean map of the sky. It’s satisfying for beginners because the design is mostly dots and short strokes, and you can pick constellations that feel meaningful.
Materials Needed:
- Stretched canvas
- Acrylic paint (deep blue, white, light gray)
- Paintbrushes in multiple sizes
- Palette or paint tray
- Optional matte varnish
Steps to Make:
- Paint the canvas deep blue and add a few darker patches for sky depth.
- Dot white “stars” across the surface, leaving small clusters for constellations.
- Use a fine brush to connect selected stars with thin light-gray lines.
- Add a few brighter, thicker white stars to make the constellations stand out.
- Dry fully and seal with matte varnish to keep the night-sky look.
6. Rainbow Gradient Star Stack Canvas
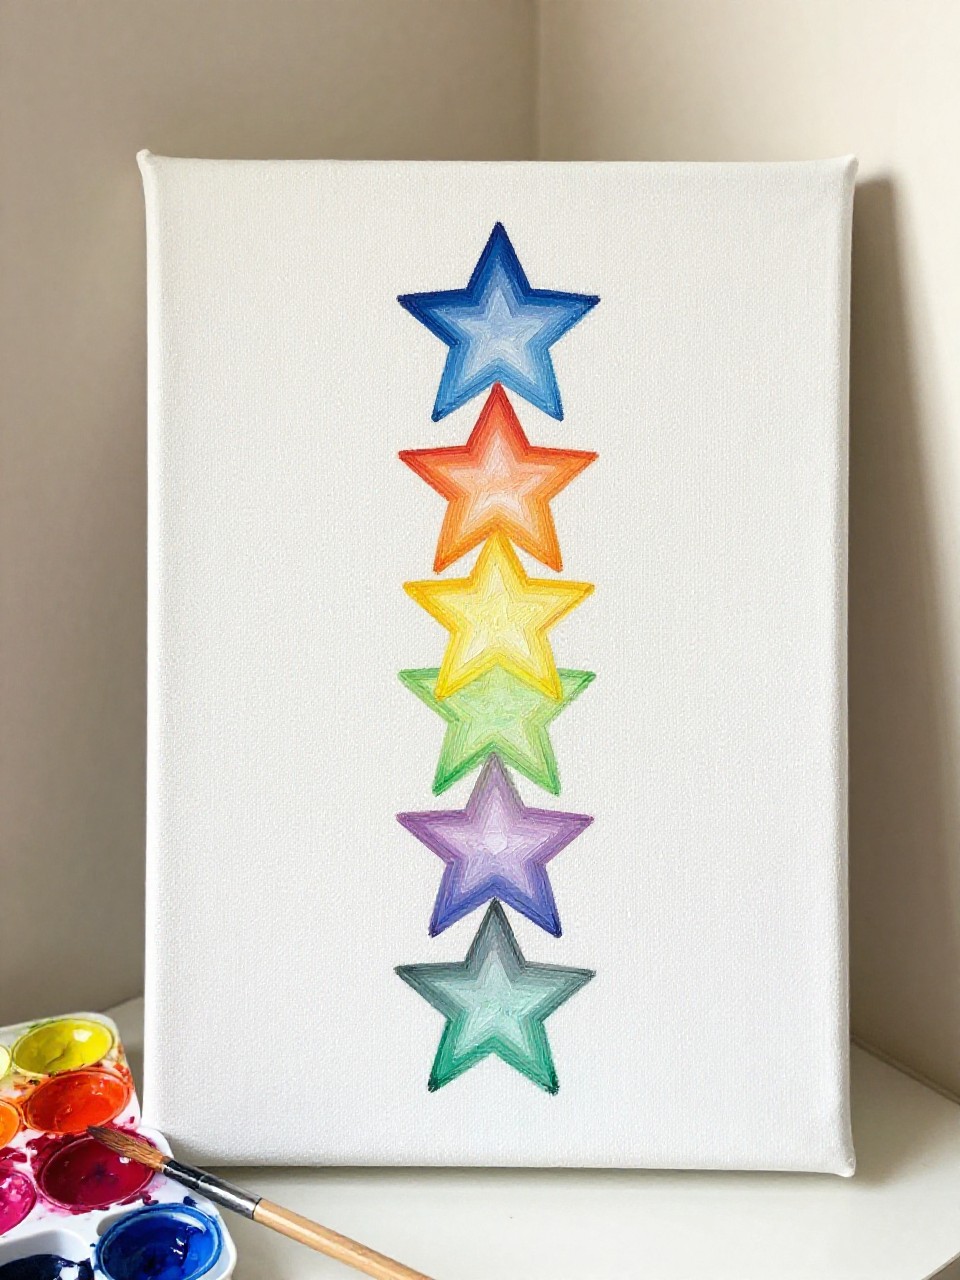
This painting shows a vertical stack of stars, each one painted a different shade as the colors shift like a rainbow. It’s great if you like neat, repeating shapes, and it feels rewarding because you can watch the gradient build step by step.
Materials Needed:
- Stretched canvas
- Acrylic paint (red, orange, yellow, green, blue, purple, white)
- Paintbrushes in multiple sizes
- Palette or paint tray
- Optional satin varnish
Steps to Make:
- Paint the background white or a very pale gray and let it dry.
- Lightly draw a centered column where your stars will line up.
- Paint the top star red, then move downward changing colors gradually to purple.
- Add thin white highlights on one side of each star to give a soft glow.
- Let dry and seal with satin varnish for gentle shine.
7. Navy Background with Tiny Copper Stars Canvas
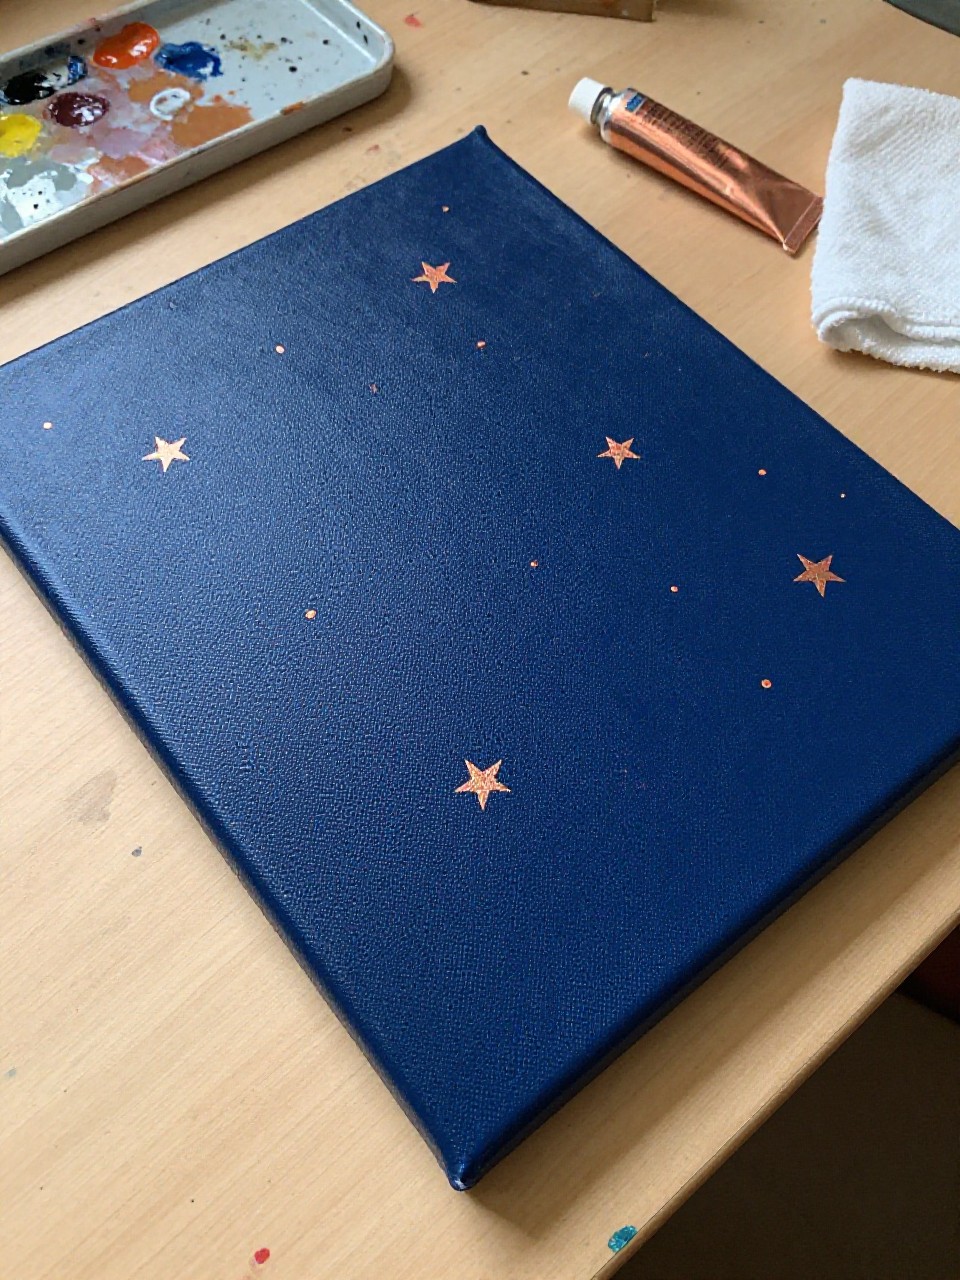
This canvas looks like a deep navy sky filled with tiny copper stars that shimmer when light hits the paint texture. It’s a soothing project for beginners because the stars are quick to dab on, and the simple color combo looks polished on a wall.
Materials Needed:
- Stretched canvas
- Acrylic paint (navy, copper/metallic, black)
- Paintbrushes in multiple sizes
- Palette or paint tray
- Optional gloss varnish
Steps to Make:
- Paint the canvas navy, then deepen a few corners with black for contrast.
- Use a small round brush to dab copper stars in varied sizes across the canvas.
- Add a handful of copper dots between stars to make the pattern feel full.
- Layer a second coat on a few stars so they look brighter and thicker.
- Let dry and seal with gloss varnish to help the metallic paint shine.
8. Watercolor-Style Star Wash Canvas (Acrylic Technique)
This canvas has soft, cloudy color washes with crisp little stars floating on top, like a dreamy galaxy. It’s perfect if you want a gentle, relaxing painting session, and beginners can get the look using watered-down acrylic paint and light layering.
Materials Needed:
- Stretched canvas
- Acrylic paint (teal, violet, white)
- Paintbrushes in multiple sizes
- Palette or paint tray
- Cup of water (for thinning paint)
- Optional matte varnish
Steps to Make:
- Wet a wide brush and lay thin teal and violet washes across the canvas.
- Blend the colors while they’re still damp, letting streaks and patches stay visible.
- Once dry, paint small white stars on top using a fine brush for clean points.
- Add a few soft white “mist” areas with dry brushing to create depth behind stars.
- Dry completely and seal with matte varnish to keep the dreamy look.
9. Bold Primary Stars on Color Blocks Canvas
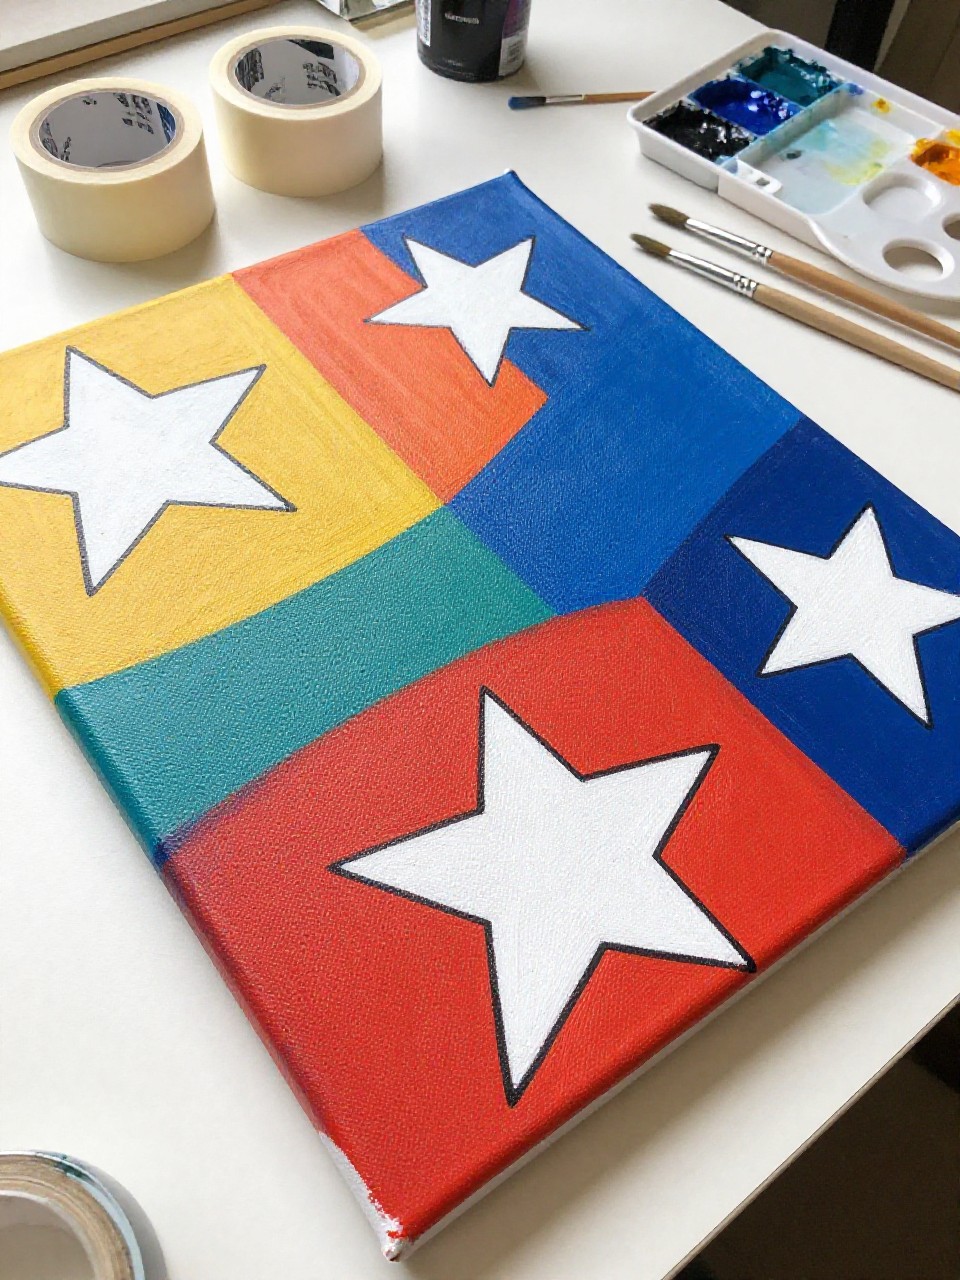
This canvas is made of big color blocks with bold star shapes sitting on top, almost like playful poster art. It’s great for beginners because you can tape straight edges, fill in flat shapes, and still see real brush texture that makes it feel handmade.
Materials Needed:
- Stretched canvas
- Acrylic paint (red, blue, yellow, white, black)
- Paintbrushes in multiple sizes
- Palette or paint tray
- Painter’s tape
- Optional satin varnish
Steps to Make:
- Tape off 3–5 large sections and paint each block a different primary color.
- Remove tape after the paint sets so the edges stay clean.
- Paint large white stars overlapping the color blocks, keeping the points simple.
- Outline a few stars with thin black lines for a graphic, bold finish.
- Let dry and seal with satin varnish for a bright, clean look.
10. Soft Neutral Stars with Speckled Background Canvas
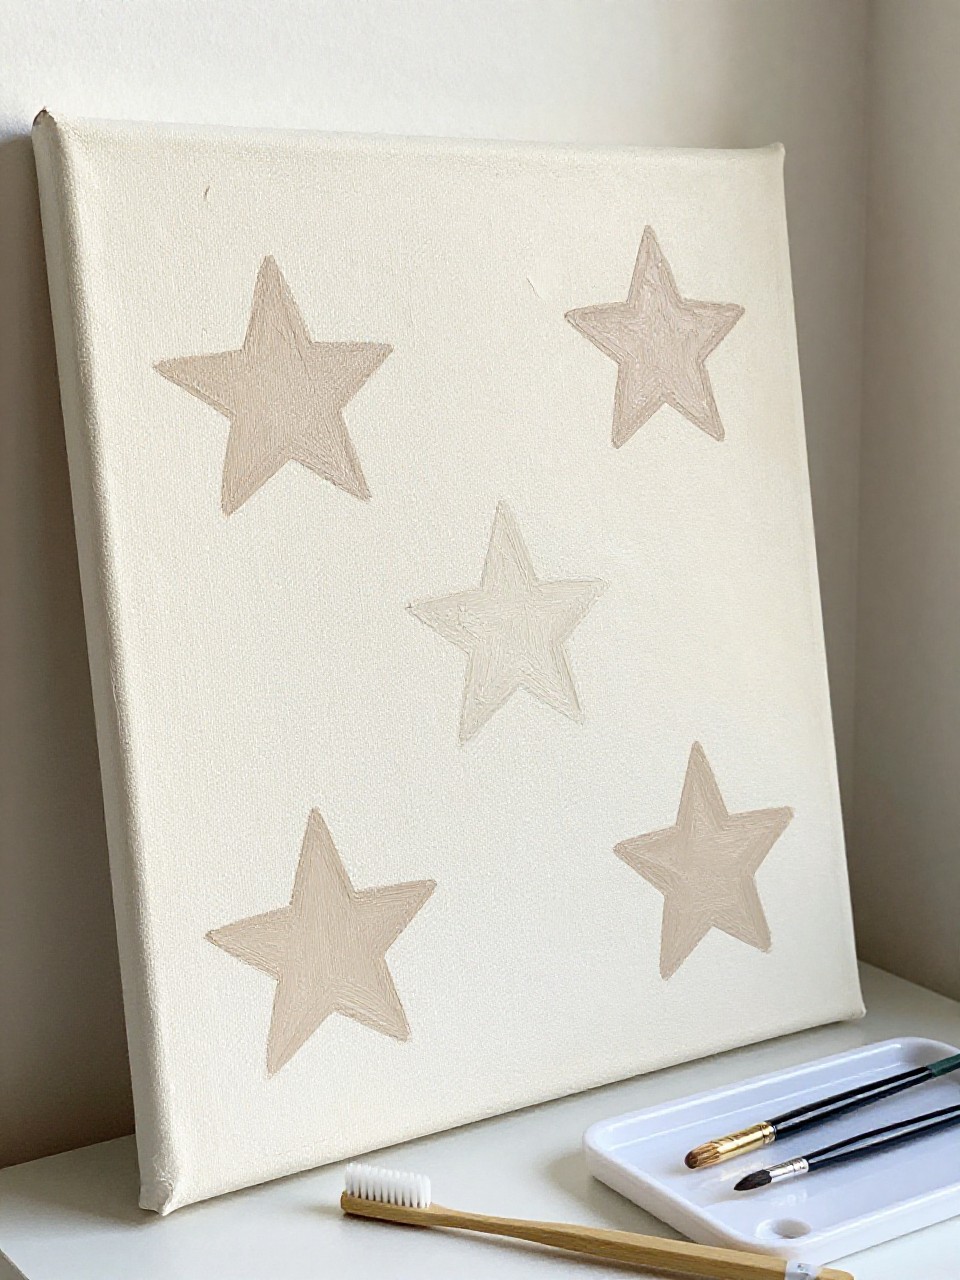
This canvas shows warm beige and cream stars floating over a lightly speckled background, like cozy modern decor. It’s a calm project if you like muted colors, and it’s beginner-friendly because the speckles and soft edges hide tiny mistakes.
Materials Needed:
- Stretched canvas
- Acrylic paint (cream, beige, taupe, white)
- Paintbrushes in multiple sizes
- Palette or paint tray
- Old toothbrush (for speckles)
- Optional matte varnish
Steps to Make:
- Paint a warm cream base and let it dry fully.
- Lightly sketch several medium stars across the canvas with pencil.
- Paint the stars in beige and taupe, leaving slightly uneven brush edges for softness.
- Load a toothbrush with thinned taupe paint and flick gentle speckles around the stars.
- Dry and seal with matte varnish for a cozy, chalky finish.
11. Spiral Galaxy Star Swirl Canvas
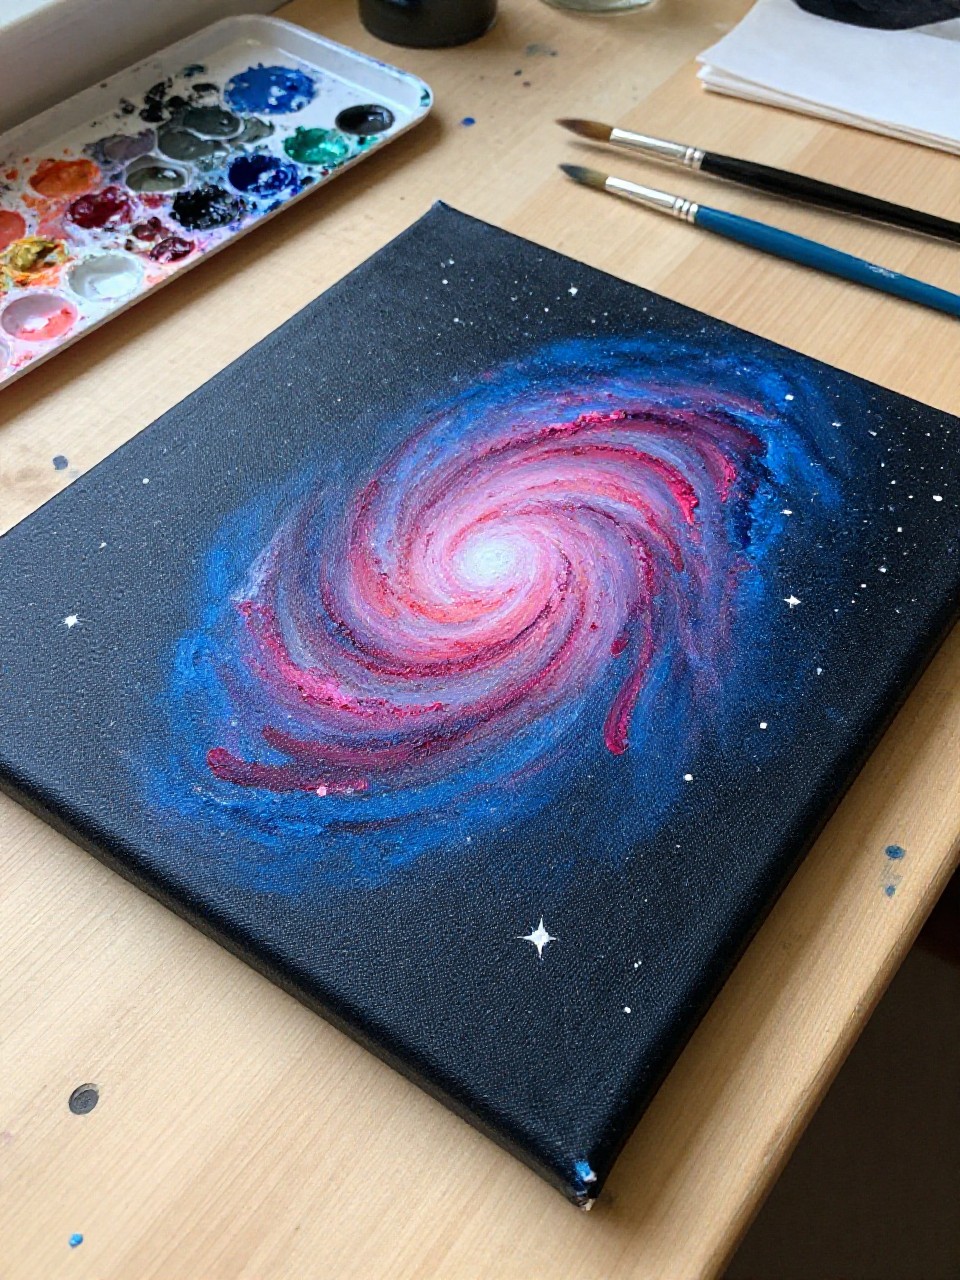
This painting looks like a swirling galaxy, with a spiral of blended color and tiny stars trailing around the curve. It’s satisfying because the spiral guides your brush, and beginners can keep the swirl loose while still getting a dramatic, space-themed result.
Materials Needed:
- Stretched canvas
- Acrylic paint (black, blue, magenta, white)
- Paintbrushes in multiple sizes
- Palette or paint tray
- Optional gloss varnish
Steps to Make:
- Paint the canvas black and let it dry so later colors stay bright.
- Sketch a light spiral path starting from the center and curling outward.
- Blend blue and magenta along the spiral using curved brush strokes that follow the swirl.
- Add white dots and a few tiny star shapes concentrated near the spiral arms.
- Let dry and seal with gloss varnish for a space-like shine.
12. Stenciled Star Border Frame Canvas
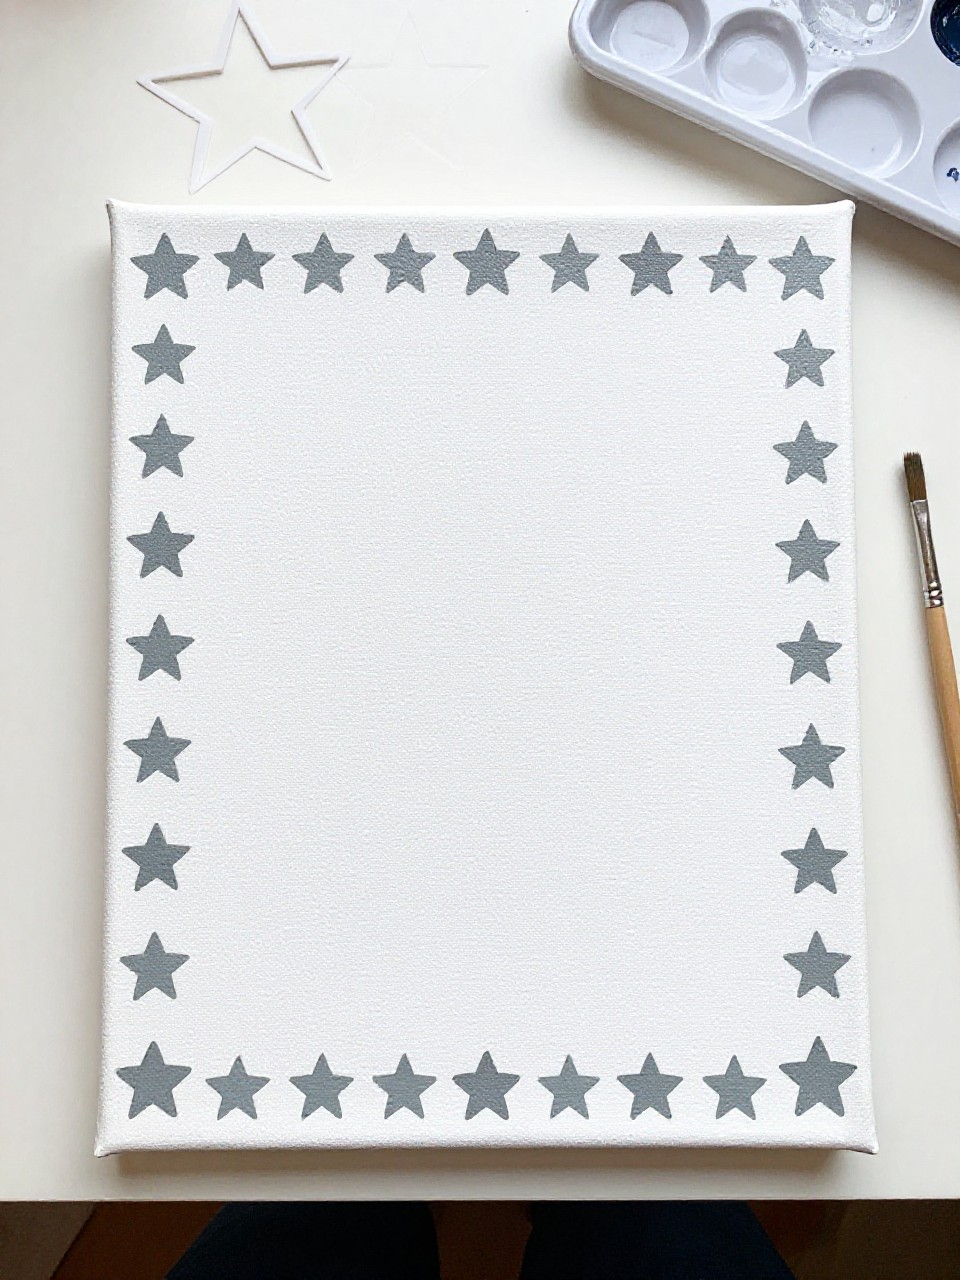
This canvas has a simple center area with a neat star border running around the edges like a framed pattern. It’s great for beginners who want structure, and it makes an easy piece of decor for hallways or above a desk without feeling too busy.
Materials Needed:
- Stretched canvas
- Acrylic paint (any two colors, plus white)
- Paintbrushes in multiple sizes
- Palette or paint tray
- Star stencil (or cardstock cutout)
- Optional matte varnish
Steps to Make:
- Paint the canvas a solid base color and let it dry.
- Mark a border area around the edges with light pencil lines.
- Hold a star stencil in place and dab paint to build a repeating star border.
- Add small dot details between stars to make the frame feel finished.
- Dry completely and seal with matte varnish, then hang like a framed print.
13. Shooting Star Trail Canvas

This canvas shows one bright shooting star with a long trail that fades across the sky, plus a few small stars in the background. It’s a relaxing project because you only focus on one main shape, and the streaky trail looks pretty even if your blending is imperfect.
Materials Needed:
- Stretched canvas
- Acrylic paint (deep blue, black, white, pale yellow)
- Paintbrushes in multiple sizes
- Palette or paint tray
- Optional satin varnish
Steps to Make:
- Paint a deep blue sky and shade the edges with black for a night effect.
- Mark the shooting star path with a light pencil line across the canvas.
- Paint a small bright star at the front using white mixed with pale yellow.
- Pull paint backward with a soft brush to create a fading trail, then add tiny background stars.
- Let dry and seal with satin varnish for a gentle glow.
14. Layered Star Silhouette Canvas (Stars Within Stars)
This canvas shows large star shapes layered on top of each other, like a stack of silhouettes, with smaller stars tucked inside. It’s beginner-friendly because you can paint one layer at a time, and the overlapping edges create depth without needing complex shading.
Materials Needed:
- Stretched canvas
- Acrylic paint (3–4 coordinating colors, plus white)
- Paintbrushes in multiple sizes
- Palette or paint tray
- Optional matte varnish
Steps to Make:
- Paint a light base color and let it dry completely.
- Sketch one large star in the center, then smaller stars inside it.
- Paint the largest star first, then paint smaller stars on top in new colors.
- Add tiny white dots and short sparkle marks around the edges for contrast.
- Dry fully and seal with matte varnish for a smooth, layered look.
15. Night Sky Star Pattern Diptych (Two Small Canvases)
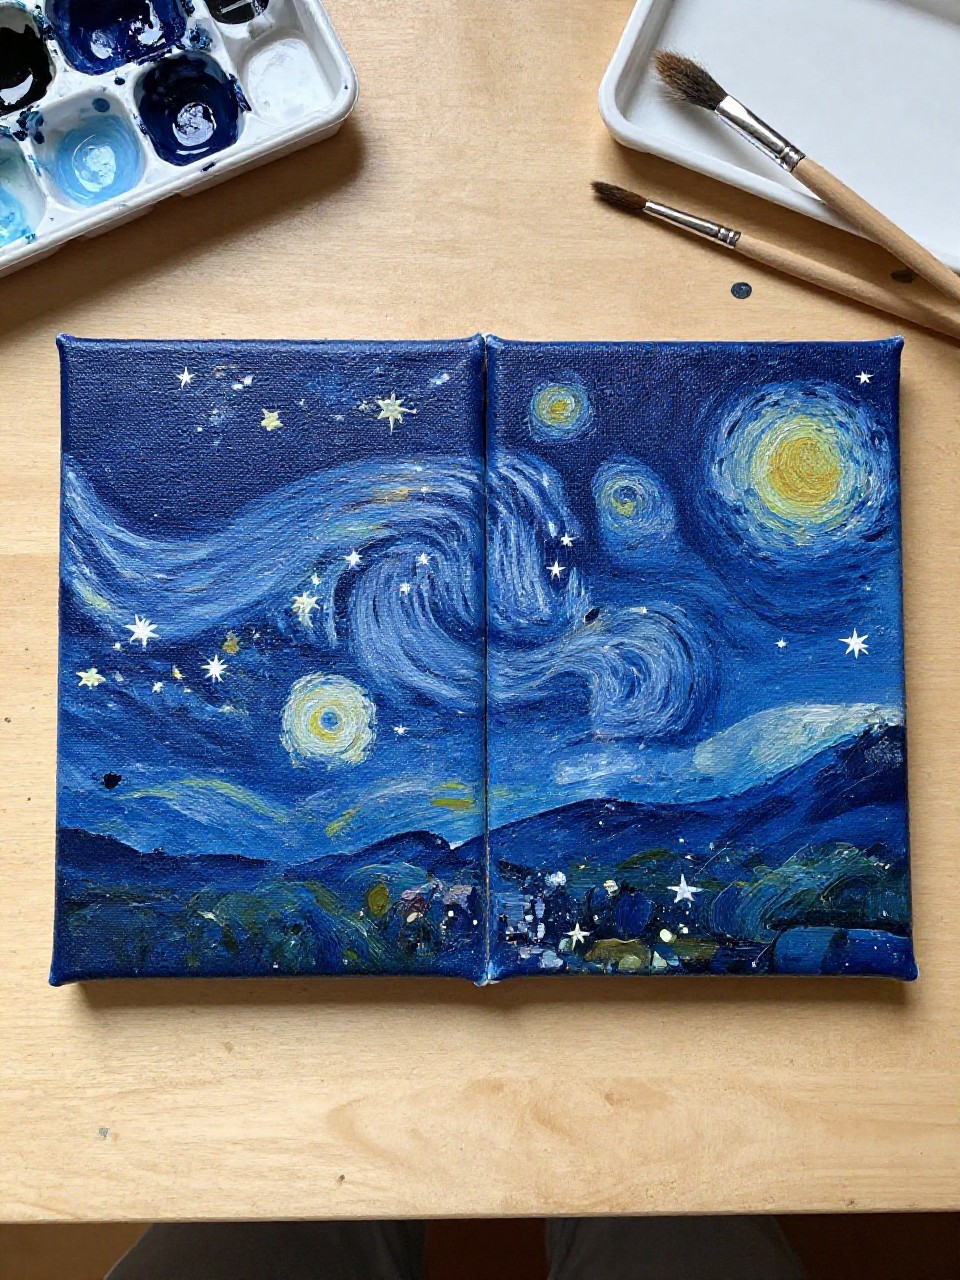
This project is two small canvases that form one big star pattern when hung side by side, like a split night sky. It’s fun for beginners because each canvas feels less intimidating, and the matching star scatter makes the pair look like a real set.
Materials Needed:
- Two small stretched canvases
- Acrylic paint (navy, black, white, silver)
- Paintbrushes in multiple sizes
- Palette or paint tray
- Optional gloss varnish
Steps to Make:
- Place the two canvases together and paint a continuous navy background across both.
- Add darker black shading near the outer edges to frame the set.
- Dot white and silver stars across both canvases, carrying the pattern from one to the other.
- Paint 3–5 larger stars that cross near the “seam” so the pair feels connected.
- Dry fully, seal with gloss varnish, and hang with a small gap between canvases.
16. Textured Raised-Paint Stars Canvas
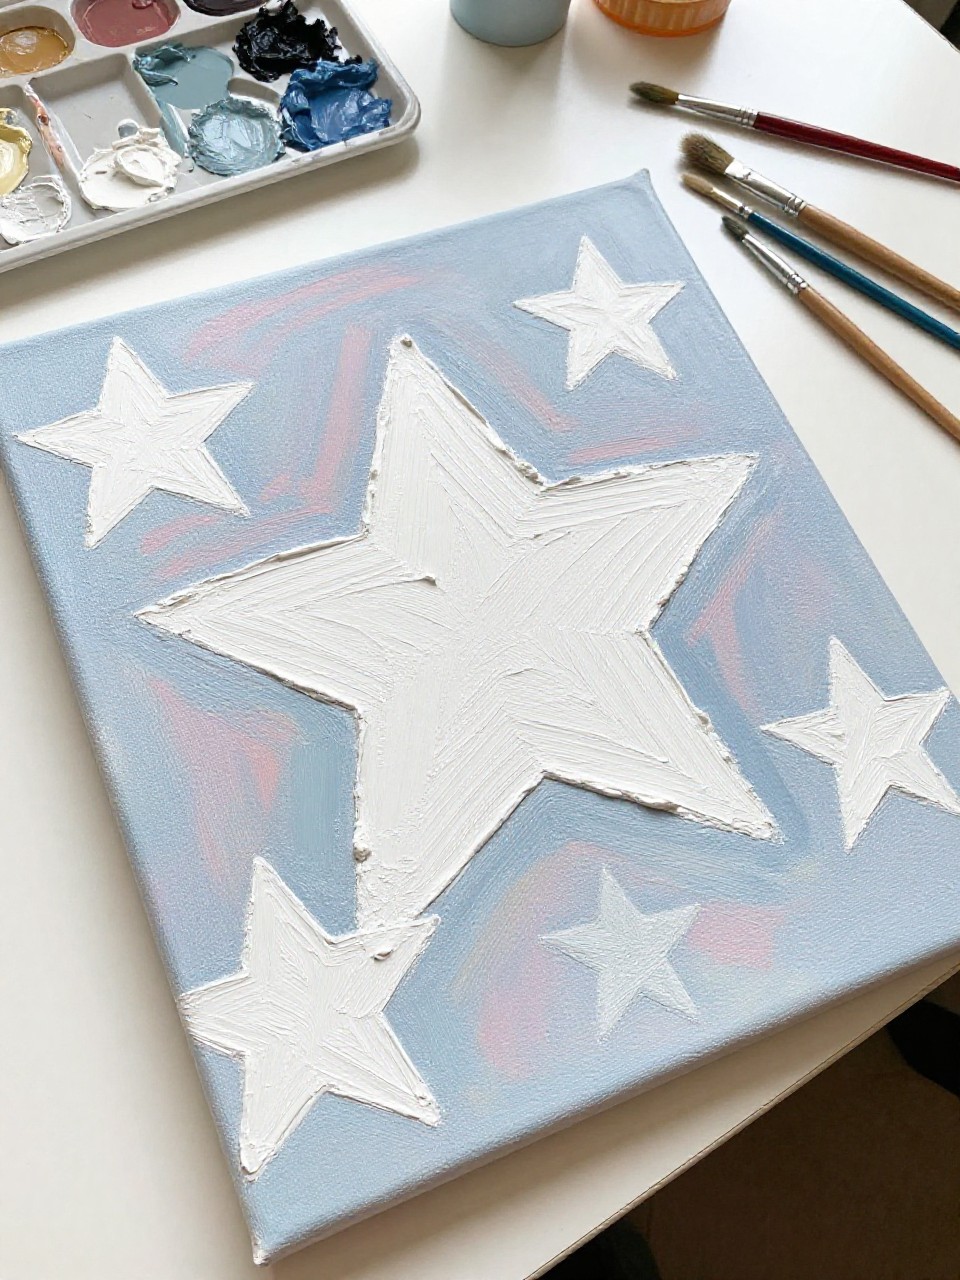
This canvas features chunky, raised stars you can actually feel, with thick paint ridges and layered color underneath. It’s especially satisfying if you like texture, and beginners can make it look impressive by simply building paint up in a few areas.
Materials Needed:
- Stretched canvas
- Acrylic paint (any background color + white + accent color)
- Paintbrushes in multiple sizes
- Palette or paint tray
- Optional modeling paste (for extra texture)
- Optional matte varnish
Steps to Make:
- Paint a solid background and let it dry so the raised stars stay clean.
- Mix white acrylic with a little modeling paste, or use thick paint straight from the tube.
- Paint star shapes with a small brush, letting the paint sit high and textured on the canvas.
- Add a thin accent color shadow on one side of each star to make them pop.
- Let dry overnight and seal gently with matte varnish without flattening the texture.