

Table of Contents Show
Spring can sneak up fast. One minute you’re wearing a sweater, the next you’re craving fresh flowers, color, and something new in your home. If you’ve felt stuck or too busy to be “crafty,” this weekend is a perfect reset. These cute, easy projects look fancy but are simple to make, even if you’re a beginner.

Pick one (or a few!), turn on a playlist, and let your hands do something calming and creative. By Sunday night, you’ll have pretty little wins that make your space feel alive again.
1. Pressed Flower Window Suncatchers

These look like tiny stained-glass panels, but they’re made with simple supplies. Sunlight shines through the petals and colors your room with a soft glow. Hang them in the kitchen window or a bright hallway.
Materials Needed:
- Clear contact paper
- Pressed flowers or leaves
- Thin ribbon or twine
- Scissors
How to make it:
- 1. Cut two identical rectangles of contact paper.
- 2. Peel the backing from one and arrange pressed flowers face down.
- 3. Seal with the second sheet, sticky sides together, smoothing bubbles.
- 4. Trim edges, punch a hole, and tie ribbon to hang.
2. Speckled Eggshell Planters

Turn empty eggshells into tiny, modern planters with a speckled paint look. They’re adorable lined up on a windowsill and perfect for herbs or succulents.
Materials Needed:
- Clean halved eggshells
- Acrylic paint (white and black)
- Small succulents or soil and seeds
- Small paintbrush/toothbrush
How to make it:
- 1. Paint eggshells white and let dry.
- 2. Flick black paint with a toothbrush to create speckles; dry fully.
- 3. Fill shells with potting soil or a mini succulent.
- 4. Set in an egg carton or small dish for display.
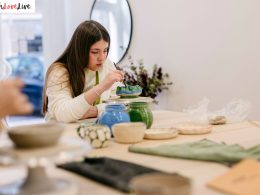
3. Clay Daisy Trinket Dish

This petite dish looks like a ceramic piece from a boutique but uses air-dry clay. The soft petal edges and matte finish feel sweet and springy on a nightstand.
Materials Needed:
- Air-dry clay
- Acrylic paint (white, yellow)
- Rolling pin or bottle
- Small bowl (as a mold)
How to make it:
- 1. Roll clay to 1/8-inch thick and cut a circle slightly larger than your bowl.
- 2. Pinch petal shapes around the edge with your fingers.
- 3. Drape clay over the outside of the bowl to form a dish; dry 24 hours.
- 4. Paint white petals and a yellow center; seal if desired.
4. Painterly Terracotta Herb Pots

Give plain pots a fresh, artsy look with loose brushstrokes and spring colors. The imperfect strokes make them look intentionally chic.
Materials Needed:
- Terracotta pots
- Acrylic paint (pastels)
- Painter’s tape (optional)
- Sealer spray (optional)
How to make it:
- 1. Wipe pots clean and tape any areas for clean lines (optional).
- 2. Brush on loose strokes or simple shapes; layer colors lightly.
- 3. Let dry and add a second coat if needed.
- 4. Seal for durability and plant your herbs.
5. Watercolor Bookmark Garden

Create dreamy, blended watercolor bookmarks that feel like a tiny spring garden. Each one is different and makes reading feel special.
Materials Needed:
- Watercolor paper
- Watercolor paints and brush
- Painter’s tape
- Hole punch and ribbon
How to make it:
- 1. Cut paper into bookmark strips and tape edges to a board.
- 2. Brush water on paper, then drop in watercolor blooms and leaves.
- 3. Let colors blend and dry, then remove tape for crisp edges.
- 4. Punch a hole and add ribbon.
6. Wildflower Seed Paper Hearts
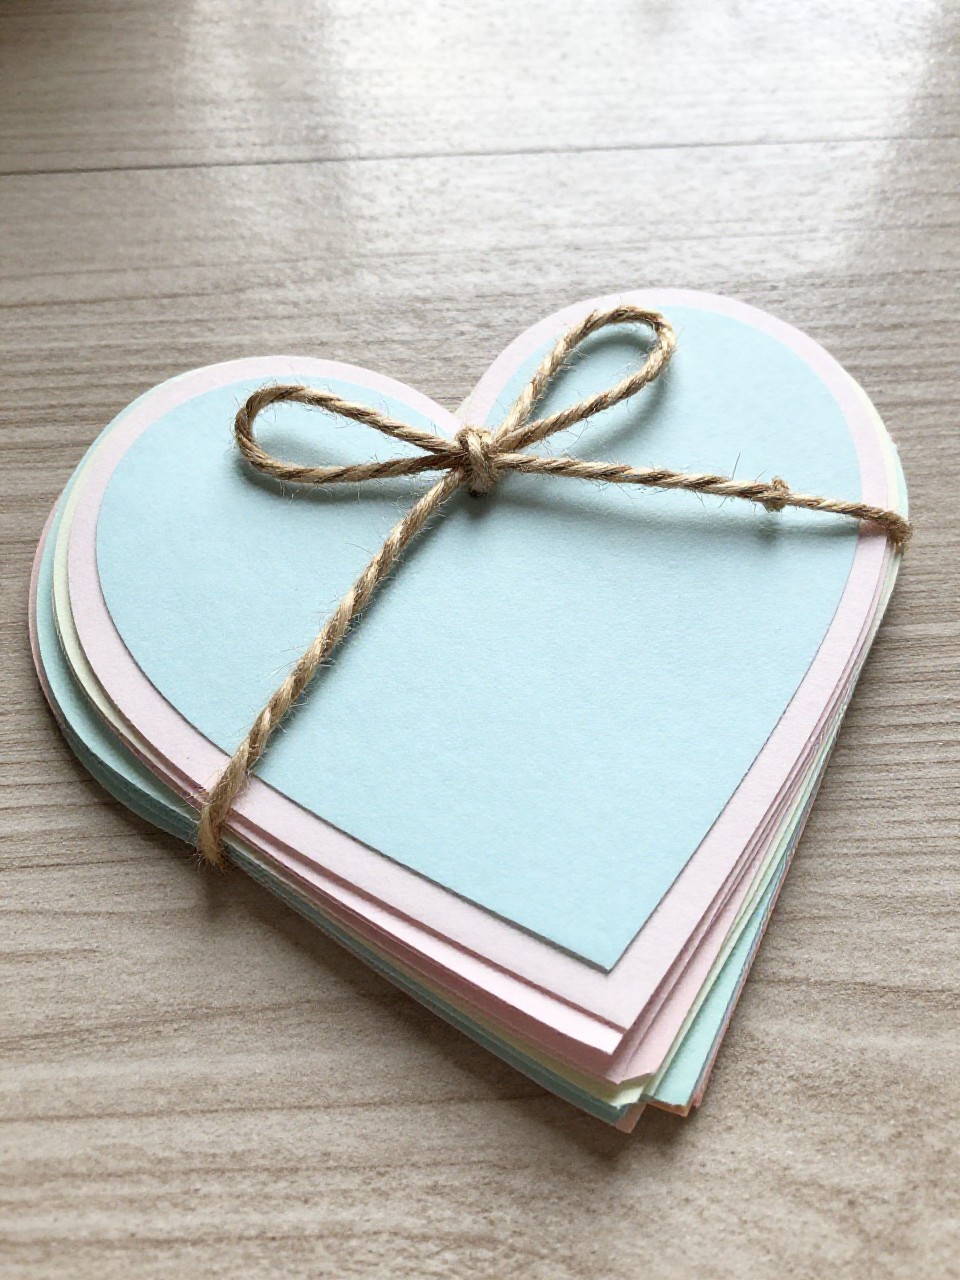
Handmade seed paper looks magical and can be planted later for real flowers. Tuck a note inside and gift to neighbors or teachers.
Materials Needed:
- Scrap paper (white or light colors)
- Wildflower seeds
- Blender
- Heart-shaped cookie cutter
How to make it:
- 1. Tear paper into pieces, soak in warm water 20 minutes.
- 2. Blend into a pulp, then stir in seeds gently.
- 3. Spread pulp into the cookie cutter on a towel; press to flatten.
- 4. Let dry fully, then pop out and trim edges.
7. Fabric-Wrapped Floral Hoop

This hoop looks like a minimalist wreath with soft fabric and faux blooms. Hang it on a wall or door for a light, airy touch.
Materials Needed:
- Embroidery hoop
- Scrap fabric or ribbon
- Faux flowers/greenery
- Hot glue gun
How to make it:
- 1. Wrap fabric around part of the hoop and secure with glue.
- 2. Snip faux stems and arrange in a cluster on the wrapped section.
- 3. Glue greenery first, then flowers on top.
- 4. Add a ribbon loop to hang.
8. Citrus Peel Tea Light Cups

Upcycle orange or grapefruit peels into glowing tea light cups that smell amazing. The warm light through the rind feels cozy and fresh.
Materials Needed:
- Oranges or grapefruits
- Tea lights (LED recommended)
- Spoon
- Small knife
How to make it:
- 1. Halve citrus and gently scoop out fruit, keeping peel intact.
- 2. Pat peels dry with a towel.
- 3. Place a tea light in each peel cup.
- 4. Set on a dish and light when ready (use LED for safety).
9. Painted Checkerboard Picnic Tote

Turn a plain canvas tote into a cheerful picnic bag with a quick grid pattern. It looks designer but only needs tape and paint.
Materials Needed:
- Canvas tote
- Acrylic fabric paint
- Painter’s tape
- Foam brush
How to make it:
- 1. Tape vertical stripes evenly across the tote.
- 2. Paint and let dry; remove tape.
- 3. Tape horizontal stripes; paint a second color.
- 4. Peel tape to reveal a crisp checkerboard.
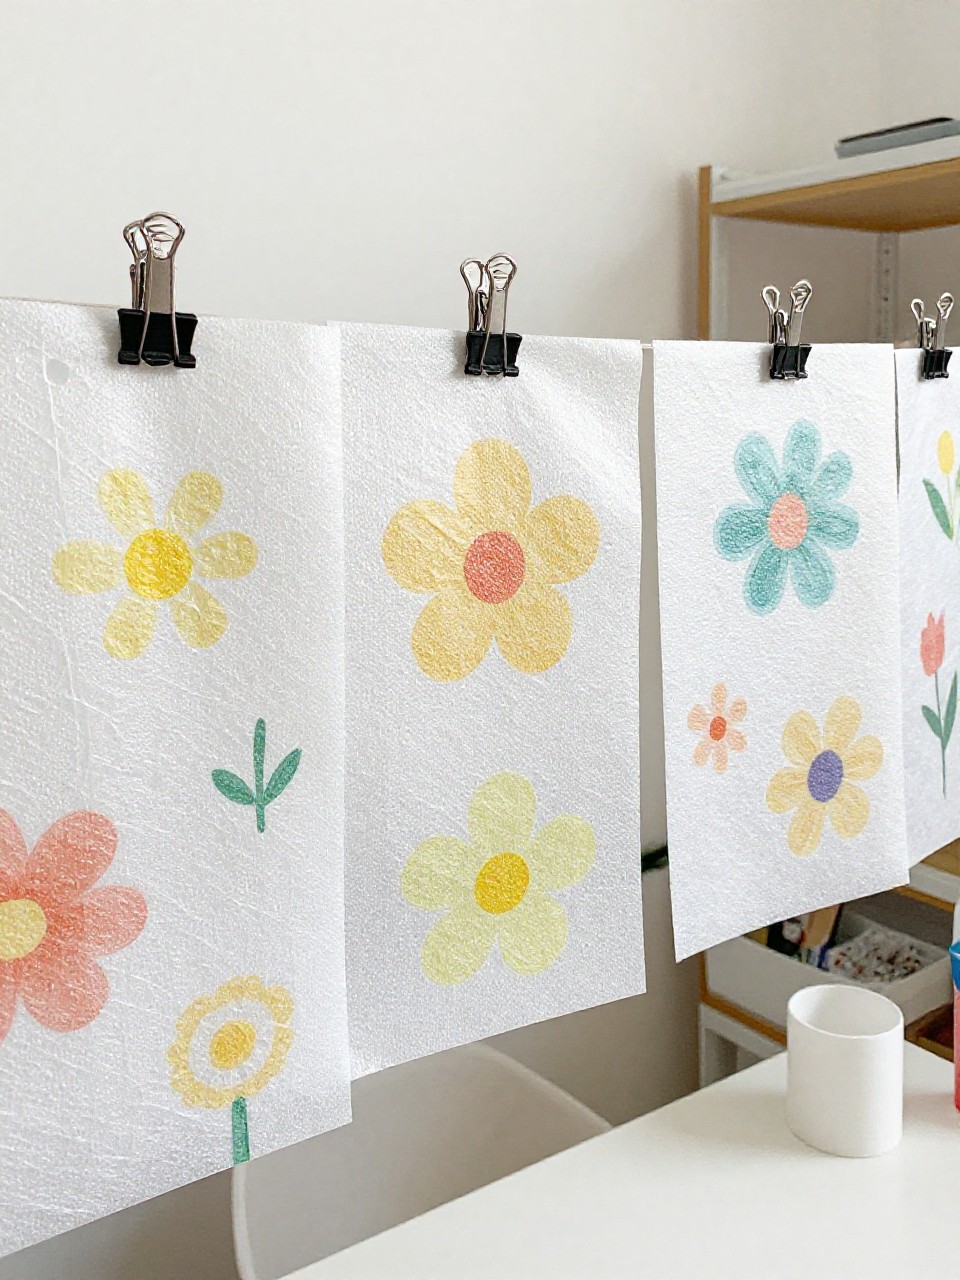
10. Floral Stamped Tea Towels

Carve flowers from a potato or use leaves to stamp sweet patterns. It’s fast, forgiving, and looks boutique-made.
Materials Needed:
- Plain cotton tea towels
- Fabric paint
- Potato or leaves
- Craft knife (if carving)
How to make it:
- 1. Cut a potato in half and carve simple petal or leaf shapes.
- 2. Dip stamp into fabric paint and blot excess.
- 3. Stamp a repeat pattern across the towel.
- 4. Heat-set paint as directed.
11. Bubble Wrap Flower Prints
Use bubble wrap to make textured, poppy-like blooms on cardstock. The dots give a playful, artsy finish.
Materials Needed:
- Bubble wrap
- Acrylic paint
- Cardstock
- Paintbrush
How to make it:
- 1. Paint a circle of color onto bubble wrap.
- 2. Flip and press onto cardstock to print a textured bloom.
- 3. Add stems and leaves with a brush.
- 4. Let dry and frame.
12. Rainbow Bead Sunburst Suncatcher

Thread colorful beads on wire to make a radiant sunburst that sparkles in the window. It looks intricate but builds fast in segments.
Materials Needed:
- Craft wire (thin)
- Assorted glass beads
- Wire cutters
- Small hoop or ring
How to make it:
- 1. Cut short wire lengths and thread beads on each.
- 2. Wrap one end of each beaded wire around the hoop.
- 3. Bend wires outward like rays and secure ends.
- 4. Add a hanging loop and place in a sunny spot.
13. Botanical Painted Matchbox
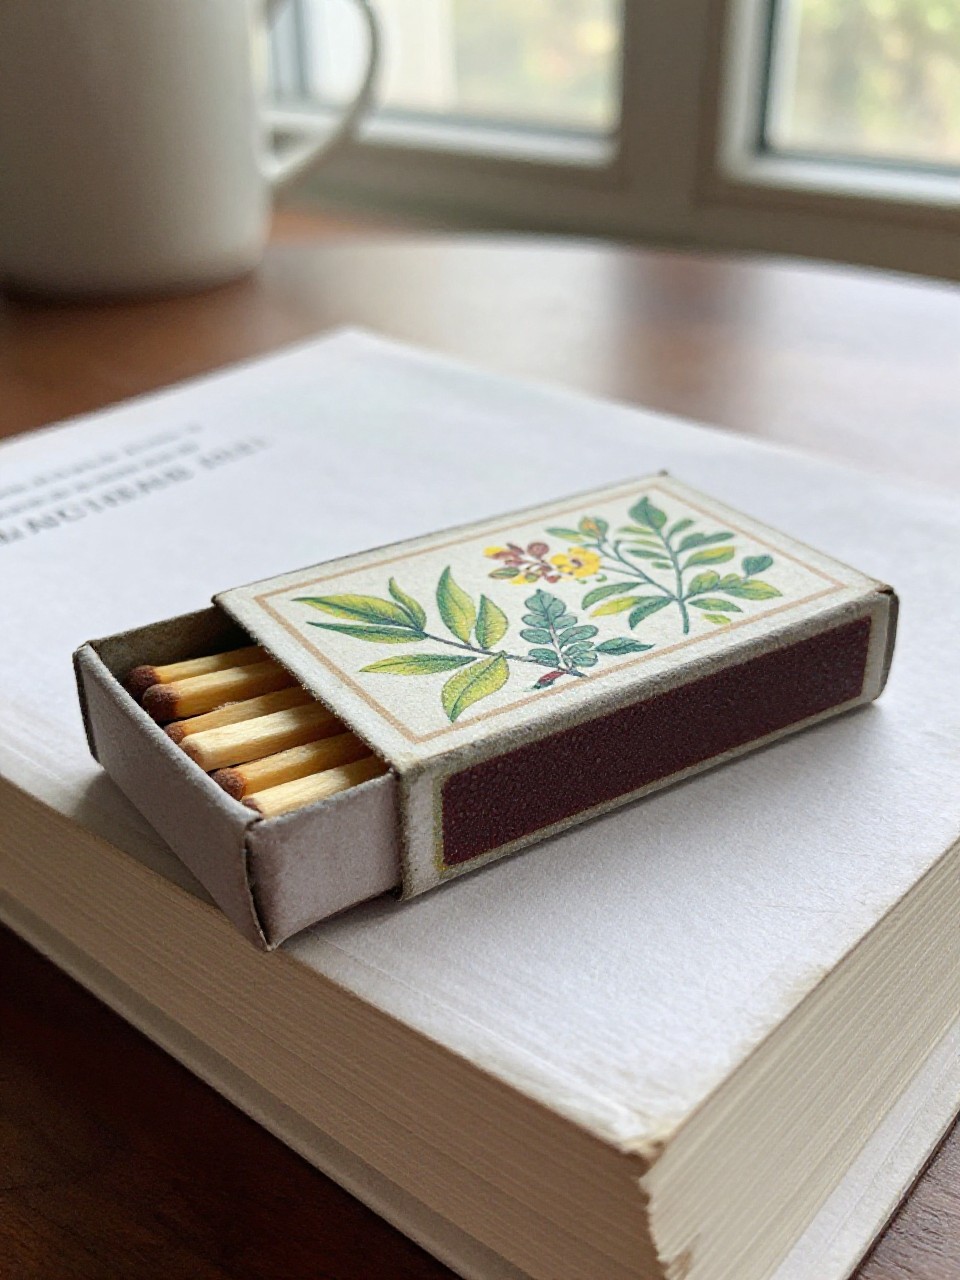
Turn a tiny matchbox into a mini art piece with leafy line art. It’s a charming little gift topper or coffee-table accent.
Materials Needed:
- Plain matchbox
- Acrylic paint or gouache
- Fine paintbrush or paint pen
- Clear sealer (optional)
How to make it:
- 1. Paint the box a soft background color; let dry.
- 2. Sketch simple leaf or twig designs in pencil.
- 3. Paint or pen over the sketch with fine lines.
- 4. Seal lightly if desired.
14. No-Sew Chunky Yarn Flower Pillow

Create plush yarn flowers and glue them to a pillow cover for instant texture. It looks luxe and cozy without a single stitch.
Materials Needed:
- Plain pillow cover
- Chunky yarn
- Fabric glue or hot glue
- Scissors
How to make it:
- 1. Wrap yarn around your hand 20–30 times; slide off and tie center to make a pom.
- 2. Trim into a neat flower puff.
- 3. Glue several puffs in a cluster onto the pillow cover.
- 4. Let dry fully, then add insert.
15. Marbled Nail Polish Vases

Get dreamy marble swirls on cheap glass bud vases using nail polish. Each dip creates a one-of-a-kind pattern.
Materials Needed:
- Clear glass bud vases
- Nail polish (2–3 colors)
- Disposable container with water
- Toothpick
How to make it:
- 1. Fill container with room-temp water.
- 2. Drip nail polish on the surface; swirl lightly with a toothpick.
- 3. Dip the vase at an angle to pick up the pattern.
- 4. Let dry on a rack and seal if desired.
16. Pastel Cork Board Gallery Tiles

Make mini cork tiles in soft colors for notes and photos. Arrange them like art for a tidy, happy wall.
Materials Needed:
- Square cork tiles
- Acrylic paint (pastels)
- Painter’s tape
- Mounting strips
How to make it:
- 1. Tape simple shapes or borders onto tiles.
- 2. Paint with pastel colors; let dry and remove tape.
- 3. Repeat patterns across several tiles.
- 4. Mount in a grid on your wall.
17. Floral-Embedded Candle Jars
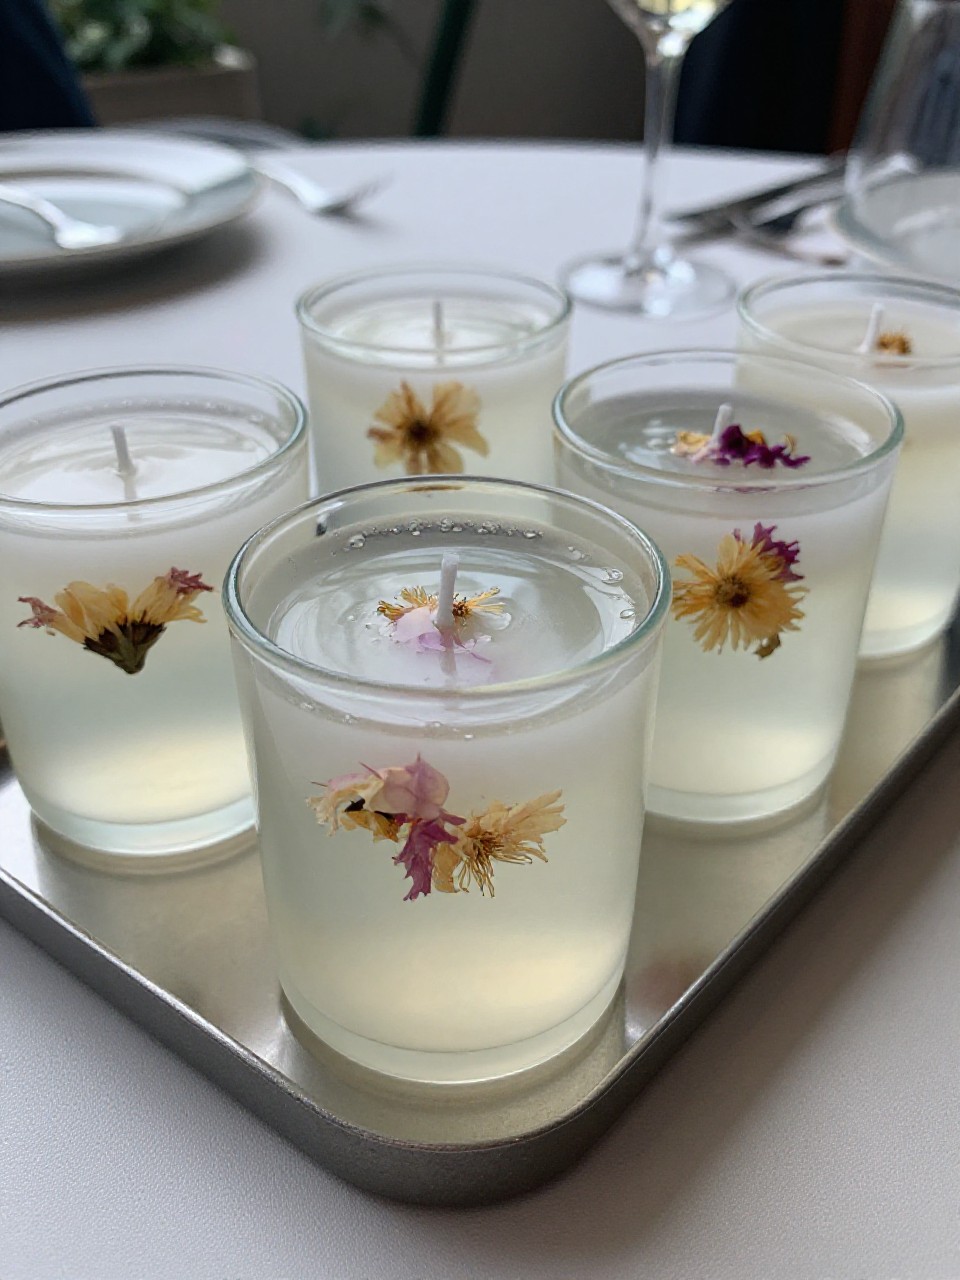
Simple gel wax lets you suspend dried flowers in a clear, springy candle. The floating petals look like they’re captured in time.
Materials Needed:
- Small glass jars
- Gel candle wax and wicks
- Dried flowers (non-flammable decor placed away from wick)
- Skewer
How to make it:
- 1. Fix the wick to the jar bottom and steady it upright.
- 2. Melt gel wax per package and pour a thin base layer.
- 3. Arrange dried flowers along the sides using a skewer, keeping clear of the wick.
- 4. Pour remaining wax, let set, and trim wick.