


Table of Contents Show
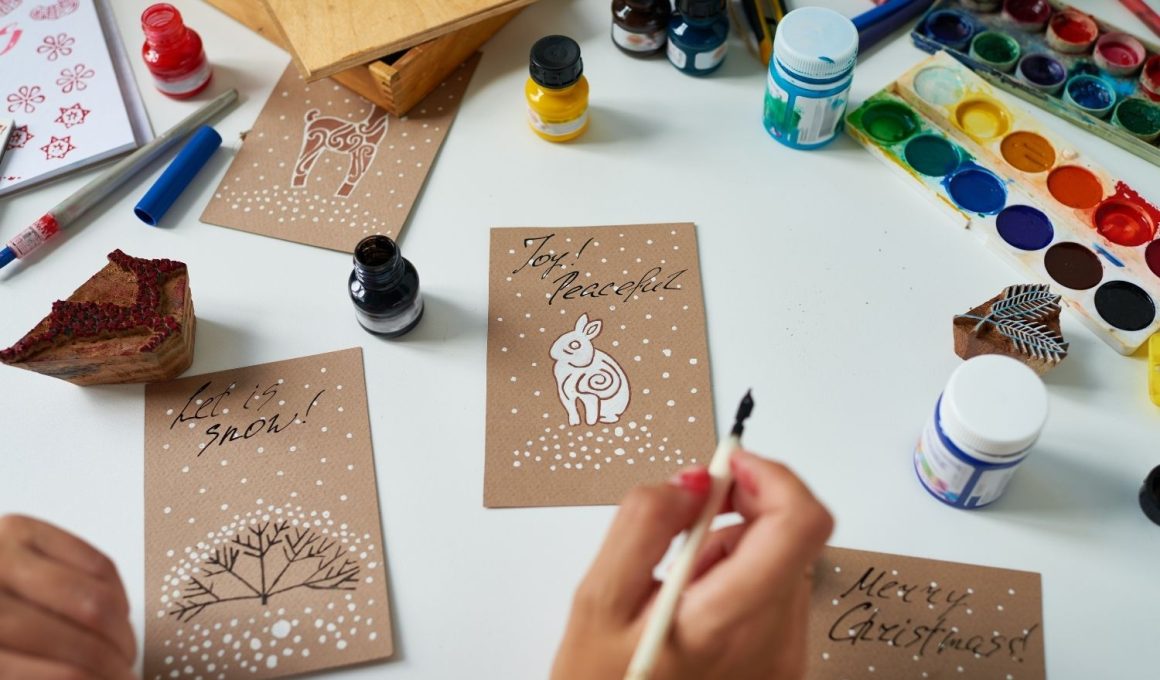
Keeping kids busy on rainy days or needing a quick classroom project can be hard, especially when a birthday or special day sneaks up. Handmade cards are simple, fun, and full of heart—and they don’t require fancy supplies.
This list gives you easy, colorful ideas that look great and feel personal. You’ll find projects perfect for kids, parents, or beginners.
Let’s jump into creative card ideas you can make today.
1. Confetti Balloon Birthday Card
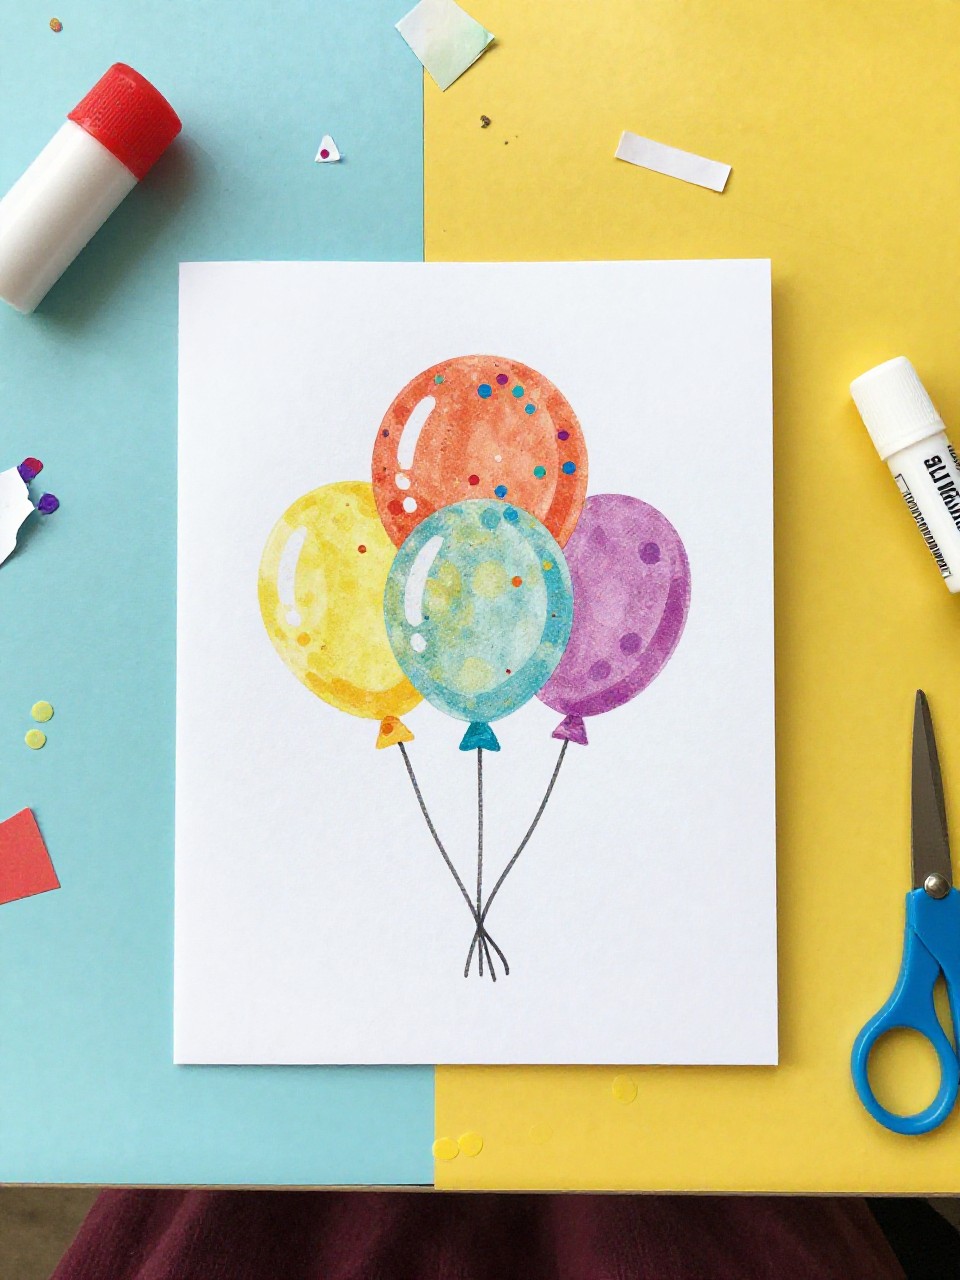
A cheerful folded card with a big balloon made from a clear plastic circle stuffed with paper confetti. Kids love shaking the “balloon” and choosing bright colors; it feels special but is easy to make.
Materials Needed:
For People Who Love to Make Things ✂️
- Blank cardstock or folded construction paper
- Clear plastic from packaging or a small snack bag
- Colorful paper scraps or tissue confetti
- Glue stick or double-sided tape
- String or ribbon for the balloon tail
How to make it:
- Fold the cardstock to make your card base.
- Cut a circle of clear plastic and a matching paper ring; stick them together to form a pocket and fill with confetti.
- Seal the pocket onto the card front, add a ribbon or drawn string tail, and write “Happy Birthday!”
- Press flat to dry, then display upright so the confetti shows.
2. Handprint Candle Card
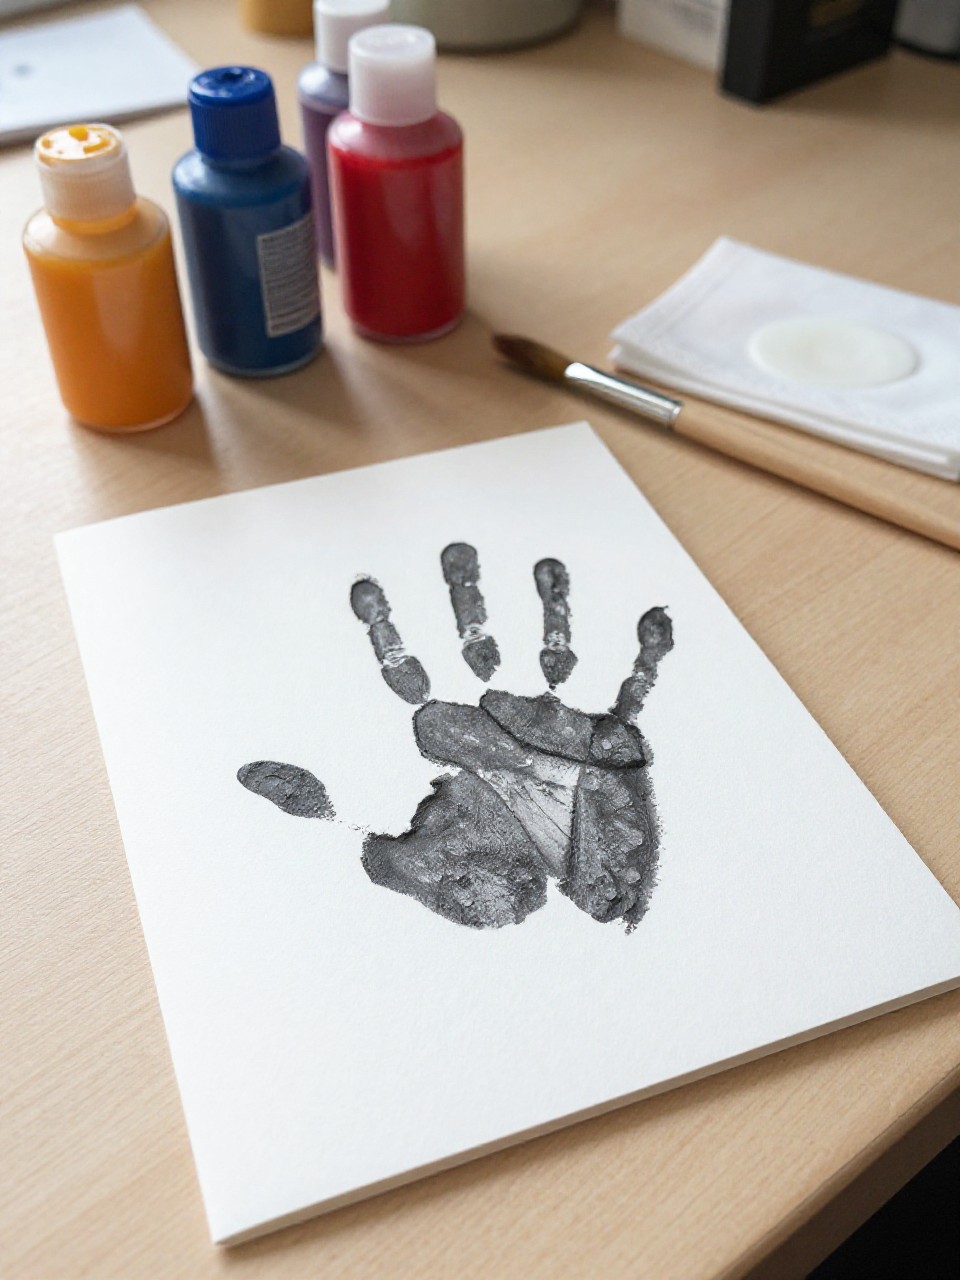
A sweet card where the child’s painted handprint becomes a row of birthday candles, with fingerprint flames on top. Kids enjoy the messy paint and seeing their handprint turn into candles, making a keepsake for family.
Materials Needed:
- Folded cardstock
- Washable tempera paint (assorted colors)
- Yellow/orange paint for flames
- Paintbrush
- Marker for message
How to make it:
- Fold the cardstock and set it on a protected surface.
- Paint stripes on the child’s hand and press it onto the card front to create “candles.”
- Add fingertip dots of yellow/orange paint above each finger for flames; draw tiny wicks if you like.
- Let dry, then write a birthday note inside.
3. Pop-Up Present Card
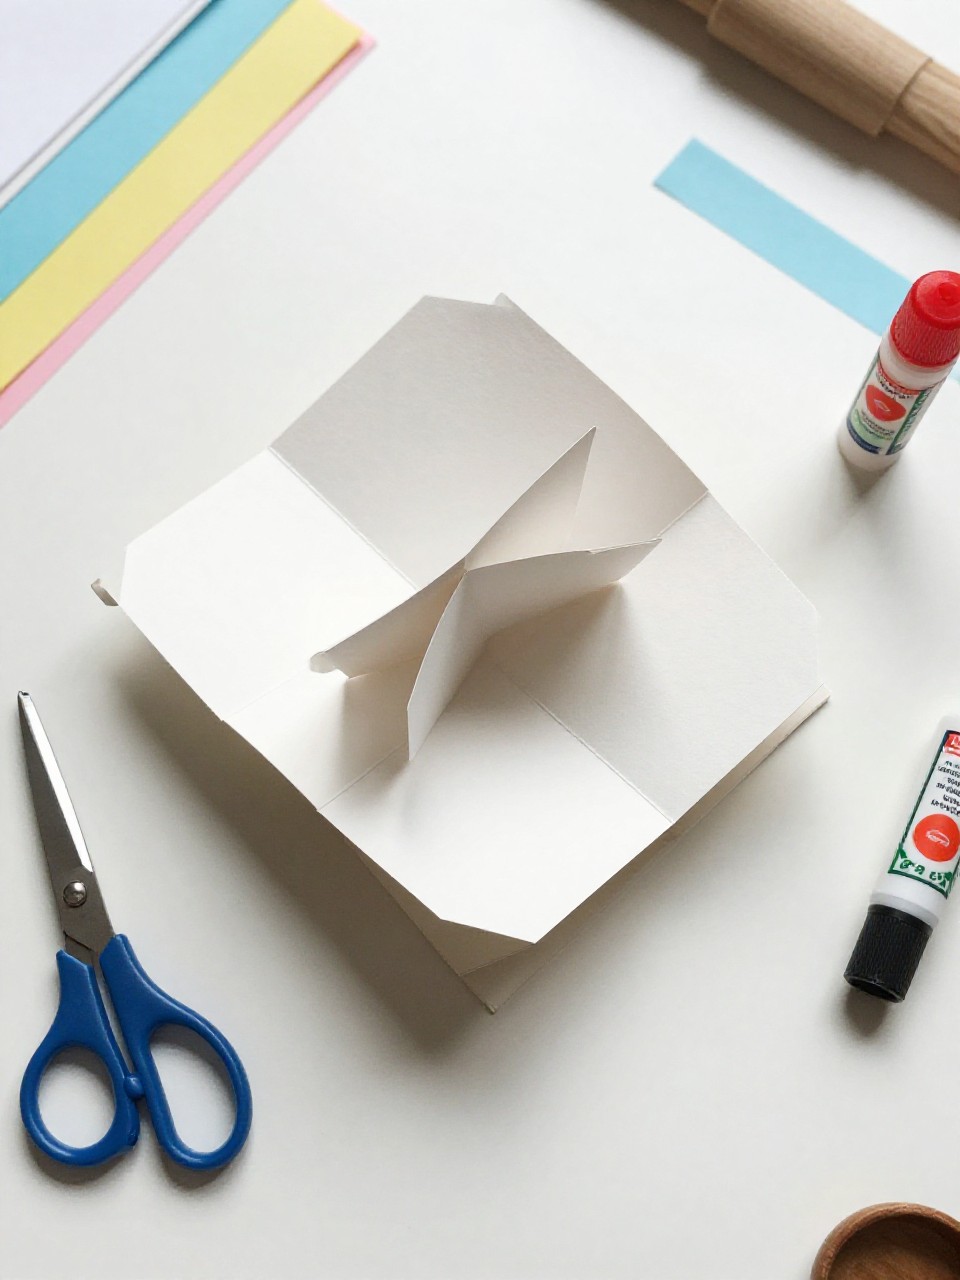
A pop-up card that opens to reveal a stacked pile of gift boxes with ribbon details. The surprise pop makes kids gasp, and the folding is simple enough for beginners.
Materials Needed:
- Two sheets of cardstock (inside + cover)
- Colored paper for gift boxes
- Glue stick
- Markers or thin ribbon
- Scissors
How to make it:
- Fold one cardstock as the inside; cut 2–3 short parallel slits in the fold and push them inward to form pop-up steps.
- Cut small rectangles for presents and glue them onto the pop-up steps.
- Draw ribbons and bows or add thin ribbon strips for texture.
- Glue the inside to a cover card to hide the cuts, then write your message.
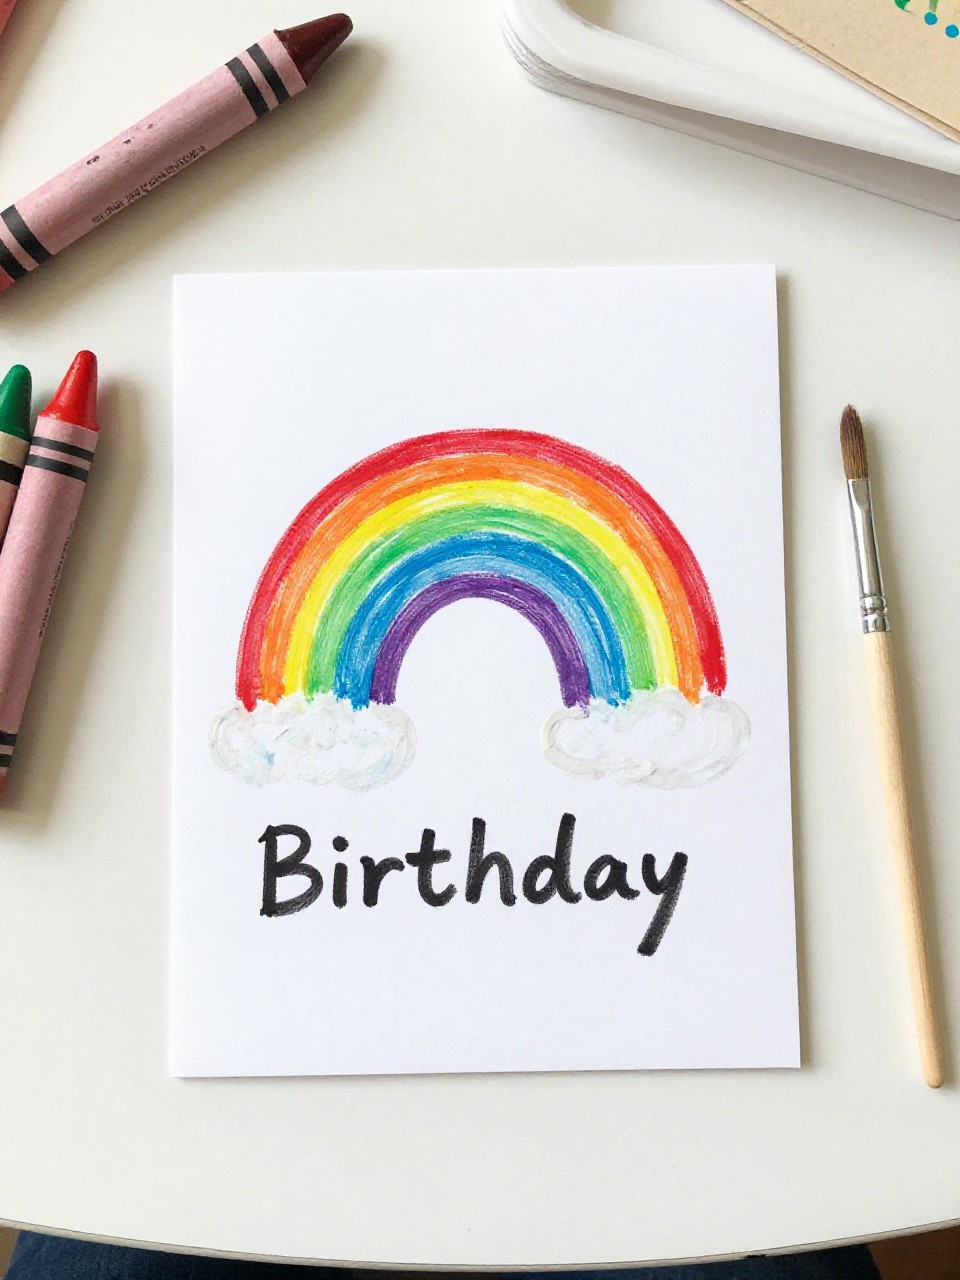
4. Watercolor Resist Birthday Cake Card
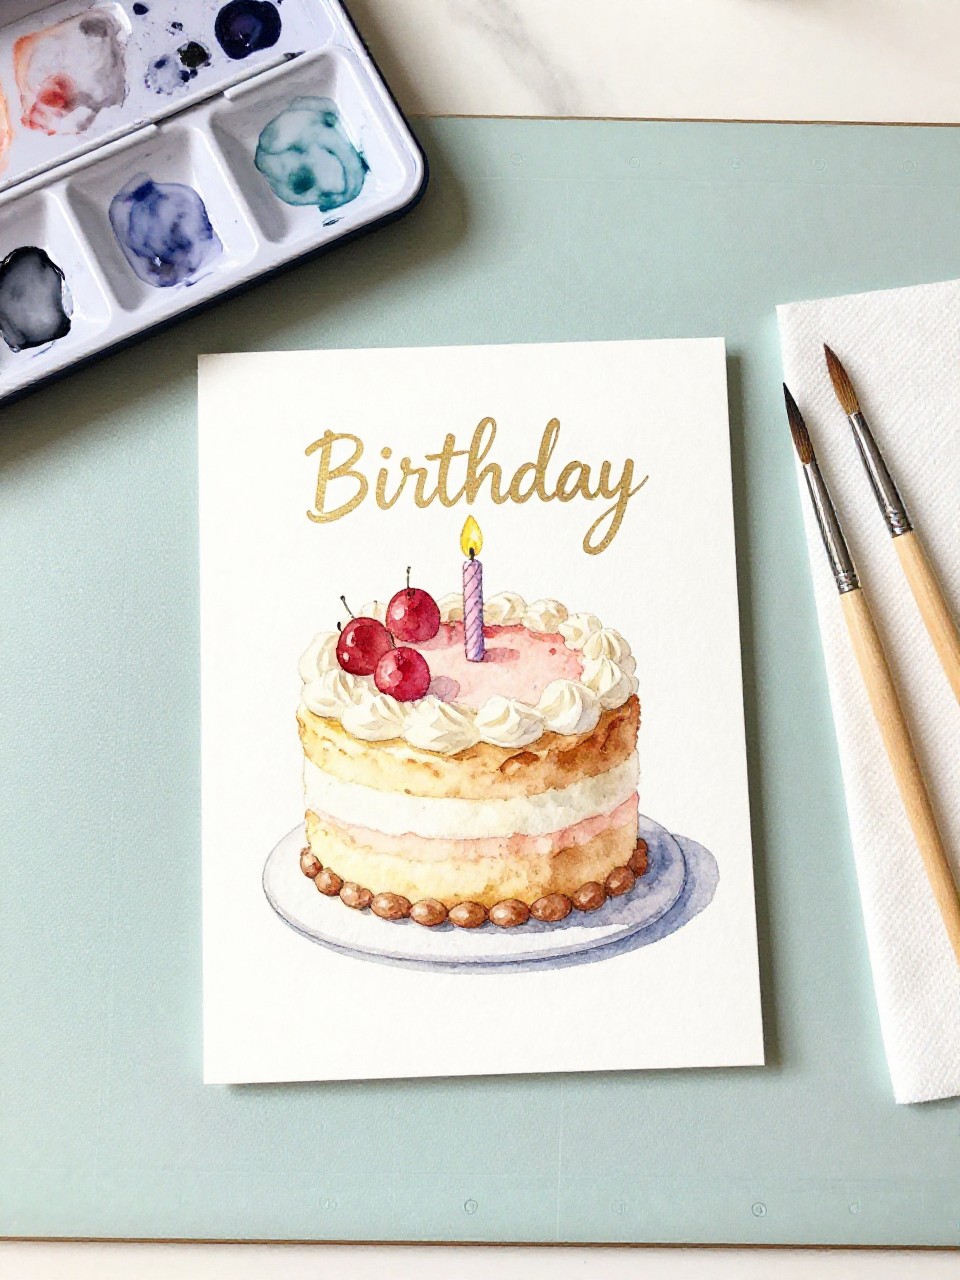
A pastel watercolor wash reveals a white frosted cake drawn in crayon resist, with candles shining through. Kids love painting and watching the image appear like magic.
Materials Needed:
- Watercolor paper or thick cardstock
- White crayon or oil pastel
- Watercolor paints and brush
- Cup of water and paper towel
- Marker for greeting
How to make it:
- Lightly sketch a simple cake with layers and candles using the white crayon.
- Brush watercolors over the paper; the crayon lines will stay white.
- Blot extra water and add a darker edge or sprinkles with paint.
- Let dry flat, then fold or mount to a colored card and add a message.
5. Button Balloon Bunch Card
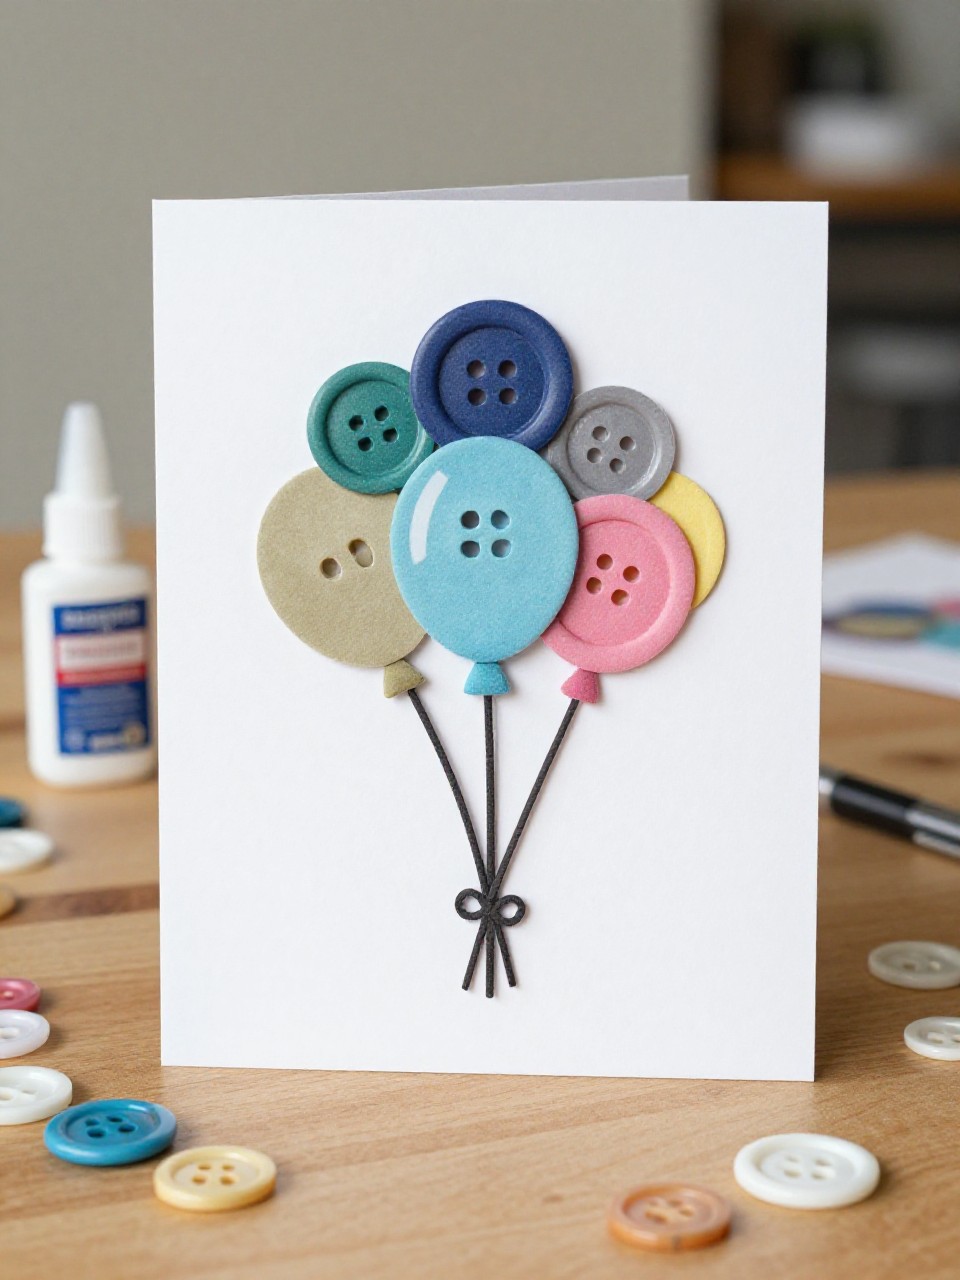
A cluster of colorful buttons becomes a bunch of balloons, with drawn strings tied in a bow. Kids enjoy picking button colors and making patterns; it’s a great fine-motor craft.
Materials Needed:
- Folded cardstock
- Assorted buttons
- Strong craft glue
- Fine-tip black pen
- Small ribbon scrap (optional)
How to make it:
- Fold your card and plan where the balloon bunch will go.
- Glue buttons in a loose cluster near the top or center.
- Draw strings from each button down to a single bow; add a tiny ribbon bow on top if desired.
- Let glue dry, then write a happy message.
6. Washi Tape Candle Card

A modern card with tall candles made from strips of patterned washi tape and tiny paper flames. Kids like choosing tape patterns, and the straight lines make this very beginner friendly.
Materials Needed:
- Folded blank card
- Assorted washi tapes
- Yellow/orange paper scraps
- Scissors
- Fine marker
How to make it:
- Lay vertical washi tape strips across the front to form candles in different heights.
- Cut and glue small teardrop flames from colored paper at the top.
- Add a simple “Make a wish!” message below.
- Smooth tape edges and press to secure.
7. Cupcake Liner Birthday Card
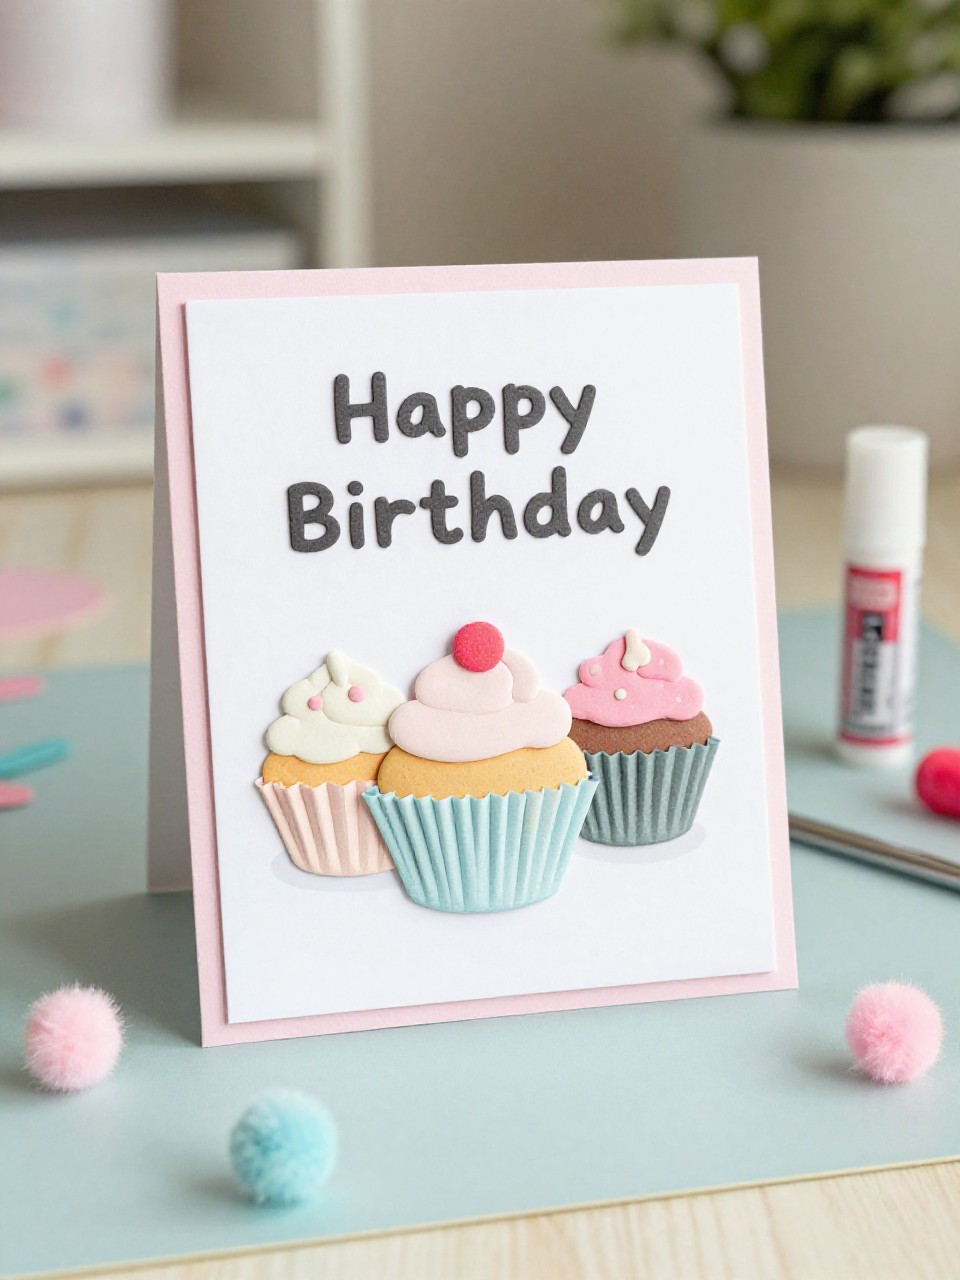
A cute cupcake crafted from a real paper liner with a pom-pom cherry on top. Kids love the 3D look and picking colors for frosting and sprinkles.
Materials Needed:
- Folded cardstock
- Colorful cupcake liner
- Cotton ball or paper circle for frosting
- Small pom-pom or red button
- Glue stick, markers, and confetti or glitter (optional)
How to make it:
- Glue a flattened cupcake liner to the bottom half of the card.
- Add a cotton ball or cut paper “frosting” above the liner.
- Glue on a pom-pom cherry; draw sprinkles or add confetti.
- Write a sweet birthday message and let dry.
8. Rainbow Scratch-Art Birthday Card
A bold card with a scratched rainbow cake or balloon design that reveals bright colors under black. Kids enjoy scratching to “draw,” making it exciting and tactile.
Materials Needed:
- White cardstock
- Crayons (rainbow colors)
- Black tempera paint mixed with a little dish soap
- Toothpick or wooden skewer
- Tape
How to make it:
- Heavily color a rectangle of cardstock with bright crayon blocks.
- Paint over with the black tempera mix; let dry completely.
- Use a toothpick to scratch out a cake, balloons, and “Happy Birthday.”
- Tape or glue the panel onto a folded card base.
9. Photo Memory Birthday Card
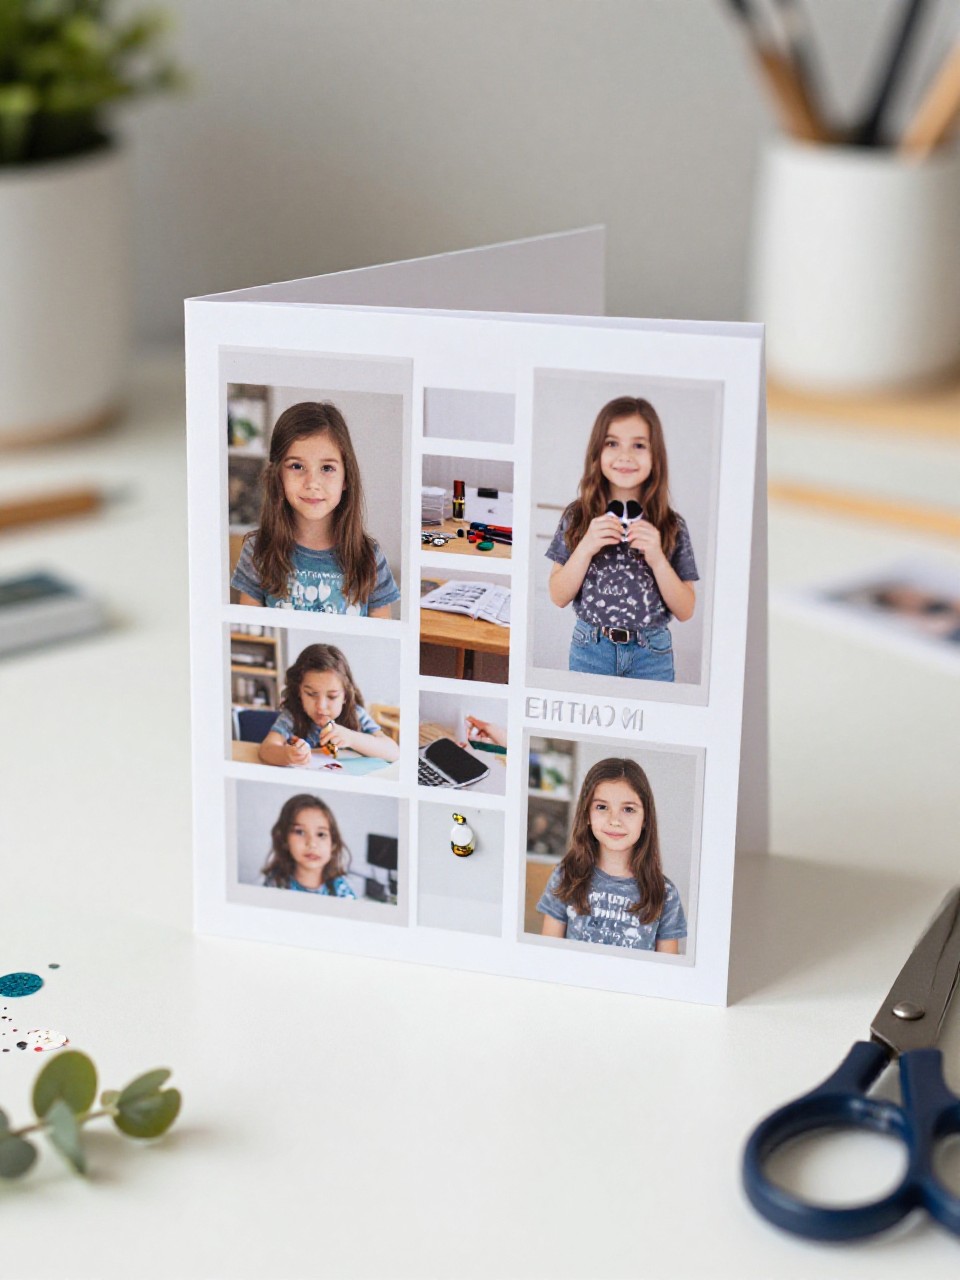
A personalized card with a small printed photo framed by paper banners and confetti. Kids like choosing the picture and decorating around it—perfect for grandparents or friends.
Materials Needed:
- Folded cardstock
- Small printed photo
- Colored paper for banners
- Glue stick and markers
- Stickers or sequins (optional)
How to make it:
- Glue the photo to the center of the card.
- Cut small triangles or flags to make a banner and glue across the top.
- Add doodles, sequins, or a short caption under the photo.
- Let everything set and write inside.
10. Pressed Flower Celebration Card
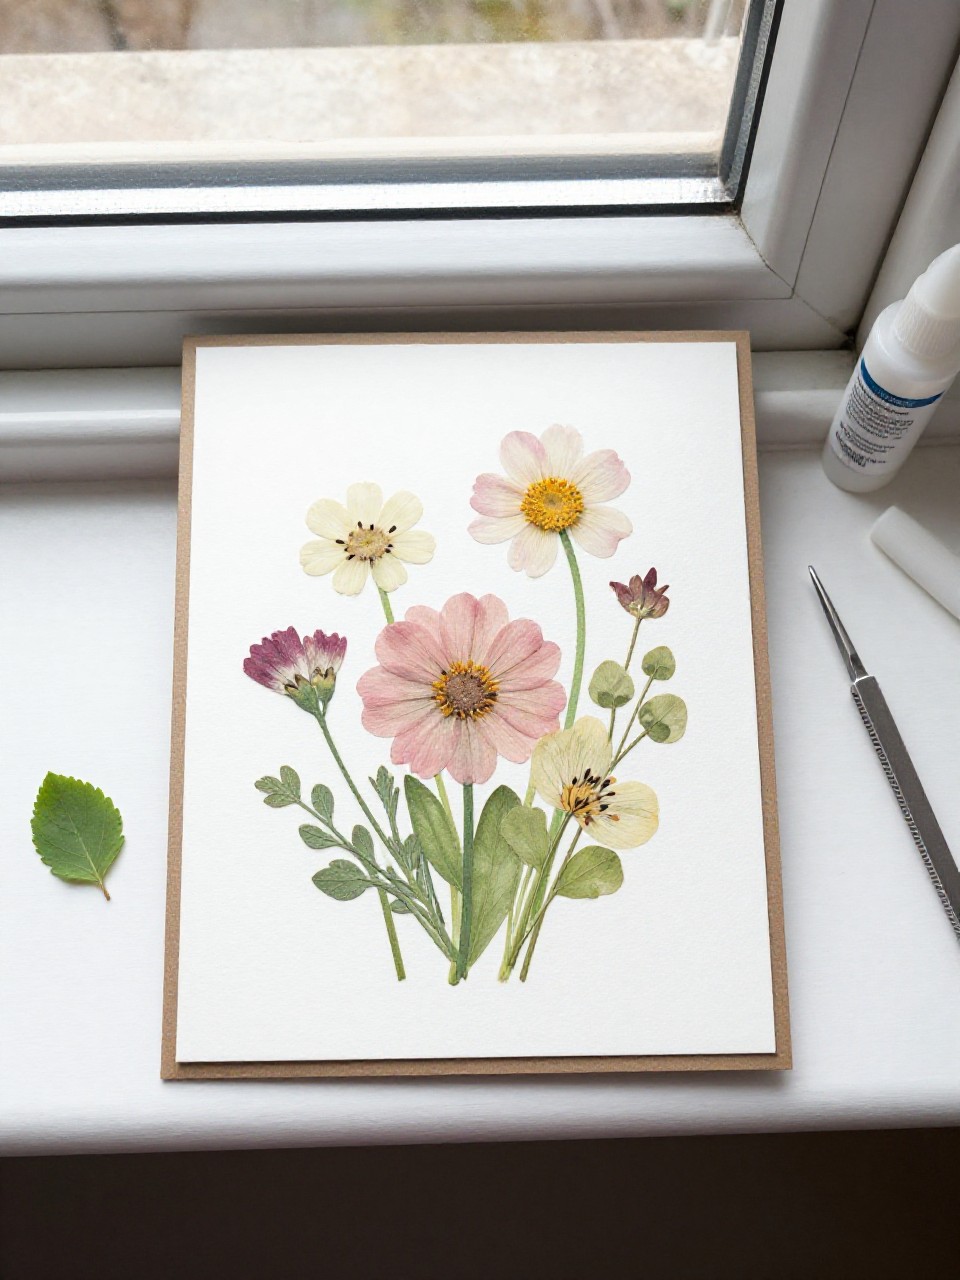
A gentle, nature-inspired card with real pressed flowers arranged around a simple greeting. Kids enjoy choosing petals and learning about plants; the result looks elegant.
Materials Needed:
- Folded cardstock
- Pressed flowers or leaves
- Clear-drying craft glue
- Tweezers (optional)
- Fine pen
How to make it:
- Arrange pressed flowers on the card front before gluing.
- Glue pieces carefully, pressing lightly with a clean paper.
- Add a small “Happy Birthday” or “With Love” message.
- Allow to dry under a book to keep flat.
11. Pop-Up Heart Hug Card
A pop-up heart opens to reveal accordion-fold paper “arms” that stretch like a hug. Kids love the playful movement and giving a “hug” in a card for birthdays or special days.
Materials Needed:
- Two sheets cardstock (cover + inside)
- Colored paper for heart
- Glue stick
- Markers
- Scissors
How to make it:
- Fold the inside card and cut a simple slit pop-up or glue a folded heart at the center.
- Make two accordion strips for arms and attach to the heart sides.
- Draw little hands or write “A Birthday Hug!”
- Glue inside to cover card to finish edges.
12. Fingerprint Balloon Bouquet Card
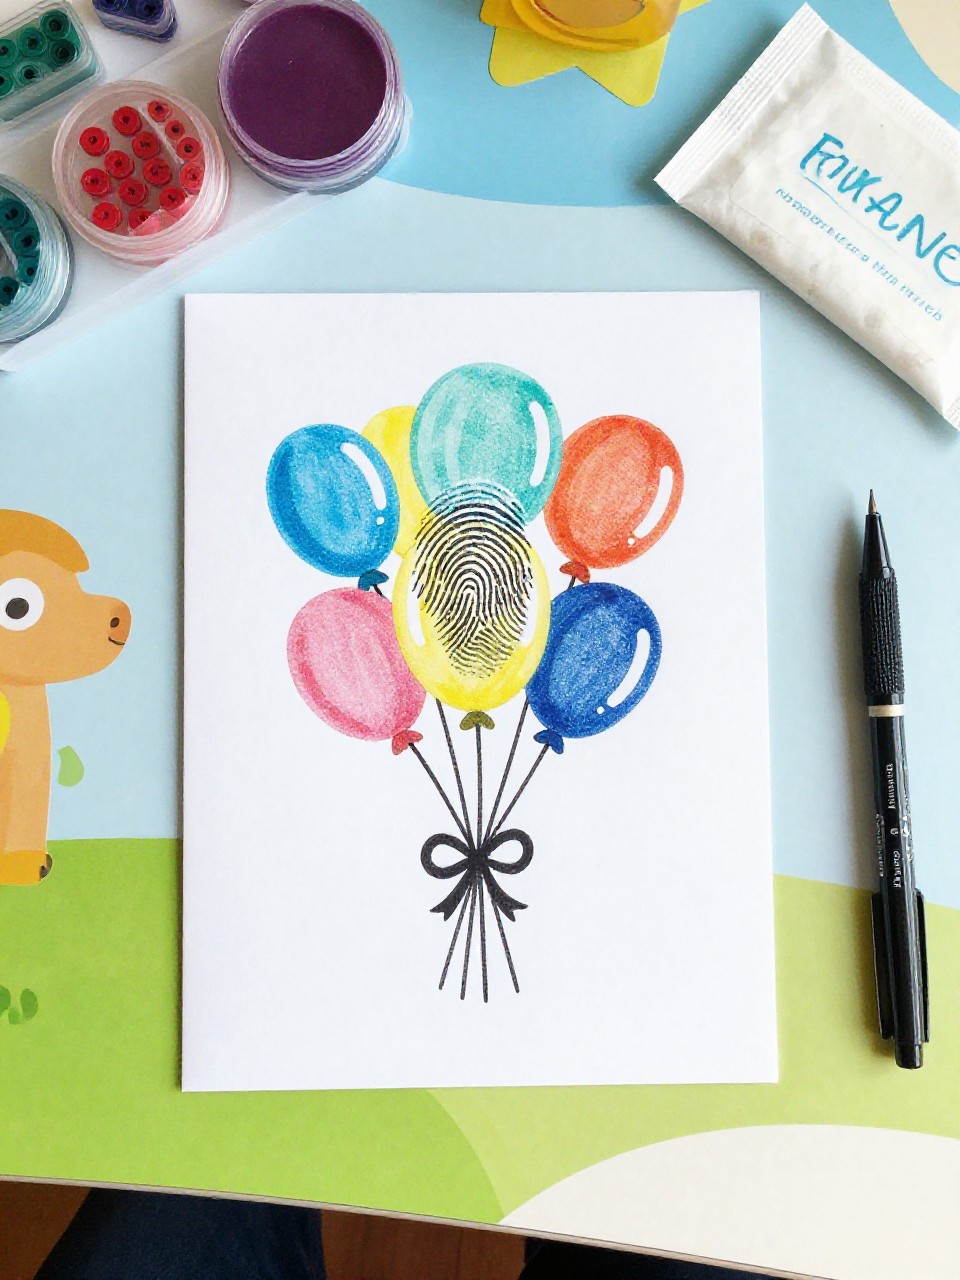
A card filled with tiny fingerprint balloons floating up from a hand-drawn string bow. Kids enjoy stamping their fingers in bright ink and seeing their prints turn into balloons.
Materials Needed:
- Folded white or light-colored card
- Washable stamp pads or paint
- Black fine-tip pen
- Baby wipes or damp cloth
- Optional confetti stickers
How to make it:
- Draw a small bow and several strings on the card front.
- Press fingertips into ink and stamp ovals at string ends for balloons.
- Add tiny highlights or faces with the pen; stick on confetti if desired.
- Let dry and write your message.
13. Quilted Paper Patchwork Card
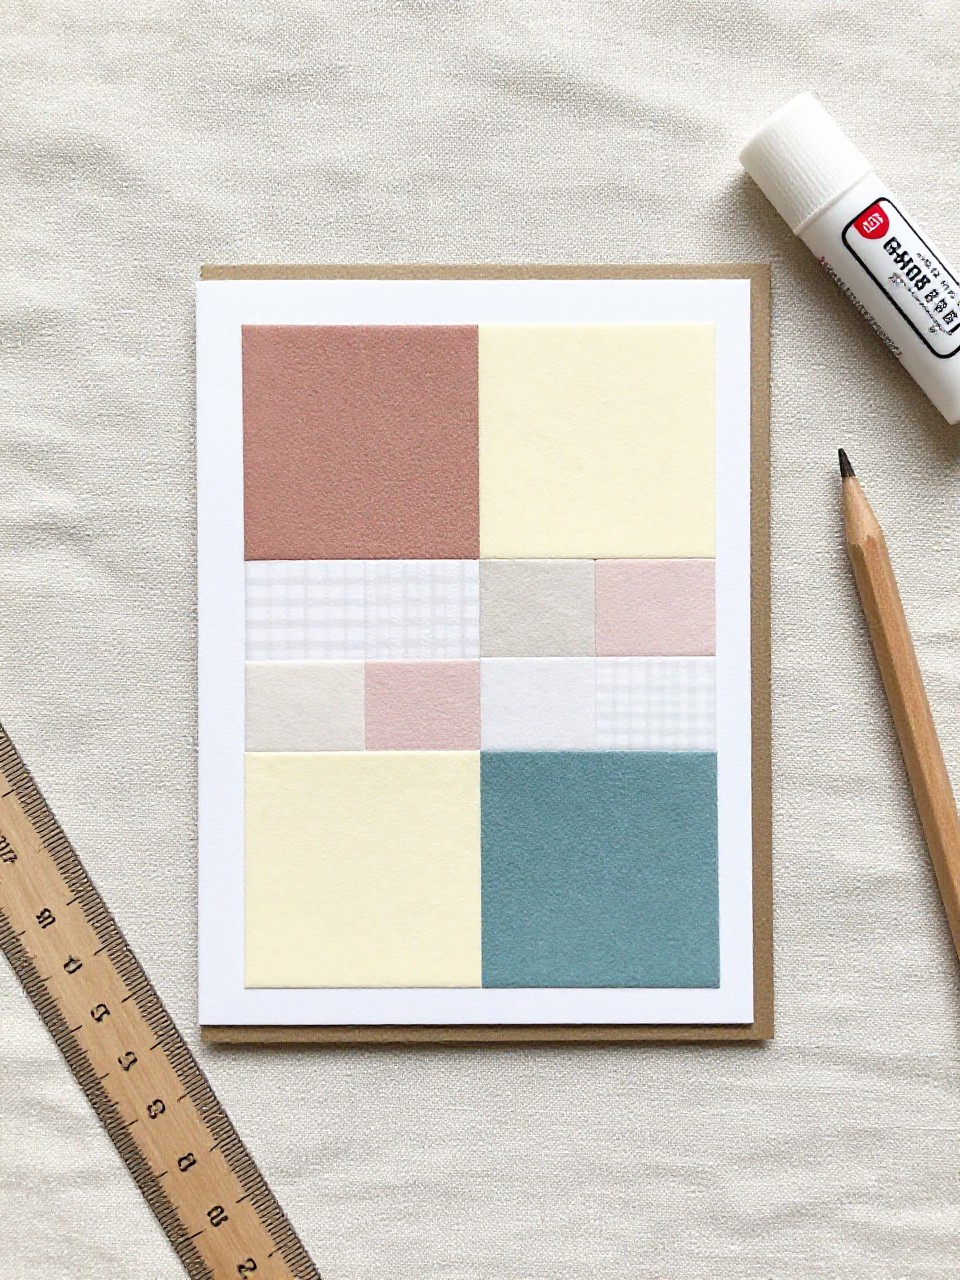
A cozy-looking card made from small paper squares arranged like a quilt around a birthday greeting. Kids enjoy mixing patterns and learning simple layout skills.
Materials Needed:
- Folded cardstock
- Patterned scrapbook paper scraps
- Glue stick
- Ruler and pencil
- Marker for message
How to make it:
- Cut several 1-inch squares from patterned paper.
- Arrange them in a grid on the card front, leaving a space for the greeting.
- Glue pieces down neatly and outline a central label.
- Write “Happy Birthday” in the label and let dry.
14. Shaker Star Celebration Card
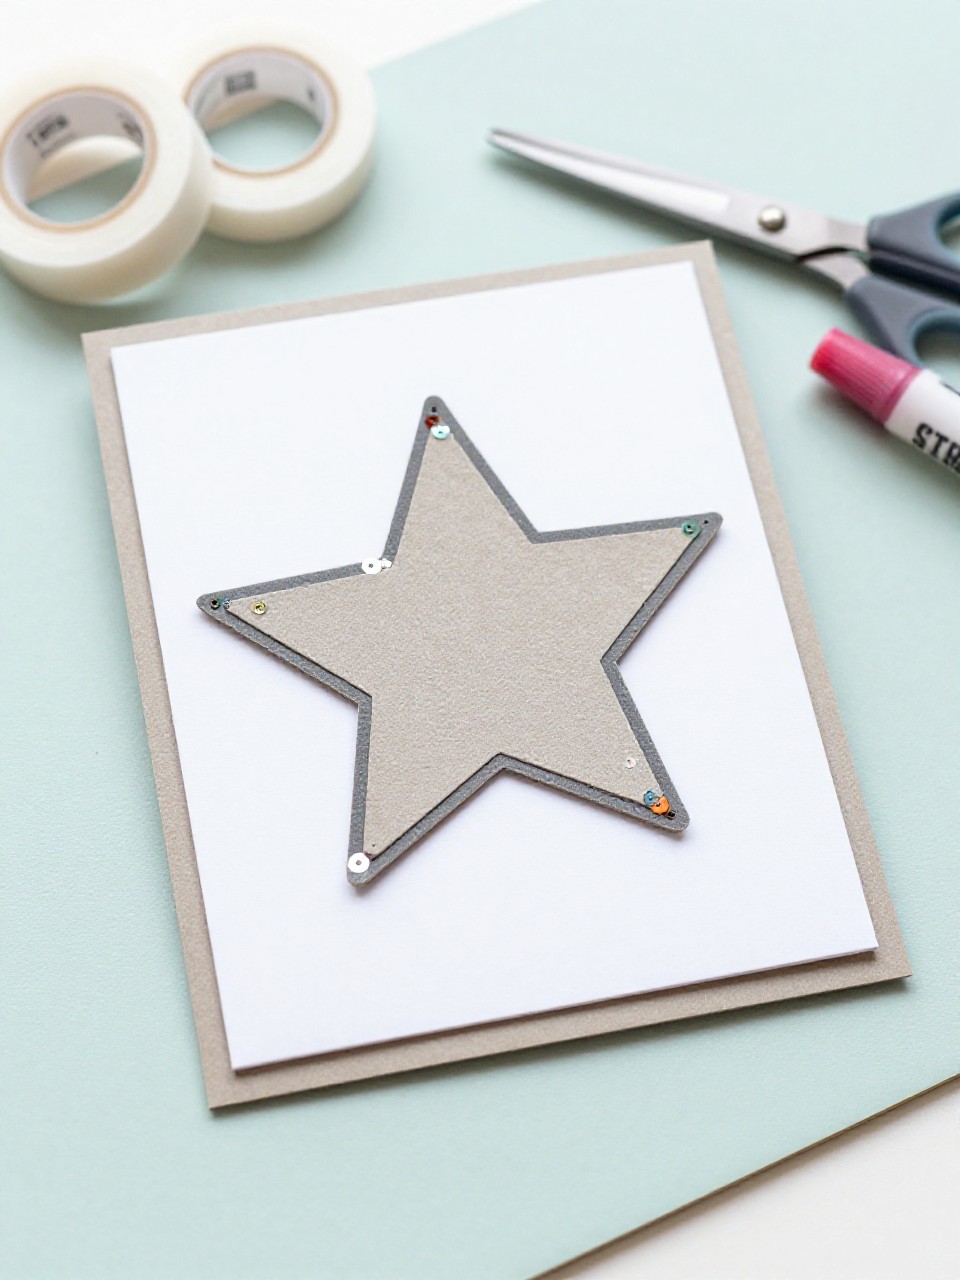
A sparkling card with a star-shaped window filled with sequins that shake and shimmer. Kids love the interactive feel and choosing colors for the sequins.
Materials Needed:
- Folded cardstock
- Clear plastic sheet
- Sequins or tiny confetti
- Foam tape or craft foam
- Star-shaped template
How to make it:
- Cut a star window in the card front using the template.
- Line the opening with foam tape to create a shallow well.
- Add sequins inside and seal with a clear plastic sheet and a paper frame.
- Shake gently and add a simple greeting below.
15. Yarn-Wrapped Birthday Banner Card
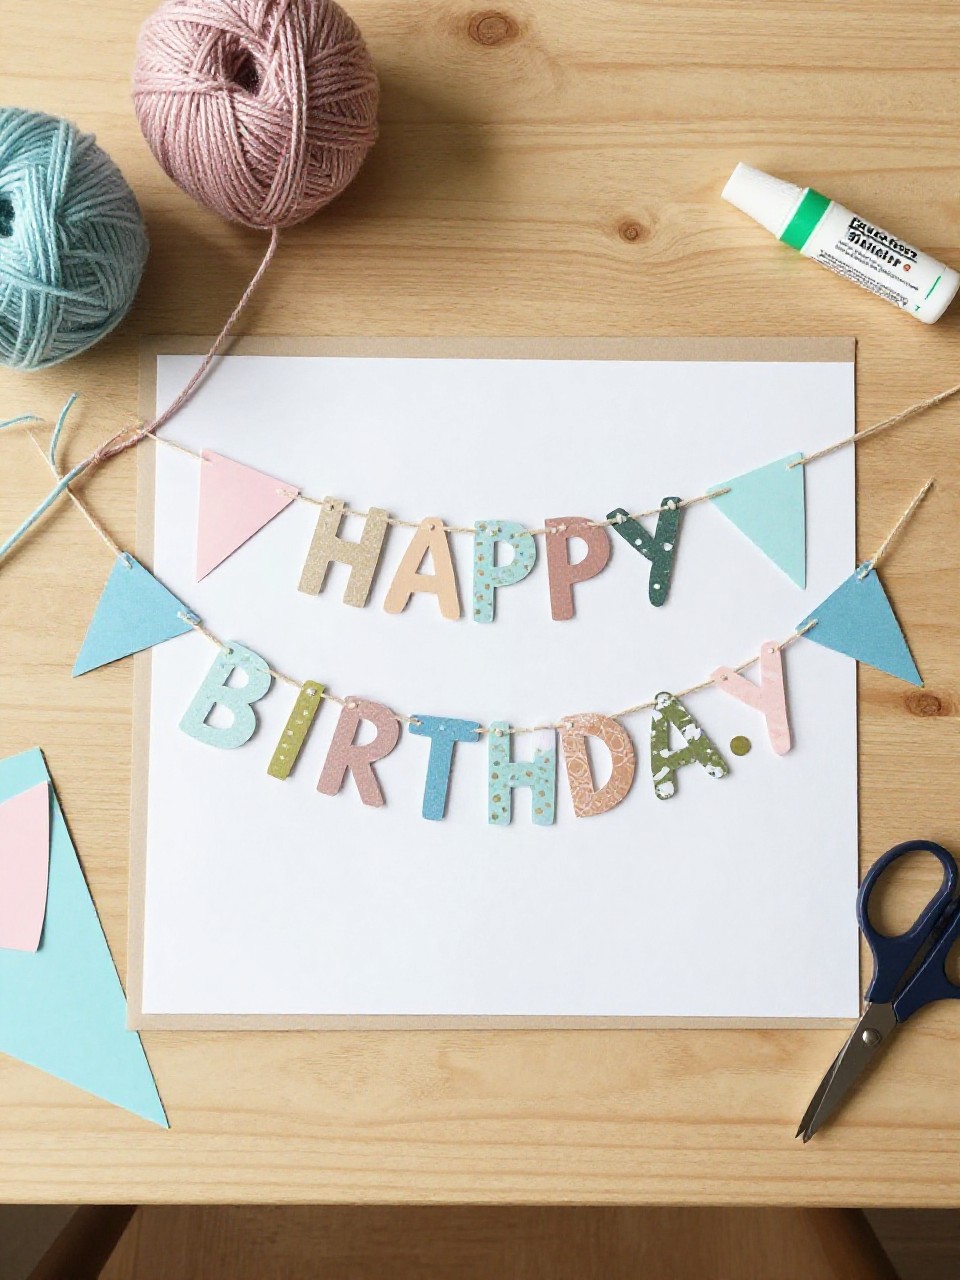
A festive card with mini triangle pennants wrapped with yarn, strung across the front like party bunting. Kids enjoy wrapping and threading, and the result looks cheerful and textured.
Materials Needed:
- Folded cardstock
- Colored paper for triangles
- Thin yarn or twine
- Glue stick and tape
- Marker for message
How to make it:
- Cut small paper triangles and punch tiny holes or leave plain.
- Wrap each triangle with a few yarn loops and secure ends on the back with tape.
- Glue or string triangles across the card; add a knot or bow at ends.
- Write “Celebrate!” and let any glue dry before gifting.