Table of Contents Show
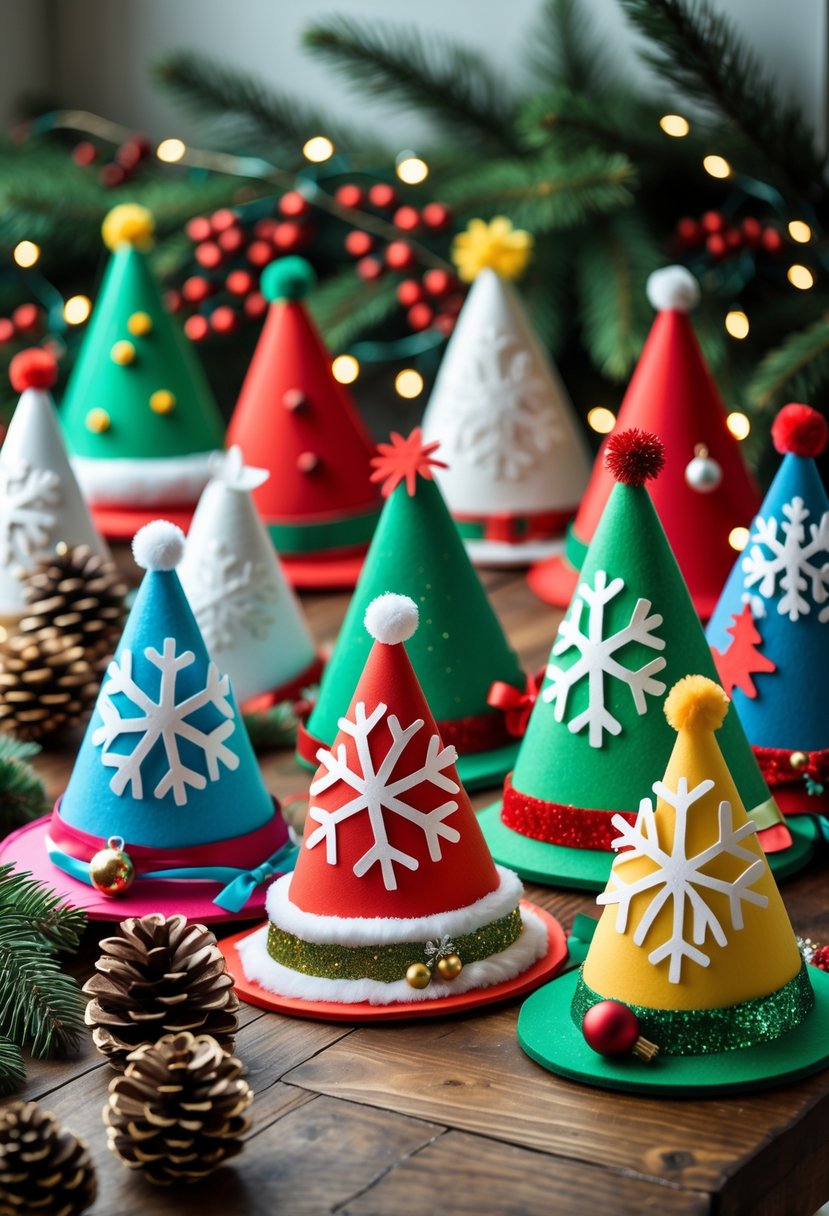
Foam snowflake crown hats are a cheerful, hands-on Christmas craft that instantly brightens any holiday party or classroom celebration.

These colorful cone-shaped hats are made from soft craft foam, making them lightweight, comfortable, and durable enough for kids to wear during playtime.
Decorated with large snowflakes, pom-poms, ribbons, and glitter bands, each hat feels special—like a mini winter wonderland crown.
How to Make Foam Snowflake Crown Hats
They’re simple to assemble, fun to customize, and a great way to get everyone in the holiday spirit while encouraging creativity and teamwork.
For People Who Love to Make Things ✂️
Materials
- Colored craft foam sheets (red, green, white, yellow, blue, etc.)
- Foam snowflake stickers or pre-cut snowflake shapes
- Glitter foam or ribbon strips (for decorative bands)
- Scissors
- Glue gun or craft glue
- Pom-poms or small bells (for the top)
- Elastic string or ribbon (for wearing)
- Pencil and ruler (for tracing and measuring)
- Optional: small ornaments, stickers, or sequins for extra sparkle
Shop the materials


The steps

Step 1: Cut Out the Hat Base
Start by cutting a large triangle from a sheet of craft foam. The triangle should be wide at the bottom and tall enough to form a cone that fits around a child’s head.
If you’re making multiple hats, use your first one as a template to trace the rest.
Step 2: Form the Cone Shape
Gently roll the foam triangle into a cone, overlapping the edges slightly to get your desired size. Use hot glue or craft glue to secure the seam along the side.
Hold it in place until the glue sets. You can adjust the tightness of the cone depending on how tall or wide you want the hat to be.
Step 3: Add the Base Trim
Cut a strip of glitter foam or ribbon long enough to wrap around the base of your hat. Glue it in place to give the hat a polished, festive border. You can also use fluffy white trim or faux fur for a Santa-inspired touch.
Step 4: Attach the Snowflakes
Now for the fun part! Decorate your hat with large foam snowflake stickers or cutouts. Place one big snowflake front and center, then add smaller ones around it for extra detail. Mixing white and metallic snowflakes gives a beautiful winter sparkle.
Step 5: Top It with a Pom-Pom
Glue a colorful pom-pom, small bell, or even a foam star to the top point of the hat. If using bells, make sure they’re securely attached so they don’t jingle off during play.
Step 6: Add the Chin Strap (Optional)
Punch two small holes on opposite sides of the hat’s base and thread elastic string or ribbon through them.
Tie knots at each end inside the hat. This will help the hat stay in place during wear—perfect for kids running around at holiday events.
Step 7: Customize and Finish
Add any final details like tiny foam ornaments, sequins, or glitter glue accents. You can also personalize each hat by writing names on the trim with metallic markers. Once the glue dries, your snowflake crown hats are ready for the party!