Table of Contents Show
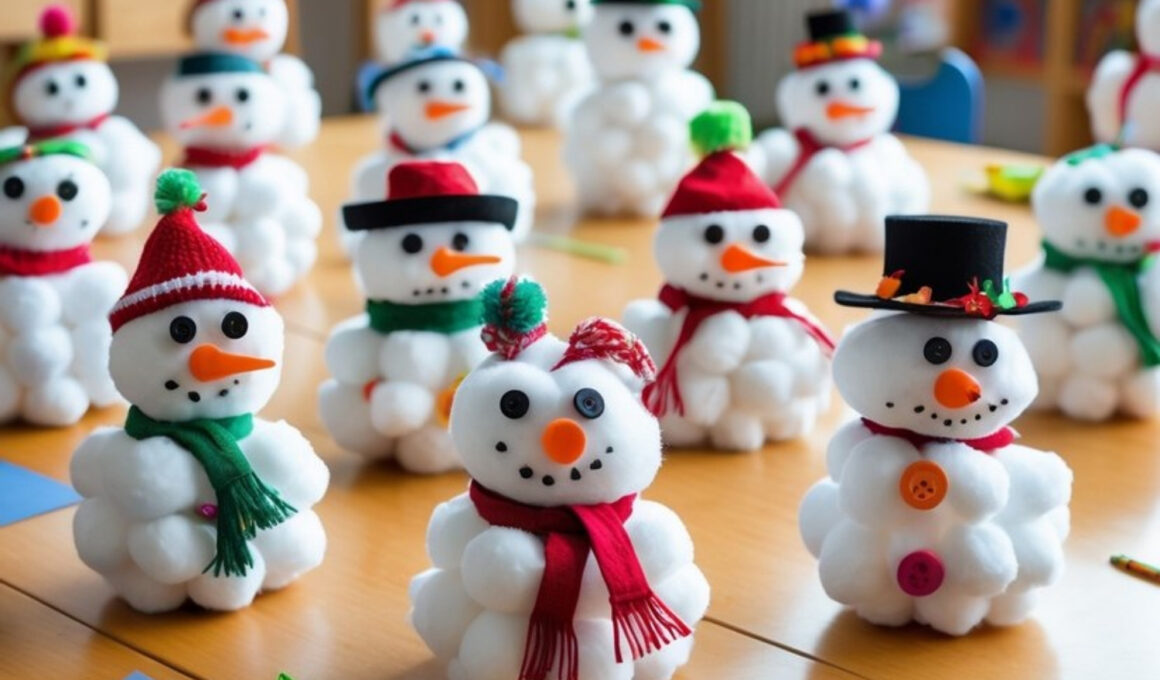
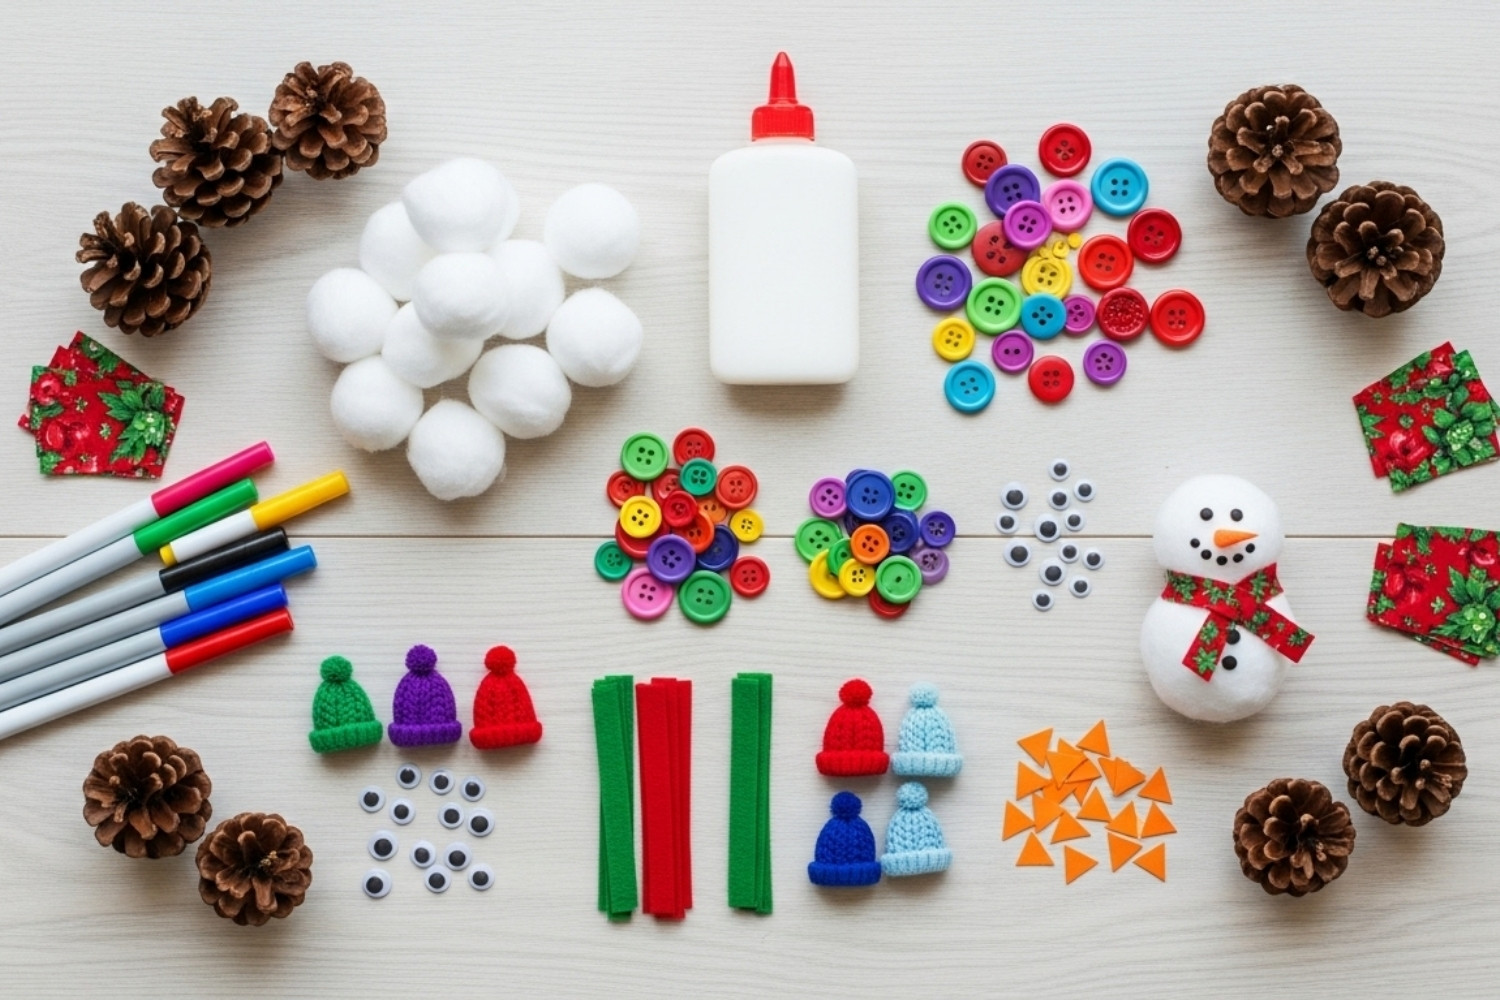
Cotton ball snowmen are a timeless winter craft that brings the magic of snow indoors—without the chill!
Soft, fluffy, and fun to make, these snowmen are perfect for kids’ classrooms, family craft nights, or cozy weekend projects.
Each snowman can be dressed up with colorful hats, scarves, and tiny accessories, letting every child’s imagination shine.
How to Make Cotton Ball Snowmen
Since cotton balls are affordable and easy to handle, this is a great activity for younger crafters or group settings where everyone can create their own unique snowy friend.
For People Who Love to Make Things ✂️
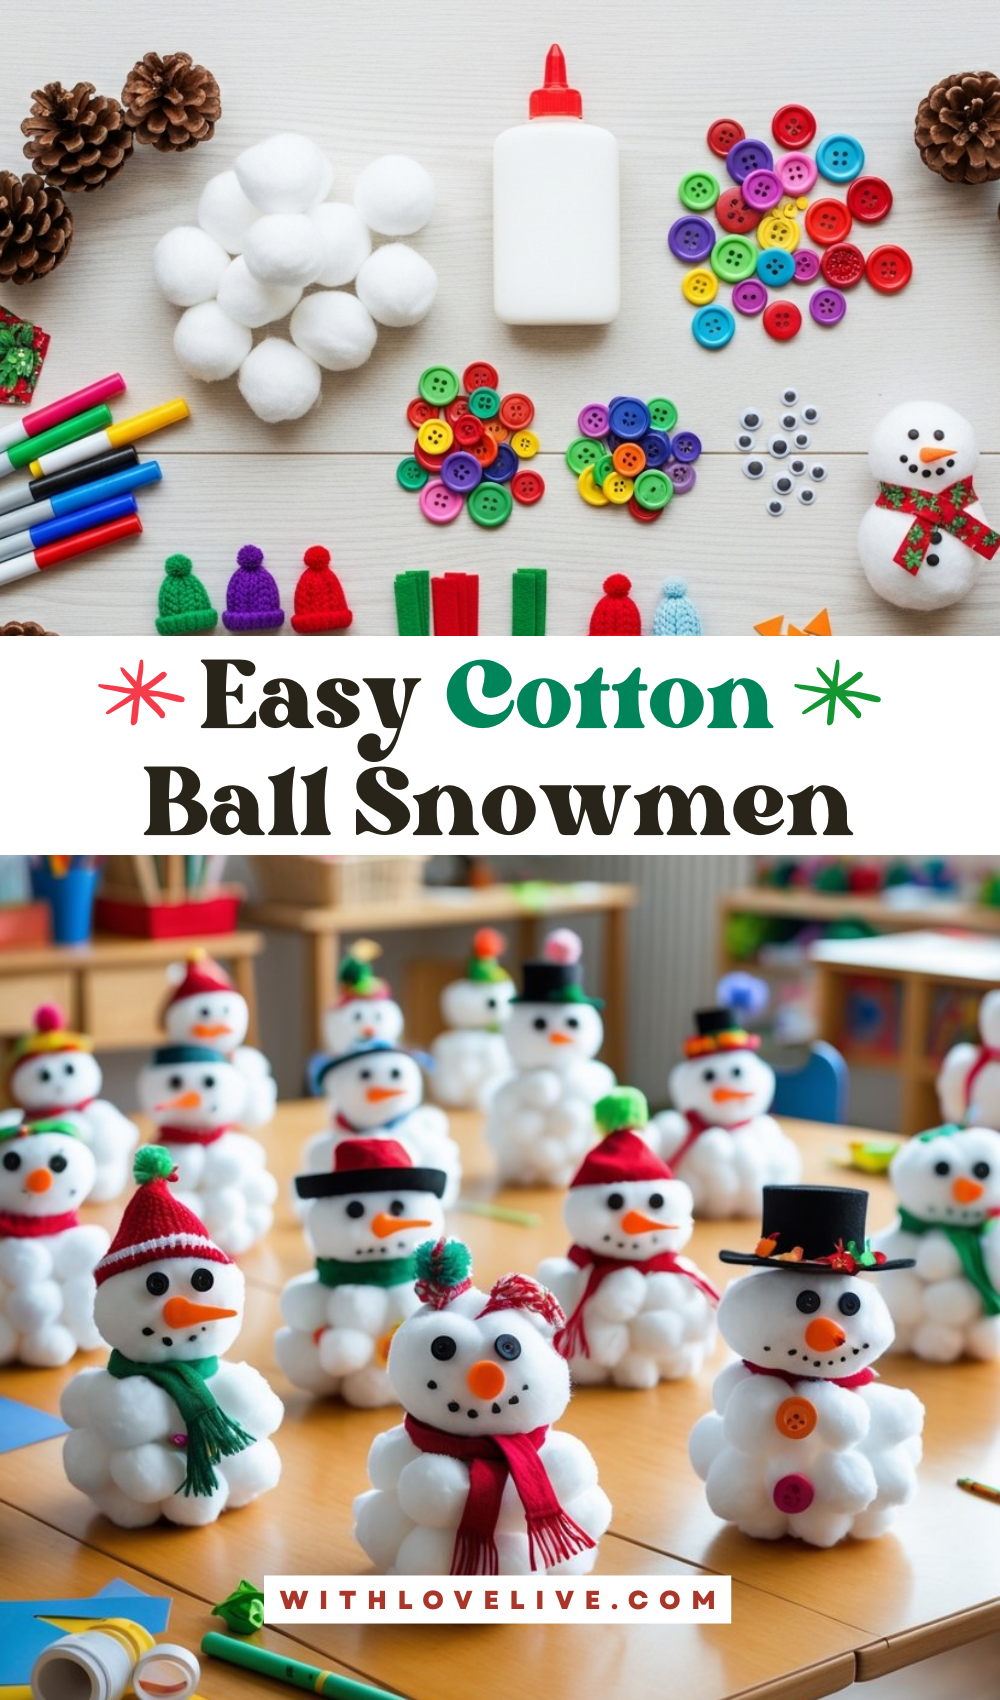
Materials
- Cotton balls (about 20–30 per snowman)
- White cardstock or foam base
- Glue (liquid school glue or hot glue for quicker drying)
- Black buttons or black paper circles (for eyes and mouth)
- Orange craft foam or paper (for the nose)
- Mini scarves (felt strips, fabric scraps, or ribbon)
- Small hats (made from felt, paper, or mini party hats)
- Colored markers or paint (optional for details)
- Craft accessories like pompoms, sequins, or mini bells
Shop the materials


The steps
Step 1: Create the Base Shape
Cut out three circles from white cardstock or foam in small, medium, and large sizes. These will form the snowman’s body. Glue the circles together, stacking the largest at the bottom and the smallest at the top.
Alternatively, you can build the snowman’s shape directly with cotton balls by gluing them together in a pyramid form.
Step 2: Add Cotton Balls
Generously spread glue over the surface of each circle and stick cotton balls side by side until the entire snowman is covered.
Overlapping the edges a little helps give it a fluffy, snow-like texture. If you want your snowman to look plumper, add a second layer of cotton balls.
Step 3: Make the Face
Use two black buttons or small paper circles for eyes and glue them in place. For the nose, cut a small triangle from orange foam or paper to resemble a carrot and glue it on.
Finish the face with a row of smaller dots or buttons for the mouth—either drawn with a marker or made from tiny paper pieces.
Step 4: Dress It Up
Now it’s time to accessorize! Cut a thin strip of felt or ribbon to wrap around the neck as a scarf. Tie it loosely and secure it with a dab of glue.
Add a mini hat to the top—felt, paper, or even a small pom-pom beanie works perfectly. You can also glue on small buttons down the snowman’s front for extra color.
Step 5: Add Personality
Encourage creativity—give your snowman earmuffs made from pom-poms and a pipe cleaner band, or glue on tiny twigs for arms. You can even add small holiday details like bells or sequins for a bit of sparkle.

Step 6: Let It Dry
Allow the glue to dry completely before moving or displaying your snowman. This ensures that all the cotton balls and decorations stay secure.
Step 7: Display Your Snowmen
Once dry, display your cotton ball snowmen on a shelf, windowsill, or classroom table. They make adorable winter decorations and can even double as handmade gifts.