


Table of Contents Show
Keeping kids busy or finding a calm hobby for yourself can be hard, especially on rainy days or slow weekends. Crochet is a soothing craft that turns yarn into something cute and useful. In this list, you’ll find simple, fun DIY crochet bag ideas that are beginner-friendly and easy to personalize.

Each idea includes materials and quick steps, so you can pick one and start right away.
Let’s jump into the projects!
1. Mini Granny Square Purse
This small purse looks like a patchwork of bright granny squares stitched together, with a simple strap. Kids and beginners love it because the squares feel quick and satisfying, and you can mix colors like a tiny quilt.
Materials Needed:
For People Who Love to Make Things ✂️
- Worsted weight yarn in 2–4 colors
- Size H/5 mm crochet hook
- Yarn needle
- Scissors
- Small button (optional)
How to make it:
- Crochet four small granny squares (about 4 inches each) and weave in ends.
- Whipstitch squares into a rectangle, fold in half, and seam sides to form a pouch.
- Single crochet around the top edge; add a button loop if desired.
- Chain a strap to your preferred length and attach; block lightly and enjoy.
2. Simple Mesh Market Tote

This airy tote has an open mesh body and sturdy handles, perfect for library books or fruit. It crochets up fast and feels magical as the mesh grows with each round.
Materials Needed:
- Cotton yarn (worsted)
- Size H/5 mm crochet hook
- Stitch marker
- Yarn needle
- Scissors
How to make it:
- Start with a magic circle and crochet a flat round base about 8–10 inches wide.
- Work mesh rounds (chain 3, skip 1, single crochet) in the round until desired height.
- Add two solid single crochet rows at the top, then chain handles and attach evenly.
- Weave in ends, lightly stretch to shape, and let it relax before using.
3. Color-Block Crossbody Bag
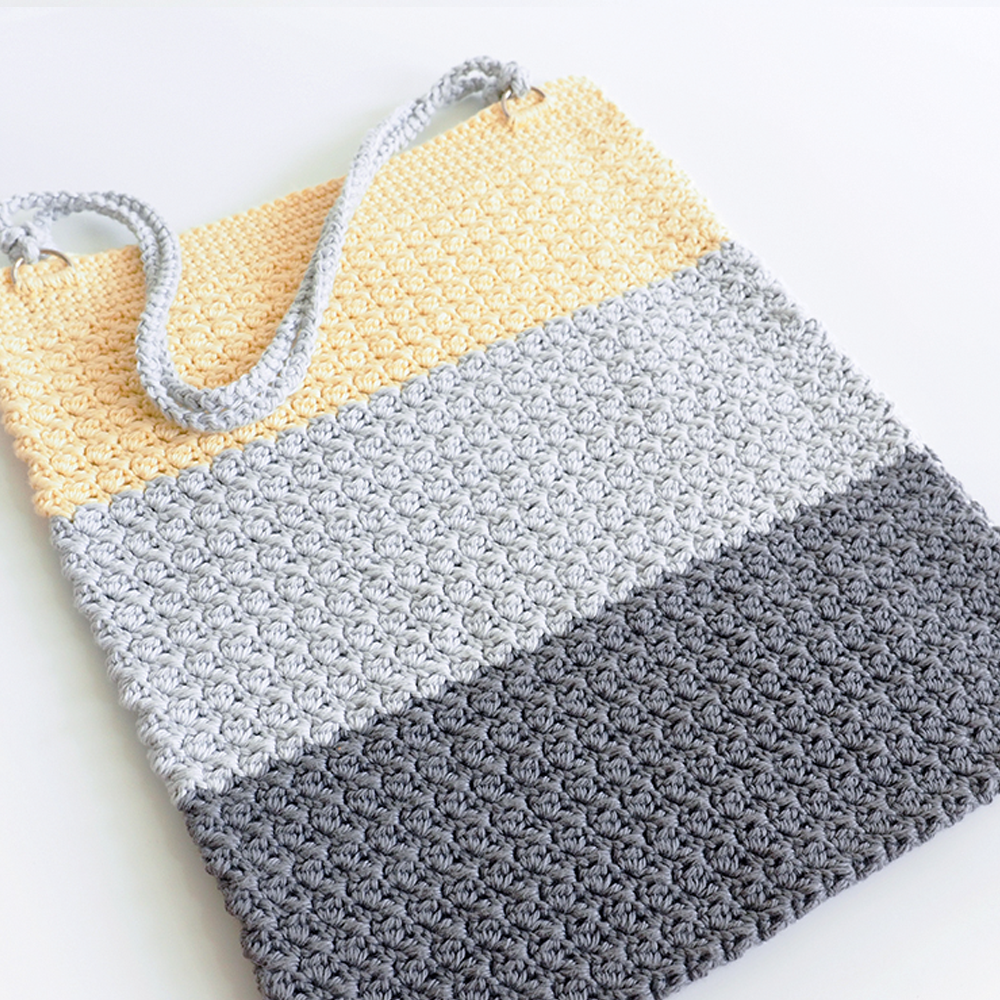
This sleek crossbody bag has two bold color sections with a long strap. It’s fun to choose colors and watch the clean lines appear, great for beginners who like simple shapes.
Materials Needed:
- Worsted weight yarn in two contrasting colors
- Size H/5 mm crochet hook
- Yarn needle
- Scissors
- Magnetic snap (optional)
How to make it:
- Single crochet a rectangle in Color A, then switch to Color B and continue to desired height.
- Fold the rectangle and seam the sides to make a pouch.
- Single crochet around the top edge for a neat finish; add a snap if you like.
- Chain a long strap and attach firmly; block flat to set shape.
4. Chunky Puff-Stitch Tote
This cozy tote features puffy textured stitches that look like little clouds. It’s satisfying to feel the squish grow row by row, and it looks fancy with simple steps.
Materials Needed:
- Bulky yarn
- Size K/6.5 mm crochet hook
- Stitch markers
- Yarn needle
- Scissors
How to make it:
- Crochet a sturdy oval base with single crochets in the round.
- Work puff-stitch rounds up the sides until the bag is tall enough.
- Add two rows of half-double crochet at the top for stability.
- Chain and attach short handles; weave in ends and shape the bag.
5. Sweet Strawberry Pouch
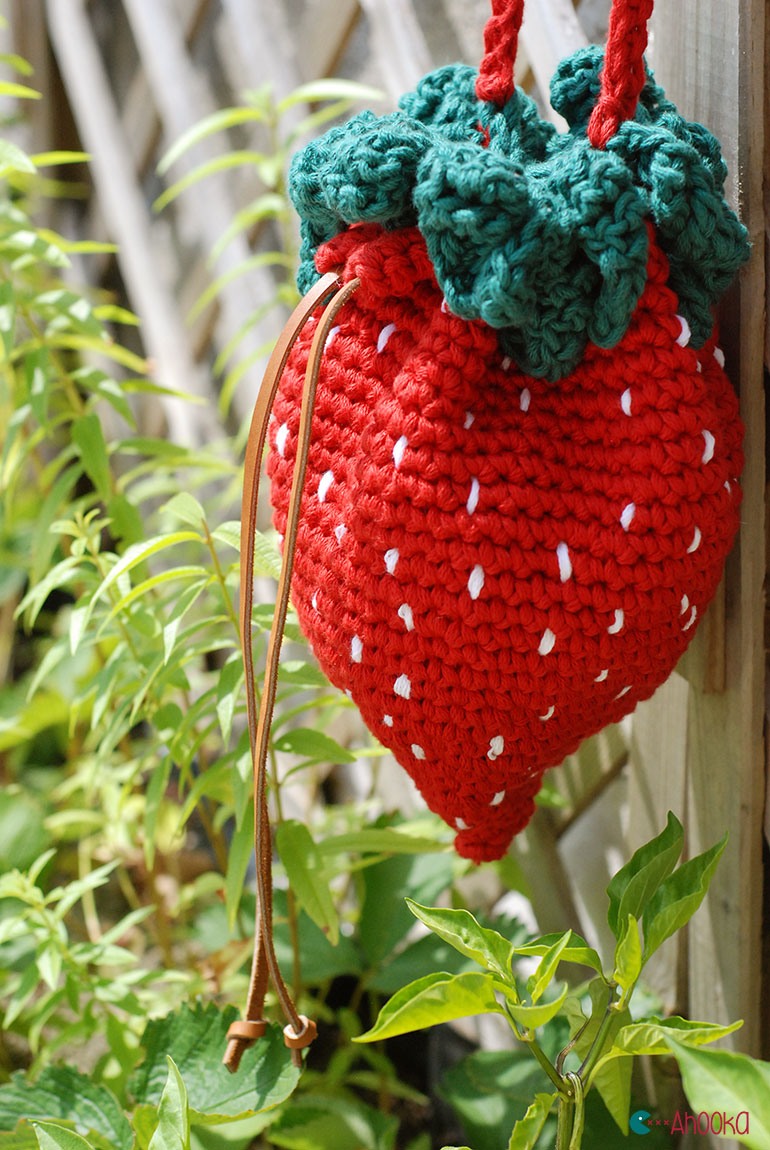
Shaped like a bright red strawberry with a green leafy top, this pouch closes with a drawstring. Kids adore the fruit look, and it’s quick enough for a weekend project.
Materials Needed:
- Red and green worsted yarn
- Size G/4 mm crochet hook
- Yarn needle
- Scissors
- Small beads or white yarn for “seeds” (optional)
How to make it:
- Crochet a small red cone in the round, increasing then decreasing to form a berry pouch.
- Switch to green and work a few rounds for the top, adding simple leaf points.
- Embroider tiny white “seeds” or sew on small beads.
- Chain a drawstring and thread it through the top; cinch and knot.
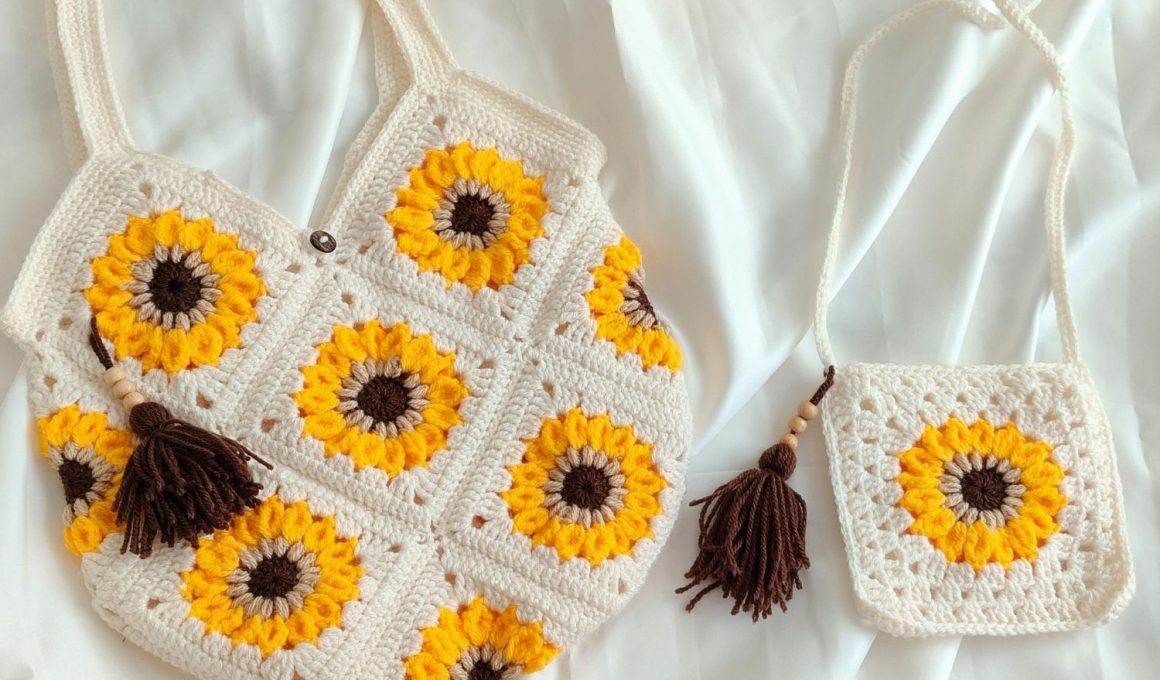
6. Sunburst Circle Sling Bag
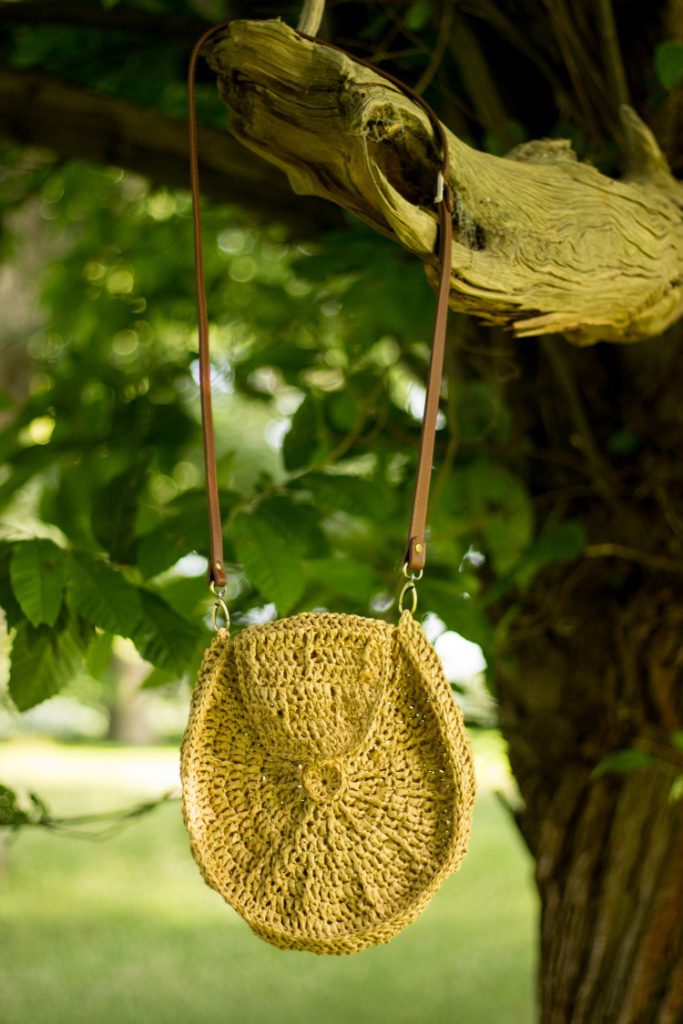
This round sling bag uses sunburst granny circles for a cheerful, retro look. It’s exciting to see the center burst of color expand into a neat circle.
Materials Needed:
- Worsted yarn in 3–4 sunny colors
- Size H/5 mm crochet hook
- Yarn needle
- Scissors
- Lining fabric and needle/thread (optional)
How to make it:
- Crochet two sunburst granny circles of equal size.
- Single crochet the circles together around the edge, leaving an opening at the top.
- Add a row of single crochet along the opening for strength.
- Chain a strap and attach; add a simple fabric lining if desired.
7. Turtle-Shell Backpack
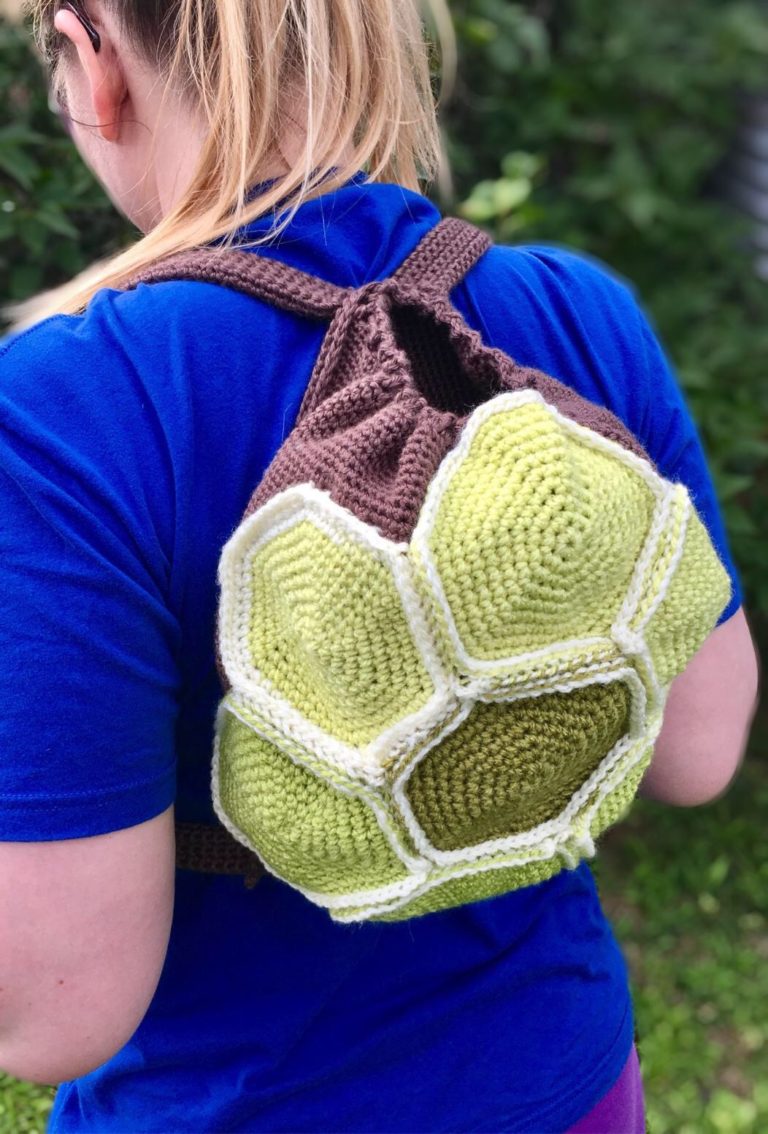
This playful backpack has hexagon “shell” motifs joined into a rounded pouch with two straps. Kids enjoy wearing their own tiny “turtle shell,” and the motifs are easy to repeat.
Materials Needed:
- Worsted yarn in green shades and brown
- Size H/5 mm crochet hook
- Yarn needle
- Scissors
- Two buttons or toggles (optional)
How to make it:
- Crochet several hexagon motifs in greens and a brown center.
- Join motifs into a rounded pouch shape; seam sides and bottom.
- Single crochet a sturdy top edge and add a flap with a button loop.
- Chain two straps, attach to top and bottom, and sew on buttons or toggles.
8. Rainbow Stripe Drawstring Bag
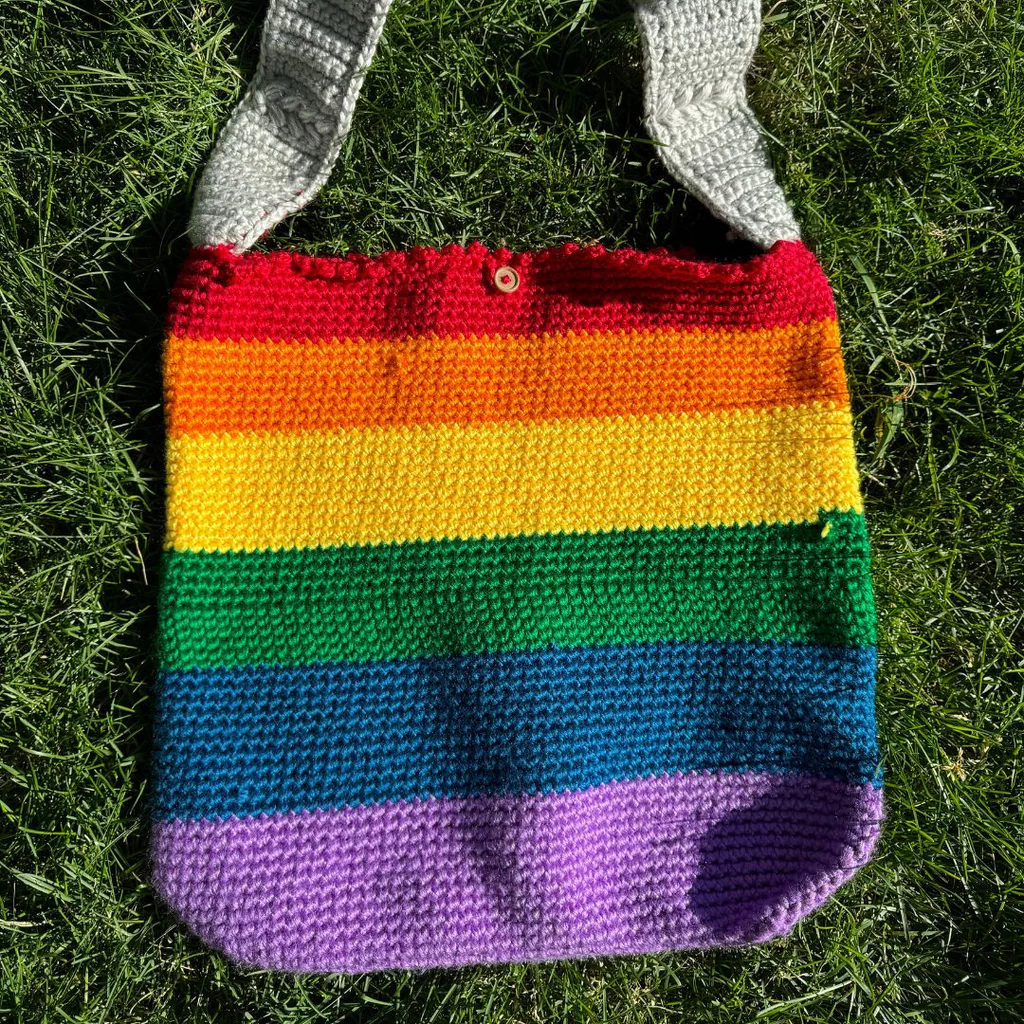
This bag has bright horizontal stripes and a simple cinch top. Changing colors keeps it interesting, and the drawstring makes it easy for kids to use.
Materials Needed:
- Worsted yarn in rainbow colors
- Size H/5 mm crochet hook
- Yarn needle
- Scissors
- Cord stoppers (optional)
How to make it:
- Work in the round with half double crochet, switching colors every 3–4 rows.
- Continue until the bag is tall enough; add eyelet row (chain-1, skip-1) near top.
- Make a long chain cord or use a shoelace as a drawstring.
- Thread the cord through eyelets, add stoppers if desired, and weave in ends.
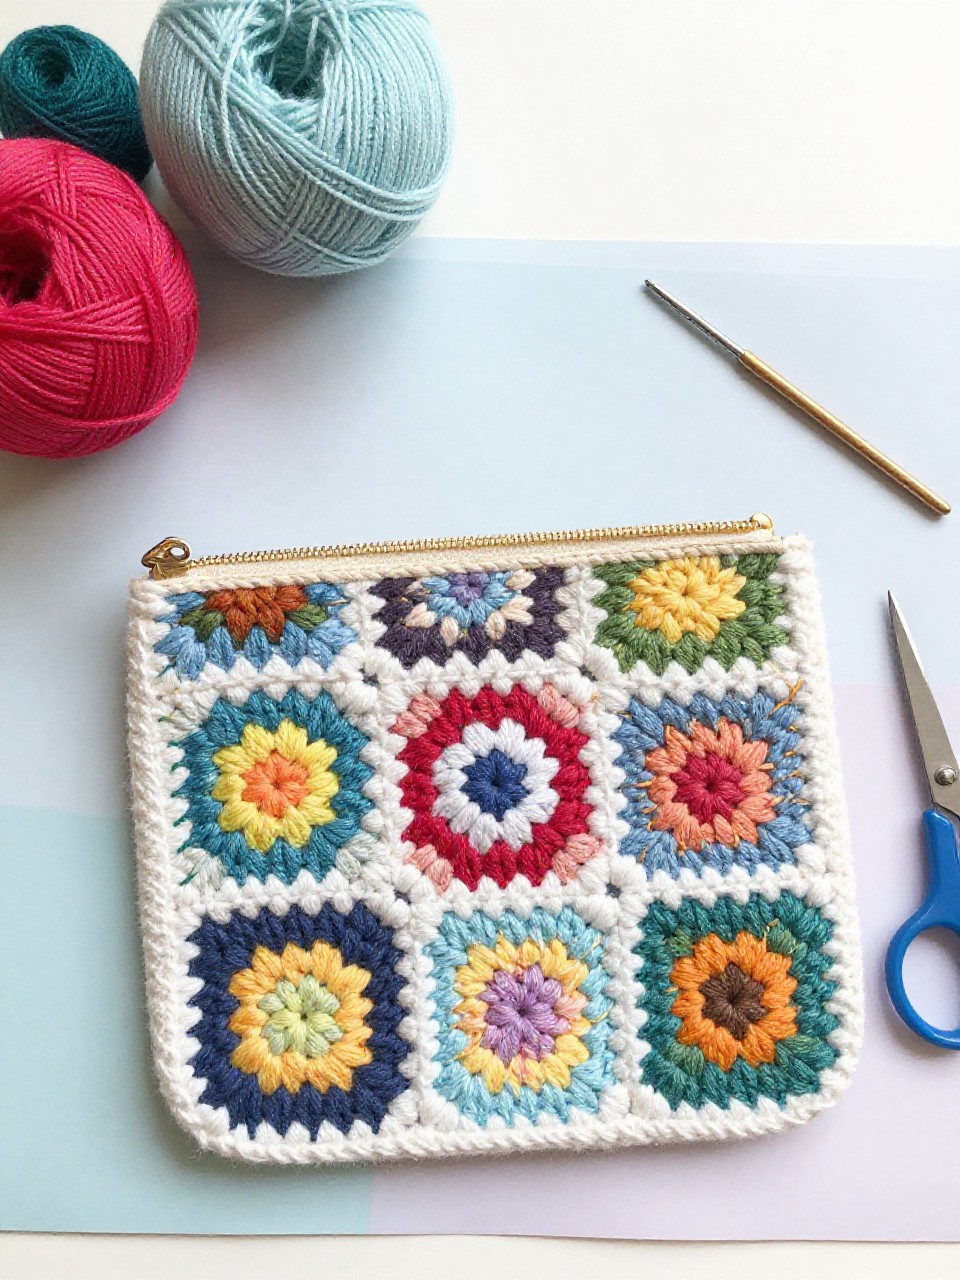
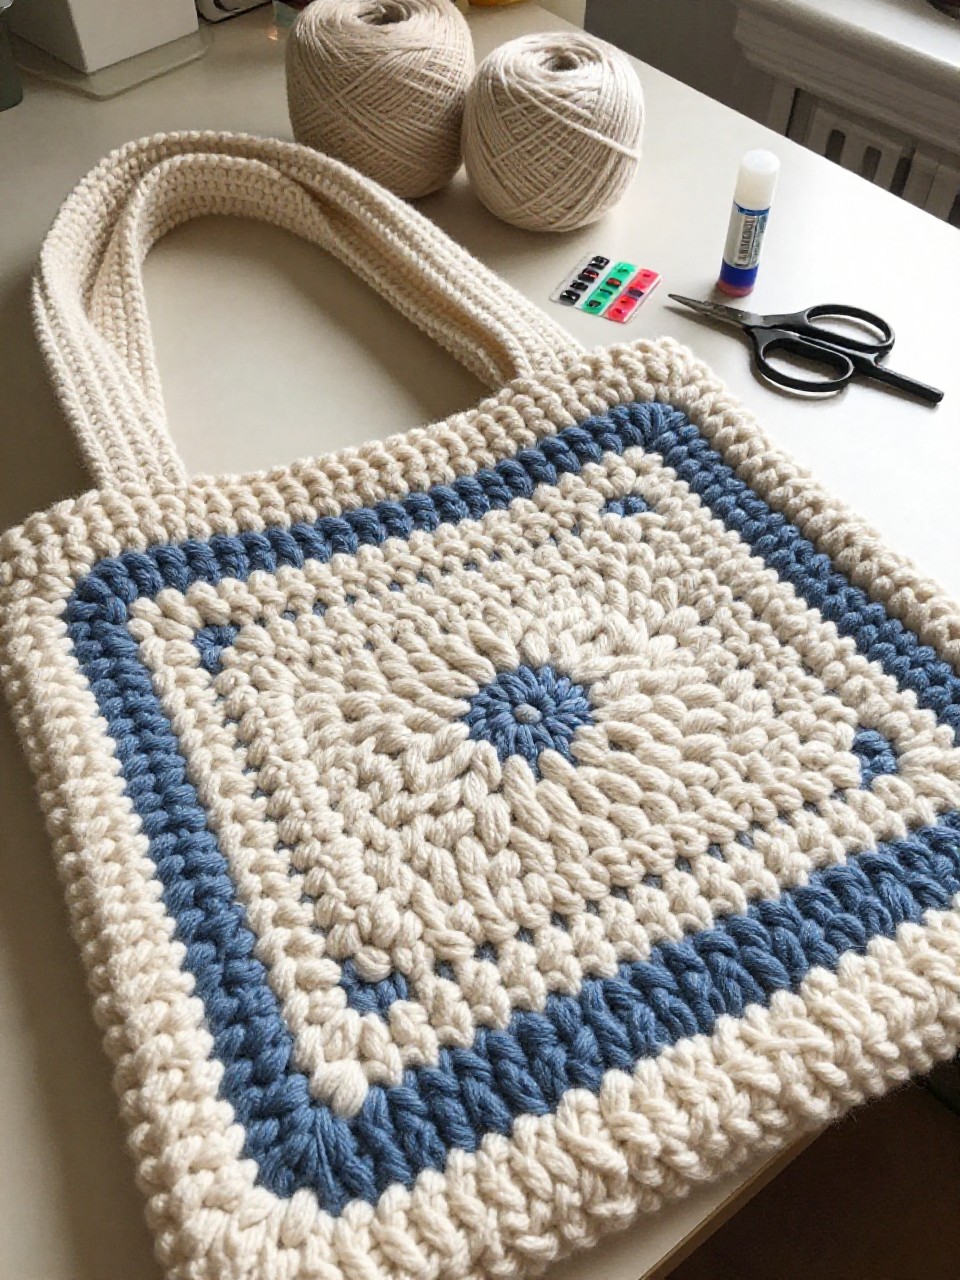
9. Daisy Granny Pouch
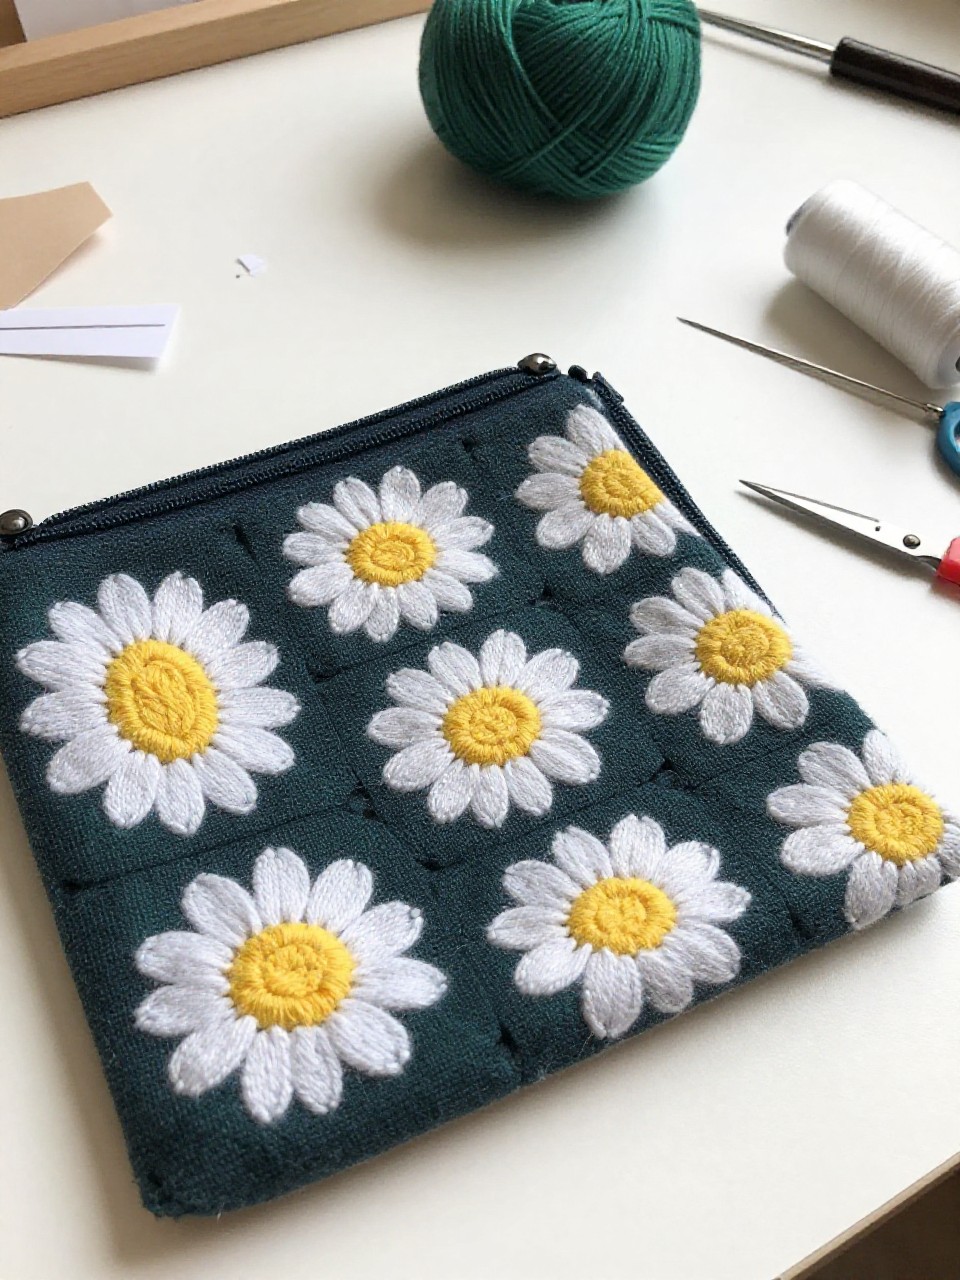
This small zipper pouch features granny squares with a daisy flower in the center. It feels sweet and vintage, and adding a zipper gives a neat, grown-up finish.
Materials Needed:
- Cotton yarn in white, yellow, and a background color
- Size G/4 mm crochet hook
- 6–8 inch zipper
- Yarn needle
- Sewing needle and thread
How to make it:
- Crochet two daisy granny squares the same size.
- Join squares around three sides; leave top open for zipper placement.
- Hand-sew the zipper along the top edge to the crochet fabric.
- Weave in ends and lightly block to square the pouch.
10. Shell-Stitch Beach Bag
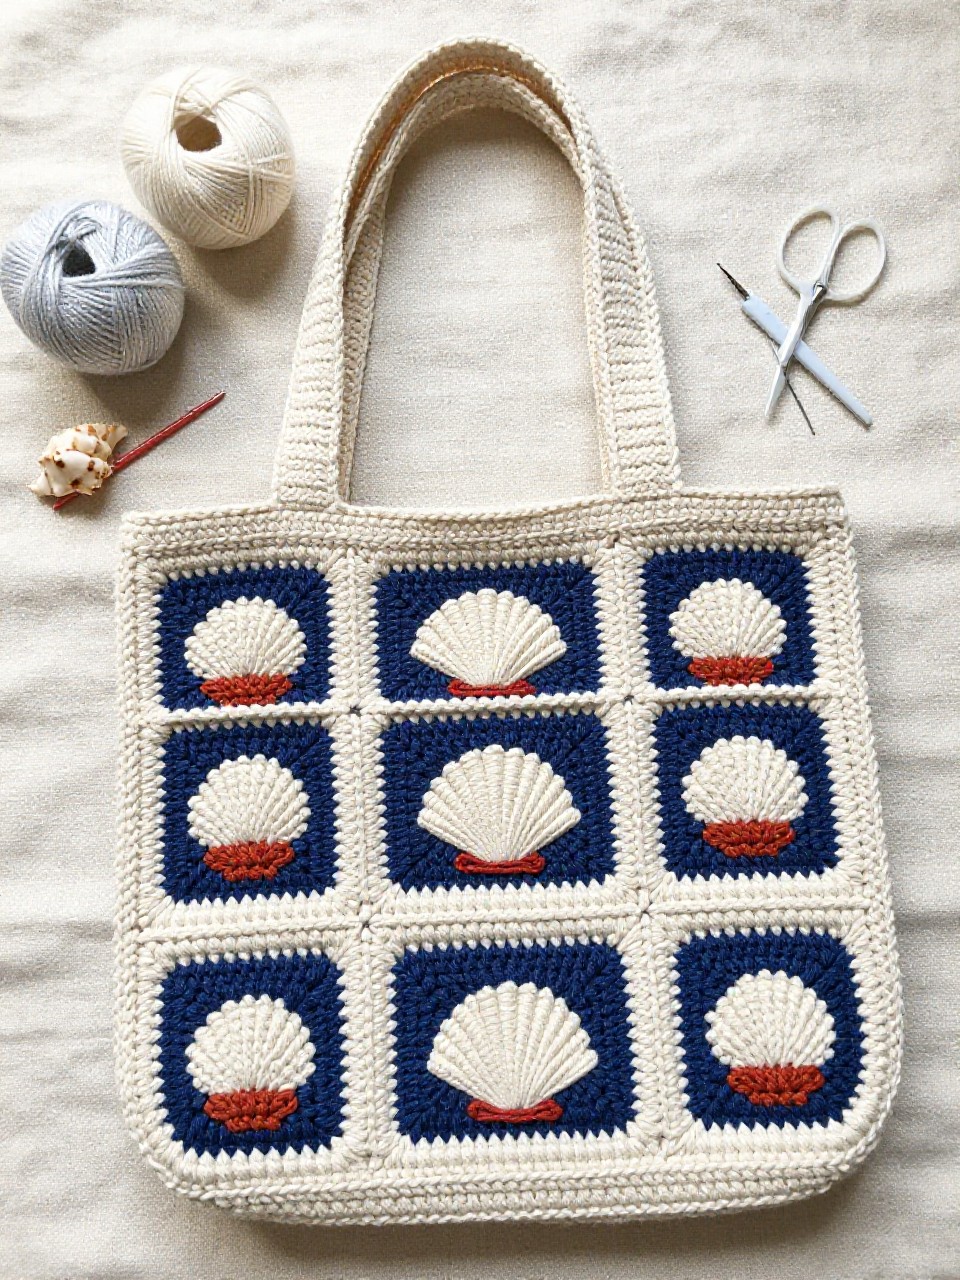
This roomy bag has wavy shell stitches that look like ocean ripples. It’s relaxing to work the repeating pattern, and the texture feels beachy and fun.
Materials Needed:
- Cotton yarn (sturdy)
- Size I/5.5 mm crochet hook
- Stitch markers
- Yarn needle
- Scissors
How to make it:
- Crochet a flat oval base, then switch to shell-stitch rounds for the sides.
- Continue shells until the bag reaches beach-bag height.
- Work several rows of tight single crochet at the top for strength.
- Chain two medium handles and attach securely; block to shape.
11. Heart Pocket Mini Bag
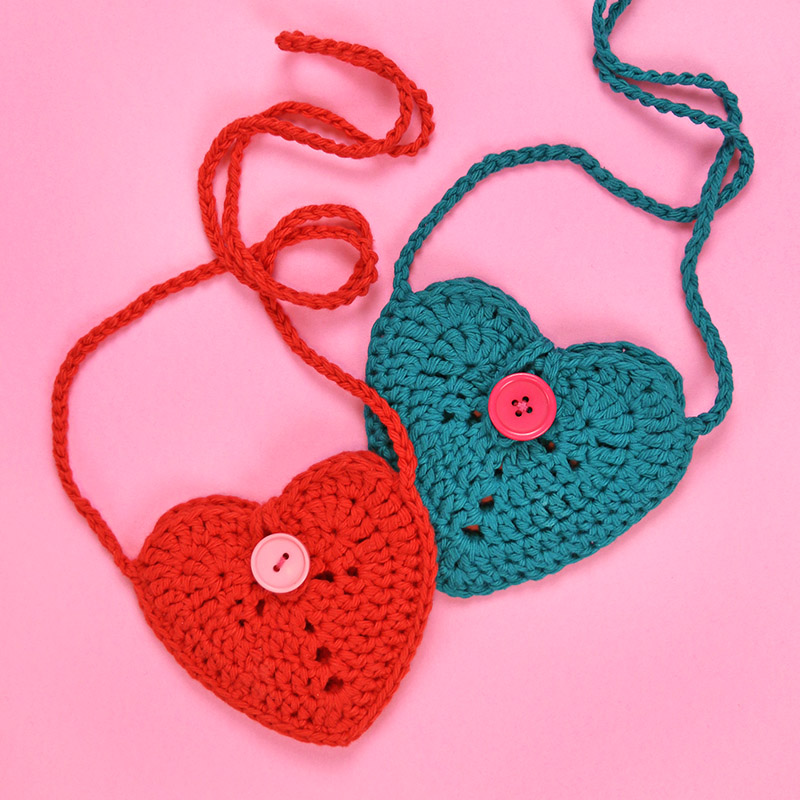
This cute mini bag has a heart-shaped pocket on the front for notes or coins. It’s a sweet gift, and the simple shapes are perfect for beginners.
Materials Needed:
- Worsted yarn in two colors
- Size G/4 mm crochet hook
- Yarn needle
- Scissors
- Small button (optional)
How to make it:
- Single crochet a small rectangle for the bag body; fold and seam sides.
- Crochet a flat heart shape and stitch it to the front as a pocket.
- Add a row of single crochet around the opening; attach a button if using.
- Chain a strap and tie on firmly; weave in all ends.
12. Checkerboard Tote

This tote shows a bold check pattern using two colors switched every few stitches. Watching the squares appear is satisfying, and it looks trendy with simple stitches.
Materials Needed:
- Worsted yarn in two high-contrast colors
- Size H/5 mm crochet hook
- Stitch markers
- Yarn needle
- Scissors
How to make it:
- Work flat panels in single crochet, switching colors for checkerboard blocks.
- Make a front and back panel; seam sides and bottom together.
- Single crochet around the top for a neat edge.
- Chain and attach two handles; block to even the squares.
13. Star Motif Crossbody
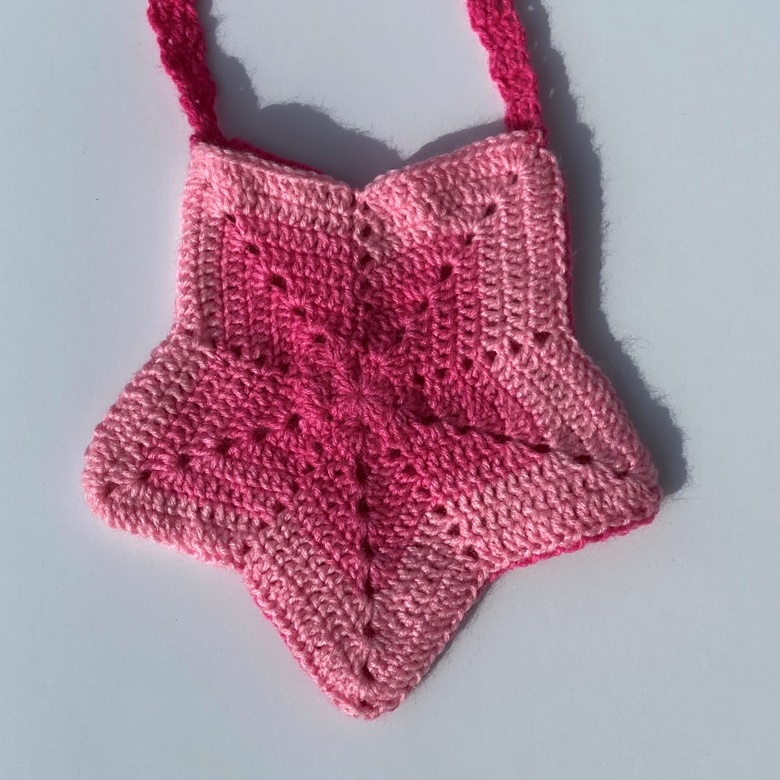
This small bag features a star-shaped granny motif on the front panel. It’s fun to make the star pop with a contrasting color and add a simple strap.
Materials Needed:
- Worsted yarn in two colors
- Size G/4 mm crochet hook
- Yarn needle
- Scissors
- Snap or button (optional)
How to make it:
- Crochet a front panel with a star motif and a plain back panel.
- Join panels on three sides to form the pouch.
- Add a row of single crochet across the top and sew on a snap or button.
- Chain a crossbody strap and attach securely; weave in ends.
14. Boho Fringe Shoulder Bag
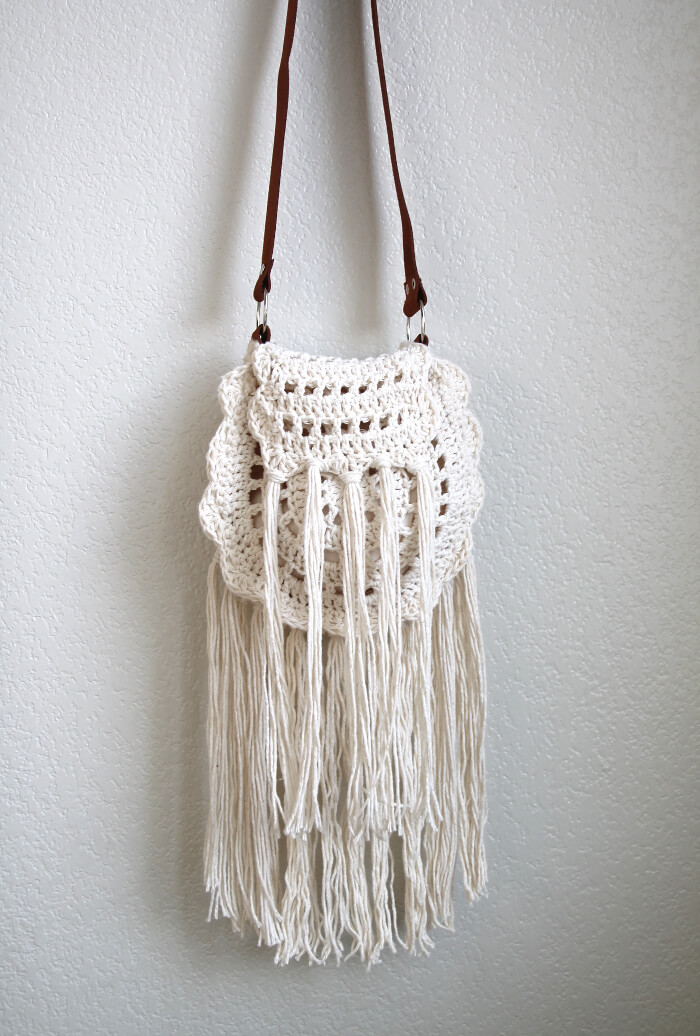
This relaxed shoulder bag has a simple body with playful fringe along the bottom edge. The fringe is the best part—easy to add and very stylish.
Materials Needed:
- Worsted or aran yarn
- Size H/5 mm crochet hook
- Yarn needle
- Scissors
- Beads for fringe (optional)
How to make it:
- Single crochet a wide rectangle, fold, and seam sides for a pouch.
- Work a few rows of half double crochet at the top for stability.
- Cut yarn strands and knot them along the bottom for fringe; add beads if you like.
- Chain a shoulder strap and attach; trim fringe evenly.
15. Bear Face Kids Pouch
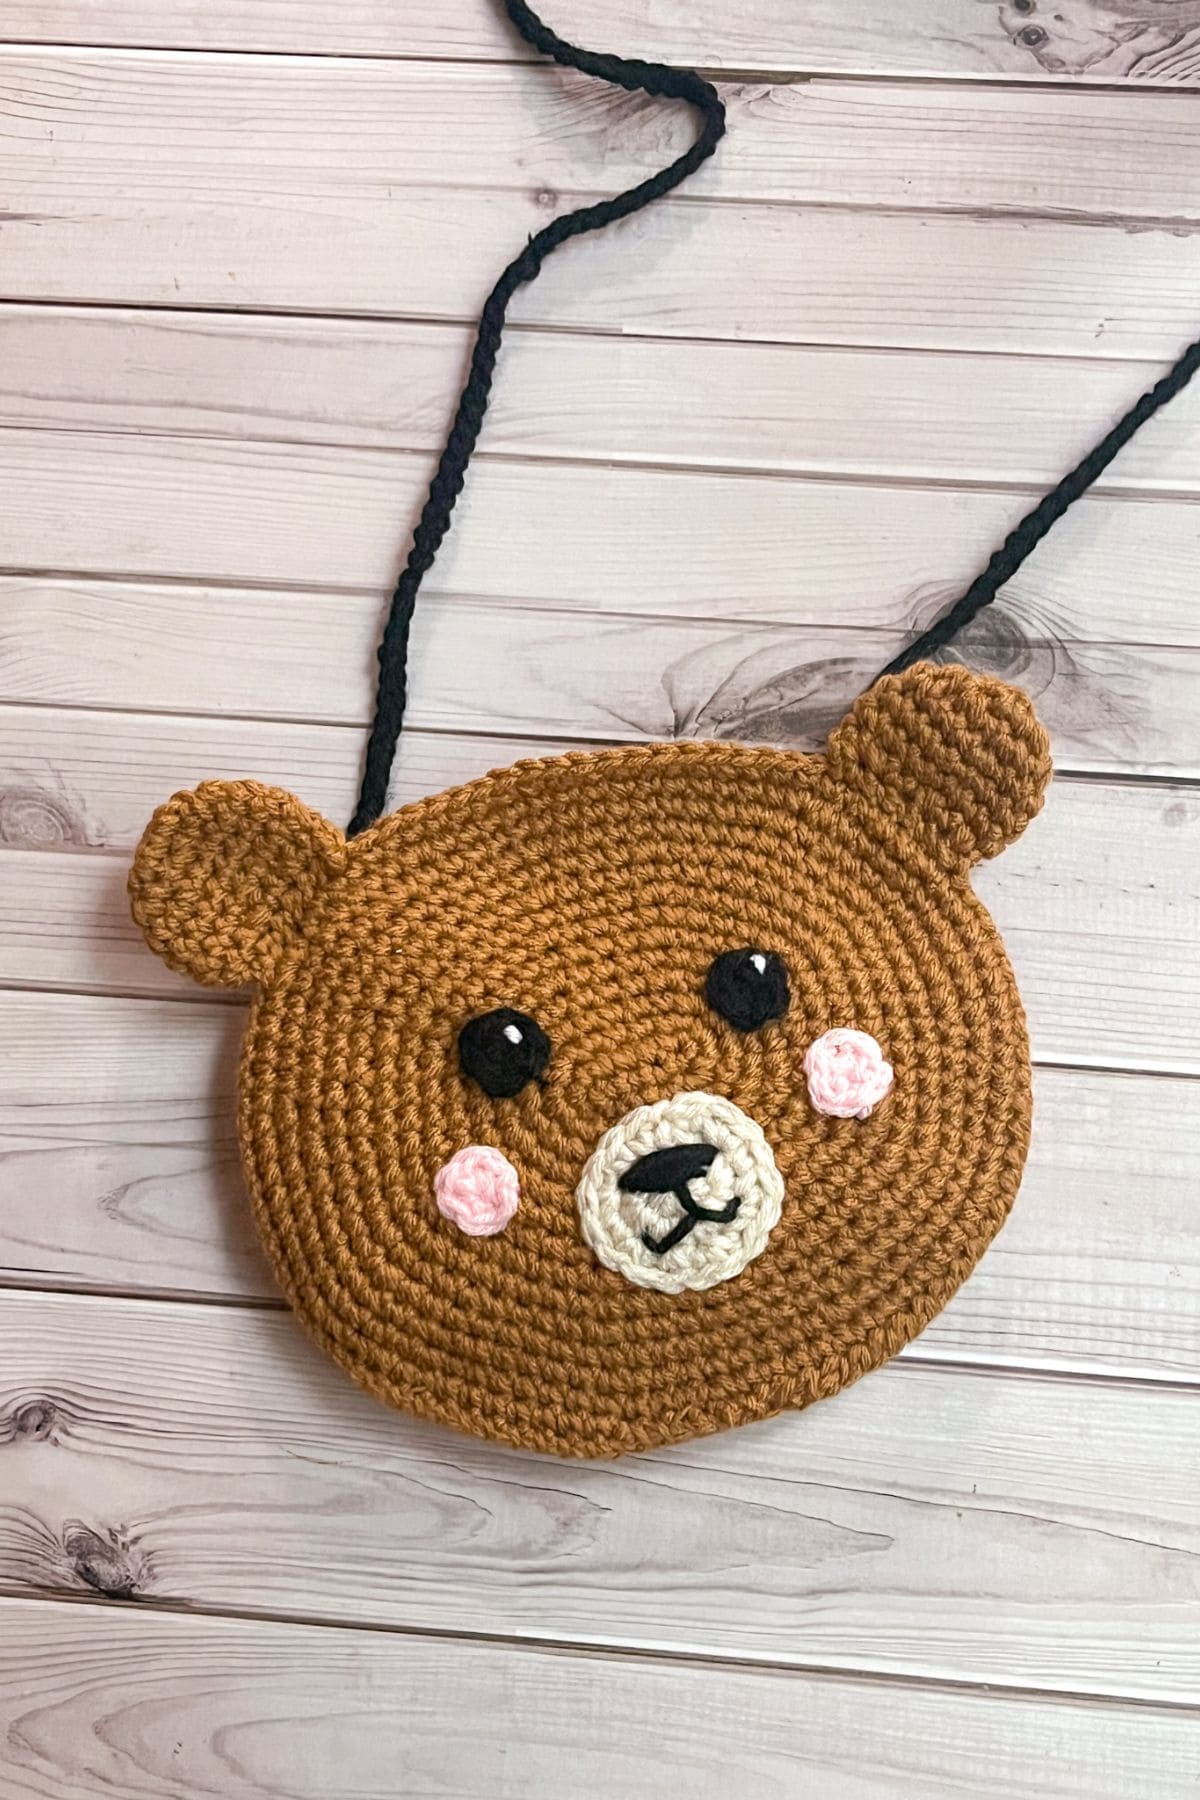
This small pouch has a cute bear face with simple crochet ears and embroidered features. Kids love the friendly look, and it’s a quick project they can help decorate.
Materials Needed:
- Brown and cream worsted yarn
- Size G/4 mm crochet hook
- Yarn needle
- Scissors
- Safety eyes or black yarn for embroidery
How to make it:
- Crochet two small round panels in brown for front and back.
- Add a cream oval muzzle, embroider nose and mouth, and attach safety eyes.
- Single crochet panels together, leaving a top opening; add two small ears.
- Chain a strap and attach; weave in ends and gently block.