


Table of Contents Show
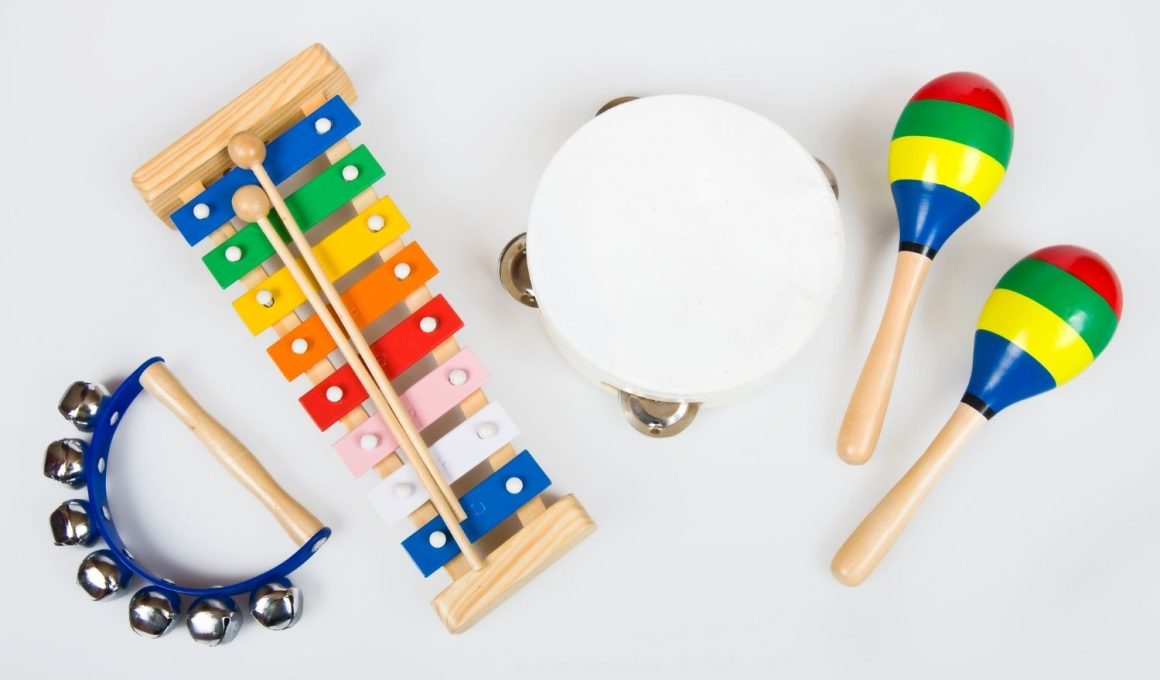
Keeping preschoolers busy can feel tough, especially on rainy days or when you need simple classroom activities. Music crafts are a great way to blend art, movement, and sound without complicated steps or pricey supplies.
This list gives you fun, easy projects that help kids explore rhythm, listen closely, and make noise in a positive way.
Let’s jump into playful music crafts that are quick to set up and joyful to use.
1. Paper Plate Tambourine
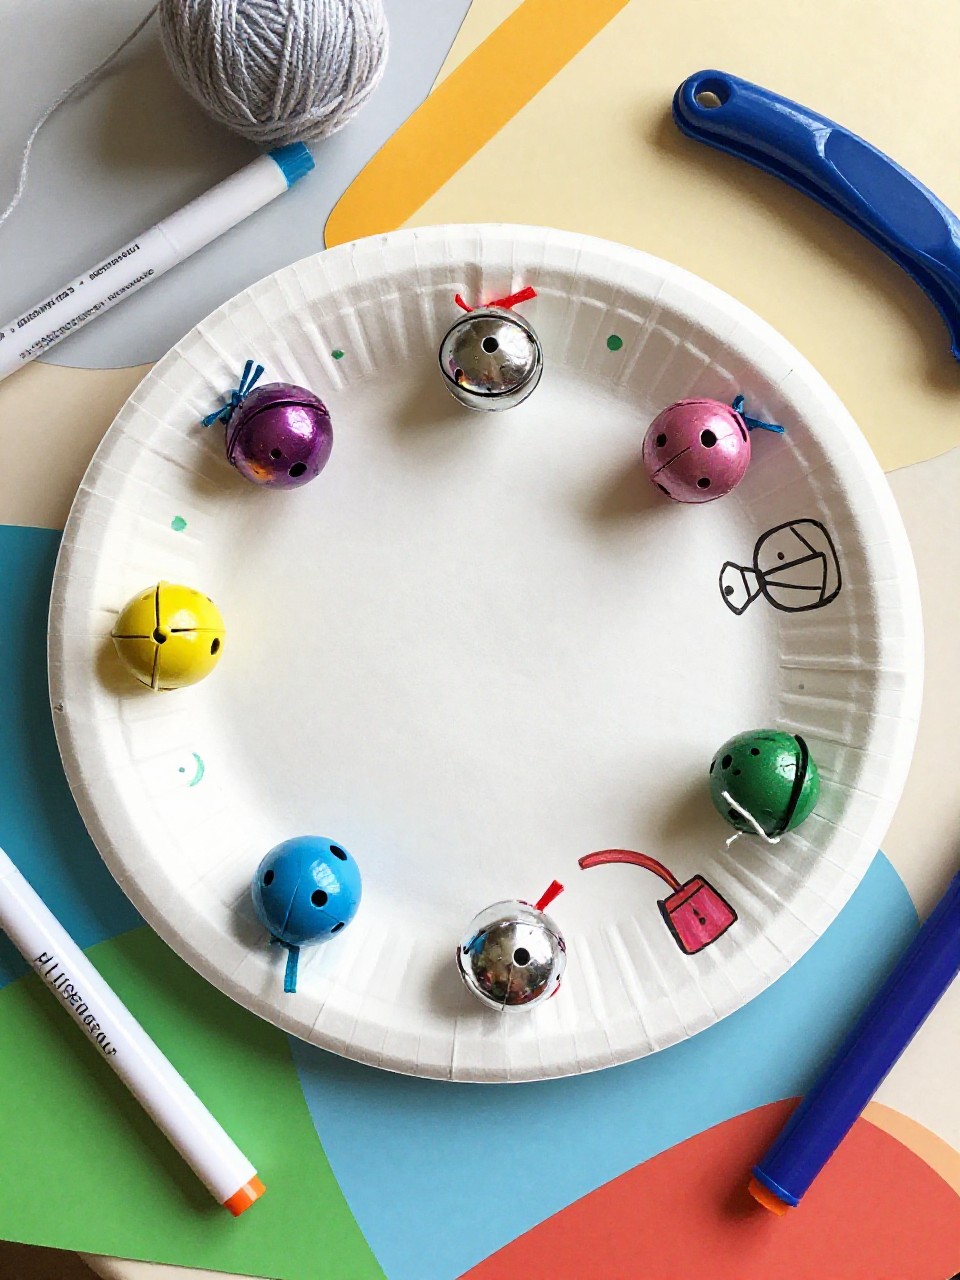
This craft makes a round shaker tambourine with bright colors and fun jingles around the edge. Kids love shaking it for instant sound and dancing to their own beat; it’s an easy, low-mess project for beginners.
Materials Needed:
For People Who Love to Make Things ✂️
- 2 sturdy paper plates
- Jingle bells or dried beans
- Hole punch and yarn/string
- Markers, stickers, or paint
- Glue stick or tape
How to make it:
- Decorate the underside of both plates first so they show on the outside.
- Place bells or beans between plates; line up edges.
- Punch holes around the rim and tie with yarn to secure.
- Shake to test sound and add extra stickers once dry.
2. Plastic Egg Maracas
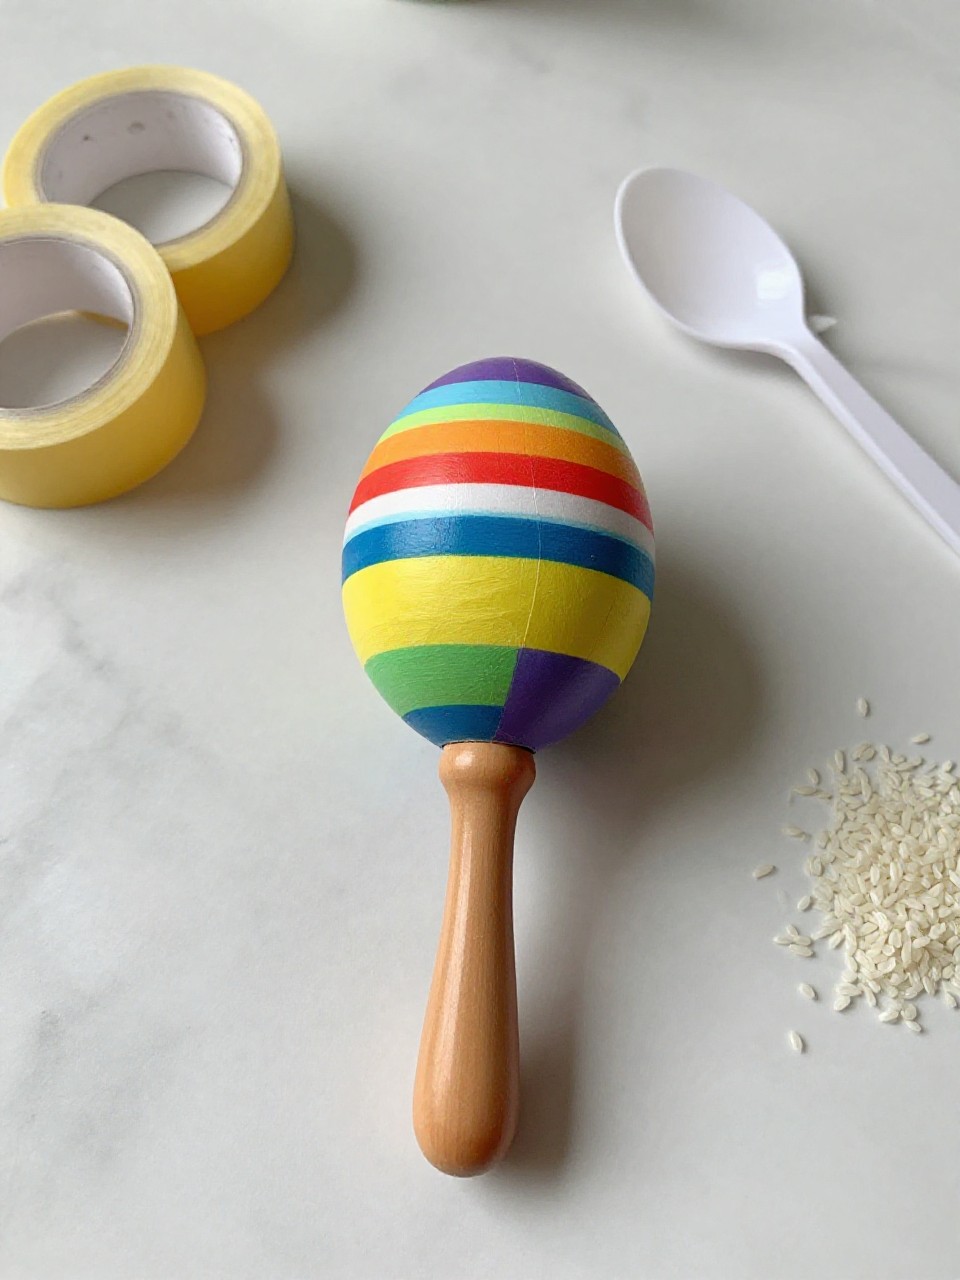
These small egg shakers look like colorful maracas using plastic Easter eggs and spoon handles. Kids enjoy choosing fillings for different sounds and love the quick reward of shake-and-play music.
Materials Needed:
- Plastic Easter eggs
- Dry rice, beans, or pasta
- 2 plastic spoons per egg
- Washi tape or duct tape
- Stickers
How to make it:
- Fill each egg halfway with rice or beans and snap shut.
- Sandwich the egg between two spoons to form a handle.
- Wrap tape around tightly from top to bottom.
- Decorate with stickers and shake to explore rhythms.
3. Rainbow Straw Pan Flute
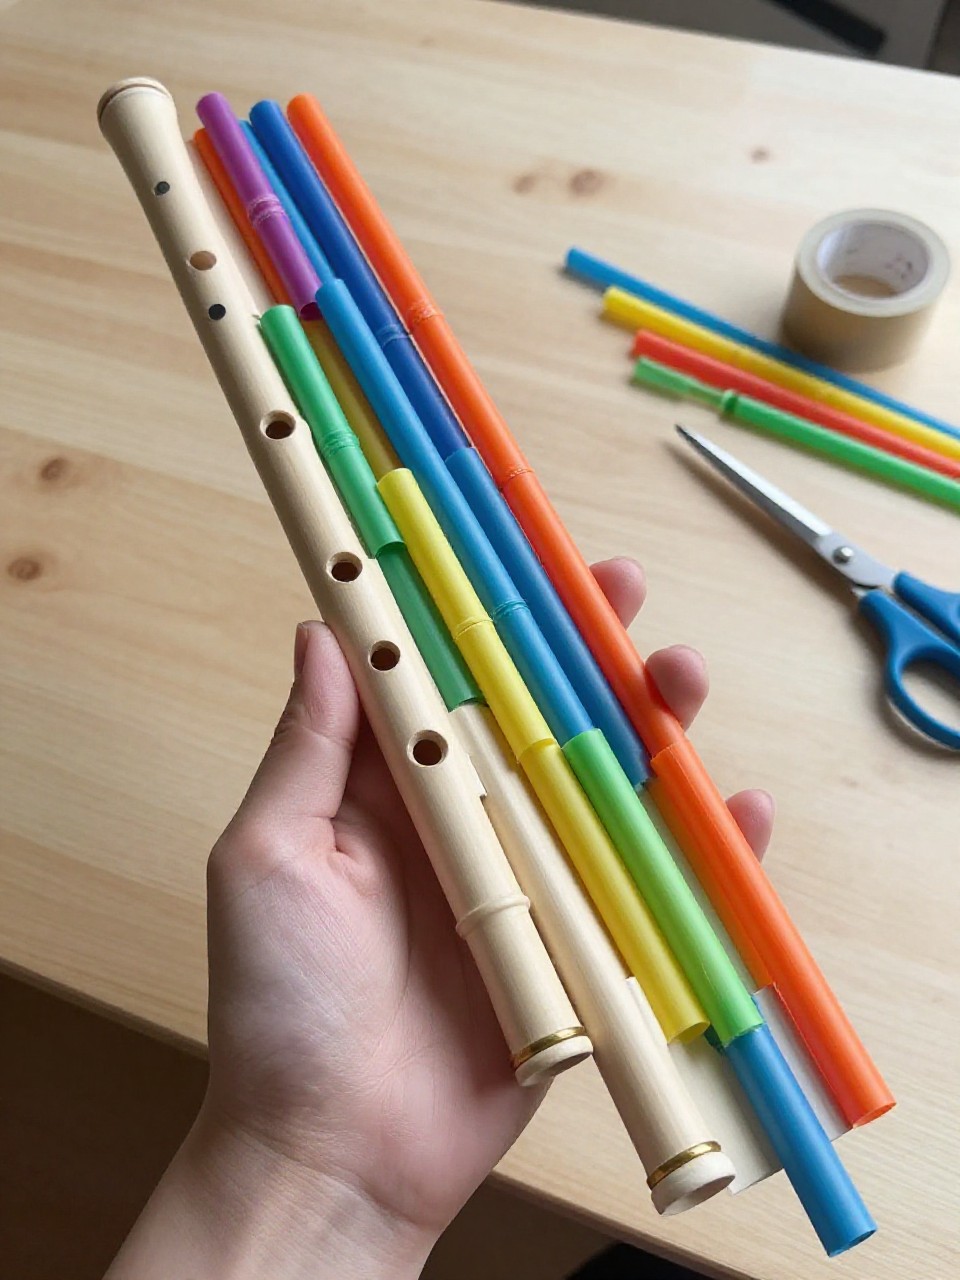
This looks like a tiny rainbow flute made from colorful drinking straws lined up from long to short. Kids love hearing high and low notes as they blow across the tops and enjoy arranging the rainbow order.
Materials Needed:
- Colorful drinking straws
- Scissors
- Clear tape or hot glue (adult help)
- Paper strip for backing
- Markers (optional for labels)
How to make it:
- Cut straws into different lengths to make varied pitches.
- Line them up on a paper strip from longest to shortest.
- Tape or glue straws securely to the strip.
- Label colors or numbers and blow gently across the tops.
4. Shoebox Rubber Band Guitar
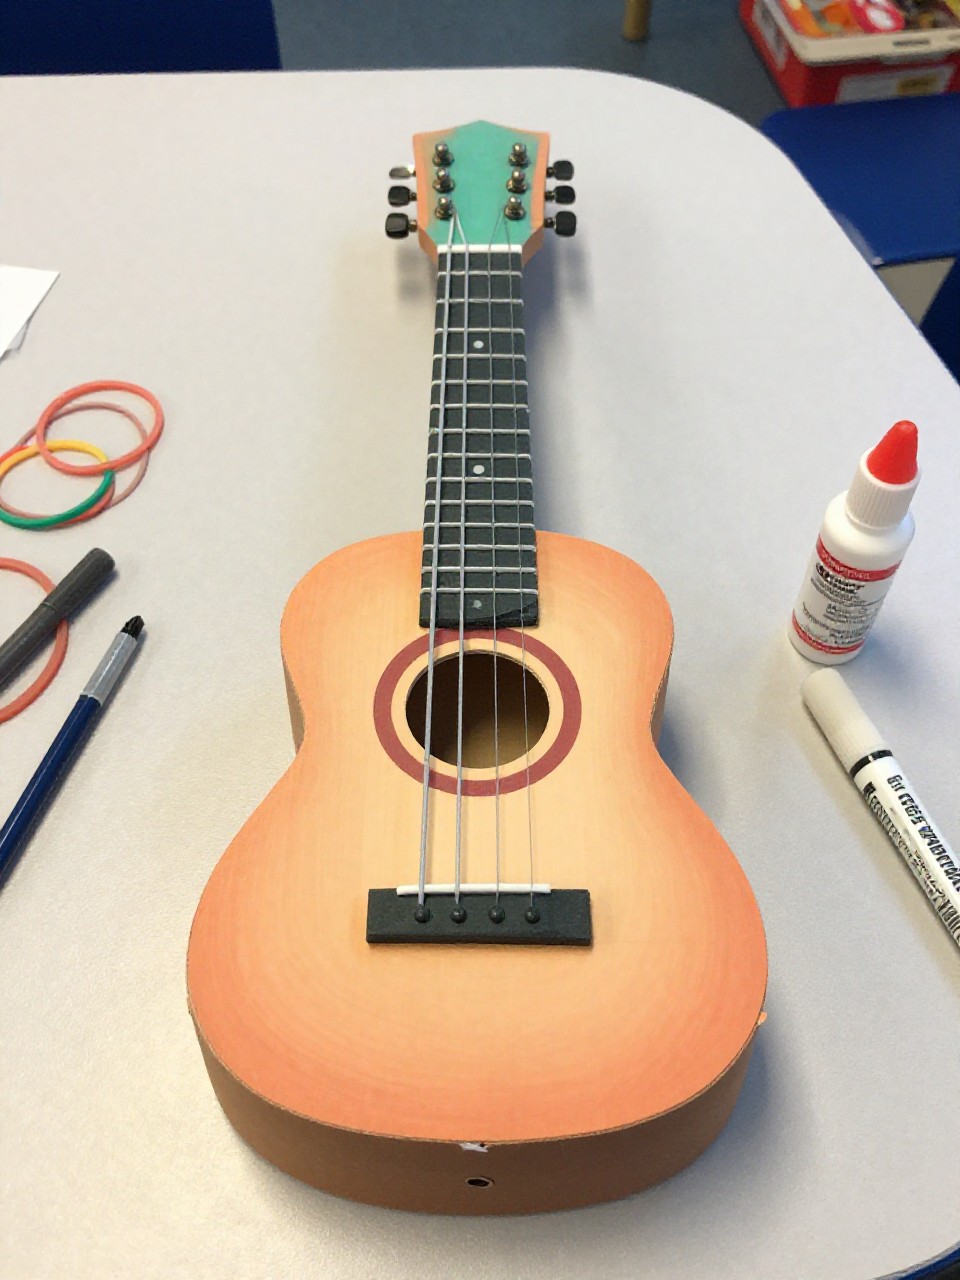
This mini guitar looks like a simple stringed instrument made from a shoebox and rubber bands. Kids enjoy plucking the bands to hear different sounds and can decorate the “body” like a real guitar.
Materials Needed:
- Empty shoebox with lid
- Assorted rubber bands
- Paper towel roll (neck)
- Tape and glue
- Paint, markers, stickers
How to make it:
- Cut a large oval hole in the shoebox lid.
- Stretch rubber bands lengthwise over the hole for strings.
- Tape a paper towel roll to the box as a neck.
- Decorate the box, then strum to explore pitch and rhythm.
5. Bottle Cap Castanets

These look like little snapping clappers made from folded cardboard and metal bottle caps. Kids love the click-clack sound and the easy squeeze motion that builds finger strength.
Materials Needed:
- Sturdy cardboard strip
- 2 metal bottle caps
- Hot glue (adult help)
- Markers or paint
- Stickers (optional)
How to make it:
- Fold a cardboard strip like a taco to make a hinge.
- Glue a bottle cap inside each end facing each other.
- Decorate the outside with colors and stickers.
- Pinch to clap and play simple rhythms.
6. Rainstick from a Cardboard Tube
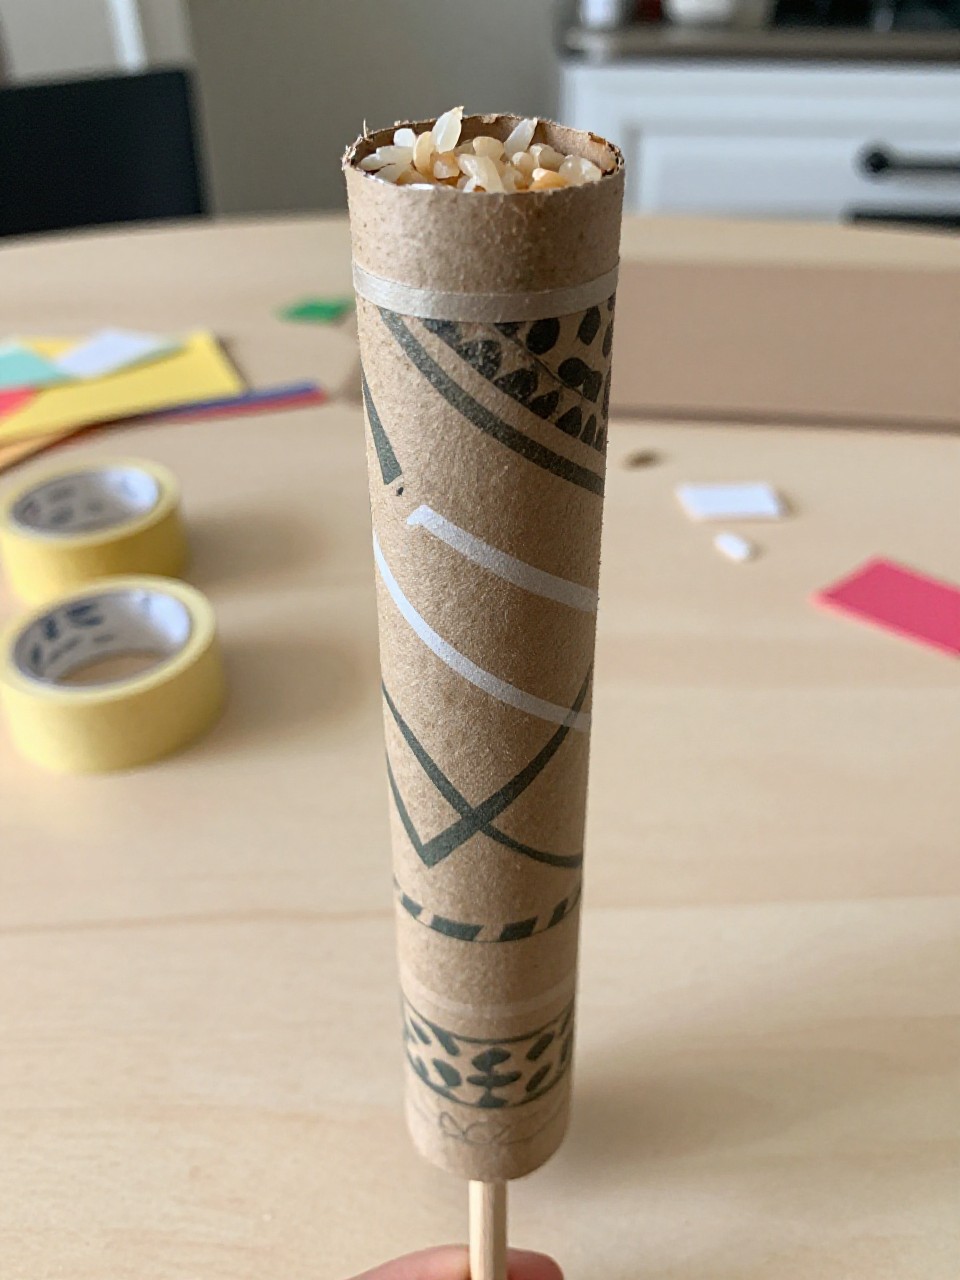
This looks like a tall tube covered in earthy patterns that makes a soothing rain sound when tilted. Kids enjoy the calm noise and decorating it with paint or paper.
Materials Needed:
- Paper towel or wrapping paper tube
- Aluminum foil
- Dry rice or small beans
- Construction paper and glue/tape
- Markers, washi tape, stickers
How to make it:
- Twist aluminum foil into a long spiral and insert into tube.
- Seal one end with paper and tape; pour in rice/beans.
- Seal the other end tightly.
- Decorate the outside and tilt slowly to hear “rain.”
7. Paper Plate Cymbals
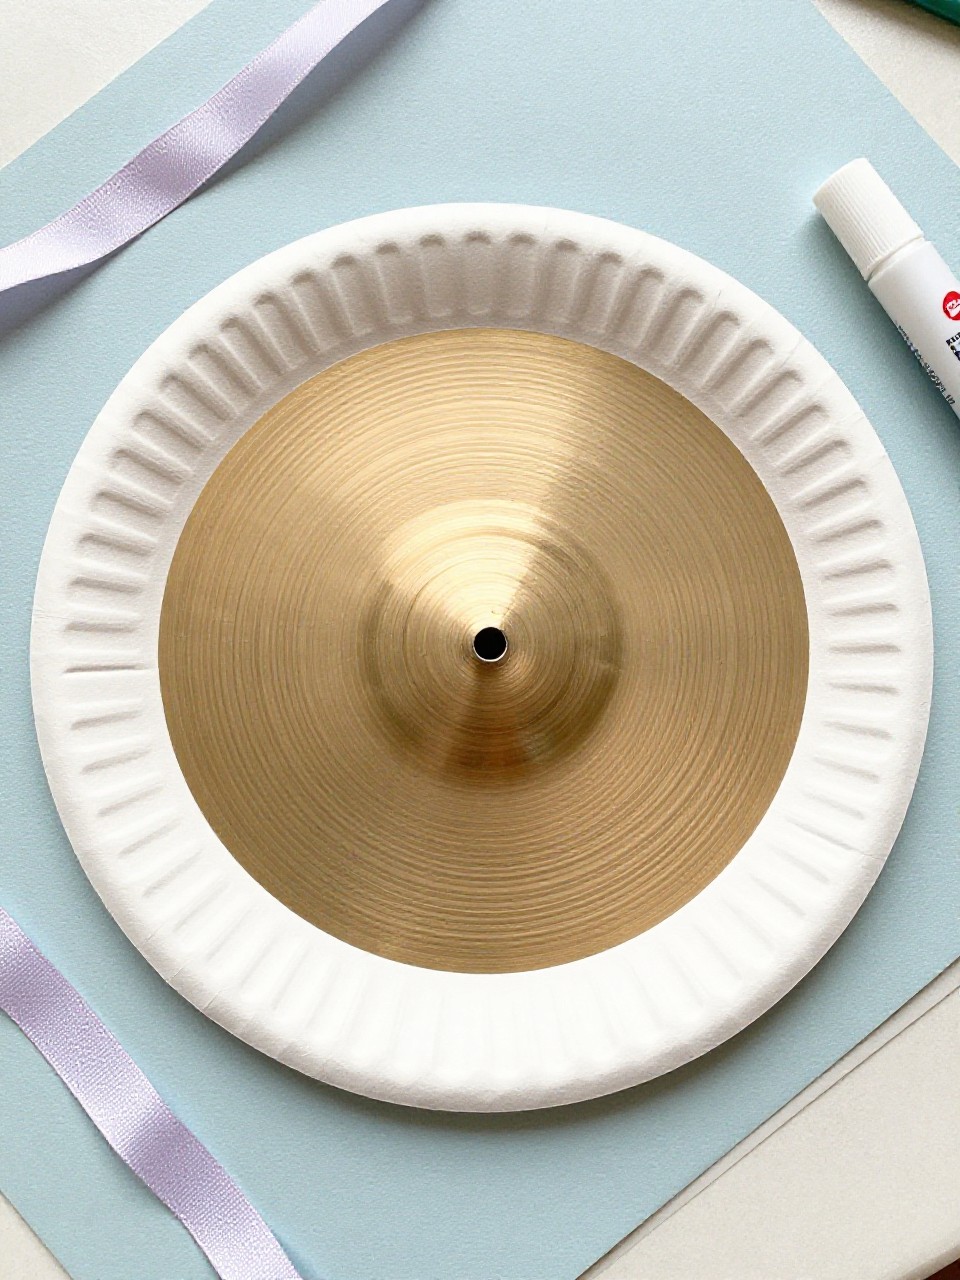
These look like shiny handheld cymbals made from two sturdy plates with ribbon handles. Kids love the big crash sound and the chance to march in a pretend parade.
Materials Needed:
- 2 thick paper plates
- Aluminum foil
- Ribbon or yarn for handles
- Glue or tape
- Stickers or sequins (optional)
How to make it:
- Cover the outside of each plate with aluminum foil for shine.
- Tape or glue ribbon loops to the centers as handles.
- Add stickers or sequins around the edges.
- Hold a plate in each hand and gently clash together.
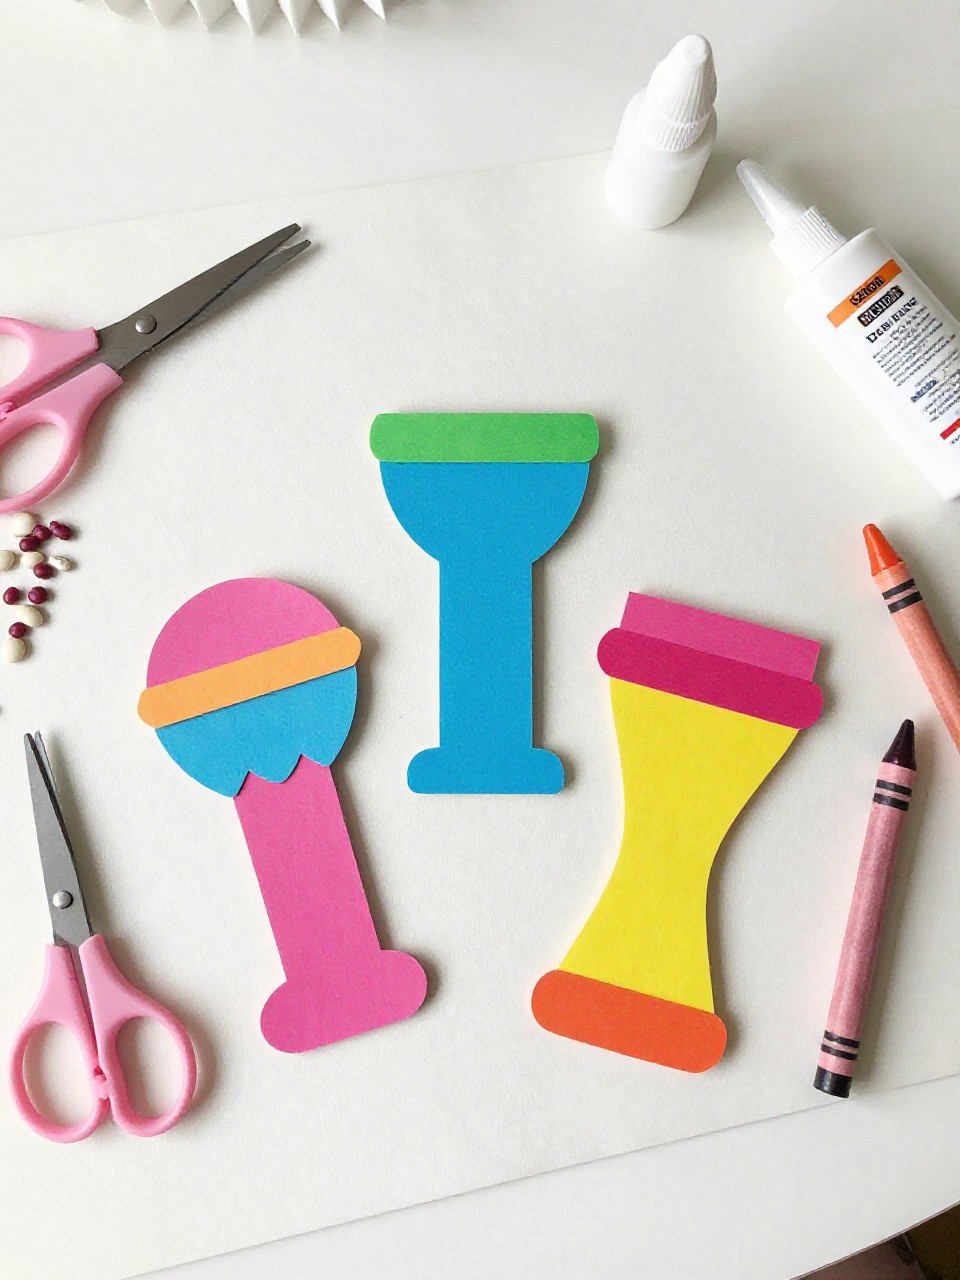
8. Beaded Rhythm Sticks
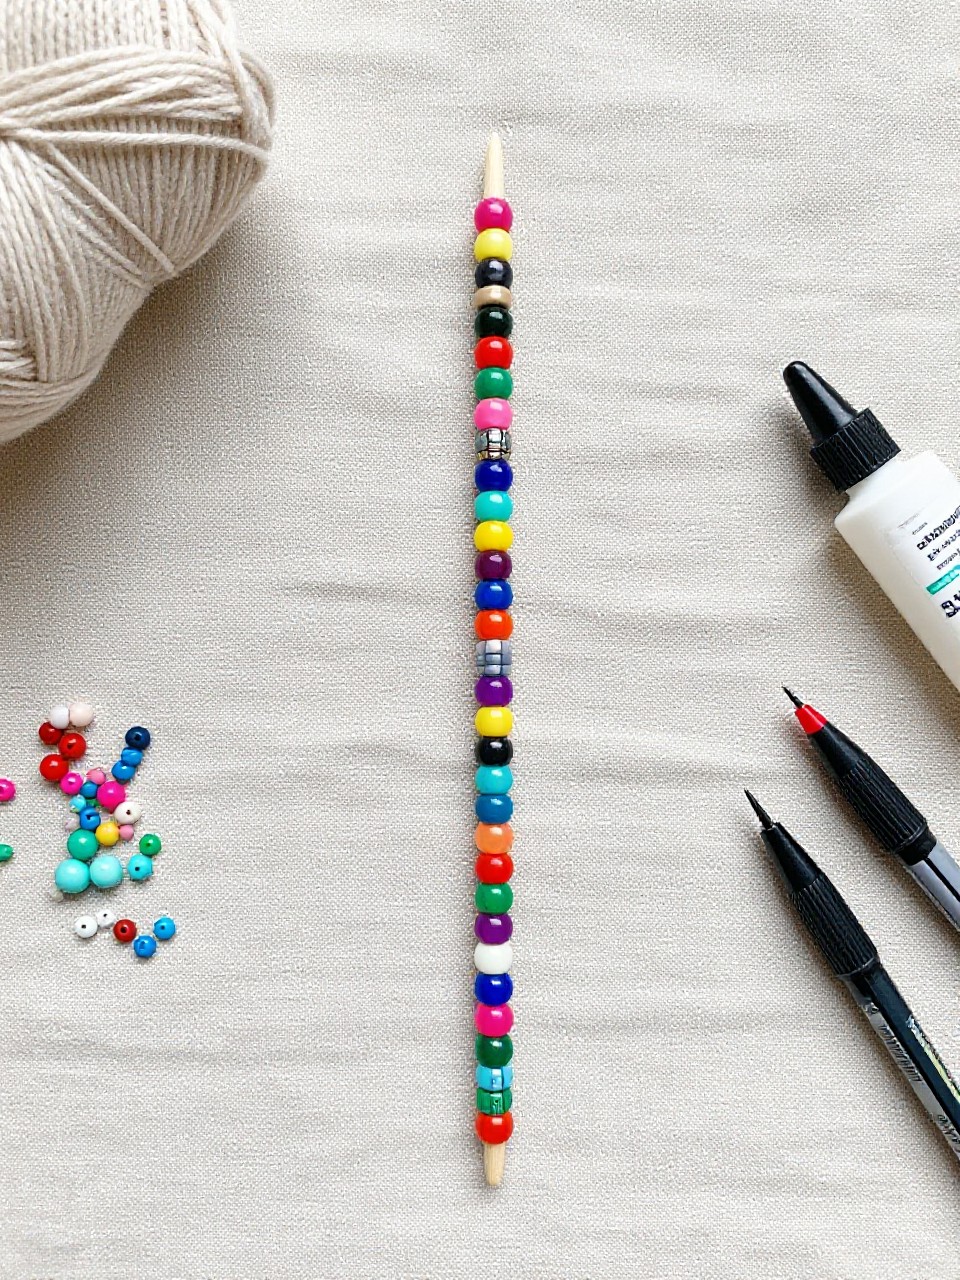
These are colorful wooden sticks wrapped with yarn and beads that make soft clicks and shakes. Kids enjoy tapping them together and feeling the textures they added.
Materials Needed:
- Wooden dowels or thick pencils
- Yarn or washi tape
- Pony beads
- Glue
- Markers
How to make it:
- Wrap dowels with yarn or washi tape for color.
- Slide on a few pony beads and glue ends to secure.
- Add marker patterns or names.
- Tap sticks together or roll beads for gentle sound.
9. Jingle Bell Dance Wand
This looks like a bright ribbon wand with jingle bells that chime when waved. Kids love dancing, spinning, and hearing the bells sparkle with every move.
Materials Needed:
- Wooden dowel or sturdy straw
- Ribbon strips
- Small jingle bells
- Pipe cleaner or thread
- Tape
How to make it:
- Tie ribbons to one end of the dowel.
- Thread bells onto a pipe cleaner and twist around the top.
- Add tape to secure knots and ends.
- Wave, twirl, and dance to the jingling beat.
10. Cup Drum with Balloon Top
This looks like a small hand drum made from a plastic cup with a balloon stretched across the top. Kids enjoy tapping different rhythms and noticing how the sound changes with finger or stick taps.
Materials Needed:
- Plastic or paper cup
- Balloon
- Rubber band
- Markers and stickers
- 2 craft sticks (optional beaters)
How to make it:
- Cut the balloon’s neck and stretch the balloon over the cup rim.
- Secure with a rubber band.
- Decorate the cup sides with markers and stickers.
- Tap gently with fingers or sticks to play.
11. Paper Tube Kazoo
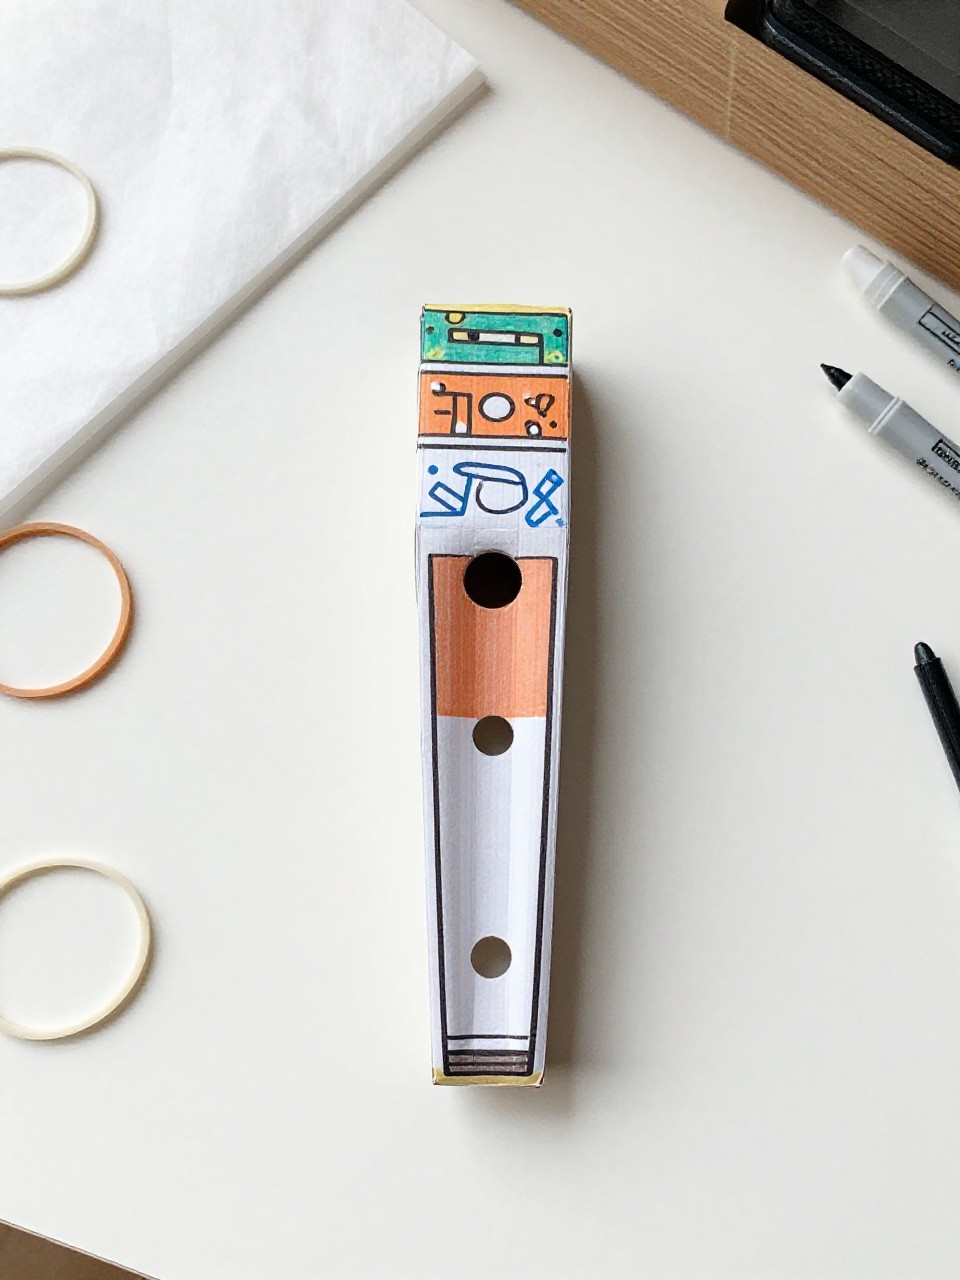
This looks like a short, decorated tube with a wax paper end that buzzes when kids hum. Children love the silly sound and learning to hum instead of blow.
Materials Needed:
- Toilet paper tube
- Wax paper or tissue paper
- Rubber band
- Push pin (adult help) or pencil
- Markers, stickers
How to make it:
- Cover one end with wax paper and secure with a rubber band.
- Poke a small hole near the covered end.
- Decorate the tube with markers and stickers.
- Hum into the open end to make it buzz.
12. Shape Drum Shakers
These look like flat, sealed paper shapes (stars, hearts, circles) filled with beads for shaking. Kids enjoy choosing their favorite shapes and decorating both sides with patterns.
Materials Needed:
- Construction paper
- Dry beans or beads
- Glue stick or stapler
- Markers and crayons
- Glitter glue (optional)
How to make it:
- Cut two matching big shapes from paper.
- Glue or staple around the edges, leaving a small opening.
- Pour a spoon of beans inside and seal fully.
- Draw designs and shake to a steady beat.
13. Popsicle Stick Xylophone Art
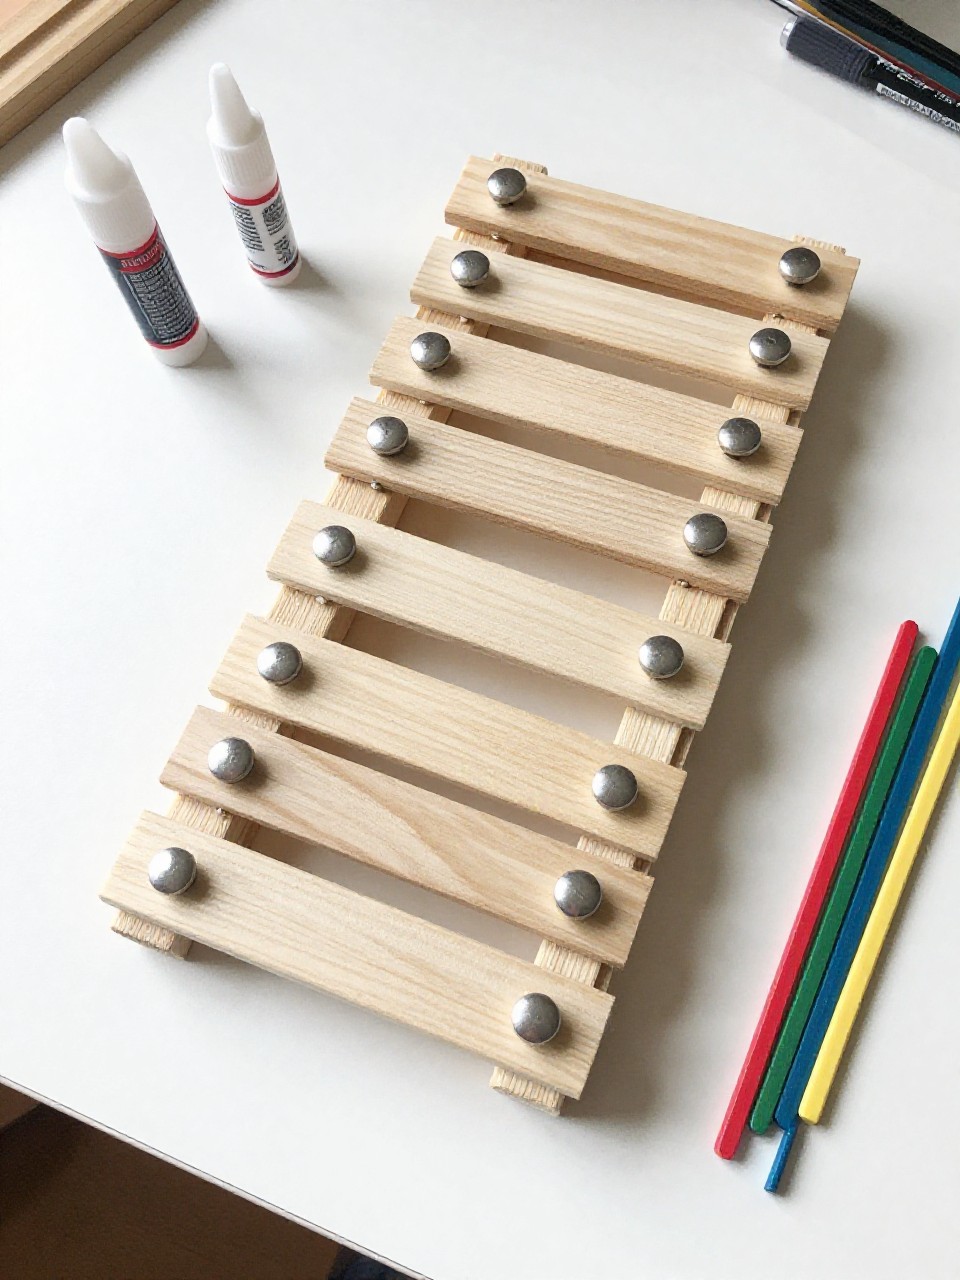
This looks like a rainbow “xylophone” picture with colored sticks arranged like bars on a paper background. Kids enjoy lining up colors and pretending to play while learning order and size.
Materials Needed:
- Colored popsicle sticks
- Cardstock or construction paper
- Glue stick
- Markers for note symbols
- Stickers (optional)
How to make it:
- Lay sticks on paper in a row from short to long or light to dark.
- Glue them down evenly with small gaps.
- Draw little mallets and music notes around.
- Display as music wall art and tap gently with a finger.
14. Finger Cymbal Rings
These look like tiny cymbals attached to ring tabs kids wear on fingers to make a delicate chime. Children love the sparkle and simple pinch-and-ring motion.
Materials Needed:
- Metal bottle caps or large sequins
- Cardstock for ring bands
- Hot glue or strong glue (adult help)
- Stickers or gems
- Marker for initials
How to make it:
- Cut cardstock into strips and tape into small rings to fit fingers.
- Glue a cap or sequin to each ring top.
- Add stickers or gems and write initials.
- Tap two rings together to make a chime.
15. Animal Rhythm Shaker Jars
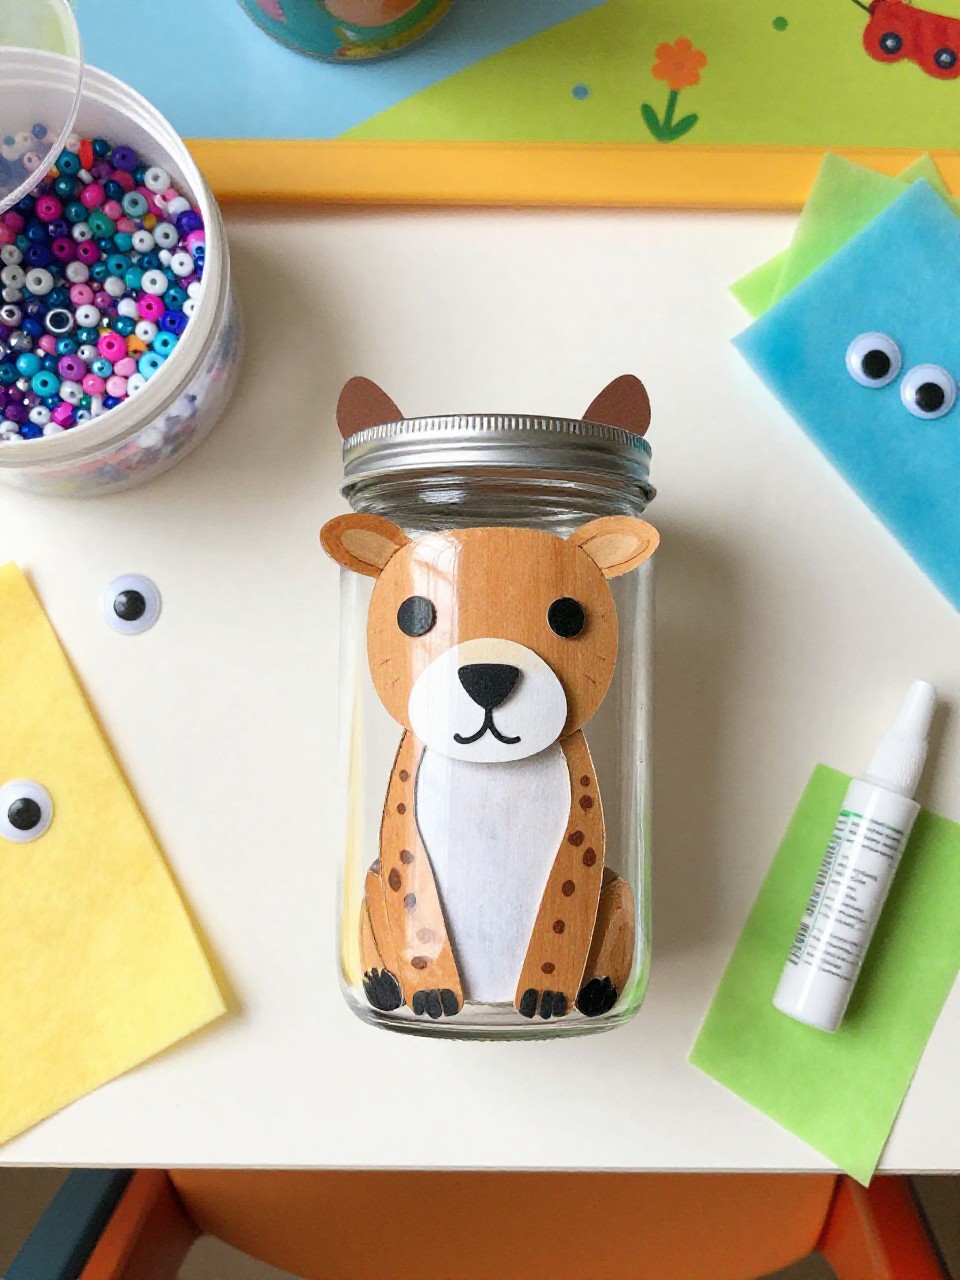
These are small clear jars turned into animal friends with ears and faces, filled with beads for shaking. Kids enjoy picking an animal and comparing loud and soft sounds by changing how they shake.
Materials Needed:
- Small plastic spice jars with lids
- Pony beads or dry rice
- Foam sheets or construction paper (ears, fins)
- Googly eyes
- Glue and markers
How to make it:
- Fill jars a third full with beads or rice and close lids tightly.
- Cut and glue ears, fins, or manes; add googly eyes.
- Draw noses, stripes, or spots with markers.
- Shake gently to play animal rhythms.
16. Handprint Drum Circle Art
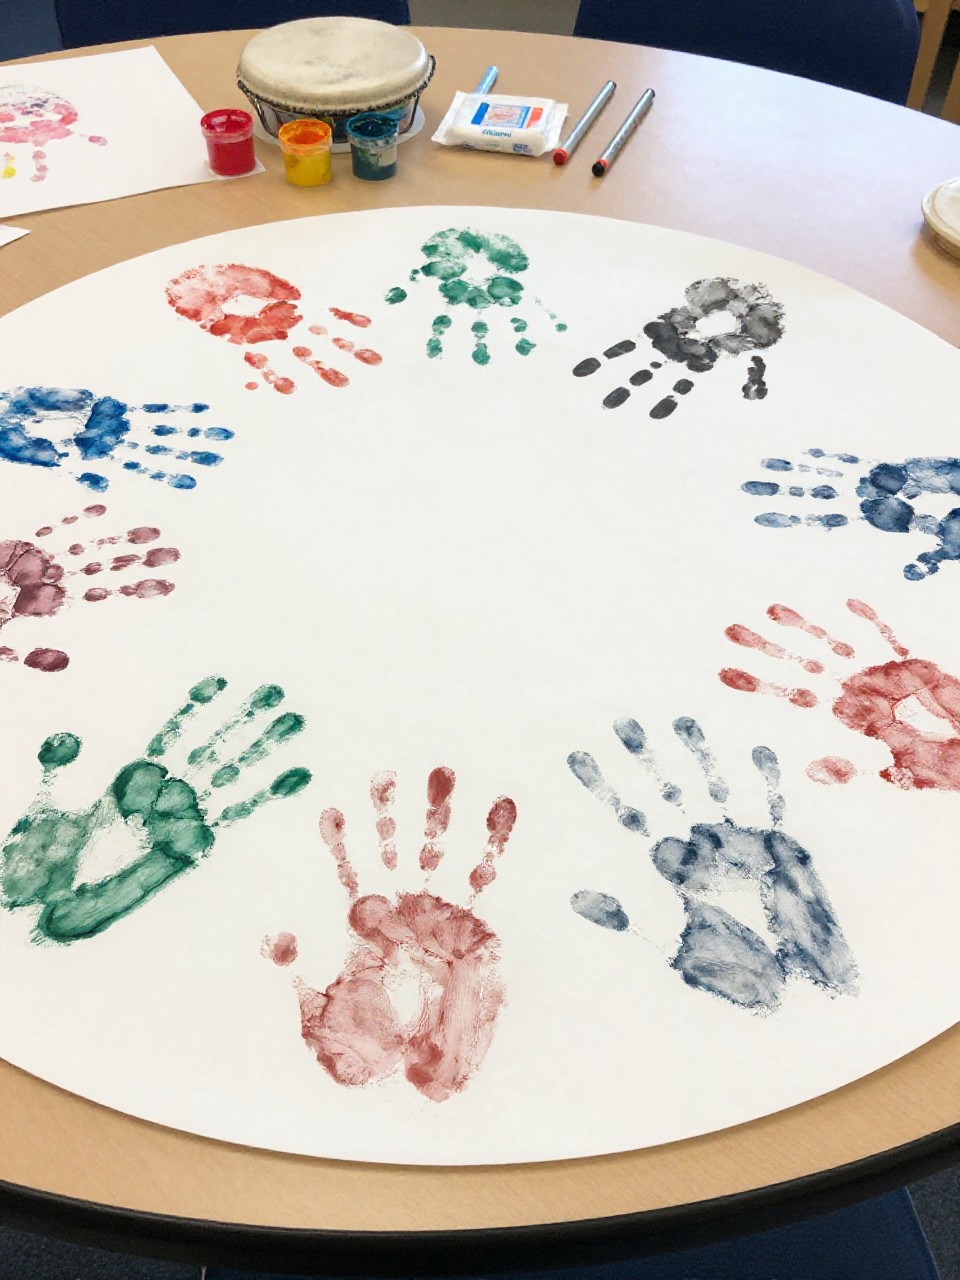
This looks like a big poster of handprint “drums” in a circle, each decorated with patterns and little music notes. Kids love stamping their hands and then clapping or tapping along as a group.
Materials Needed:
- Large poster paper
- Washable paint
- Markers and crayons
- Stickers or dot markers
- Wipes for cleanup
How to make it:
- Paint each child’s palm and press handprints in a circle on the poster.
- Let dry, then outline each handprint as a “drum.”
- Add patterns, borders, and music notes around.
- Hang up and have a group clap-and-tap session.


