

Table of Contents Show
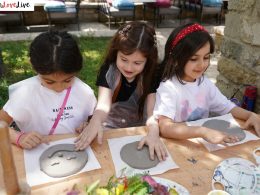
Keeping kids busy at home isn’t always easy, especially when you want activities that are simple, low-mess, and still teach something. This list brings you fun “Letter N” crafts that help kids learn the letter shape and sounds while making cute projects.

Each idea is easy to set up with common supplies, and most take under 30 minutes.
Let’s jump into creative ways to make “N” stand for narwhal, nest, night sky, noodles, and more!
1. Newspaper Letter N Collage
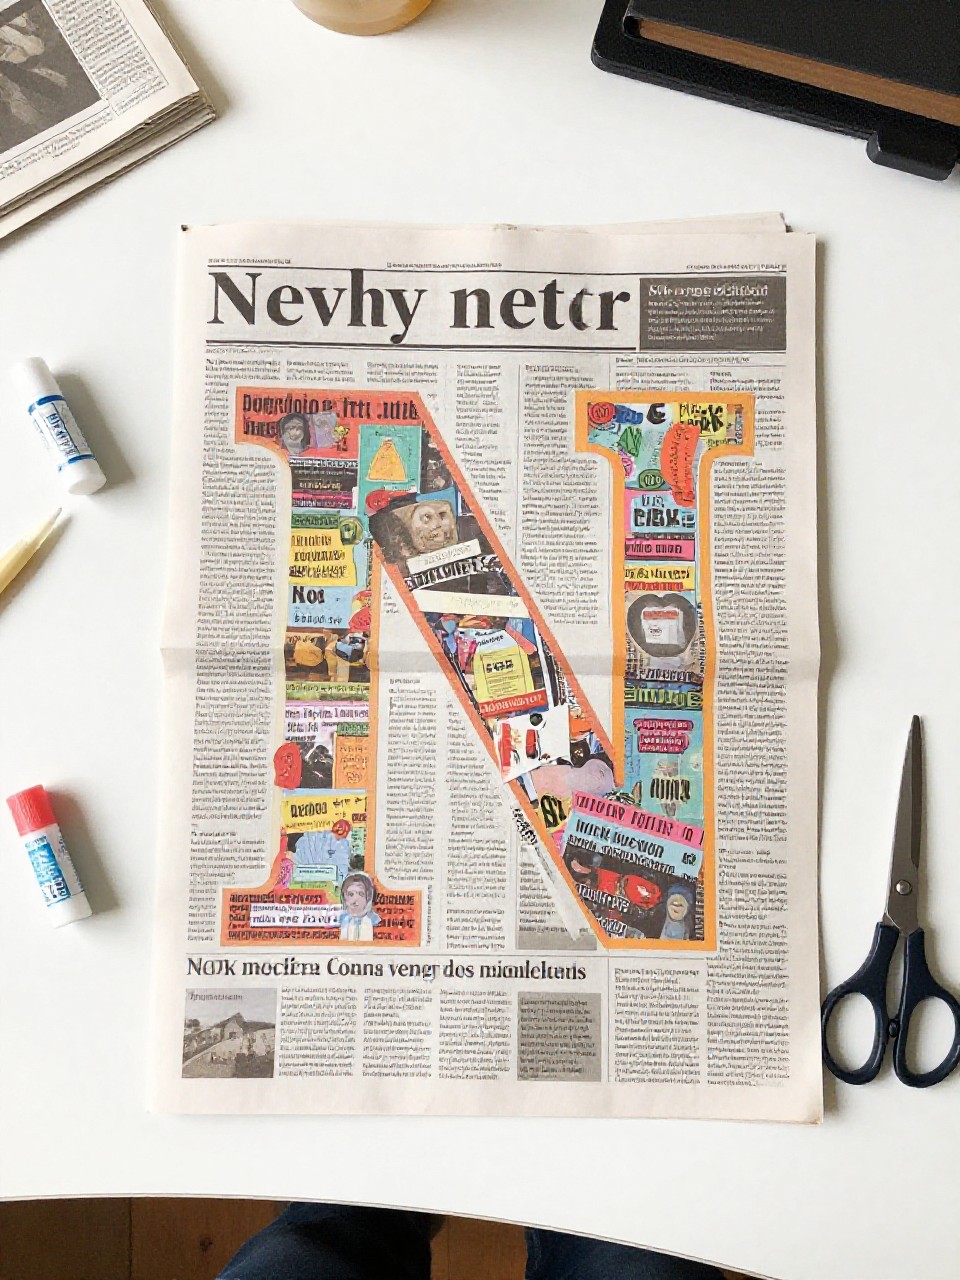
This craft turns old newspaper into a bold letter N covered in cut-out textures and print. Kids love tearing and gluing the pieces, and it’s a great beginner project that looks artsy and graphic when finished.
Materials Needed:
For People Who Love to Make Things ✂️
- Cardstock or cereal box for N base
- Old newspaper or magazine pages
- Glue stick
- Scissors
- Black marker (optional for outline)
How to make it:
- 1. Draw and cut a big letter N from cardstock or a cereal box panel.
- 2. Tear or cut newspaper into small pieces.
- 3. Glue the pieces to cover the N, adding a few bold headlines for contrast.
- 4. Outline the edges with marker, let dry, and hang on the fridge.
2. N is for Narwhal Paper Craft
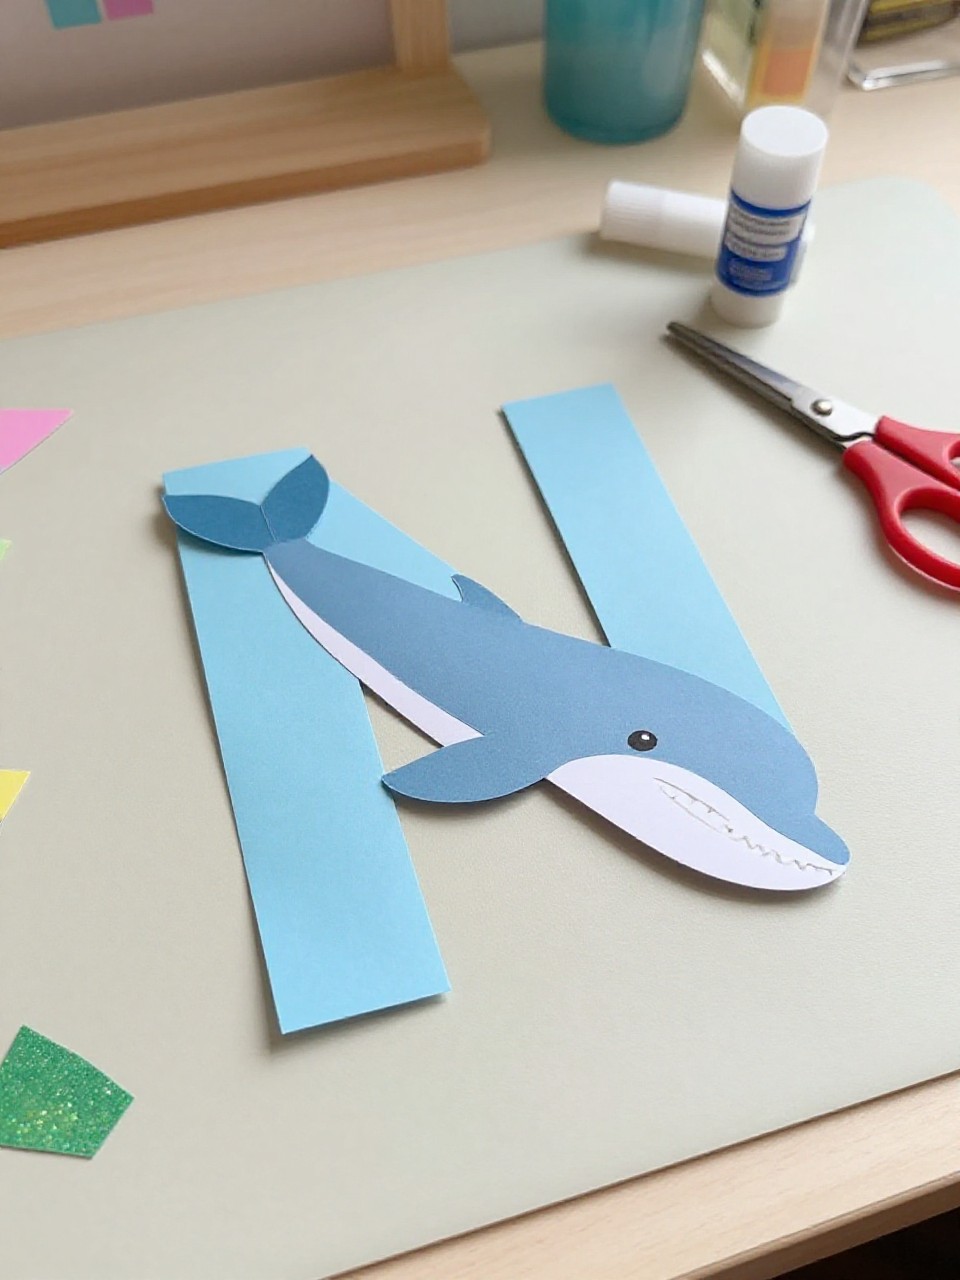
A friendly narwhal wraps around a big letter N, with a sparkly tusk and smiling face. Kids enjoy choosing ocean colors and adding glitter to the tusk for a magical touch.
Materials Needed:
- Blue cardstock for N base
- Light blue or gray paper for narwhal body
- Gold or silver glitter paper for tusk
- Googly eye
- Glue stick and scissors
How to make it:
- 1. Cut a large N from blue cardstock.
- 2. Cut a simple narwhal shape (oval body with tail) from light blue paper.
- 3. Glue the narwhal along one side of the N and add the glitter tusk and googly eye.
- 4. Draw a smile, let dry, and display on a bulletin board.
3. Noodle Necklace with Letter N Tag
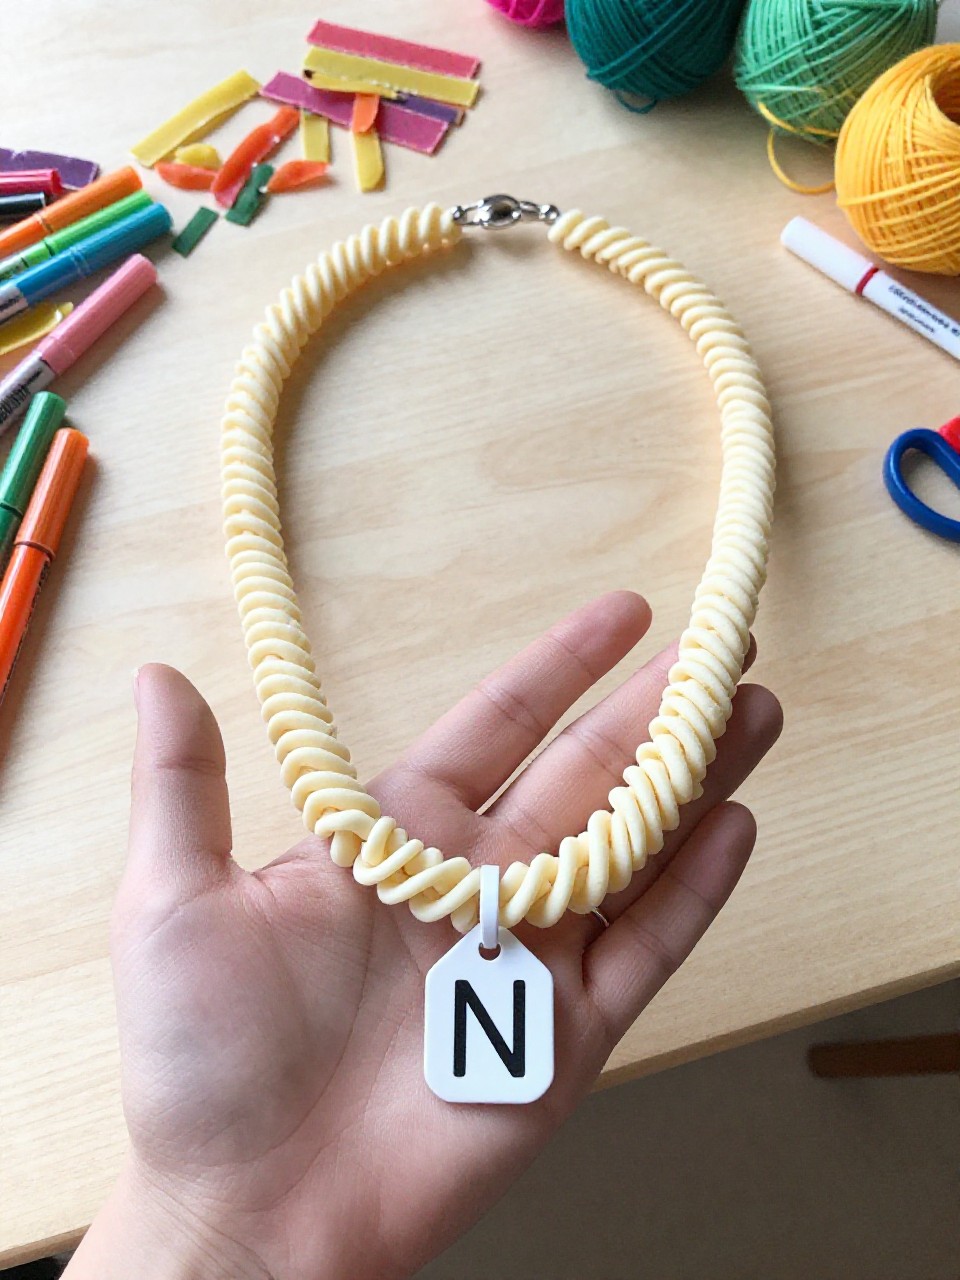
This colorful pasta necklace features a cardboard N charm in the center. Kids love dyeing noodles and threading them, which builds fine motor skills and feels like wearable art.
Materials Needed:
- Dry pasta (tubed pasta or wagon wheels)
- Liquid food coloring and zip bags (for dyeing)
- String or yarn
- Cardboard for N tag
- Hole punch and markers
How to make it:
- 1. Dye pasta by shaking it with a few drops of food coloring in zip bags; let dry on paper towels.
- 2. Cut a small N from cardboard and punch a hole at the top.
- 3. Decorate the N with markers, then string noodles and add the N charm in the middle.
- 4. Tie to fit and let your child proudly wear it.
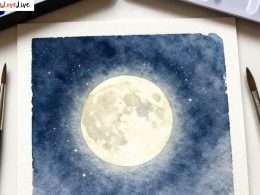
4. Night Sky Letter N Painting
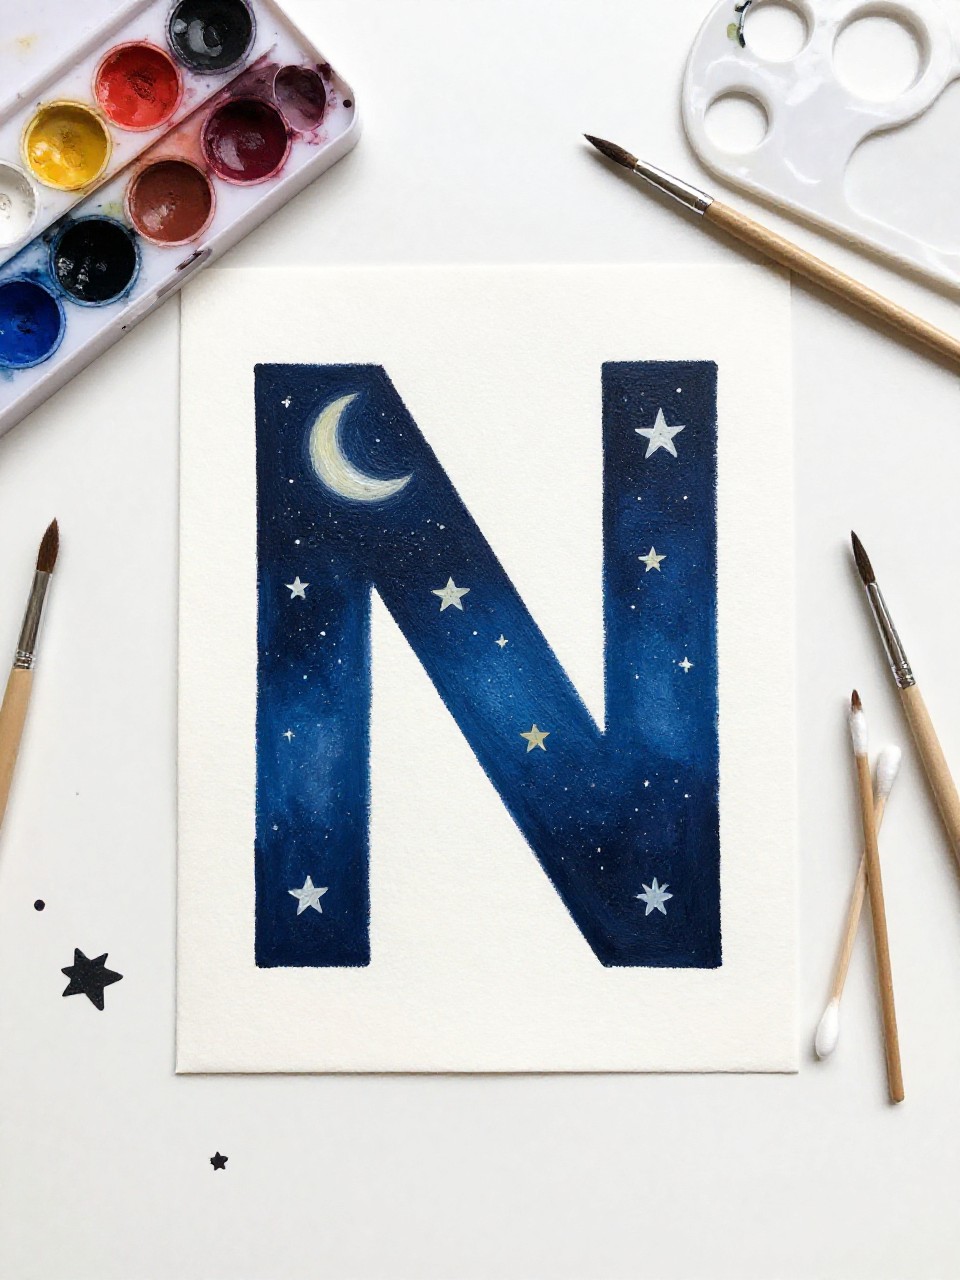
A bold letter N sits over a painted night sky full of stars and a crescent moon. Kids enjoy blending blues and purples and dotting stars with a paintbrush or cotton swab.
Materials Needed:
- White cardstock
- Painter’s tape or paper N mask
- Washable paints (blue, purple, black, white)
- Paintbrushes or sponges
- Cotton swabs for stars
How to make it:
- 1. Tape a paper N onto cardstock or use painter’s tape to create an N shape.
- 2. Paint the background in dark sky colors and blend.
- 3. Add white dots for stars and a small moon.
- 4. Peel off the mask to reveal the crisp N, then dry flat.
5. Nest on the Letter N
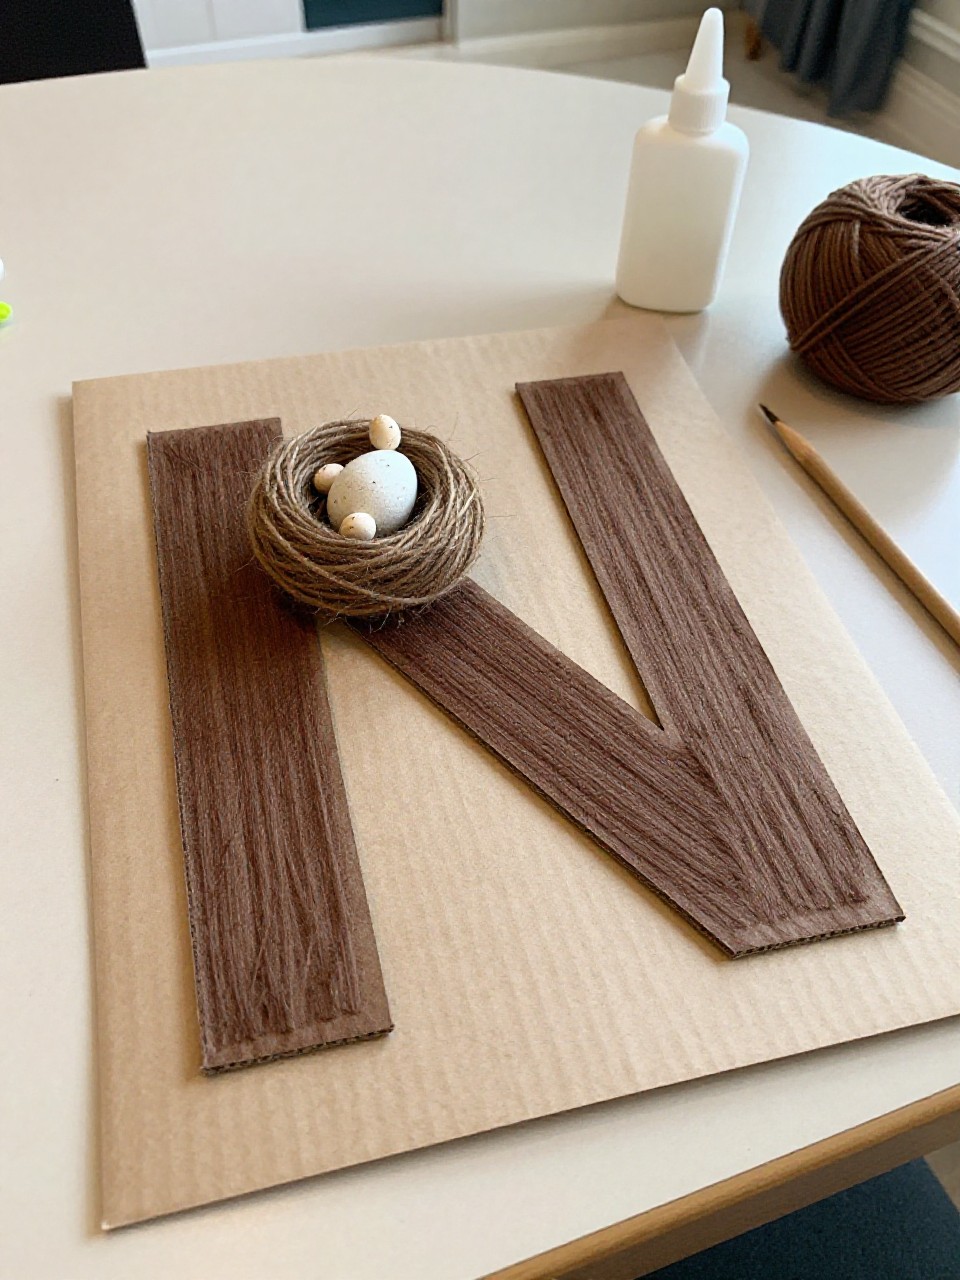
A twiggy little bird nest sits on top of a chunky cardboard N with tiny paper eggs. Kids love arranging the “sticks” and placing the pastel eggs like a real nest.
Materials Needed:
- Cardboard for N base
- Brown yarn or shredded paper
- Small pom-poms or paper eggs
- Glue
- Brown paint or marker (optional)
How to make it:
- 1. Cut a sturdy N from cardboard and color it brown if desired.
- 2. Twist yarn or bunch shredded paper into a small nest shape.
- 3. Glue the nest at the top corner of the N and tuck in eggs or pom-poms.
- 4. Let dry completely and prop it on a shelf.
6. Nature N Rubbing Art
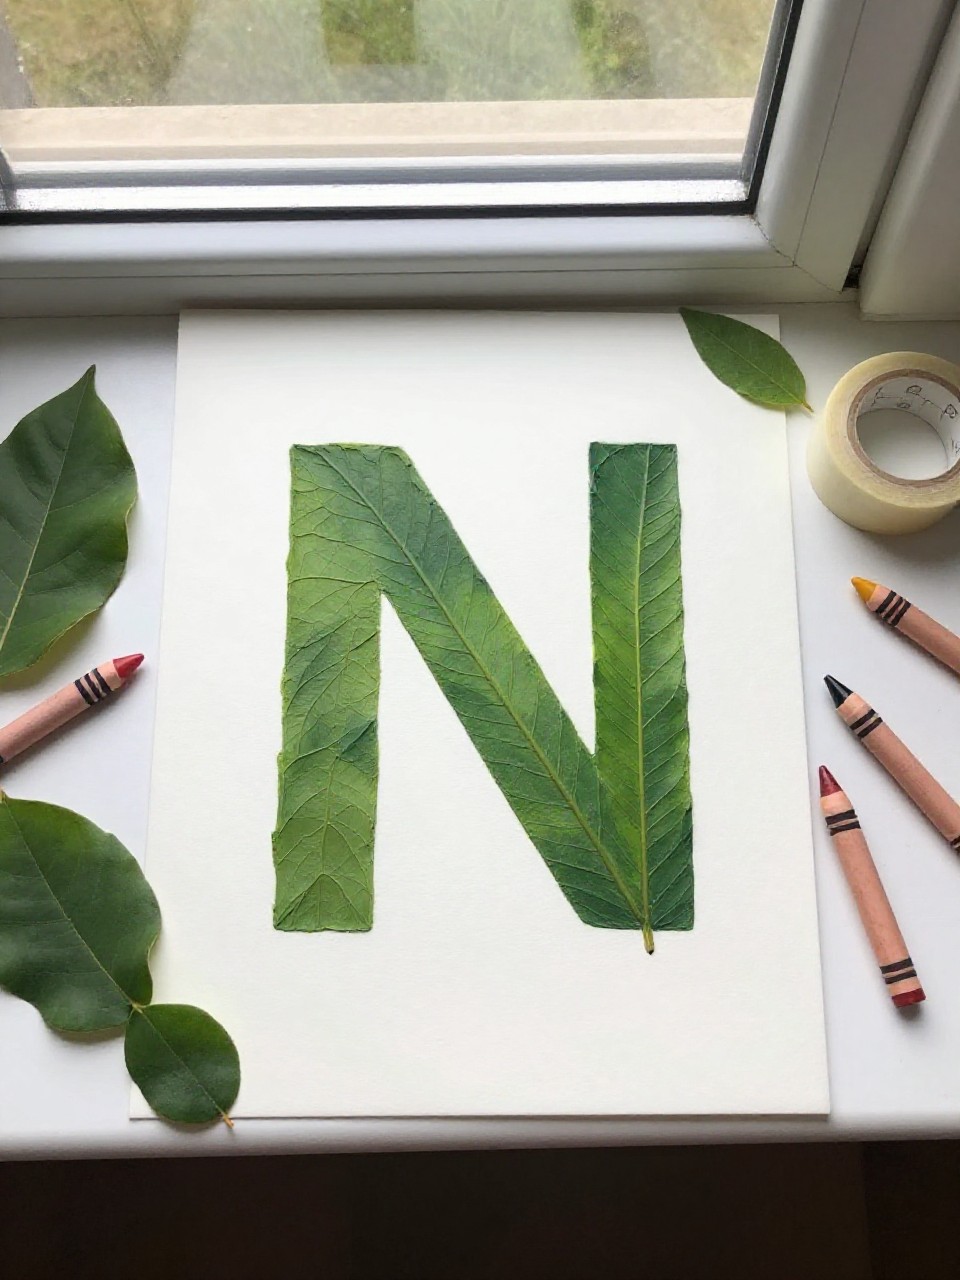
Leaves and textured nature finds create a leafy pattern inside a large letter N. Kids enjoy exploring outdoors and seeing the textures appear like magic with crayons.
Materials Needed:
- White paper with a large outlined N
- Leaves, ferns, or bark pieces
- Crayons with wrappers peeled
- Tape
- Clipboard or hard surface
How to make it:
- 1. Place leaves under the paper, aligning them beneath the N outline.
- 2. Tape paper to hold things in place on a hard surface.
- 3. Rub crayons sideways over the N area to reveal textures.
- 4. Trim and mount the N on colored paper to display.
7. N is for Ninja Headband
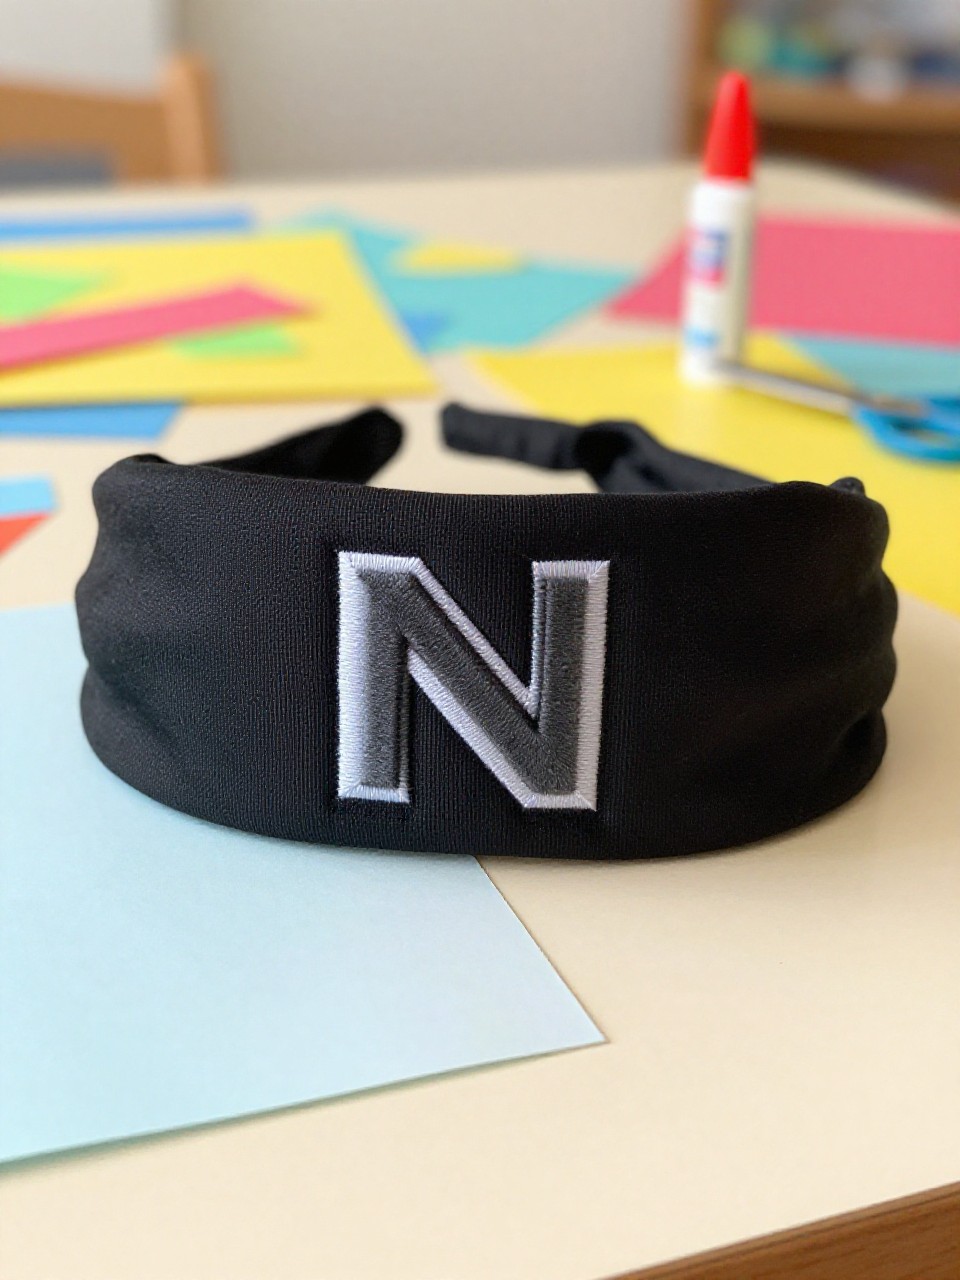
A simple paper headband shows a bold N and a tiny ninja face emblem. Kids love wearing their craft and pretending to sneak and swoosh around the room.
Materials Needed:
- Black construction paper
- White paper for N and ninja eyes
- Glue stick and scissors
- Stapler or tape
- Marker
How to make it:
- 1. Cut a long black paper strip to fit around the head.
- 2. Cut a large white N and a small oval for a ninja face; draw simple eyes.
- 3. Glue the N and ninja emblem to the band.
- 4. Fit and staple or tape the band, then start the ninja moves.
8. Popsicle Stick Letter N Frame
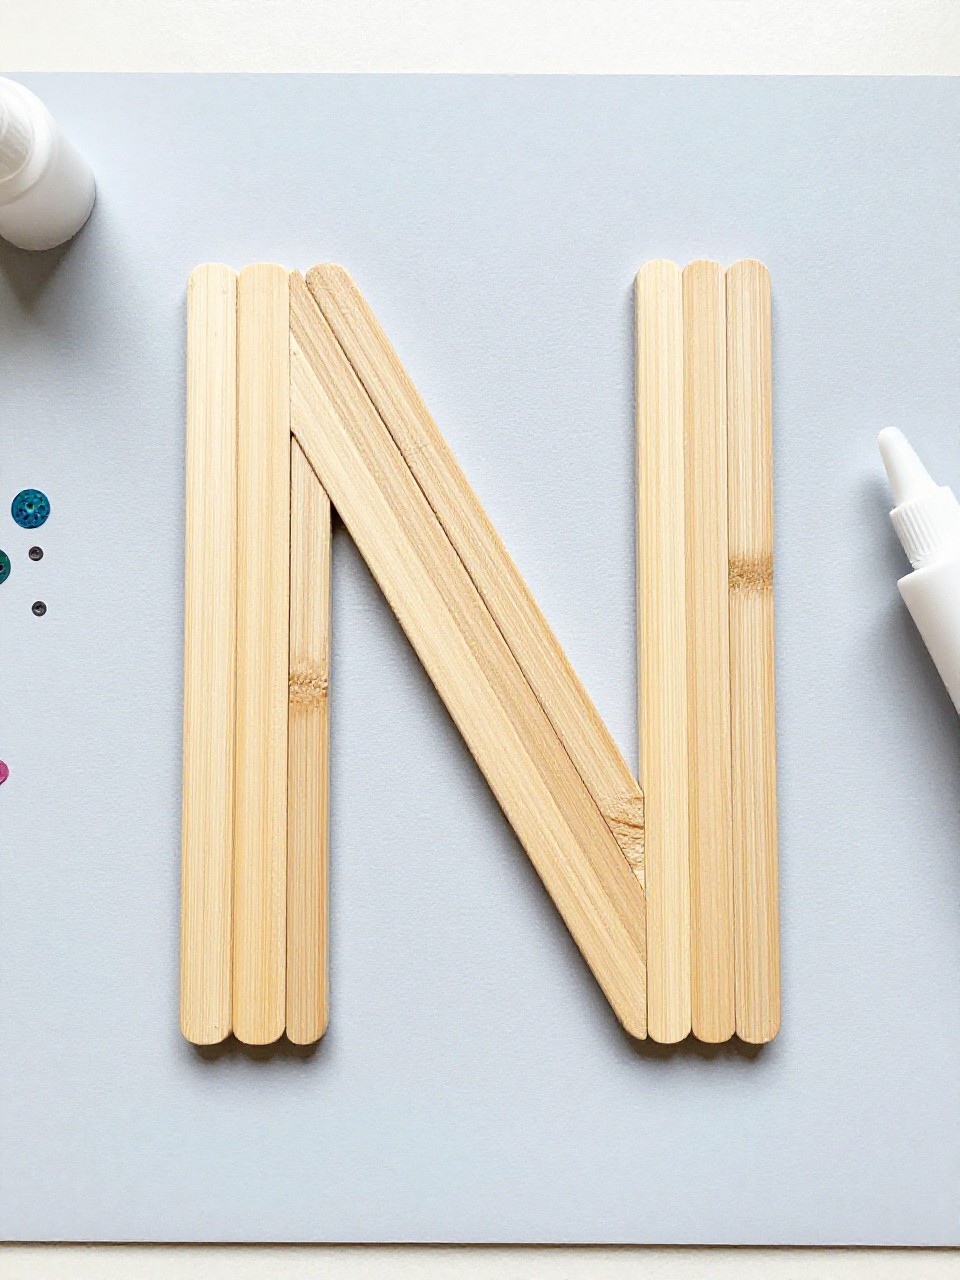
Four popsicle sticks form a mini frame with a big N in the center, ready for a small photo or drawing. Kids like painting the sticks bright colors and adding stickers for flair.
Materials Needed:
- Popsicle sticks
- Cardstock for N insert
- Washable paint and brush
- Glue
- Stickers or sequins (optional)
How to make it:
- 1. Paint popsicle sticks and let them dry.
- 2. Glue sticks into a square frame.
- 3. Cut a paper N to fit inside and decorate it.
- 4. Glue the N to the back of the frame and add stickers.
9. Napkin Tie-Dye N Banner
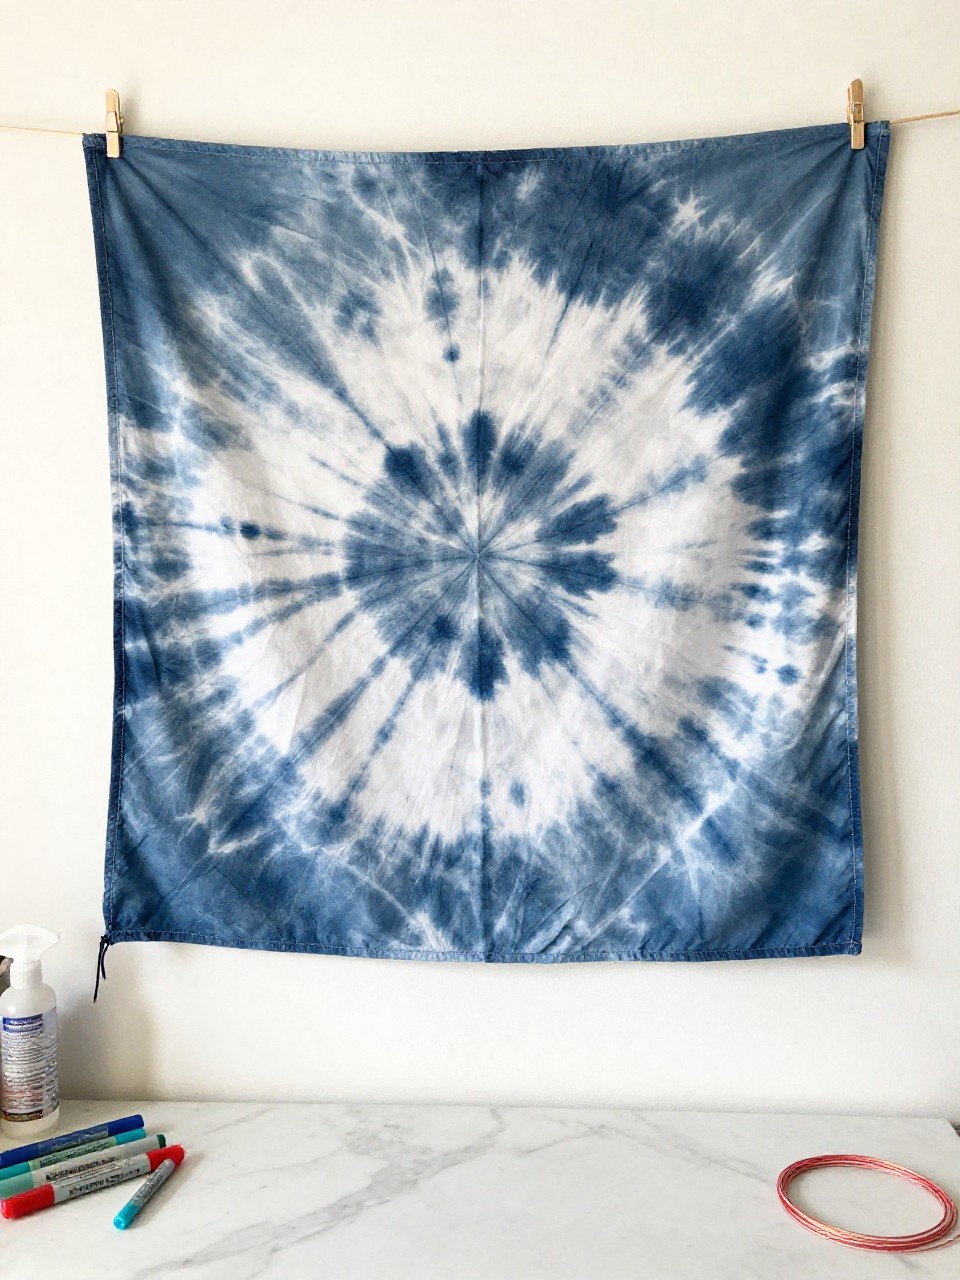
A colorful tie-dye napkin becomes a small banner with a bold N on top. Kids love watching the colors spread and blend to make a unique pattern.
Materials Needed:
- White paper napkin
- Washable markers
- Spray bottle with water
- Black paper for N
- String and tape
How to make it:
- 1. Decorate the napkin with marker patterns and dots.
- 2. Lightly mist with water to make colors bloom; let dry.
- 3. Cut a large black N and glue it to the center.
- 4. Tape the top edge to a string and hang as a mini banner.
10. N is for Nutcracker Clothespin Puppet
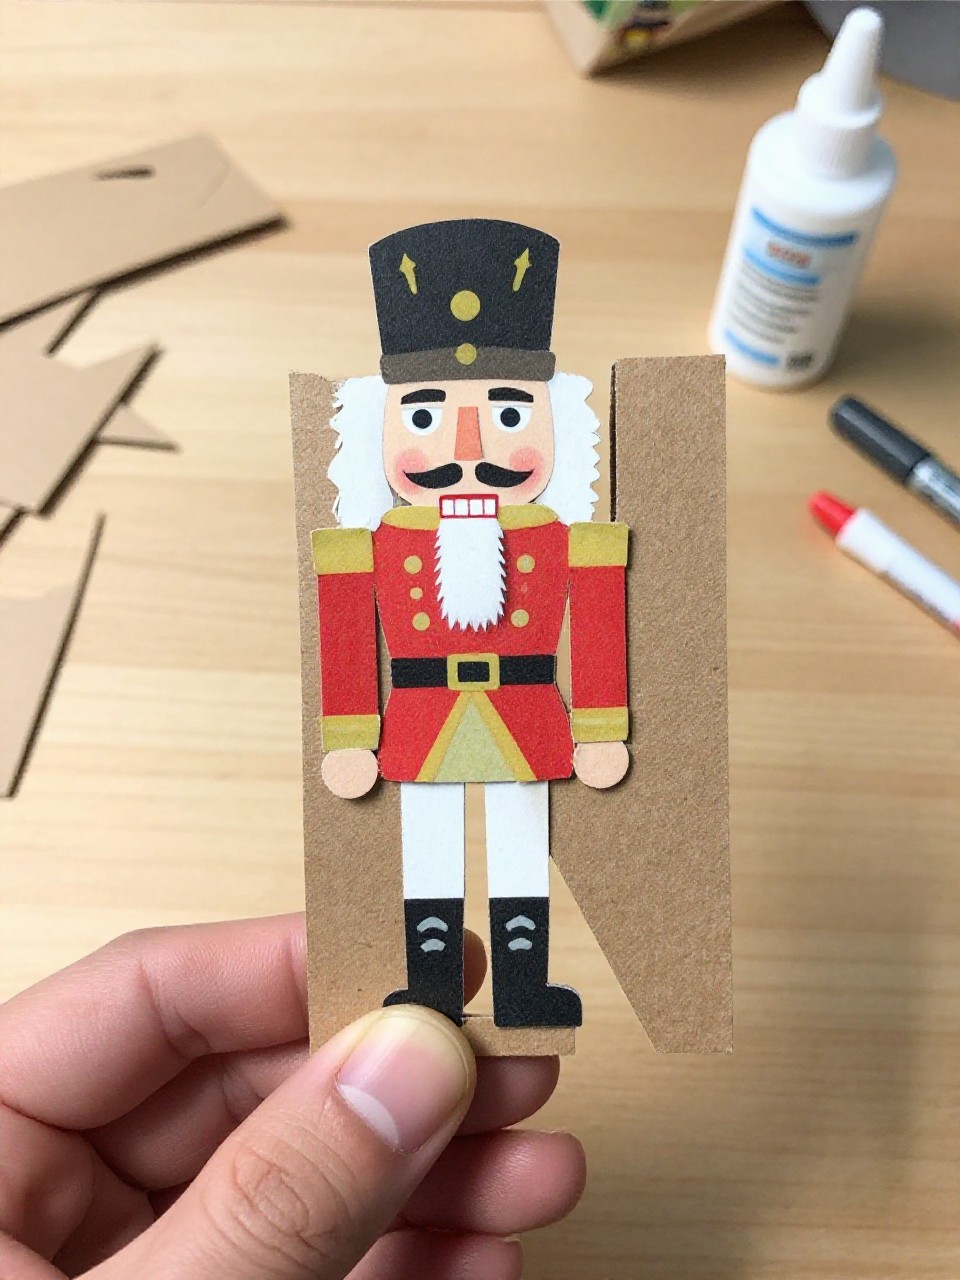
A small nutcracker face and torso clip onto a clothespin, with a bold N on his tiny hat. Kids enjoy clipping it to books or tree branches and making it “talk.”
Materials Needed:
- Wooden clothespin
- Cardstock in red, black, gold
- Markers
- Glue
- Small pom-pom (optional for hat)
How to make it:
- 1. Cut simple shapes for the nutcracker’s hat, jacket, and face.
- 2. Glue pieces onto the clothespin so the mouth line is at the clip opening.
- 3. Draw eyes, mustache, and add a gold N on the hat.
- 4. Add a pom-pom, let dry, and start puppet play.
11. Noodle Print Stamping Art
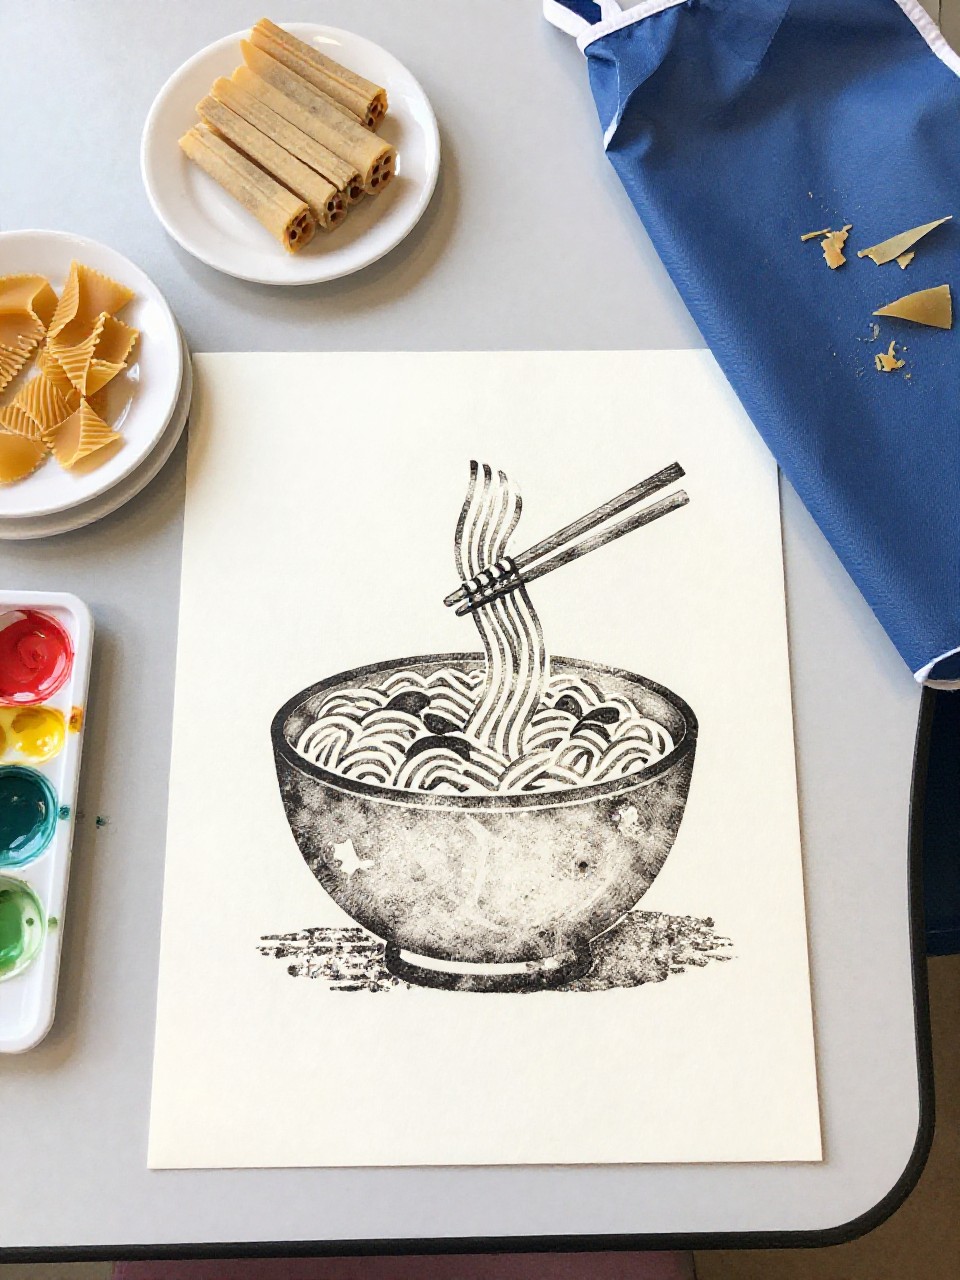
Painted noodles become stamps to print patterns inside a big letter N outline. Kids love seeing the different shapes each pasta makes and filling the N with color.
Materials Needed:
- White paper with a large N outline
- Dry pasta shapes (rigatoni, farfalle, rotini)
- Washable paint on plates
- Sponge or brush
- Apron or smock
How to make it:
- 1. Tape your N-outline paper to the table.
- 2. Dip pasta shapes lightly in paint.
- 3. Stamp patterns inside the N, mixing shapes and colors.
- 4. Let dry, then cut out and mount on bright paper.
12. Neon Letter N Sign
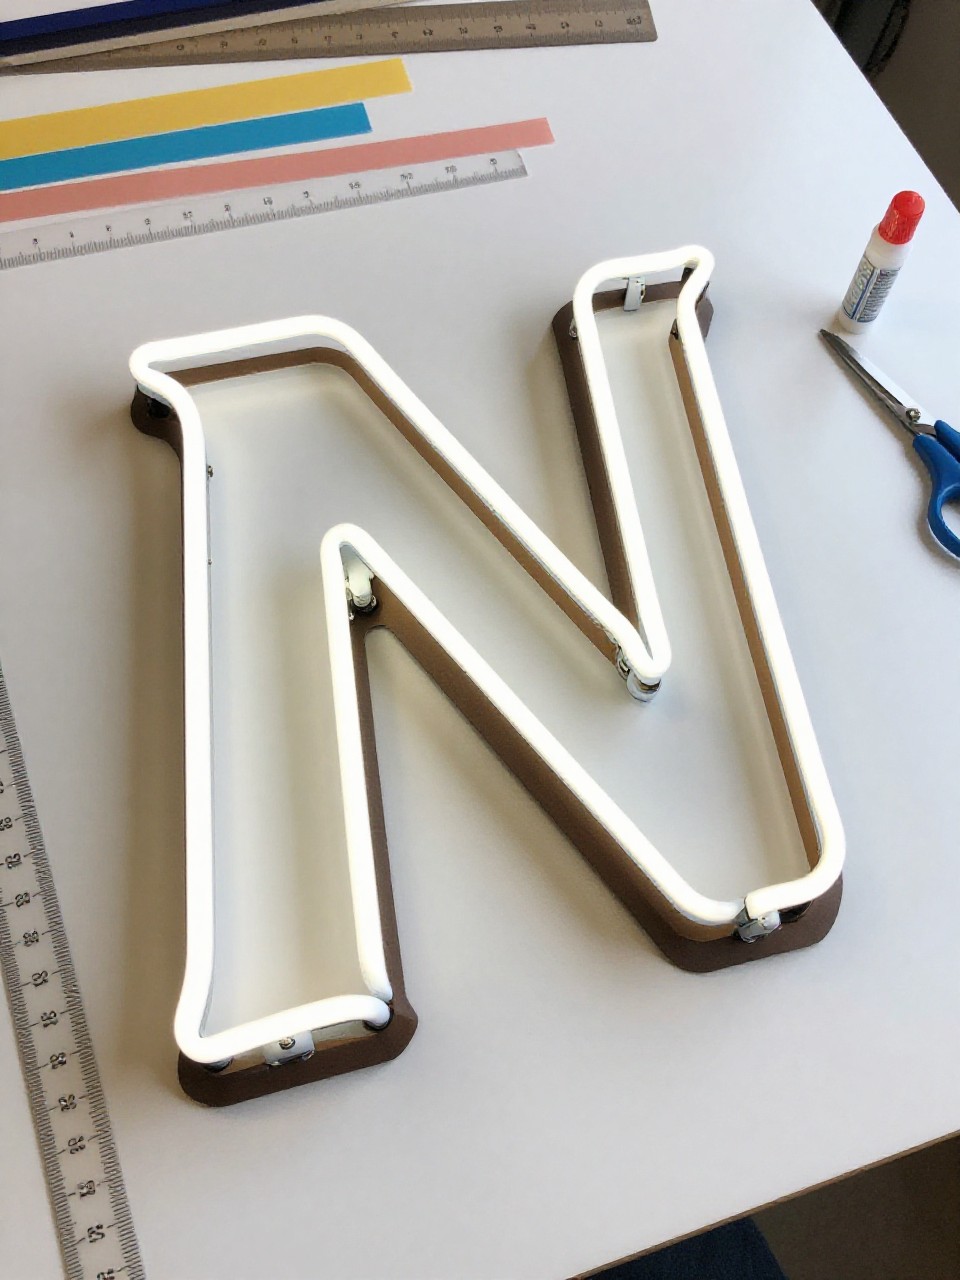
This bold sign uses neon paper strips to make a glowing-looking N on black cardstock. Kids enjoy the high-contrast look and choosing fun color combos.
Materials Needed:
- Black cardstock
- Neon paper or neon washi tape
- Ruler and pencil
- Glue stick
- Stick-on stars (optional)
How to make it:
- 1. Lightly sketch an N on black cardstock with a ruler.
- 2. Cut neon paper into strips or use neon washi to cover the lines.
- 3. Layer a second color slightly offset for a glow effect.
- 4. Add star stickers and hang in a window.
13. Ninja Turtle N Paper Plate
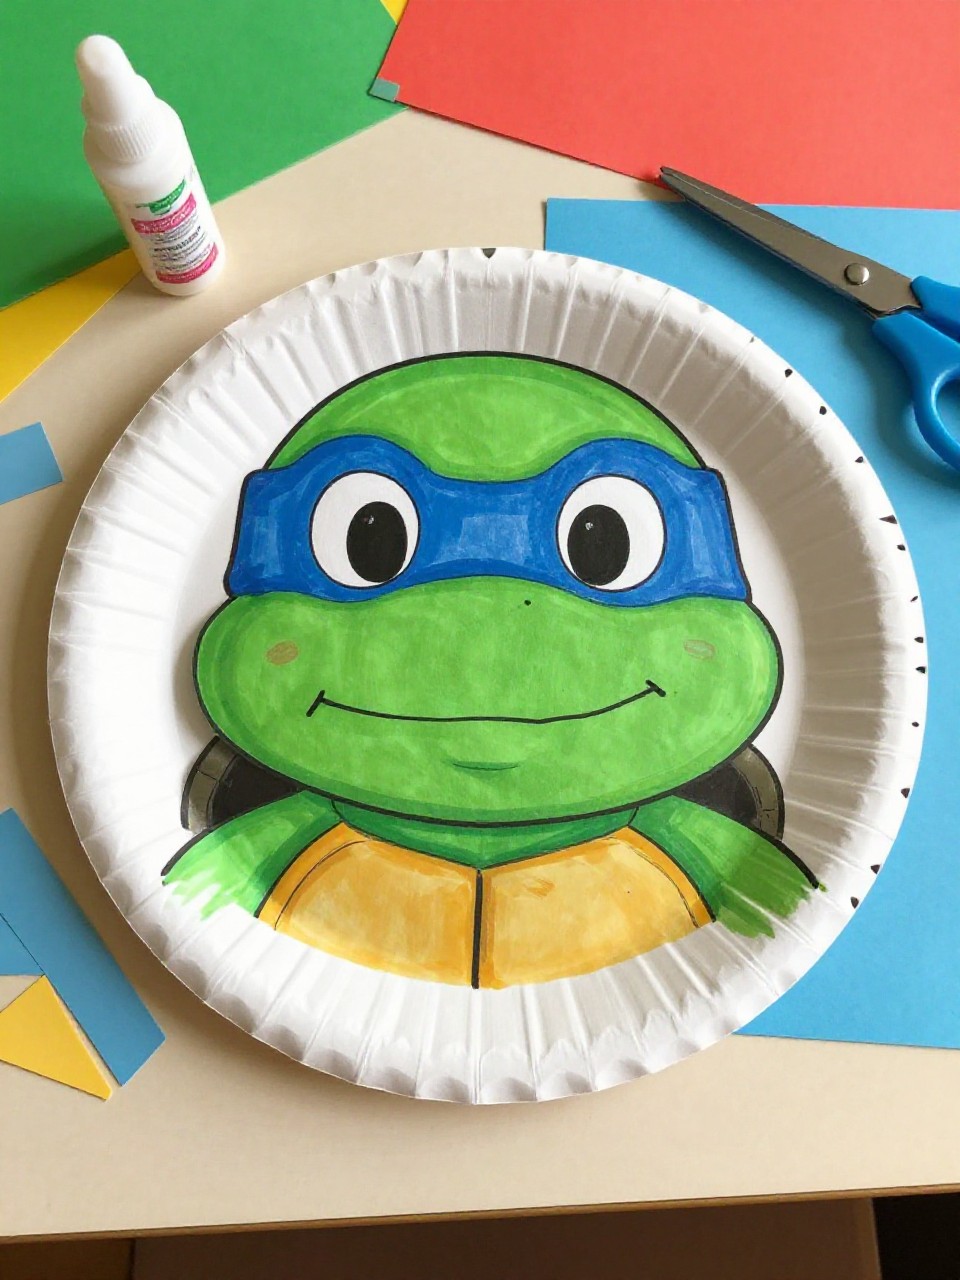
A green paper plate becomes a Ninja Turtle face with a big N eye mask. Kids love choosing mask colors and giving their turtle a bold grin.
Materials Needed:
- Green paper plate
- Colored paper for mask strip with N
- Googly eyes
- Black marker
- Glue and scissors
How to make it:
- 1. Cut a long mask strip and write a big N at the center.
- 2. Glue the mask across the plate and add googly eyes.
- 3. Draw a smile and nostrils with marker.
- 4. Punch a hole and hang with string if desired.
14. N is for Narra-tree Nature Weaving (N Weaving)
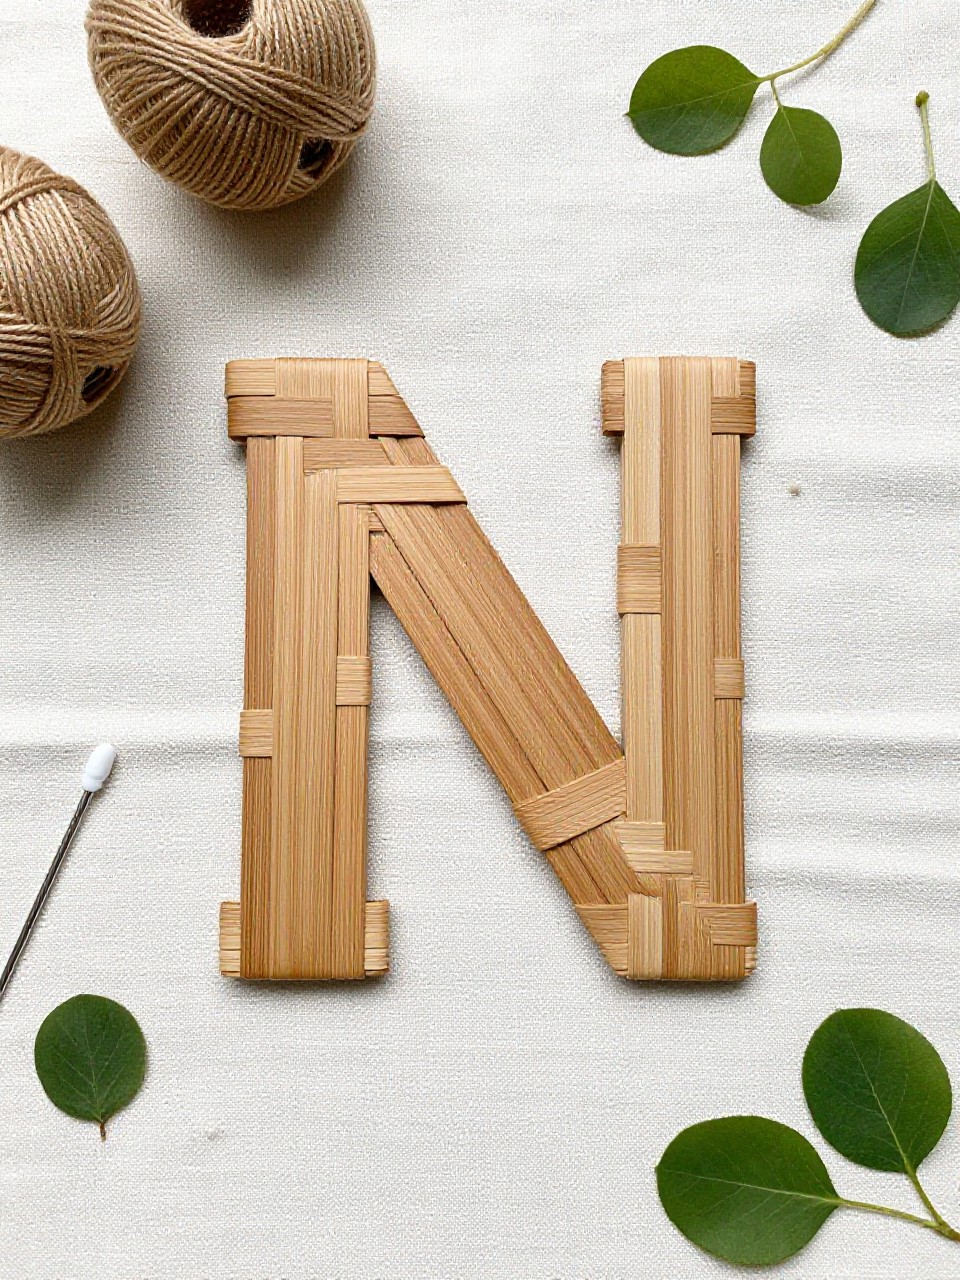
A cardboard N becomes a simple loom for weaving yarn and small nature bits. Kids enjoy the calming rhythm of weaving and the surprise of textures from leaves and petals.
Materials Needed:
- Cardboard N base
- Yarn in greens and browns
- Leaves, grass, or flower petals
- Tape
- Plastic needle (optional)
How to make it:
- 1. Cut small notches along the top and bottom of the cardboard N.
- 2. Wrap yarn vertically through notches to make warp lines.
- 3. Weave yarn and nature pieces over-under across the N.
- 4. Tuck ends, tape the back, and display your woven letter.
15. Noodle-Nest Baby Birds Art
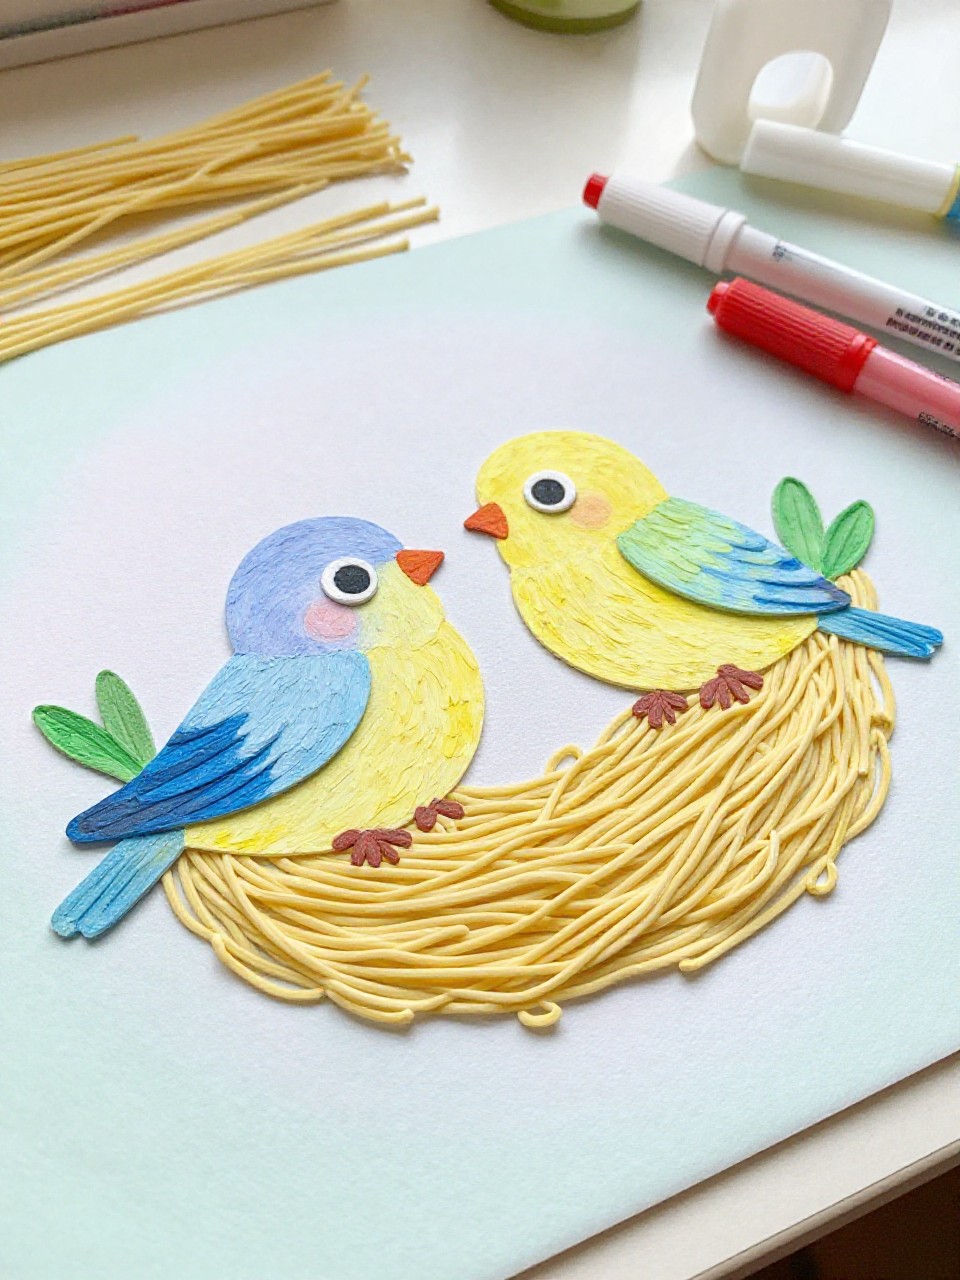
A printed letter N holds a spaghetti “nest” with two tiny baby bird heads peeking out. Kids love gluing real noodles and drawing beaks and eyes to bring the scene to life.
Materials Needed:
- White cardstock with big N printed or drawn
- Cooked and dried spaghetti or uncooked thin noodles
- Brown paint or marker
- Small pom-poms or paper circles for bird heads
- Glue
How to make it:
- 1. Color the inside of the N with brown to mark nest space.
- 2. Glue noodles in swirly layers to build the nest.
- 3. Add two pom-poms or paper circles at the top and draw eyes and beaks.
- 4. Let dry flat and trim the edges neat.