


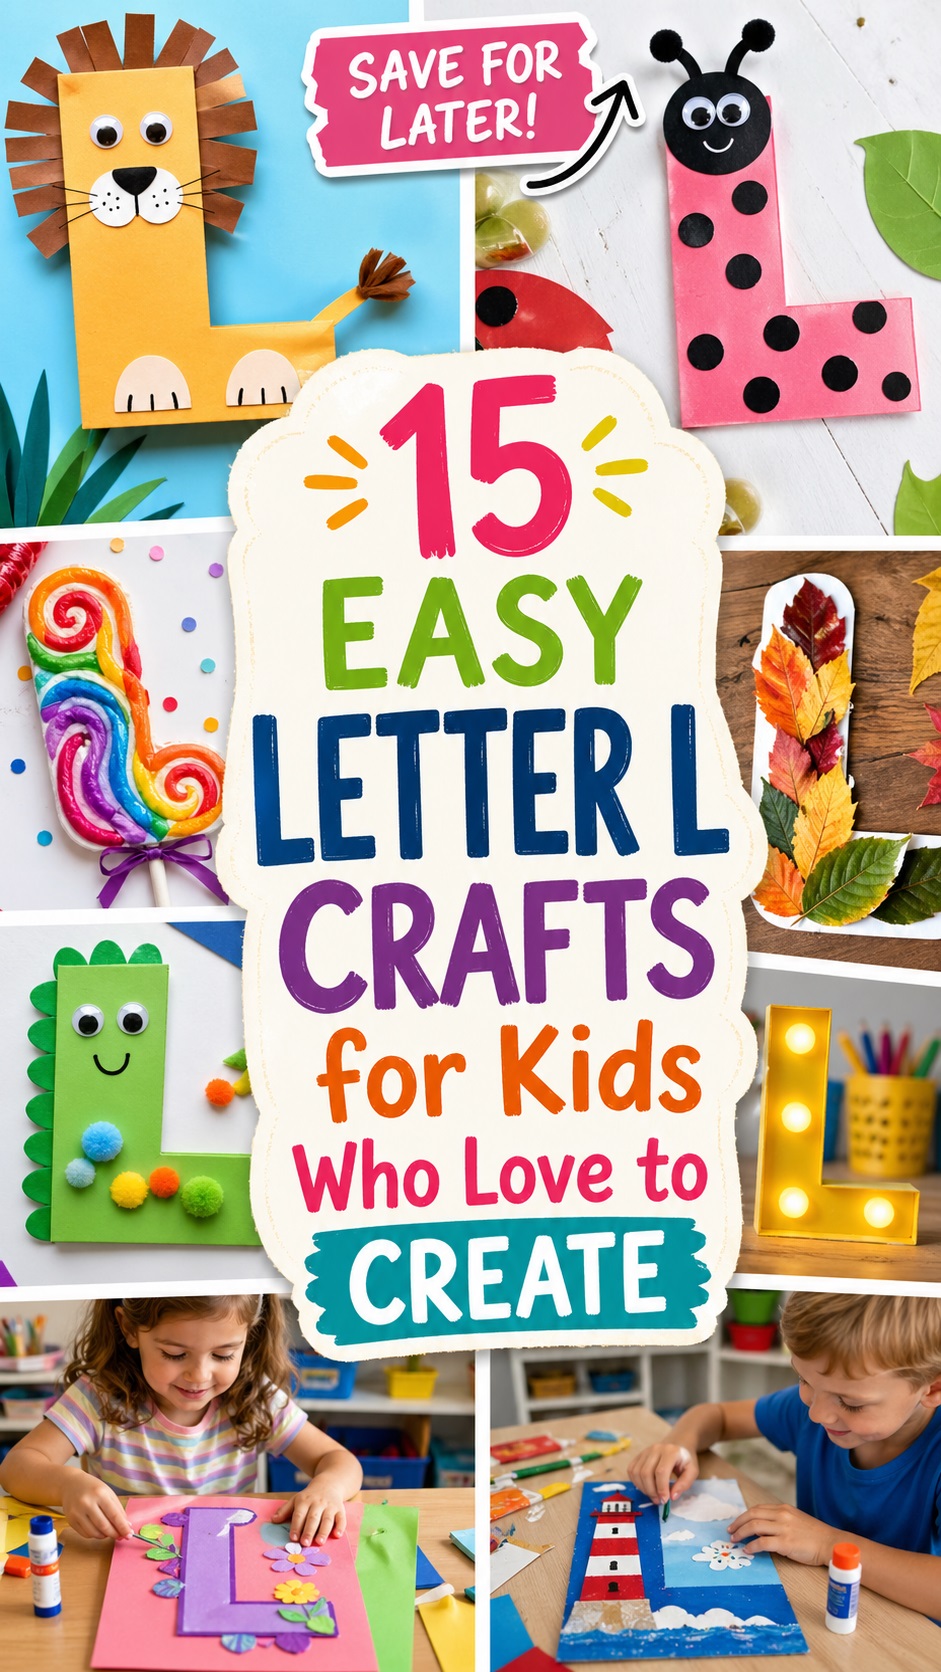
Table of Contents Show
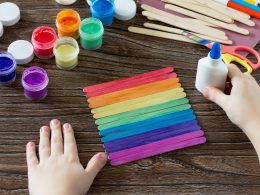
Keeping kids busy can be hard, especially on rainy days or when you need a quick classroom activity. If you’re looking for simple, low-mess projects that still feel exciting, these Letter L crafts are perfect.
Each idea is easy to set up, teaches the letter shape or a word that starts with L, and looks bright on a bulletin board or fridge.
Browse this list to find fun, fast inspiration, then pick a favorite and jump right in to creating.
1. Paper Plate Lion Face
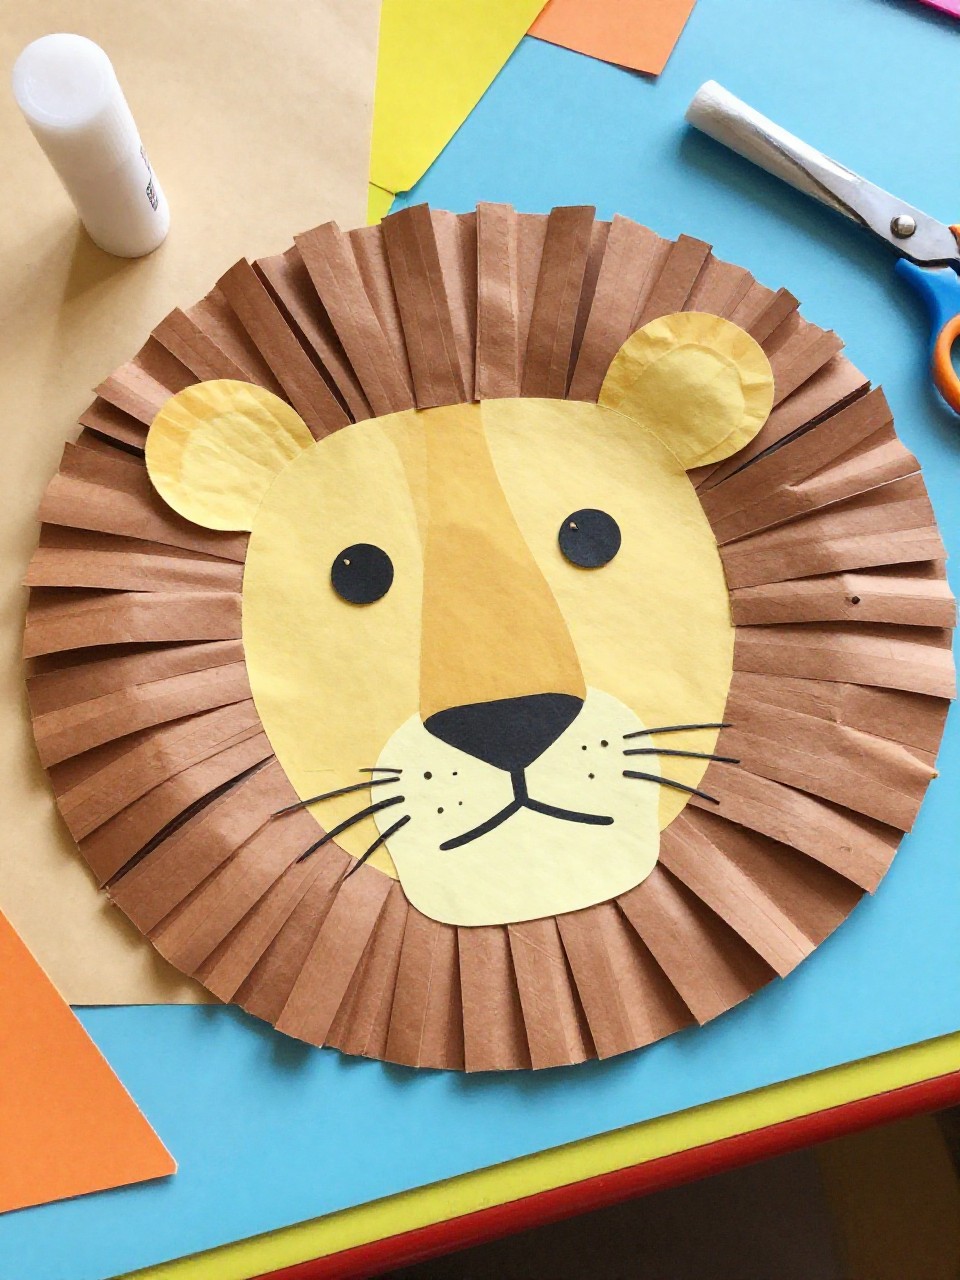
This craft makes a round, sunny lion with a fluffy paper mane and a big letter L nose. Kids love snipping the mane and choosing bold colors, and the simple shape is great for beginners.
Materials Needed:
For People Who Love to Make Things ✂️
- Paper plate (plain or painted yellow)
- Construction paper (orange, brown, and black)
- Glue stick
- Safety scissors
- Marker for facial details
How to make it:
- 1. Paint or color the paper plate yellow; let it dry.
- 2. Cut strips of orange and brown paper for the mane and glue them around the plate’s edge.
- 3. Cut a black letter L for the nose and add eyes, whiskers, and a smile with paper or marker.
- 4. Fluff the mane strips outward and display your roaring Letter L lion.
2. L Is for Ladybug Collage
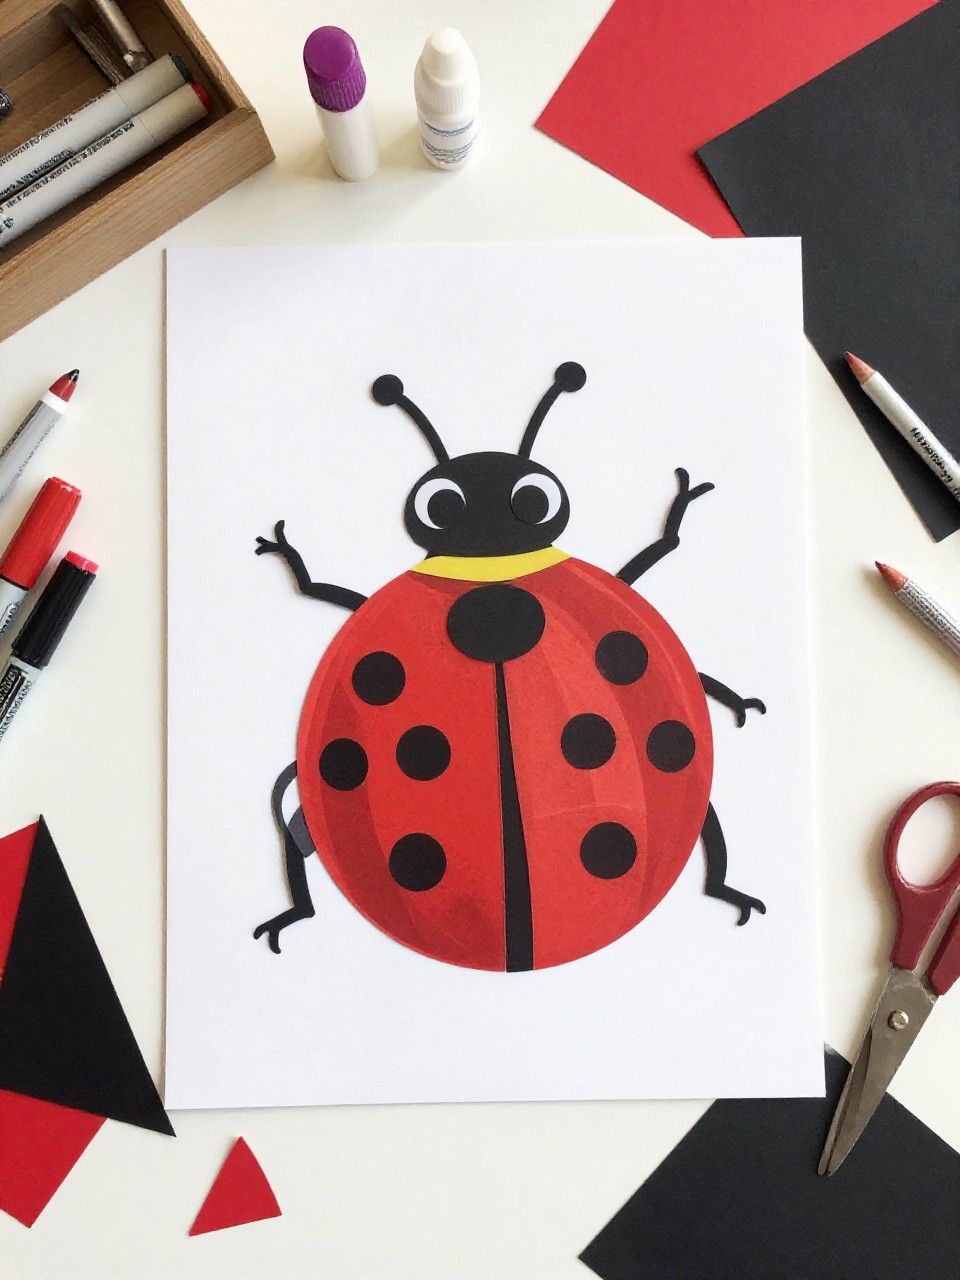
This project makes a big letter L filled with red and black ladybug spots and tiny paper wings. Kids enjoy placing dots and adding little antennae, making it a playful way to remember the letter.
Materials Needed:
- Printable or hand-drawn large letter L on cardstock
- Red and black construction paper
- Glue stick
- Googly eyes (optional)
- Black marker
How to make it:
- 1. Cut small red ovals and black dots from paper.
- 2. Glue the red ovals along the L shape, then add black dots on top.
- 3. Attach eyes and draw antennae and a line down each “ladybug” back.
- 4. Let dry and hang as a bright letter poster.
3. Popsicle Stick Llama
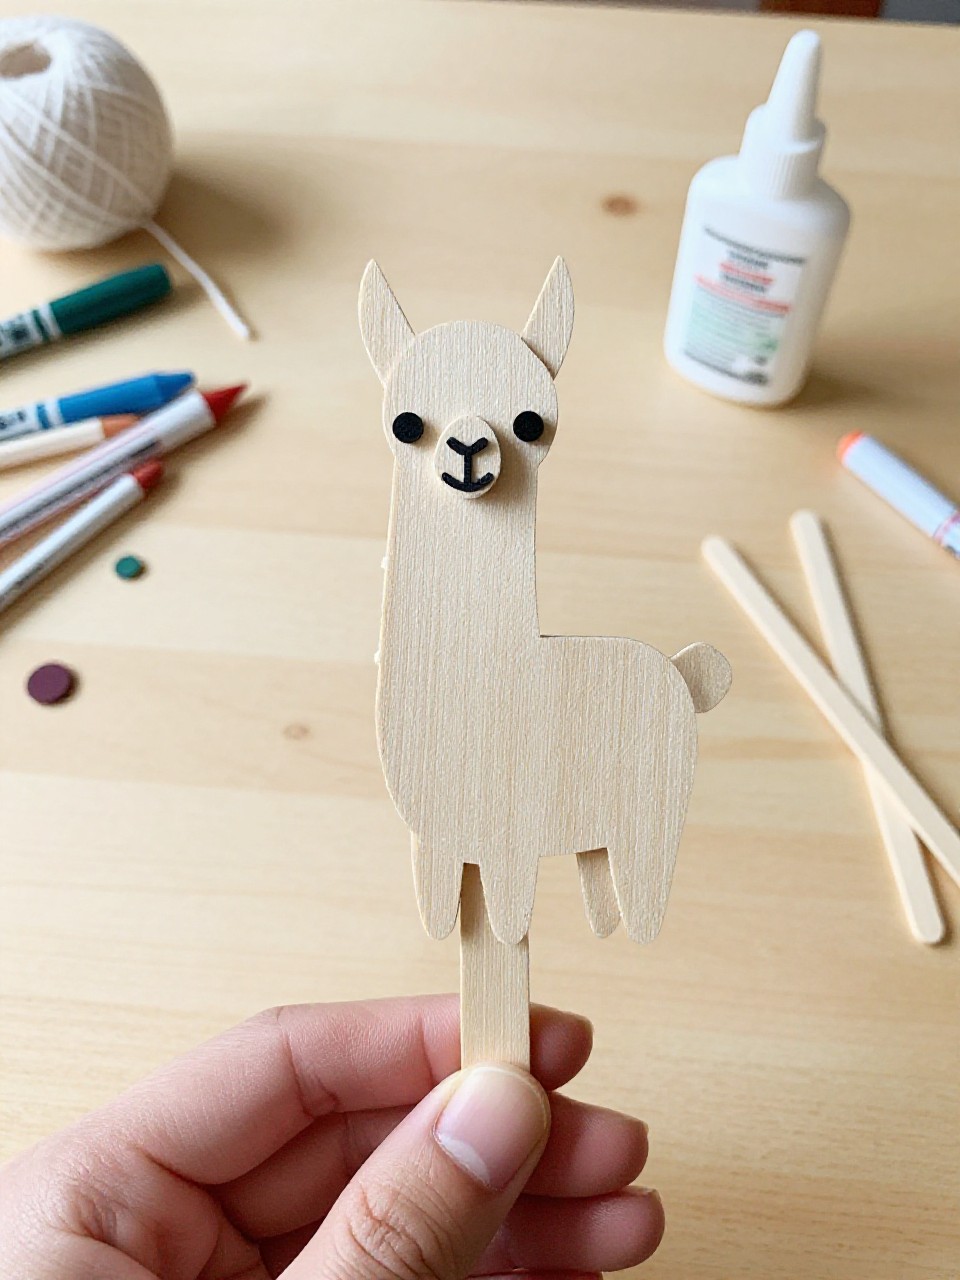
This cute llama uses popsicle sticks to form a big L body with a fuzzy yarn “wool” blanket. Kids love the funny face and adding colorful patterns on the saddle.
Materials Needed:
- 4–5 popsicle sticks
- White paint or white paper to wrap sticks
- Glue
- Yarn or felt for a saddle/blanket
- Markers and googly eyes (optional)
How to make it:
- 1. Glue sticks into a strong letter L shape; let dry.
- 2. Paint the sticks white or wrap with white paper.
- 3. Add a small paper llama head, ears, and a yarn or felt saddle with simple patterns.
- 4. Draw eyes and a smile; set up to display standing or on a card.
4. Leafy Letter L Nature Art
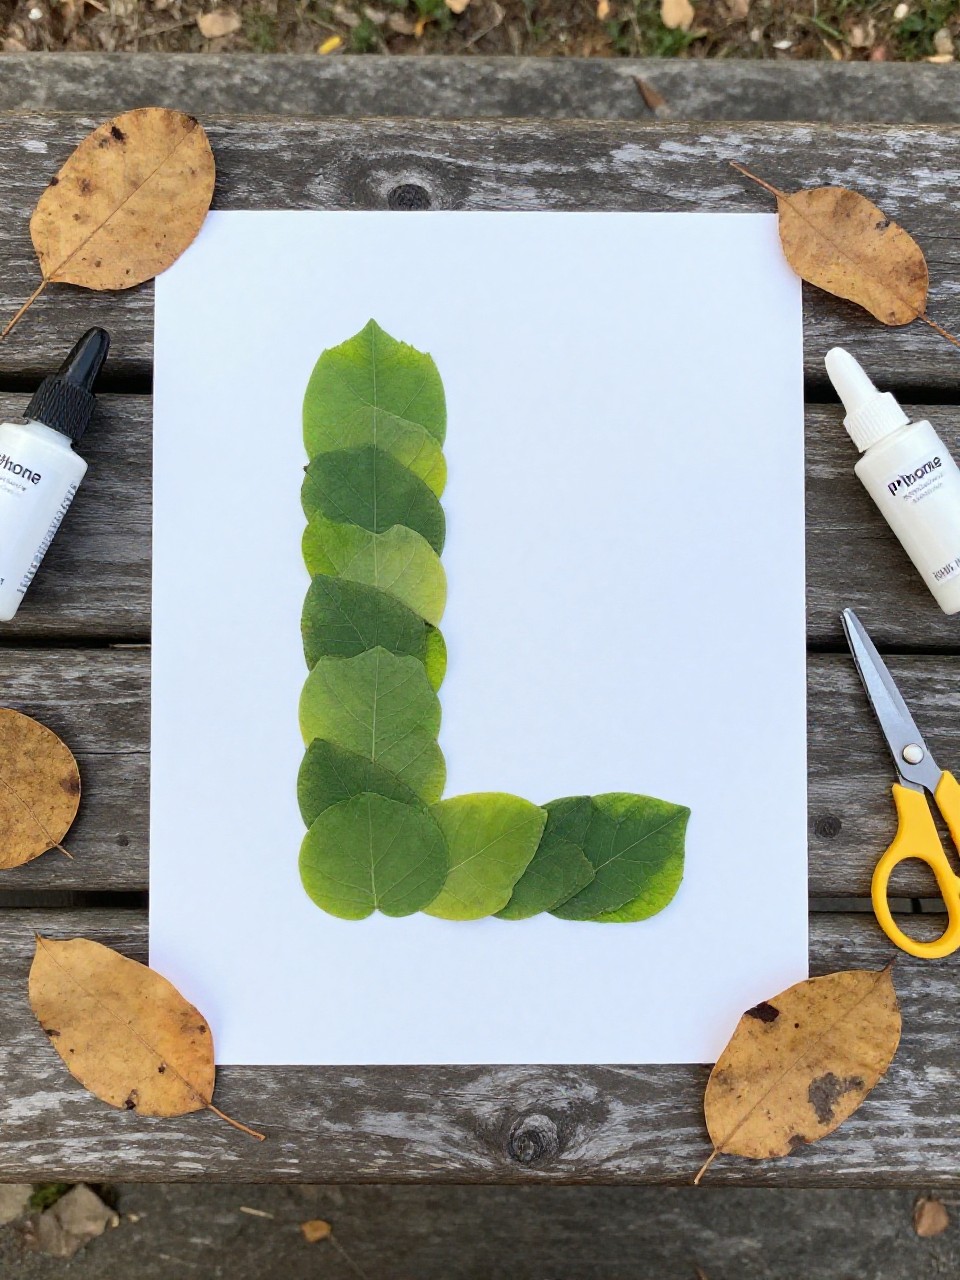
This craft turns real leaves into a textured letter L on cardboard. Kids enjoy exploring outside and choosing different shapes and greens for a natural look.
Materials Needed:
- Cardboard or thick paper base
- Fresh or dried leaves (varied sizes)
- White glue
- Scissors (for trimming)
- Optional: paintbrush to spread glue
How to make it:
- 1. Draw a large L on cardboard.
- 2. Spread glue inside the L and place leaves closely to fill the shape.
- 3. Trim edges for a clean outline and press gently.
- 4. Let dry flat and display your earthy letter.
5. Lace-Up Letter L Sewing Card
Make a sturdy L shape with holes to practice lacing like a shoe. Kids love the calming, hands-on threading and the proud feeling of finishing the outline.
Materials Needed:
- Cardstock or thin cardboard
- Hole punch
- Yarn or shoelace
- Tape (to make a stiff “needle” tip)
- Markers for decorating
How to make it:
- 1. Cut a large letter L from cardstock.
- 2. Punch holes evenly around the edges.
- 3. Tape one end of the yarn to make a point and lace in and out through holes.
- 4. Tie the ends and add simple doodles or a name.
6. Lemon Slice Stamping L Art
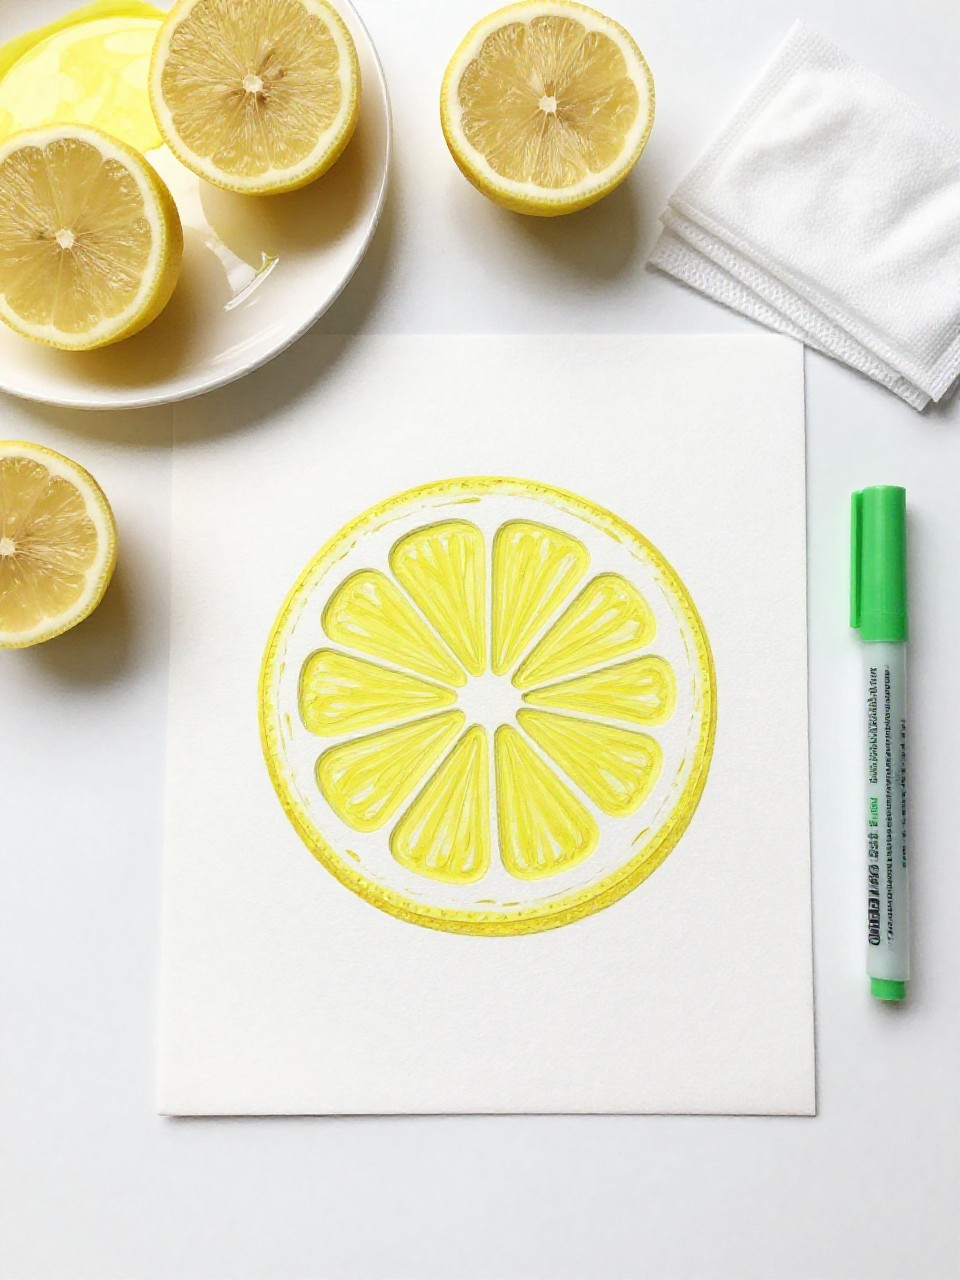
This painting makes a bright letter L filled with cheerful lemon slice prints. Kids enjoy the sensory stamping and watching circles overlap into fun patterns.
Materials Needed:
- Printable or hand-drawn large letter L on paper
- Lemon halves (or foam lemon shapes)
- Yellow paint
- Paper plate for paint
- Baby wipes or paper towels
How to make it:
- 1. Place the L outline on a protected surface.
- 2. Dip a lemon half into yellow paint and stamp inside the L.
- 3. Add leaf shapes with green marker or thumbprints if you like.
- 4. Let dry and trim around the L to mount on colored paper.
7. Little Lamp Lantern (Paper L)
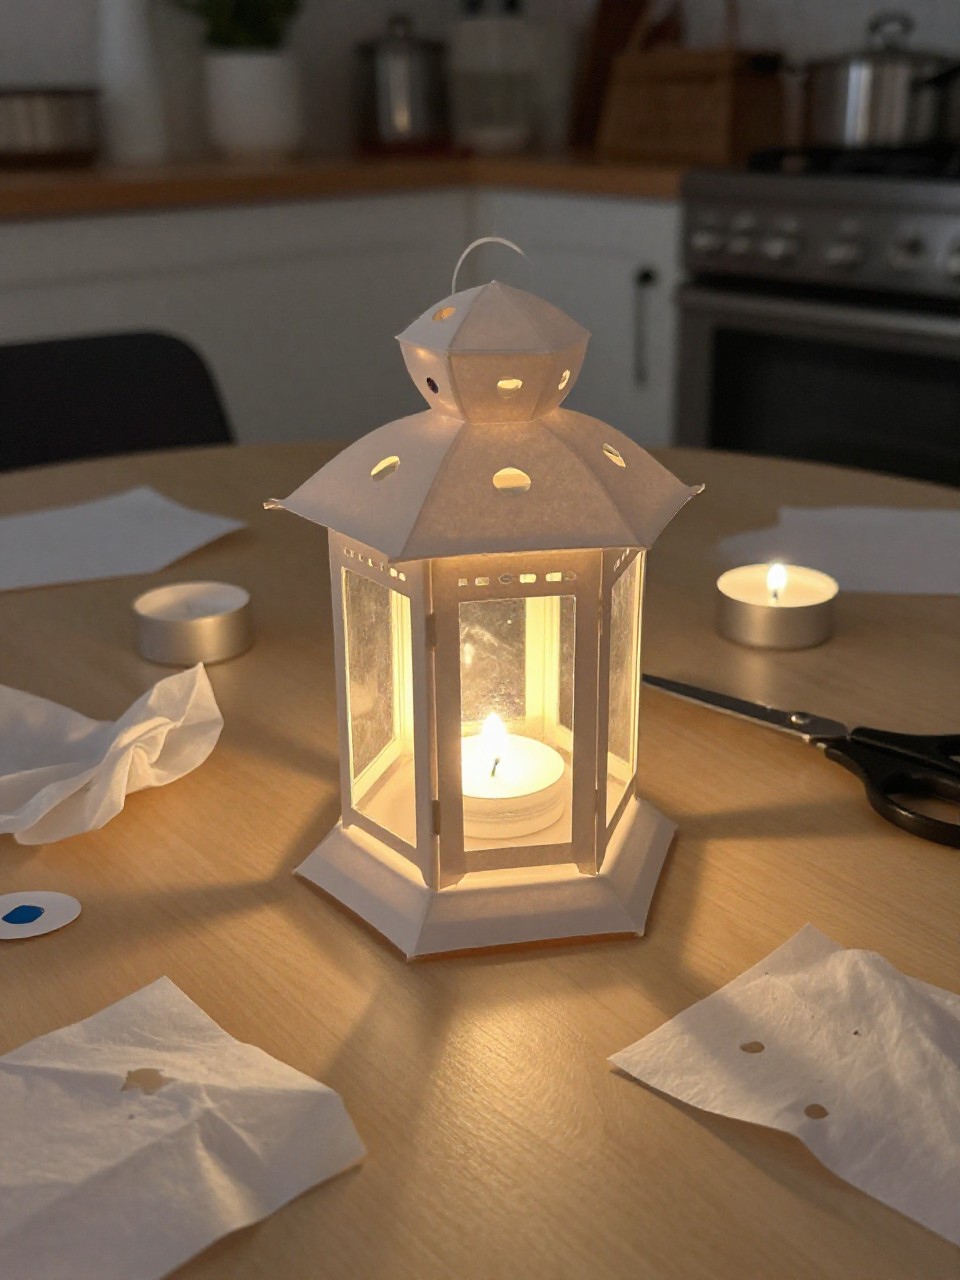
Create a mini paper lantern shaped like the letter L that glows with an LED tea light. Kids love seeing their letter light up safely.
Materials Needed:
- Construction paper or colored cardstock
- Scissors and glue or double-sided tape
- Hole punch (optional for patterns)
- Tissue paper for “windows”
- LED tea light (battery)
How to make it:
- 1. Cut and fold cardstock to form a blocky letter L with hollow sides.
- 2. Cut small window openings and glue tissue paper behind them.
- 3. Punch holes or add cutout stars for extra glow.
- 4. Place an LED tea light inside and enjoy the soft shine.
8. Handprint Leaf Lion
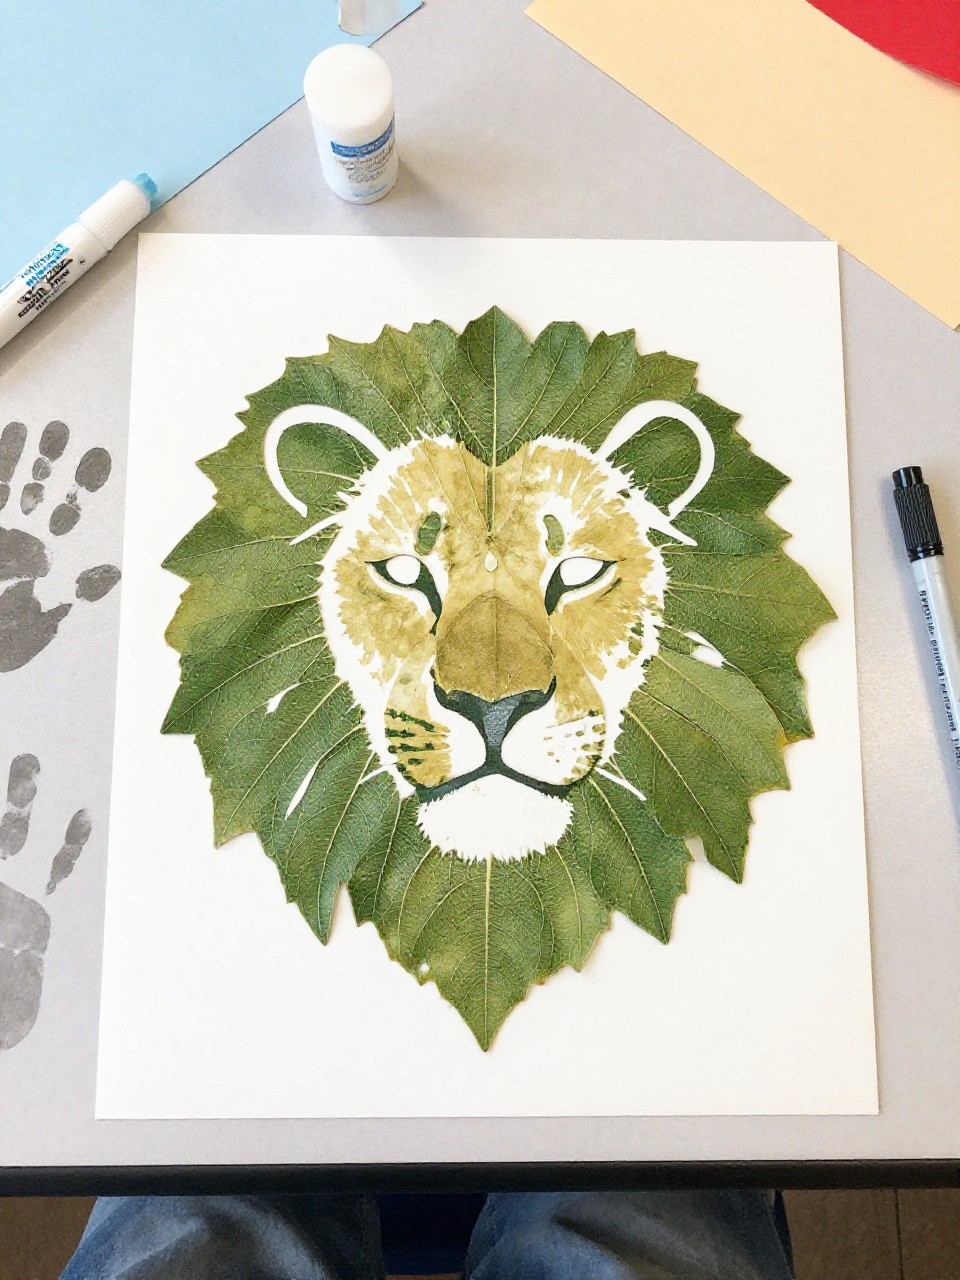
This piece shows a bold letter L with a lion head framed by handprint “leaf” mane pieces. Kids enjoy tracing their hands and layering colors for a wild, friendly look.
Materials Needed:
- Cardstock with a large letter L drawn
- Yellow, orange, and red construction paper
- Glue stick
- Black marker
- Googly eyes (optional)
How to make it:
- 1. Trace and cut 4–6 handprints from warm-colored papers.
- 2. Glue the handprints around a yellow circle to form a lion’s mane near the top of the L.
- 3. Add the lion’s face with eyes, nose, and a small L-shaped mouth line.
- 4. Let dry and display as a roaring letter poster.
9. Lace Doily Letter L Print
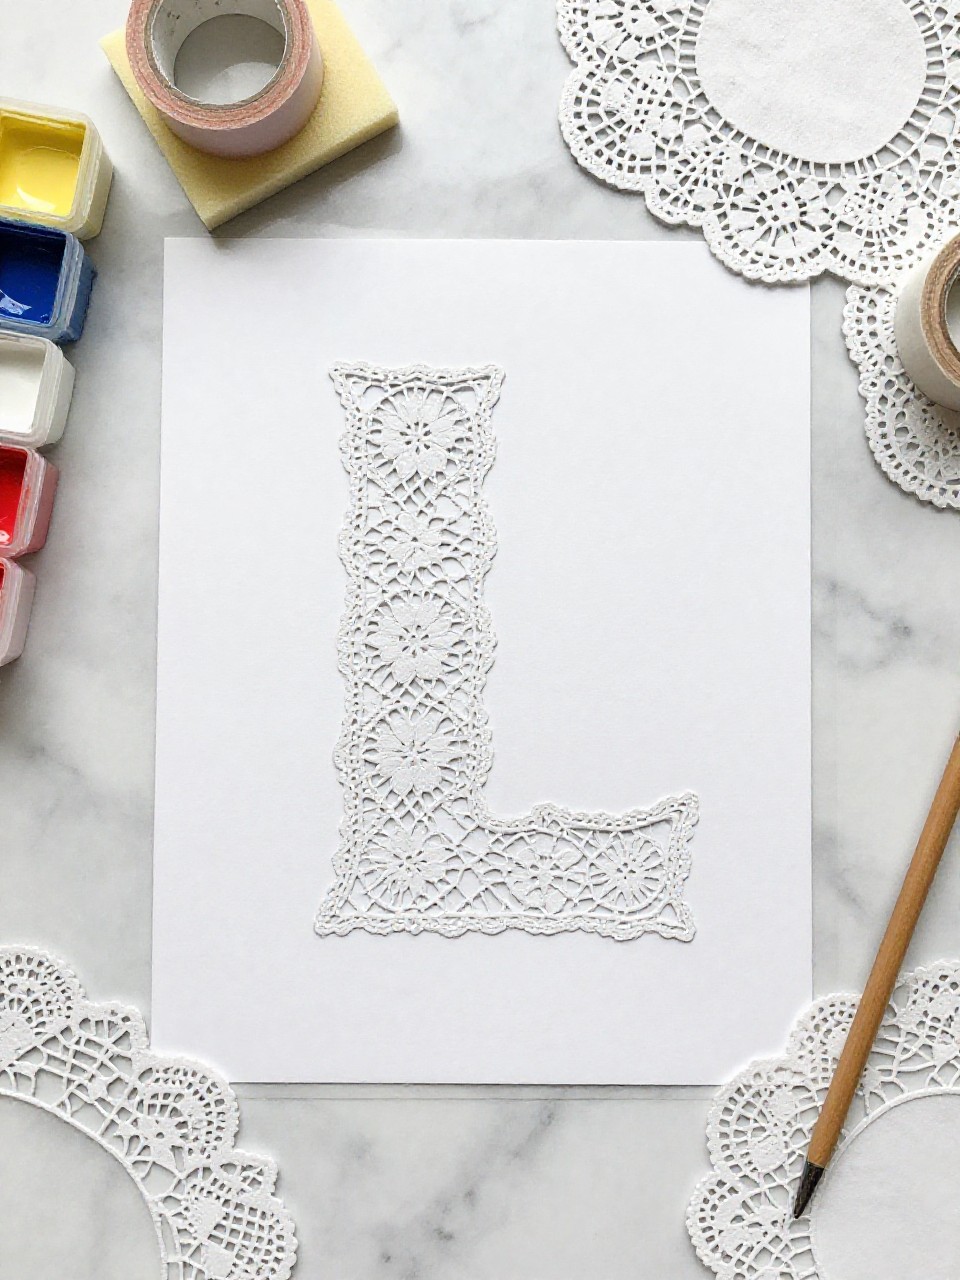
This art uses a paper lace doily as a stencil to make a delicate pattern inside a painted L. Kids enjoy the surprise reveal when the doily lifts off.
Materials Needed:
- White cardstock with a large L lightly sketched
- Paper lace doily
- Washable paints and sponge or brush
- Painter’s tape
- Scrap paper for testing
How to make it:
- 1. Tape the doily over the L outline.
- 2. Dab paint gently with a sponge to cover the L area.
- 3. Carefully remove the doily to reveal the lace pattern.
- 4. Let dry and add a small “L is for Lace” label.
10. Lego Print Letter L
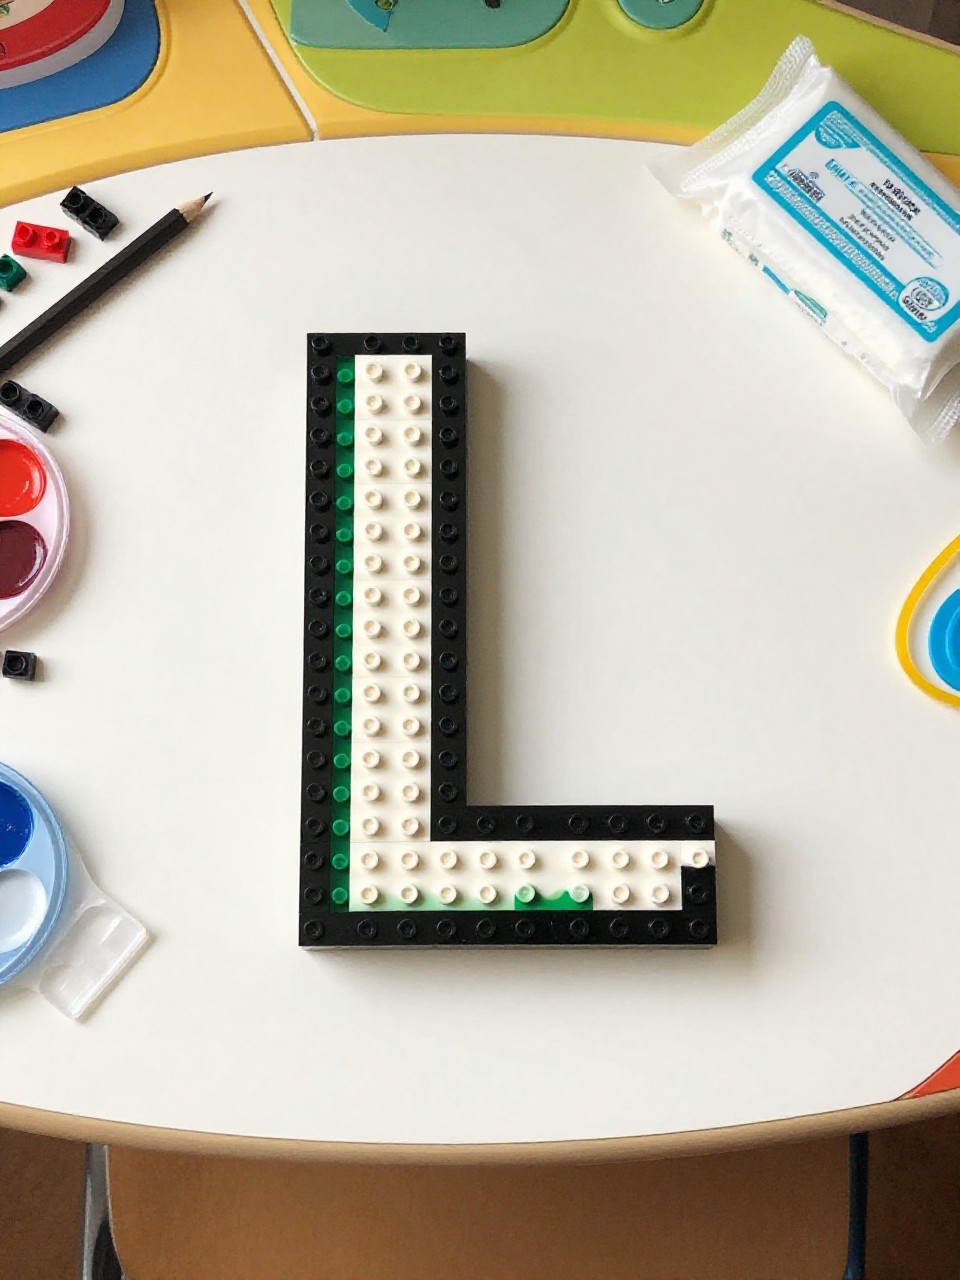
Make a bold L filled with dotted textures by dipping the ends of building bricks in paint and stamping. Kids love choosing brick sizes and colors to build their own pattern.
Materials Needed:
- Paper with a large L outline
- Small LEGO or brick pieces
- Washable paint
- Paper plate palette
- Wipes for cleanup
How to make it:
- 1. Place paint in thin layers on a plate.
- 2. Dip the flat side of a brick into paint and stamp inside the L.
- 3. Mix colors and repeat to fill the shape with dots and lines.
- 4. Let dry and mount on colored paper.
11. Lovely Lavender Sachet L

Sew or glue a simple felt letter L and fill it with dried lavender for a calming craft. Kids enjoy the gentle smell and soft fabric feel.
Materials Needed:
- Felt sheets (two L shapes)
- Dried lavender or cotton balls with lavender oil
- Yarn or embroidery thread
- Large plastic needle or glue
- Ribbon loop (optional)
How to make it:
- 1. Cut two matching felt L shapes.
- 2. Stitch around the edges or glue, leaving a small opening.
- 3. Stuff with lavender, then close the gap and add a ribbon loop.
- 4. Squeeze gently to release scent and place in a drawer.
12. Lightning Bolt Letter L

Turn the letter L into a zappy lightning design with shiny foil and bold yellow paint. Kids love the dramatic zigzags and metallic sparkle.
Materials Needed:
- Cardstock with a large block letter L
- Yellow paint or markers
- Aluminum foil or gold paper
- Glue stick
- Black marker for outline
How to make it:
- 1. Paint or color the L bright yellow.
- 2. Cut small lightning bolt shapes from foil and glue across the L.
- 3. Outline the L and bolts with a black marker for pop.
- 4. Let dry and tape to a window or wall.
13. Pool Noodle L Lollipop Prop
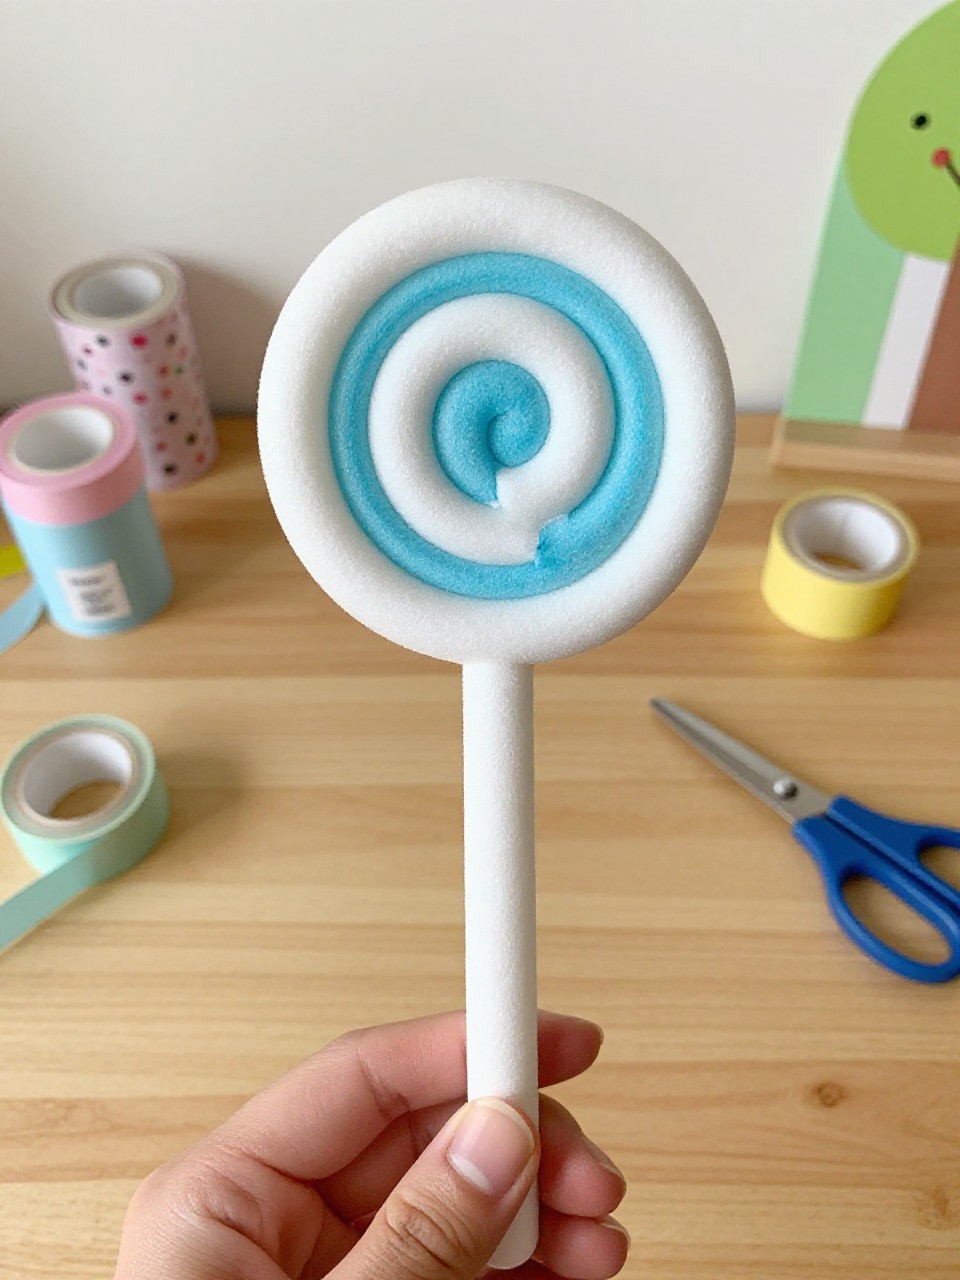
Make a giant, goofy “lollipop” L using a pool noodle wrapped in ribbon, great for pretend play or photos. Kids love holding the oversized, candy-colored letter.
Materials Needed:
- Pool noodle (cut to size)
- Duct tape or strong tape
- Wide ribbon or crepe paper streamers
- Wooden dowel or cardboard tube for stick
- Stickers (optional)
How to make it:
- 1. Cut and tape the pool noodle into a firm letter L.
- 2. Wrap ribbon or streamers around the noodle and tape the ends neatly.
- 3. Attach a dowel or tube to the short leg as the “lollipop stick.”
- 4. Add stickers and pose for sweet photos.
14. Little Library Letter L Bookmark
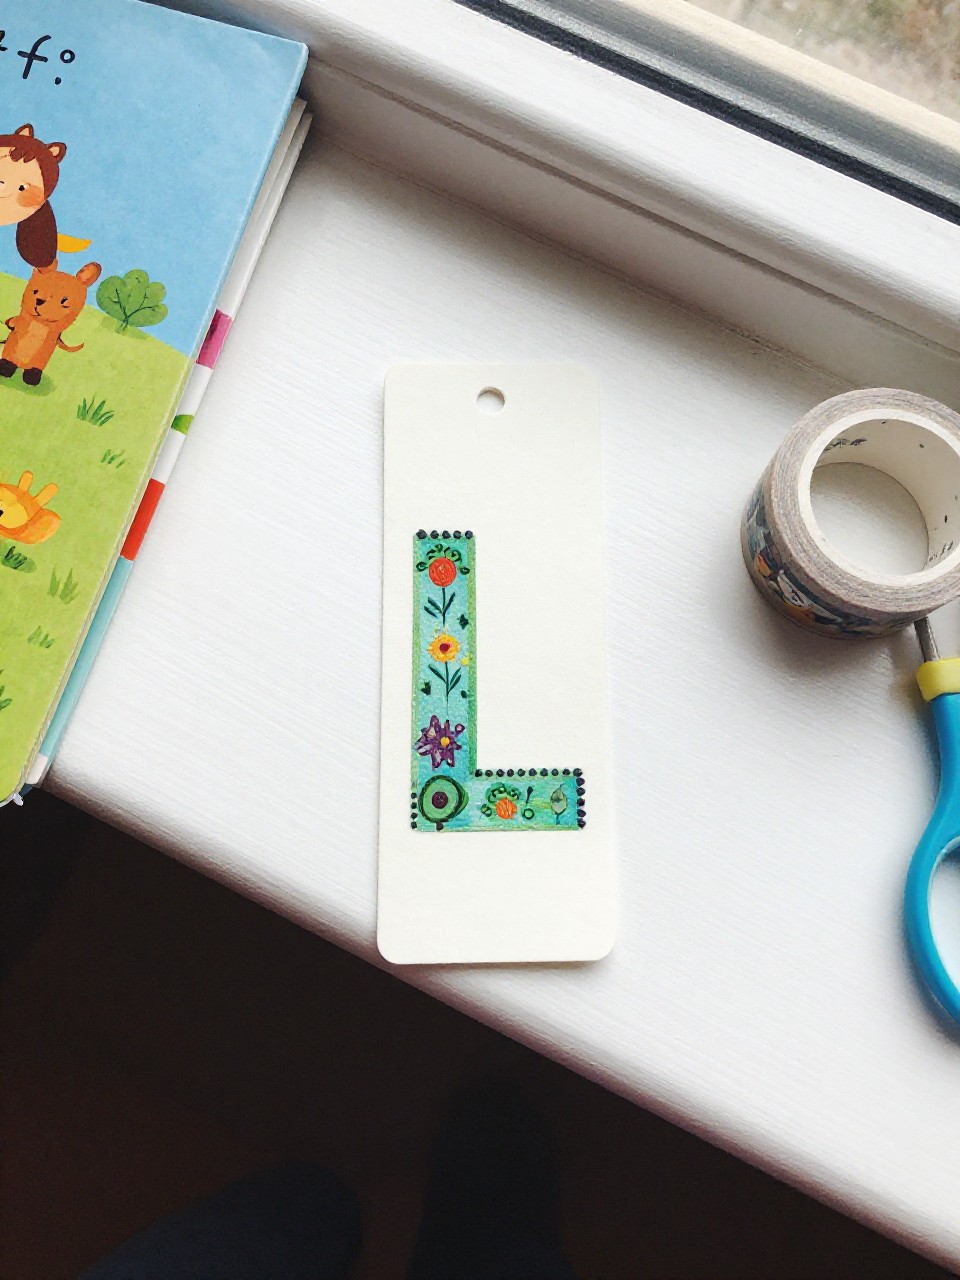
Craft a corner bookmark shaped like an L with tiny “book spine” stripes. Kids enjoy using their own letter during reading time.
Materials Needed:
- Colored paper or cardstock
- Glue stick
- Markers or washi tape
- Scissors
- Optional: small tassel
How to make it:
- 1. Fold and cut paper to make an L-shaped corner that fits a book page.
- 2. Glue layers to strengthen the corner.
- 3. Add spine stripes, a mini title, and an initial; attach a tassel if you like.
- 4. Slide it onto a book page and save your spot.
15. Letter L Ocean Lily Pad Scene
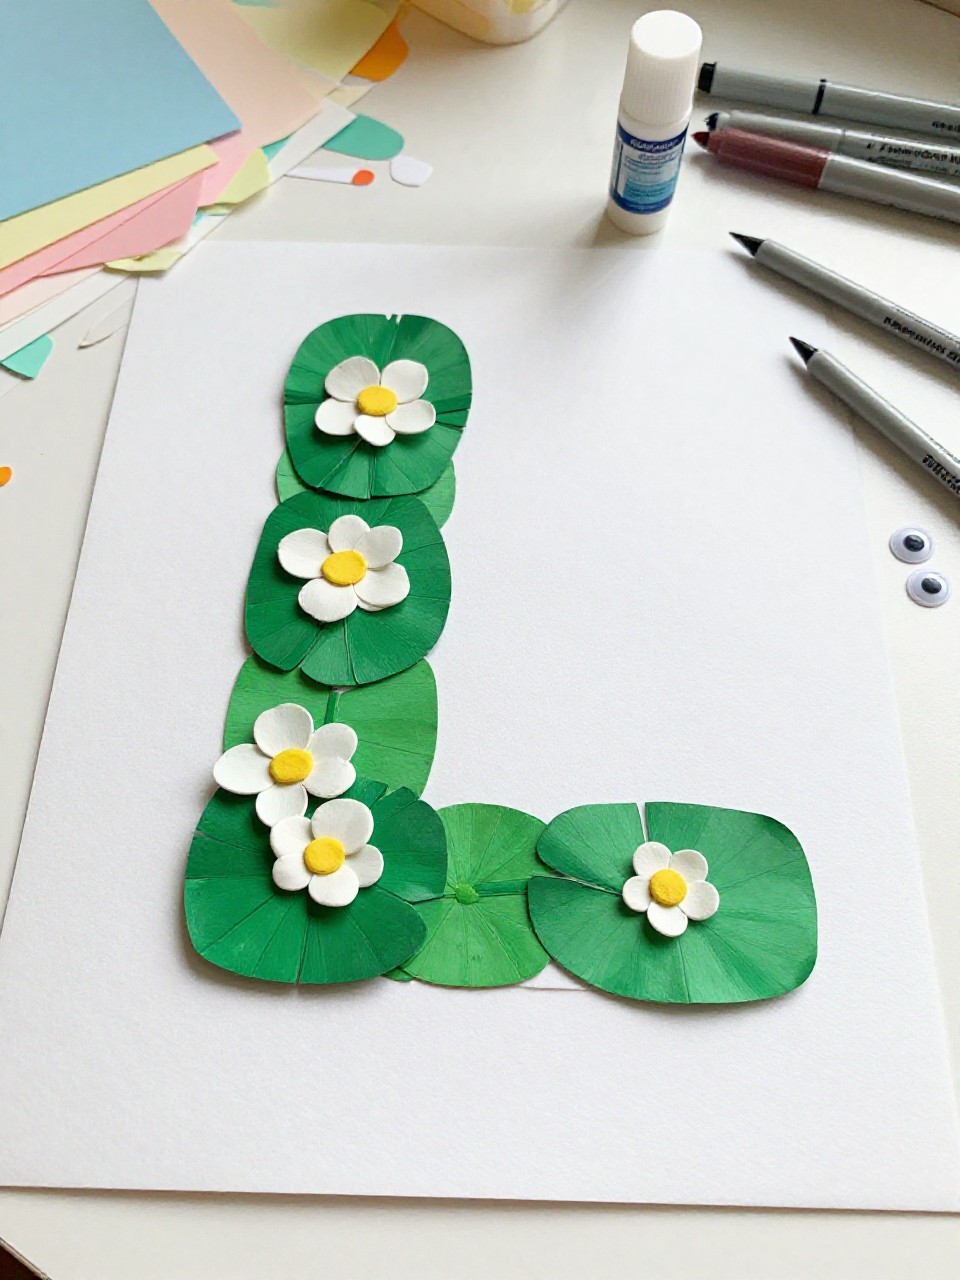
Build a small pond scene where a big green letter L becomes a lily pad with a paper frog. Kids enjoy arranging the frog, flowers, and water ripples around the letter.
Materials Needed:
- Blue cardstock background
- Green paper for a large L lily pad
- Pink or white paper for flowers
- Glue stick
- Marker and googly eyes for frog
How to make it:
- 1. Cut a large green L and glue it onto the blue background.
- 2. Add a simple folded paper frog sitting on the L.
- 3. Cut and glue small lily flowers and draw water ripples.
- 4. Let dry and hang your peaceful pond picture.