


Table of Contents Show
Keeping kids busy can be tough, especially on rainy days or when you need a quick classroom activity. If you’re looking for simple projects that still feel fun and fresh, this list is for you.
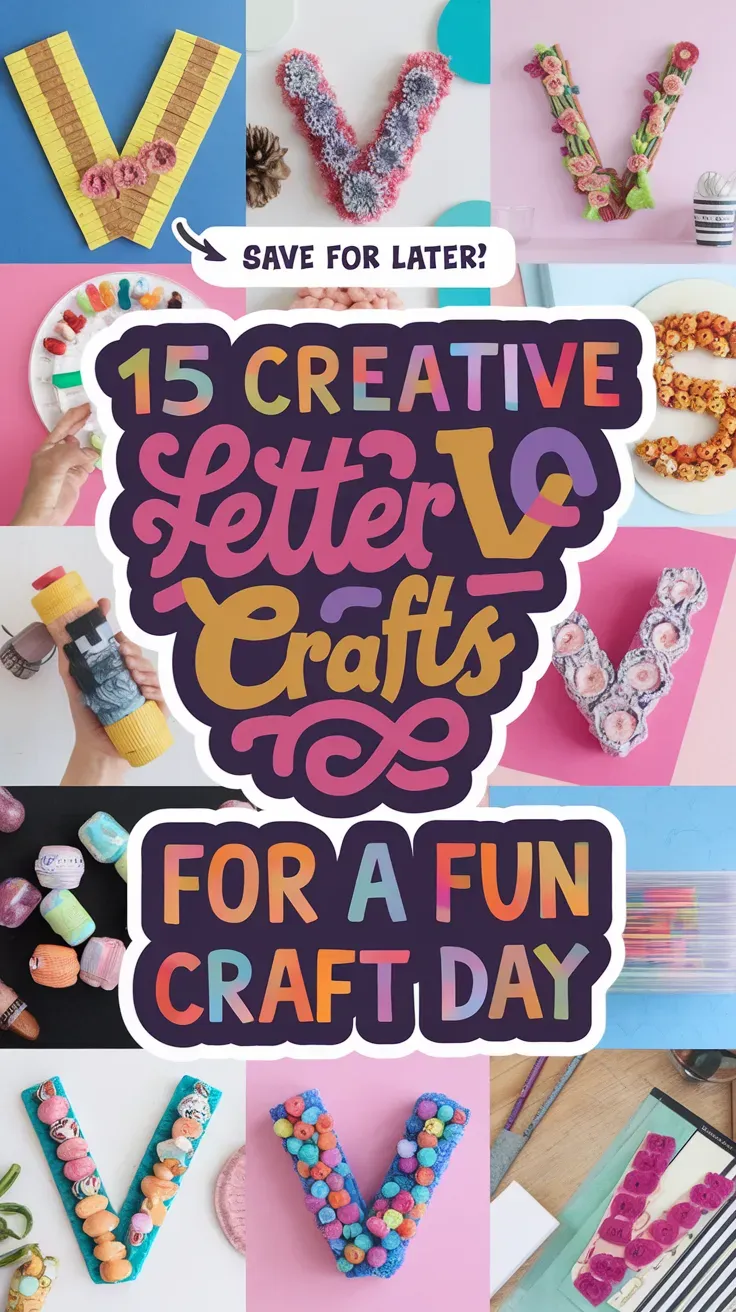
These letter V crafts help kids learn the letter while making bright, playful art they’ll be proud to show off.
You’ll find easy steps, short material lists, and ideas that spark imagination. Let’s jump into these creative “V” projects!
1. Volcano Paper Plate Eruption
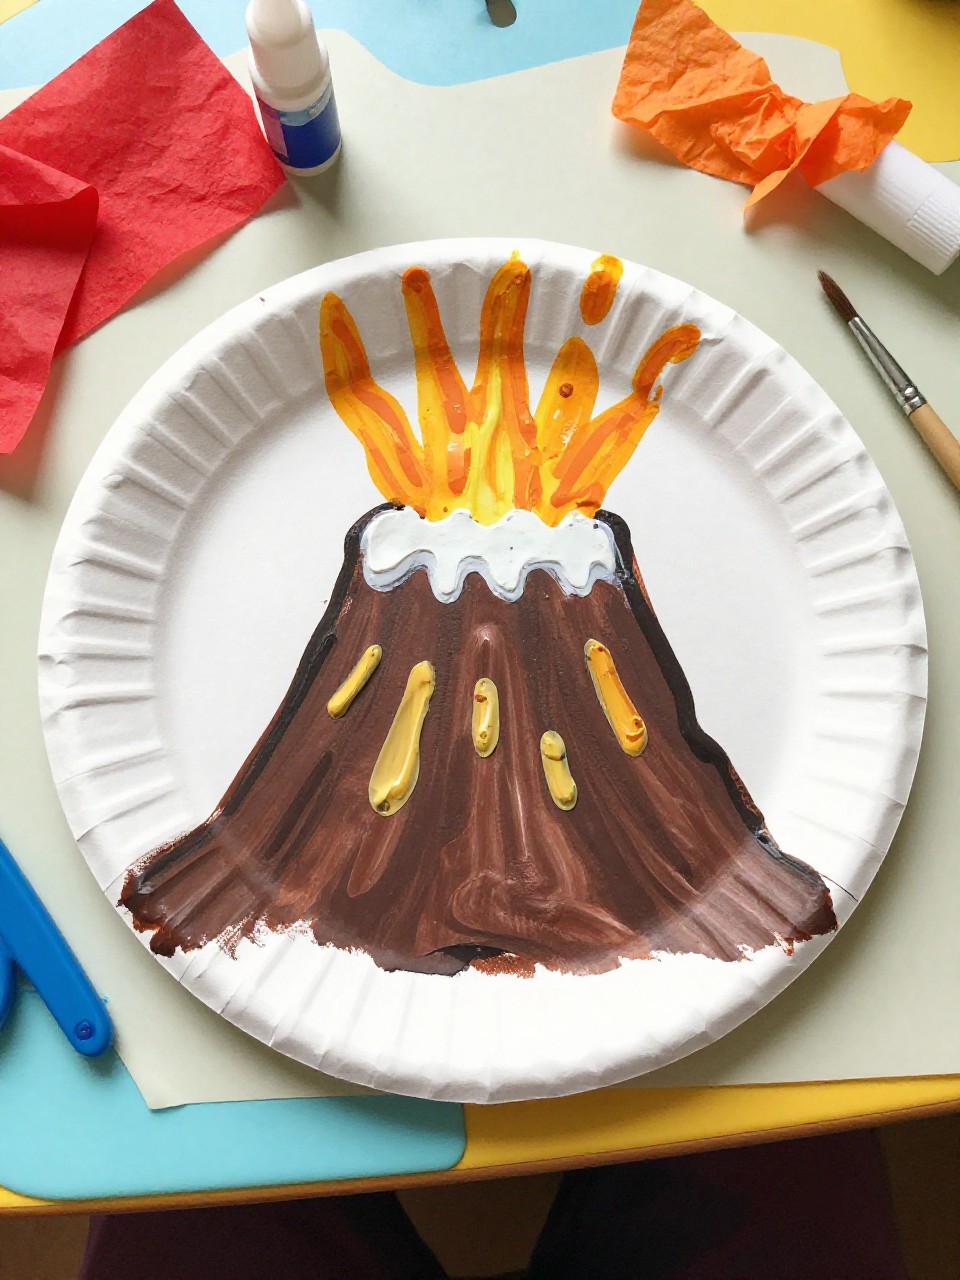
This craft looks like a bold paper plate volcano with painted lava flowing down the sides. Kids love adding tissue “lava” and pretending it’s erupting, and the steps are simple for beginners.
Materials Needed:
For People Who Love to Make Things ✂️
- Paper plate (cut in half)
- Brown and red paint
- Red/orange tissue paper strips
- Glue stick
- Markers
How to make it:
- 1. Cut a paper plate in half and paint it brown for the volcano base.
- 2. Glue the half-plate onto a sheet of blue or white paper.
- 3. Add red/orange tissue paper strips at the top for lava and outline details with markers.
- 4. Let dry and display your fiery letter V word volcano.
2. Vibrant Letter V Collage
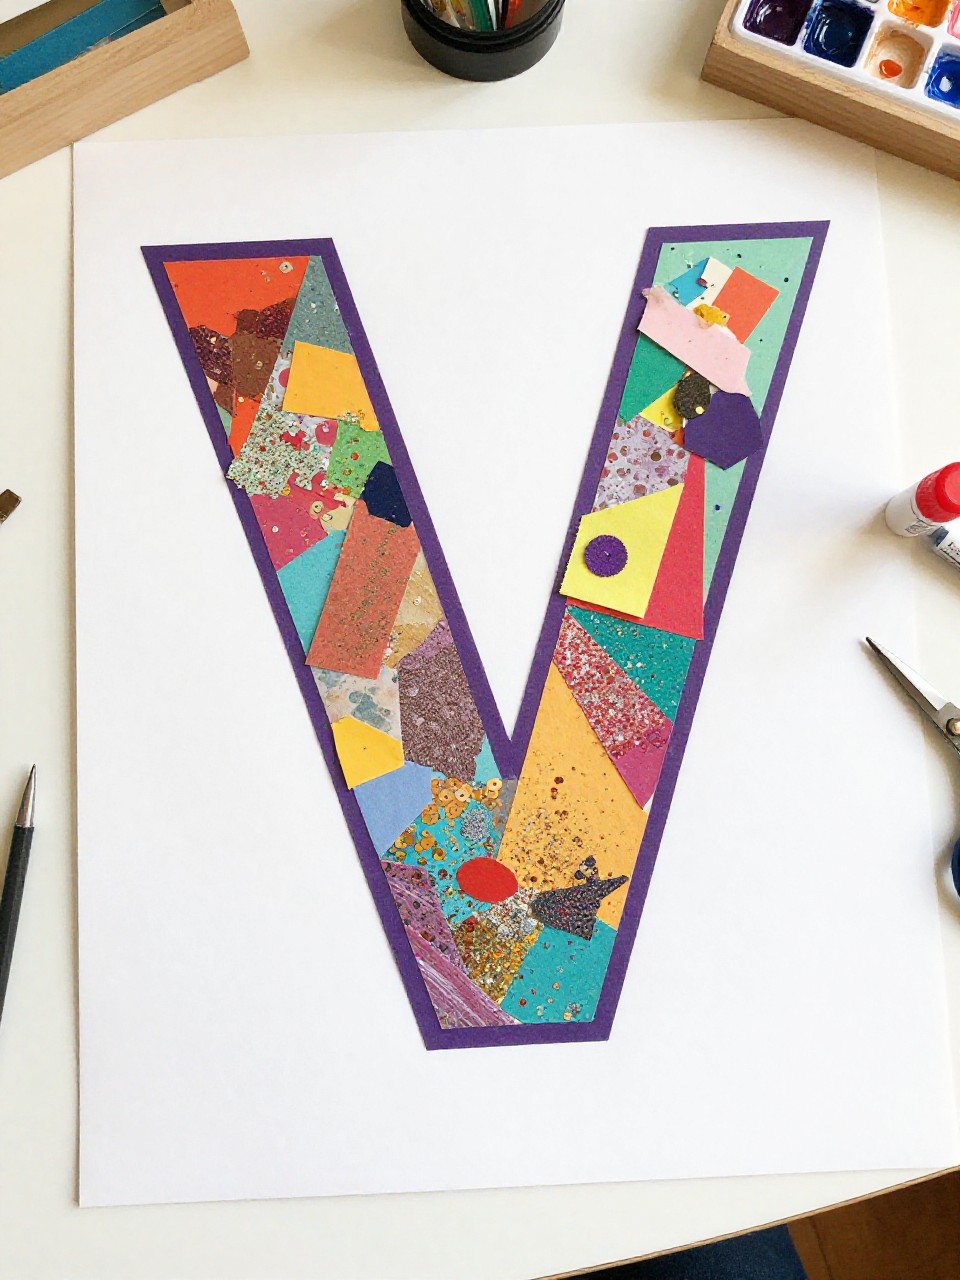
This project makes a big block letter V covered in colorful paper bits, sequins, and stickers. Kids enjoy the free-style decorating and bright patterns, and it’s a low-mess, quick win.
Materials Needed:
- Cardstock letter V (pre-cut or drawn and cut out)
- Colored paper scraps
- Glue stick
- Sequins or stickers
- Markers (optional)
How to make it:
- 1. Cut a large letter V from cardstock.
- 2. Spread glue and press on colored paper scraps, filling the whole letter.
- 3. Add sequins or stickers and outline with markers if you like.
- 4. Let dry and tape to a wall or classroom letter board.
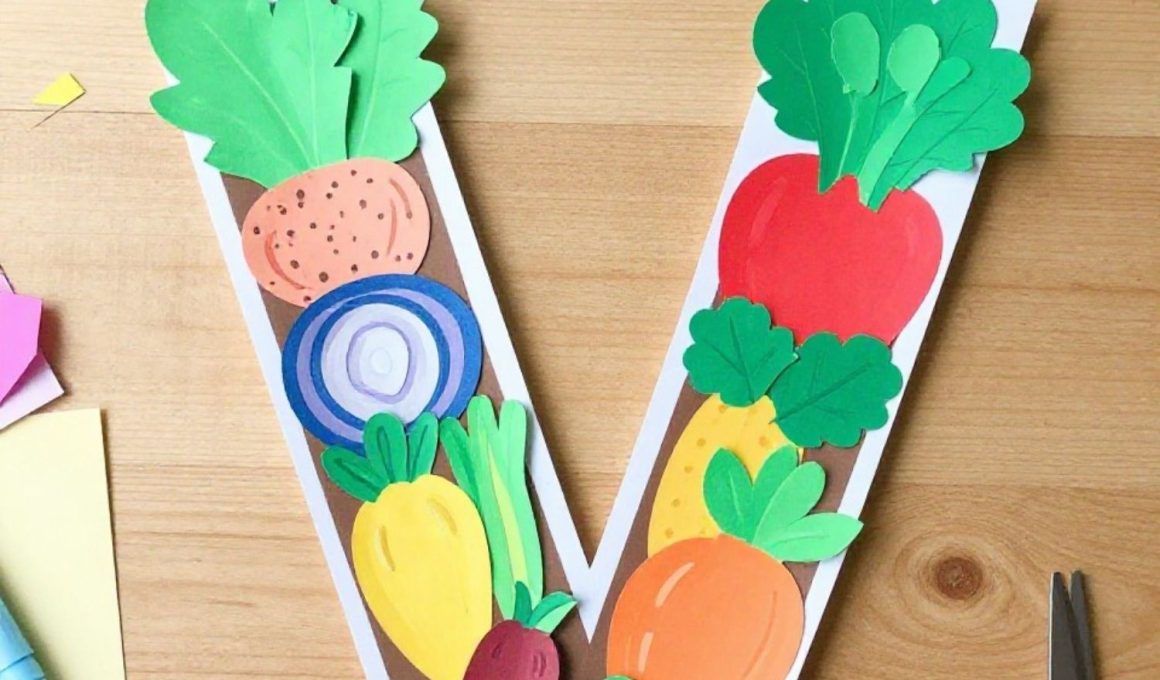
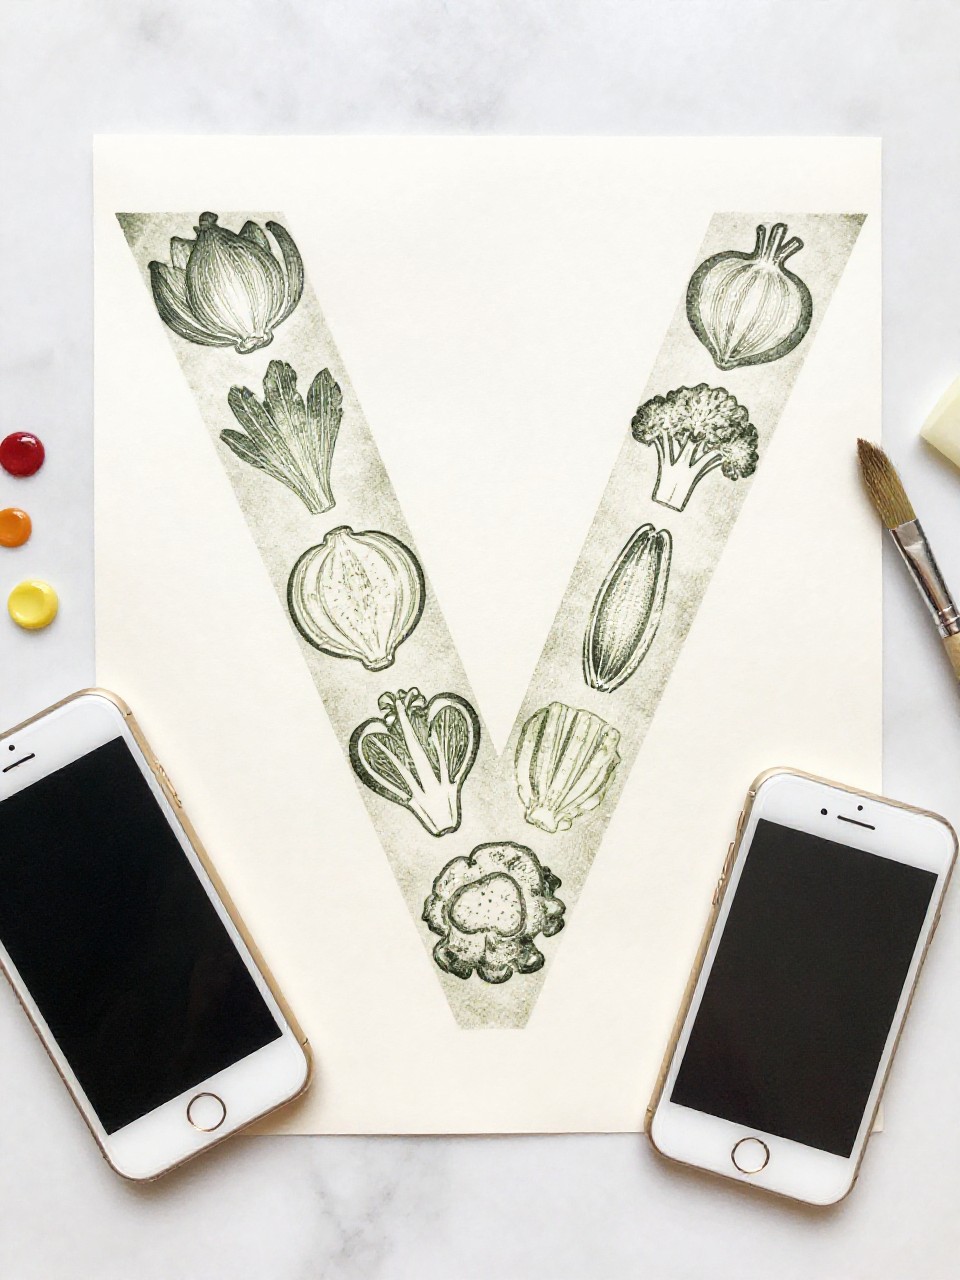
3. Vegetable Garden Letter V
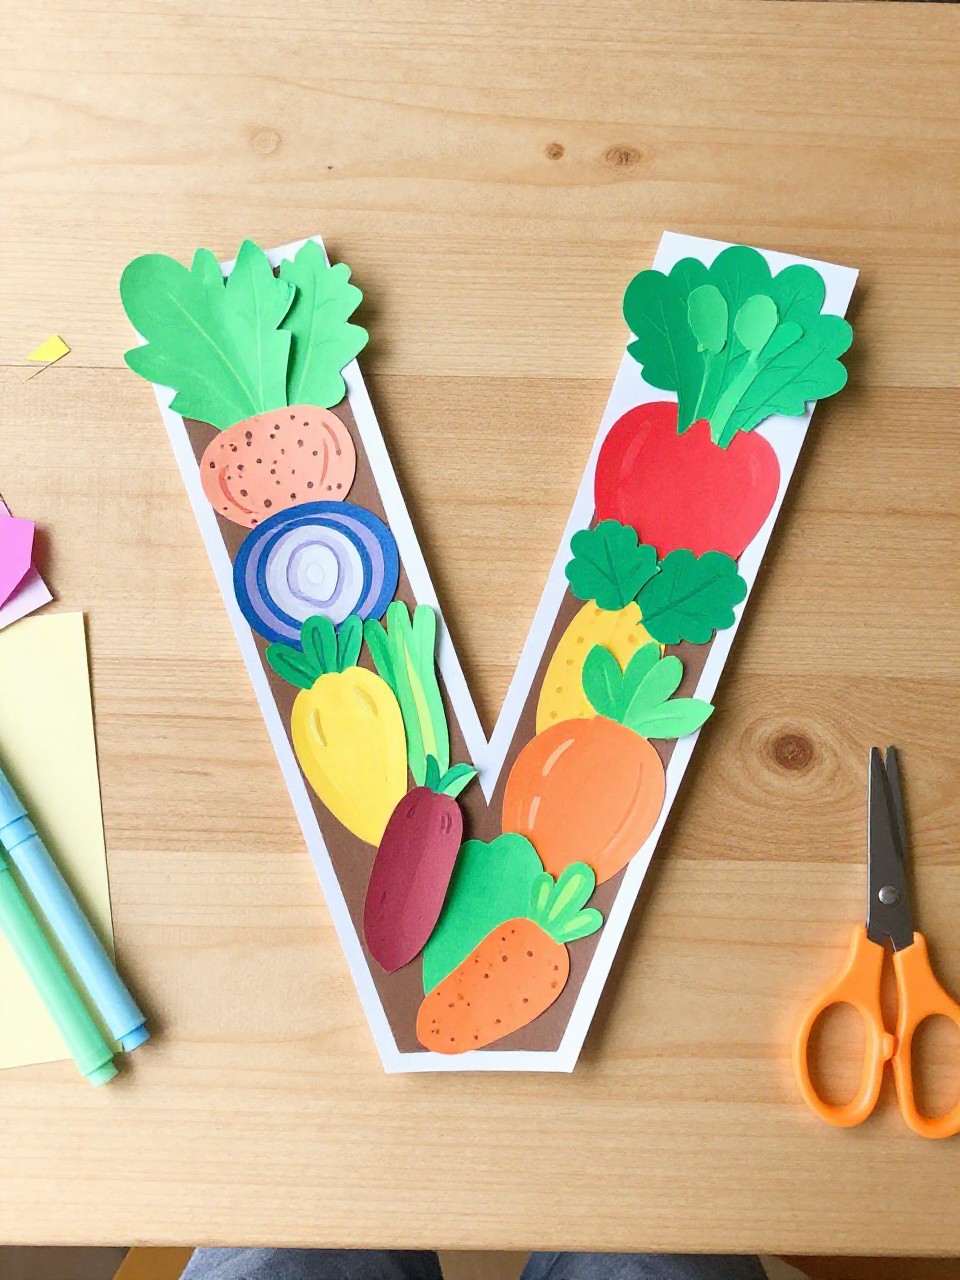
This craft shows a big V turned into a tiny veggie garden with paper carrots, peas, and tomatoes. Kids like “planting” the veggies and learning vegetable names while crafting.
Materials Needed:
- Brown and green construction paper
- Pre-cut large letter V (cardstock)
- Colored paper for veggies (orange, red, green)
- Glue stick
- Black marker
How to make it:
- 1. Glue the V onto brown paper to be the garden path or bed.
- 2. Cut small veggie shapes and leaves; glue them along the sides of the V.
- 3. Add details like lines on carrots and pea pods with a marker.
- 4. Let dry and hang as a cheerful veggie-themed letter.
4. Paper Bag Vulture Puppet
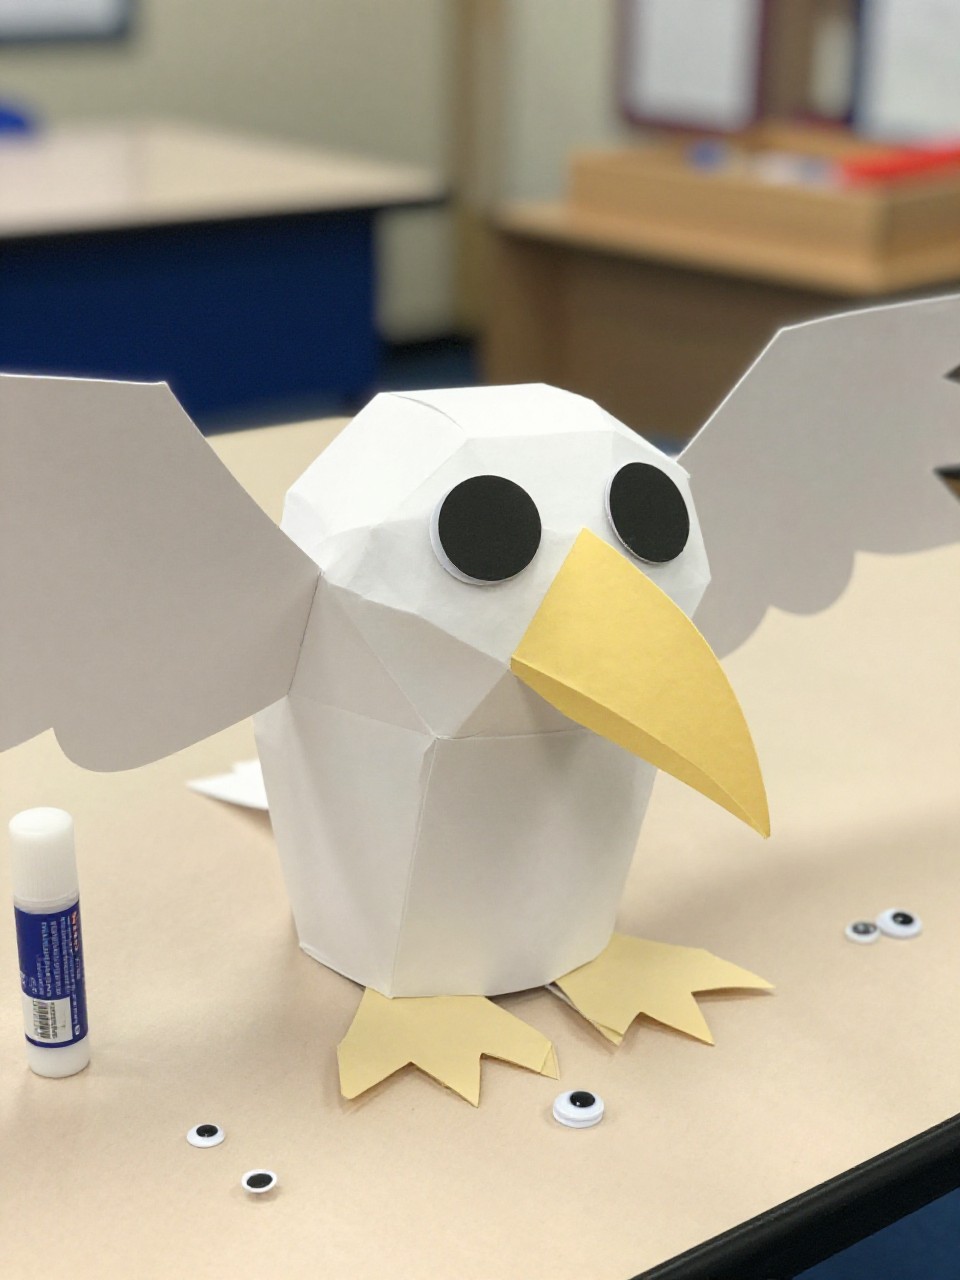
This puppet looks like a friendly vulture with a hooked beak, wings, and big eyes on a lunch bag. Kids enjoy flapping the wings and using them for letter sound play or storytelling.
Materials Needed:
- Brown paper lunch bag
- Construction paper (black, white, pink or gray)
- Googly eyes
- Glue stick
- Marker
How to make it:
- 1. Place the lunch bag flap-side down to be the face area.
- 2. Cut and glue wings, a curved beak, and a feathered collar from paper.
- 3. Add googly eyes and draw feather lines with a marker.
- 4. Let glue set, then use the flap as a talking puppet mouth.
5. Vase of Paper Flowers
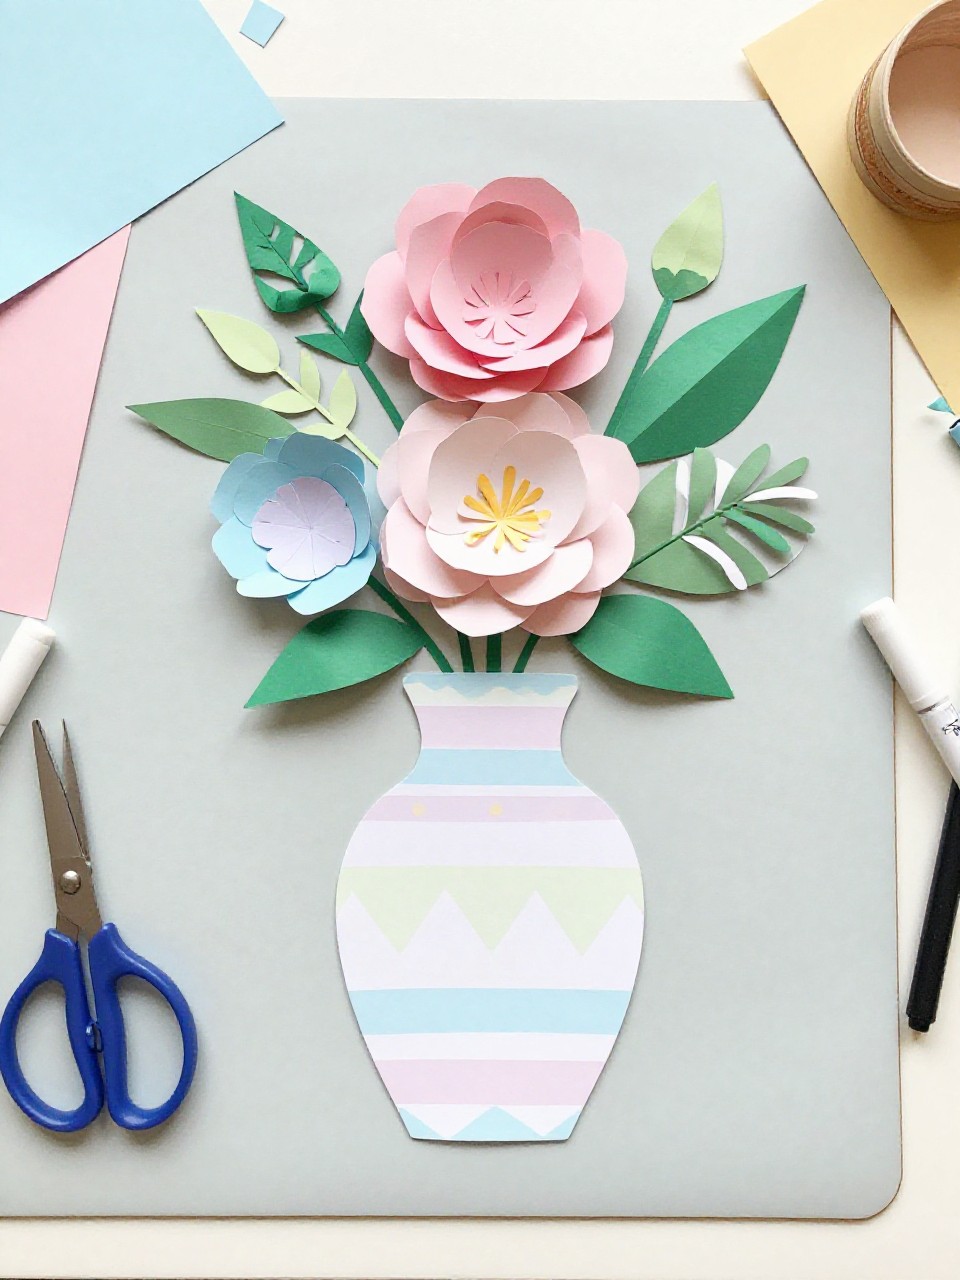
This craft turns a cut-out vase shape into a bright bouquet with paper flowers and stems. Kids love choosing colors and arranging their own “florist” display.
Materials Needed:
- Cardstock for vase shape
- Colored paper for flowers and leaves
- Green paper or pipe cleaners for stems
- Glue stick
- Crayons or markers
How to make it:
- 1. Cut a vase shape and glue it near the bottom of a background sheet.
- 2. Cut simple flowers and leaves; add stems from green paper or pipe cleaners.
- 3. Glue flowers above the vase and draw patterns on the vase.
- 4. Press flat to dry and display on a windowsill or bulletin board.
6. Handprint Violin Art
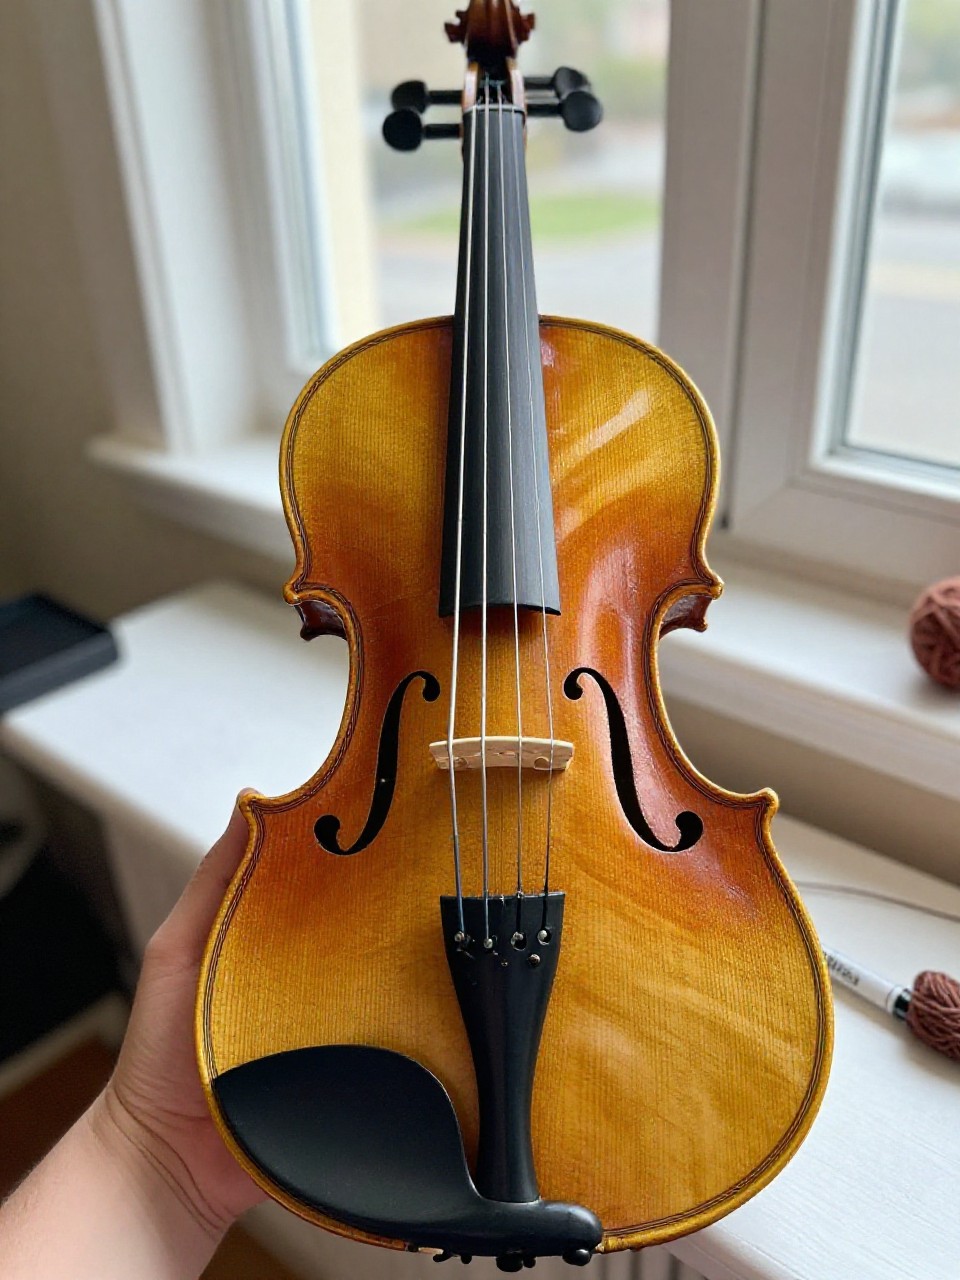
This artwork shows a violin shape with strings, using a child’s handprint as the body of the instrument. Kids enjoy tracing their hands and adding shiny string lines for a musical twist.
Materials Needed:
- Construction paper (brown or tan)
- Black marker or thin yarn for strings
- Paint or ink pad for handprint
- Glue stick
- White background paper
How to make it:
- 1. Make a handprint in brown/tan paint on white paper with fingers pointing down.
- 2. Draw or glue a neck and scroll at the top to form a violin.
- 3. Add four strings with marker or thin yarn and small details like f-holes.
- 4. Let dry and label “V is for Violin.”
7. Cardboard Van Craft
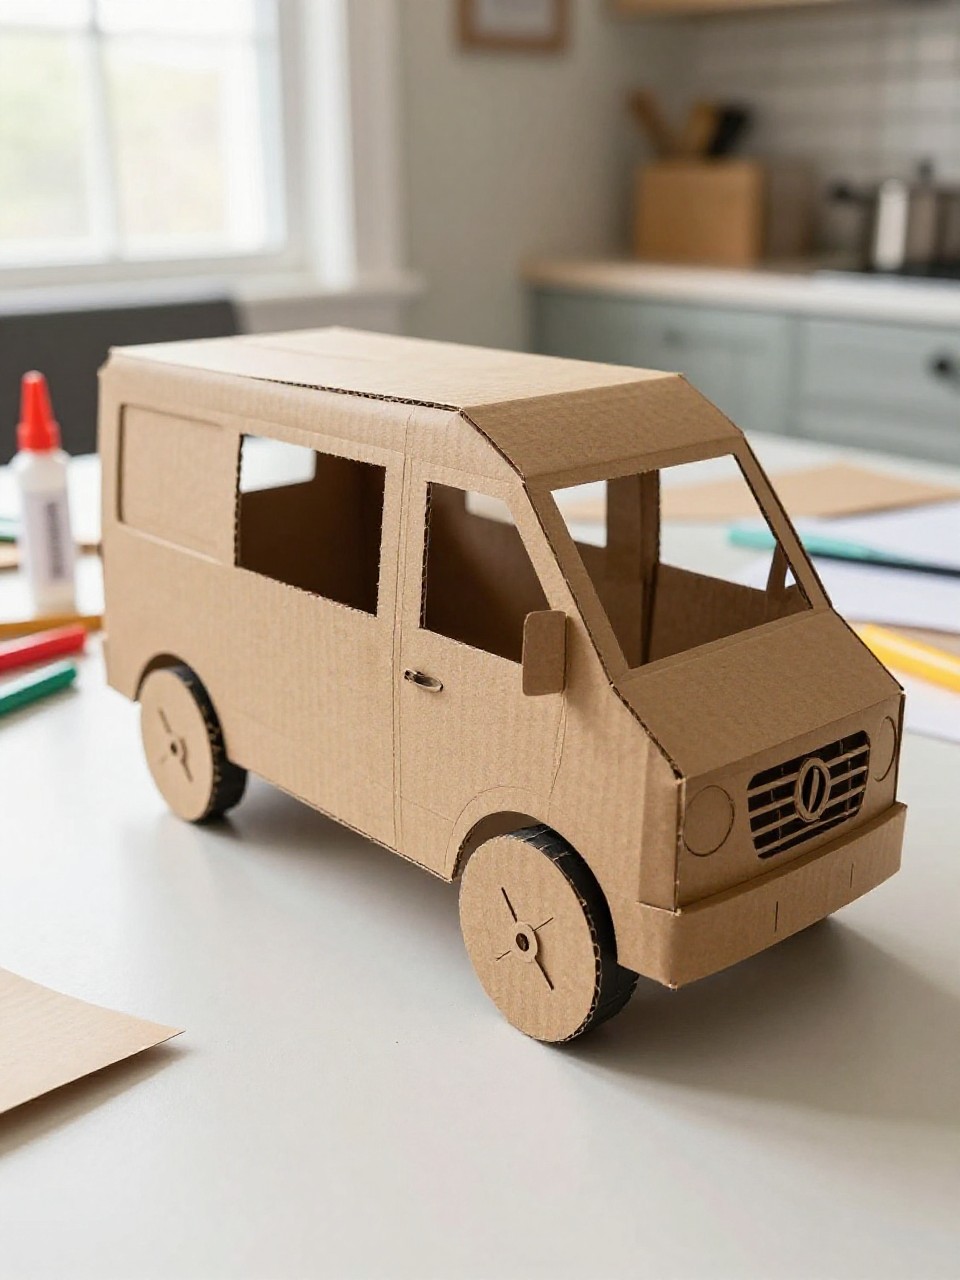
This mini van looks like a small box car with wheels, windows, and a big V on the side. Kids like rolling it along and customizing colors like a road-trip vehicle.
Materials Needed:
- Small cardboard box (tissue or snack box)
- Construction paper (assorted)
- Bottle caps or paper circles for wheels
- Glue or tape
- Markers
How to make it:
- 1. Cover the box with colored paper to make the van body.
- 2. Cut and glue windows, doors, and a big V logo on the side.
- 3. Add wheels with bottle caps or paper circles; draw headlights and details.
- 4. Let glue set, then drive your van across the table.
8. Velvet Textured Letter V Rubbing
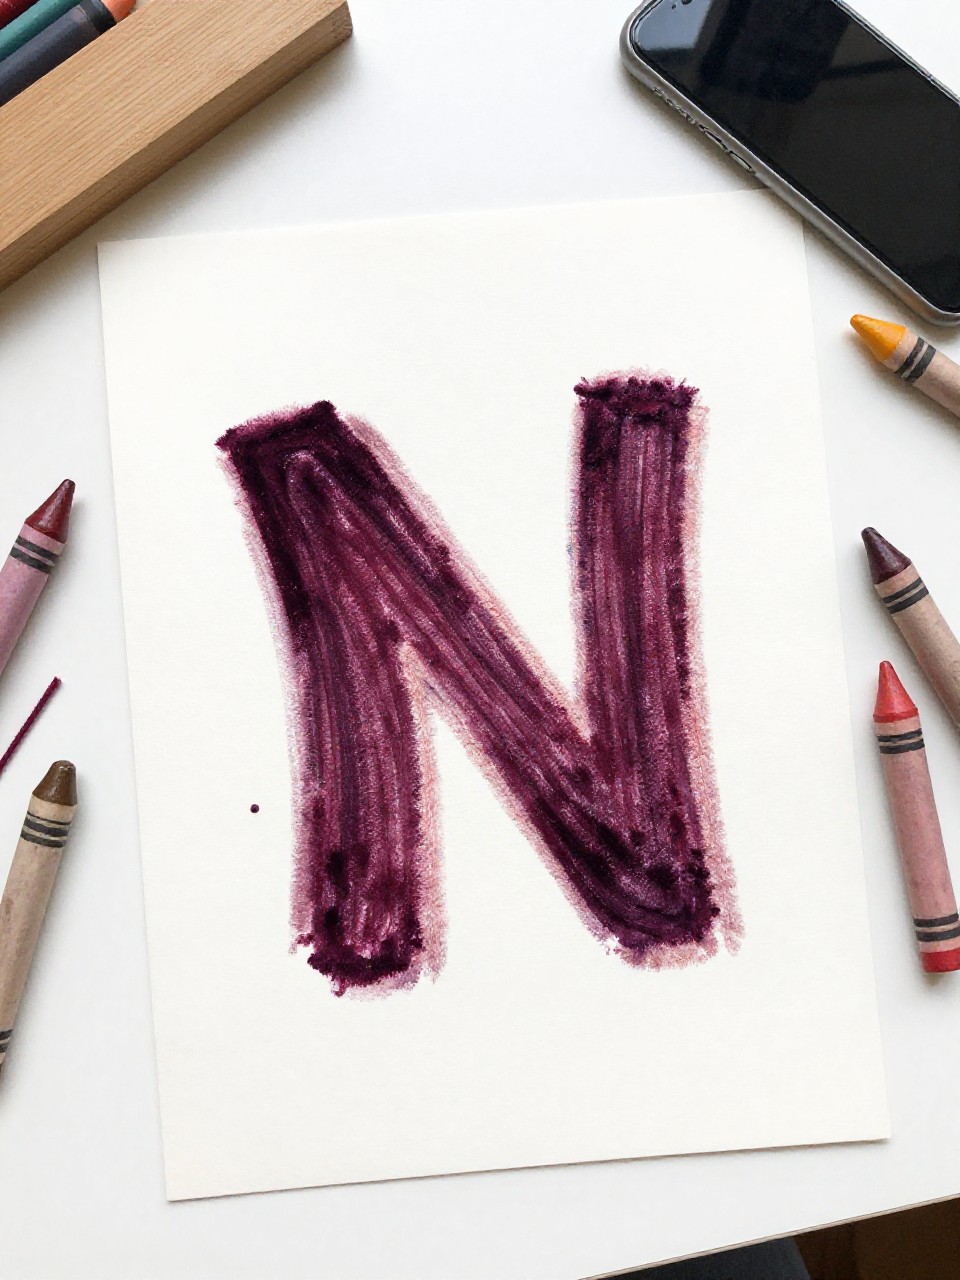
This project creates a fuzzy-looking V by gluing yarn to form a letter and doing a crayon rubbing over thin paper. Kids enjoy the surprise reveal and textured feel.
Materials Needed:
- Cardboard base
- Yarn or thick string
- Thin white paper
- Crayons (peeled for side rubbing)
- Tape and glue
How to make it:
- 1. Glue yarn on cardboard in the shape of a large V; let dry.
- 2. Tape thin paper over the cardboard.
- 3. Rub the side of a crayon over the top to reveal the raised V; try different colors.
- 4. Remove and mount the best rubbing on colored paper.
9. Vegetable Print Stamping V
This art page shows a large outlined V filled with stamped shapes made from cut veggies like okra and potato. Kids love seeing patterns appear and exploring nature prints.
Materials Needed:
- White cardstock
- Black marker
- Cut vegetables (okra, potato, celery base)
- Washable paint
- Paper plate palette
How to make it:
- 1. Draw a big block V on cardstock.
- 2. Dip cut vegetable pieces into paint on a paper plate.
- 3. Stamp inside the V shape, mixing colors and patterns.
- 4. Let dry and trim the edges for a clean poster look.
10. Butterfly Wings V (Letter-Shaped Wings)
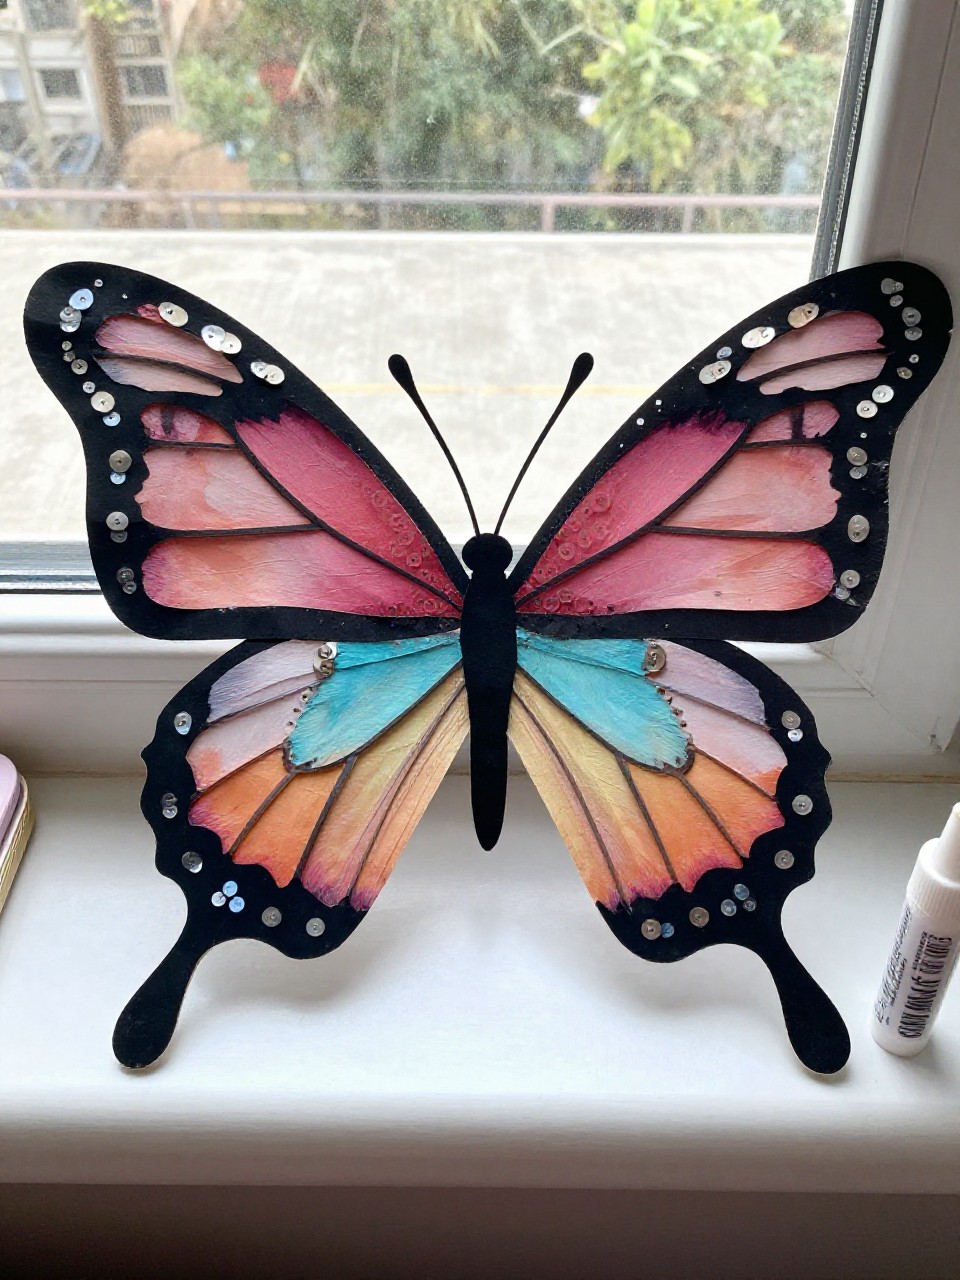
This craft makes a butterfly whose wings form a big letter V when opened. Kids enjoy decorating with dots and stripes and learning how shapes can hide letters.
Materials Needed:
- Colored cardstock (for wings and body)
- Markers or crayons
- Glue stick
- Sequins or stickers (optional)
- Clothespin or paper strip for the body
How to make it:
- 1. Cut two large triangle wings that open to form a V when placed together.
- 2. Glue the wings to a clothespin or paper strip body in a V position.
- 3. Decorate with patterns, sequins, and a smiling face.
- 4. Clip it to a plant or stand it up on a shelf.
11. Popsicle Stick Village Scene
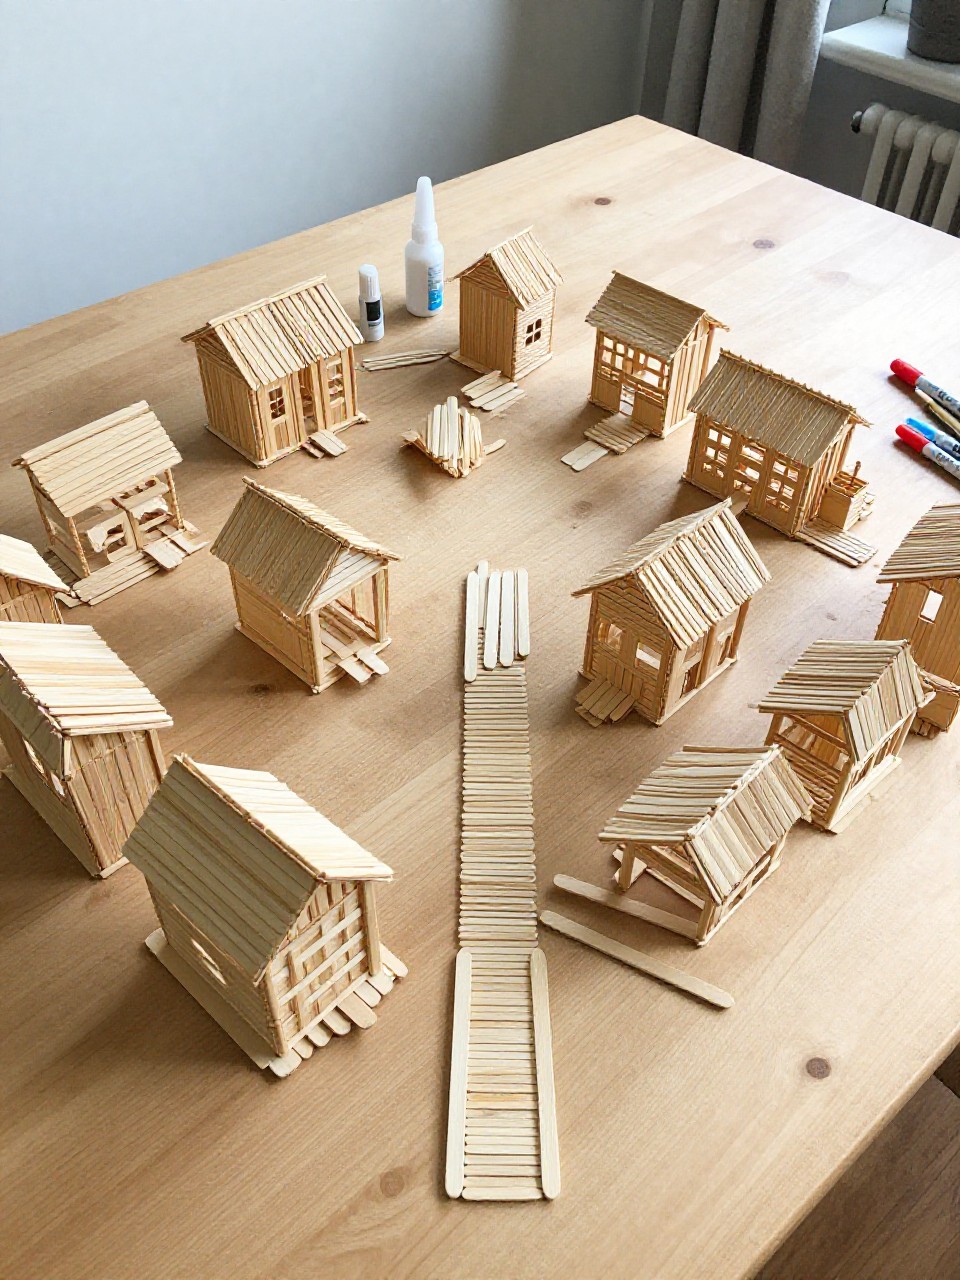
This scene shows a small “village” with V-shaped rooftops made from popsicle sticks on a paper background. Kids enjoy building tiny houses and arranging them like a story map.
Materials Needed:
- Popsicle sticks
- Cardstock background
- Glue
- Markers or paint
- Small stickers (optional)
How to make it:
- 1. Arrange and glue popsicle sticks into small house frames on the cardstock.
- 2. Add V-shaped rooftops using two sticks meeting at a point.
- 3. Draw doors, windows, and trees; add stickers if desired.
- 4. Let dry flat and display your village.
12. Viney Letter V Wall Art
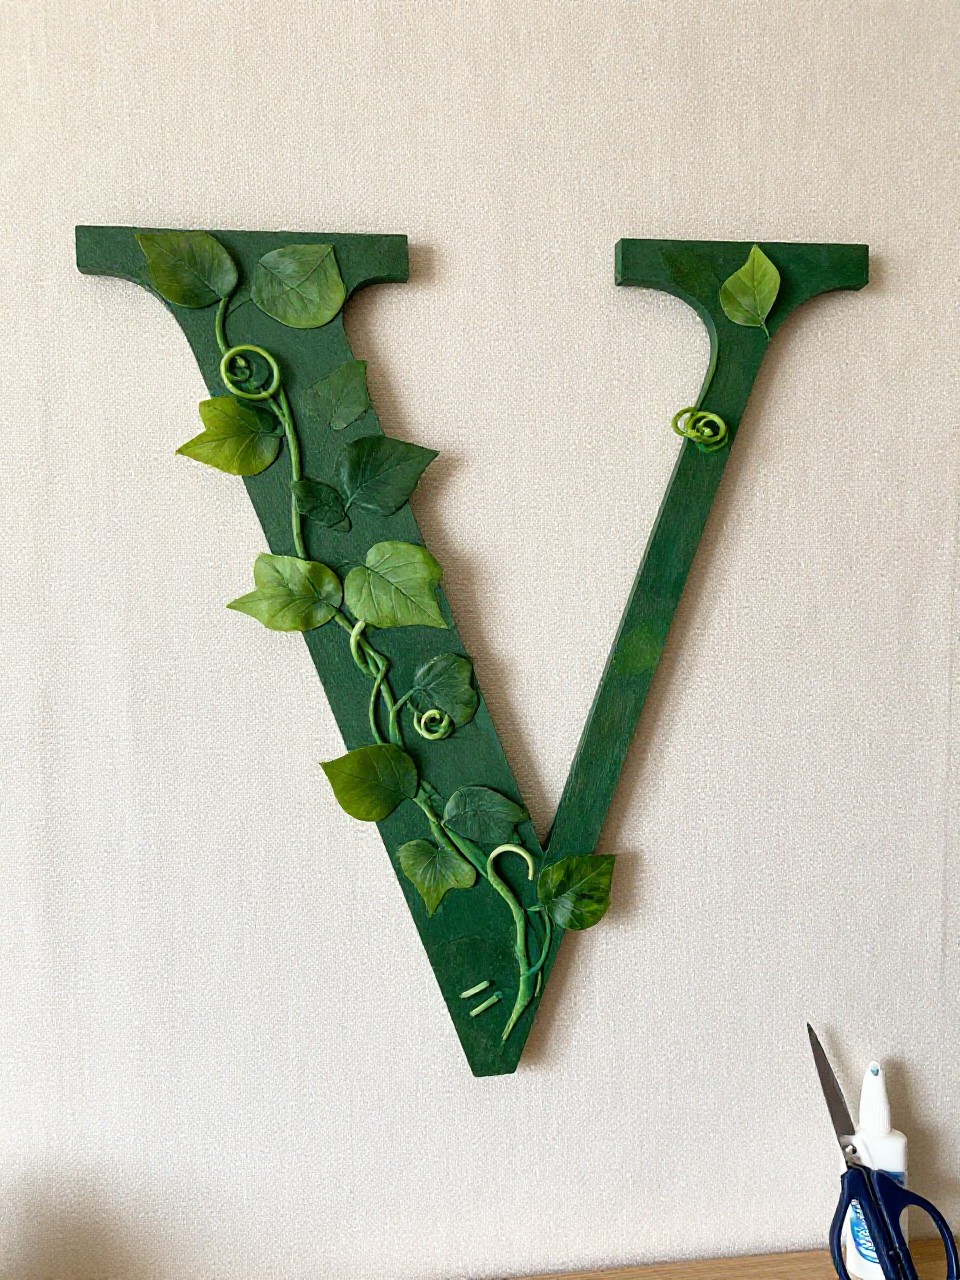
This craft turns a big V into a leafy vine with curling tendrils and paper flowers. Kids like twisting paper into vines and seeing the letter come alive with nature.
Materials Needed:
- Cardboard or thick cardstock letter V
- Green paper strips
- Small paper flowers or buttons
- Glue
- Marker for veins
How to make it:
- 1. Cut a sturdy letter V from cardboard.
- 2. Twist green paper strips into vines and glue along the letter.
- 3. Add leaves, small flowers, and draw vein lines with a marker.
- 4. Let dry and hang with tape or string.
13. Paper Plate Vampire Face
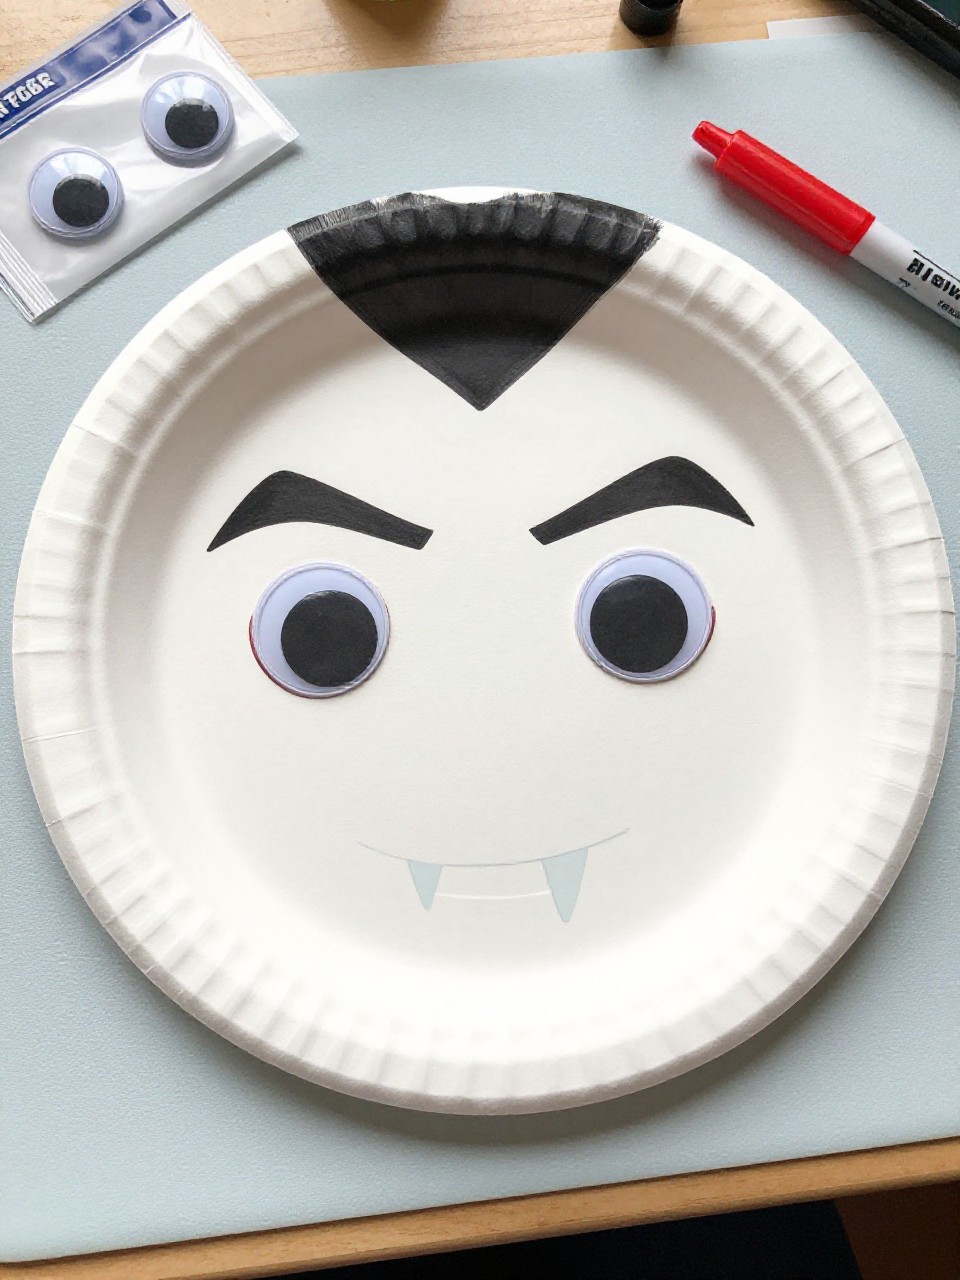
This craft creates a friendly vampire with pointy V fangs and a widows-peak hairline. Kids enjoy the spooky-cute look and customizing the expression.
Materials Needed:
- Paper plate
- Black and white paper
- Googly eyes
- Red marker or paper
- Glue stick
How to make it:
- 1. Use a paper plate as the face; cut black paper hair in a V shape and glue on top.
- 2. Cut two small white V fangs and glue under a red mouth.
- 3. Add googly eyes and draw eyebrows and cheeks.
- 4. Let dry and hang for a playful “V is for Vampire” sign.
14. Yarn-Wrapped Vase Pencil Holder
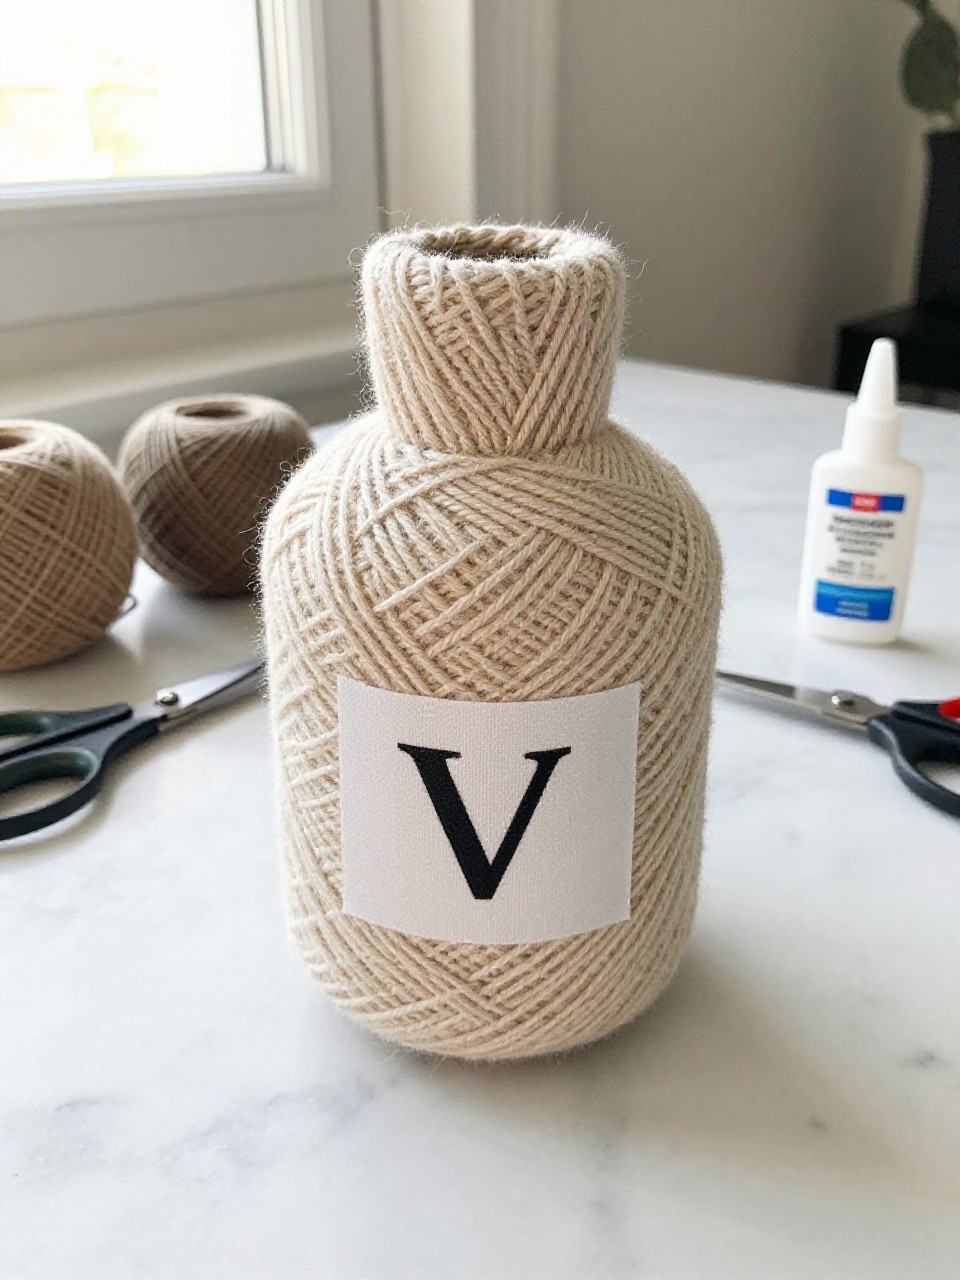
This is a recycled can wrapped in colorful yarn to look like a bright vase, perfect for holding pencils or flowers. Kids like the cozy texture and picking color patterns.
Materials Needed:
- Clean tin can (no sharp edges)
- Yarn (various colors)
- White glue
- Cardstock label for a big V
- Scissors
How to make it:
- 1. Spread glue around the can and start wrapping yarn from the bottom up.
- 2. Change colors as you go to make stripes, pressing yarn snugly.
- 3. Cut a cardstock V and glue it to the front like a label.
- 4. Let dry fully and fill with pencils or faux flowers.
15. Vehicle Parade Footprint Art
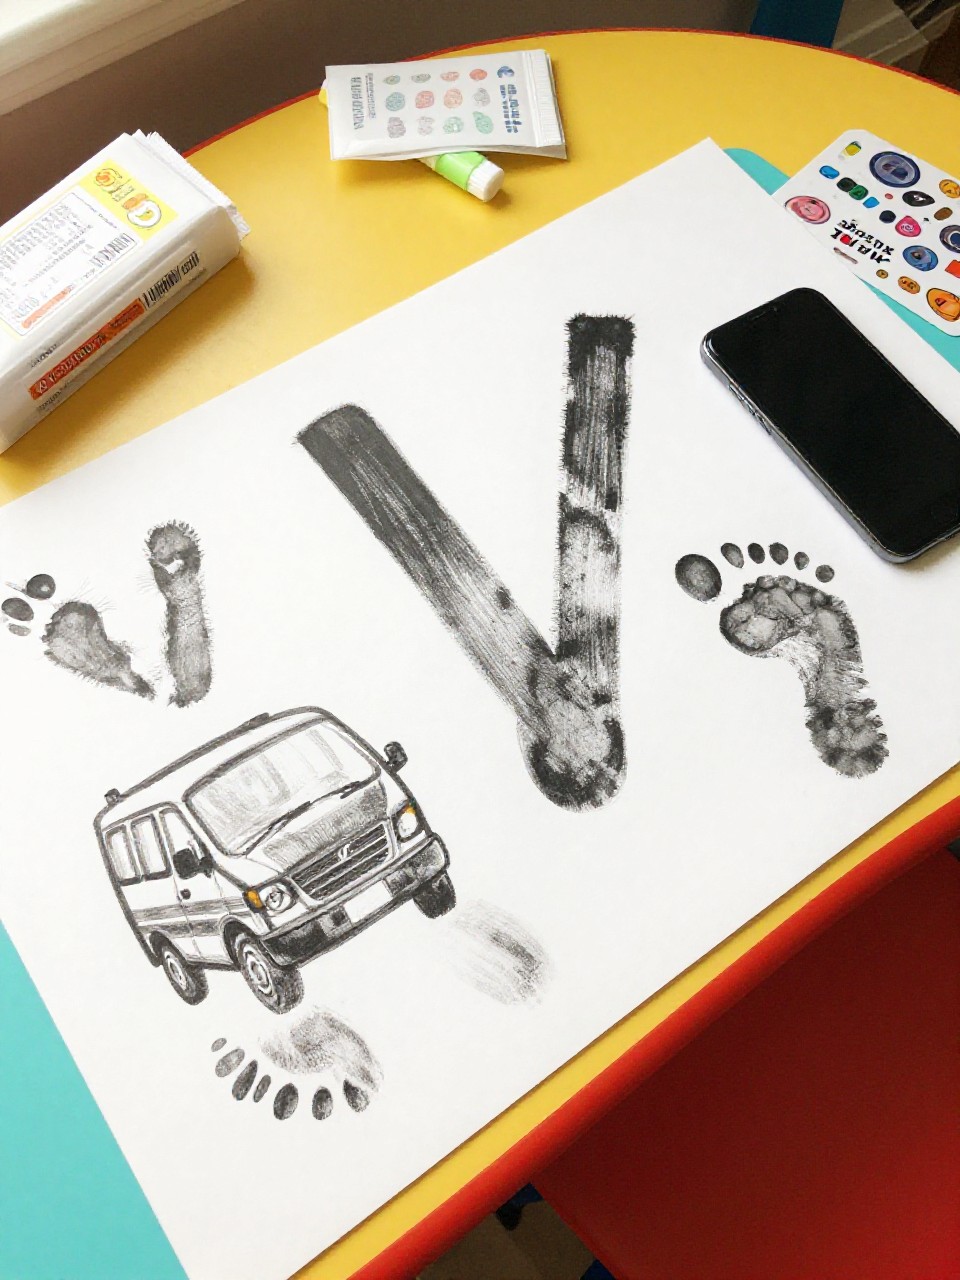
This artwork features a row of vehicles (van, fire van, and delivery van) made from painted footprints, each labeled with a big V. Kids enjoy the tickly paint and turning prints into wheels and windows.
Materials Needed:
- Washable paint
- White cardstock
- Black marker
- Stickers or paper circles for wheels
- Wipes for cleanup
How to make it:
- 1. Paint the bottom of a foot and make a footprint on cardstock; repeat for a few prints.
- 2. Turn each print sideways to become a van body.
- 3. Add wheels, windows, lights, and a large V on each vehicle with marker or stickers.
- 4. Let dry, then frame your vehicle parade.