

Table of Contents Show
Preschoolers love learning letters when their hands are busy and their art looks “wow.” If your Letter Y week needs a spark, this list is packed with clever, low-stress projects that look impressive but are easy to pull off.
Each idea uses simple materials you likely have at home or in the classroom.
Expect bright colors, bold textures, and joyful little “yippee!” moments when kids spot the letter Y in their creations.
1. Y is for Yarn Yeti
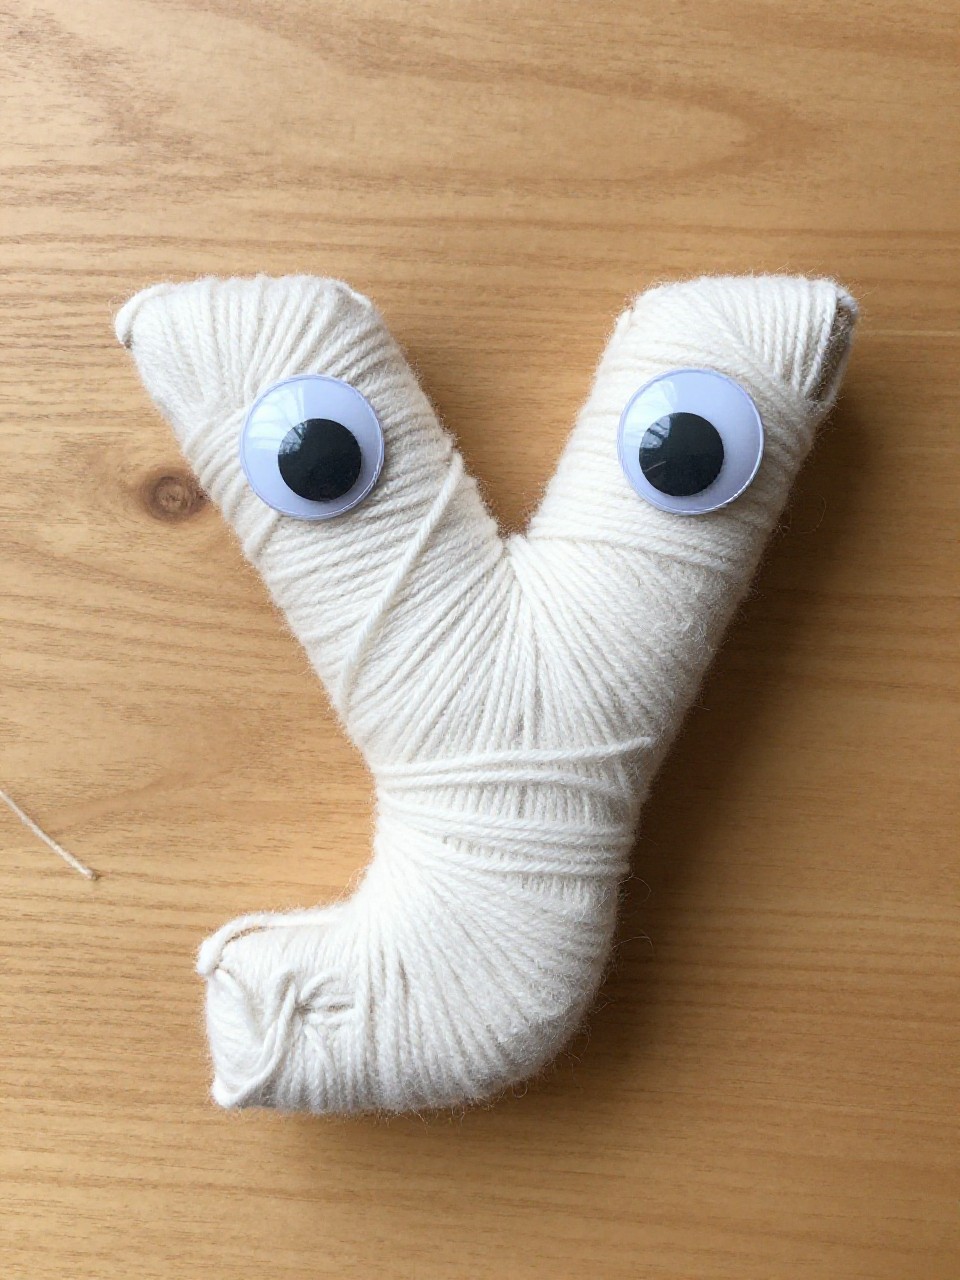
A fluffy, friendly “yeti” that hides a giant Y shape under cozy yarn. Kids love the texture and silly face, and you’ll love how fast it comes together.
Materials Needed:
For People Who Love to Make Things ✂️
- Cardboard or cardstock
- White or pastel yarn
- Googly eyes
How to make it:
- 1. Draw and cut a big letter Y from cardboard.
- 2. Tape the yarn end to the back and wrap the Y completely, crisscrossing to make it fluffy.
- 3. Glue on googly eyes and a tiny paper mouth near the top.
- 4. Add a small paper snowflake or scarf for charm.
2. Yellow Y Sunburst
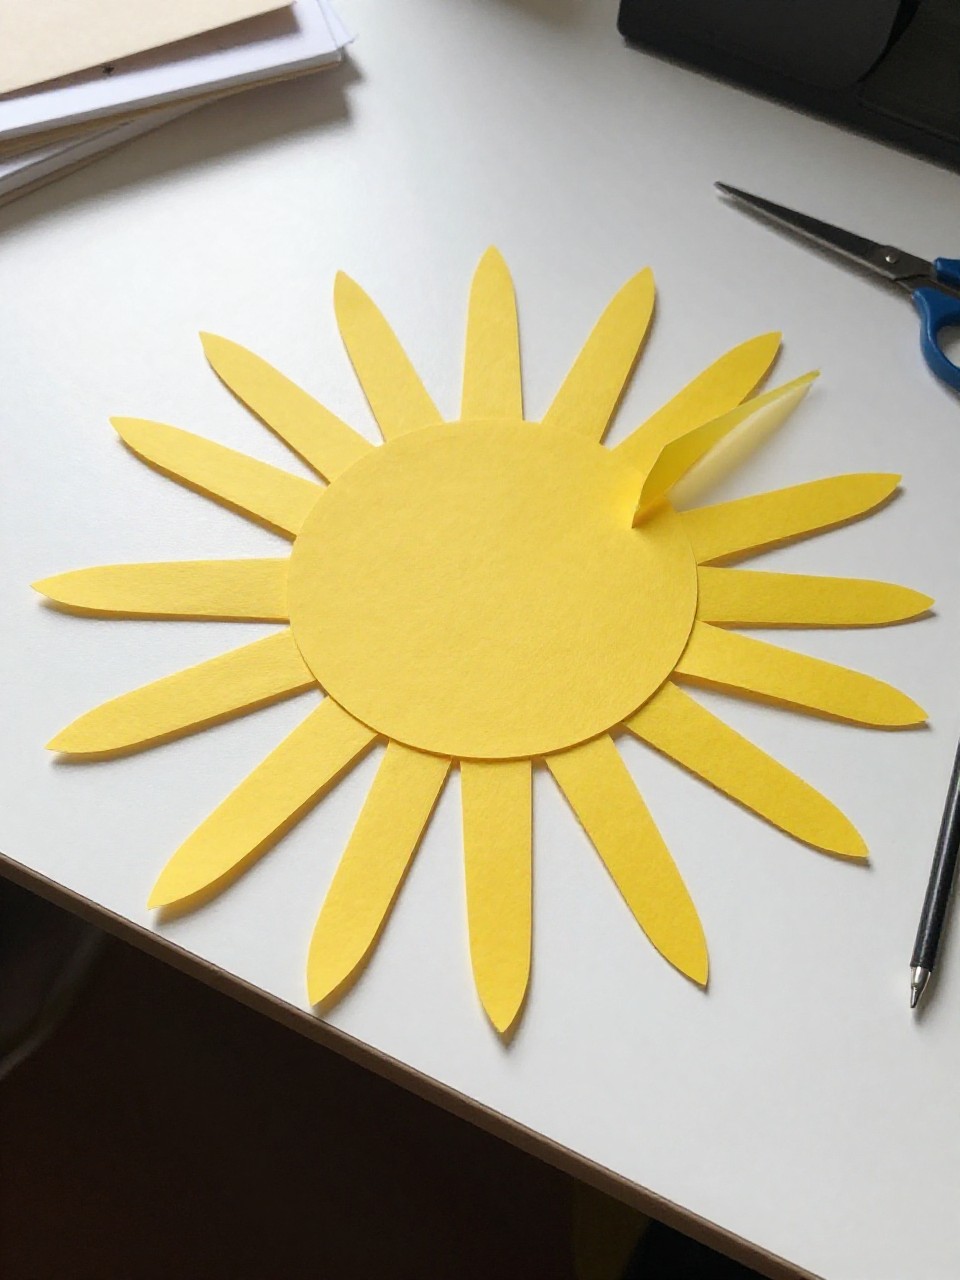
A bright sunburst with rays that form the letter Y in the center—bold, graphic, and super sunny.
Materials Needed:
- Yellow paper
- Glue stick
- Scissors
How to make it:
- 1. Cut a large circle from yellow paper.
- 2. Cut narrow yellow strips for rays.
- 3. Glue two long strips in a Y shape across the circle.
- 4. Add shorter strips around the edge to finish the sunburst.
3. Yogurt Cup Y-Boat
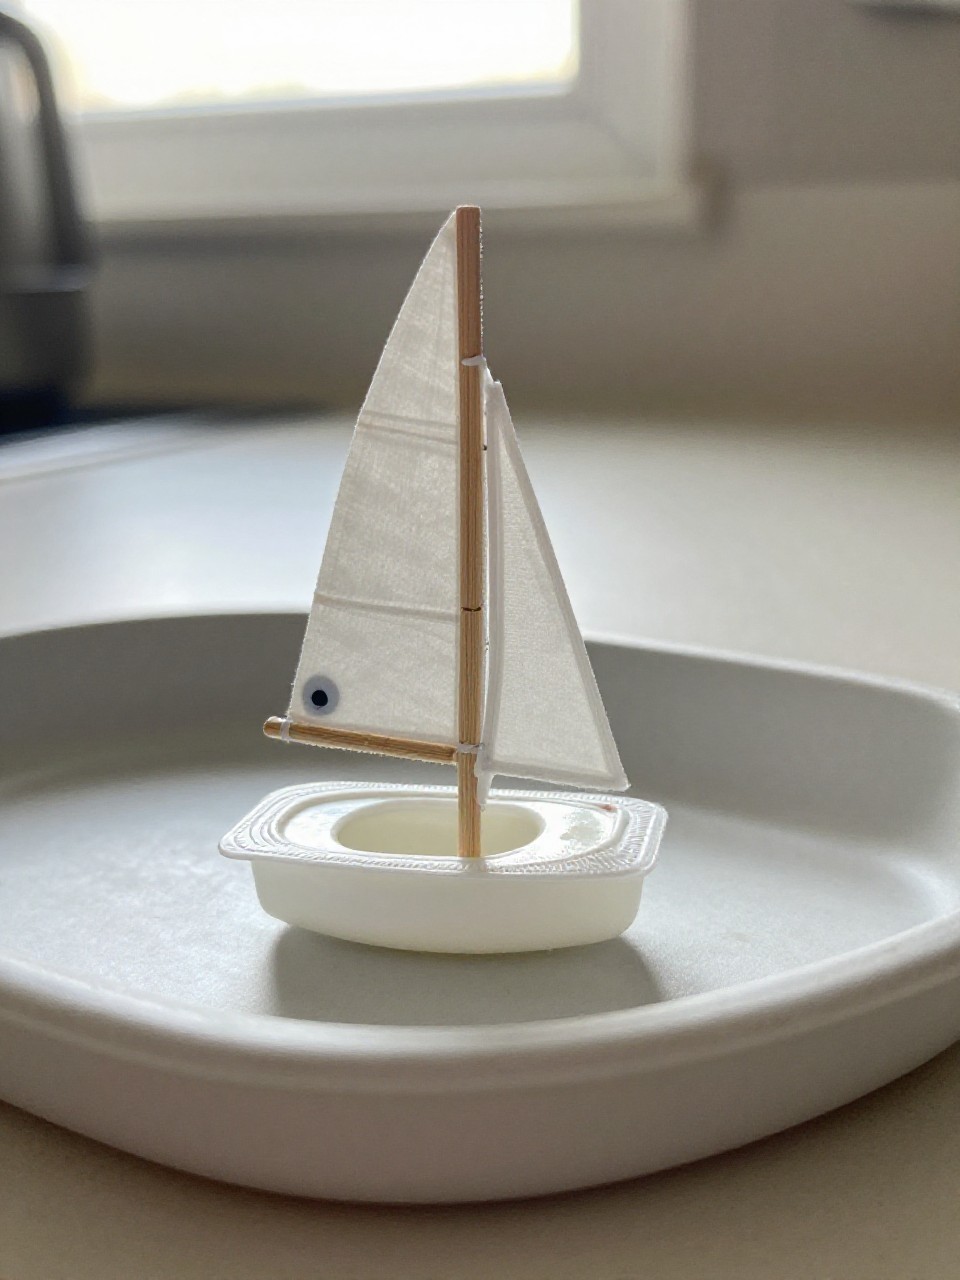
Turn a clean yogurt cup into a mini sailboat with a strong Y mast—adorable and bathtub-ready.
Materials Needed:
- Clean yogurt cup
- Craft stick
- Paper triangle sail
How to make it:
- 1. Poke a small hole in the yogurt cup lid or rim for the mast.
- 2. Cut a paper triangle sail and glue it to a craft stick.
- 3. Add two short sticks at the top to form a Y mast; tape them securely.
- 4. Insert the mast into the cup and float it in a shallow tray of water.
4. Y-Shaped Nature Wand
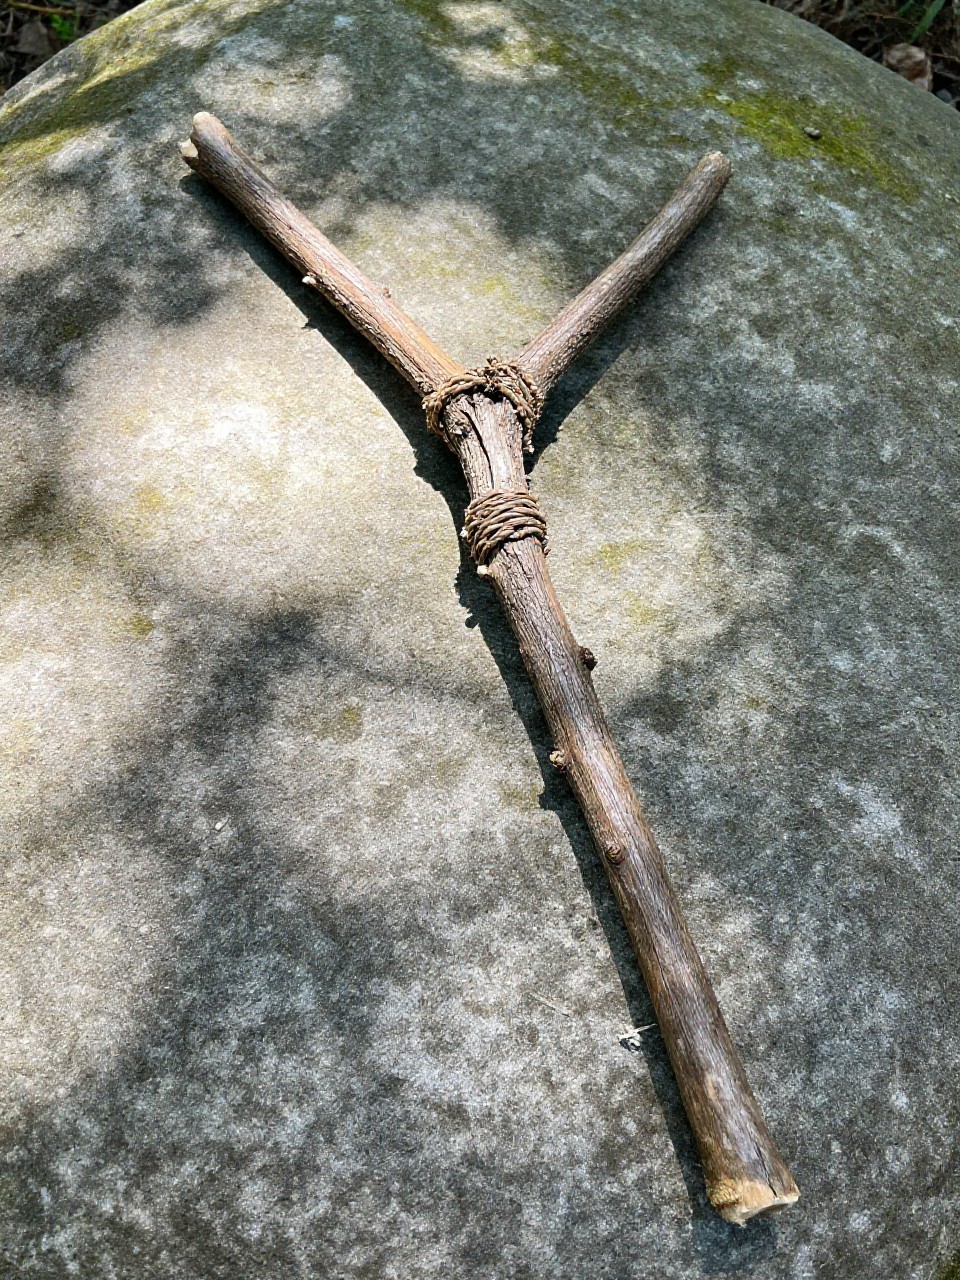
A magical wand made from a Y-shaped twig, decorated with ribbons and found nature bits—earthy and whimsical.
Materials Needed:
- Y-shaped stick
- Ribbon or yarn scraps
- Leaves or small flowers
How to make it:
- 1. Find a sturdy Y-shaped stick outside.
- 2. Wrap the handle with ribbon or yarn and tie a knot.
- 3. Glue or tie small leaves and flowers along the top.
- 4. Add a tiny bell or bow for sparkle.
5. Yummy Yellow Collage Y
A monochrome collage that pops: kids glue yellow bits to a bold Y base for a gallery-worthy look.
Materials Needed:
- Cardstock Y cutout
- Assorted yellow scraps (tissue, buttons, felt)
- Glue
How to make it:
- 1. Cut a large Y from cardstock.
- 2. Sort yellow materials and talk about shades.
- 3. Glue scraps closely to fill the Y shape.
- 4. Mount the Y on dark paper for contrast.
6. Yawning Yak Puppet
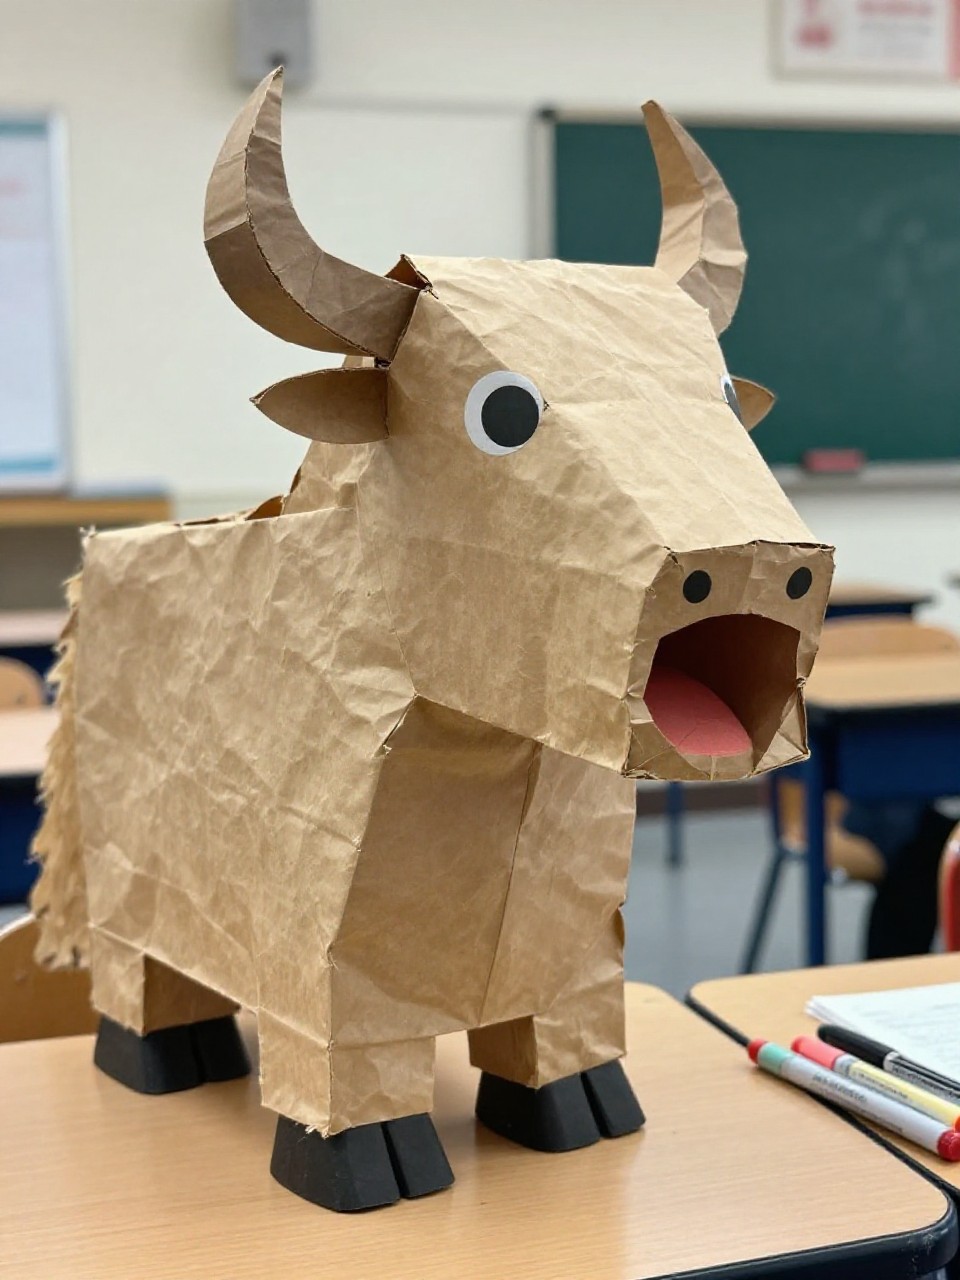
A paper-bag puppet shaped like a yak with a big “yawn” mouth—cute, character-driven, and great for letter sounds.
Materials Needed:
- Small paper bag
- Brown paper or felt
- Googly eyes
How to make it:
- 1. Cut two horn shapes and a shaggy mane from brown paper or felt.
- 2. Glue them to the bag flap (mouth area) and top.
- 3. Add googly eyes and draw nostrils; cut a small slit for an open “yawn.”
- 4. Write a big Y on the body and let kids make it “yawn.”
7. Yarn-Painted Y Print
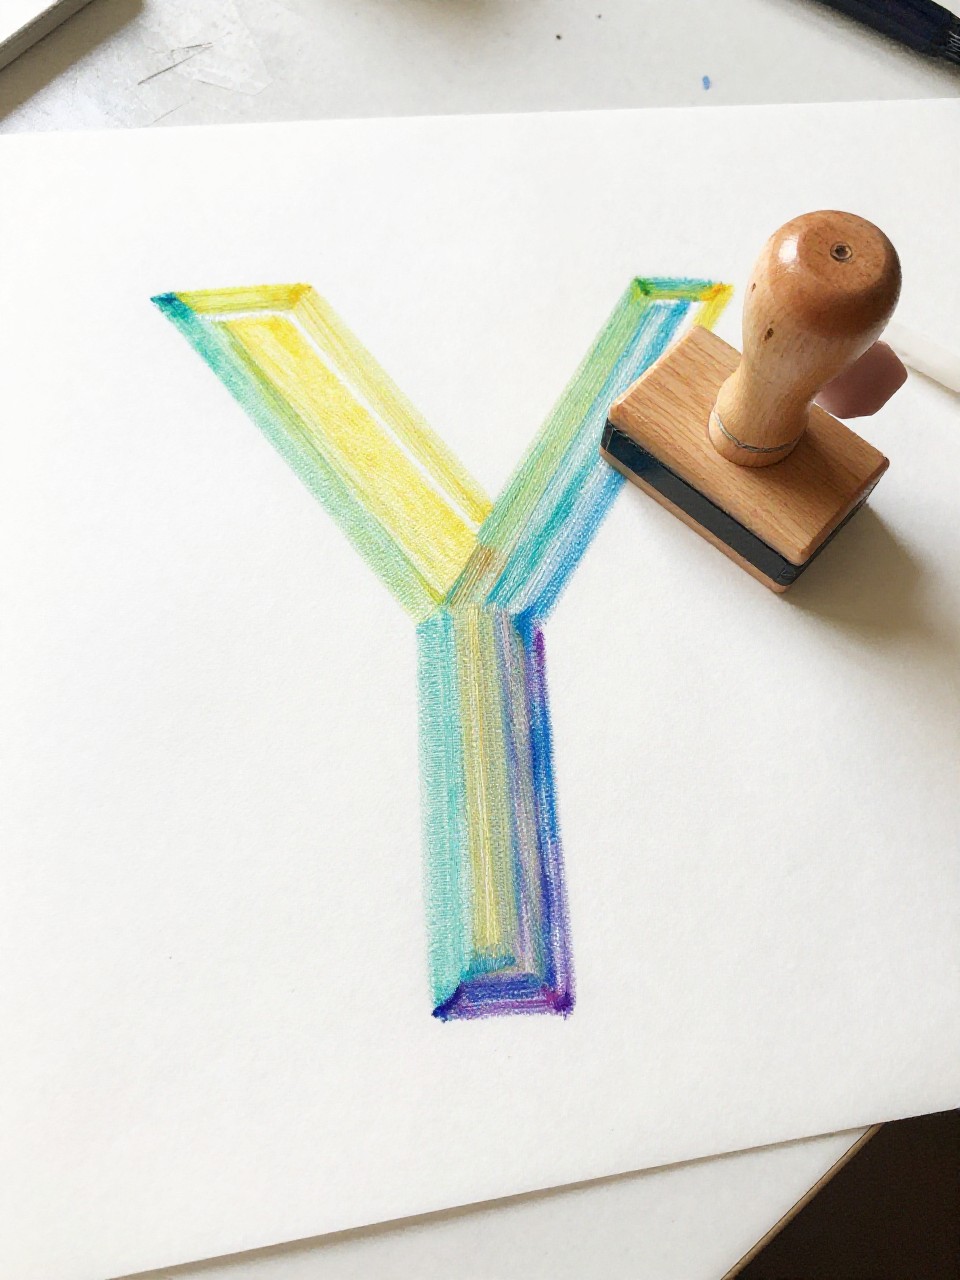
Thick yarn becomes a stamp to make bold, artsy Y prints—super satisfying for little hands.
Materials Needed:
- Cardboard scrap
- Yarn
- Washable paint
How to make it:
- 1. Wrap yarn around a small rectangle of cardboard.
- 2. Paint the wrapped surface with a brush or sponge.
- 3. Press onto paper in a Y shape by tilting and stamping twice for the arms.
- 4. Repeat with different colors for a pattern.
8. Y Icicle Suncatcher
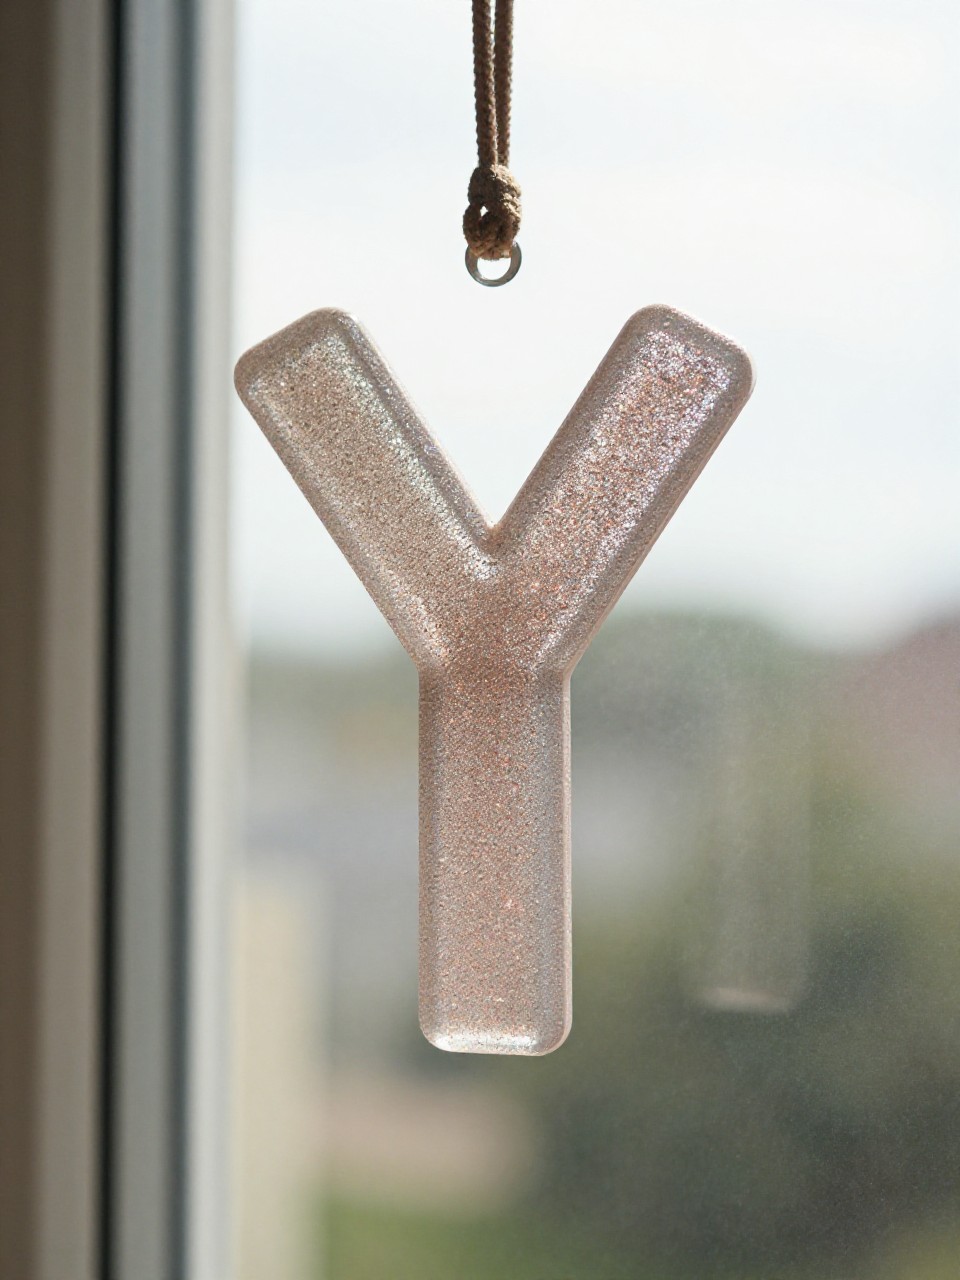
A frosty, translucent Y that glows in the window—made from glue and glitter for an icy vibe.
Materials Needed:
- Wax paper
- Clear glue
- Silver or white glitter
How to make it:
- 1. Place wax paper on a tray and draw a big Y with clear glue.
- 2. Thicken the lines by adding more glue to form “icicles.”
- 3. Sprinkle glitter lightly and let it dry fully.
- 4. Peel off and hang with string in a sunny window.
9. Yummy Yogurt Paint Resist
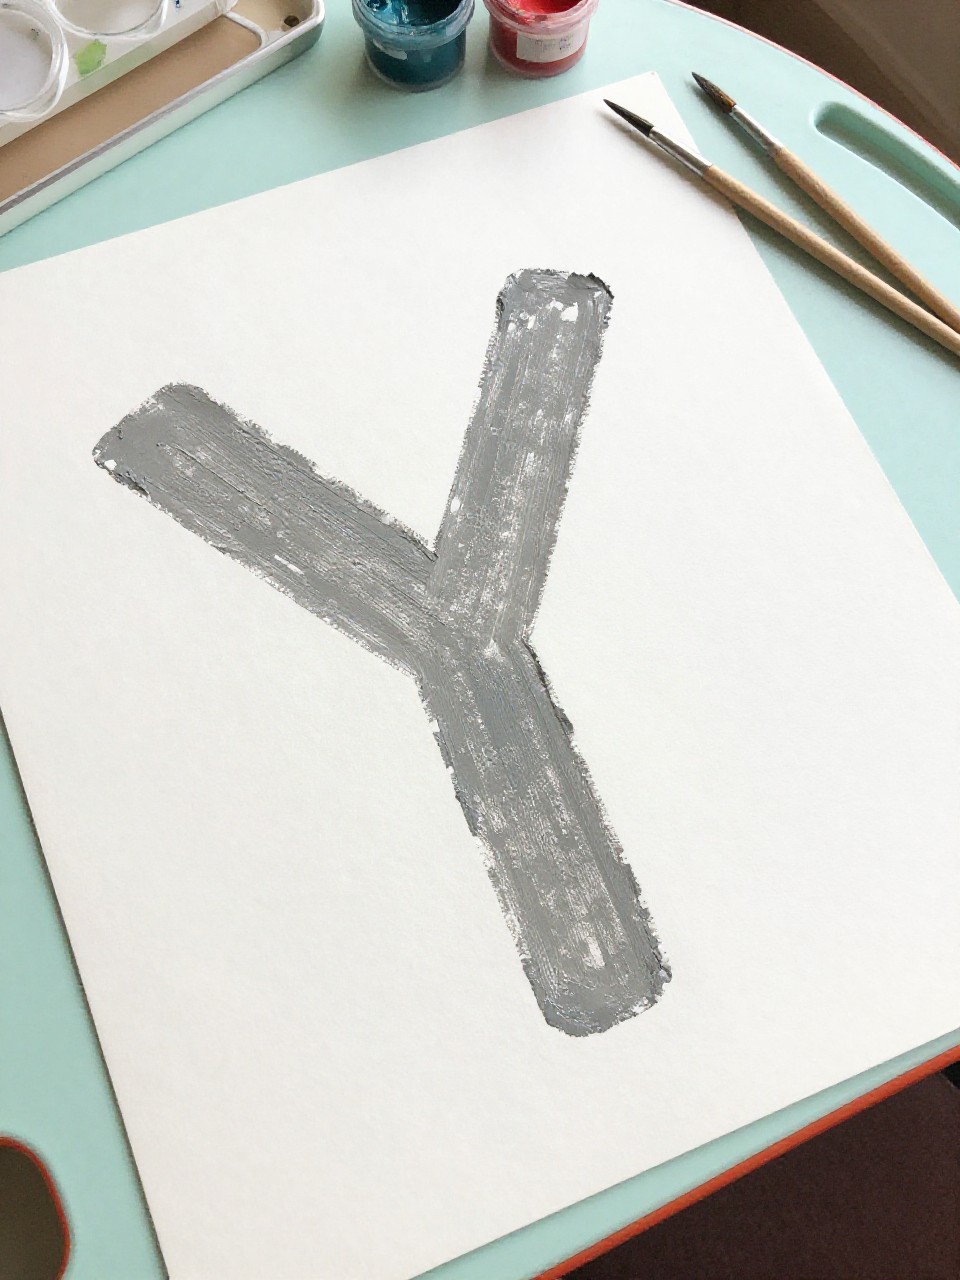
Use yogurt-tinted paint over a tape Y to reveal a crisp letter—process art with a surprise.
Materials Needed:
- Painter’s tape
- Paper
- Washable paint (or yogurt + food coloring)
How to make it:
- 1. Make a big Y on paper using painter’s tape.
- 2. Brush paint all over the page; mix colors or use yogurt paint for texture.
- 3. Let dry until just tacky, then peel tape.
- 4. Reveal the clean, sharp Y and add dots or stamps around it.
10. Y City Overpass
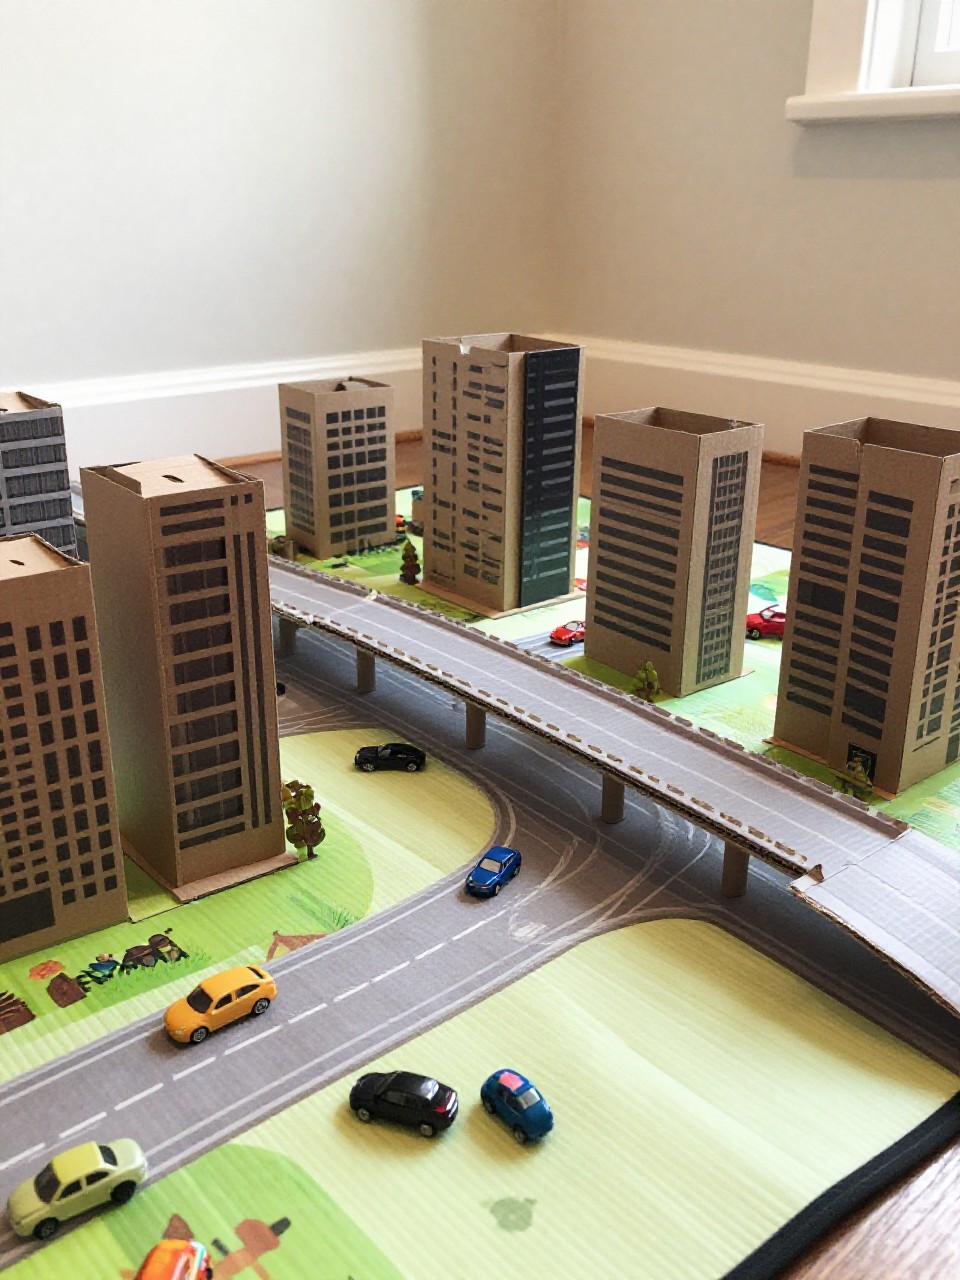
Build a mini city road where a Y-shaped overpass connects streets—STEM meets art.
Materials Needed:
- Cardboard
- Black paper or tape (for roads)
- White crayon or paint pen
How to make it:
- 1. Cut a large base and draw streets.
- 2. Cut narrow cardboard strips and tape into a Y overpass shape.
- 3. Cover roads with black paper and add white lane lines.
- 4. Drive toy cars under and over the Y.
11. Y Kites on a String
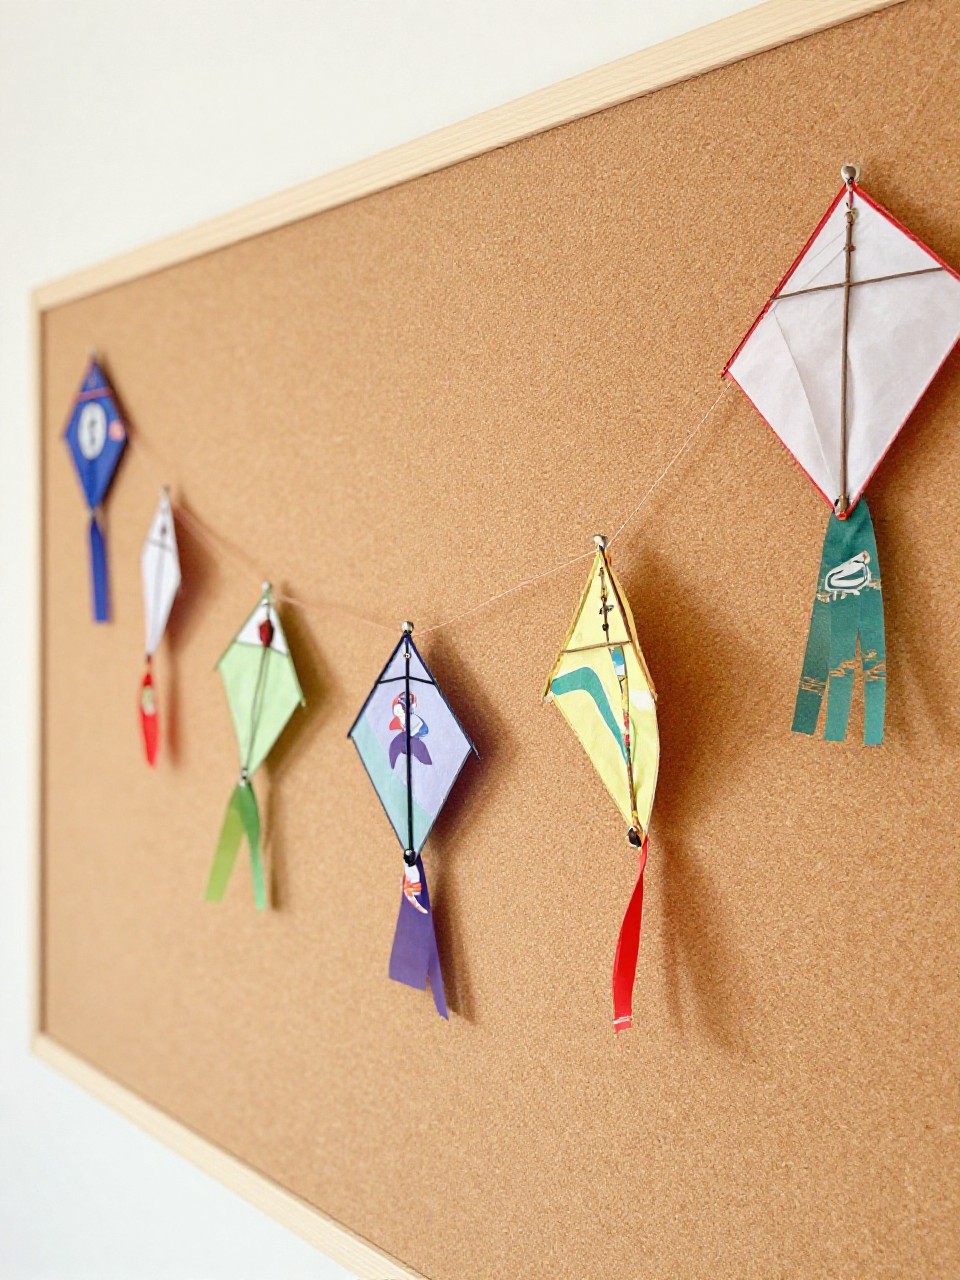
Tiny Y-framed paper kites strung as a garland—airy, bright, and perfect for a classroom wall.
Materials Needed:
- Colorful paper
- Craft sticks
- String
How to make it:
- 1. Glue two short sticks into a Y to make a mini frame.
- 2. Cut a small diamond from paper and glue onto the Y frame.
- 3. Tape a short yarn tail with paper bows.
- 4. Clip several kites to a string to form a garland.
12. Yak Tracks Snow Scene
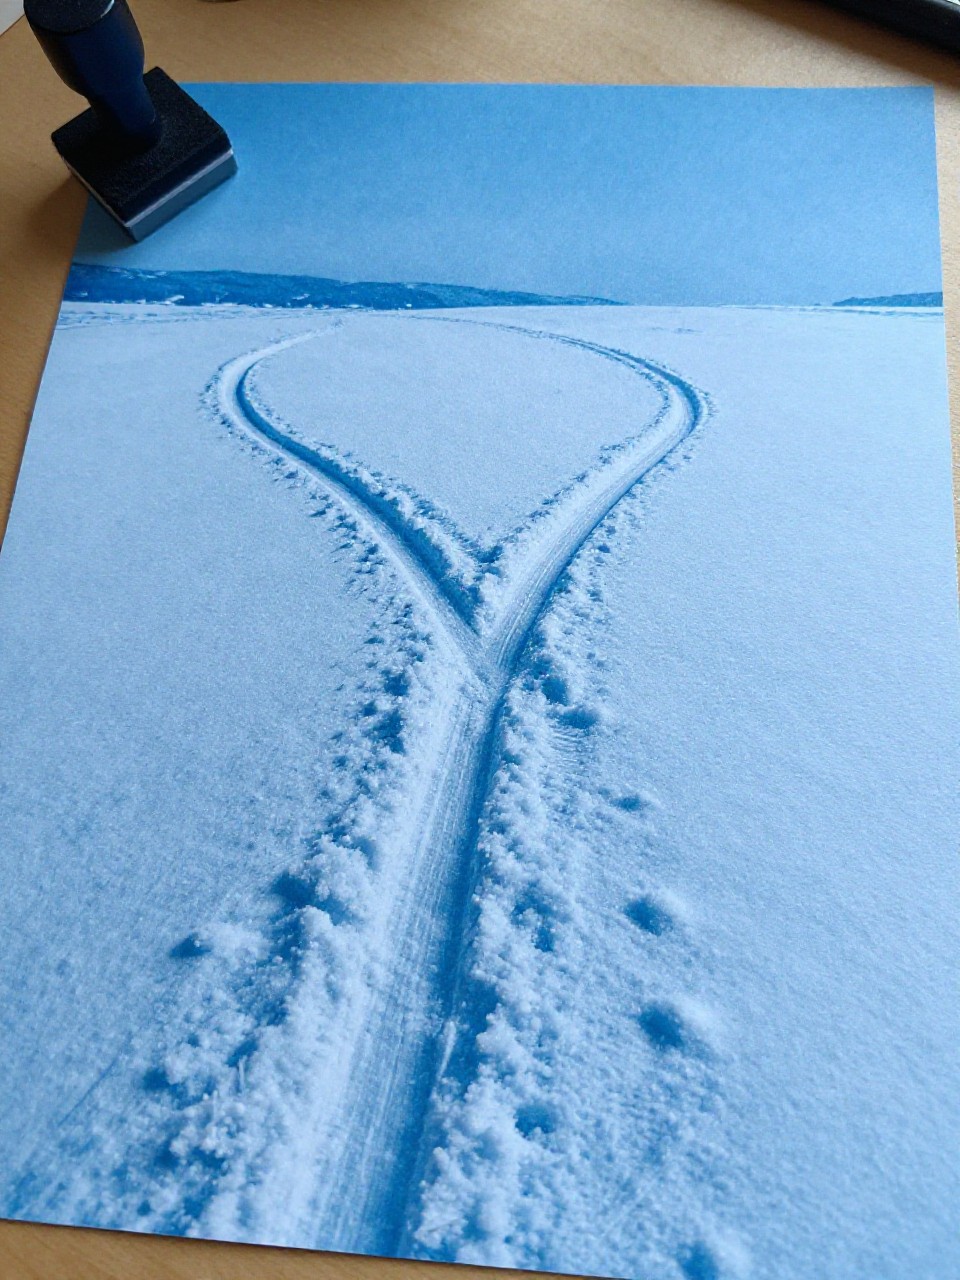
Create a snowy scene where Y-shaped “yak tracks” stamp across the page—simple and story-rich.
Materials Needed:
- Blue paper
- White paint
- Sponge or foam Y stamp
How to make it:
- 1. Cut a Y from foam and glue to a small block.
- 2. Paint the top of the paper with a white “snowy sky” edge.
- 3. Dip the Y stamp in white paint and stamp tracks across.
- 4. Add a tiny paper yak or house in the corner.
13. Y Branch Bird Perch
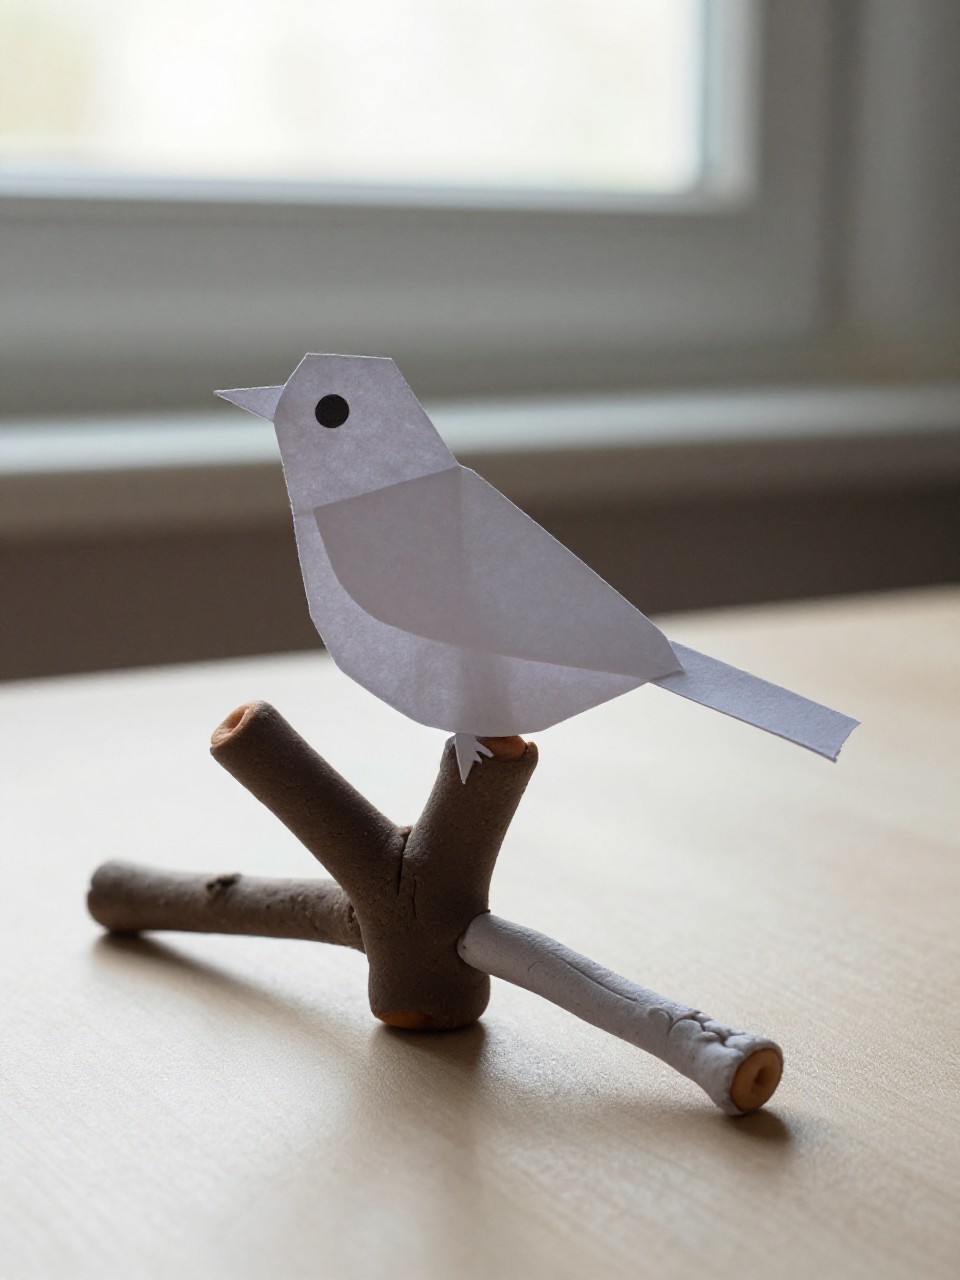
A real Y branch becomes a sweet perch for a simple paper bird—natural and sculptural.
Materials Needed:
- Y-shaped stick
- Paper bird cutout
- Glue dots or tape
How to make it:
- 1. Find a small Y branch and wipe clean.
- 2. Cut a bright paper bird with a wing and eye dot.
- 3. Perch the bird where the Y splits and secure with glue dots.
- 4. Stand it in a small lump of playdough to display.
14. Y Rainbow Weaving
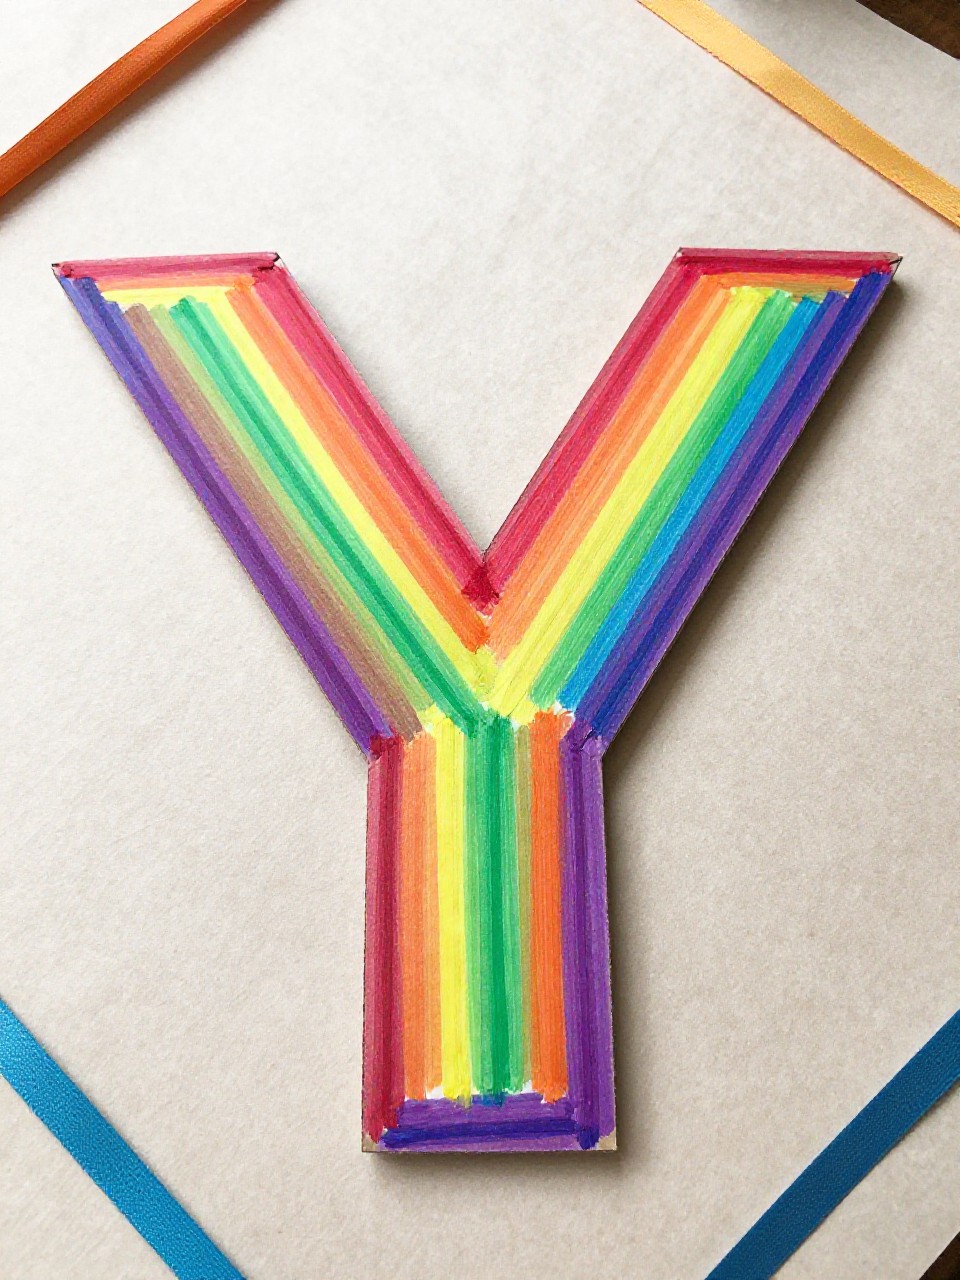
Weave ribbon through a cardboard Y for a tidy rainbow pattern—relaxing and beautiful.
Materials Needed:
- Cardboard Y
- Ribbon or yarn in rainbow colors
- Tape
How to make it:
- 1. Cut a sturdy Y from cardboard and snip small notches along the edges.
- 2. Tape the ribbon end to the back and weave around arms and stem.
- 3. Switch colors as you go for a rainbow effect.
- 4. Tie off on the back and trim ends neatly.
15. Y Volcano (Y-cano)
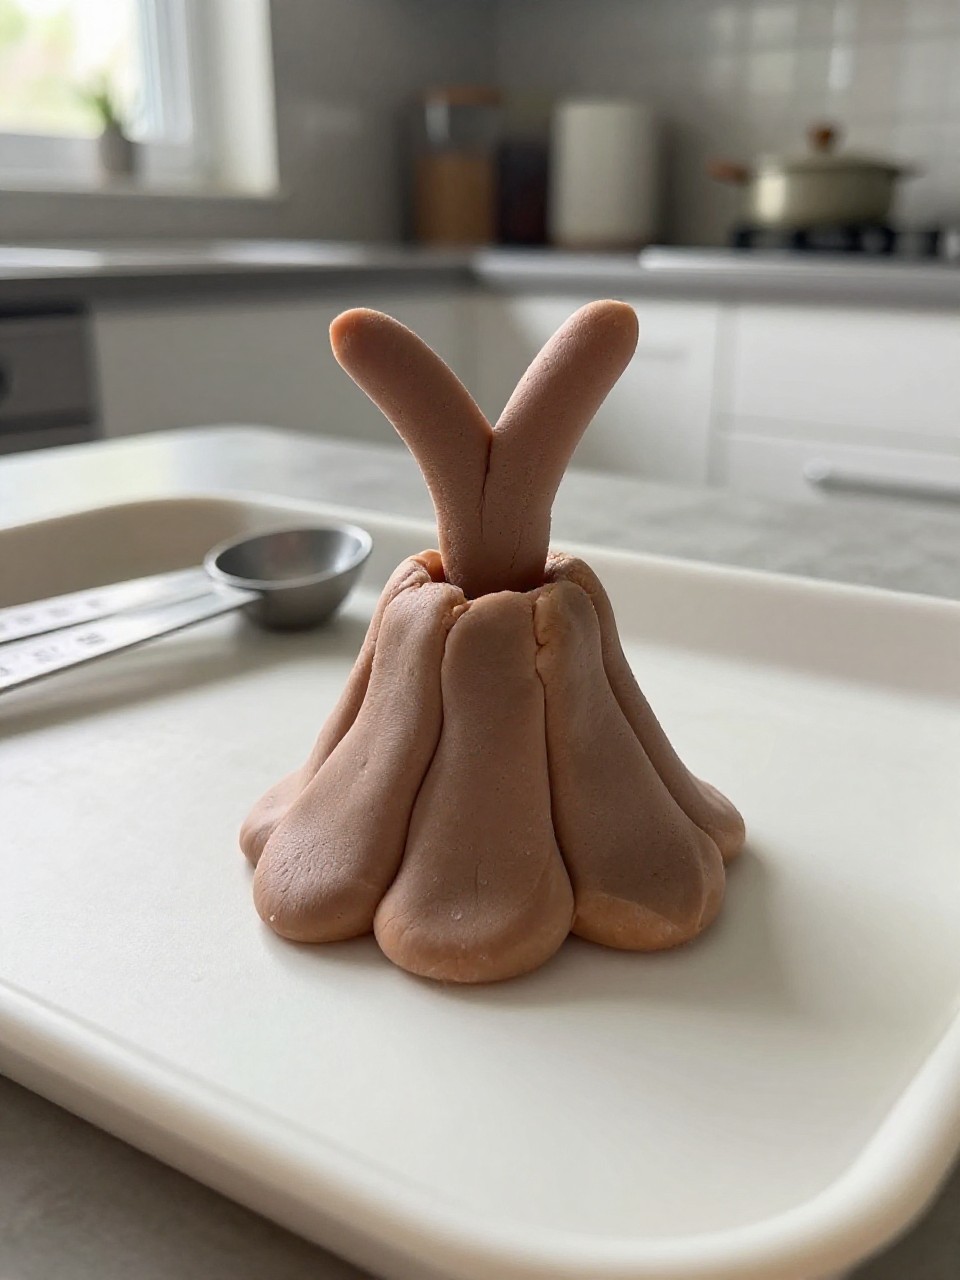
A tiny model volcano shaped like a Y fork—baking soda fizz fun with a clear letter tie-in.
Materials Needed:
- Modeling clay or playdough
- Baking soda
- Vinegar (with food coloring)
How to make it:
- 1. Form a small volcano base with two top vents shaped like a Y.
- 2. Sprinkle baking soda into both vents.
- 3. Mix vinegar with red or orange coloring.
- 4. Pour into vents and watch bubbly “lava” flow along the Y.
16. Y Underwater Reef
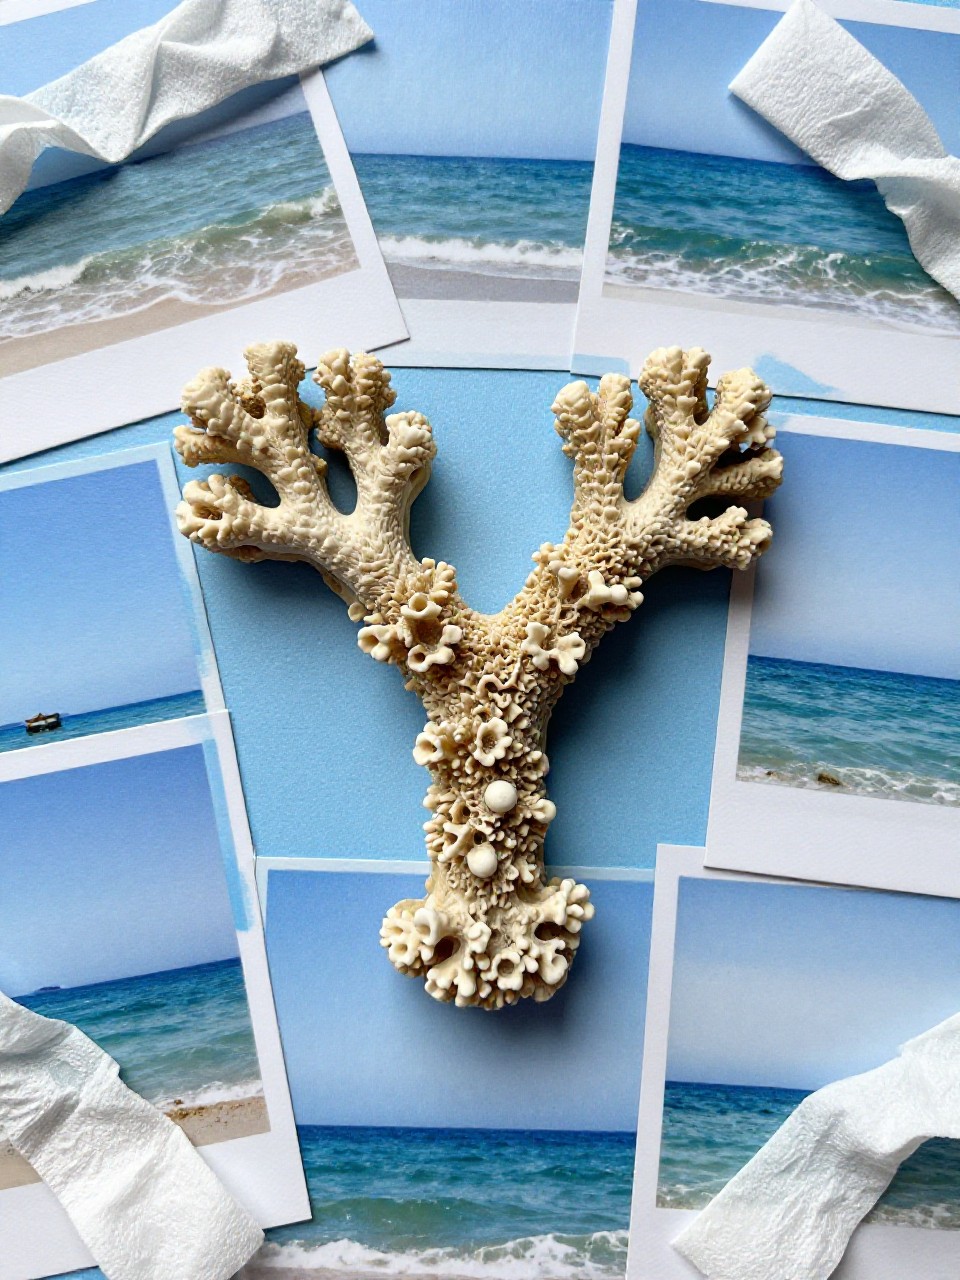
A coral reef collage with a big coral Y at the center—colorful, layered, and ocean-calm.
Materials Needed:
- Blue paper
- Tissue paper scraps
- Glue stick
How to make it:
- 1. Cut a large coral-like Y from bright paper.
- 2. Glue it to blue paper as the main reef piece.
- 3. Add tissue “seaweed,” fish shapes, and bubbles.
- 4. Draw tiny dots and lines for coral texture.
17. Y Shape Shadow Puppet
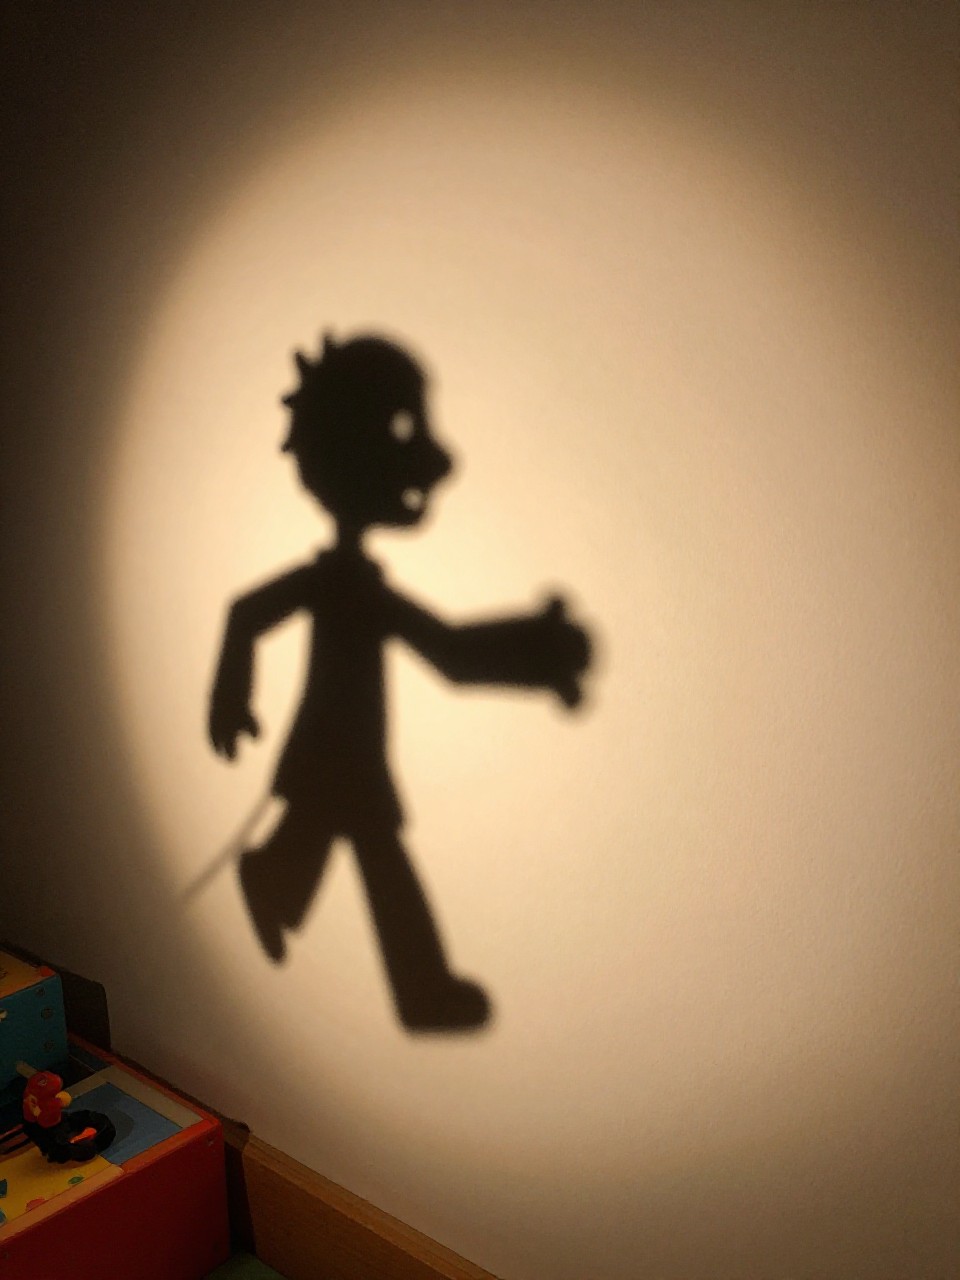
A simple shadow puppet theater star: a bold Y with character bits that cast funny shadows.
Materials Needed:
- Black cardstock
- Craft stick
- Tape
How to make it:
- 1. Cut a large, chunky Y from black cardstock.
- 2. Add small cutouts like eyes, crown, or zigzag edges.
- 3. Tape a craft stick to the back as a handle.
- 4. Shine a flashlight at a wall and perform Y stories.