

Table of Contents Show
Moving things fascinate little kids—wheels turning, wings flapping, boats bobbing. But as a parent or teacher, you need crafts that are cute, quick, and won’t end in glitter tears. These 16 projects look impressive on a classroom wall or the fridge, yet they’re simple enough for preschool hands.
Minimal prep, easy clean-up, and plenty of “wow” moments when the wheels spin, the sails puff, and the lights “glow.”
Let’s make vehicles that feel magical without being complicated.
1. Puffy Cloud Hot-Air Balloon Collage
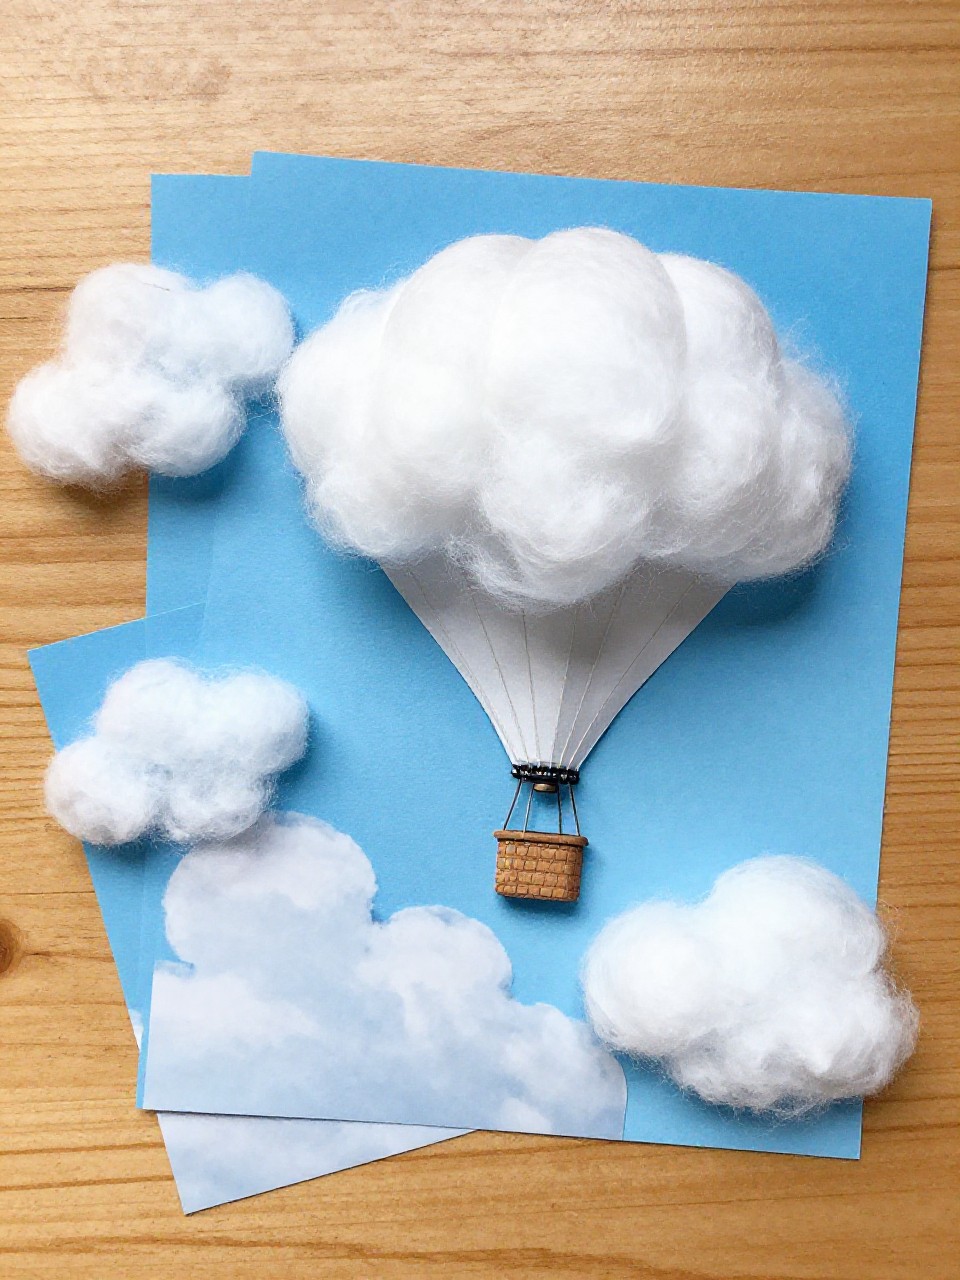
Soft, puffy, and dreamy—this balloon collage has that storybook look kids love. The balloon “puffs” off the page, and the cotton clouds make it feel like it’s floating.
Materials Needed:
For People Who Love to Make Things ✂️
- Colored cardstock
- Cupcake liner
- Cotton balls
- Glue stick
How to make it:
- 1. Glue a cupcake liner upside down for the balloon top.
- 2. Cut a small rectangle basket from cardstock and glue below the liner.
- 3. Add two thin paper strips as strings from balloon to basket.
- 4. Pull apart cotton balls and glue around as fluffy clouds.
2. Spinning Paper Plate Ferris Wheel
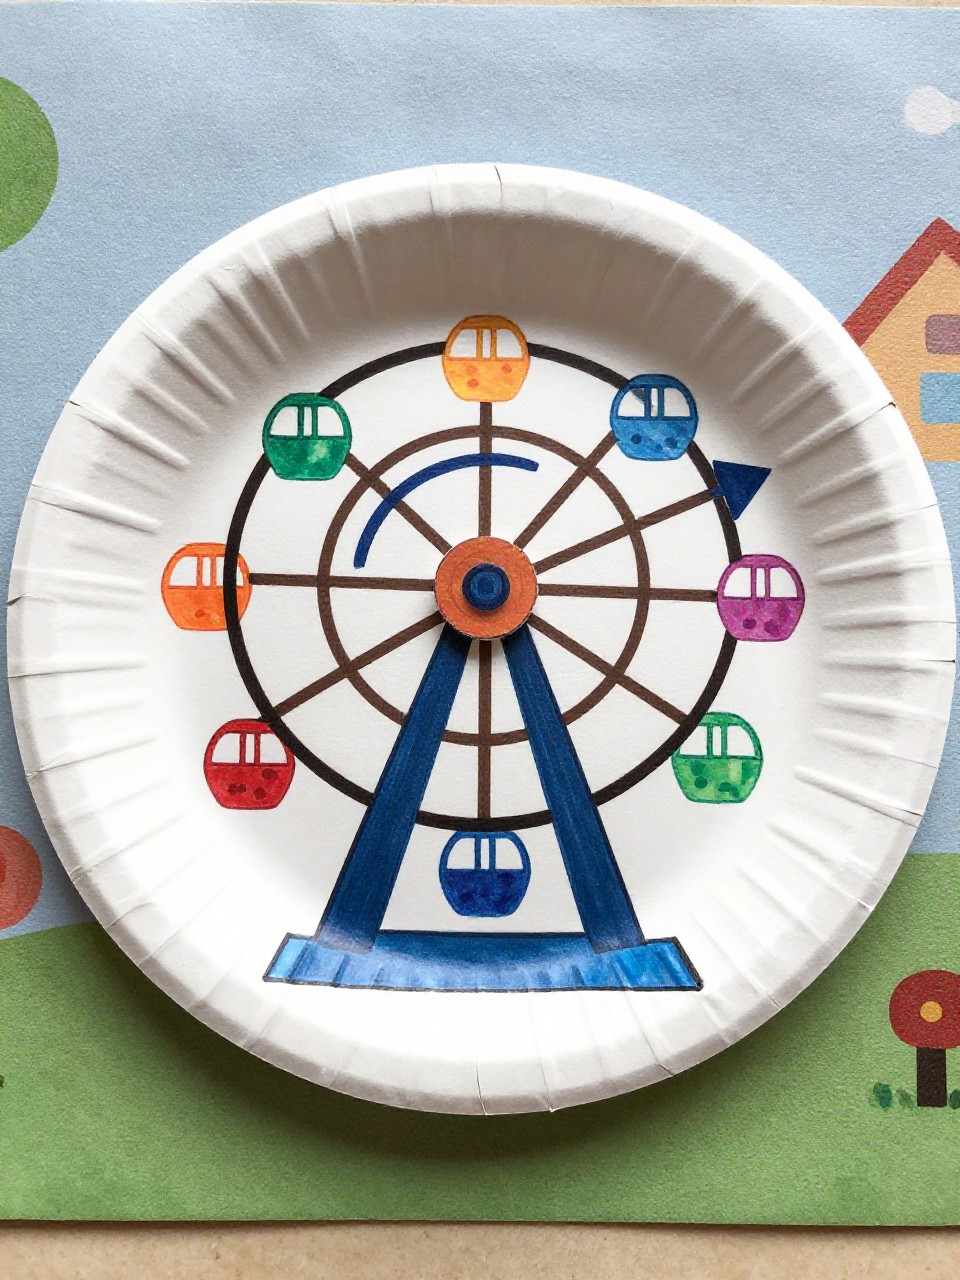
This has moving parts that actually spin, but it’s still beginner-friendly. Bright, dotty “gondolas” make it cheerful and kinetic.
Materials Needed:
- Paper plate
- Construction paper
- Brass paper fastener (brad)
- Crayons or markers
How to make it:
- 1. Color the paper plate like a wheel with spokes.
- 2. Cut small circles (gondolas) from construction paper and glue around the rim.
- 3. Poke a hole in the center and attach a paper arrow hand with a brad.
- 4. Spin the hand to “turn” the Ferris wheel.
3. Bubble-Wrap Tire Track Car Print
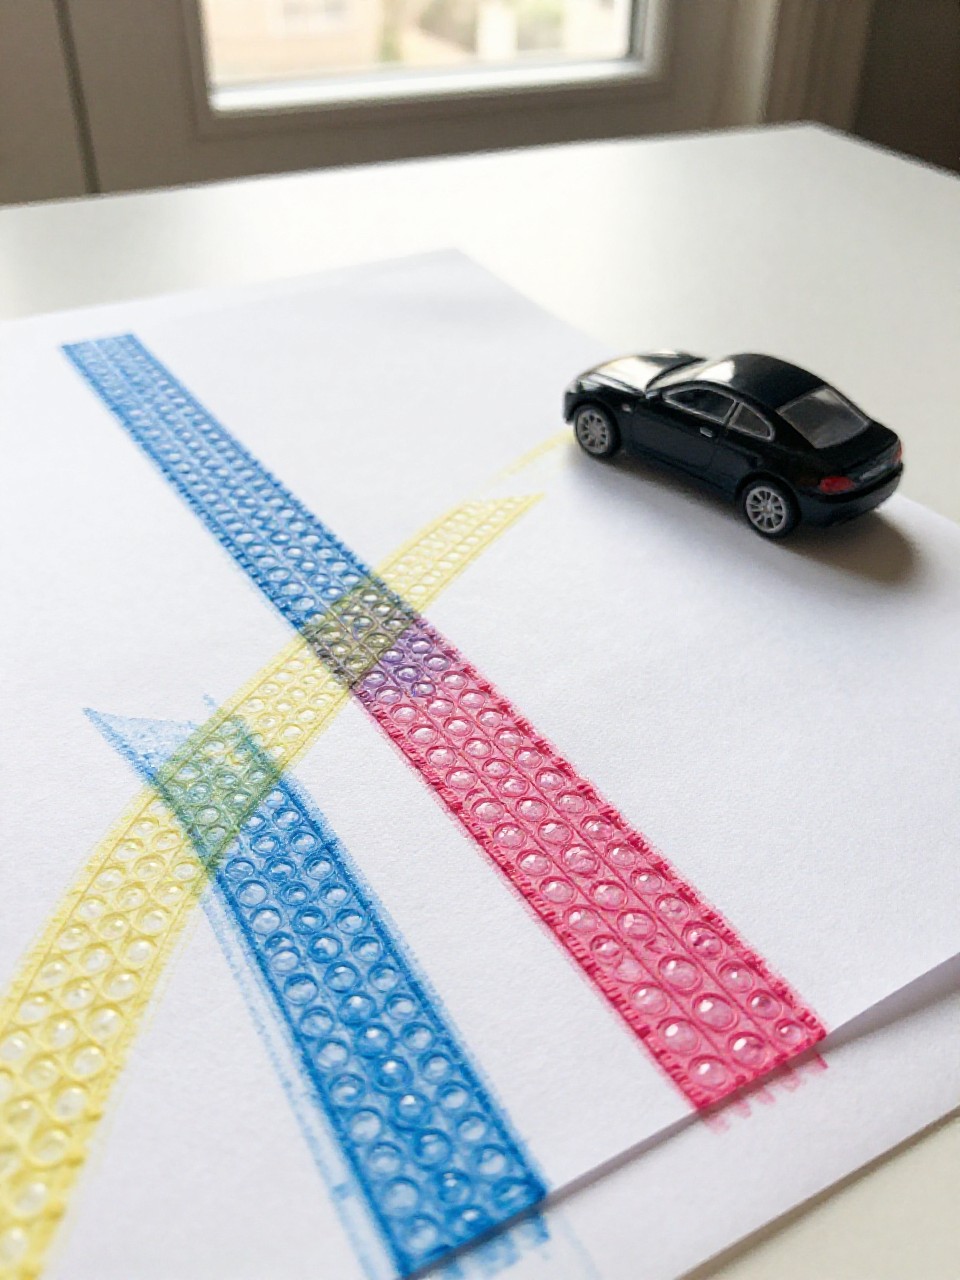
Kids “drive” a toy car through paint and stamp real-looking tire tracks. The bubble wrap makes perfect mini treads with zero mess fuss.
Materials Needed:
- Toy car
- Bubble wrap
- Washable paint
- White paper
How to make it:
- 1. Wrap bubble wrap around the car’s wheels and tape snugly.
- 2. Brush a thin layer of washable paint on the bubble wrap wheels.
- 3. Roll the car across the paper to stamp tracks.
- 4. Add a drawn road, sun, and a few stickers for scenery.
4. Paper Bag Sailboat with Billowy Sails
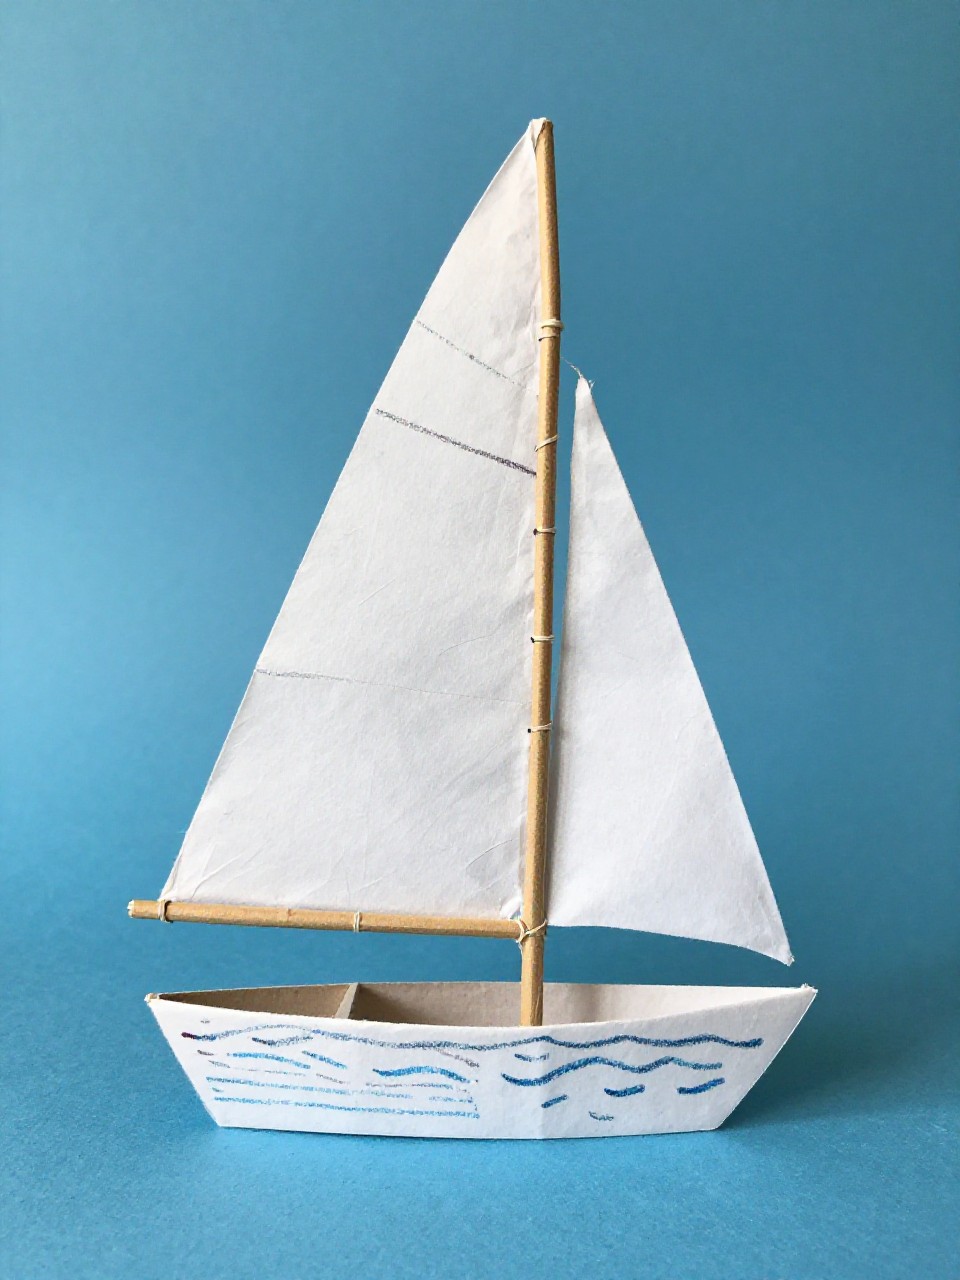
A flat paper bag becomes a breezy sailboat that stands up on its own. The puffed bag looks like a hull on gentle waves.
Materials Needed:
- Brown paper lunch bag
- White paper
- Tape or glue stick
- Crayons
How to make it:
- 1. Puff open the paper bag and fold the top edge over to make a sturdy hull.
- 2. Draw windows or planks on the bag with crayons.
- 3. Cut two triangles for sails and tape them to a straw or paper strip mast.
- 4. Tape the mast inside the bag opening so the sails stand tall.
5. Rainbow Road Tape City
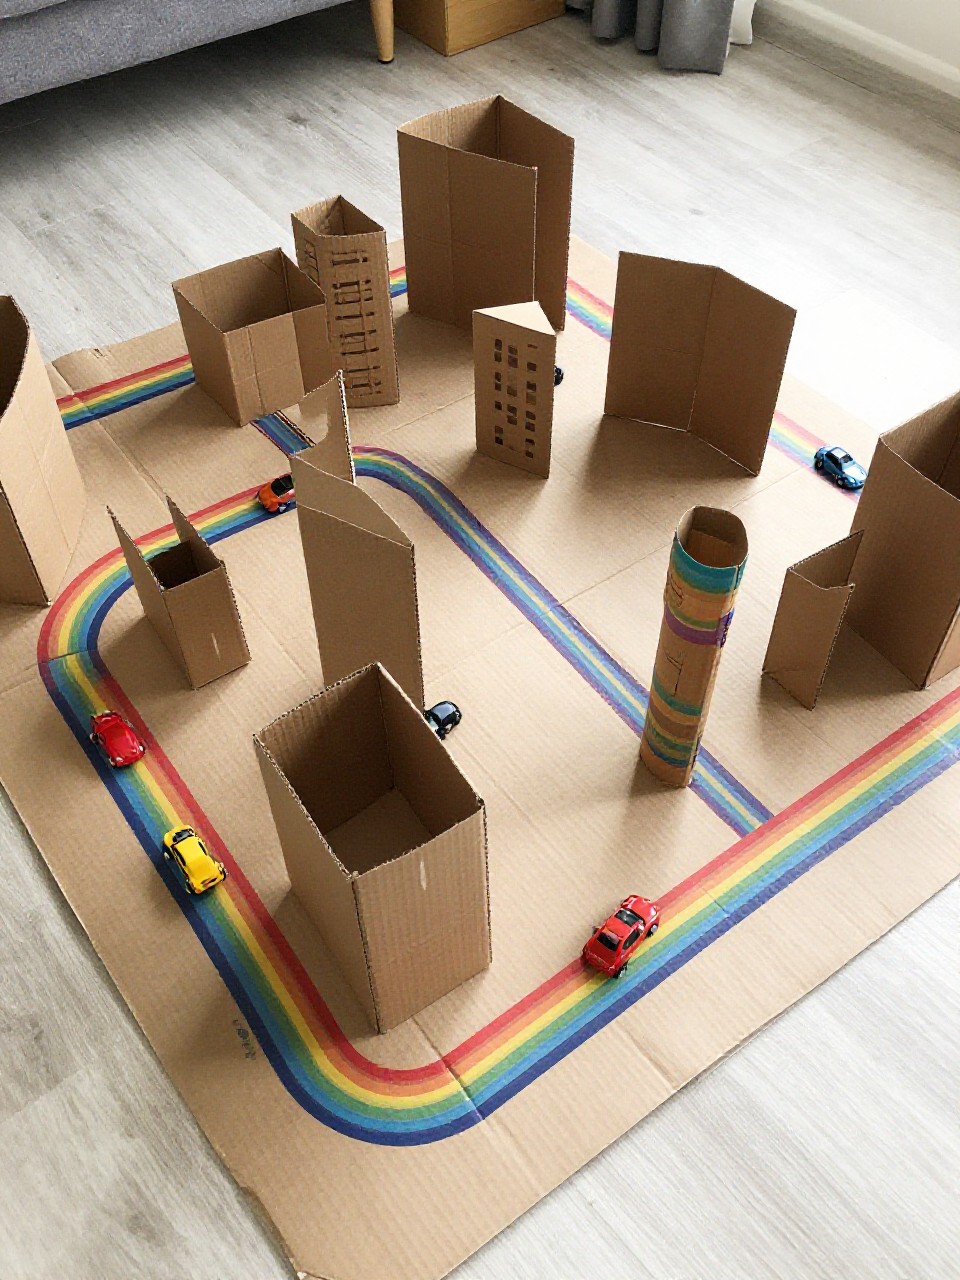
Create a bright, winding street system kids can drive on right away. The rainbow colors make the roads pop and define little neighborhoods.
Materials Needed:
- Colored masking or washi tape
- Large sheet of cardboard
- Toy cars
- Marker
How to make it:
- 1. Lay tape roads on cardboard—curves, intersections, and roundabouts.
- 2. Add crosswalks and lane lines with white tape or marker.
- 3. Draw simple buildings, trees, and parking spots.
- 4. Zoom toy cars around the custom city.
6. Foam Cup Rocket with Swishy Flames
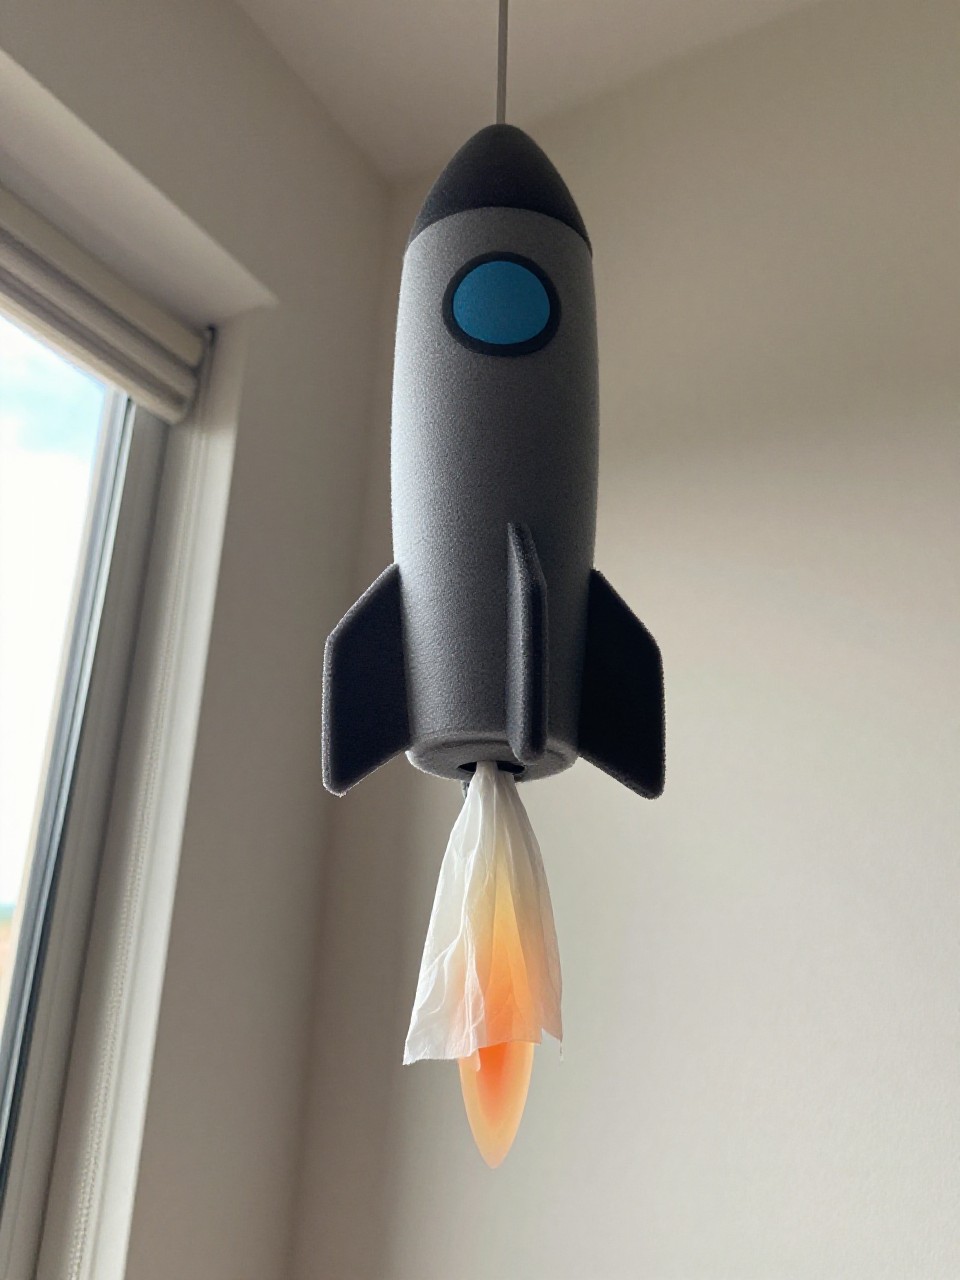
This rocket looks sleek and lifts off with a whooshy tug. Tissue-paper flames flicker with every move.
Materials Needed:
- Foam or paper cup
- Tissue paper
- Tape
- Markers
How to make it:
- 1. Turn the cup upside down and decorate it as a rocket body.
- 2. Cut triangles from paper for fins and tape near the rim.
- 3. Tape long tissue paper strips inside the cup opening as flames.
- 4. Thread yarn through a tiny top hole for hanging and “flying.”
7. Clothespin Helicopter with Whirly Rotor
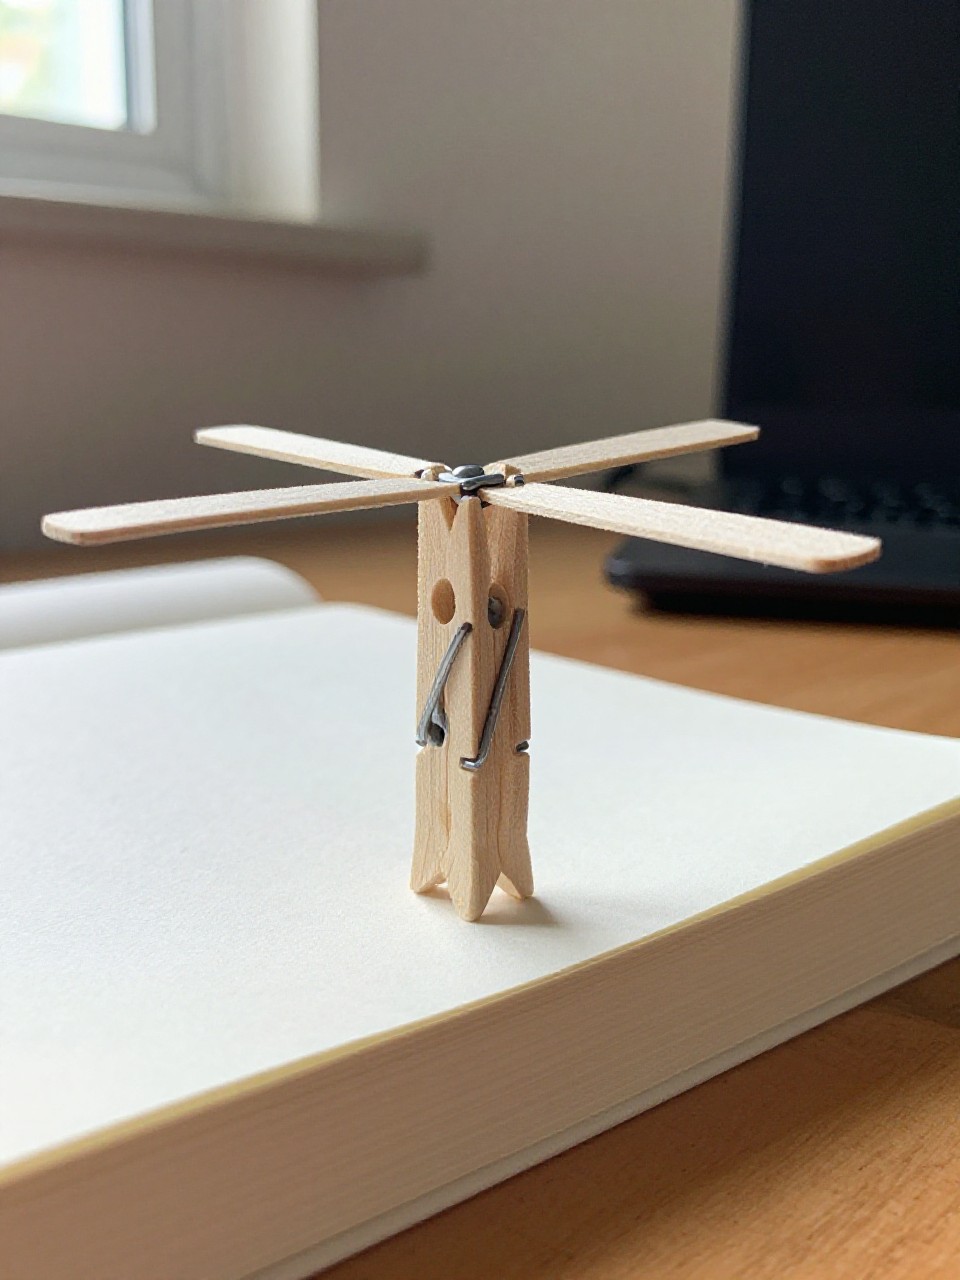
A simple clip becomes a cute helicopter that clips to books or curtains. A spinny paper rotor on top makes it feel alive.
Materials Needed:
- Wooden clothespin
- Craft stick or paper strip
- Glue
- Markers
How to make it:
- 1. Color the clothespin like a helicopter body.
- 2. Glue a small paper tail at the back of the clothespin.
- 3. Glue a craft stick or paper blade across the top as the rotor.
- 4. Add windows and stripes with markers.
8. Shape Train on a Track
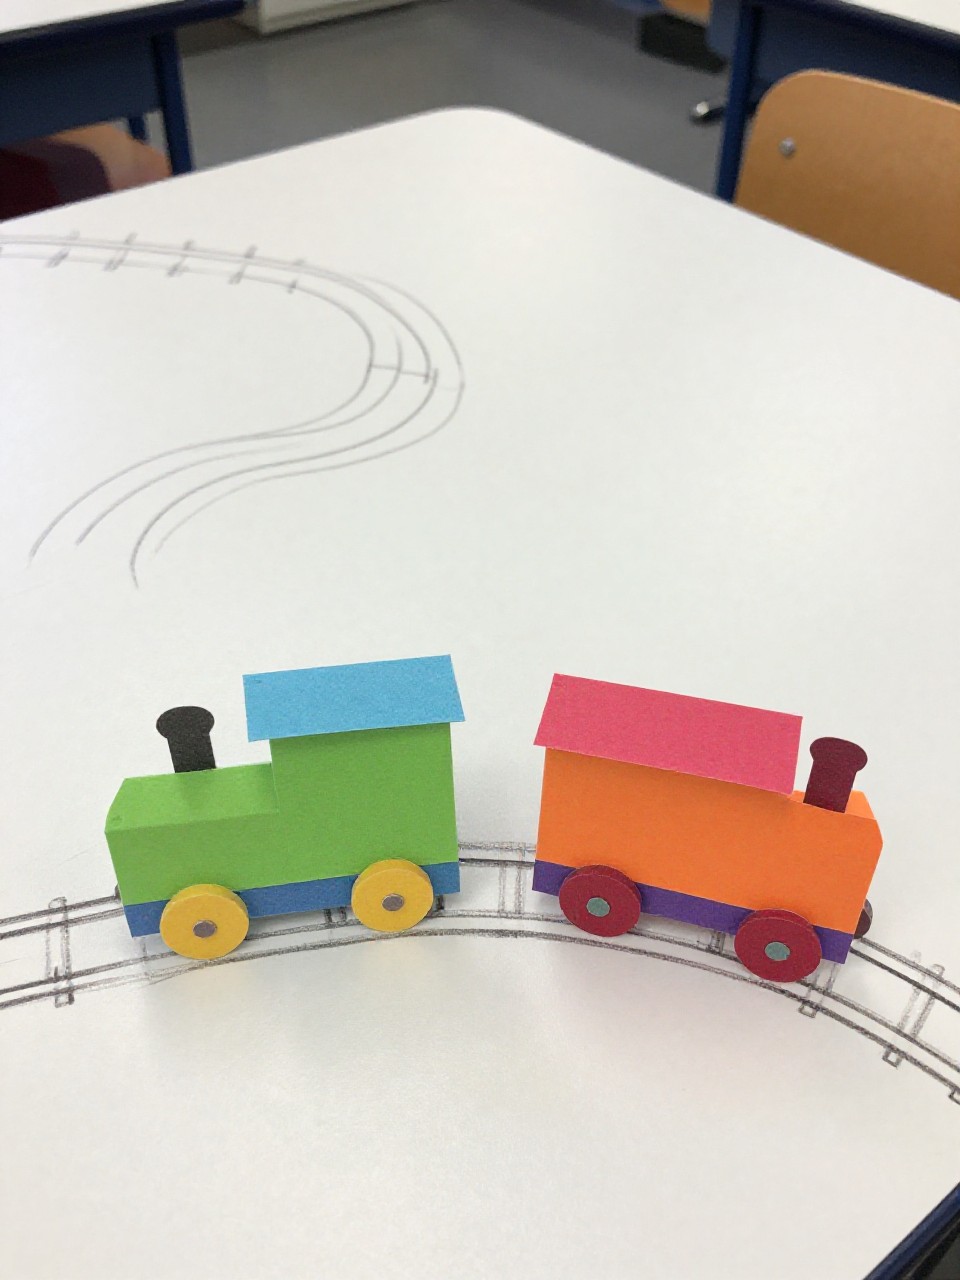
Bold shapes stack into a graphic little train that looks like modern art. It’s great scissor practice and super satisfying to line up the cars.
Materials Needed:
- Colored paper
- Glue stick
- Black marker
- Scissors (child-safe)
How to make it:
- 1. Cut big shapes: rectangles (cars), squares (windows), circles (wheels).
- 2. Glue shapes in a row on a long paper to form an engine and cars.
- 3. Draw a simple track and puff clouds of smoke.
- 4. Add letters or numbers to each car.
9. Sailing Sponges Boat Race
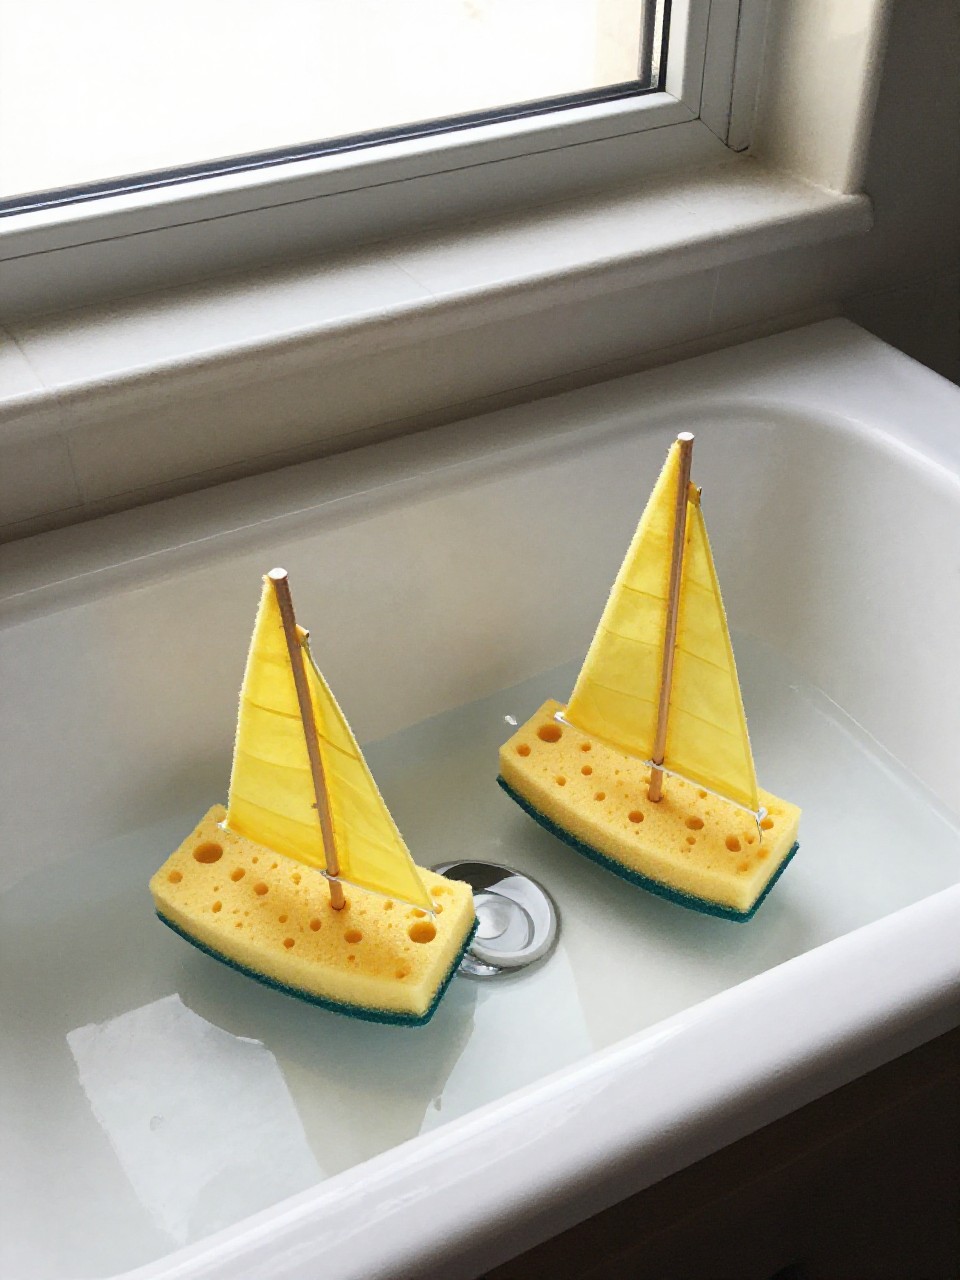
These chubby sponge boats float and actually race in a sink or tub. The sails stand up, and kids can blow them across the water.
Materials Needed:
- Kitchen sponge
- Drinking straw
- Foam sheet or paper
- Tape
How to make it:
- 1. Cut a small slit in the sponge center.
- 2. Slide a straw into the slit as a mast.
- 3. Cut a triangle sail from foam or paper and tape to the straw.
- 4. Float and race with gentle puffs.
10. Shoebox Parking Garage Ramp
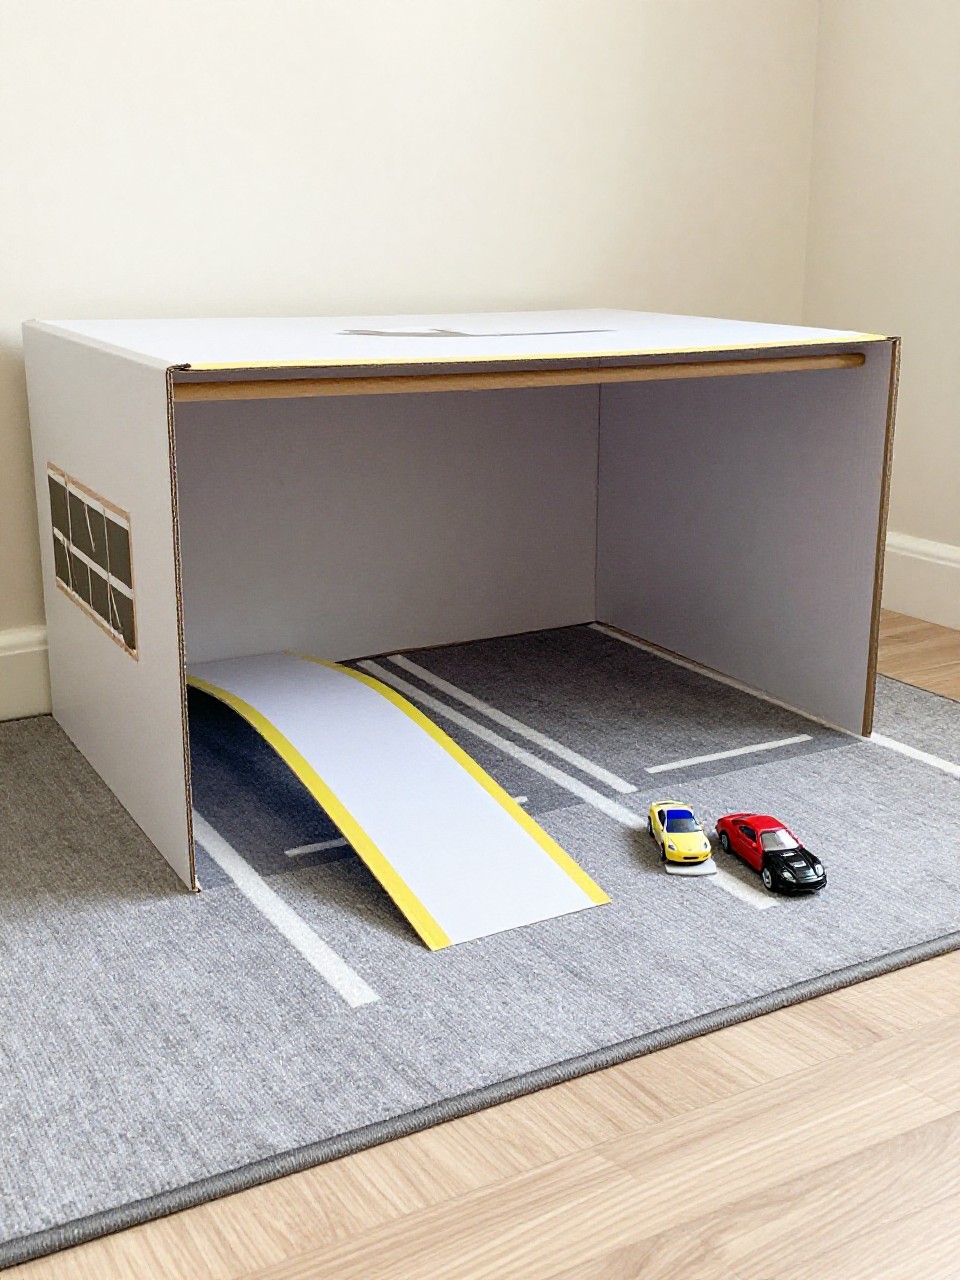
Turn a shoebox into a multi-level garage with a swoopy ramp. It’s sturdy enough for little cars and looks like a real city build.
Materials Needed:
- Shoebox and lid
- Tape
- Markers
- Scissors
How to make it:
- 1. Stand the shoebox on its side and draw parking lines inside.
- 2. Cut the lid into a curved ramp and tape from the top to the base.
- 3. Add arrows, signs, and “P” symbols with markers.
- 4. Park cars and test the ramp.
11. Paper Roll Submarine Porthole
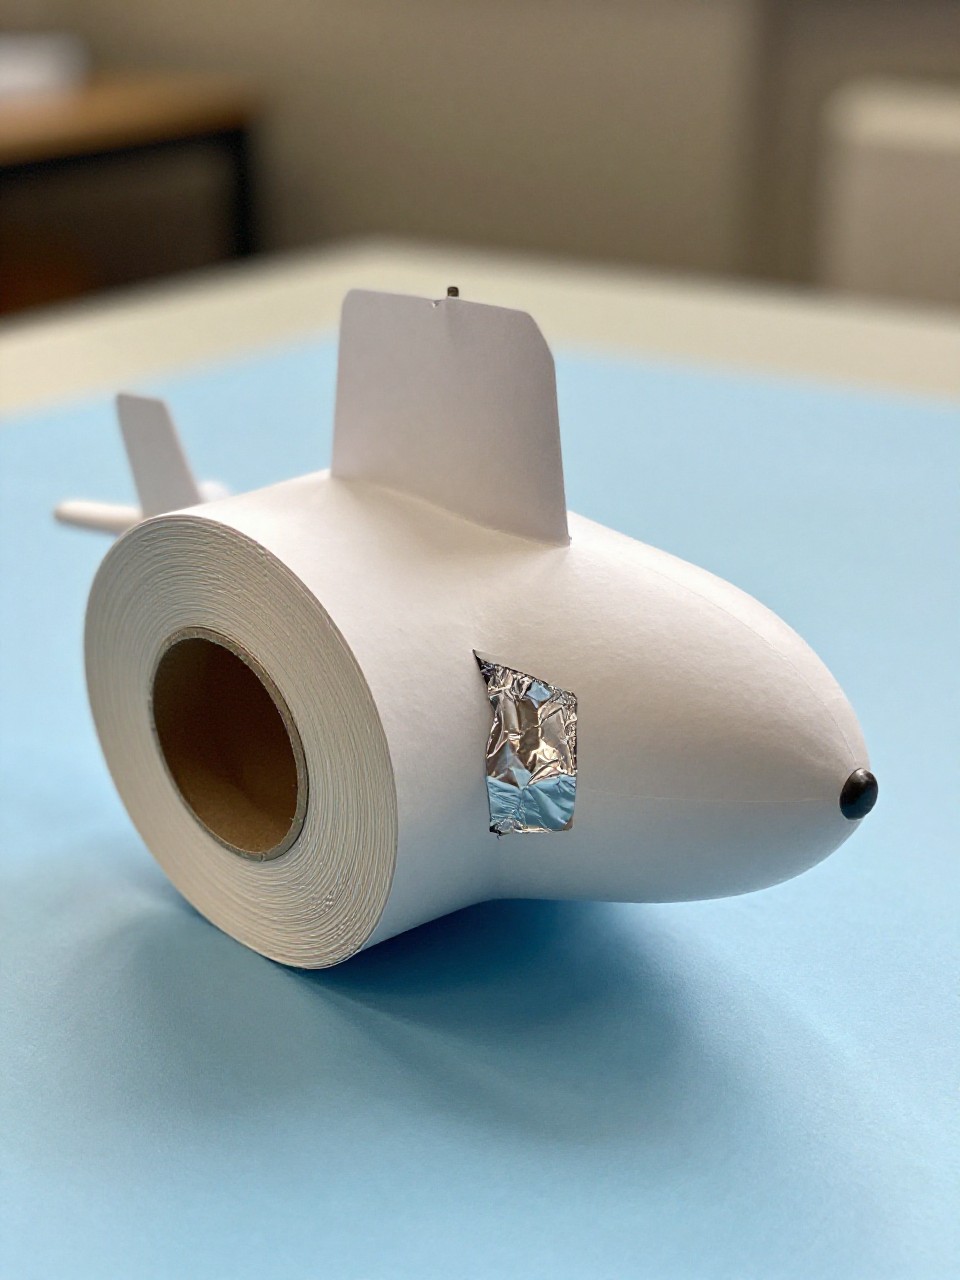
A cardboard tube turns into a colorful undersea explorer. The shiny “porthole” window makes it look real and a little magical.
Materials Needed:
- Toilet paper roll
- Aluminum foil
- Construction paper
- Glue
How to make it:
- 1. Wrap the tube in colored paper and glue.
- 2. Cut a small circle window and back it with aluminum foil.
- 3. Add a paper periscope and fins.
- 4. Draw fish and bubbles around the porthole.
12. Stained-Glass Kite Flyer
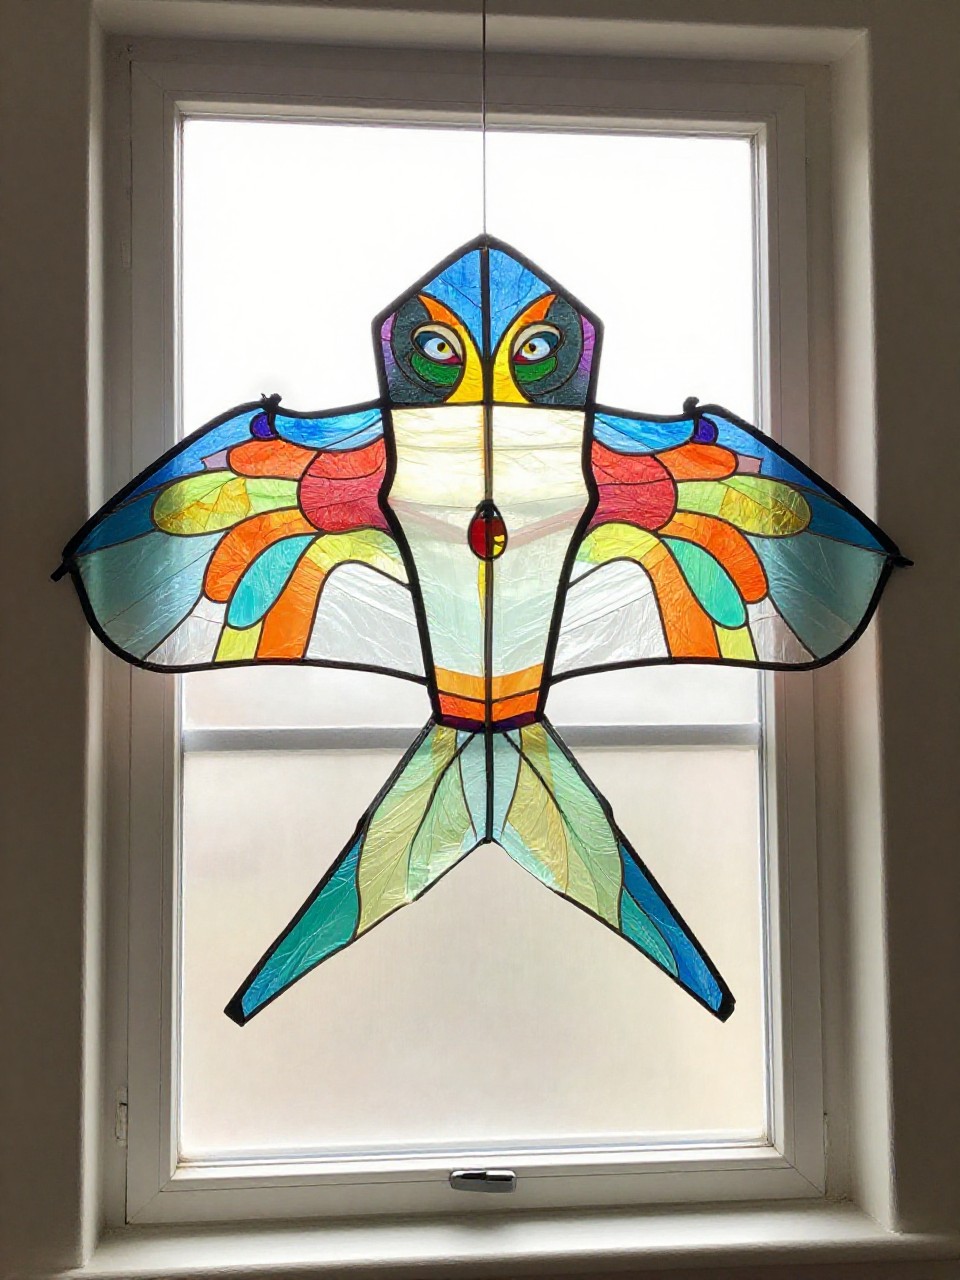
This bright “window” kite glows when hung up. The tissue mosaic makes preschoolers feel like true artists.
Materials Needed:
- Clear contact paper
- Tissue paper
- Yarn
- Craft sticks (optional)
How to make it:
- 1. Cut a diamond shape of contact paper and peel the backing.
- 2. Stick on squares of tissue to make a stained-glass pattern.
- 3. Seal with another layer of contact paper and trim.
- 4. Tape yarn tails and hang from a window or stick.
13. Cupcake Liner School Bus Faces
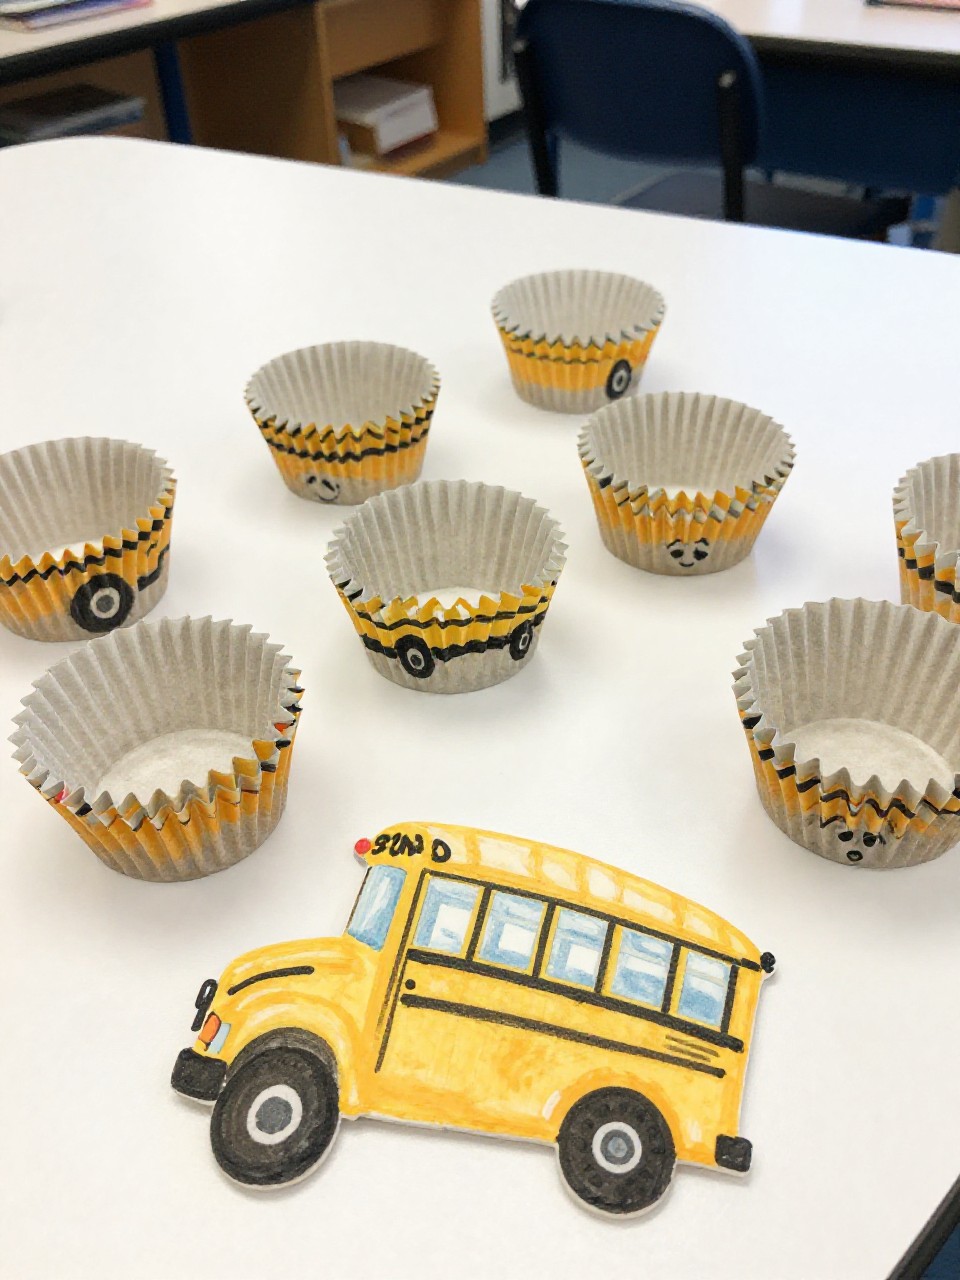
Cupcake liners fold into chubby bus shapes with smiling riders. The circle windows show friendly faces peeking out.
Materials Needed:
- Yellow cupcake liners
- Markers
- Glue stick
- White paper
How to make it:
- 1. Flatten a yellow liner and fold the bottom edge up to square it.
- 2. Glue it to paper and draw wheels, lights, and a stop sign.
- 3. Add small circle “windows” and draw faces inside.
- 4. Write the route number on the front.
14. Straw-Blown Paper Rocket Launch
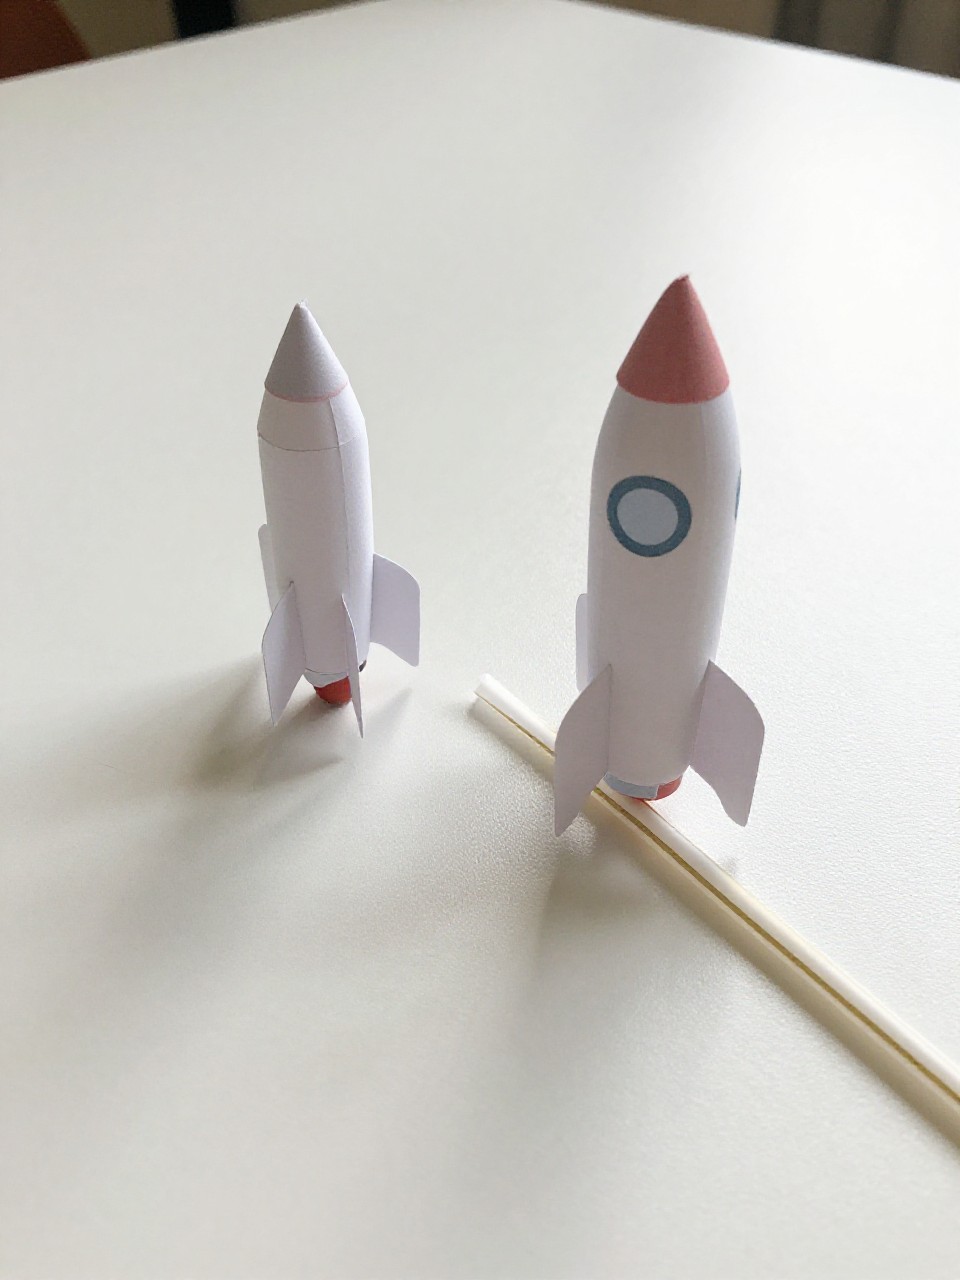
Kids blow through a straw to launch a tiny paper rocket—pure giggles. The snug paper sleeve makes it zip forward.
Materials Needed:
- Paper
- Tape
- Straw
- Markers
How to make it:
- 1. Wrap a small paper rectangle around a straw and tape to make a loose tube (don’t tape to the straw).
- 2. Pinch and tape one end shut to form the rocket top.
- 3. Add small triangle fins and decorate.
- 4. Slide off, place on straw, and blow to launch.
15. Fingerprint Traffic Light Art
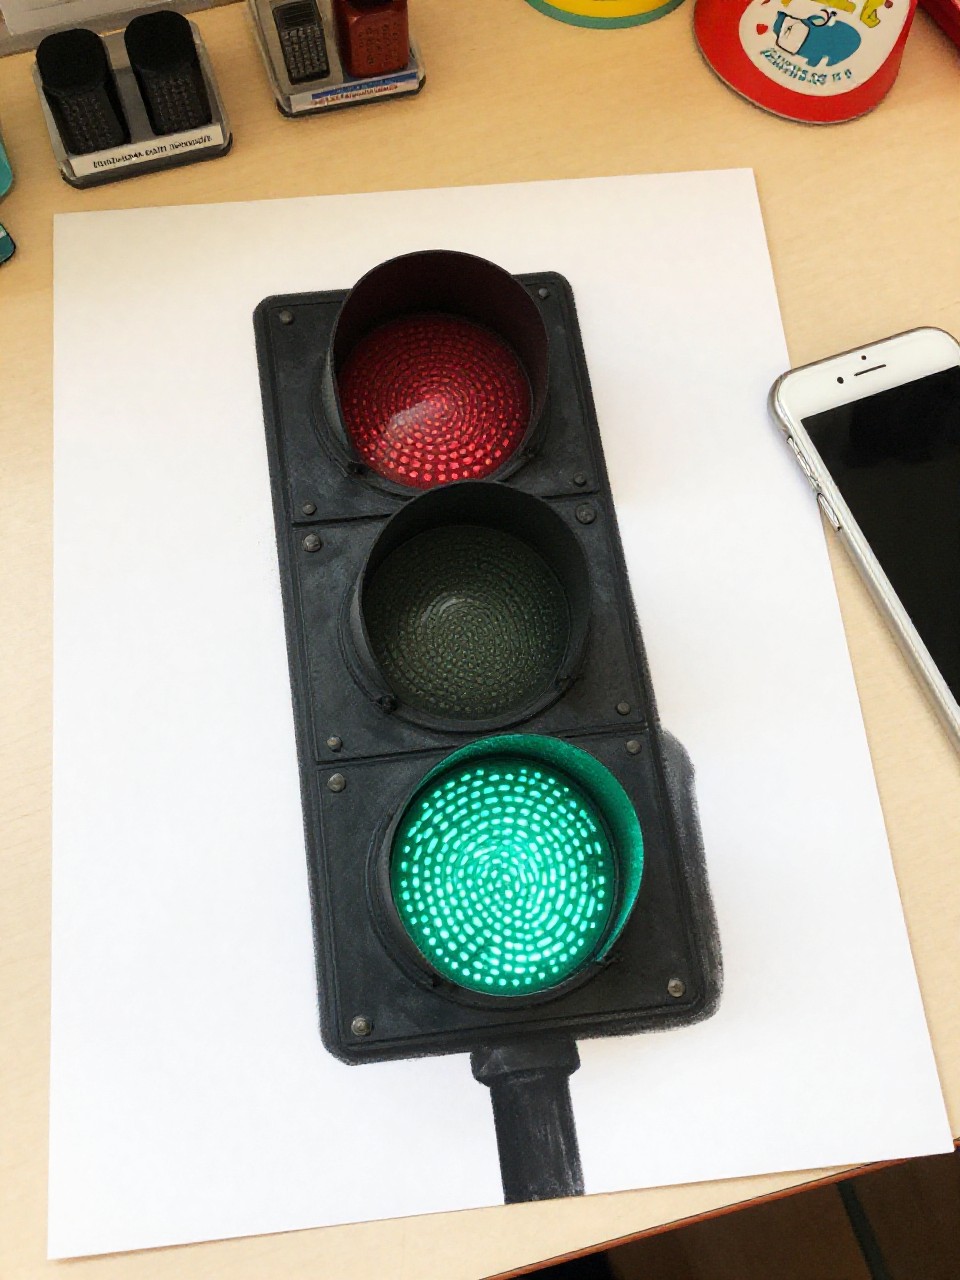
Tiny fingerprints become the red, yellow, and green lights. It’s quick, bold, and teaches simple traffic rules.
Materials Needed:
- White paper
- Washable stamp pads or paint
- Black marker
- Ruler (optional)
How to make it:
- 1. Draw a tall rectangle and divide it into three circles or boxes.
- 2. Press red, yellow, and green fingerprints into each section.
- 3. Add a pole and street details with marker.
- 4. Label “Stop, Slow, Go” underneath.
16. Leaf Sail Canoe
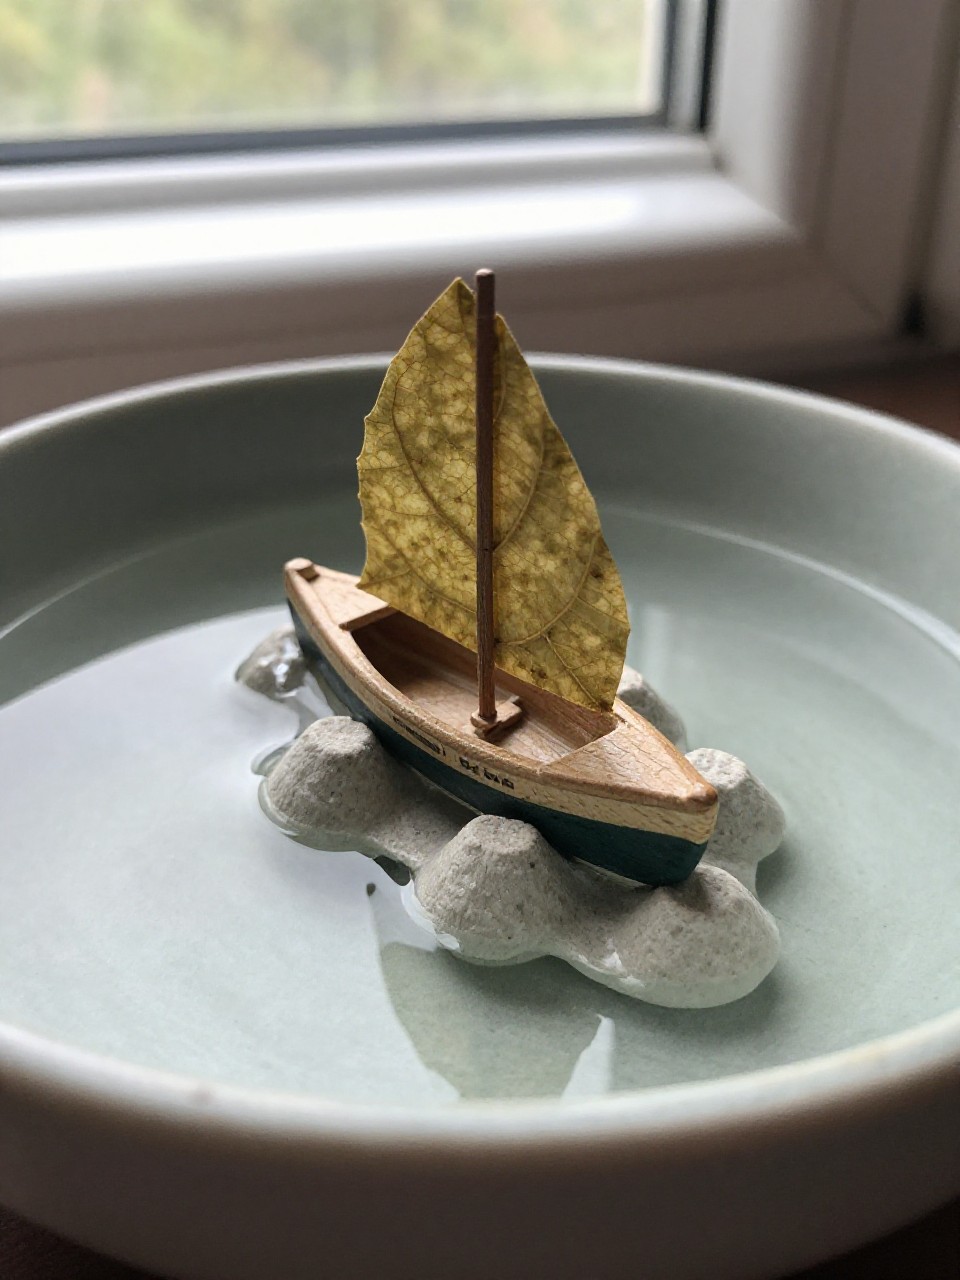
Natural leaves become gentle sails on a tiny canoe. It feels earthy and magical—perfect for pretend pond adventures.
Materials Needed:
- Egg carton cup
- Leaves
- Toothpick
- Play-dough or tape
How to make it:
- 1. Cut one egg carton cup to be the canoe body and color if you like.
- 2. Press a bit of play-dough inside to hold a toothpick mast.
- 3. Poke a leaf onto the toothpick as a sail.
- 4. Float in a shallow tray or use for small-world play.